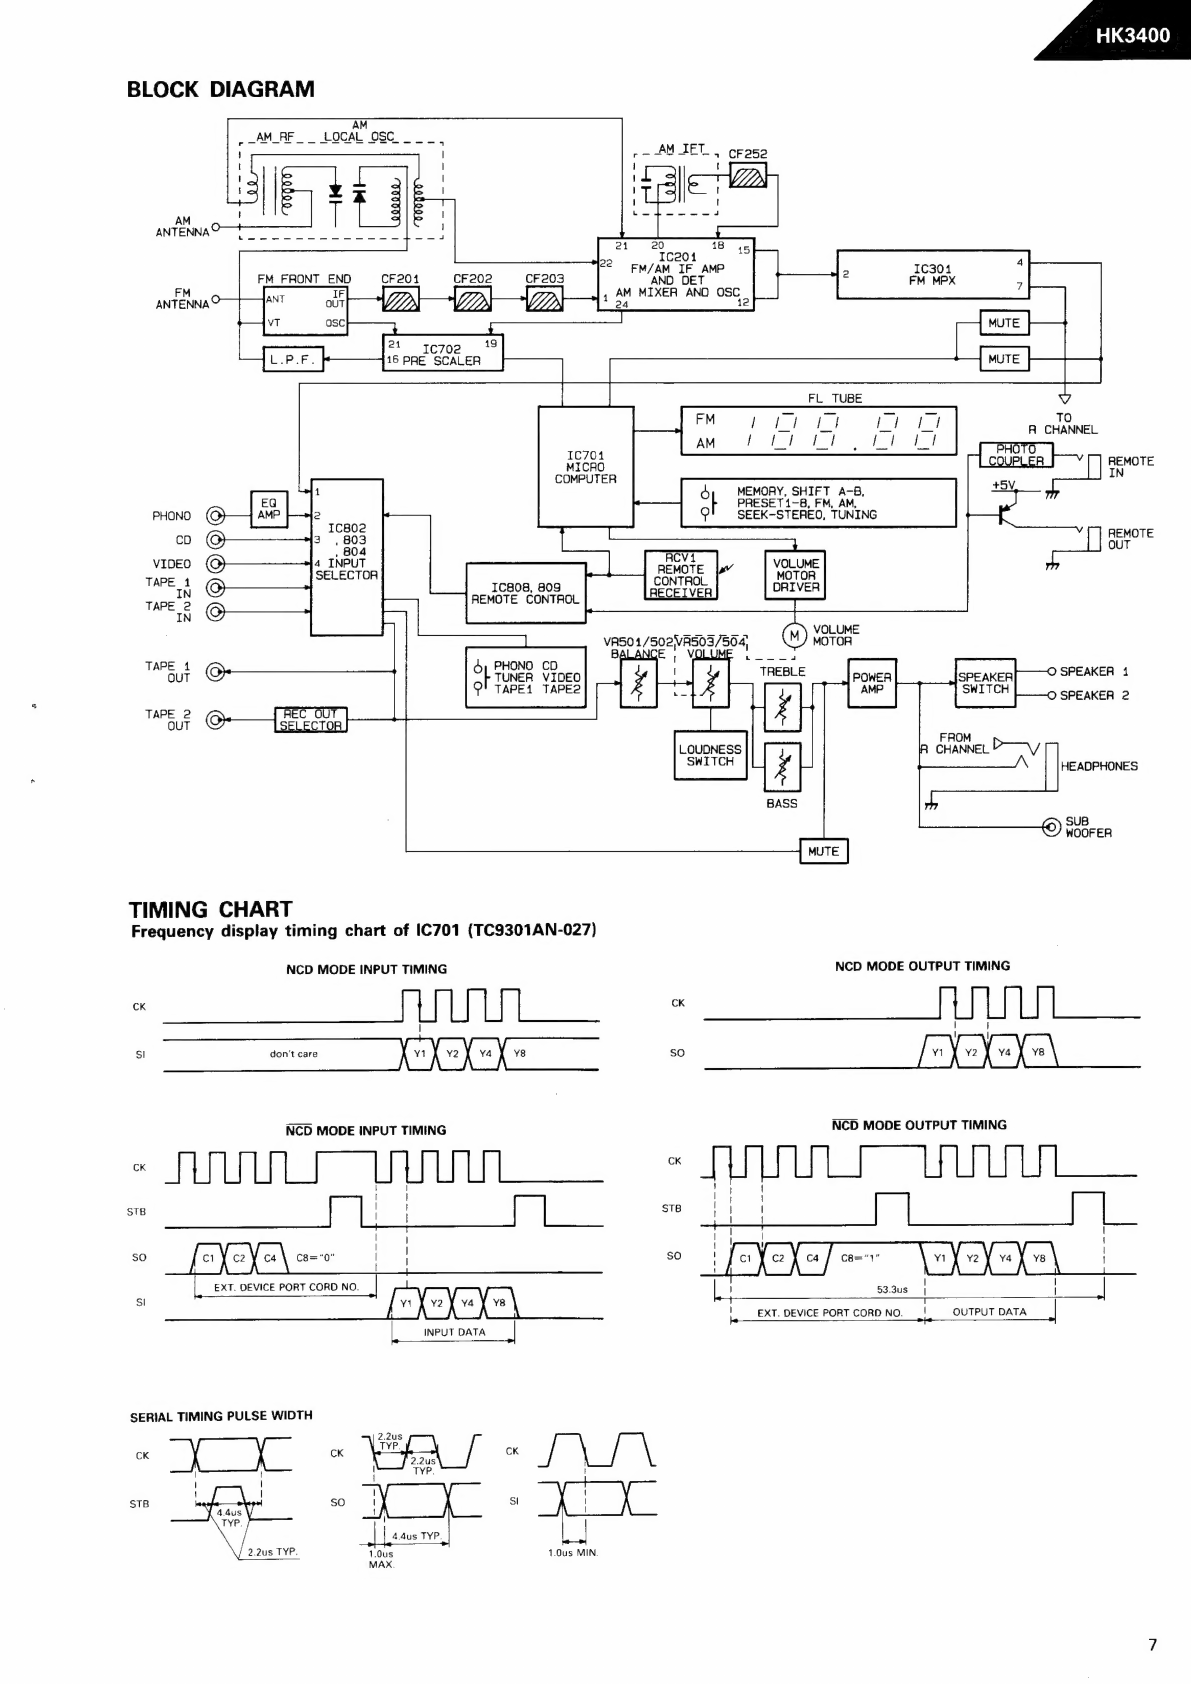
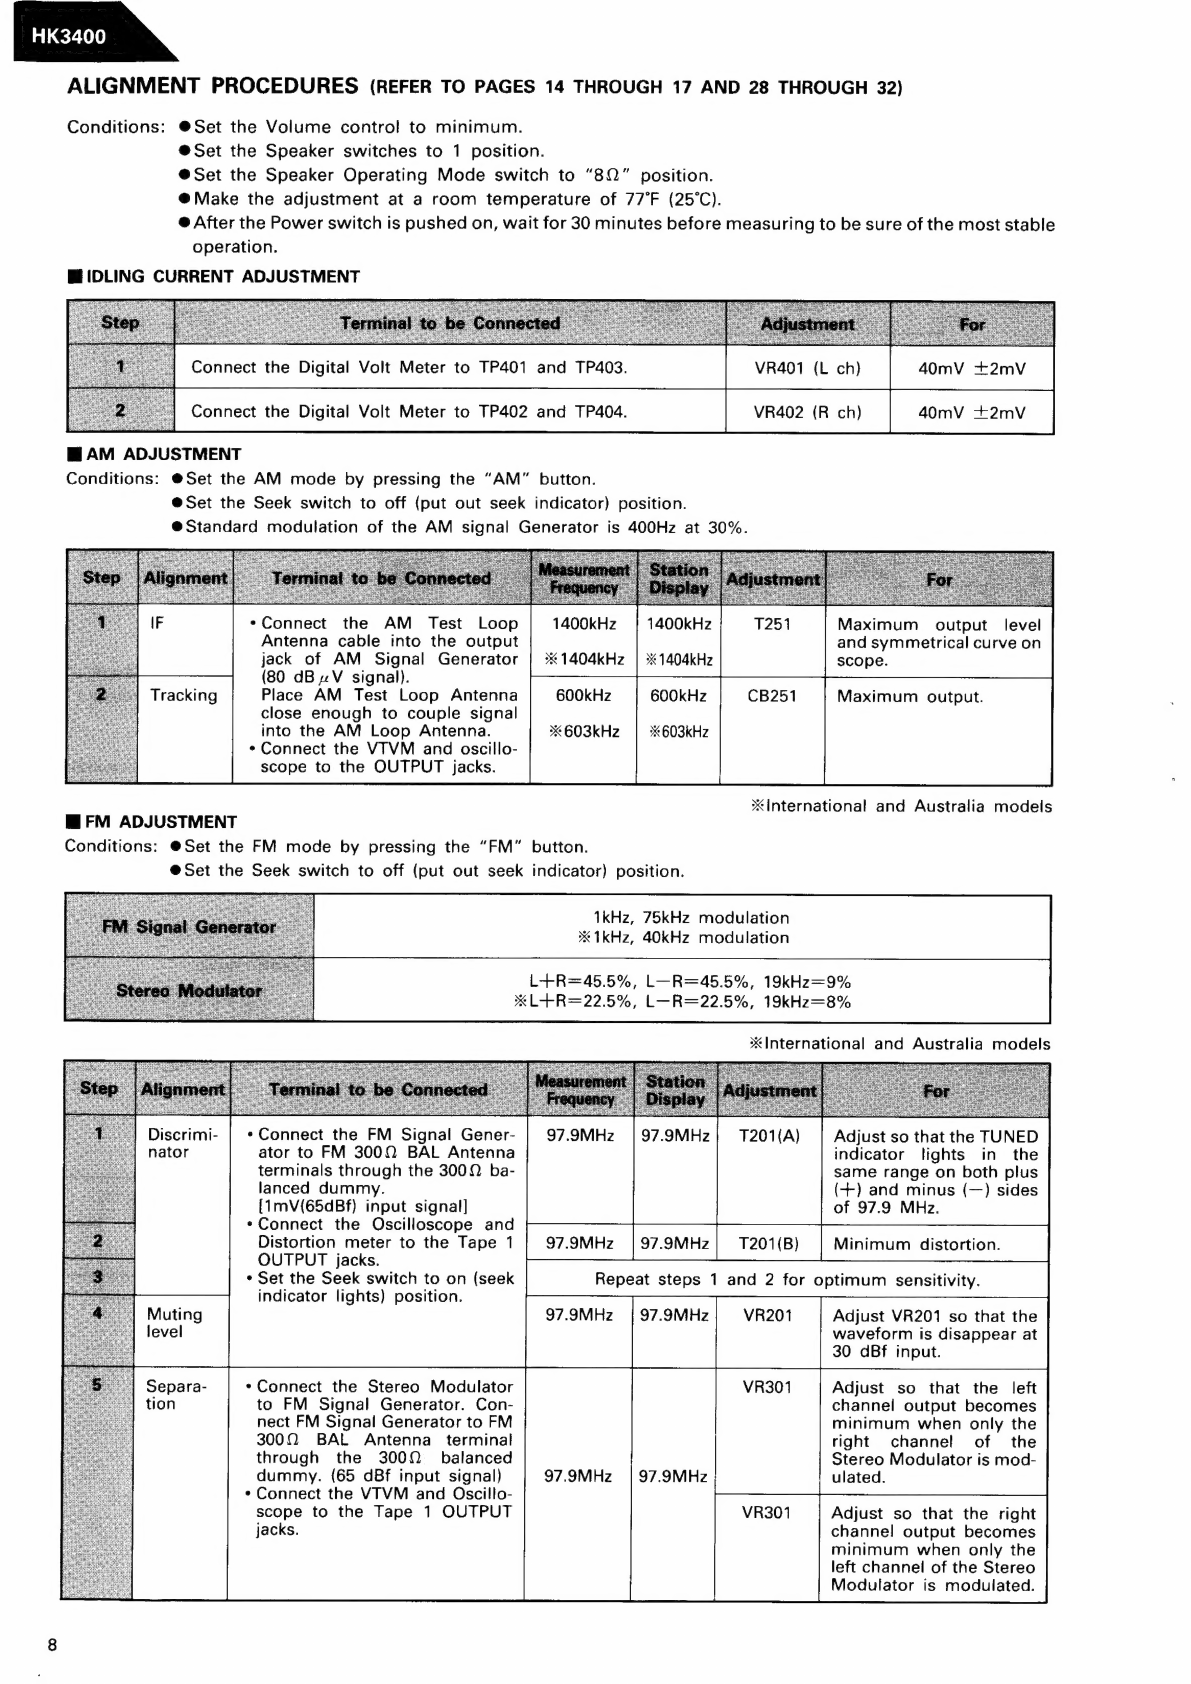
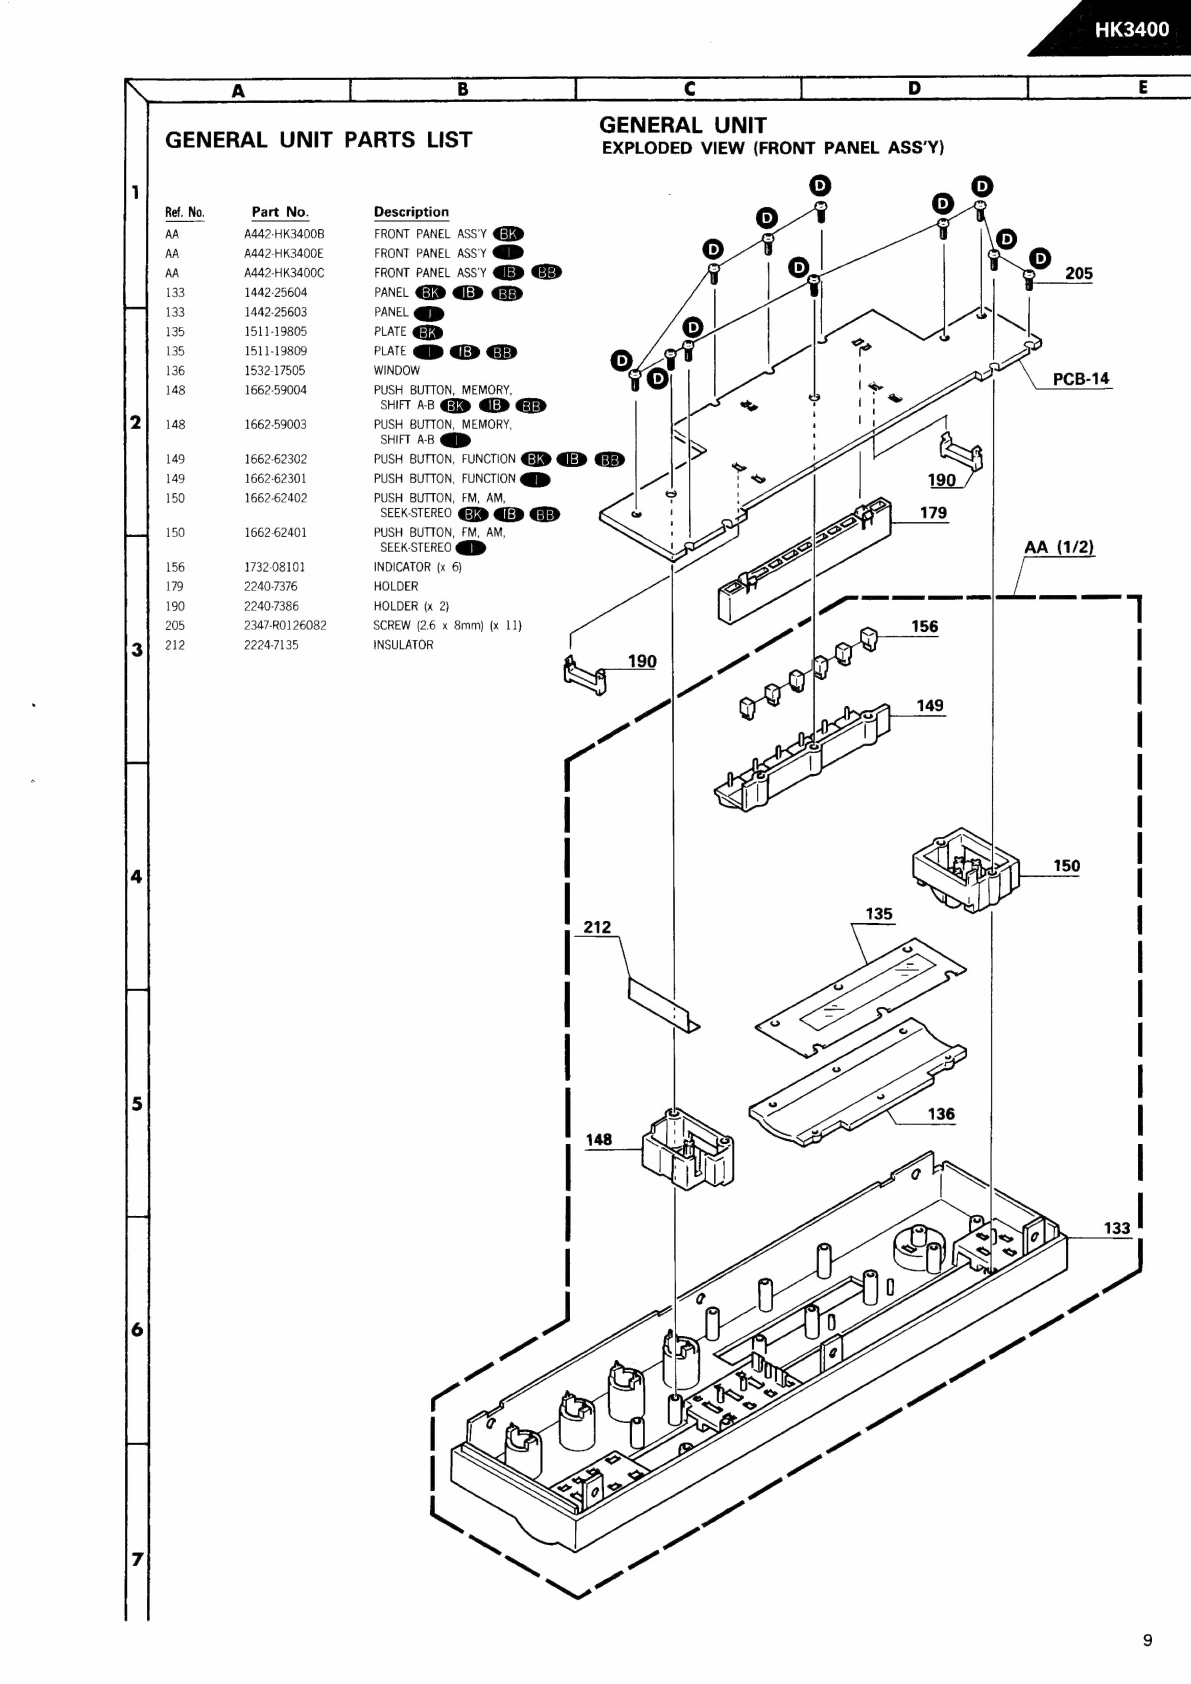
Harman Kardon HK3400 User manual
Other Harman Kardon Stereo Receiver manuals

Harman Kardon
Harman Kardon HK590I User manual

Harman Kardon
Harman Kardon HK380I User manual

Harman Kardon
Harman Kardon HK350I User manual

Harman Kardon
Harman Kardon AVR 355/230 User manual

Harman Kardon
Harman Kardon AVR 745 User manual

Harman Kardon
Harman Kardon HK 3370 User manual

Harman Kardon
Harman Kardon AVR 7000 Reference manual

Harman Kardon
Harman Kardon HK690I User manual

Harman Kardon
Harman Kardon HK3600 User manual

Harman Kardon
Harman Kardon Harman/kardon HK3490 User manual

Harman Kardon
Harman Kardon HK 3470 User manual

Harman Kardon
Harman Kardon HK690I User manual

Harman Kardon
Harman Kardon AVR 135 User manual

Harman Kardon
Harman Kardon HK880VXI User manual

Harman Kardon
Harman Kardon HK 3370 User manual

Harman Kardon
Harman Kardon AVR 3550HD Quick start guide

Harman Kardon
Harman Kardon AVR25MKII User manual

Harman Kardon
Harman Kardon hk330 Vi User manual

Harman Kardon
Harman Kardon HK3350 User manual

Harman Kardon
Harman Kardon HK330I User manual


Popular Stereo Receiver manuals by other brands


Pioneer
Pioneer SX-1000TA operating instructions

Yamaha
Yamaha MusicCast TSR-5B3D owner's manual

Sony
Sony STR-DE335 - Fm Stereo/fm-am Receiver operating instructions

Sony
Sony STR-DG500 - Multi Channel Av Receiver Service manual

Panasonic
Panasonic AJSD955B - DVCPRO50 STUDIO DECK Brochure & specs

Pioneer
Pioneer SX-838 Service manual