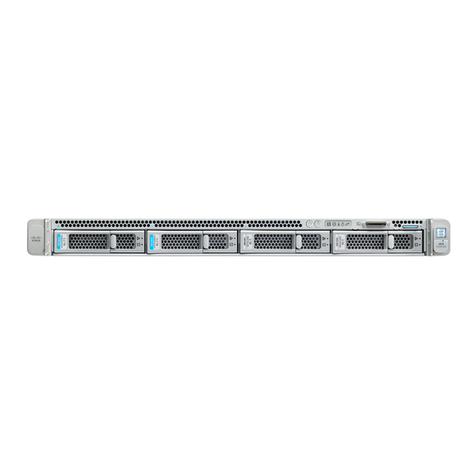
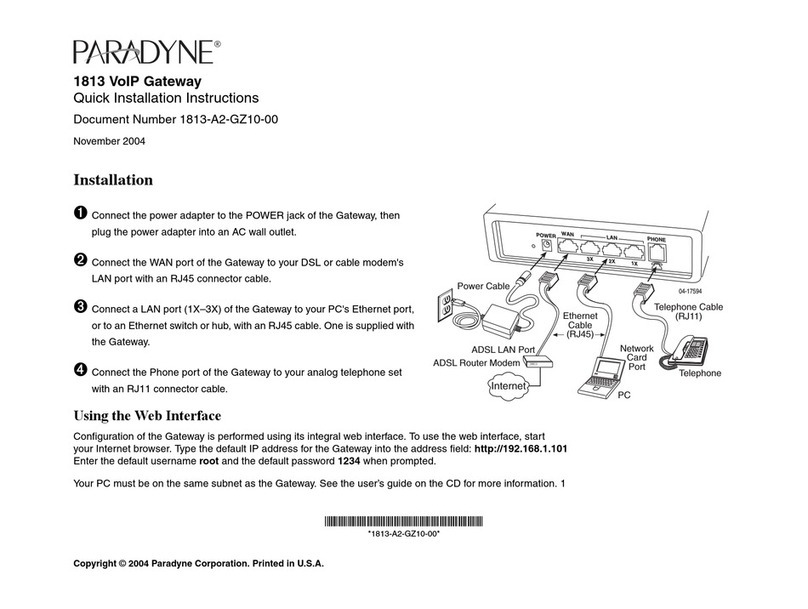
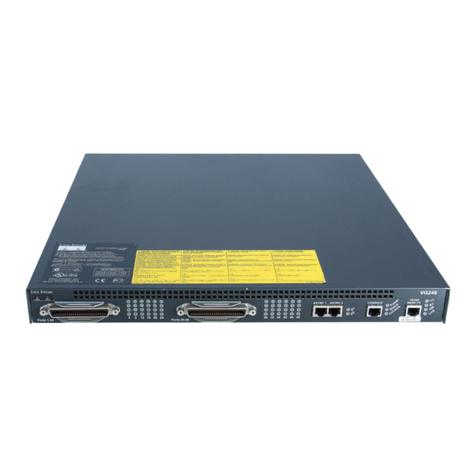
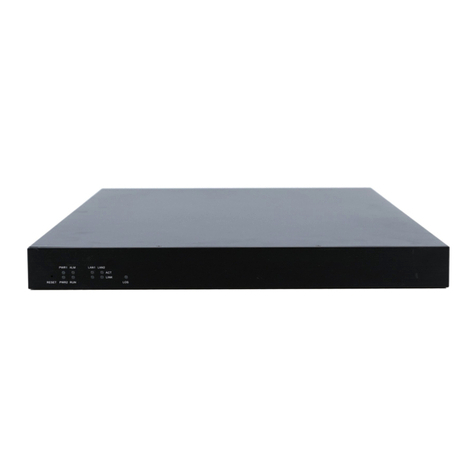
Hartmann POE-ODM-MB User manual

POE-ODM x 1
2P Connector x 4 3P Connector x 2 6P Connector x 2
HARTMANN
A
B
C
D
R1
R2
G
H
I
APOE-ODM
J
BElectric Strike
CAuto Door Opener
DExtra Loud Buzzer*
*Optional Internal Extra Loud Buzzer
GHandicap Open
HDoor Contact
JDoorbell
R1 Inside Reader
R2 Outside Reader
IEmergency Alarm
Controller - POE Injector - PC (Direct)
Controller - POE Injector - Router - PC
In Out
Controllers - POE Router - PC
* LAN or Internet
* LAN or Internet
LAN INTERNET
In Out
LAN INTERNET
2
2
3
3
1
1
Controller
Outputs
Inputs
5
8
0
2
1
4
79
6
3
HARTMANN
POE-ODM
Quick Start Guide
Package Contents
Cover screw x 2Resistor(1K ) x 8 Wall screw x 4
HARTMANN CONTROLS Corp www.hartmann-controls.com
Supervisor Input
Installation Example
QR Code for POE-ODM
Networking Examples
Part Number
POE-ODM-MB
POE-ODM-XB
POE-ODM-MW
POE-ODM-XW
Motion Sensor Color
Yes
No
Yes
No
Black
Black
White
White
: POE Powered
: Normal

HARTMANN CONTROLS Corp www.hartmann-controls.com
Controllers - POE Switch - Router - PC
(Continued)
Controllers - POE Switch (at doors) - Router - PC
5
4
Networking Examples
Outputs & Usage Example Inputs & Usage Example
: POE Powered
: Normal
LAN INTERNET
LAN
LAN INTERNET
LAN
* LAN or Internet
* LAN or Internet
* Can be wireless
* At door
Specification
P1 (Relay1, Lock power) Lock power relay, GND, 12V DC 500mA
P8 (12V DC out) 12V DC output, GND, 12V DC 200mA
P6 (Relay2) 24V DC 500mA limit
P7 (Relay3) 24V DC 500mA limit
* All the relay outputs are configurable.
For example, Relay2 can be configured to a door strike.
Specification
12
12
Note : Output Test
Get in Setup Menu Edit Mode
by pressing Enter Key and hold.
Select Output Test menu.
( Enter keys )
Toggle selected relay by pressing Enter.
( Select change : keys,
0 = Off, 1 = On )
Output Test
Input Test R1 R2 R3
1 0 0
2
23
3
1
1
* All the inputs are configurable.
For example, Input1 can be configured to a doorbell.
Specification
P2 1-2 Pin (Input1) Input Common (GND)
P2 2-3 Pin (Input2) Common (GND) Input
P3 1-2 Pin (Input3) Input Common (GND)
P3 2-3 Pin (Input4) Common (GND) Input
Specification
3
3
12
12
2
2
Note : Input Test
Get in Setup Menu Edit Mode
by pressing Enter Key and hold.
Select Input Test menu.
( Enter keys )
LCD displays current input states.
( D = Digital, S = Supervised,
O = Open, C = Closed )
2
23
3
1
1
Input Test
Reader Test I1 I2 I3 I4
DO DC DO SC
Note : Reader Test
Get in Setup Menu Edit Mode
by pressing Enter Key and hold.
Select Reader Test menu.
( Enter keys )
Scan a card or press numbers and #
( keypad reader only ). LCD shows
the data infomation.
2
23
3
1
1
Request to Exit
Door Contact
Emergency Alarm
External Motion Sensor
2
1
3
1
2
3
Door Strike
Optional Internal Extra Loud Buzzer
Automatic Door Opener
1
2
1
2
1
2
2
1
1
2
3
4
5
6
1
2
3
4
5
6
HARTMANN
5
8
0
21
4
7 9
6
3
HARTMANN
Input Test
Reader Test Reader : 1, Bit:40
33, 13532
Readers & Usage Example
Wiring Specification
Ground Black and shield wires
Power (12V DC) Red wire
LED Brown wire
Buzzer Blue wire
1
2
Data 1 White wire
Data 0 Green wire
3
4
5
6
PUSH
TO
EXIT
Enter
Enter
Enter

Dimensions
240 mm (9.449”)
260 mm (10.236”)
59.3 mm
(2.335”)
88 mm
(3.465”)
58 mm
(2.283”)
7 mm
38 mm
(1.496”)
25 mm
50 mm
(1.968”)
4.5 mm Dia.
129.3 mm (5.090”)
HARTMANN CONTROLS Corp www.hartmann-controls.com
Board I/O and Connections
S1 D4 D3
* For the first time installation, get in this
mode and do following tests.
Output Test : Toggle relays with Enter
Input Test : Shows input states
Reader Test : Shows scaned card info
** Factory default password is 0000.
Toll Free: 1-877-411-0101
D1 System heart beat
D4 Green: Motion detected
Red: Door Opened
D5 Relay2 on
D6 Relay3 on
D7 Relay1 on
D8 Reader1 data flow
D9 Reader2 data flow
D17 POE power
D24 CPU power
LINK Ethernet linked
ACT Ethernet Activity
D2 Server log on/off state
Key pressed
D3 On: Server log off
Blink: Server log in
ConnectorsLEDs
P1 Relay1, DC 12V wet contact
P4 Reader1
P5 Reader2
P6 Relay2
P7 Relay3
P8 DC 12V out
P11 Sensor module
P21 Expansion
P22 Expansion
J1 Ethernet
P2 Input1, Common, Input2
P3 Input3, Common, Input4
Keys
SW1 Left( ), down( )
SW2 Right( ), up( )
SW3 Enter, get in
SW4 Esc, exit
Etc
LS1 Tamper sensor
S1 Motion sensor
BZ1 Embedded buzzer
P20 LCD display
VR1 LCD contrast
Setup Menu View Mode
Get in Press and hold Esc
(beeps after 2 sec)
Get out Esc
Move cursor Up(Right),Down(Left)
Select menu Enter
Exit menu Esc
Setup Menu Edit Mode*
Get in Press and hold Enter
(beeps after 2 sec)
Enter password**
Get out Esc
Move cursor Up(Right),Down(Left)
Select menu Enter
Exit menu Esc
Toggle cursor Enter
White blink: move
Black blink: edit
Note
1
2
3
4
5
6
1
2
3
4
5
6
1
2
3
1
2
3
1
2
1
2
1
2
1
2
Input Types
Specification
Digital Input States
1
1
Supervised Input States
2
2
1
2
3
Input1
Common
1
2
3
Input1
Common
On
1
2
3
Input1
Common
Off
1
2
3
Input1
Common
Short
1
2
3
Input1
Common
No connection
1
2
3
Input1
Common
On
Off
Digital* Off(DO), On(DC)
Supervised* Off(SO), On(SC), Short(DC), No connection(DO)
* Software selectable
* 1K Resistor
*
*

Cable Requirements
POE Cable** 100 m (328’) twisted pair, 4 pairs Cat5 100BASE-T or better
Door Strike Cable 152 m (500’) 2 conductor stranded 18 AWG Belden 9740 or equivalent*
Output Cable 152 m (500’) 2 conductor stranded 22 AWG Belden 8740 or equivalent*
Input Cable 152 m (500’) 2 conductor stranded 22 AWG Belden 8740 or equivalent*
Reader Cable 152 m (500’) 6 conductor stranded not twisted,
24 AWG or thicker,
100% overall shielded
Belden 9537 or equivalent
Name Cable Type Code
Maximum
Distance
* Unless otherwise specified by manufacturer.
** Recommended the following T568B wiring for both ends.
123456 7 8
White/Orange
Orange
White/Green
Blue
1
2
White/Blue
Green
3
4
5
6
White/Brown
Brown
7
8
T568B (TIA/EIA568B) Wiring
HARTMANN CONTROLS Corp www.hartmann-controls.com
Motion Sensor
Single Door Typical
Sensor Type PIR
Detection Range 5 m
Detection Angle H: 94 , V: 82
Detection Zone 64 zones
Specification
94
2.2 m
(86.61”)
(100.39”)
2.55 m
(228.35”)
5.8 m
1
2
3
4
5
6
1
2
1
2
5
8
0
2
1
4
79
6
3
HARTMANN
1
2
1
2
1
2
3
4
5
6
1
2
3
1
2
3
C
F
G
A
R1
(with motion, single reader, door contact, auto door opener)
AWet Lock Power (12V DC 500mA)
CAuto Door Opener (dry)
FDoor Contact (dry)
GHandicap Button (dry)
R1 Outside Reader
Outputs
Inputs

POE-TDM x 1
2P Connector x 4 3P Connector x 2 6P Connector x 2
HARTMANN
A
B
C
D
R1
R2
G
H
I
APOE-TDM
J
BElectric Strike
CAuto Door Opener
DExtra Loud Buzzer*
*Optional Internal Extra Loud Buzzer
GHandicap Open
HDoor Contact
JDoorbell
R1 Inside Reader
R2 Outside Reader
IEmergency Alarm
Controller - POE Injector - PC (Direct)
Controller - POE Injector - Router - PC
In Out
Controllers - POE Router - PC
* LAN or Internet
* LAN or Internet
LAN INTERNET
In Out
LAN INTERNET
2
2
3
3
1
1
Controller
Outputs
Inputs
5
8
0
2
1
4
79
6
3
HARTMANN
POE-TDM
Quick Start Guide
Package Contents
Cover screw x 2Resistor(1K ) x 8 Wall screw x 4
HARTMANN CONTROLS Corp www.hartmann-controls.com
Supervisor Input
Installation Example
QR Code for POE-TDM
Networking Examples
Part Number
POE-TDM-MB
POE-TDM-XB
POE-TDM-MW
POE-TDM-XW
Motion Sensor Color
Yes
No
Yes
No
Black
Black
White
White
: POE Powered
: Normal

HARTMANN CONTROLS Corp www.hartmann-controls.com
Controllers - POE Switch - Router - PC
(Continued)
Controllers - POE Switch (at doors) - Router - PC
5
4
Networking Examples
Outputs & Usage Example Inputs & Usage Example
: POE Powered
: Normal
LAN INTERNET
LAN
LAN INTERNET
LAN
* LAN or Internet
* LAN or Internet
* Can be wireless
* At door
Specification
P1 (Relay1, Lock power) Lock power relay, GND, 12V DC 500mA
P8 (12V DC out) 12V DC output, GND, 12V DC 200mA
P6 (Relay2) 24V DC 500mA limit
P7 (Relay3) 24V DC 500mA limit
* All the relay outputs are configurable.
For example, Relay2 can be configured to a door strike.
Specification
12
12
Note : Output Test
Get in Setup Menu Edit Mode
by pressing Enter Key and hold.
Select Output Test menu.
( Enter keys )
Toggle selected relay by pressing Enter.
( Select change : keys,
0 = Off, 1 = On )
Output Test
Input Test R1 R2 R3
1 0 0
2
23
3
1
1
* All the inputs are configurable.
For example, Input1 can be configured to a doorbell or a door contact of Door_2
Specification
P2 1-2 Pin (Input1) Input Common (GND)
P2 2-3 Pin (Input2) Common (GND) Input
P3 1-2 Pin (Input3) Input Common (GND)
P3 2-3 Pin (Input4) Common (GND) Input
Specification
3
3
12
12
2
2
Note : Input Test
Get in Setup Menu Edit Mode
by pressing Enter Key and hold.
Select Input Test menu.
( Enter keys )
LCD displays current input states.
( D = Digital, S = Supervised,
O = Open, C = Closed )
2
23
3
1
1
Input Test
Reader Test I1 I2 I3 I4
DO DC DO SC
Note : Reader Test
Get in Setup Menu Edit Mode
by pressing Enter Key and hold.
Select Reader Test menu.
( Enter keys )
Scan a card or press numbers and #
( keypad reader only ). LCD shows
the data infomation.
2
23
3
1
1
Request to Exit
Door Contact
Emergency Alarm
External Motion Sensor
2
1
3
1
2
3
Door Strike
Optional Internal Extra Loud Buzzer
Automatic Door Opener
1
2
1
2
1
2
2
1
1
2
3
4
5
6
1
2
3
4
5
6
HARTMANN
5
8
0
21
4
7 9
6
3
HARTMANN
Input Test
Reader Test Reader : 1, Bit:40
33, 13532
Readers & Usage Example
Wiring Specification
Ground Black and shield wires
Power (12V DC) Red wire
LED Brown wire
Buzzer Blue wire
1
2
Data 1 White wire
Data 0 Green wire
3
4
5
6
PUSH
TO
EXIT
Enter
Enter
Enter

Dimensions
240 mm (9.449”)
260 mm (10.236”)
59.3 mm
(2.335”)
88 mm
(3.465”)
58 mm
(2.283”)
7 mm
38 mm
(1.496”)
25 mm
50 mm
(1.968”)
4.5 mm Dia.
129.3 mm (5.090”)
HARTMANN CONTROLS Corp www.hartmann-controls.com
Board I/O and Connections
S1 D4 D3
* For the first time installation, get in this
mode and do following tests.
Output Test : Toggle relays with Enter
Input Test : Shows input states
Reader Test : Shows scaned card info
** Factory default password is 0000.
Toll Free: 1-877-411-0101
D1 System heart beat
D4 Green: Motion detected
Red: Door Opened
D5 Relay2 on
D6 Relay3 on
D7 Relay1 on
D8 Reader1 data flow
D9 Reader2 data flow
D17 POE power
D24 CPU power
LINK Ethernet linked
ACT Ethernet Activity
D2 Server log on/off state
Key pressed
D3 On: Server log off
Blink: Server log in
ConnectorsLEDs
P1 Relay1, DC 12V wet contact
P4 Reader1
P5 Reader2
P6 Relay2
P7 Relay3
P8 DC 12V out
P11 Sensor module
P21 Expansion
P22 Expansion
J1 Ethernet
P2 Input1, Common, Input2
P3 Input3, Common, Input4
Keys
SW1 Left( ), down( )
SW2 Right( ), up( )
SW3 Enter, get in
SW4 Esc, exit
Etc
LS1 Tamper sensor
S1 Motion sensor
BZ1 Embedded buzzer
P20 LCD display
VR1 LCD contrast
Setup Menu View Mode
Get in Press and hold Esc
(beeps after 2 sec)
Get out Esc
Move cursor Up(Right),Down(Left)
Select menu Enter
Exit menu Esc
Setup Menu Edit Mode*
Get in Press and hold Enter
(beeps after 2 sec)
Enter password**
Get out Esc
Move cursor Up(Right),Down(Left)
Select menu Enter
Exit menu Esc
Toggle cursor Enter
White blink: move
Black blink: edit
Note
1
2
3
4
5
6
1
2
3
4
5
6
1
2
3
1
2
3
1
2
1
2
1
2
1
2
Input Types
Specification
Digital Input States
1
1
Supervised Input States
2
2
1
2
3
Input1
Common
1
2
3
Input1
Common
On
1
2
3
Input1
Common
Off
1
2
3
Input1
Common
Short
1
2
3
Input1
Common
No connection
1
2
3
Input1
Common
On
Off
Digital* Off(DO), On(DC)
Supervised* Off(SO), On(SC), Short(DC), No connection(DO)
* Software selectable
* 1K Resistor
*
*

Cable Requirements
POE Cable** 100 m (328’) twisted pair, 4 pairs Cat5 100BASE-T or better
Door Strike Cable 152 m (500’) 2 conductor stranded 18 AWG Belden 9740 or equivalent*
Output Cable 152 m (500’) 2 conductor stranded 22 AWG Belden 8740 or equivalent*
Input Cable 152 m (500’) 2 conductor stranded 22 AWG Belden 8740 or equivalent*
Reader Cable 152 m (500’) 6 conductor stranded not twisted,
24 AWG or thicker,
100% overall shielded
Belden 9537 or equivalent
Name Cable Type Code
Maximum
Distance
* Unless otherwise specified by manufacturer.
** Recommended the following T568B wiring for both ends.
123456 7 8
White/Orange
Orange
White/Green
Blue
1
2
White/Blue
Green
3
4
5
6
White/Brown
Brown
7
8
T568B (TIA/EIA568B) Wiring
HARTMANN CONTROLS Corp www.hartmann-controls.com
Motion Sensor
Two Door Typical
Sensor Type PIR
Detection Range 5 m
Detection Angle H: 94 , V: 82
Detection Zone 64 zones
Specification
94
2.2 m
(86.61”)
(100.39”)
2.55 m
(228.35”)
5.8 m
1
2
3
4
5
6
1
2
5
8
0
2
1
4
79
6
3
HARTMANN
1
2
1
2
1
2
3
4
5
6
C
F1
G
A1
R1
(with motion, two readers, two door contacts, auto door opener)
1
2
3
PUSH
TO
EXIT
HARTMANN
1
2
1
2
3
- +
DC12V
A1,A2 Wet Lock Power (12V DC 500mA)
CAuto Door Opener (dry)
Outputs
Inputs
F1,F2 Door Contact (dry)
GHandicap Button (dry)
HRequest to Exit (dry)
R1,R2 Readers
A2
R2
F2
H*All inputs are configurable and interchangeable
This manual suits for next models
3
Table of contents
