Haute Decor BKILLLED75T2-2 User manual

7.5 FOOT BERKSHIRE SNOWY SPRUCE WITH WARM WHITE LED LIGHTS
Item # BKILLLED75T2-2
IMPORTANT, RETAIN FOR FUTURE REFERENCE: READ CAREFULLY.
PARTS LIST
•1 EA. TREE STAND (WITH 3 SCREWS)
•1 EA. TREE SECTION A (BOTTOM)
•1 EA. TREE SECTION B (MIDDLE)
•1 EA. TREE SECTION C (TOP)

2 of 6
ASSEMBLY
CAREFULLY REMOVE THE CONTENTS FROM THE CARTON.KEEP THE CARTON FOR FUTURE STORAGE.DO NOT FORCIBLY REMOVE CONTENTS.
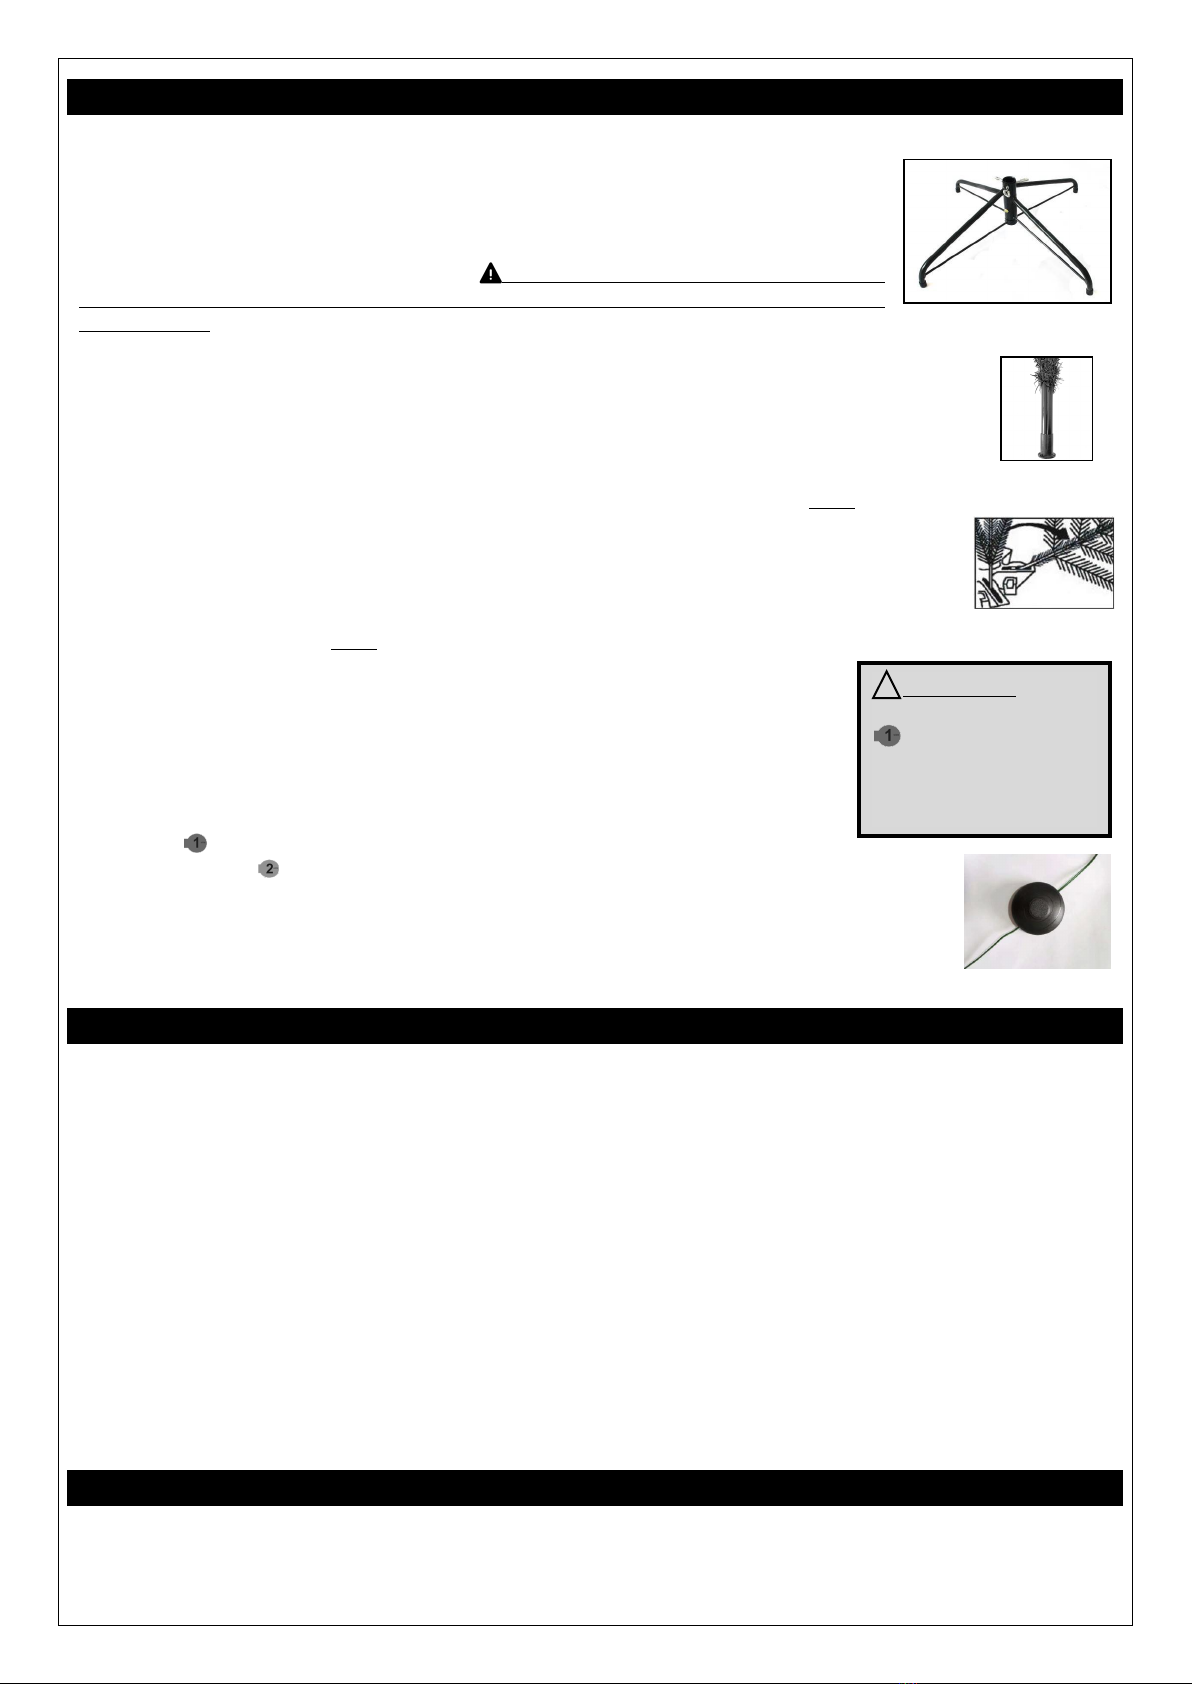
Step 1: Locate the TREE STAND.Rotate the legs until the three (3) holes on the inner and outer walls
of the hub align, and the stand forms an “X” shape (see Fig. 1). There are three (3) screws with the
stand. Insert the screws into the holes, but do not turn all the way in. Leave space inside the hub
for the tree pole to slide down. Place the stand where you are going to set up the tree. THIS
PRODUCT IS SUITABLE FOR INDOOR USE ONLY. IMPORTANT: DO NOT PLACE THE TREE WHERE
IT IS LIKELY TO WOBBLE DUE TO UNEVEN FLOORS OR THICK CARPETING. PLACE THE TREE ON A
LEVEL SURFACE.
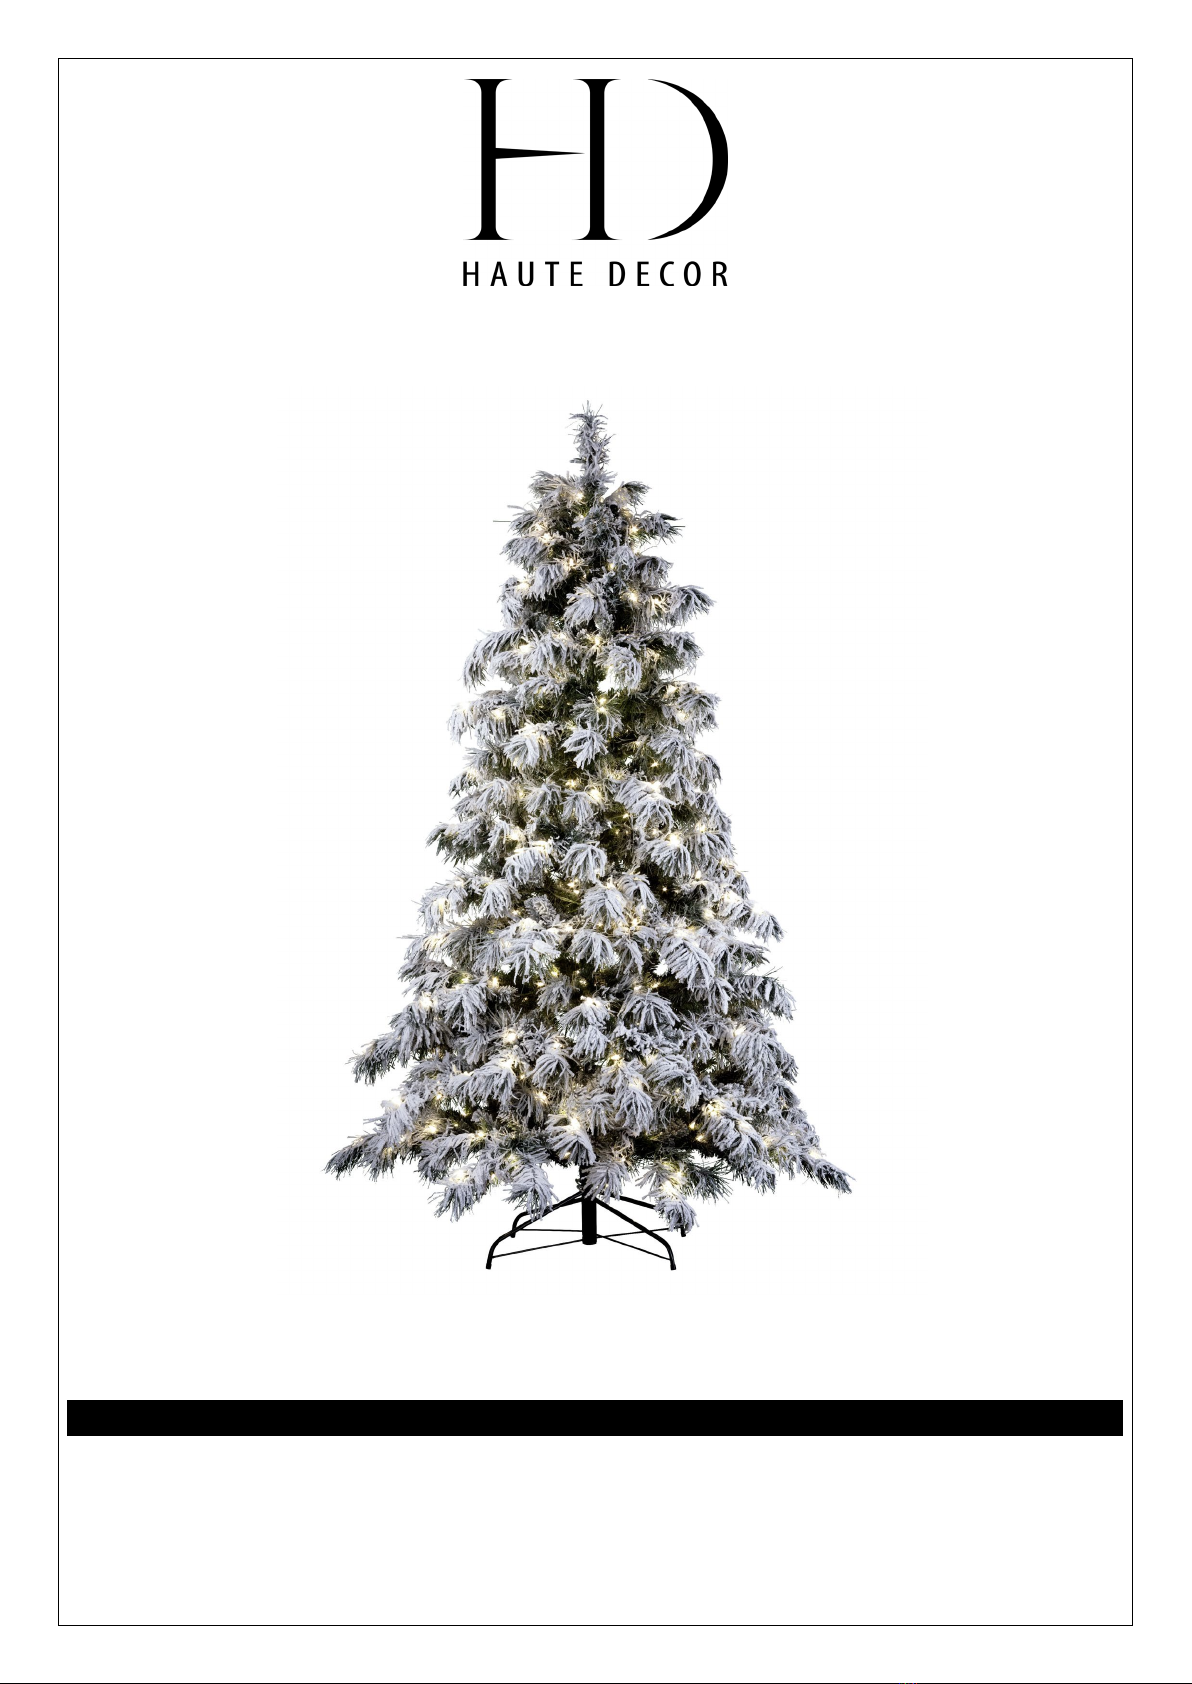
Step 2: Find TREE SECTION A, tagged with the letter “A”. Remove the green pole cap (see Fig. 2) that is covering
the bottom of the pole. It is a protective cover only and can be kept for storage if desired. Insert TREE SECTION A
into the TREE STAND. Do not force the pole. It will slide down to its correct position. Make sure the pole is seated
firmly in the stand. Turn all three screws evenly until they touch the pole. If Tree Section A is not sitting
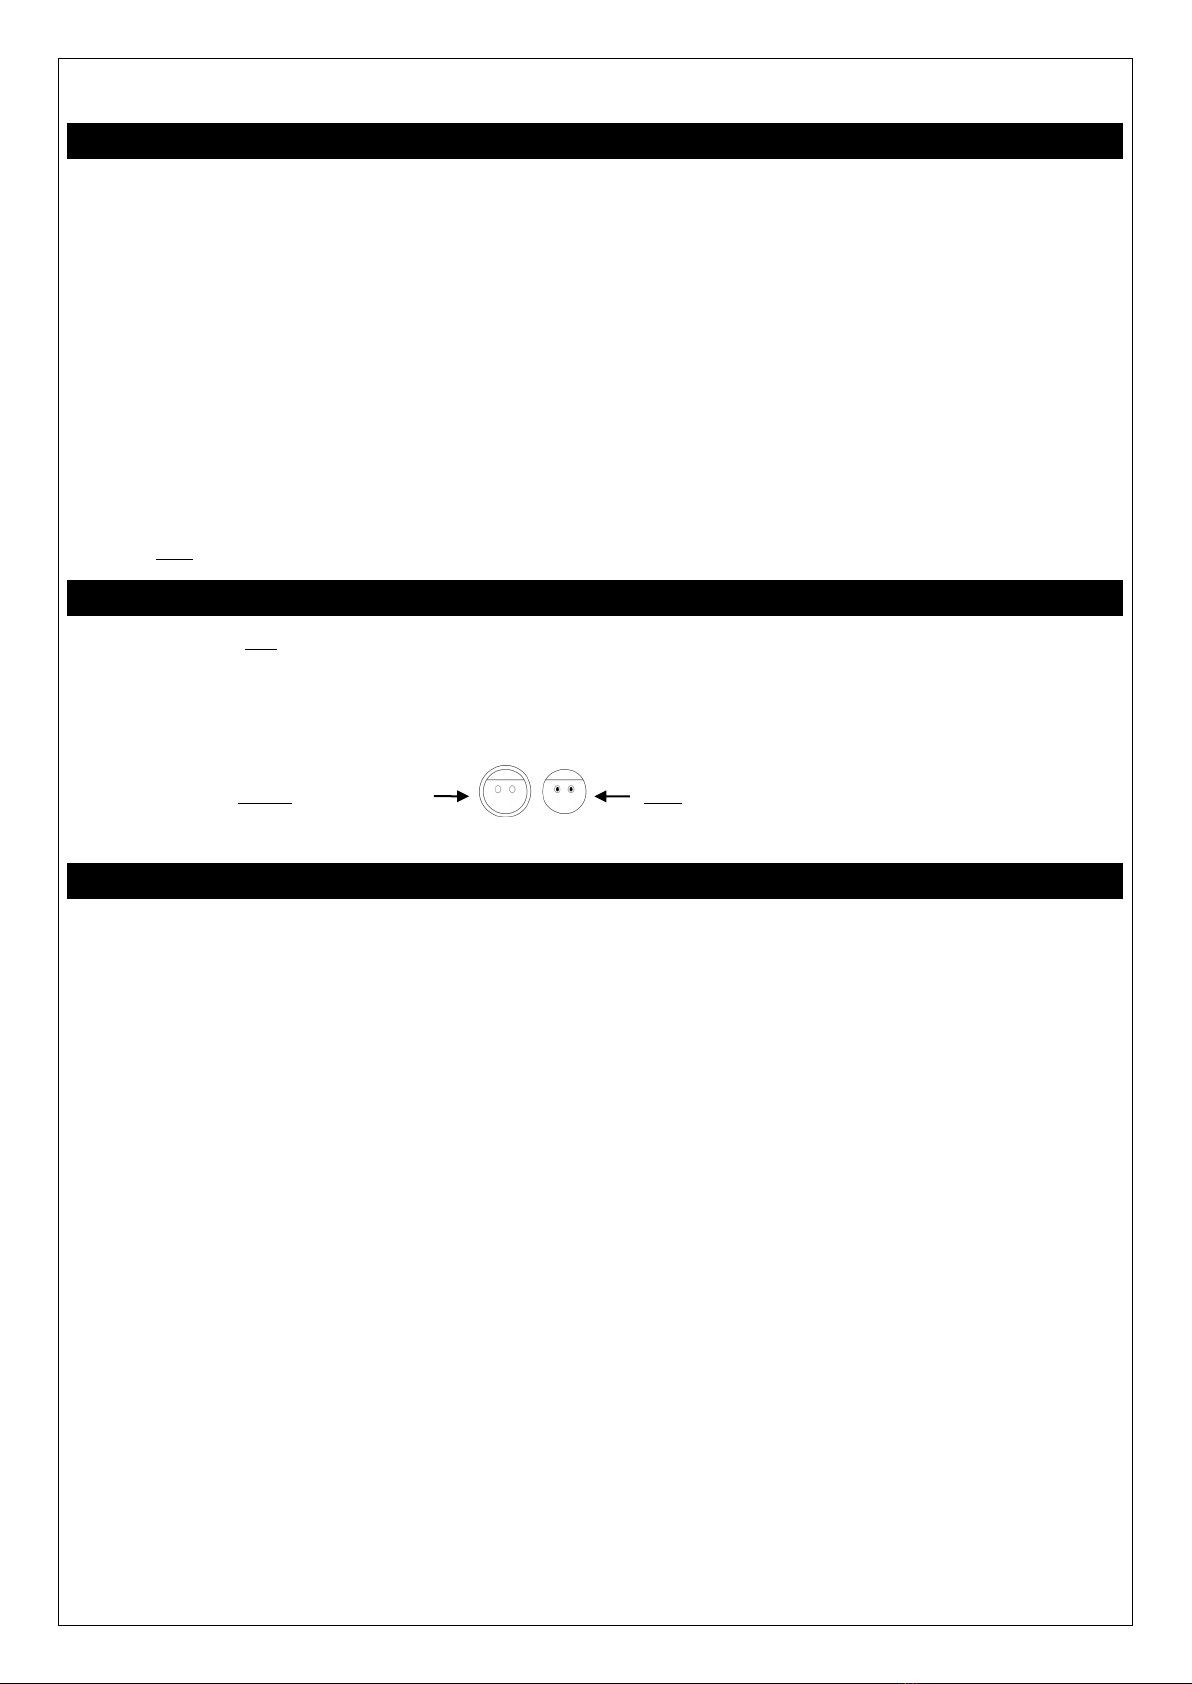
straight, then simply loosen the screws, adjust the tree pole, and retighten the screws. Allow the branches to
fall into place. The branches are connected to the tree pole by metal hinges (see Fig. 3). NOTE:SOME BRANCHES
MAY CATCH ON ONE ANOTHER.IF THAT OCCURS,SLOWLY PRESS DOWN ON EACH BRANCH UNTIL IT FALLS INTO PLACE.
Step 3: Locate TREE SECTION B, tagged with the letter “B”. Insert TREE SECTION B into TREE SECTION A. Make sure
the section is sitting securely and allow the branches to fall into place.
Step 4: Locate TREE SECTION C, tagged with the letter “C”. Insert TREE SECTION C into TREE SECTION B. Make sure
the section is sitting securely. NOTE:THE TOP,INNER PART OF THE POLE TO TREE SECTION BHAS A GREEN POLE ADAPTER
INSIDE.THIS POLE ADAPTER IS NOT TO BE REMOVED.TREE SECTION BHAS A GREEN STEM COMING OFF THE
BOTTOM OF ITS POLE WHICH FITS SNUGGLY INTO THIS ADAPTER AND GIVES STABILITY TO YOUR TREETOP.The
branches are not hinged to the pole in this section, so you will need to pull the branches
down slightly by hand.
Step 5: Connect the light set plug(s) from each tree section into the section below securely.
To find the connections easier, the light sets have a male/female plug with a colored barbell
label. For the connection from Section A to B, there will be a red barbell label with the
number one . For the connection from Section B to C, there will be a yellow barbell label
with the number two . Further secure the plug connection by screwing the outer cover into place.
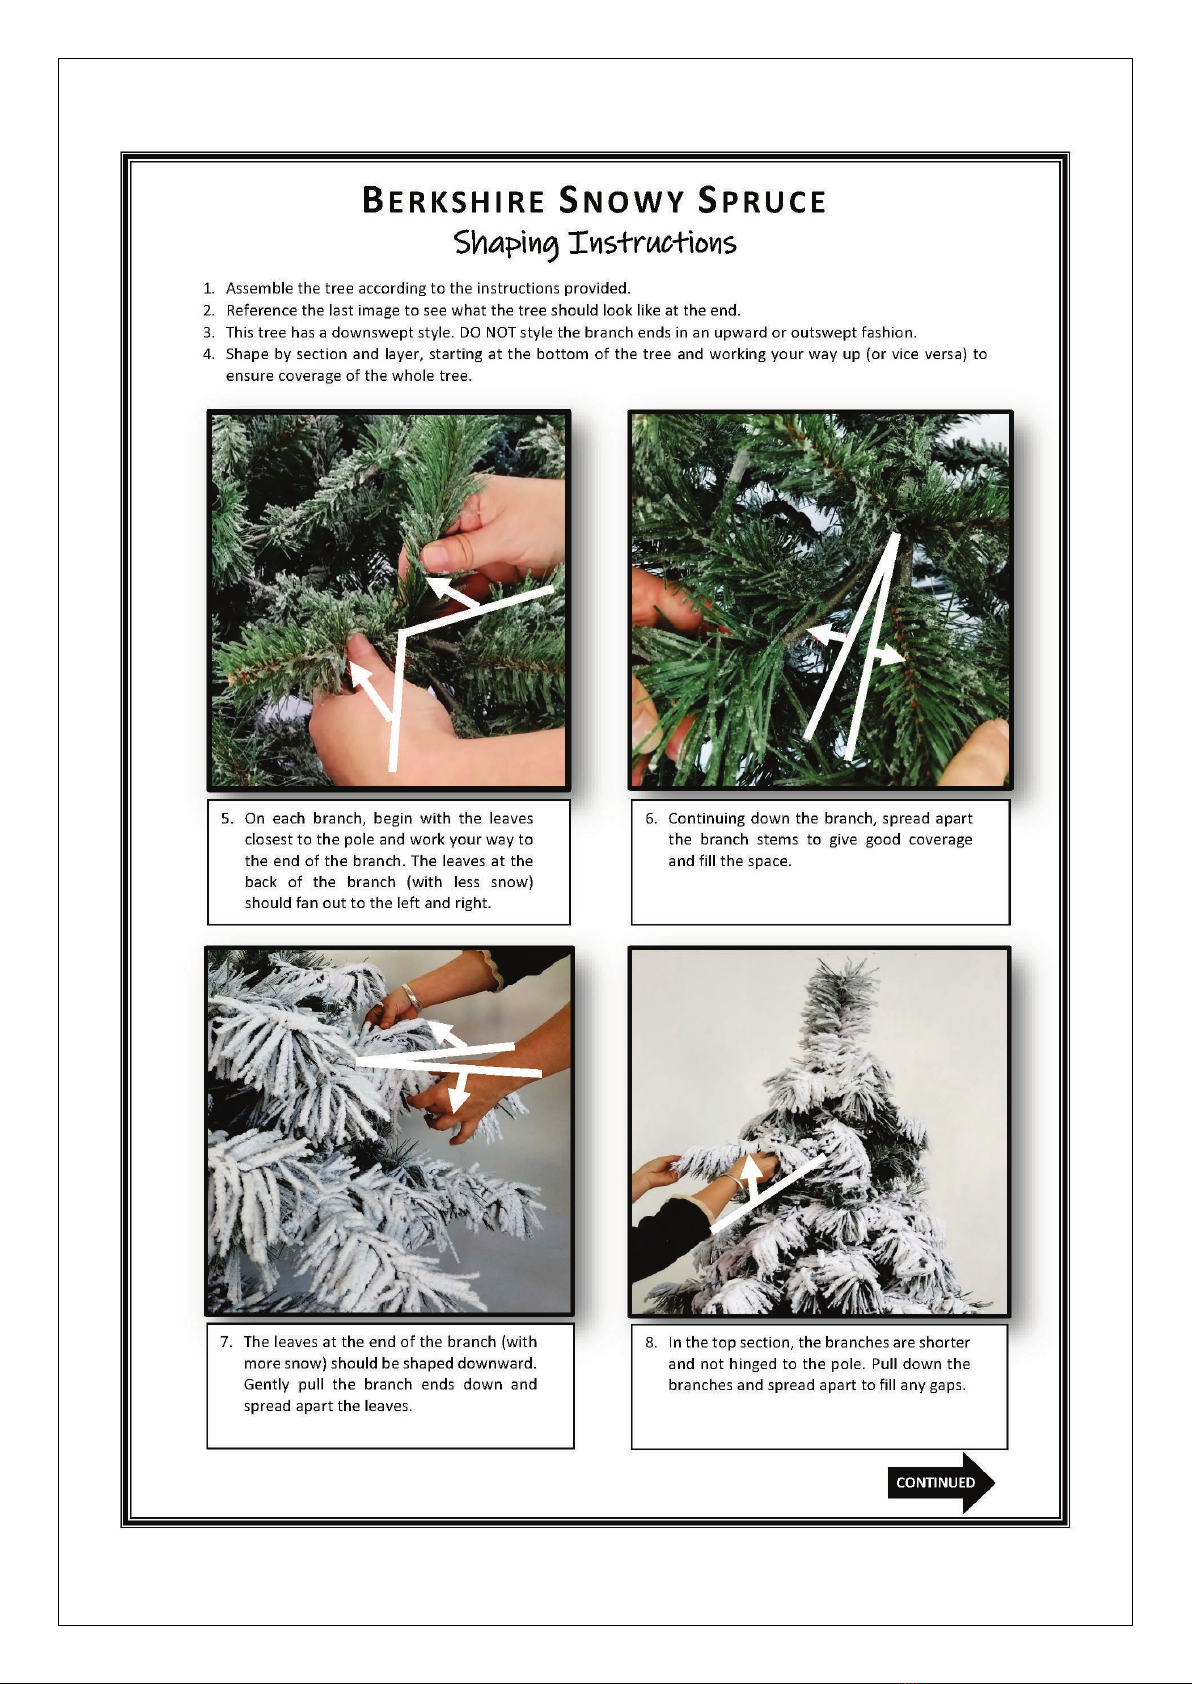
Step 6: In TREE SECTION A, there is a power adapter that is to be guided down through the tree section to
the floor. Insert it into a power outlet in your home or into a U.L. approved power strip (not included).
Tap the foot pedal (see Fig. 4) to turn the lights on. Your tree should now be lit. If some bulbs do not light,
please go to the section on TROUBLESHOOTING FOR LIGHTS.
SHAPING
1. The branches have been condensed to fit into the box and can be easily reshaped to their original fullness by bending and
separating each of the branches in a more realistic manner.
2. Please reference the image on the cover of this instruction manual to see what the tree should like.
3. Plug in the lights as you are shaping the tree.
4. Shape by section and layer, starting at the top of the tree and working your way down (or vice versa) to ensure coverage of
the whole tree.
5. This tree has a downswept style. DO NOT style the outer branches in an up or outswept fashion.
6. On each branch, begin with the leaves closest to the pole and work your way to the end of the branch.
7. The leaves at the back of the branch (with less snow) should be fanned out to the left and right. Offset the tip from the tip
before to hide the tree’s pole and fill spaces.
8. The leaves at the end of the branch (with more snow) should be shaped downward. Gently pull the branches downward
and spread apart the leaves.
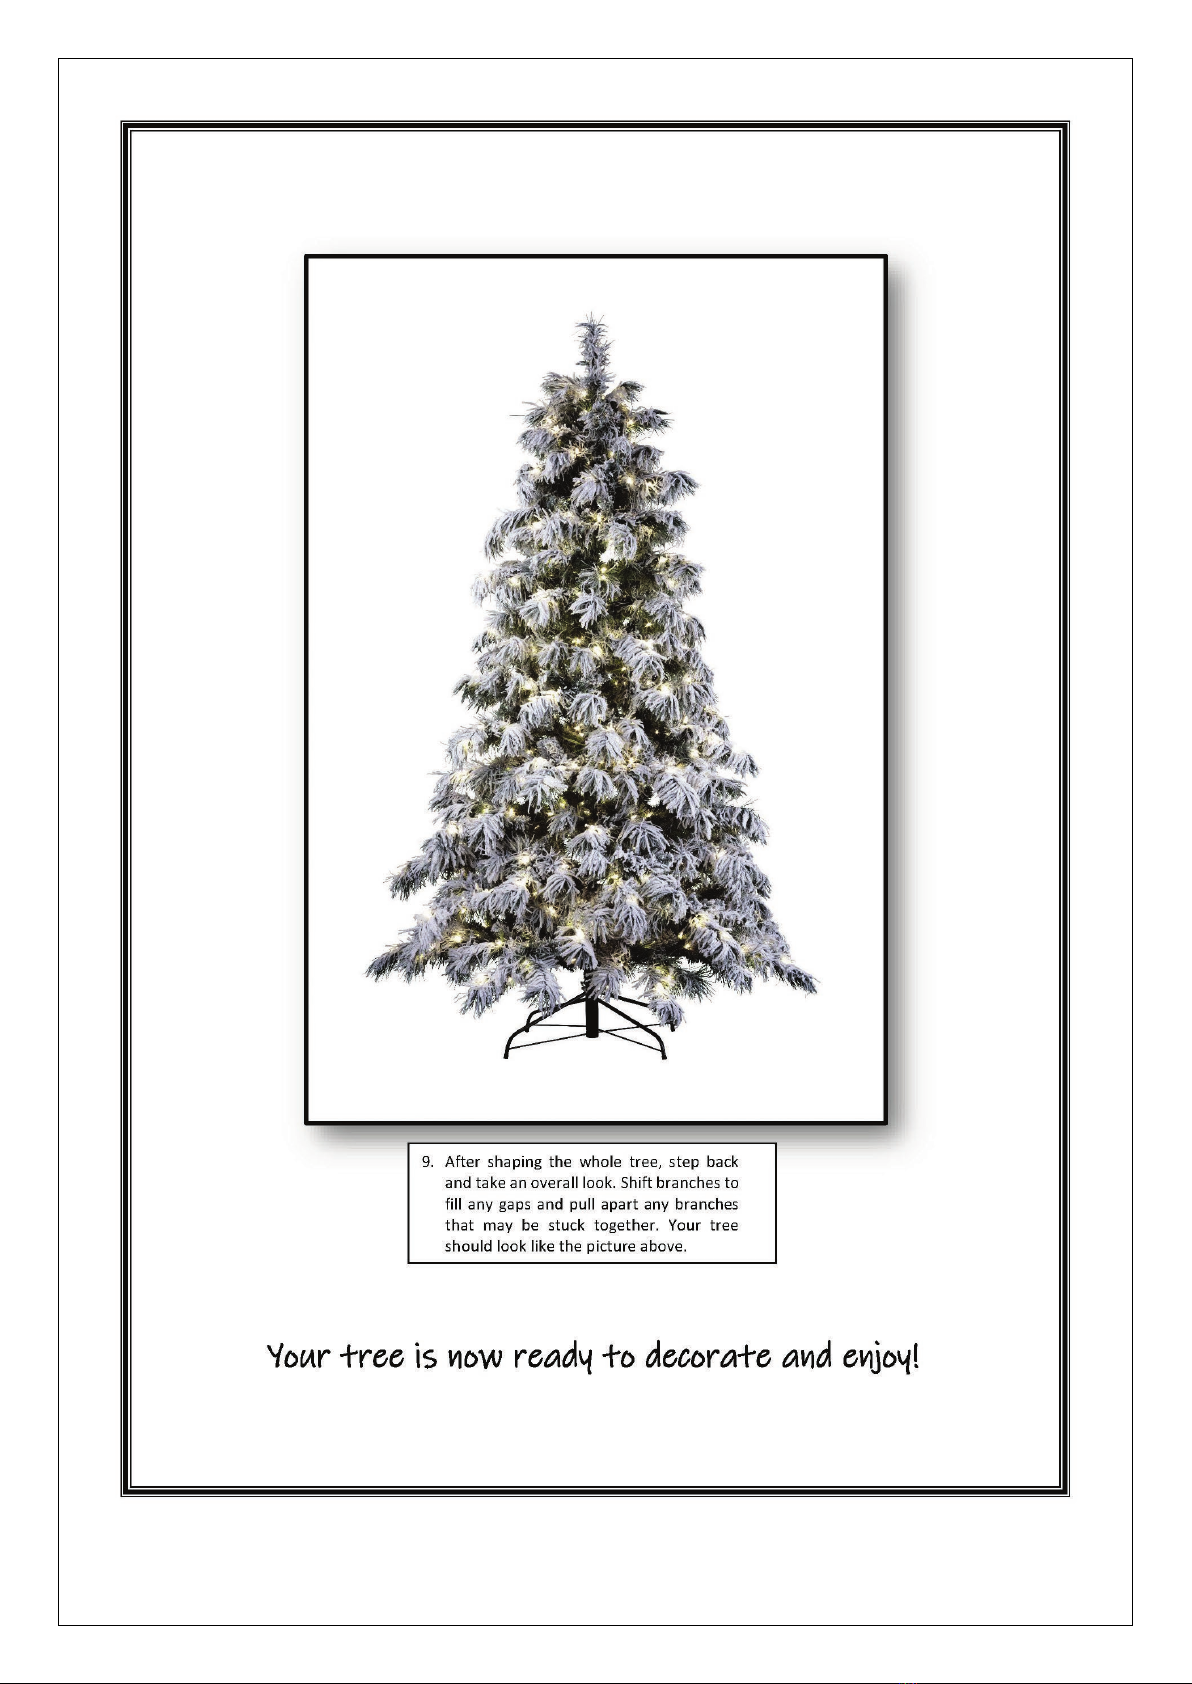
9. After shaping the whole tree, step back and take an overall look. Shift branches to fill any gaps and pull apart any branches
that may be stuck together. Your tree is now ready to decorate and enjoy!
PLEASE FIND DETAILED SHAPING INSTRUCTIONS WITH PHOTOGRAPHS AT THE END OF THIS DOCUMENT
CLEANING &CARE
AS YOU WILL BE USING THE TREE EVERY YEAR,FOLLOWING ARE TIPS TO KEEP IT IN GOOD CONDITION AND MAINTAINED:
•Dust gently using a soft cloth or fabric duster. Do NOT use any chemicals or solvents to clean.
•Handle the light sets gently. Do NOT pull or tug light sets as this may inadvertently loosen the bulb.
Fig. 4
!
IMPORTANT:
D
O NOT
REMOVE THE BARBELL LABELS
ON YOUR LIGHT SETS.THEY
WILL HELP YOU TO EASILY FIND
THE PLUGS AND CONNECT THE
FOLLOWING YEAR
.
Fig. 1
Fig. 3
Fig. 2

3 of 6
•Follow all Storage and Safety Instructions.
STORAGE
PROPER TREE HANDLING AND STORAGE WILL HELP YOU GET THE MOST OUT OF YOUR TREE FOR MANY YEARS TO COME.
1. Remove any ornaments and decorations that were added by you and did not come with the tree.
2. Unplug the tree from the power source in your home and disconnect the plug connection between each tree section.
3. Starting with the top, separate each tree section and stand gently, being sure not to roughly handle as it could cause
damage to the parts.
4. Compress each tree section by turning it upside down and squeezing the branches together so that it will fit more easily
into the storage box or container. You can also tie a ribbon or cord around the sections to secure the branches closer
together for storage.
5. Place all the parts gently back into the storage box. The box will help prevent the tree from being damaged should it get
bumped in your garage, basement, or other storage location. Tape the box shut to keep out any dust or insects. When
packing up the tree, please ensure that there is no stress or strain to the tree.
6. Be sure to store the tree in a cool, dry area free of water and moisture to prevent mold and mildew from accumulating
and a musty odor from developing. Exposing your tree to excessive heat or humidity may damage your tree. DO NOT
STORE THE TREE IN A DAMP AREA OR IN AN AREA WHERE THE TEMPERATURE EXCEEDS 100ºF. STORE THE CARTON FLAT
AND NOT UPRIGHT ON ITS SHORT END.
TROUBLESHOOTING FOR LIGHTS
IF YOUR LIGHTS ARE NOT WORKING,FOLLOWING ARE TROUBLESHOOTING STEPS TO TRY:
1. Check that the power plug is properly connected to your wall outlet or other power source and tap the foot pedal.
2. Check that there is power to the wall outlet or power source.
3. Check that all the plugs within the tree are securely connected and positioned correctly. Plugs are keyed to fit one
direction only with the flat section of the female plug matching up to the flat section of the male plug.
NOTE: LED bulbs are permanent and cannot be removed from the light sets.
IMPORTANT SAFETY
THIS TREE IS SAFE FOR INDOOR USE ONLY.
PLEASE READ AND FOLLOW ALL INSTRUCTIONS AND WARNING TAGS THAT ARE ON THE TREE AND PROVIDED WITH THE TREE.
SAVE THESE INSTRUCTIONS –THIS MANUAL CONTAINS IMPORTANT SAFETY AND OPERATING INSTRUCTIONS.
WHEN USING ELECTRICAL PRODUCTS,BASIC PRECAUTIONS SHOULD ALWAYS BE PRACTICED INCLUDING THE FOLLOWING:
1. WARNING: Risk of Fire. Electrical installation in homes involves special wiring methods to run wiring through a building
structure. Consult a qualified electrician. Installation work and electrical wiring must be done by qualified person(s) in
accordance with all applicable codes and standards, including fire-rated construction. Reference the National Electrical
Code, NFPA 70, specifically for the installation of wiring and clearances from power and lighting conductors.
2. CAUTION: This is an electrical product - not a toy! To avoid risk of fire, burns, personal injury and electric shock, the tree
should not be played with or placed where small children can reach it.
3. Do not use an extension cord.
4. Do not install or use within ten feet of a pool.
5. Do not use in a bathroom.
6. Do not use this product if the power adapter or light sets are damaged. Always inspect light sets and electrical cords for
signs of damage or wear.
7. Be careful not to overload electrical circuits by plugging too many lights and decorations into a single outlet. Overloaded
outlets can overheat and cause a fire.
8. This seasonal use product is not intended for permanent installation or use.
9. Do not secure the wiring of this product with staples or nails.
10. Do not alter the construction of the wiring in anyway.
11. Unplug the product when leaving the house, retiring for the night, or if left unattended.
12. Do not use this product for anything other than its intended use.
13. Do not hang ornaments or other objects from the cord, wire, or light string.
14. Do not close doors or windows on the product or its light set cords as this may damage the wire insulation.
15. Do not cover the tree with cloth, paper, or any material not part of the tree when in use.
Female Plug Flat Section
Male Plug Flat Section

4 of 6
16. Do not mount or support strings in a manner that can cut or damage the wire insulation.
17. Do not mount or place near gas or electric heaters, fireplaces, candles, or other similar sources of heat.
18. Do not place your tree where it is likely to wobble due to uneven floors or thick carpeting. Place it on a flat, hard surface.
19. This product should not be used with a voltage converter.
FOLLOWING SAFETY INSTRUCTIONS APPLY TO THE POWER ADAPTER PART ONLY.
THE POWER ADAPTER PART ONLY IS RATED FOR INDOOR AND OUTDOOR USE.
TREE AND ALL OTHER PARTS ARE NOT MEANT FOR OUTDOOR USE.
1. WARNING: Risk of Electric Shock. When used outdoors, install only to a covered Class A GFCI protected receptacle that is
weatherproof with the power unit connected to the receptacle. If you do not have this receptacle, contact a qualified
electrician for proper installation. Ensure that the power unit and cord do not interfere with completely closing the
receptacle cover.
2. WARNING: Not to use with receptacles that are weatherproof, unless it is a covered receptacle (attachment plug cap not
inserted, and receptacle cover closed).
3. WARNING: Risk of Electric Shock. Mount the unit at a height greater than one foot from the ground surface.
FCC STATEMENT
This device complies with Part 15 of the FCC rules. Operation is subject to the following two conditions:
(1) This device may not cause harmful interference, and
(2) This device must accept any interference received, including interference that may cause undesired operation.
NOTE: This equipment has been tested and found to comply with the limits for a Class B digital device, pursuant to Part 15 of
the FCC Rules. These limits are designed to provide reasonable protection against harmful interference in a residential
installation. This equipment generates, uses, and can radiate radio frequency energy and, if not installed and used in
accordance with the instructions, may cause harmful interference to radio communications. However, there is no guarantee
that interference will not occur in a particular installation. If this equipment does cause harmful interference to radio or
television reception, which can be determined by turning the equipment off and on, the user is encouraged to try to correct
the interference by one or more of the following measures:
• Reorient or relocate the receiving antenna.
• Increase the separation between the equipment and receiver.
• Connect the equipment into an outlet on a circuit different from that to which the receiver is connected.
• Consult the dealer or an experienced radio/TV technician for help.
WARNING: Changes or modifications to this unit not expressly approved by the party responsible for compliance could void
the user’s authority to operate the equipment.
CANADA ICES-003 STATEMENT
This Class B digital apparatus complies with Industry Canada Standard ICES-003. Operation is subject to the following two
conditions:
(1) this device may not cause harmful interference, and
(2) this device must accept any interference received, including interference that may cause undesired operation.
CUSTOMER SERVICE
THANK YOU FOR YOUR PURCHASE!
Comments or questions?
Contact us at 1-877-359-0115
customerservice@haute-decor.co m
Haute Decor
PO Box 1594
Allen, TX 75013
©2022 Haute Decor
Made in China

5 of 6

6 of 6
Table of contents
Other Haute Decor Home Lighting Accessories manuals
Popular Home Lighting Accessories manuals by other brands

V-TAC
V-TAC SMART LIGHT VT-5050 Installation instruction

Onvis
Onvis Kameleon K1-2TS user manual

DS Produkte
DS Produkte ZJGY-3020CD instructions

degardo
degardo STORUS VI Instructions for assembly and use

Anslut
Anslut 005629 operating instructions

Home Accents Holiday
Home Accents Holiday TY410-1611 Use and care guide

Hay
Hay COMMON LAMP BASE instruction manual

Home Accents Holiday
Home Accents Holiday 21RT0422124 Assembly instructions

Smart Candle
Smart Candle LV96 instructions

EKVIP
EKVIP SKI SLOPE operating instructions

Anslut
Anslut 008516 operating instructions

Home Accents Holiday
Home Accents Holiday TY476-1611-0 Assembly instructions