HD Mask iMini User manual

iMiniCam 1080p Wireless Spy Camera
User Manual
2
iMini Spy Camera User Manual
Introduction
Thank you for choosing the iMini Spy Camera. Experience cutting edge
technology and enjoy the security that the iMini Spy Camera system
brings to your home, office, or anywhere you are. We hope you enjoy
your new wireless spy system.
User and Installation Guide
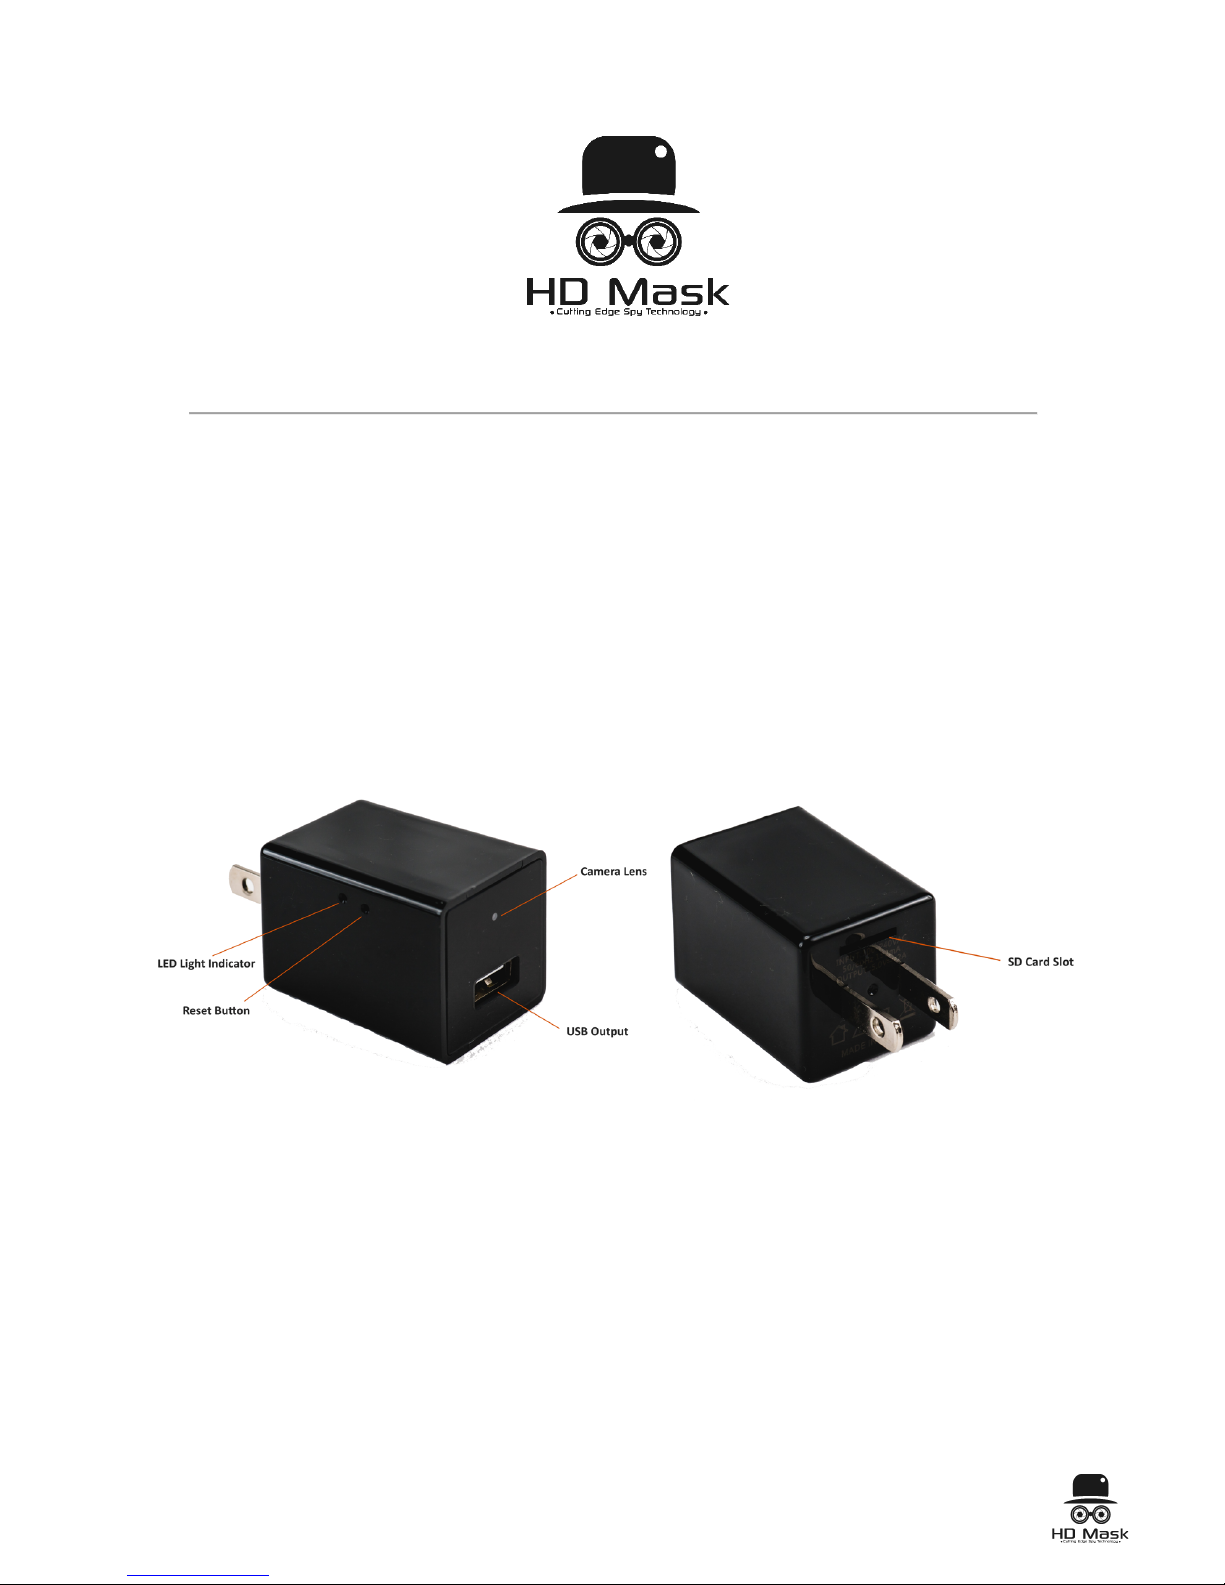
Product Structure
Package Includes:
• USB Spy Camera
• USB SD Reader
• Pin
Note: The instructions outlined in this manual are specifically for the
iPhone, but Android setup instructions are similar.

3
Download the iMiniCam App
Option 1: Search “iMiniCam” on the App Store or Google Play and
download.
iMiniCam
Option 2: Scan the QR code below through any QR scanning app. You
will be navigated to the following page. Select a means of downloading
that is suitable for your device.
Setting up your iMiniCam
Add a new online camera via the iMiniCam app and Wi-Fi
1. Plug the iMiniCam device into a functioning electrical outlet.
2. Reset the device by taking the included pin tool and push and hold
the button for about 5 seconds. Wait another 30 seconds for the
reset to complete. The indicator light should flash and when
complete, will stop flashing and turn off entirely.
4
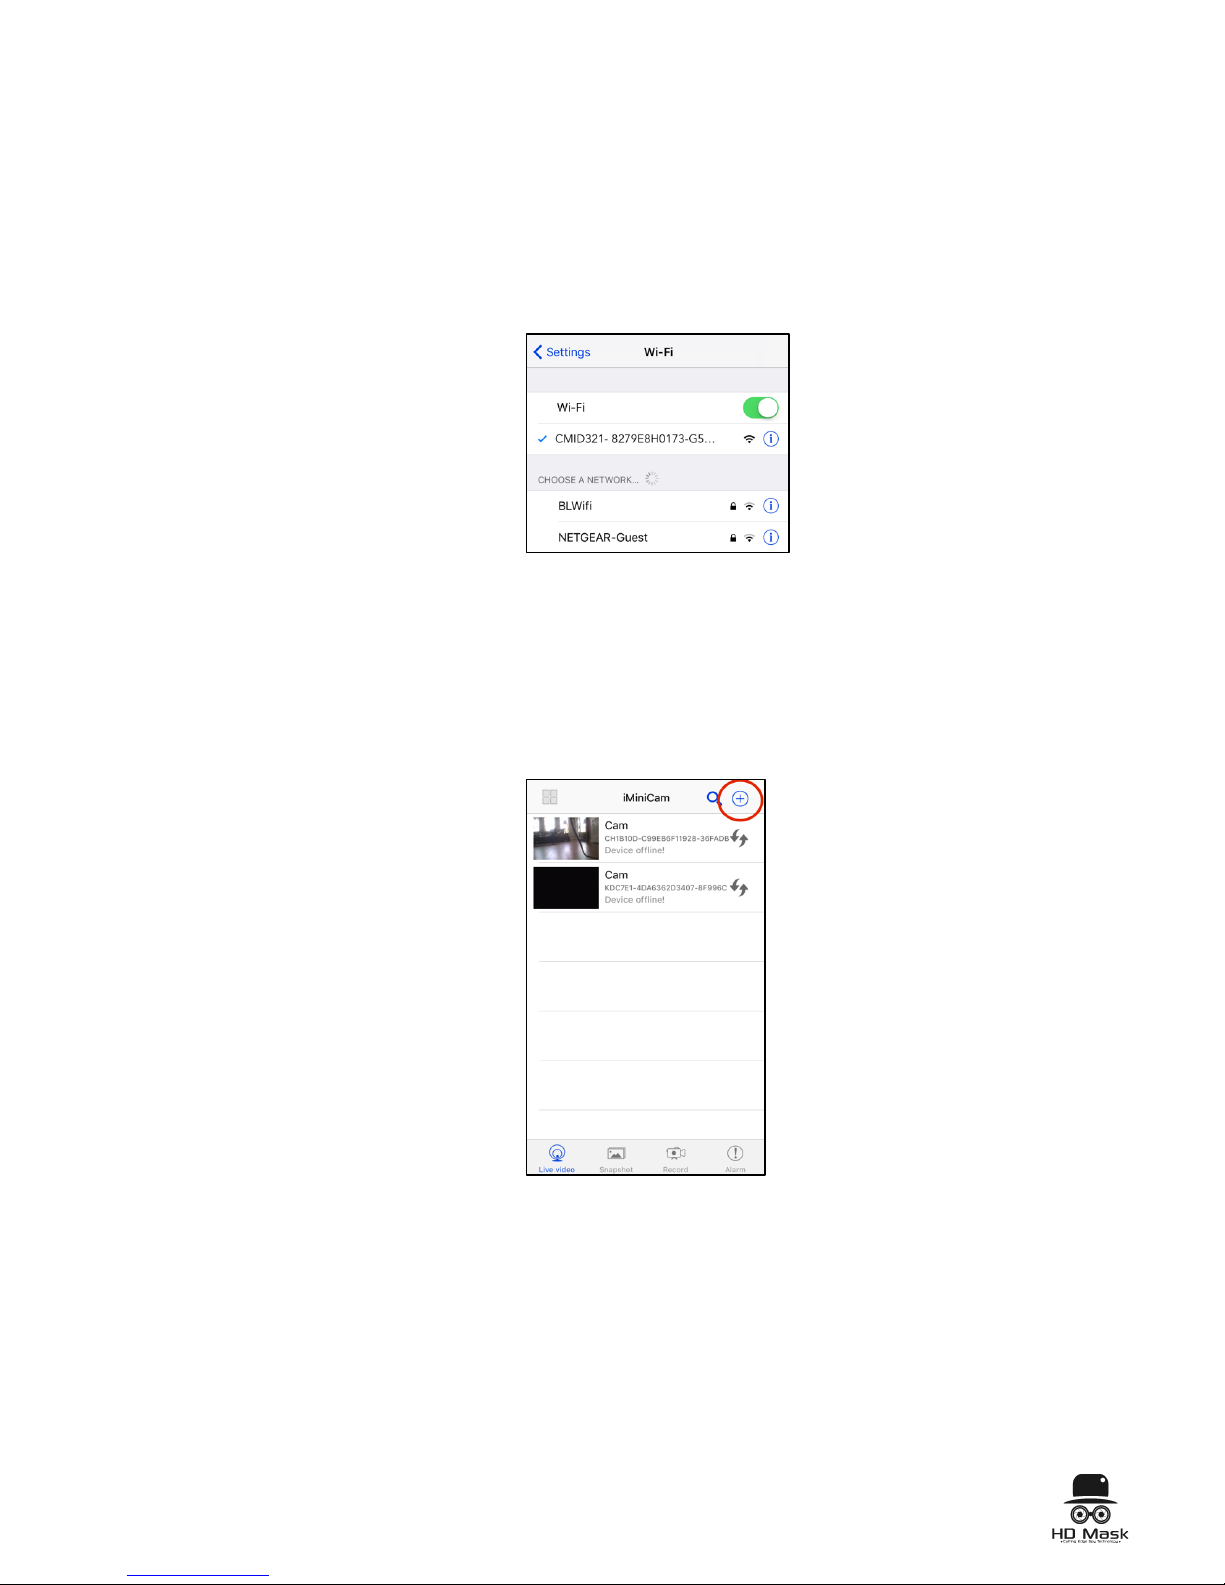
3. Open your phone’s Wi-Fi settings and search for the iMiniCam’s
Wi-Fi signal. The Wi-Fi address will be a long series of letters and
numbers and also acts as the device’s unique UID. This UID can
also be found on a sticker on the side of the iMiniCam device. This
sticker also has a QR code you can scan to easily copy the UID.
4. Once found, connect your phone to this Wi-Fi. If after 3 minutes
the iMiniCam’s Wi-Fi does not appear, reset the device and try
again.
5. Open the iMiniCam app on your phone and click the (+) button in
the top right corner to add the new camera.
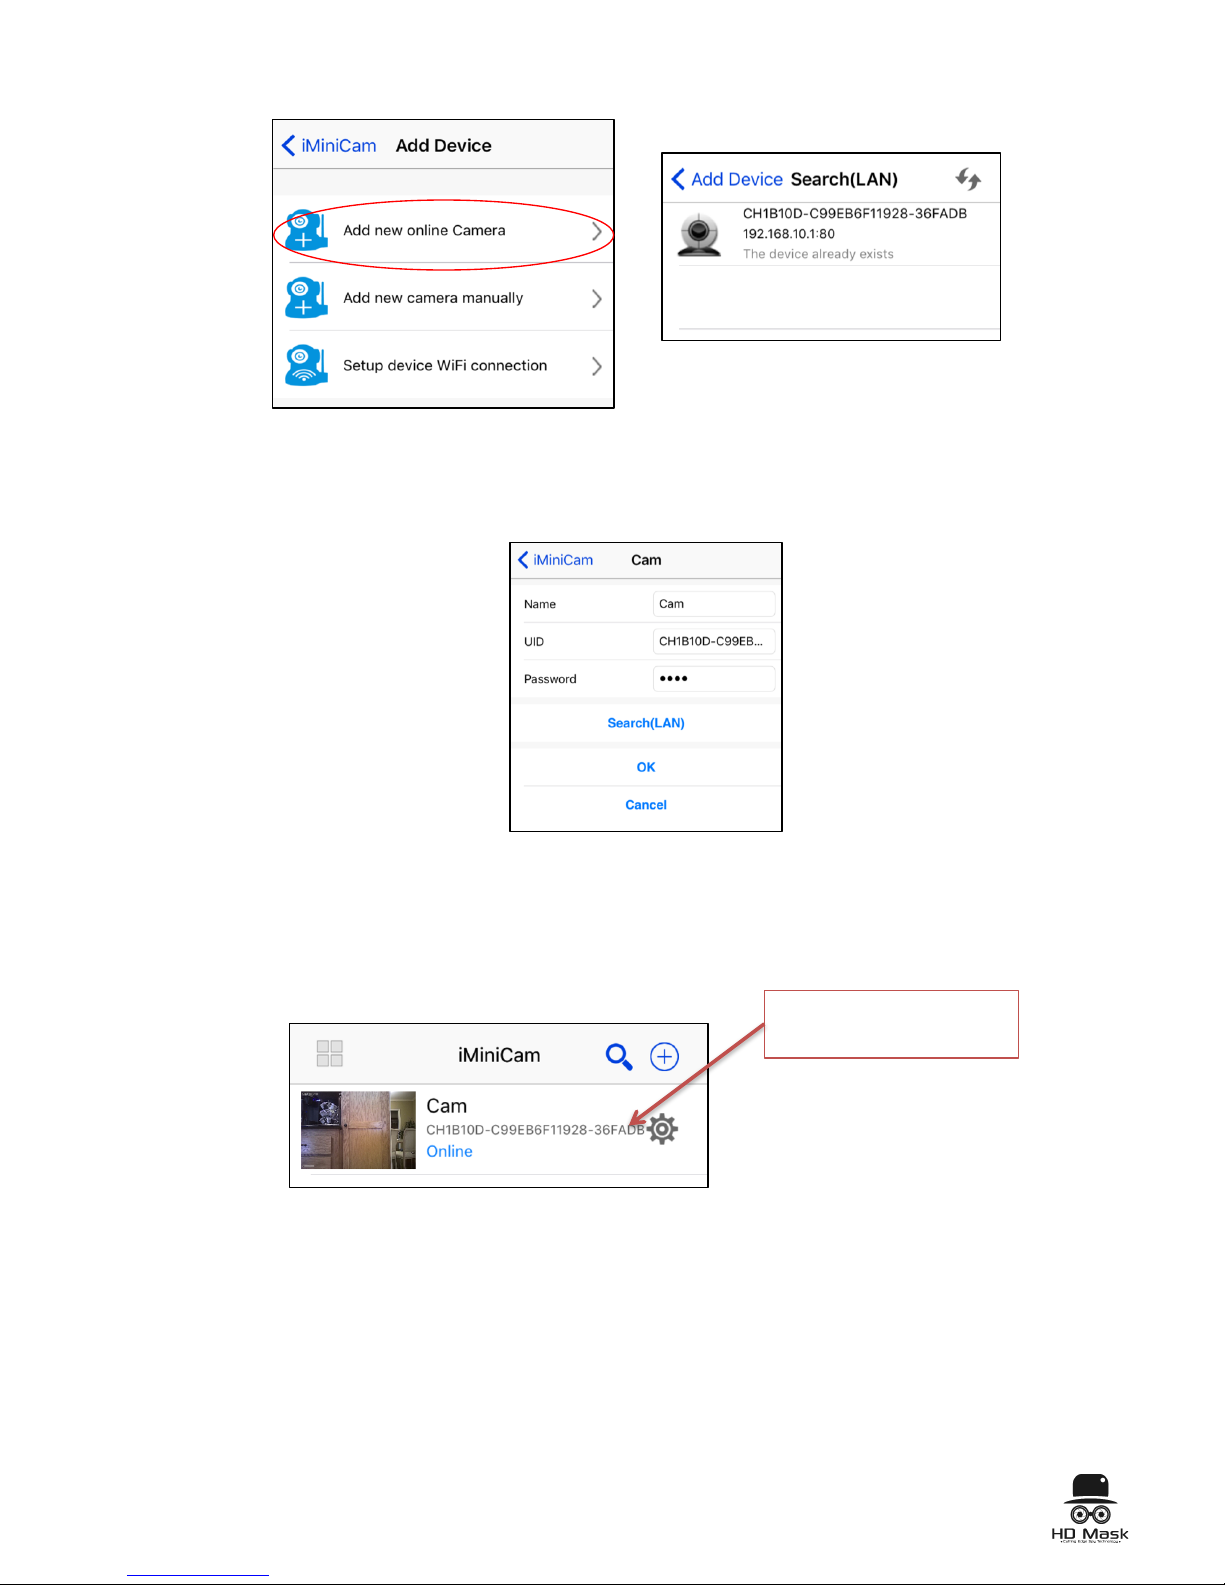
6. Click “Add new online camera” and the device’s Wi-Fi address
should appear in the following page titled “Search(LAN)”. Select it
to add it as a new device. If the device does not appear, check that
your phone is connected to the iMiniCam’s Wi-Fi with the UID.
5
7. When prompted for a password, the default password is 8888.
8. Navigate back to the home screen “Live Video” and the newly
added camera should appear online. It will display its UID, which
will also match its Wi-Fi code.
Adding a New Camera Manually
1. Once a camera has already been previously set up, you have the
option to later connect the camera manually using the camera’s
UID.
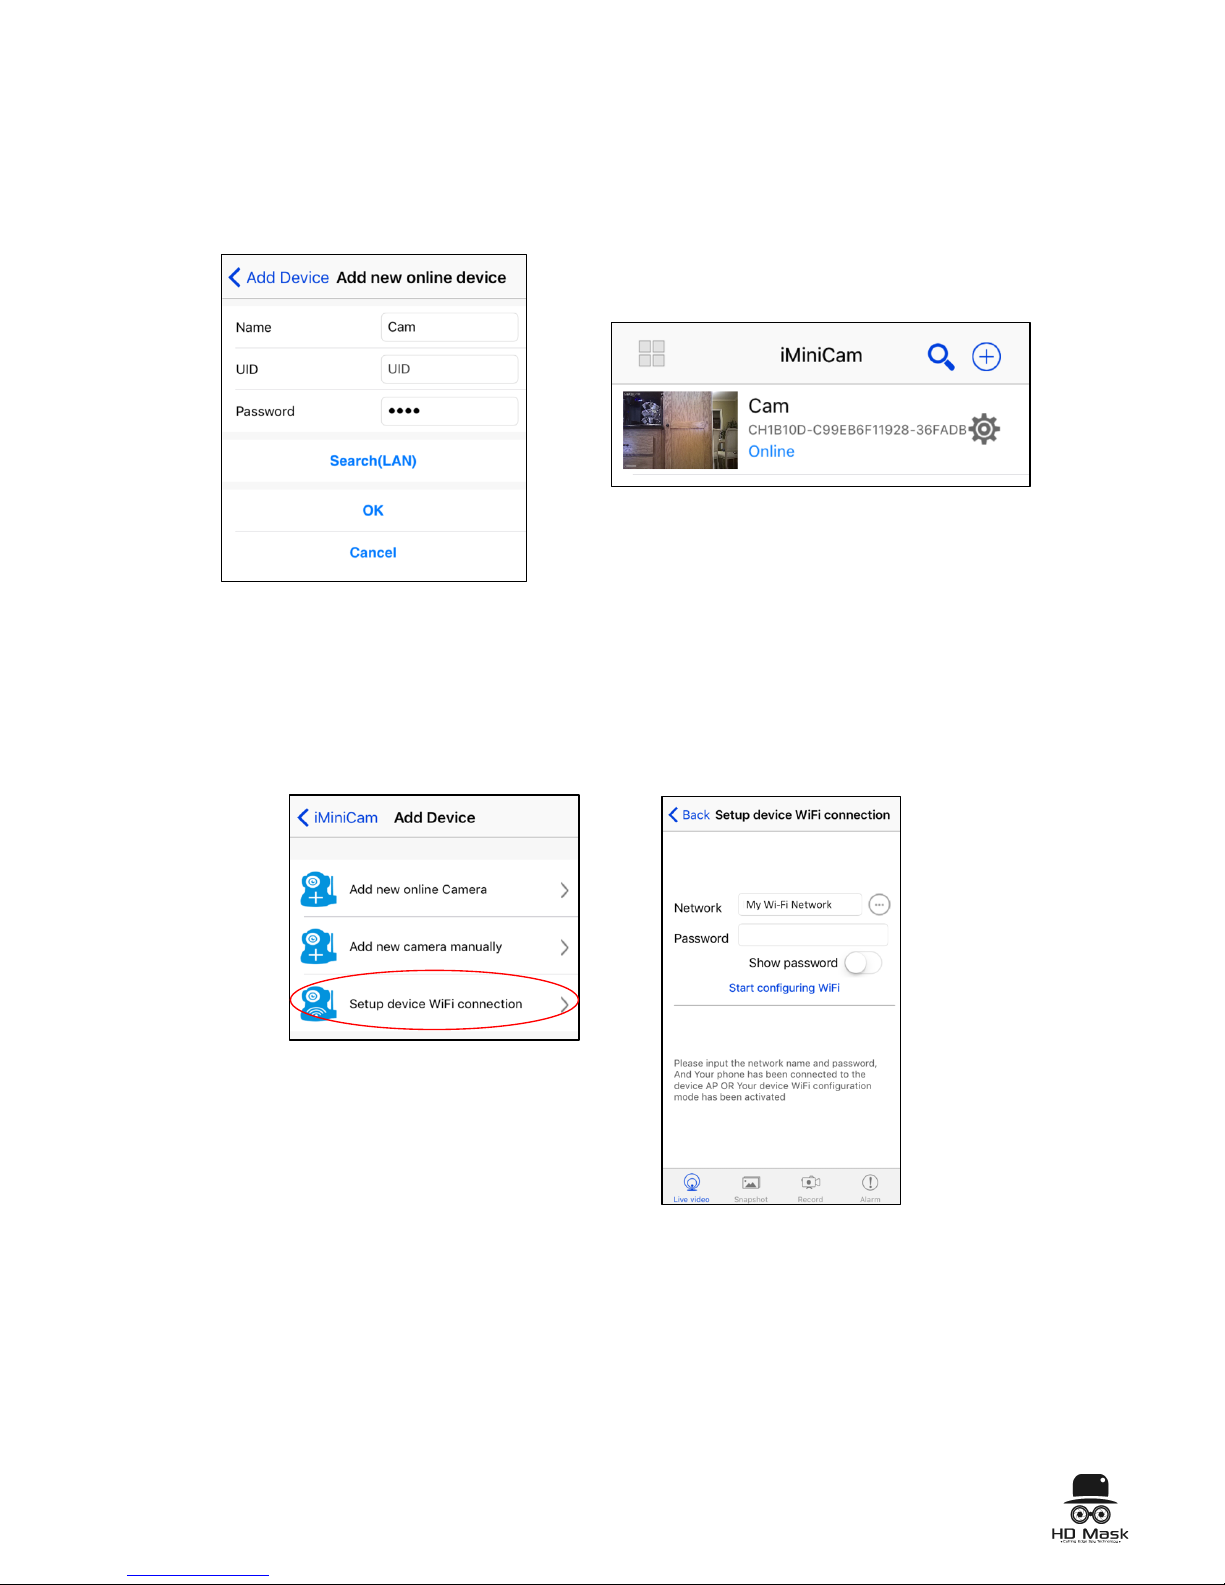
2. In the iMiniCam app, click the (+) button in the top right corner and
select the option to “Add new camera manually.”
The camera’s UID and
matching Wi-Fi code

6
3. Here, you can rename your camera to something like “Living
Room” or “Office.”
4. Retrieve the device’s UID (either on the outside surface of the
iMiniCam or from it’s Wi-Fi address) and manually input it into the
UID space. Tip: Use a QR scanner to scan the sticker code to
easily copy and paste the UID into the app.
5. Here, you can also update the device’s password. The default
password is 8888. If you choose not to update the password, you
will later be prompted to change it for added security. You can
choose to Skip that step or Change your password.
Rename device
UID
Change password
7
Set up device Wi-Fi connection:
This aspect of iMiniCam is still under development and will be fully
functional in the next update of the app. For now, you can disregard this
section and still enjoy all of other features your iMiniCam app.
Live Feed
When your camera or cameras are online, they will appear in the Live
Video feed on the app’s home page and will display their individual
UIDs. To view a single live feed, click on the camera. If you have not
updated your password, you will be prompted to either change your
password or skip that step.
6. Press “OK” to set up
the new device.
7.Navigate back to the home
screen “Live Video” and the
newly added camera should
appear online.

8
In Live Video viewing mode, there are helpful buttons to enhance your surveillance
experience. Note: Numbers are shown for representative purposes only. They do not appear
in Live Video mode.
Live Video Feed Key:
1. Color Correcting: click to adjust color of video
2. Brightness: click to adjust brightness
3. Night Vision Mode: turn on Night Vision mode for use in low light
4. LED light: click to turn LED light on/off
5. Resolution: adjust resolution / video quality
6. Speaker: turn speaker on/off (N/A)
7. Microphone: turn microphone on/off (N/A)
8. Snapshot: click to take a picture of your recording
9. Record: click to begin recording video
10. Horizontal Flip: click to flip the camera’s view horizontally. This will
update the view for others who have access to your camera.
11. Vertical Flip: click to flip the camera’s view vertically. This will
update the view for others who have access to your camera.
1 2 3 4 5
6 7 8 9 10 11

9
Night Vision Mode
The camera still captures sharp images even with limited or no light.
Record
The Record feature allows you to begin live recording camera feedback.
You can watch and save recordings in the app and have the option to
save it to an SD or share it with others.
Night Vision Off
Night Vision On
In Live Video
mode, click this
record button
to start
Recording will
begin. Stop
recording
anytime by
Recordings are saved
under the “Record”
section where they
can be saved, shared,
or deleted.
10
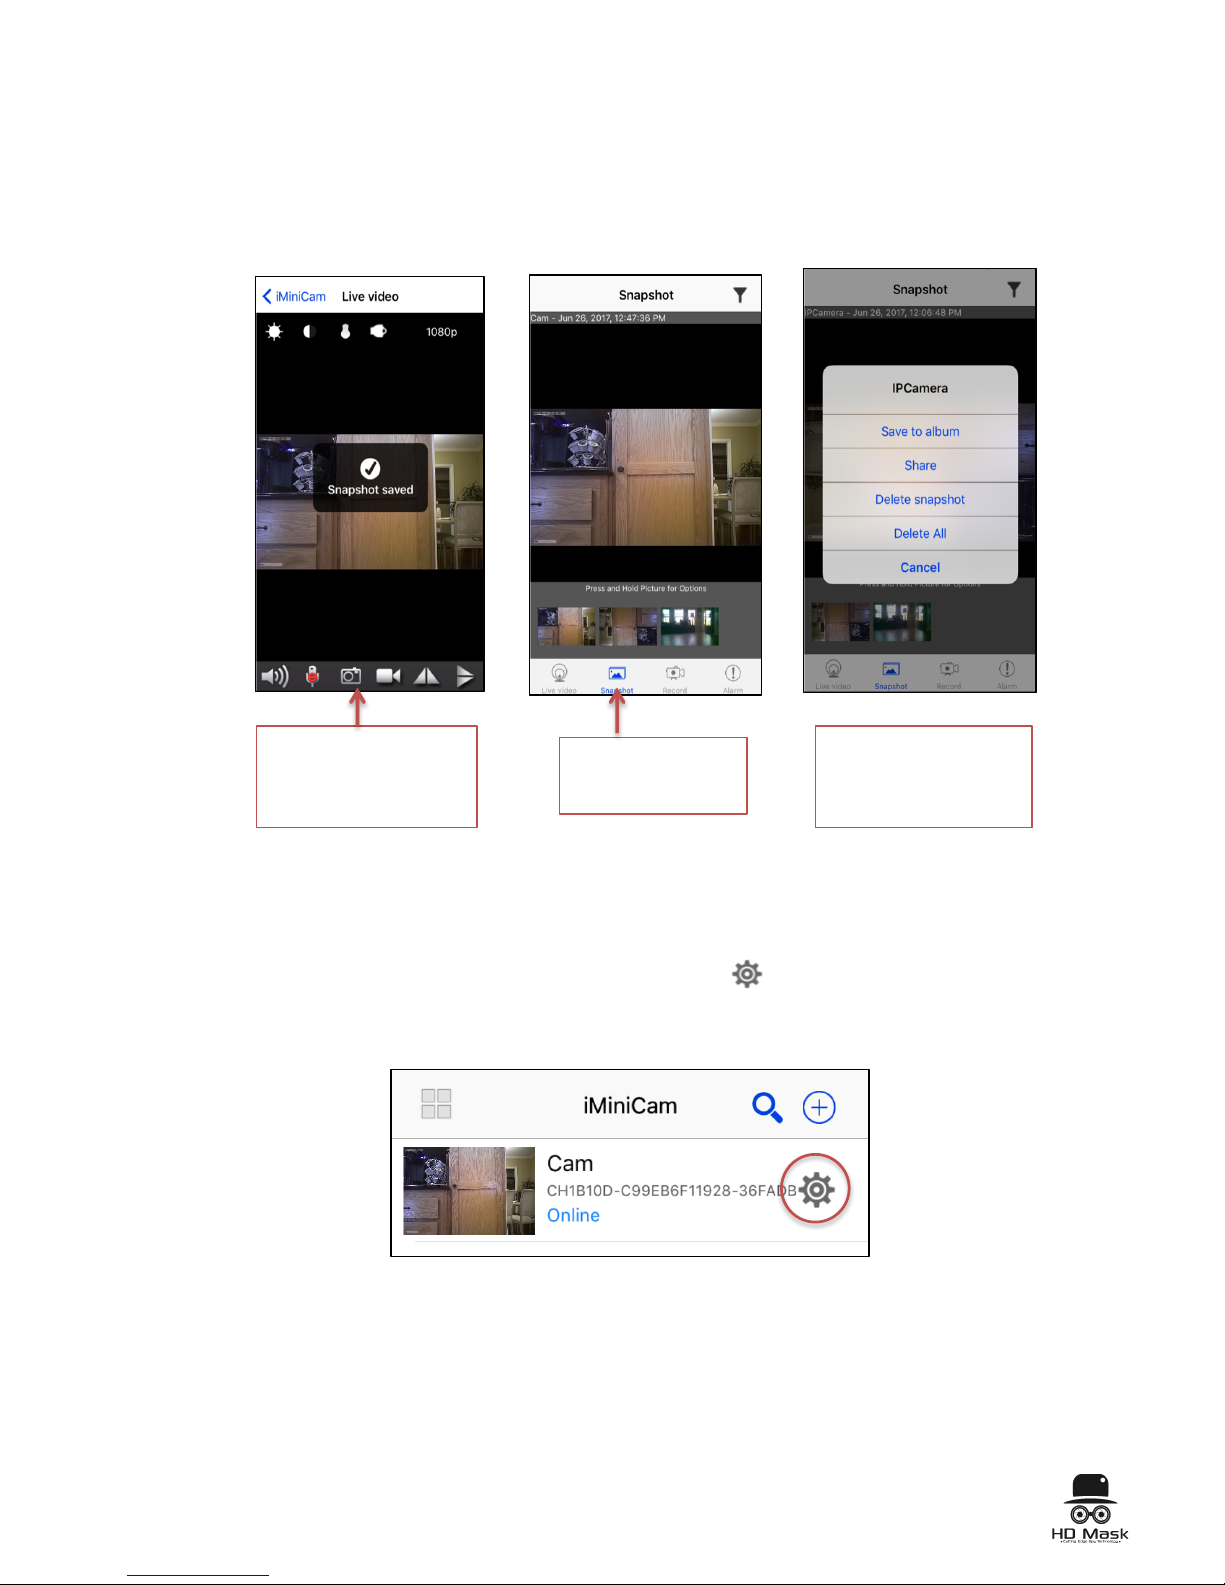
Snapshots
The Snapshot feature allows you to take still images of recordings and
save them to your photos or share them with others.
Camera Settings
To manage each device’s settings, click the gear icon on the right
of the camera’s feed.
In Live Video mode,
click this snapshot
button to take a picture
of your recording.
Snapshots will be
saved in the
Snapshot section.
Press and hold the
snapshot to save,
share or delete a
snapshot.
Table of contents
Other HD Mask Security Camera manuals


