manuals.online logo
Brands
  1. Home
  2. •
  3. Brands
  4. •
  5. HEALTH RIDER
  6. •
  7. Treadmill
  8. •
  9. HEALTH RIDER SoftStrider HCTL05910 User manual

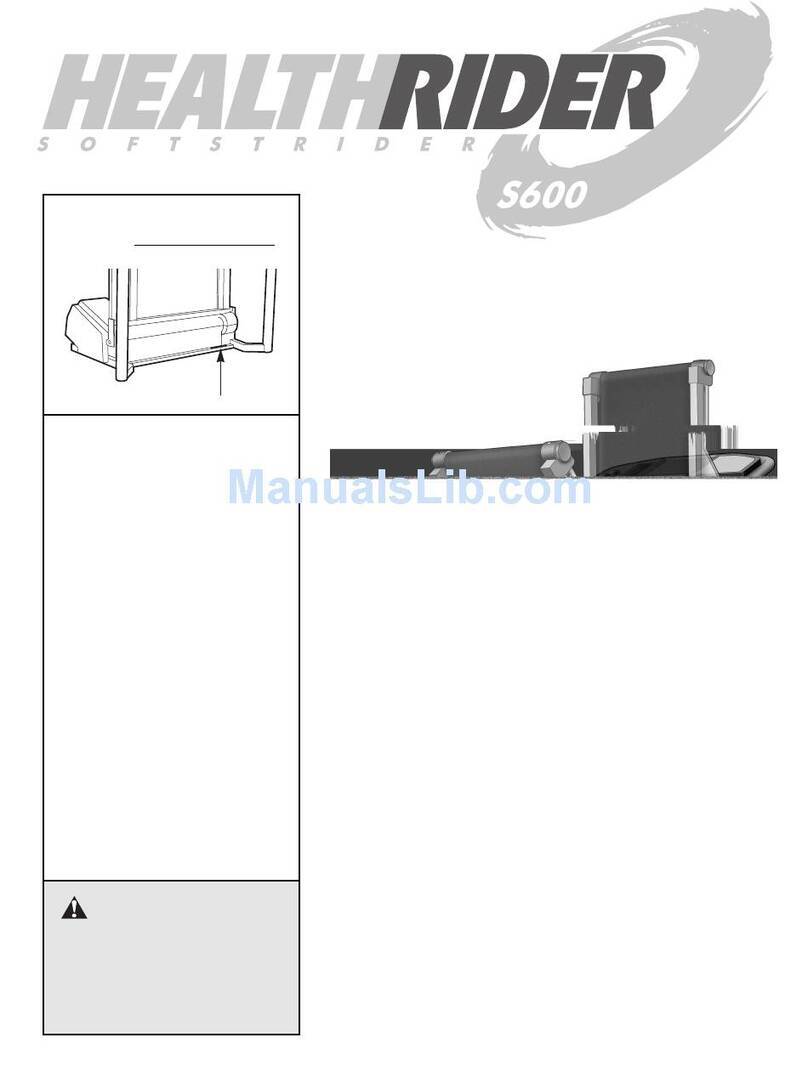
HEALTH RIDER SoftStrider HCTL05910 User manual

®
USER'S MANUAL
Model No. HCTL05910
Serial No. ___________________
CAUTION
Read all precau ions and ins ruc-
ions in his manual before using
his equipmen . Save his man-
ual for fu ure reference.
Write the serial number in the space
above for future reference.
www.heal hrider.com
Visi our websi e a
Serial Number Decal
QUESTIONS?
As a manufac urer, we are
commi ed o providing com-
ple e cus omer sa isfac ion. If
you have ques ions, or if here
are missing par s, please call:
Monday hrough Friday, 8h00 o
18h30 Eas ern S andard Time
(excep holidays).
1-888-936-4266
TABLE OF CONTENTS
IMPORTANT PR CAUTIONS . . . . . . . . . . . . . . . . . . . . . . . . . . . . . . . . . . . . . . . . . . . . . . . . . . . . . . . . . . . . . . . . .3
B FOR YOU B GIN . . . . . . . . . . . . . . . . . . . . . . . . . . . . . . . . . . . . . . . . . . . . . . . . . . . . . . . . . . . . . . . . . . . . . . .5
ASS MBLY . . . . . . . . . . . . . . . . . . . . . . . . . . . . . . . . . . . . . . . . . . . . . . . . . . . . . . . . . . . . . . . . . . . . . . . . . . . . . . .6
OP RATION AND ADJUSTM NT . . . . . . . . . . . . . . . . . . . . . . . . . . . . . . . . . . . . . . . . . . . . . . . . . . . . . . . . . . . . .7
HOW TO FOLD AND MOV TH TR ADMILL . . . . . . . . . . . . . . . . . . . . . . . . . . . . . . . . . . . . . . . . . . . . . . . . . .21
TROUBL -SHOOTING AND MAINT NANC . . . . . . . . . . . . . . . . . . . . . . . . . . . . . . . . . . . . . . . . . . . . . . . . . . .22
CONDITIONING GUID LIN S . . . . . . . . . . . . . . . . . . . . . . . . . . . . . . . . . . . . . . . . . . . . . . . . . . . . . . . . . . . . . . .24
PART LIST . . . . . . . . . . . . . . . . . . . . . . . . . . . . . . . . . . . . . . . . . . . . . . . . . . . . . . . . . . . . . . . . . . . . . . . . . . . . . . .26
HOW TO ORD R R PLAC M NT PARTS . . . . . . . . . . . . . . . . . . . . . . . . . . . . . . . . . . . . . . . . . . . . . .Back Cover
LIMIT D WARRANTY . . . . . . . . . . . . . . . . . . . . . . . . . . . . . . . . . . . . . . . . . . . . . . . . . . . . . . . . . . . . . . .Back Cover
Note: An XPLOD D DRAWING is attached in the center of this manual. Please save the XPLOD D DRAWING
for future reference.
®
2
HealthRider is a registered trademark of ICON Health & Fitness, Inc.
WARNING:To reduce he risk of burns, fire, elec ric shock, or injury o persons, read he
following impor an precau ions and informa ion before opera ing he readmill.
IMPORTANT PRECAUTIONS
1. I is he responsibili y of he owner o ensure
ha all users of his readmill are adequa ely
informed of all warnings and precau ions.
2. Use he readmill only as described in his
manual.
3. Place he readmill on a level surface, wi h
2 m (8 f .) of clearance behind i . Do no place
he readmill on any surface ha blocks air
openings. To pro ec he floor or carpe from
damage, place a ma under he readmill.
4. Keep he readmill indoors, away from mois-
ure and dus . Do no pu he readmill in a
garage or covered pa io, or near wa er.
5. Do no opera e he readmill where aerosol
produc s are used or where oxygen is being
adminis ered.
6. Keep children under he age of 12 and pe s
away from he readmill a all imes.
7. The readmill should no be used by persons
weighing more han 115 kg (250 lbs.).
8. Never allow more han one person on he
readmill a a ime.
9. Wear appropria e exercise clo hing when
using he readmill. Do no wear loose clo h-
ing ha could become caugh in he readmill.
A hle ic suppor clo hes are recommended
for bo h men and women. Always wear ath-
letic shoes. Never use the treadmill with bare
feet, wearing only stockings, or in sandals.
10.When connec ing he power cord (see page 7),
plug he power cord in o a surge pro ec or (no
included) and plug he surge pro ec or in o a
grounded circui capable of carrying 15 or
more amps. No o her appliance should be on
he same circui . Do no use an ex ension cord.
11.Use only a CUL-lis ed surge pro ec or, ra ed a
15 amps, wi h a 14-gauge cord of 1,5 m (5 f .) or
less in leng h. Do no use an ex ension cord.
12.Keep he power cord and he surge suppres-
sor away from hea ed surfaces.
13.Never move he walking bel while he power
is urned off. Do no opera e he readmill if
he power cord or plug is damaged, or if he
readmill is no working properly. (See
BEFORE YOU BEGIN on page 5 if he read-
mill is no working properly.)
14.Never s ar he readmill while you are s and-
ing on he walking bel . Always hold he
handrails while using he readmill.
15.The readmill is capable of high speeds.
Adjus he speed in small incremen s o avoid
sudden jumps in speed.
16.Using hand weigh s and no holding he
handrails may compromise your abili y o
main ain your balance. Exercises using hand
weigh s should be a emp ed only by experi-
enced users.
17.The pulse sensor is no a medical device.
Various fac ors, including he user's move-
men , may affec he accuracy of hear ra e
readings. The pulse sensor is in ended only
as an exercise aid in de ermining hear ra e
rends in general.
18.Never leave he readmill una ended while i
is running. Always remove he key, unplug
he power cord and move he on/off swi ch o
he off posi ion when he readmill is no in
use. (See he drawing on page 5 for he loca-
ion of he on/off swi ch.)
19.Do no a emp o raise, lower, or move he
readmill un il i is properly assembled. (See
ASSEMBLY on page 6, and HOW TO FOLD
AND MOVE THE TREADMILL on page 21.)
You mus be able o safely lif 20 kg (45 lbs.)
o raise, lower, or move he readmill.
20.When folding or moving he readmill, make
sure ha he s orage la ch is fully closed.
3
21.When using iFIT.com CD’s and videos, an
elec ronic “chirping” sound will aler you
when he speed and/or incline of he readmill
is abou o change. Always lis en for he
“chirp” and be prepared for speed and/or in-
cline changes. In some ins ances, he speed
and/or incline may change before he per-
sonal rainer describes he change.
22. When using iFIT.com CD’s and videos, you
can manually override he speed and incline
se ings a any ime by pressing he speed
and incline bu ons. However, when he nex
“chirp” is heard, he speed and/or incline will
change o he nex se ings of he CD or
video program.
23. Always remove iFIT.com CD’s and videos
from your CD player or VCR when you are no
using hem.
24. Inspec and igh en all par s of he readmill
regularly.
25. Never inser or drop any objec in o any
opening.
26. DANGER:Always unplug he power
cord immedia ely af er use, before cleaning
he readmill, and before performing he
main enance and adjus men procedures de-
scribed in his manual. Never remove he
mo or hood unless ins ruc ed o do so by an
au horized service represen a ive. Servicing
o her han he procedures in his manual
should be performed by an au horized ser-
vice represen a ive only.
27. This readmill is in ended for in-home use
only. Do no use his readmill in any com-
mercial, ren al, or ins i u ional se ing.
WARNING:Before beginning his or any exercise program, consul your physician. This
is especially impor an for persons over he age of 35 or persons wi h pre-exis ing heal h problems.
Read all ins ruc ions before using. ICON assumes no responsibili y for personal injury or proper y
damage sus ained by or hrough he use of his produc .
4
SAVE THESE INSTRUCTIONS
The decals shown below have been placed on your readmill. If a decal is missing, or if i is no legible,
please call our Cus omer Service Depar men oll-free a 1-888-936-4266 o order a free replacemen decal.
Apply he decal in he loca ion shown. No e: The large decal is shown a 38% of ac ual size.
Congratulations for purchasing the Softstrider S300i™
treadmill by HealthRider®. The S300i offers an impres-
sive array of features to help you achieve your fitness
goals in the convenience of your home. From the ad-
vanced console to the cushioned walking platform, the
S300i is designed to make each workout more effec-
tive and enjoyable. And when you’re not exercising,
the S300i can be folded away, taking less than half the
floor space of conventional treadmills.
For your benefi , read his manual carefully before
using he S300i readmill. If you have additional
questions, please call our Customer Service
Department toll-free at 1-888-936-4266,Monday
through Friday, 8h00 to 18h30 astern Standard Time
(excluding holidays). To help us assist you, please
note the product model number and serial number be-
fore calling. The model number is HCTL05910. The
serial number can be found on a decal attached to the
treadmill (see the front cover of this manual for the
location).
Before reading further, please familiarize yourself with
the parts that are labeled in the drawing below.
BEFORE YOU BEGIN
Handrail
Latch Knob
Console
Book Holder
Hand Weight Holder
Water Bottle Holder†
Handgrip
Pulse Sensor
Chest Pulse Sensor Holder*
*For information about the optional chest pulse
sensor, see page 20.
†Water bottle is not included.
Key/Clip
Circuit
Breaker
On/Off
Switch
Walking Belt
Foot Rail
Cushioned
Walking Platform
Power
Cord
BACK
RIGHT SIDE
Rear Roller
Adjustment Bolts
5
ASSEMBLY
Assembly requires wo people. Place the treadmill in a cleared area and remove all packing materials. Do not
dispose of the packing materials until the treadmill is assembled. No ools are required.
Note: The underside of the treadmill walking belt is coated with high-performance lubricant. During shipping, a
small amount of lubricant may be transferred to the top of the walking belt, the sides of the walking platform, or
the shipping carton. This does not affect treadmill performance. If there is lubricant on top of the walking belt or
on the sides of the walking platform, wipe off the lubricant with a soft cloth and a mild, non-abrasive cleaner.
1. Wi h he help of a second person, carefully raise the
Uprights (103) until the Wheels (99) are resting on the
floor as shown.
1
99
103
2. Next, make sure that the Latch Knob Sleeve (68) is fully
inserted into the left Upright (103).
Remove the Latch Knob (67) from the Latch Pin (72).
Make sure that the Latch Knob Collar (70) and the Spring
(69) are on the Latch Pin. (Note: If there are two Latch Pin
Collars, place one on each side of the Spring.) Insert the
Latch Pin into the left Upright (103) and tighten the Latch
Knob onto it.
70
72
68
69
67
103
2
3. Make sure ha all par s are igh ened before you use he readmill. Place a ma benea h he readmill
o pro ec he floor or carpe . For your benefit, we recommend that you familiarize yourself with the
TROUBL -SHOOTING AND MAINT NANC section on pages 22 and 23.
6
7
OPERATION AND ADJUSTMENT
THE PERFORMANT LUBETM WALKING BELT
Your treadmill features a walking belt coated with
P RFORMANT LUB TM, a high-performance lubricant.
IMPORTANT: Never apply silicone spray or o her
subs ances o he walking bel or he walking pla -
form. They will de eriora e he walking bel and
cause excessive wear.
HOW TO PLUG IN THE POWER CORD
Your treadmill, like any other type of sophisticated
electronic equipment, can be seriously damaged by
sudden voltage changes in your home’s power.
Voltage surges, spikes, and noise interference can re-
sult from weather conditions or from other appliances
being turned on or off.
To decrease he pos-
sibili y of your read-
mill being damaged,
always use a surge
pro ec or (no in-
cluded) wi h your
readmill.
Surge protectors are
sold at most hardware
stores and department
stores. Use only a UL-
listed surge protector,
rated at 15 amps, with a
14-gauge cord of five
feet or less in length.
This produc mus be
grounded. If it should
malfunction or break
down, grounding pro-
vides a path of least re-
sistance for electric cur-
rent to reduce the risk of
electric shock. This product is equipped with a cord
having an equipment-grounding conductor and a
grounding plug. Plug he power cord in o a surge
pro ec or, and plug he surge pro ec or in o an ap-
propria e ou le ha is properly ins alled and
grounded in accordance wi h all local codes and
ordinances. Impor an : The readmill is no com-
pa ible wi h GFCI-equipped ou le s.
This product is for use on a nominal 120-volt circuit,
and has a grounding plug that looks like the plug illus-
trated in drawing 1 below. A temporary adapter that
looks like the adapter illustrated in drawing 2 may be
used to connect the surge protector to a 2-pole recep-
tacle as shown in drawing 2 if a properly grounded out-
let is not available.
The temporary adapter should be used only until a
properly grounded outlet (drawing 1) can be installed
by a qualified electrician.
The green-colored rigid ear, lug, or the like extending
from the adapter must be connected to a permanent
ground such as a properly grounded outlet box cover.
Whenever the adapter is used it must be held in place
by a metal screw. Some 2-pole recep acle ou le box
covers are no grounded. Con ac a qualified elec-
rician o de ermine if he ou le box cover is
grounded before using an adap er.
DANGER:Improper connec ion
of he equipmen -grounding conduc or can
resul in an increased risk of elec ric shock.
Check wi h a qualified elec rician or service-
man if you are in doub as o whe her he
produc is properly grounded. Do no modify
he plug provided wi h he produc —if i will
no fi he ou le , have a proper ou le in-
s alled by a qualified elec rician.
1
2
Grounded Outlet Box
Grounded Outlet Box
Grounding Plug
Treadmill Power Cord
Grounding Plug
Grounding Plug
Grounding Pin
Surge Protector
Grounding Pin
Grounding Pin
Adapter
Lug
Metal Screw
Grounded Outlet
FEATURES OF THE CONSOLE
The treadmill console offers an impressive selection of
features to help you get the most from your exercise.
When the console is in the manual mode, the speed
and incline of the treadmill can be changed with a
touch of a button. As you exercise, the four displays
will show your workout time, the number of calories
you have burned, the distance you have walked, the
incline level of the treadmill, and the speed of the walk-
ing belt. The console will also show your heart rate
when the handgrip pulse sensor or the optional chest
pulse sensor is used.
The console also offers four preset workout programs.
ach program automatically controls the speed and in-
cline of the treadmill as it guides you through an effec-
tive workout. If you purchase the optional chest pulse
sensor, the console’s two pulse programs can also be
used. ach program controls the speed and incline of
the treadmill to keep your heart rate within a preset
range during your workouts.
The console also features advanced iFIT.com technol-
ogy. IFIT.com technology is like having a personal
trainer right in your home. Using the included audio
cable, you can connect the treadmill to your home
stereo, portable stereo, or computer and play special
iFIT.com CD programs (one CD is included). IFIT.com
CD programs automatically control the speed and in-
cline of the treadmill as a personal trainer guides you
through every step of your workout. High-energy music
provides added motivation. ach CD features two pro-
grams designed by certified personal trainers.
In addition, you can connect the treadmill to your VCR
and TV and play iFIT.com video programs (one video-
cassette is included). Video programs offer the same
benefits as iFIT.com CD programs, but add the excite-
ment of working out with a class and an instructor—the
hottest new trend at health clubs.
With the treadmill connected to your computer, you
can also go to our new internet site at www.iFIT.com
and access basic programs that interactively control
the speed and incline of your treadmill to help you
achieve your specific exercise goals. Or, use iFIT.com
audio and video programs directly from our internet
site. Visit www.iFIT.com for more information.
See www.iFIT.com to learn about other iFIT.com fea-
tures. To purchase iFIT.com CD’s, iFIT.com video-
casse es, call oll-free 1-888-936-4266. For informa-
ion abou he op ional ches pulse sensor, see
page 20.
To use he manual mode of he console, follow the
steps beginning on page 10. To use a prese program,
see page 12. To use a pulse program, see page 13.
To use iFIT.com CD or video programs, see page
17. To use iFIT.com programs direc ly from our in-
erne si e, see page 19.
Note: If there is a thin
sheet of clear plastic
on the face of the
console, remove it.
A
BC
N
O P Q
J
FI
G
D
H
K
L
M
8
DESCRIPTION OF THE CONSOLE
Refer to the drawing on page 8 to identify the features
described below.
A. Water bottle holder—This holder keeps your water
bottle handy during your workouts (no water bottle
is included).
B. Hand weight holder—These compartments hold the
hand weights.
C. Book holder—This holder allows you to read a book
or enjoy your favorite magazine while you get in
shape.
D. Incline buttons—These buttons control the incline of
the treadmill. The incline range is 1.5% to 10%.
. Speed buttons and One Touch Speed buttons—
These buttons control the speed of the walking belt.
The speed range is 0.5 mph to 10 mph.
F. Stop buttons—These buttons are used to stop the
walking belt. Note: Pressing either button will stop
the walking belt.
G. Waistband clip—This clip is designed to be worn on
the waistband of your clothes. If the key is pulled
from the console, the walking belt will automatically
stop.
H. Key—This key turns the console on and off.
I. Start button—This button is used to start the walking
belt.
J. Time/Segment Time display—When the manual
mode or the iFIT.com mode is selected, this display
will show the elapsed time. When a preset program
or a pulse program is selected, the display will show
both the time remaining in the program and the time
remaining in the current segment of the program.
The display will alternate between one number and
the other every seven seconds.
K. Calories/Pulse display—This display shows the ap-
proximate number of calories you have burned.
When the optional chest pulse sensor is worn, the
display will also show your heart rate. The display
will alternate between one number and the other
every seven seconds. If the handgrip pulse sensor
is used, the display will show your heart rate contin-
uously while your hands are on the pulse sensor.
L. Distance/Incline display—This display shows the
distance you have walked and the incline level of
the treadmill. The display will alternate between one
number and the other every seven seconds. Note:
ach time the Incline buttons are pressed, the dis-
play will change to show the incline setting.
M. Speed display—This display shows the speed of
the walking belt.
N. nter button and
▲▲
and
▼▼
buttons—These buttons
are used to enter your age when pulse programs
are used.
O. Select Workout button—This button is used to select
the manual mode, the four preset programs, the two
pulse programs, and the iFIT.com mode. Note: If
the walking belt is moving when the Select Workout
button is pressed, the walking belt will slow to a
stop and the displays will be reset.
P. Mode indicators—These indicators show whether
the manual mode, a preset program, a pulse pro-
gram, or the iFIT.com mode is selected.
Q. Program profiles—These profiles show how the tar-
get heart rate will change during pulse programs
and how the speed and incline of the treadmill will
change during preset programs.
No e: The console can display exercise feedback
in ei her miles or kilome ers (see SPEED DISPLAY
on page 11). For simplici y, all ins ruc ions in his
sec ion refer o miles.
9
HOW TO TURN ON THE POWER
A ach he clip o he wais band of your clo hes.
Stand on the foot
rails of the treadmill.
Find the clip at-
tached to the key,
and slide the clip
onto the waistband
of your clothes. Next,
insert the key fully into the console. Tes he clip
by carefully aking a few s eps backward un il
he key is pulled from he console. If he key is
no pulled from he console, adjus he posi-
ion of he clip as needed. Then, remove the key
from the console.
Plug in he power cord.
See page 7.
Move he on/off swi ch o he on posi ion.
Locate the on/off
switch on the tread-
mill near the power
cord. Move the
switch to the on posi-
tion.
Inser he key fully in o he console.
When the key is inserted, the four displays and
various indicators on the console will light.
HOW TO USE THE MANUAL MODE
Inser he key fully in o he console.
See HOW TO TURN ON TH POW R at the left.
Selec he manual mode.
When the key is in-
serted, the manual
mode will be selected
and the manual indica-
tor will light. If a pro-
gram has been se-
lected, press the Select
Workout button repeatedly to select the manual
mode.
Press he S ar bu on or he Speed
▲▲
bu on
o s ar he walking bel .
A moment after the button is pressed, the walking
belt will begin to move at 1.0 mph. Hold the hand-
rails and begin walking. As you exercise, adjust
the speed of the walking
belt as desired by press-
ing the Speed
▲▲
and
▼▼
buttons. ach time a
button is pressed, the
speed will change by
0.1 mph. If a button is
held down, the speed
will change in increments of 0.5 mph. To change
the speed setting quickly, press the One Touch
Speed buttons.
To stop the walking belt, press either of the Stop
buttons. The four displays will pause and the
Time/Segment Time display will begin to flash. To
restart the walking belt, press the Start button or
the Speed
▲▲
button. To stop the walking belt and
reset the displays, press a Stop button, remove
the key, and then reinsert the key.
Adjus he incline of he readmill.
To vary the intensity of
your exercise, adjust the
incline of the treadmill
as desired with the
Incline buttons. ach
time a button is pressed,
the incline will change
by 0.5%. The incline range is 1.5% to 10%. Note:
After the buttons are pressed, it may take a mo-
ment for the treadmill to reach the selected incline
setting.
4
3
2
1
4
3
2
1
WARNING:To reduce he risk of
serious injury, read he following precau ions
before opera ing he console.
• Do no s and on he walking bel when urn-
ing on he power or s ar ing he walking bel .
• Always a ach he clip o your wais band
when using he readmill.
• The readmill is capable of high speeds.
Adjus he speed in small incremen s.
• To reduce he risk of elec ric shock, keep
liquids away from he console and place only
a sealed wa er bo le in he console.
On
Position
Clip Key
10
Follow your progress wi h he four displays.
Time/Segmen Time
display—When the
manual mode or an
iFIT.com program is
selected, this display
will show the elapsed
time. When a preset
program or a pulse program is selected, the display
will show both the time remaining in the program
and the time remaining in the current segment of
the program. The display will alternate between
one number and the other every seven seconds.
Calories/Pulse
display—This display
shows the approximate
number of calories you
have burned. When the
optional chest pulse
sensor is worn, the dis-
play will also show your heart rate. The display
will alternate between one number and the other
every seven seconds. If the handgrip pulse sensor
is used, the display will show your heart rate con-
tinuously while your hands are on the pulse sensor.
To use the hand-
grip pulse sensor,
s and on he foo
rails and place
your hands on the
metal contacts on
the handrail. Your
palms must be on
the upper con-
tacts, and your fin-
gers must be touching the lower contacts—avoid
moving your hands. After a few seconds, one or
two dashes will appear in the Calories/Pulse dis-
play and then your heart rate will be shown. For
he mos accura e hear ra e reading, hold he
con ac s for abou 15 seconds.
Dis ance/Incline
display—This display
shows the distance you
have walked and the
incline level of the
treadmill. The display
will alternate between one number and the other
every seven seconds. Note: ach time the Incline
buttons are pressed, the display will change to
show the incline setting.
Speed display—This
display shows the speed
of the walking belt.
The console can display
speed in either miles per
hour or kilometers per
hour. The MPH or Km/H
indicator below the
Speed display will light
to show which unit of
measurement is selected. To change the unit of
measurement, first hold down one of the Stop but-
tons while inserting the key into the console. The
Speed display will show an “ ” for nglish miles
or an “M” for metric kilometers. Press the Speed
▲▲
button to change the unit of measurement. When
the desired unit of measurement is selected, re-
move and then reinsert the key. Note: If speed is
shown in miles per hour, distance will be shown in
miles; if speed is shown in kilometers per hour, dis-
tance will be shown in kilometers.
When you are finished exercising, s op he
walking bel and remove he key.
Step onto the foot rails, press one of the Stop but-
tons, and adjust the incline of the treadmill to 1.5%.
The incline mus be a 1.5% when he readmill
is raised o he s orage posi ion or he readmill
will be damaged. Next, remove the key from the
console and put it in a safe place. No e: If he dis-
plays and indica ors on he console remain li
af er he key is removed, he console is in he
“demo” mode. Refer o page 20 and urn off he
demo mode.
When you are finished using the treadmill, move
the on/off switch near the power cord to the off
position and unplug the power cord.
6
5
Metal
Contacts
11
THE PRESET PROGRAMS
Inser he key fully in o he console.
See HOW TO TURN ON TH POW R on page 10.
Selec one of he four prese programs.
When the key is
inserted, the
manual mode
will be selected
and the manual
indicator will
light. To select
one of the pre-
set programs,
press the Select
Workout button repeatedly until one of the four
preset program indicators lights.
The profiles on the console show how the speed
and incline of the treadmill will change during the
preset programs—the white profiles show speed
settings and the green lines show incline settings.
The numbers at the left ends of the profiles show
the speed and incline ranges for the programs.
For example, during the H ALTHWALK program,
the speed of the walking belt will be from 2 mph to
4 mph and the incline will be from 1.5% to 6%.
The Time/Segment Time display will show how
long the selected program will last.
Press he S ar bu on or he Speed
▲▲
bu on
o s ar he program.
A moment after the button is pressed, the tread-
mill will automatically adjust to the first speed and
incline settings for the program. Hold the handrails
and begin walking.
ach program is di-
vided into several time
segments of different
lengths. The Time/
Segment Time display
will show both the time
remaining in the program and the time remaining
in the current segment. One speed setting and
one incline setting are programmed for each seg-
ment. When only three seconds remain in the first
segment of the program, a series of tones will
sound and the treadmill will automatically adjust to
the speed and incline settings for the second seg-
ment.
The program will continue in this way until the
Time/Segment Time display counts down to zero.
The walking belt will then slow to a stop.
If the speed or incline setting for the current seg-
ment is too high or too low, you can manually
override the setting by pressing the Speed or
Incline buttons on the console. However, when
he nex segmen begins, he readmill will au-
oma ically adjus o he speed and incline se -
ings for he nex segmen .
To stop the program temporarily, press one of the
Stop buttons. All displays will pause and the Time/
Segment Time display will begin to flash. To
restart the program, press the Start button or the
Speed
▲▲
button. To end the program, press a Stop
button, remove the key, and then reinsert the key.
Follow your progress wi h he four displays.
Refer to step 5 on page 11.
When he program has ended, remove he key.
Step onto the foot rails and make sure that the in-
cline of the treadmill is at 1.5%. The incline mus
be a 1.5% when he readmill is raised o he
s orage posi ion. Next, remove the key from the
console and put it in a safe place. No e: If he dis-
plays and indica ors on he console remain li
af er he key is removed, he console is in he
“demo” mode. Refer o page 20 and urn off he
demo mode.
When you are finished using the treadmill, move
the on/off switch near the power cord to the off
position and unplug the power cord.
5
4
3
2
1
12
HOW TO USE THE PULSE PROGRAMS
Inser he key fully in o he console.
See HOW TO TURN ON TH POW R on page 10.
Pu on he op ional ches pulse sensor.
You must wear the optional chest pulse sensor in
order to use a pulse program. To put on the chest
pulse sensor, follow the instructions included with
the chest pulse sensor.
Selec one of he wo pulse programs.
When the key is
inserted, the
manual mode
will be selected
and the manual
indicator will
light. To select
one of the pulse programs, press the Select
Workout button repeatedly until one of the two
pulse program indicators lights.
The profiles on the console show how the target
heart rate will change during the programs. The
Time/Segment Time display will show how long
the selected program will last.
En er your age.
When a pulse
program is se-
lected, an age
setting will begin
to flash in the
Calories/Pulse
display. If you
have already entered your age, simply press the
nter button. To enter your age, press the
▲▲
and
▼▼
buttons. The buttons can be held down to enter
your age quickly. When your age is shown, press
the nter button.
En er a maximum hear ra e se ing.
After you have
entered your
age, another
number will
begin to flash in
the Calories/
Pulse display.
This number is the maximum heart rate setting for
the program. If Pulse program 1 is selected, the
maximum heart rate setting can be from 65% to
85% of your maximum possible heart rate (your
maximum possible heart rate is 220 minus your
age); if Pulse program 2 is selected, the maximum
heart rate setting can be from 65% to 80% of your
maximum possible heart rate. Note: Your maxi-
mum possible heart rate is an estimate only.
For example, if you are 30 years old, your maxi-
mum possible heart rate is 190 (220 minus 30
equals 190). Therefore, if Pulse program 1 is se-
lected, the maximum heart rate setting can be from
123 to 161 (65% of 190 is 123; 85% of 190 is 161).
If you want to change the maximum heart rate set-
ting, press the
▲▲
and
▼▼
buttons. The buttons can
be held down to change the setting quickly. When
the desired setting is shown, press the nter button.
Press he S ar bu on or he Speed
▲▲
bu on
o s ar he program.
A moment after the button is pressed, the tread-
mill will automatically adjust to the first speed and
incline settings for the program. Hold the handrails
and begin walking.
ach program is divided
into several time seg-
ments of different
lengths. The Time/
Segment Time display
will show both the time
remaining in the pro-
gram and the time remaining in the current seg-
ment. One target heart rate setting is programmed
for each segment. When only three seconds re-
main in the first segment of the program, a series
of tones will sound and the next segment will
begin. As you exercise, the speed and/or incline of
the treadmill will automatically change as needed
to keep your heart rate near the current target
heart rate setting.
The program will continue until the Time/Segment
Time display counts down to zero. The walking
belt will then slow to a stop.
6
5
4
3
2
1
WARNING: If you have hear
problems, or if you are over 60 years of age
and have been inac ive, do no use he pulse
programs. If you are aking medica ion regu-
larly, consul your physician o find whe her
he medica ion will affec your exercise hear
ra e. Note: The pulse programs require an
optional chest pulse sensor.
13
If your heart rate is not detected during the pro-
gram, the speed and incline of the treadmill may
automatically decrease until your heart rate is de-
tected. If this happens, see the instructions in-
cluded with the chest pulse sensor.
If the speed or incline setting for the current seg-
ment is too high or too low, you can adjust the set-
ting with the Speed or Incline buttons. However, if
you decrease the speed, the incline will automati-
cally increase; if you increase the speed, the in-
cline will decrease. If you increase the incline, the
speed will decrease; if you decrease the incline,
the speed will increase.The treadmill will always
attempt to keep your heart rate near the target
heart rate setting for the current segment. Note:
When the incline reaches the lowest setting, the
speed cannot be increased any further. When the
incline reaches the highest setting, the speed can-
not be decreased any further.
Pulse programs should not be stopped temporar-
ily and then restarted. To stop the program before
it is completed, press a Stop button, remove the
key, and then reinsert the key.
Follow your progress wi h he four displays.
Refer to step 5 on page 11.
When he program has ended, remove he key.
Step onto the foot rails and make sure that the in-
cline of the treadmill is at 1.5%. The incline mus
be a 1.5% when he readmill is raised o he
s orage posi ion. Next, remove the key from the
console and put it in a safe place. No e: If he dis-
plays and indica ors on he console remain li
af er he key is removed, he console is in he
“demo” mode. Refer o page 20 and urn off he
demo mode.
When you are finished using the treadmill, move
the on/off switch near the power cord to the off
position and unplug the power cord.
8
7
14
HOW TO CONNECT THE TREADMILL TO
YOUR CD PLAYER, VCR, OR COMPUTER
To use iFIT.com CD’s, the treadmill must be con-
nected to your portable CD player, portable stereo,
home stereo, or computer with CD player. See pages
15 and 16 for connecting instructions. To use iFIT.com
videocasse es, the treadmill must be connected to
your VCR. See page 17 for connecting instructions. To
use iFIT.com programs direc ly from our in erne
si e, the treadmill must be connected to your home
computer. See page 16 for connecting instructions.
HOW TO CONNECT YOUR PORTABLE CD PLAYER
No e: If your CD player has separa e LINE OUT and
PHONES jacks, see ins ruc ion A below. If your CD
player has only one jack, see ins ruc ion B.
A. Plug one end of the audio cable into the jack on the
front of the treadmill near the power cord. Plug the
other end of the cable into the LIN OUT jack on
your CD player. Plug your headphones into the
PHON S jack.
B. Plug one end of the audio cable into the jack on the
front of the treadmill near the power cord. Plug the
other end of the cable into a 3.5mm Y-adapter
(available at electronics stores). Plug the Y-adapter
into the PHON S jack on your CD player. Plug your
headphones into the other side of the Y-adapter.
HOW TO CONNECT YOUR PORTABLE STEREO
No e: If your s ereo has an RCA- ype AUDIO OUT
jack, see ins ruc ion A below. If your s ereo has a
3.5mm LINE OUT jack, see ins ruc ion B. If your
s ereo has only a PHONES jack, see ins ruc ion C.
A. Plug one end of the audio cable into the jack on the
front of the treadmill near the power cord. Plug the
other end of the cable into the included adapter. Plug
the adapter into an AUDIO OUT jack on your stereo.
B. Plug one end of the audio cable into the jack on the
front of the treadmill near the power cord. Plug the
other end of the cable into the LIN OUT jack on
your stereo.
C. Plug one end of the audio cable into the jack on the
front of the treadmill near the power cord. Plug the
other end of the cable into a 3.5mm Y-adapter
(available at electronics stores). Plug the Y-adapter
into the PHON S jack on your stereo. Plug your
headphones into the other side of the Y-adapter.
LINE OUT
PHONES LINE OUT
PHONES
Audio
Cable Head-
phones
A
AUDIO OUT
RIGHT
LEFT
Audio
Cable Adapter
A
LINE OUT
Audio
Cable
B
PHONES
Audio
Cable
C
PHONES
PHONES
Audio
Cable
3.5mm
Y-adapter
Headphones
B
3.5mm
Y-adapter
Headphones
15
HOW TO CONNECT YOUR HOME STEREO
No e: If your s ereo has an unused LINE OUT jack,
see ins ruc ion A below. If he LINE OUT jack is
being used, see ins ruc ion B.
A. Plug one end of the audio cable into the jack on the
front of the treadmill near the power cord. Plug the
other end of the cable into the included adapter.
Plug the adapter into the LIN OUT jack on your
stereo.
B. Plug one end of the audio cable into the jack on the
front of the treadmill near the power cord. Plug the
other end of the cable into the included adapter.
Plug the adapter into an RCA adapter (available at
electronics stores). Next, remove the wire that is
currently plugged into the LIN OUT jack on your
stereo and plug the wire into the unused side of the
RCA adapter. Plug the RCA adapter into the LIN
OUT jack on your stereo.
HOW TO CONNECT YOUR COMPUTER
No e: If your compu er has a 3.5mm LINE OUT jack,
see ins ruc ion A. If your compu er has only a
PHONES jack, see ins ruc ion B.
A. Plug one end of the audio cable into the jack on the
front of the treadmill near the power cord. Plug the
other end of the cable into the LIN OUT jack on
your computer.
B. Plug one end of the audio cable into the jack on the
front of the treadmill near the power cord. Plug the
other end of the cable into a 3.5mm Y-adapter
(available at electronics stores). Plug the Y-adapter
into the PHON S jack on your computer. Plug your
headphones or speakers into the other side of the
Y-adapter.
CD
VCR
Amp
LINE OUT
LINE OUT
Audio
Cable Adapter
A
LINE OUT
Audio
Cable
A
CD
VCR
Amp
LINE OUT
Audio
Cable
RCA
Adapter
Wire removed from
LIN OUT jack
B
Adapter
PHONES
Audio
Cable
B
3.5mm
Y-adapter
Headphones/Speakers
16
HOW TO CONNECT YOUR VCR
No e: If your VCR has an unused AUDIO OUT jack,
see ins ruc ion A below. If he AUDIO OUT jack is
being used, see ins ruc ion B. If you have a TV
wi h a buil -in VCR, see ins ruc ion B. If your VCR
is connec ed o your home s ereo, see HOW TO
CONNECT YOUR HOME STEREO on page 16.
A. Plug one end of the audio cable into the jack on the
front of the treadmill near the power cord. Plug the
other end of the cable into the included adapter.
Plug the adapter into the AUDIO OUT jack on your
VCR.
B.Plug one end of the audio cable into the jack on the
front of the treadmill near the power cord. Plug the
other end of the cable into the included adapter.
Plug the adapter into an RCA adapter (available at
electronics stores). Next, remove the wire that is
currently plugged into the AUDIO OUT jack on your
VCR and plug the wire into the unused side of the
RCA adapter. Plug the RCA adapter into the AUDIO
OUT jack on your VCR.
HOW TO USE IFIT.COM CD AND VIDEO
PROGRAMS
To use iFIT.com CD’s or videocassettes, the treadmill
must be connected to your portable CD player, portable
stereo, home stereo, computer with CD player, or
VCR. See HOW TO CONN CT TH TR ADMILL TO
YOUR CD PLAY R, VCR, OR COMPUT R on page
15. One iFIT.com CD and one iFIT.com videocas-
se e are included. To purchase o her CD’s or
videocasse es, call oll-free 1-888-936-4266.
Follow the steps below to use an iFIT.com CD or video
program.
Inser he key fully in o he console.
See HOW TO TURN ON TH POW R on page 10.
Selec he iFIT.com mode.
When the key is in-
serted, the manual
mode will be selected.
To use iFIT.com CD’s
or videocassettes,
press the Select
Workout button repeat-
edly until the iFIT.com indicator lights.
Inser he iFIT.com CD or videocasse e.
If you are using an iFIT.com CD, insert it into your
CD player. If you are using an iFIT.com videocas-
sette, insert it into your VCR.
Press he PLAY bu on on your CD player or
VCR.
A moment after the button is pressed, your per-
sonal trainer will begin guiding you through your
workout. Simply follow your personal trainer’s
instructions. Note: If the Time/Segment Time dis-
play is flashing, press the Start button or the
Speed
▲▲
button on the console. The treadmill will
not respond to a CD or video program when the
Time/Segment Time display is flashing.
During the CD or video program, an electronic
“chirping” sound will alert you when the speed
and/or incline of the treadmill is about to change.
CAUTION: Always lis en for he “chirp” and be
prepared for speed and/or incline changes. In
some ins ances, he speed and/or incline may
change before he personal rainer describes
he change.
4
3
2
1
AUDIO OUT
RIGHT
LEFT
VIDEO AUDIO
ANT. IN
RF OUT
IN
OUT
CH
34
Audio
Cable Adapter
A
VIDEO AUDIO
ANT. IN
RF OUT
IN
OUT
CH
34
Audio
Cable Adapter
B
Wire removed from
AUDIO OUT jack
RCA Adapter
17
If the speed or incline settings are too high or too
low, you can manually override the settings at any
time by pressing the Speed or Incline buttons on
the console. However, when he nex “chirp” is
heard, he speed and/or incline will change o
he nex se ings of he CD or video program.
To stop the walking belt at any time, press a Stop
button on the console. The Time/Segment Time
display will begin to flash. To restart the program,
press the Start button. After a moment, the walk-
ing belt will begin to move at 1.0 mph. When he
nex “chirp” is heard, he speed and incline
will change o he nex se ings of he CD or
video program. The program can also be
stopped by pressing the stop button on your CD
player or VCR.
When the CD or video program is completed, the
walking belt will stop and the Time/Segment Time
display will begin to flash. Note: To use another
CD or video program, press a Stop button or re-
move the key and go to step 1 on page 17.
No e: If he speed or incline of he readmill
does no change when a “chirp” is heard:
• Make sure ha he iFIT.com indica or is li and
ha he Time/Segmen Time display is no
flashing. If he Time/Segmen Time display is
flashing, press he S ar bu on or he Speed
▲▲
bu on on he console.
• Adjus he volume of your CD player or VCR.
If he volume is oo high or oo low, he con-
sole may no de ec he program signals.
• Make sure ha he audio cable is properly
connec ed, ha i is fully plugged in, and ha
i is no wrapped around a power cord.
• If you are using your por able CD player and
he CD skips, se he CD player on he floor or
ano her fla surface ins ead of on he console.
Follow your progress wi h he four displays.
See step 5 on page 11.
When he program is comple ed, remove he
key.
See step 5 on page 12.
CAUTION: Always remove iFIT.com CD’s and
videocasse es from your CD player or VCR
when you are finished using hem.
6
5
18
HOW TO USE PROGRAMS DIRECTLY FROM
OUR INTERNET SITE
Our new internet site at www.iFIT.com allows you to
access a selection of programs that interactively con-
trol your treadmill to help you achieve your specific ex-
ercise goals. In addition, you can play iFIT.com audio
and video programs directly from the internet.
To use programs from our internet site, the treadmill
must be connected to your home computer. See HOW
TO CONN CT YOUR COMPUT R on page 16. In
addition, you must have an internet connection and
an internet service provider. A list of specific system
requirements will be found on our internet site.
Follow the steps below to use a program from our
internet site.
Inser he key fully in o he console.
See HOW TO TURN ON TH POW R on page 10.
Selec he iFIT.com mode.
When the key is in-
serted, the manual
mode will be selected
and the manual indica-
tor will light. To use a
program from our inter-
net site, press the
Program Select button repeatedly until the
iFIT.com indicator lights.
Go o your compu er and s ar an in erne con-
nec ion.
S ar your web browser, if necessary, and go o
our in erne si e a www.iFIT.com.
Follow he desired links on our in erne si e o
selec a program.
Read and follow the on-line instructions for using a
program.
Follow he on-line ins ruc ions o s ar he
program.
When you start the program, an on-screen count-
down will begin.
Re urn o he readmill and s and on he foo
rails. Find he clip a ached o he key and slide
he clip on o he wais band of your clo hing.
When the on-screen countdown ends, the program
will begin and the walking belt will begin to move.
Hold the handrails, step onto the walking belt, and
begin walking.
During the program, an electronic “chirping” sound
will alert you when the speed and/or incline of the
treadmill is about to change. CAUTION: Always
lis en for he “chirp” and be prepared for speed
and/or incline changes.
If the speed or incline settings are too high or too
low, you can manually override the settings at any
time by pressing the Speed or Incline buttons on
the console. However, when he nex “chirp” is
heard, he speed and/or incline will change o
he nex se ings of he program.
To stop the walking belt at any time, press a Stop
button on the console. The Time/Segment Time
display will begin to flash. To restart the program,
press the Start button. After a moment, the walk-
ing belt will begin to move at 1.0 mph. When he
nex “chirp” is heard, he speed and incline will
change o he nex se ings of he program.
When the program is completed, the walking belt
will stop and the Time/Segment Time display will
begin to flash. Note: To use another program,
press a Stop button and go to step 5.
No e: If he speed or incline of he readmill
does no change when a “chirp” is heard, make
sure ha he iFIT.com indica or is li and ha
he Time/Segmen Time display is no flashing.
In addi ion, make sure ha he audio cable is
properly connec ed, ha i is fully plugged in,
and ha i is no wrapped around a power cord.
Follow your progress wi h he four displays.
See step 5 on page 11.
When he program has ended, remove he key.
See step 5 on page 12.
9
8
7
6
5
4
3
2
1
19
THE INFORMATION MODE/DEMO MODE
The console features an information mode that keeps
track of the total number of hours that the treadmill has
been operated and the total number of miles that the
walking belt has moved. The information mode also al-
lows you to switch the console from miles per hour to
kilometers per hour. In addition, the information mode
allows you to turn on and turn off the demo mode.
To select the information mode, hold down one of the
Stop buttons while inserting the key into the console.
When the information mode is selected, the following
information will be shown:
The Time/Segment Time
display will show the total
number of hours that the
treadmill has been used.
The Distance/Incline display
will show the total number of
miles that the walking belt
has moved.
An “ ,” for nglish miles, or
an “M,” for metric kilometers,
will appear in the Speed dis-
play. Press the Speed
▲▲
button to change the unit of
measurement.
IMPORTANT: The
Calories/Pulse display
should be blank. If a “d”
appears in the display, the
console is in the “demo”
mode. This mode is in-
tended to be used only
when a treadmill is displayed in a store. When the con-
sole is in the demo mode, the power cord can be
plugged in, the key can be removed from the console,
and the displays and indicators on the console will au-
tomatically light in a preset sequence, although the but-
tons on the console will not operate. If a “d” appears
in he Calories/Pulse display when he informa ion
mode is selec ed, press he Speed
▼▼
bu on so he
Calories/Pulse display is blank.
To exit the information mode, remove the key from the
console.
THE OPTIONAL CHEST PULSE SENSOR
An optional chest pulse sensor adds even more
features to the console. The chest pulse sensor contin-
uously monitors your heart rate during your workouts
and allows you to use the console’s two pulse pro-
grams. To purchase he op ional ches pulse sen-
sor, call oll-free 1-888-936-4266.
20

This manual suits for next models

1

Other HEALTH RIDER Treadmill manuals

HEALTH RIDER H550i Treadmill User manual

HEALTH RIDER

HEALTH RIDER H550i Treadmill User manual

HEALTH RIDER H150t Treadmill User manual

HEALTH RIDER

HEALTH RIDER H150t Treadmill User manual

HEALTH RIDER HRTL12910 User manual

HEALTH RIDER

HEALTH RIDER HRTL12910 User manual

HEALTH RIDER HRTL16940 User manual

HEALTH RIDER

HEALTH RIDER HRTL16940 User manual

HEALTH RIDER H55t Treadmill User manual

HEALTH RIDER

HEALTH RIDER H55t Treadmill User manual

HEALTH RIDER 275p Treadmill User manual

HEALTH RIDER

HEALTH RIDER 275p Treadmill User manual

HEALTH RIDER HRTL12994 User manual

HEALTH RIDER

HEALTH RIDER HRTL12994 User manual

HEALTH RIDER H95t Treadmill User guide

HEALTH RIDER

HEALTH RIDER H95t Treadmill User guide

HEALTH RIDER HMEL50708 User manual

HEALTH RIDER

HEALTH RIDER HMEL50708 User manual

HEALTH RIDER S300i User manual

HEALTH RIDER

HEALTH RIDER S300i User manual

HEALTH RIDER S900i HRTL19990 User manual

HEALTH RIDER

HEALTH RIDER S900i HRTL19990 User manual

HEALTH RIDER T850i HTL13940 User manual

HEALTH RIDER

HEALTH RIDER T850i HTL13940 User manual

HEALTH RIDER H50 Crosswalk Sl Treadmill User manual

HEALTH RIDER

HEALTH RIDER H50 Crosswalk Sl Treadmill User manual

HEALTH RIDER T90 User manual

HEALTH RIDER

HEALTH RIDER T90 User manual

HEALTH RIDER SoftStrider HRTL09990 User manual

HEALTH RIDER

HEALTH RIDER SoftStrider HRTL09990 User manual

HEALTH RIDER 831.299300 User manual

HEALTH RIDER

HEALTH RIDER 831.299300 User manual

HEALTH RIDER H110i HRTL34306.0 User manual

HEALTH RIDER

HEALTH RIDER H110i HRTL34306.0 User manual

HEALTH RIDER Pro H250i Treadmill User manual

HEALTH RIDER

HEALTH RIDER Pro H250i Treadmill User manual

HEALTH RIDER H130t Treadmill User manual

HEALTH RIDER

HEALTH RIDER H130t Treadmill User manual

HEALTH RIDER H105t Treadmill User manual

HEALTH RIDER

HEALTH RIDER H105t Treadmill User manual

HEALTH RIDER H 110i Treadmill User manual

HEALTH RIDER

HEALTH RIDER H 110i Treadmill User manual

HEALTH RIDER SoftStrider EX User manual

HEALTH RIDER

HEALTH RIDER SoftStrider EX User manual

HEALTH RIDER HRTL16990 User manual

HEALTH RIDER

HEALTH RIDER HRTL16990 User manual

HEALTH RIDER HRTL10911 User manual

HEALTH RIDER

HEALTH RIDER HRTL10911 User manual

Popular Treadmill manuals by other brands

ICON Health & Fitness PRO-FORM POWER 595i user manual

ICON Health & Fitness

ICON Health & Fitness PRO-FORM POWER 595i user manual

Ironman Fitness 320t owner's manual

Ironman Fitness

Ironman Fitness 320t owner's manual

SPORTSTECH F48 user manual

SPORTSTECH

SPORTSTECH F48 user manual

Reebok RBTL12910 user manual

Reebok

Reebok RBTL12910 user manual

NordicTrack NTL77806.0 user manual

NordicTrack

NordicTrack NTL77806.0 user manual

CAPITAL SPORTS INFINITY PRO 2.0 manual

CAPITAL SPORTS

CAPITAL SPORTS INFINITY PRO 2.0 manual

Xterra TR600 owner's manual

Xterra

Xterra TR600 owner's manual

Nautilus Be Strong Commerical T916 Owner's and assembly manual addendum

Nautilus

Nautilus Be Strong Commerical T916 Owner's and assembly manual addendum

AsVIVA T18 manual

AsVIVA

AsVIVA T18 manual

NordicTrack A2155 Treadmill Manuel de l'utilisateur

NordicTrack

NordicTrack A2155 Treadmill Manuel de l'utilisateur

NordicTrack Powertread 1750 owner's guide

NordicTrack

NordicTrack Powertread 1750 owner's guide

Weslo Cadence 400cs Treadmill user manual

Weslo

Weslo Cadence 400cs Treadmill user manual

Tempo Fitness 611T user guide

Tempo Fitness

Tempo Fitness 611T user guide

Bodyworx JSPORT3000 owner's manual

Bodyworx

Bodyworx JSPORT3000 owner's manual

Merit 715T PLUS user guide

Merit

Merit 715T PLUS user guide

ICON Health & Fitness Pro-Form Carbon T10 user manual

ICON Health & Fitness

ICON Health & Fitness Pro-Form Carbon T10 user manual

Bowflex LateralX LX3 Service manual

Bowflex

Bowflex LateralX LX3 Service manual

GE 2000 Series installation instructions

GE

GE 2000 Series installation instructions

manuals.online logo
manuals.online logoBrands
  • About & Mission
  • Contact us
  • Privacy Policy
  • Terms and Conditions

Copyright 2025 Manuals.Online. All Rights Reserved.