Healthy Climate Solutions HCWHD4-080 User manual
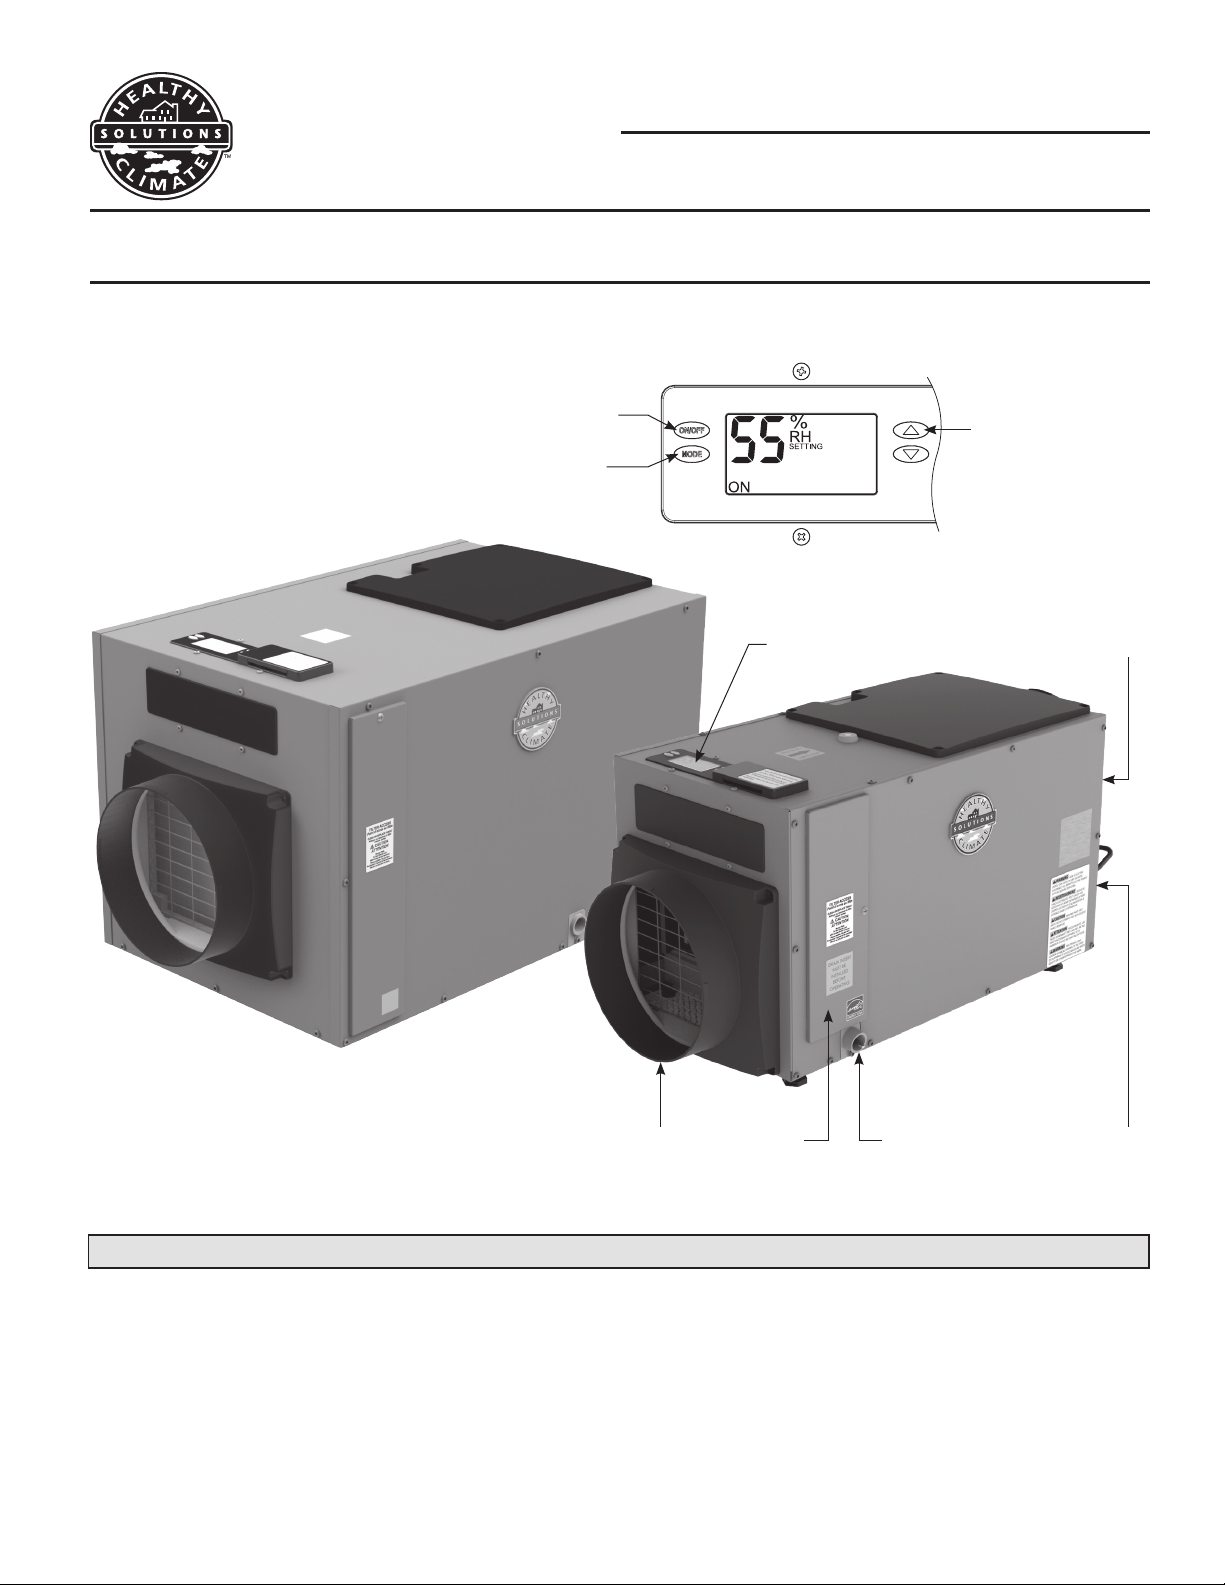
Dehumidifer Control
Inlet Filter
Access Door
Drain Power
Switch
Outlet
90-1874
DEHUMIDIFIERS
508167-01
3/2021
Supersedes 507385-01
HEALTHY CLIMATE®
DEHUMIDIFIERS
OWNER’S MANUAL FOR HEALTHY CLIMATE®DEHUMIDIFIER
MODEL HCWHD4-080, HCWHD4-100 AND HCWHD4-130
THIS MANUAL MUST BE LEFT WITH THE HOMEOWNER FOR FUTURE REFERENCE
Whole Home Dehumidication
The Healthy Climate® Dehumidier controls the humidity level in your entire home. A powerful blower inside the dehumidier
draws air into the cabinet, lters the air and removes moisture, then discharges the dry air into the HVAC system or
dedicated area of the home. Inside the cabinet, a sealed refrigeration system removes moisture by moving the air through
a series of tubes and ns that are kept colder than the dew point of the incoming air. The dew point is the temperature at
which moisture in the air will condense, much like what occurs on the outside of a cold glass on a hot summer day. The
condensed moisture drips into the dehumidier drain pan to a drain tube routed to the nearest oor drain or condensate
pump. After the moisture is removed, the air moves through a second coil where it is reheated before being sent back into
the home. The air leaving the dehumidier will be warmer and drier than the air entering the dehumidier.
90-2630
90-2637
ON/OFF button used to turn dehumidifier on and off Up/Down buttons used
to change humidity setting
MODE button used for optional ventilation feature
1

90-1853
90-1854
90-1854
Setting the Desired Humidity Level
The dehumidier on-board control will display the humidity
setting when not running, and displays the measured
humidity when running.
How Does the Dehumidier Work?
Once per hour the dehumidier will measure the humidity
level of the air and compare it to the humidity setting. If
the humidity in your home is higher than the setting, the
dehumidier will dehumidify the air until the humidity level
drops below the setting.
When the dehumidier turns on, the blower circulates the
air for 3 minutes. The on-board control will display AIR
SAMPLING, along with the measured humidity on the
control screen. At the end of this 3 minutes, the measured
humidity level of the air is compared to the humidity setting.
If the humidity of the air is higher than the setting,
the compressor turns on and the control will display
DEHUMIDIFYING, along with the measured humidity on
the control screen.
OPTIONAL – HEATING AND COOLING SYSTEM
BLOWER OPERATION
Your installing contractor may have configured the
dehumidier to turn on the heating and cooling system
blower when the dehumidier turns on to allow for improved
circulation of the dry air.
The UP and DOWN arrow buttons allow the humidity level
to be set from 40% to 80% relative humidity. Use the ON/
OFF button to turn the dehumidier ON or OFF.
Set the control at 55%RH when rst installed. Allow the
dehumidifier to run until it reaches the setting before
deciding if you want to change the setting.
• If you prefer the air to be more dry, decrease the
humidity setting.
• If you prefer the air to be less dry, increase the humidity
setting.
Your comfort is the best measure of how to adjust your
setting. When rst installed, your dehumidier has to remove
all the moisture that is initially in your home. The home
acts like a sponge so the moisture in the materials of your
home is at the same level as the air. After drying the air,
the materials of the home will release moisture back into
the air until they are again at the same level. As a result, it
is common for the dehumidier to operate for an extended
period when rst installed.
ENERGY SAVINGS TIPS
Energy Savings Tip #1: Adjust the humidity setting to be as
high as is comfortable to reduce dehumidier run time. If it
feels clammy or “smells musty”, lower the humidity setting.
To save energy, turn the dehumidier to OFF when you
open your windows, just as you would with air conditioning.
Energy Savings Tip #2: If vacating your home for an
extended period in the summer, set the RH at 55% and set
your thermostat as high as you are comfortable setting it to
in the cooling mode. Consult with appropriate professionals
regarding the highest temperature that is safe for your pets
or possessions. This will keep the humidity at a controlled
level while minimizing the amount of cooling energy used.
2
90-1854
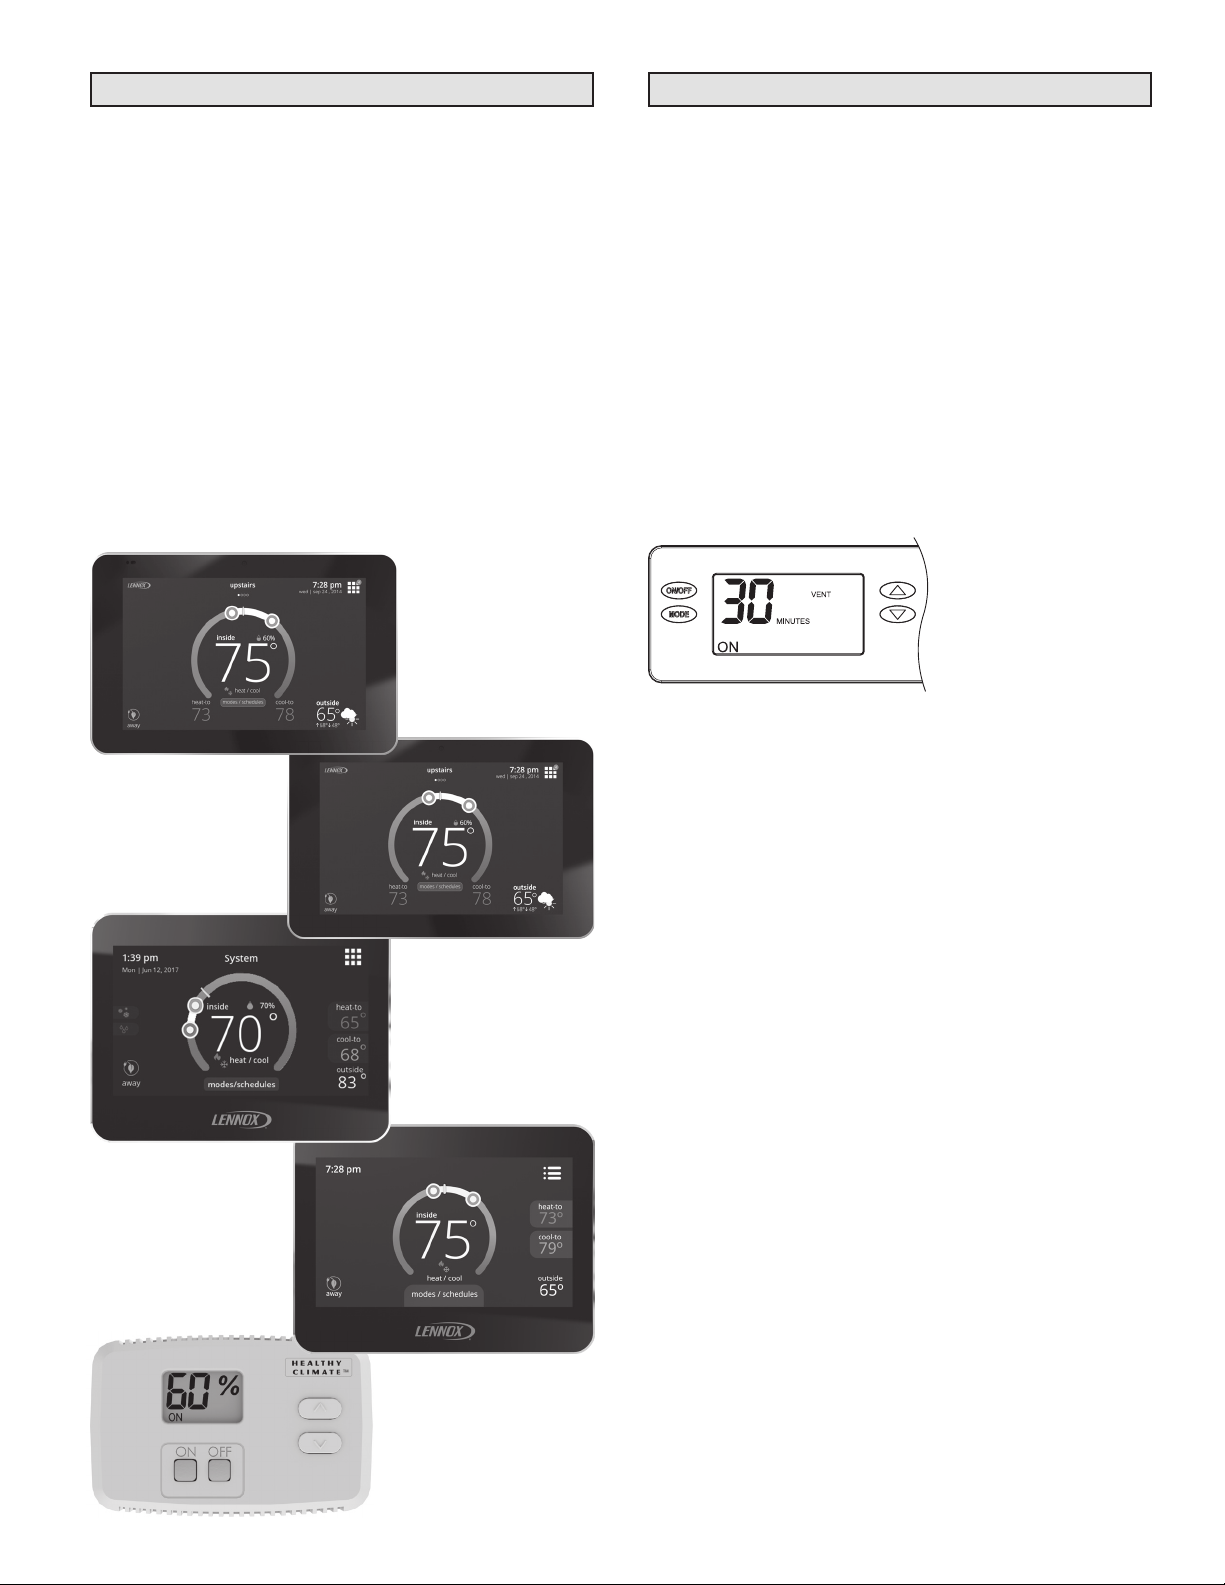
External Control Options
Your dehumidier can be controlled with an iComfort®
Thermostat, a ComfortSense® Thermostat, or an optional
external control that is conveniently located in the living
space. The iComfort® or ComfortSense® Thermostat can
be used to control your whole home dehumidier by using
the dehumidication features in the thermostat. The Y6456
is a dedicated dehumidier control.
The Y6456 can also act as a remote control if the
dehumidier is located in a crawl space. Install the Y6456
in your living space and make changes to the dehumidier
setting or nd out what the humidity level is in the crawl
space from the comfort and convenience of the living space.
When an external control is installed, please refer to the
owner’s manuals for operating instructions.
If you are interested in having an external control installed,
please consult your installing contractor.
How Does the Optional Ventilation Work?
If you had your contractor install the optional ventilation
feature, they calculated how much fresh air was needed
based on various factors (i.e. home size, number of
occupants, local building codes, etc.). Knowing how much
is needed and the rate at which fresh air will be brought into
your home, the contractor set up the dehumidier control
to operate ventilation a certain amount of time per hour to
provide the needed fresh air. When ventilation operates, a
damper in a duct that brings air in from the outside opens,
and your heating and cooling system blower will run to
distribute the fresh air.
If you need to change the amount of time to operate
ventilation, press the MODE button twice to display the
ventilation time setting. Use the UP or DOWN button to
adjust the number of minutes per hour (0–60, set to zero
to turn it off) that ventilation is to run. The control will return
to the dehumidier setting display automatically.
Y6456 Control
iComfort® S30 Ultra
Smart Thermostat
iComfort®M30
Smart Thermostat
ComfortSense®
7500 Touchscreen
Thermostat
iComfort®E30
Smart Thermostat
3
90-1854
Maintenance – Model HCWHD4-080 and
HCWHD4-100
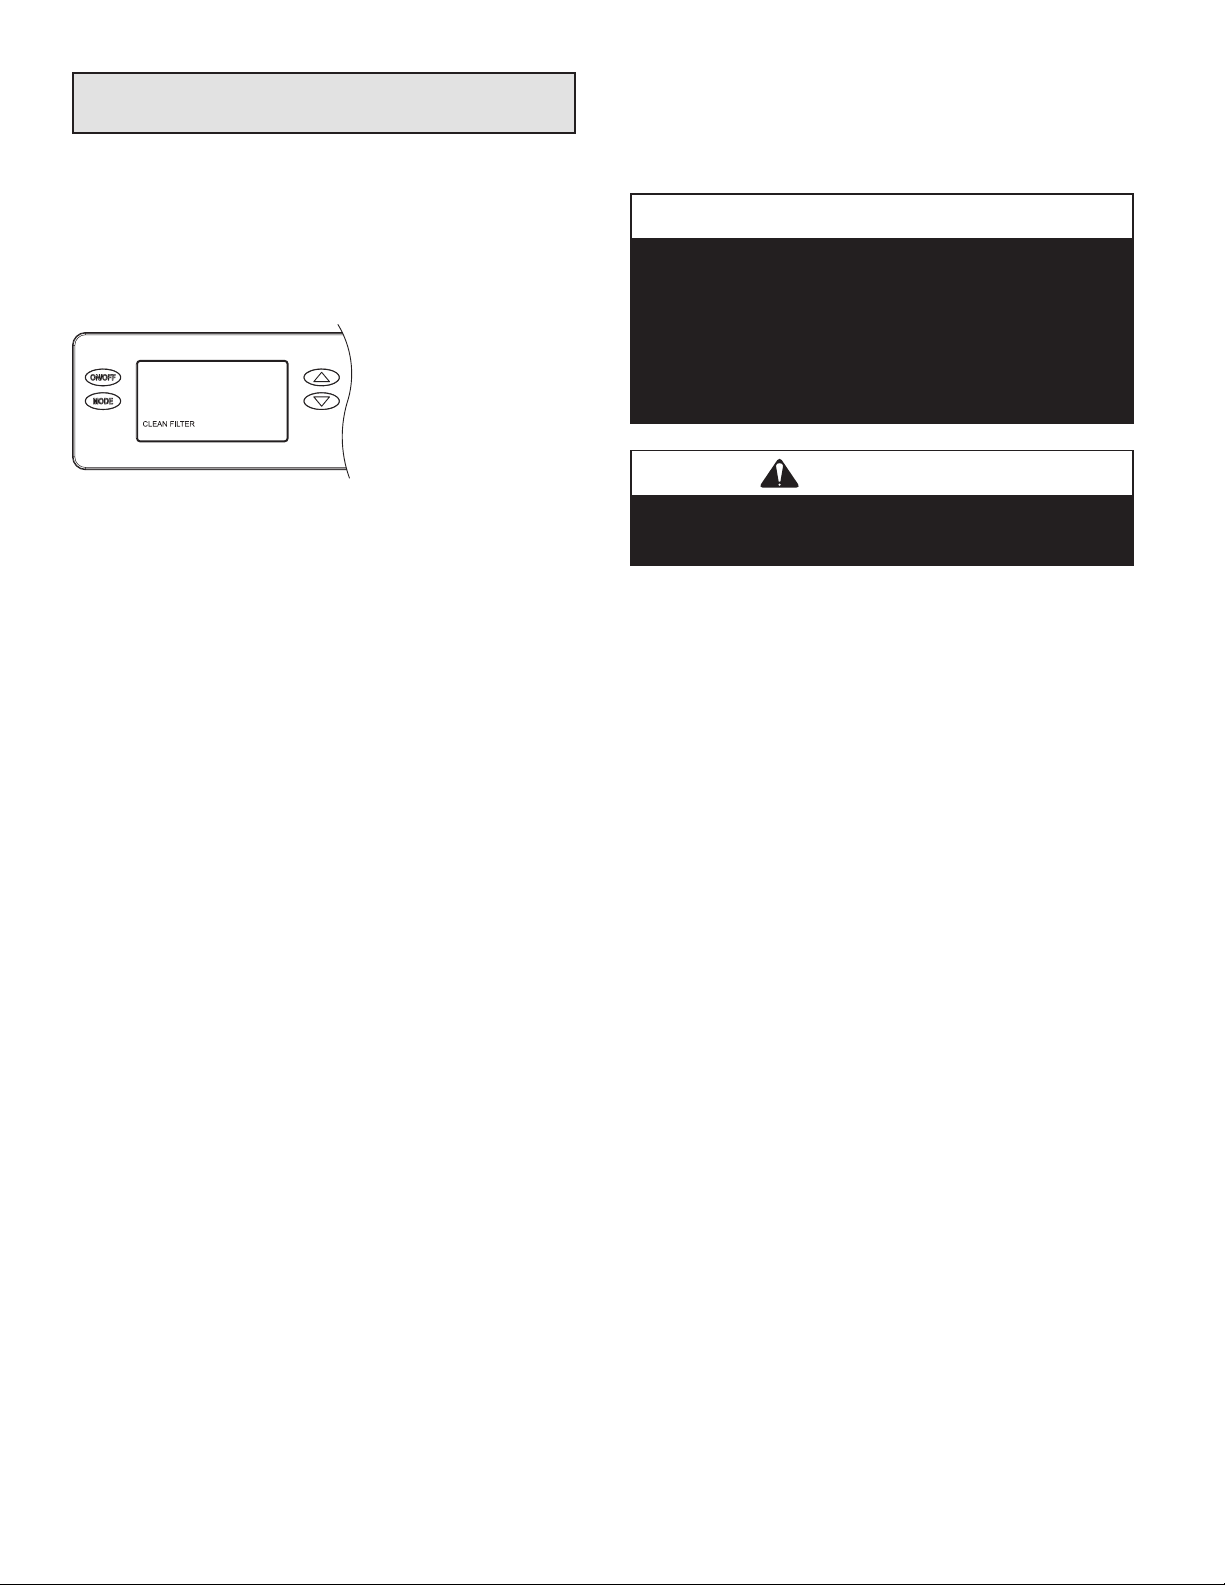
CLEAN OR REPLACE THE AIR FILTER
After initial installation the air lter should be checked and
cleaned every 6 months. The CLEAN FILTER service
reminder will display on the on-board control screen every
6 months. To clear the service message, press the UP and
DOWN arrows simultaneously for 3 seconds.
Filter Cleaning Procedure
1. Turn the ON/OFF switch OFF.
2. Remove the lter access door from either side of the
dehumidier.
3. Slide the lter out of the dehumidier.
4. Flush the lter with warm water and a mild detergent
solution.
5. Shake off the excess water from the lter.
6. Replace the lter, making sure the lter is secured in
both the top and bottom lter rails.
7. Replace the lter access door.
8. Turn the ON/OFF switch ON.
9. Press the UP and DOWN buttons simultaneously for 3
seconds to clear the service message.
DRAIN AND DRAIN INSERT INSPECTION
The drain and drain insert should be checked annually
to ensure there are no blockages or air lock in the drain
system.
IMPORTANT
The drain insert is a critical feature of the dehumidier
drain management system. This component is required
for the dehumidier to run properly. If the drain insert
is not installed, you will not be able to reinstall the air
lter. The air lter is equipped with a safety mechanism
that prevents you from fully inserting the lter without
the drain insert installed.
WARNING
Running the dehumidier without the drain insert can
lead to condensate leaks.
4
REINSTALLING THE DRAIN INSERT
1. Reinstall the drain insert by inserting your forenger
into the nger loop and grasping the outer edge of the
nger loop your thumb.
2. Gently insert the drain insert tip into the drain opening
and tilting the cover downwards into place.
3. Insure the drain insert is seated properly by checking
the top surface of the drain cover is the same surface
height as the lter guide channel.
4. Turn the ON/OFF switch ON.
5. At the UI control, select the ON/OFF button and switch
to ON mode.
CAUTION
Do not use spray solvents or cleaners on or near the
inlet side of the dehumidier. If desired, apply cleaner
to a cloth and use to clean the cabinet.
DRAIN INSERT
90-2607
Figure 1. Drain Insert
REMOVING THE DRAIN INSERT
1. Turn the ON/OFF switch OFF.
2. Remove the lter access door from the drain side of
the dehumidier.
3. Remove the lter from the dehumidier to access the
drain insert.
4. Locate the drain insert which is located over the drain
opening.
5. Remove the drain insert by hooking your nger into
the nger loop and gently lifting the cover up and out
of the drain pan.
6. Clean the drain insert with warm water and mild
detergent solution.
5

10015558 B2209241A 3.21
90-1854
Maintenance – Model HCWHD4-130
CLEAN OR REPLACE THE AIR FILTER
After initial installation the air lter should be checked and
cleaned every 6 months. The CLEAN FILTER service
reminder will display on the on-board control screen every
6 months. To clear the service message, press the UP and
DOWN arrows simultaneously for 3 seconds.
CHECK THE DRAIN
The drain should be checked annually to ensure there are
no blockages or air lock in the drain system. If the unit is
not draining properly, have it checked by a qualied service
professional.
CAUTION
Do not use spray solvents or cleaners on or near the
inlet side of the dehumidier. If desired, apply cleaner
to a cloth and use to clean the cabinet.
Filter Cleaning Procedure
1. Turn the ON/OFF switch OFF.
2. Remove the lter access door from either side of the
dehumidier.
3. Slide the lter out of the dehumidier.
4. Flush the lter with warm water and a mild detergent
solution.
5. Shake off the excess water from the lter.
6. Replace the lter, making sure the lter is secured in
both the top and bottom lter rails.
7. Replace the lter access door.
8. Turn the ON/OFF switch ON.
9. Press the UP and DOWN buttons simultaneously for 3
seconds to clear the service message.
6
Other manuals for HCWHD4-080
1
This manual suits for next models
2
Table of contents
Other Healthy Climate Solutions Dehumidifier manuals


Popular Dehumidifier manuals by other brands


Johnson Controls Unitary Products
Johnson Controls Unitary Products S1-CD065T01 installation instructions

Haier
Haier DM32EK User and care guide

Mitsubishi Electric
Mitsubishi Electric MJ-E82GH-H instruction manual

Hisense
Hisense DH3020K1W Use & care guide

Heaven Fresh
Heaven Fresh HF 625 instruction manual

Clean Air Optima
Clean Air Optima CA-703 user manual