Hearing Direct.com HD 350 User manual

Hearing Direct.com
Operating instructions
Before use, please read these instructions to help you
get the best out of your HearingDirect.com hearing aid
Model HD 350

2
Introduction Welcome to a world of better hearing!
We understand that hearing loss affects one’s quality of life. That is
why we are dedicated to building the highest quality hearing aids.
Your new hearing aids will soon be indispensable to you and will bring
new pleasure and enjoyment to your life.
A period of adjustment may be needed to become accustomed to
your new hearing aids and the renewed world of sounds you will
experience. The adjustment time varies for each individual and may
be from as little as a couple of weeks to as long as several months.
Allow yourself time to become familiar with those sounds you have
not heard for a long time.
Before operating your hearing aids, please read these operating
instructions thoroughly.
Hearing Direct.com

3
Left:
Model
Serial Number
Right:
Model
Serial Number
Battery Size
Owner
Information
Complete the following for your own records.

4
Your HD 350 hearing aid 6
Proper placement on ear 7
Left and right hearing aids 8
On / Off function 8
Battery information 9
Replacing the battery 11
Cleaning your hearing aids 12
Caring for your hearing aids 16
Table of
contents

Telephone use 18
Push Button Multi-memory 19
DO’s and DON’Ts 20
Troubleshooting 22
Warranty information 25
Service and repair information 27
Serial numbers 27
5

Rear Microphone
Push Button Memory Switch
Battery Compartment
Microphone Grill/
Sound Inlet
Front Microphone
Dome
Retention Guard
Sound Tube
Left/Right Identifying Marks
Model/Serial Number
6
Your HD 350
hearing aid

Your HD 350 hearing aids should fit comfortably and easily over the
top of your ears.
lStep 1: Place the hearing aid over the top of
your ear.
lStep 2: With your index finger, hold the sound
tube where it attaches to the ear dome and
gently push the dome into your ear canal until
it is just inside your ear canal.
lStep 3: Place the retention guard of the sound
tube into the bowl of your concha.
Be sure to open the battery door after removing the
aids from your ears, as this will turn the aids off and
conserve battery power.
7
Proper
placement
on ear

If you are wearing hearing aids on both ears, it is important to use the
correct device in each ear. The sound tubes are marked with «red»
lettering for the Right ear and «blue» lettering for the Left ear.
To turn your hearing aid «on», you simply need to close the battery
door after inserting a battery.
There are two ways to turn your hearing
aid «off»:
1. Grasp the notch on the battery door
and pull it until one click is felt. Your
aid is now «off».
2. You may choose to open the battery
door completely, which will also turn
off the hearing aid.
8
Left and Right
hearing aids
Turning the
hearing aid
on and off

In fact, when the hearing aid is not in use, it is recommended that you
open the battery door and remove the battery. This helps to prevent
excessive battery drain and allows for proper ventilation of the
hearing aid.
The HD 350 is equipped with a low battery detection system, which
continuously monitors battery life.
When the battery becomes low, the low battery warning sequence
consisting of 3 double beeps is initiated. After the warning beeps are
complete, normal operation resumes.
The low battery warning sequence will repeat every 10 minutes until
the battery becomes critically low. At that time, the end of the battery
life warning sequence consisting of 6 double beeps is triggered. The
device is then muted and put into low power sleep mode.
9
Battery
information

Battery replacement will then be required.
The life of your hearing aids’ batteries will vary depending on length of
daily use and listening environments. When the hearing aid batteries
go dead, remove them immediately and replace them with new
batteries. Batteries may be purchased from the
HearingDirect.com website.
Important: Always discard used batteries in accordance with
your local disposal regulations. Small batteries can be harmful if
swallowed. Keep batteries out of the reach of pets and small children.
In case of ingestion, contact your doctor immediately.
10

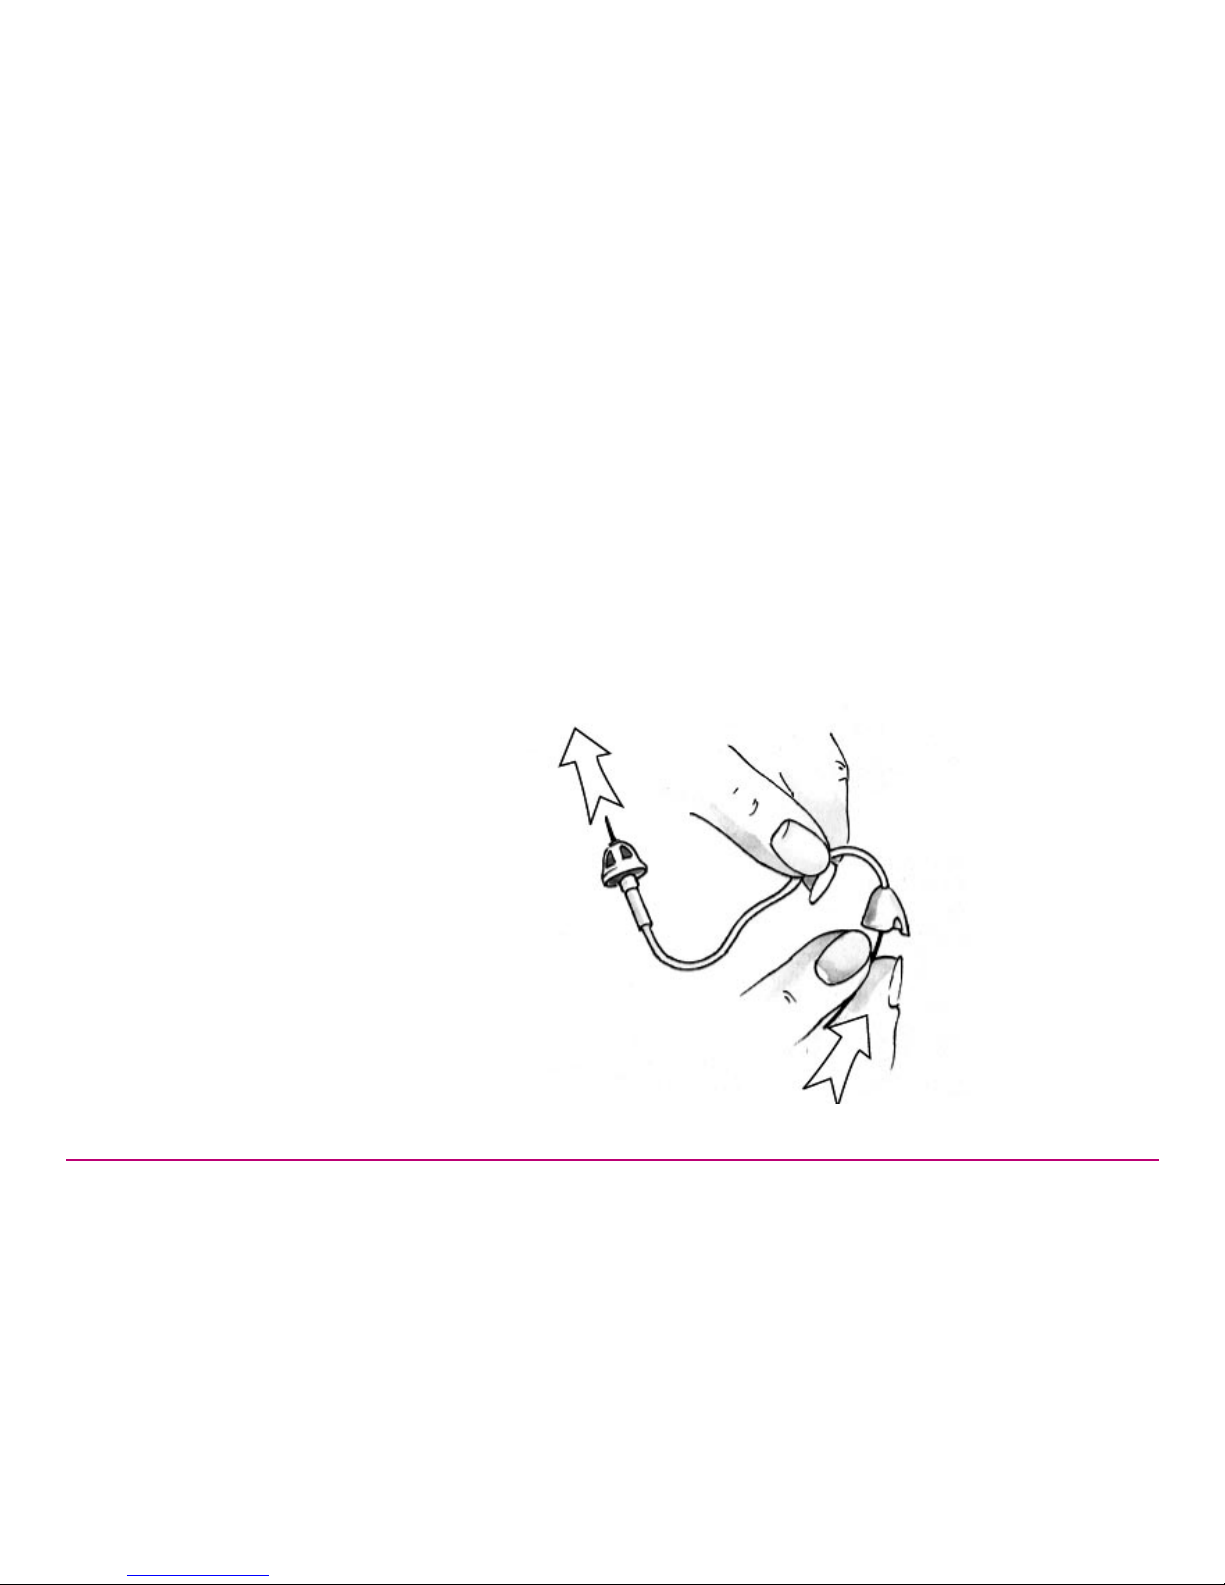
Follow these steps.
lStep 1: Lift the notch at the edge of the
compartment and swing open the door.
Do not force it. Remove the battery.
lStep 2: Remove the tab on the 10A
battery, slide in the battery with the «+»
side up, matching it to the «+» on the
battery compartment door.
lStep 3: Swing the door into the closed
position. The compartment should close
easily. Do not force it. If resistance
is noted, check that the battery is
inserted correctly.
11
Replacing
your hearing
aid battery

The following instructions will assist in extending the life of your
hearing aids.
You should inspect your hearing aids daily and clean them periodically
to control wax build-up. To clean, very gently wipe the surface with
a soft, dry cloth or moist cleaning wipes made especially for hearing
aids. Do not allow water or liquid to enter any openings on the aids.
The sound tube delivers the amplified sound from the hearing aid
into the ear. It is important that these components fit properly in your
ear. The materials used in your hearing aids are of the highest quality
available, and the likelihood of an allergic reaction is low. Please don’t
attempt to modify the shape or length of the sound tube yourself.
The tube and dome should be cleaned regularly according to the
instructions on the following pages.
12
Cleaning your
hearing aid
Cleaning the
exterior of
the aid
The wearing of a hearing aid may accelerate the accumulation of ear
wax. This can easily be removed by your doctor. You should not use
cotton swabs to clean your ears, due to the risk of pushing the wax
deeper into the ear canal.
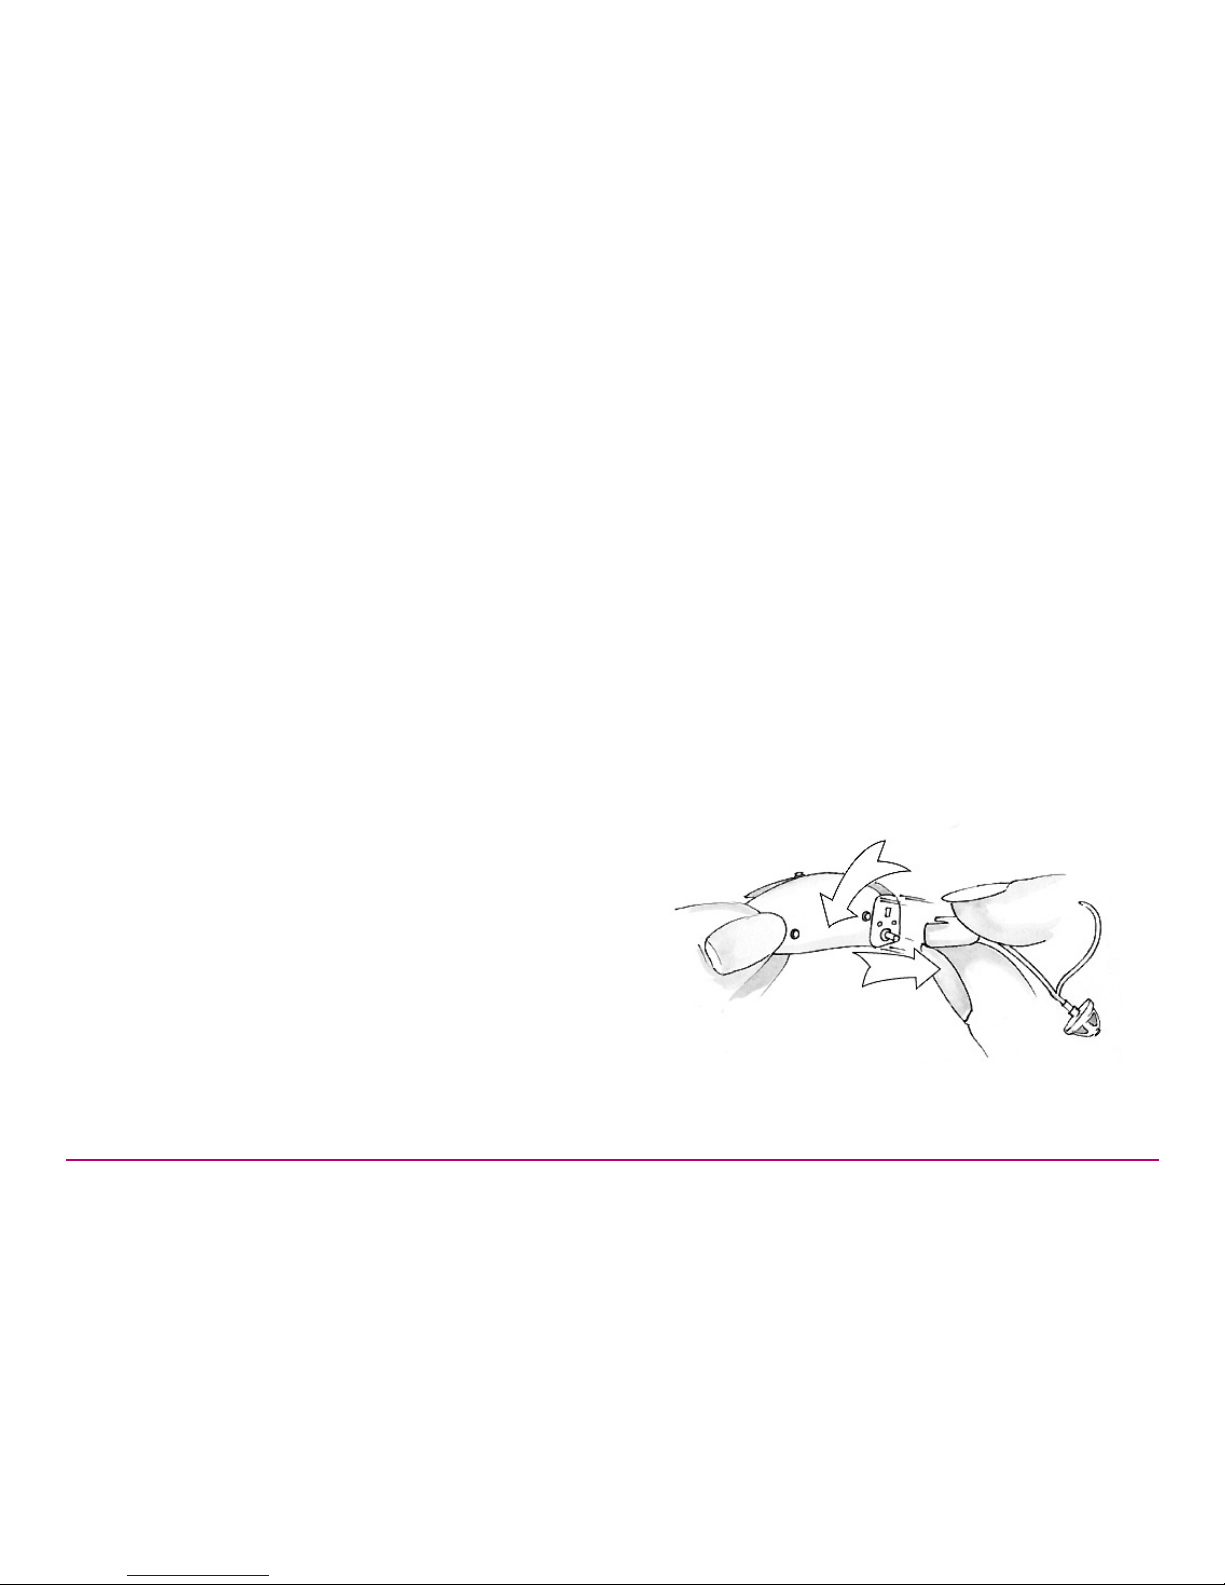
Remove the sound tube from the hearing aid by gently twisting the
tube 90° and pulling it straight off, away from the main aid.
13
To clean the
sound tube
and ear dome
Use a damp cloth to clean the exterior of the sound tube and dome.
Use the cleaning rod (provided in storage case) to clean the sound
tube and dome. Lightly push the cleaning rod through the sound tube,
inserting it in the opening where the tube attaches to the body of the
aid and push out through the dome.
14

Do not rinse or submerge these parts in water, as there is a risk of
damage if a water drop becomes trapped in the sound tube. If this
should occur, it will prevent sound from coming through the tube and
may be harmful to the hearing aid’s electronics.
Re-attach the sound tube onto the body of the aid by holding the
sound tube in one hand and the hearing aid in the other hand. Line
up the sound tube and the connecting end of the aid, push the sound
tube straight onto the aid body. There is no need to rotate the sound
tube when re-attaching.
15

The sound tube and the dome may need to be changed if the sound
tube becomes stiff, brittle, kinked or damaged. When you change the
domes, make sure they are securely fastened to the sound tube before
inserting them in your ear. Failure to change the dome in accordance
with the instructions could result in injury.
Hearing aids are exposed to moisture in the form of humidity and
perspiration while being worn. The daily use of a dehumidifying
system or drying kit is recommended. These accessories may be
purchased from the HearingDirect.com website.
Your HD 350 hearing aid is equipped with a filter. This filter is located
at the front and top of the aid and prevents moisture and debris from
getting into the hearing aid. If the hearing aid seems to have lost
power and changing the battery does not correct the situation, the
16
Caring for
your aid
Sound Inlet
filters

filter may be blocked and needs to be changed. Use the repair/return
form available to download at HearingDirect.com.
If it is necessary to store your hearing aids for an extended amount of
time, follow the steps below for proper storage.
1. Remove the batteries.
2. Clean the aid according to the instructions on page 12.
3. Place the aids in a cool, dry place. Either their original container or
a hearing aid dehumidifier is recommended.
17
Extended
storage

You may use your HearingDirect.com hearing aid with either a mobile
or landline telephone. Finding the optimal position for holding a
telephone may require practice for some individuals, and one or more
of the following suggestions may be helpful.
Hold the phone up to your ear as you would normally or you may
want to try holding the telephone towards the top of the ear (closer to
where the microphone is). If the hearing aid whistles, try repositioning
the phone receiver so that it is not against the ear or completely
covering the hearing aid. Individual differences in hearing loss,
ear shape and size may influence how much hearing benefit your
HearingDirect.com hearing aid can provide when used with a phone.
18
Telephone
use

These hearing aids feature multiple volume memory settings for
different listening situations. The push-button control is used to
switch between memories that have been programmed. Simply select
your preferred option.
19
Push Button
Multi-
memory

lDO store the aids overnight in a hearing aid dehumidifier to absorb
moisture (Be sure to remove batteries first).
lDO always carry spare batteries.
lDO replace the battery when the low battery warning beep
sequence begins.
lDO always care for your aid as outlined in this manual.
lDO dry the battery contacts with a cotton swab in case of humid
weather or heavy perspiration.
lDO safely store hearing aids when not in use. Keep them out of the
reach of small children and pets.
20
The DO’s
of hearing aid
care
Table of contents
Other Hearing Direct.com Hearing Aid manuals

Hearing Direct.com
Hearing Direct.com HD150 User manual

Hearing Direct.com
Hearing Direct.com HD210 User manual

Hearing Direct.com
Hearing Direct.com HD230 User manual

Hearing Direct.com
Hearing Direct.com HD85 User manual

Hearing Direct.com
Hearing Direct.com HD 91 User manual

Hearing Direct.com
Hearing Direct.com HD500 User manual


