manuals.online logo
Brands
  1. Home
  2. •
  3. Brands
  4. •
  5. Hearth and Home Technologies
  6. •
  7. Door
  8. •
  9. Hearth and Home Technologies DM1736 User manual

Hearth and Home Technologies DM1736 User manual

Hearth & Home Technologies Inc. • DM Doors • 31178 Rev J • 11/10 1
tm
Models:
DM1031, DM1036, DM1039, DM1042, DM1242
DM1736, DM1742, ODVGF-36, ODVGF-42
Bi-fold Glass Doors
Installation
Instructions
These bi-fold glass doors have been tested for use with specic Hearth & Home Technologies replaces and are listed as
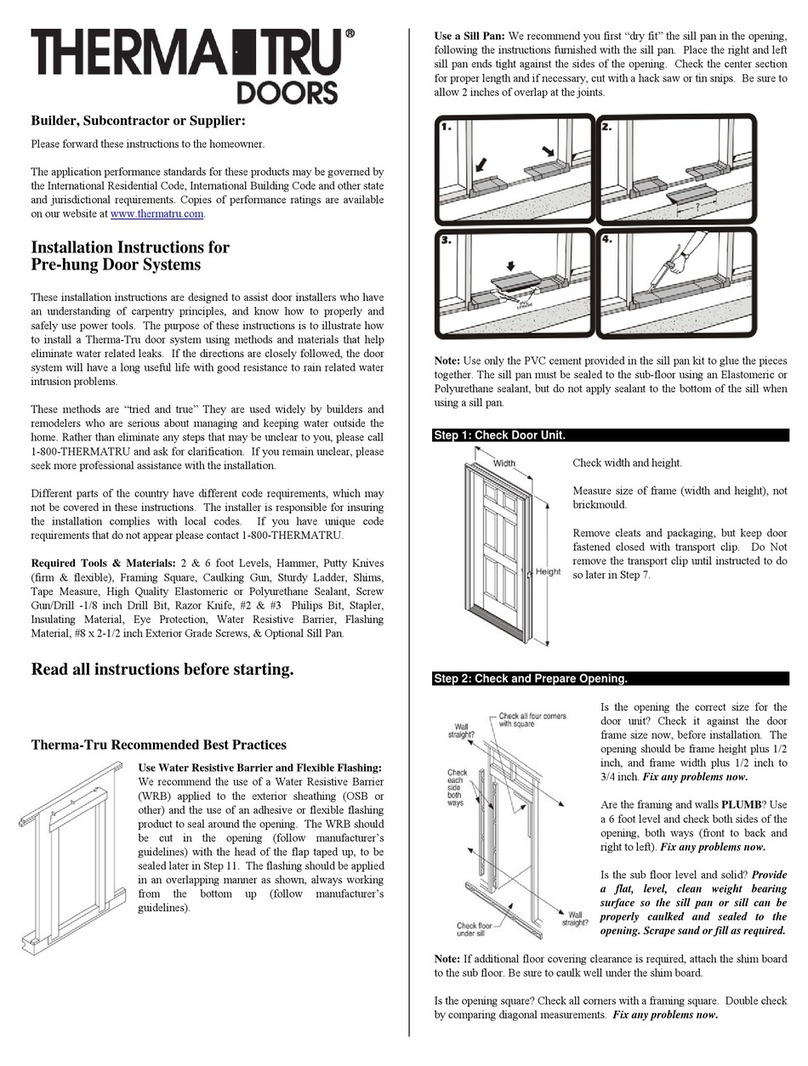
replace parts. Refer to the replace installation instructions/owner’s manual for the correct accessories to be used. Check
with your local building code agency before you begin installation to ensure compliance with local codes, including the need
for permits and follow-up inspections. If you encounter any problems regarding code approvals, or if you need clarication
of any of the instructions contained here, contact your local Hearth & Home Technologies dealer or visit www.hearthnhome.
com
Note: An arrow () found in the text signies change in content.
Sharp Edges
• Wear protective gloves and safety
glasses during installation.
CAUTION
Note: Before burning the replace for the
rst time, wipe the trim with a clean, dry rag to
remove all smudges and ngerprints. Failure
to do so will cause smudges and ngerprints
to be burned into the nish of the trim.
Note: An arrow () found in the text
signies change in content.
1
2
Fire Risk
• Close rescreen when burning replace.
• Do not use rescreen or glass doors to
hold burning material in replace.
Firescreen controls sparks.
Glass may break or burning material may
roll out.
WARNING
Fire Risk
Smoke Risk
• Doors must be fully opened or fully closed
when operating replace.
Partially opened doors may draw ame, smoke
or heat from replace.
WARNING
Item # Description Qty.
1 Bi-fold Door Assy., LH 1
2Bi-fold Door Assy., RH 1

Hearth & Home Technologies Inc. • DM Doors • 31178 Rev J • 11/10
2
C. For All Installations
• Fold one pair of doors. Insert the pin into the large hole
located at the bottom outside corner of the replace
opening. Tilt it toward the center of the replace such that
the pins clear the top door track edge. Slide the pin into
the top door track until the pin snaps into the hole in the
spring clip.
• Doors may be adjusted by repositioning the spring clips
in the screw slots, by loosening the screws and then
retightening. Do not overtighten the screws!
• If removal becomes necessary, depress the spring clips
located in the upper corners of the replace and tilt the
doors towards the center of the replace opening.
Note: Glass doors aid in the prevention of loss of
room heat through an open chimney.
FULLY OPEN
CORRECT
PARTLY CLOSED
INCORRECT
PARTLY OPEN
INCORRECT
FULLY CLOSED
CORRECT
Figure 3 Proper Operation of Bi-fold Glass Doors
A. For Use on Reveal Series Appliances
• Door installation on the RBV4236 or RBV4842 requires
longer pins. The longer pins and screws to attach them
are located on the valve bracket of the appliance. See
Figure 1.
Figure 2 Install Pins
• Remove the shorter door pins using a phillips screwdriver
and replace them with the longer pins. See Figure 2.
Screws for DM Door Installation
Figure 1 Pins & Screws for DM Door Installation - Reveal
B. For Use on Odvilla-36, Odvilla-42
Outdoor Woodburning Fireplace
• Remove the screws from the door track area before
placing the door tracks on the replace. Once in place
reinsert screws.

This manual suits for next models

8

Popular Door manuals by other brands

Ives 661 Installation and maintenance instructions

Ives

Ives 661 Installation and maintenance instructions

Pella 81DU0100 installation instructions

Pella

Pella 81DU0100 installation instructions

Mira fight ACE Installation and user guide

Mira

Mira fight ACE Installation and user guide

Thermador LFTD30 Series Use and care/ Use and care/installation manual

Thermador

Thermador LFTD30 Series Use and care/ Use and care/installation manual

Ives Flush Pull 22 installation instructions

Ives

Ives Flush Pull 22 installation instructions

GE 19214 installation instructions

GE

GE 19214 installation instructions

Gianni Industries EB-260 specification

Gianni Industries

Gianni Industries EB-260 specification

Sterling Plumbing Proline Custom Doors N5 Dimensions

Sterling Plumbing

Sterling Plumbing Proline Custom Doors N5 Dimensions

BFT VISTA SL Installation and user manual

BFT

BFT VISTA SL Installation and user manual

Sterling Plumbing Bypass Shower Doors 6065 installation guide

Sterling Plumbing

Sterling Plumbing Bypass Shower Doors 6065 installation guide

Label 16005 user manual

Label

Label 16005 user manual

manuals.online logo
manuals.online logoBrands
  • About & Mission
  • Contact us
  • Privacy Policy
  • Terms and Conditions

Copyright 2025 Manuals.Online. All Rights Reserved.