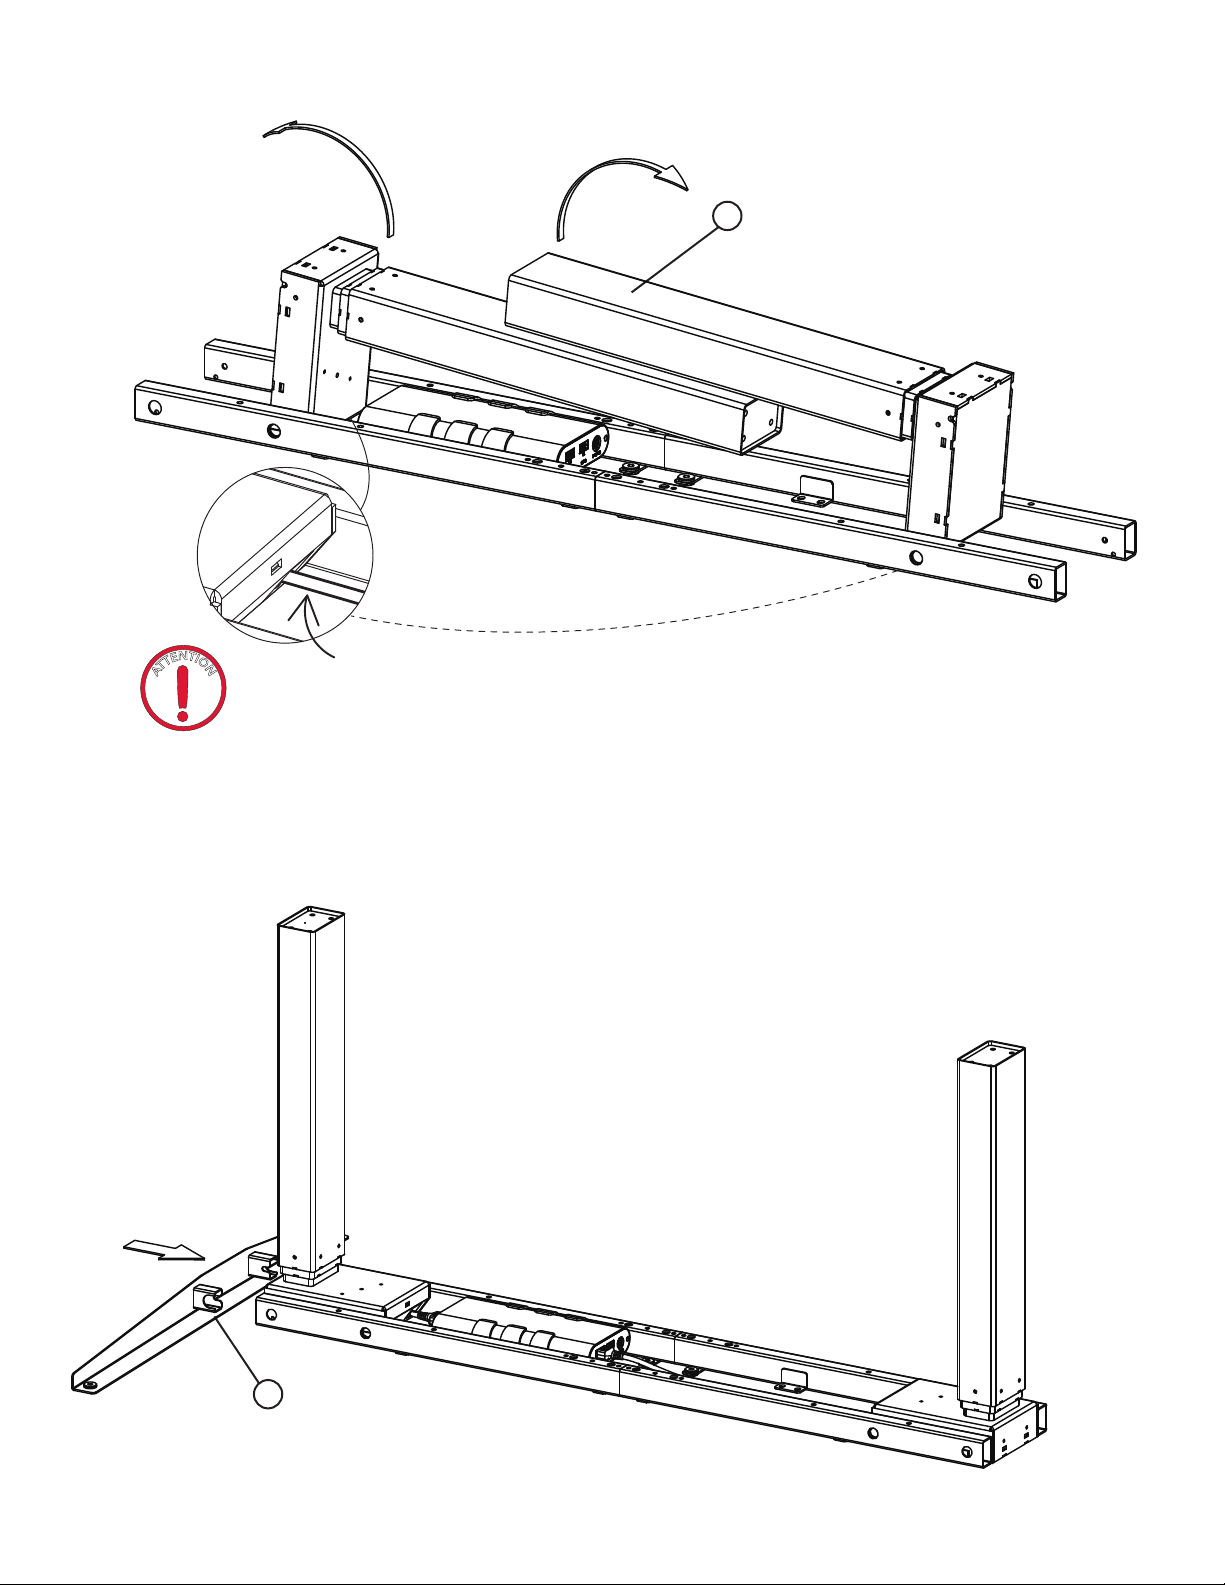
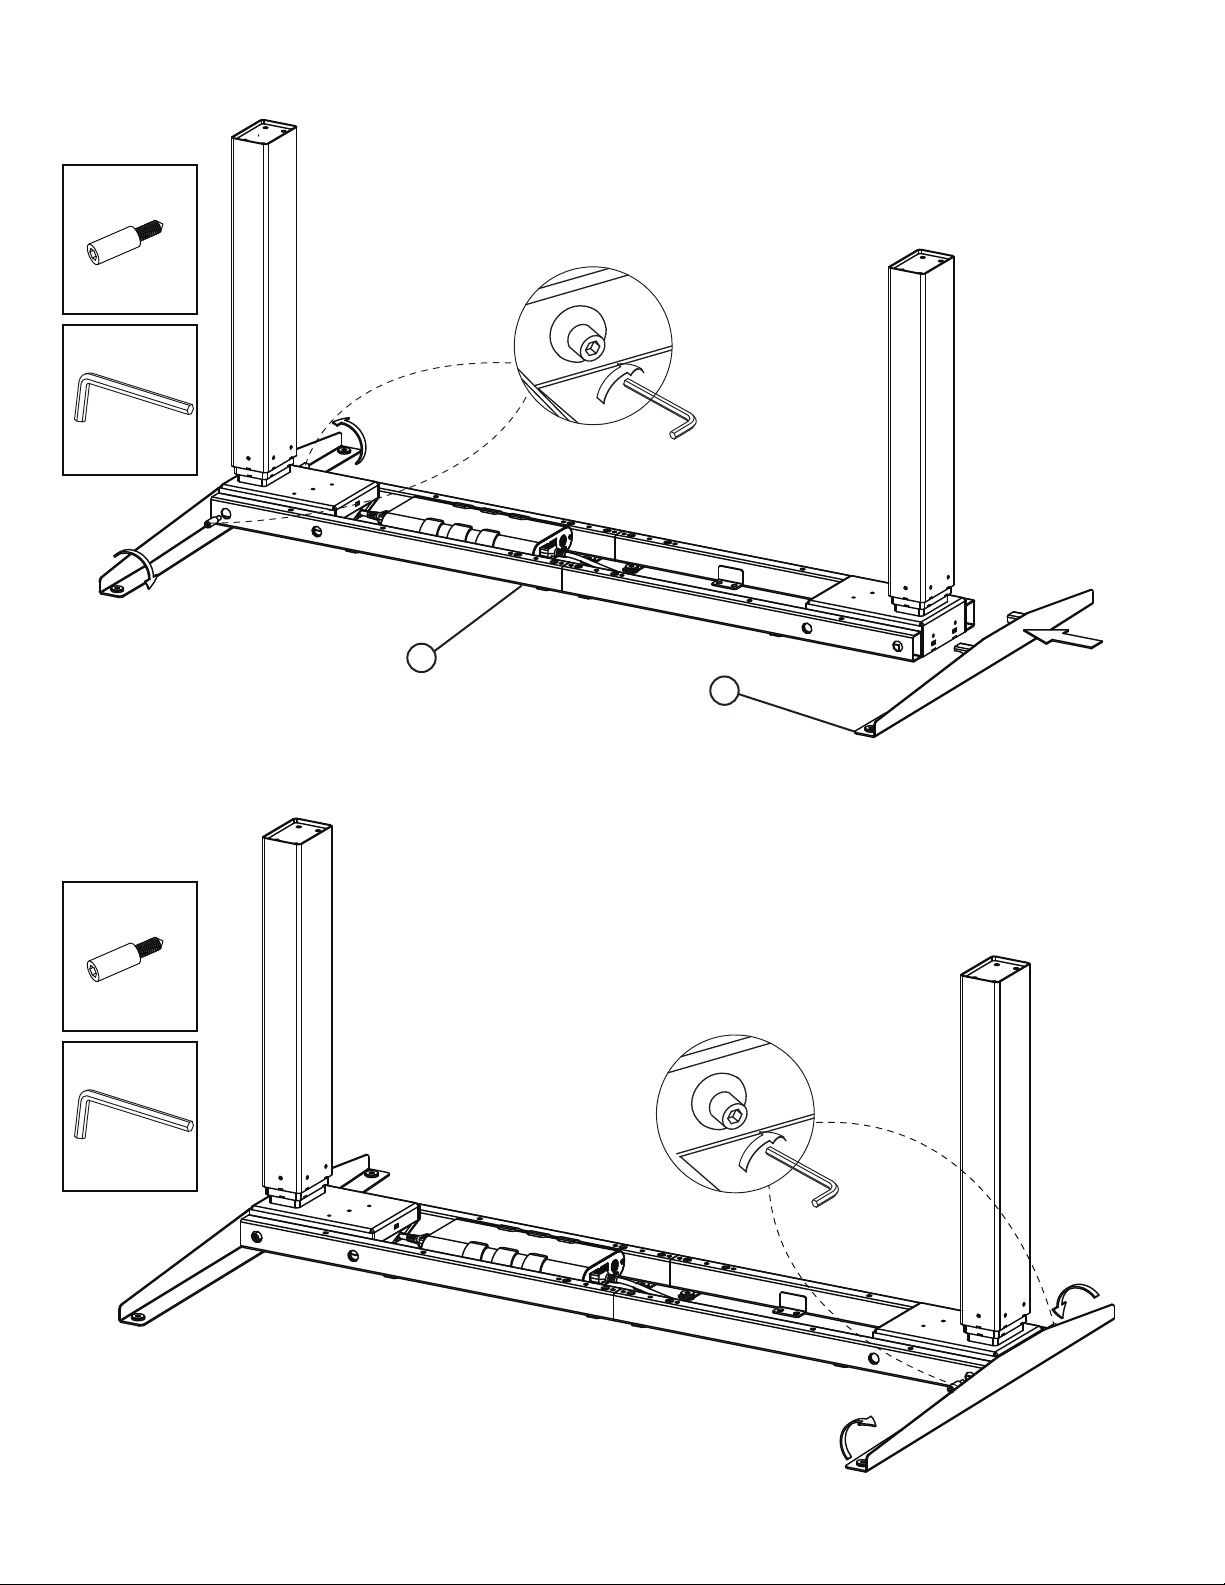
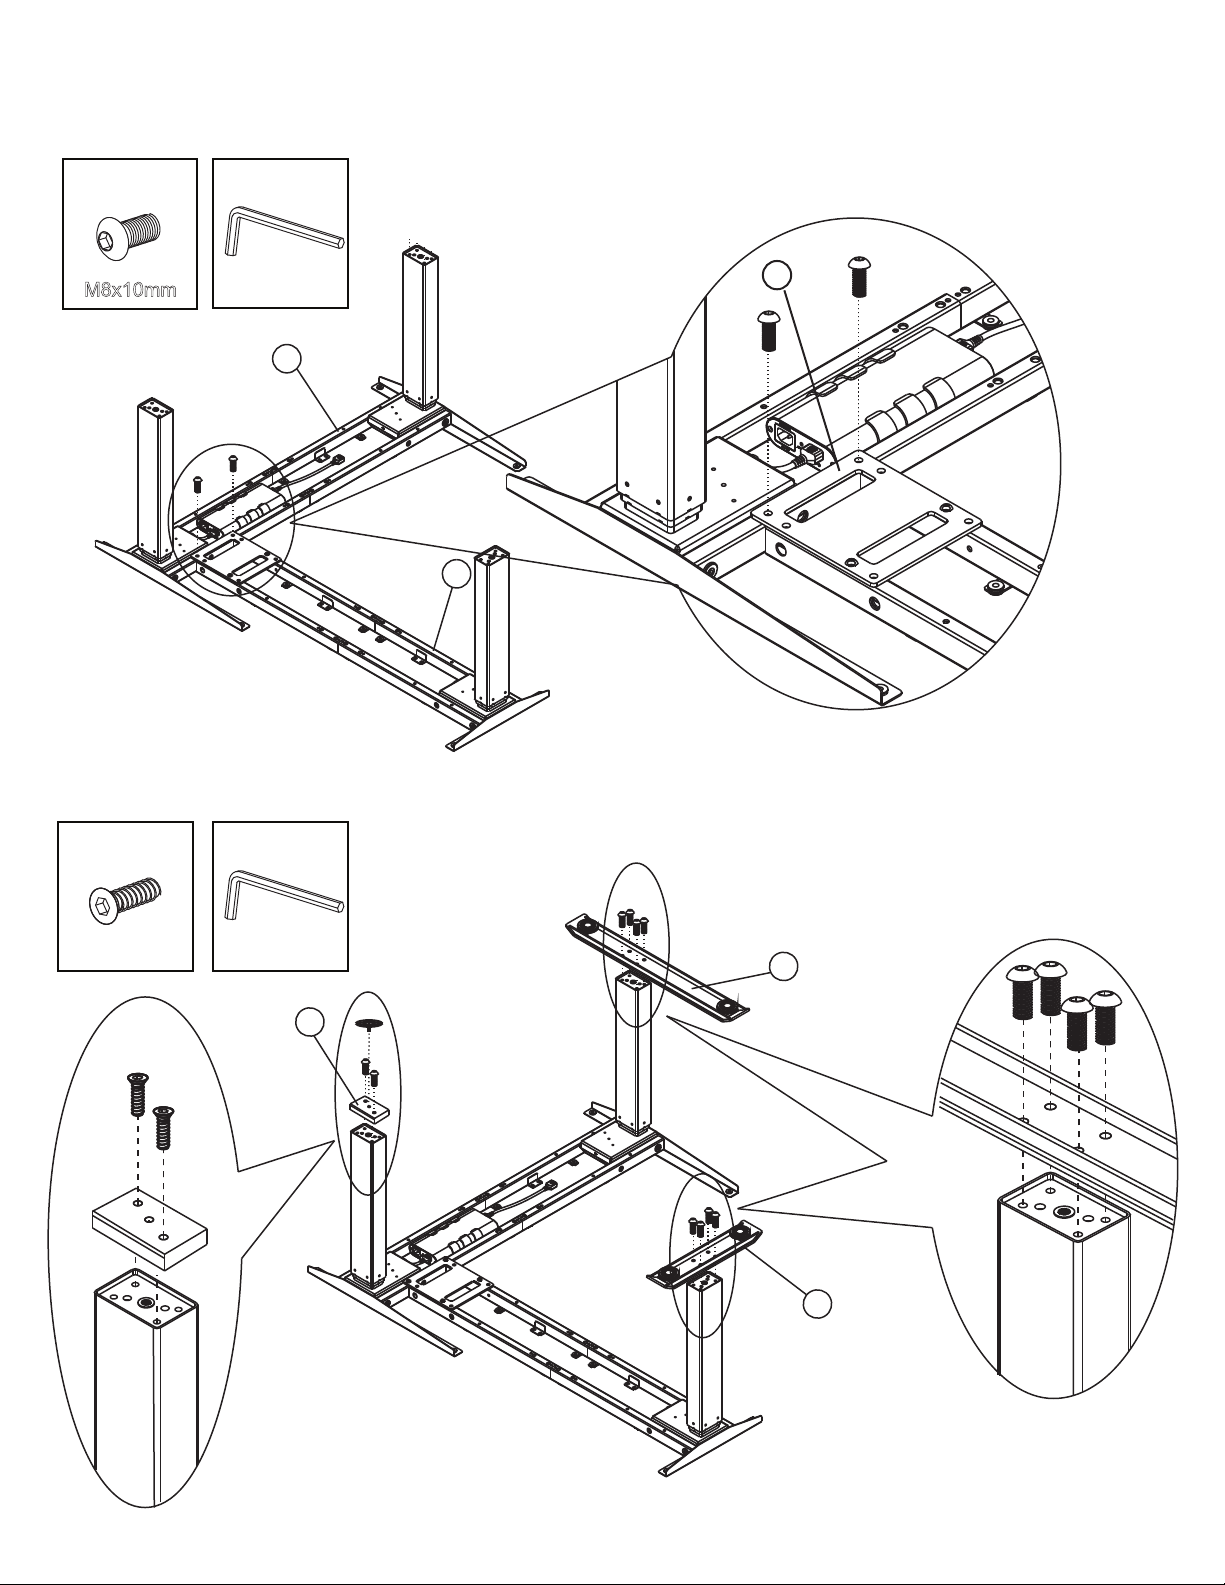
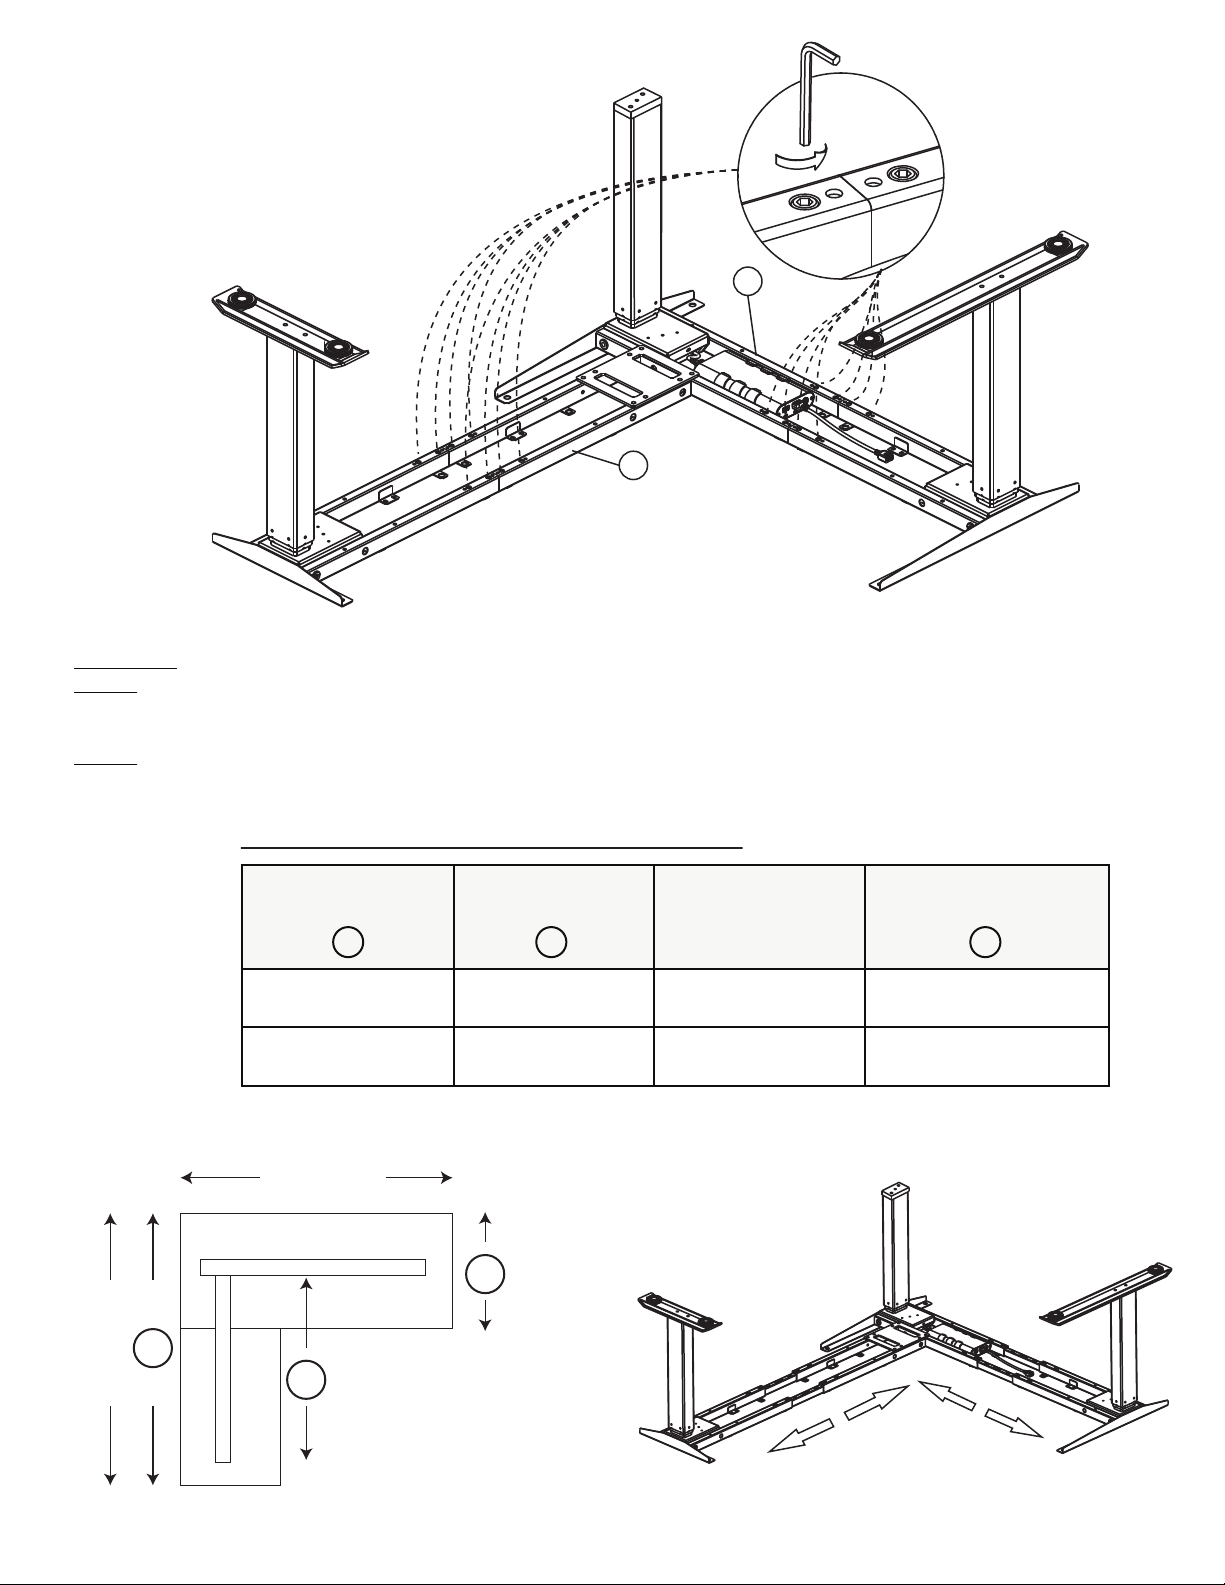
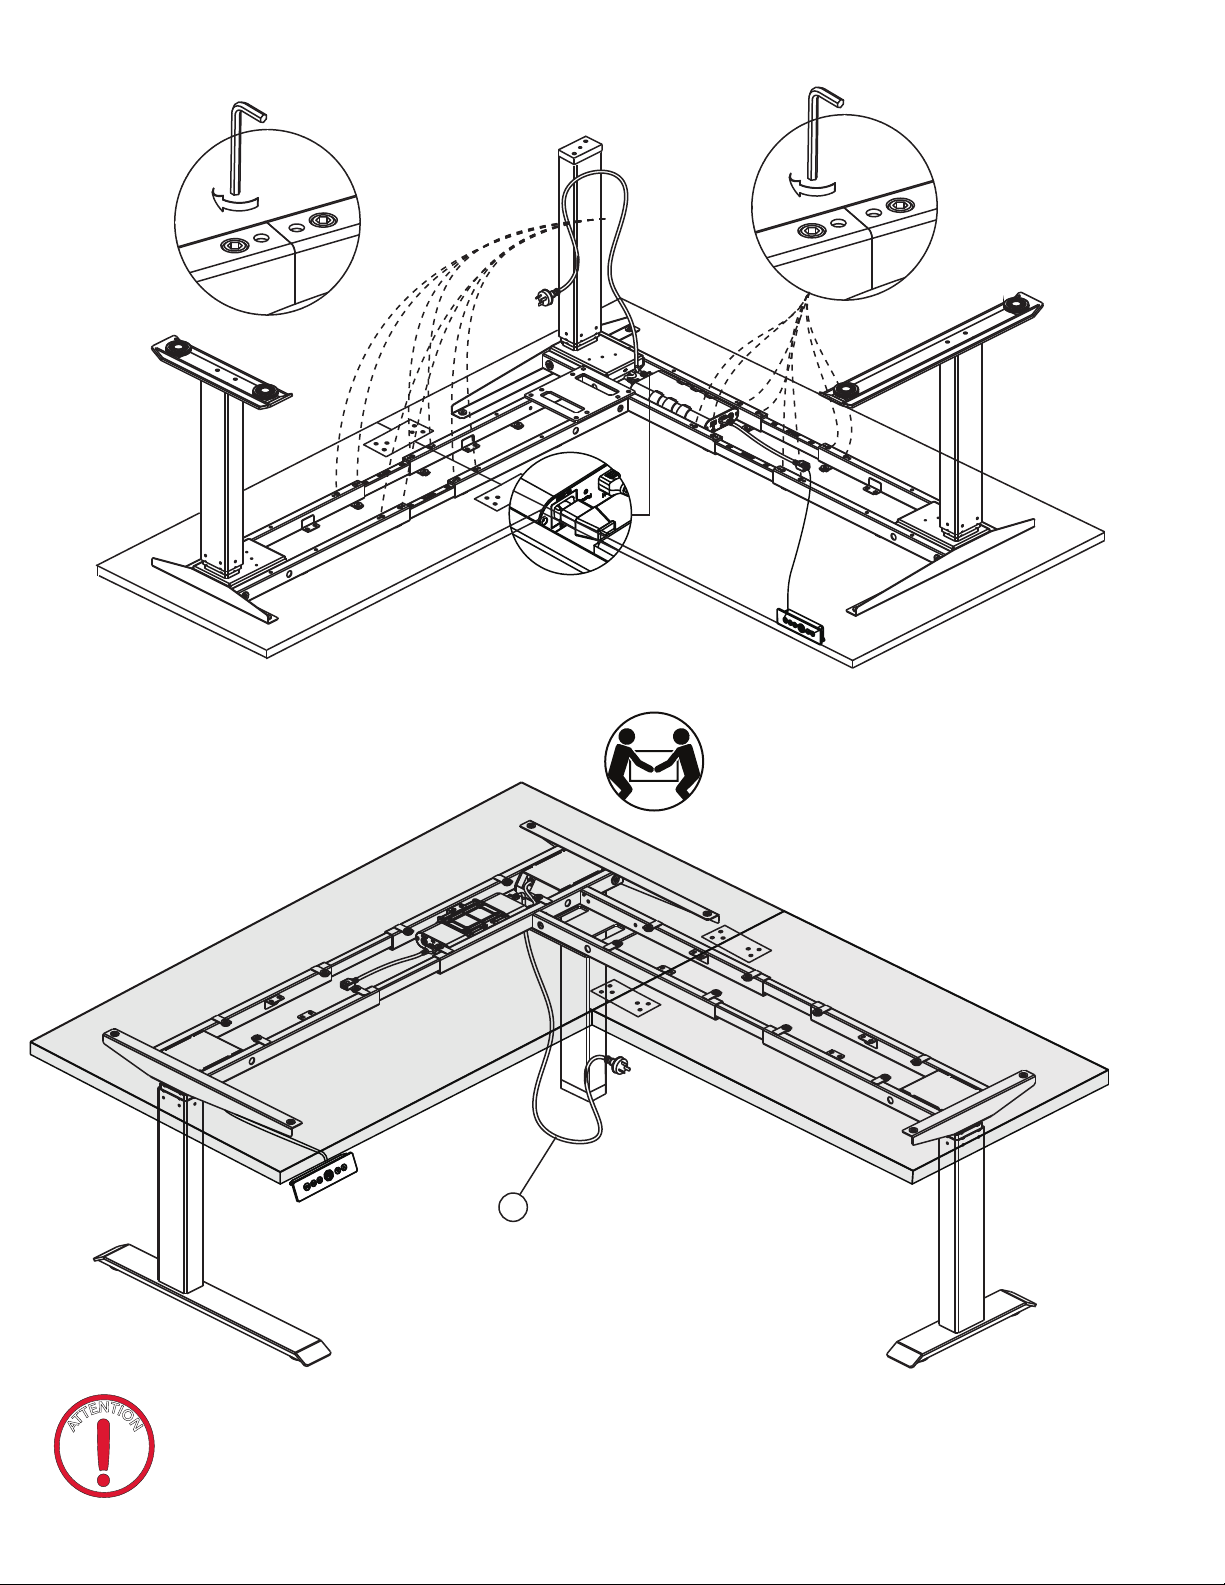
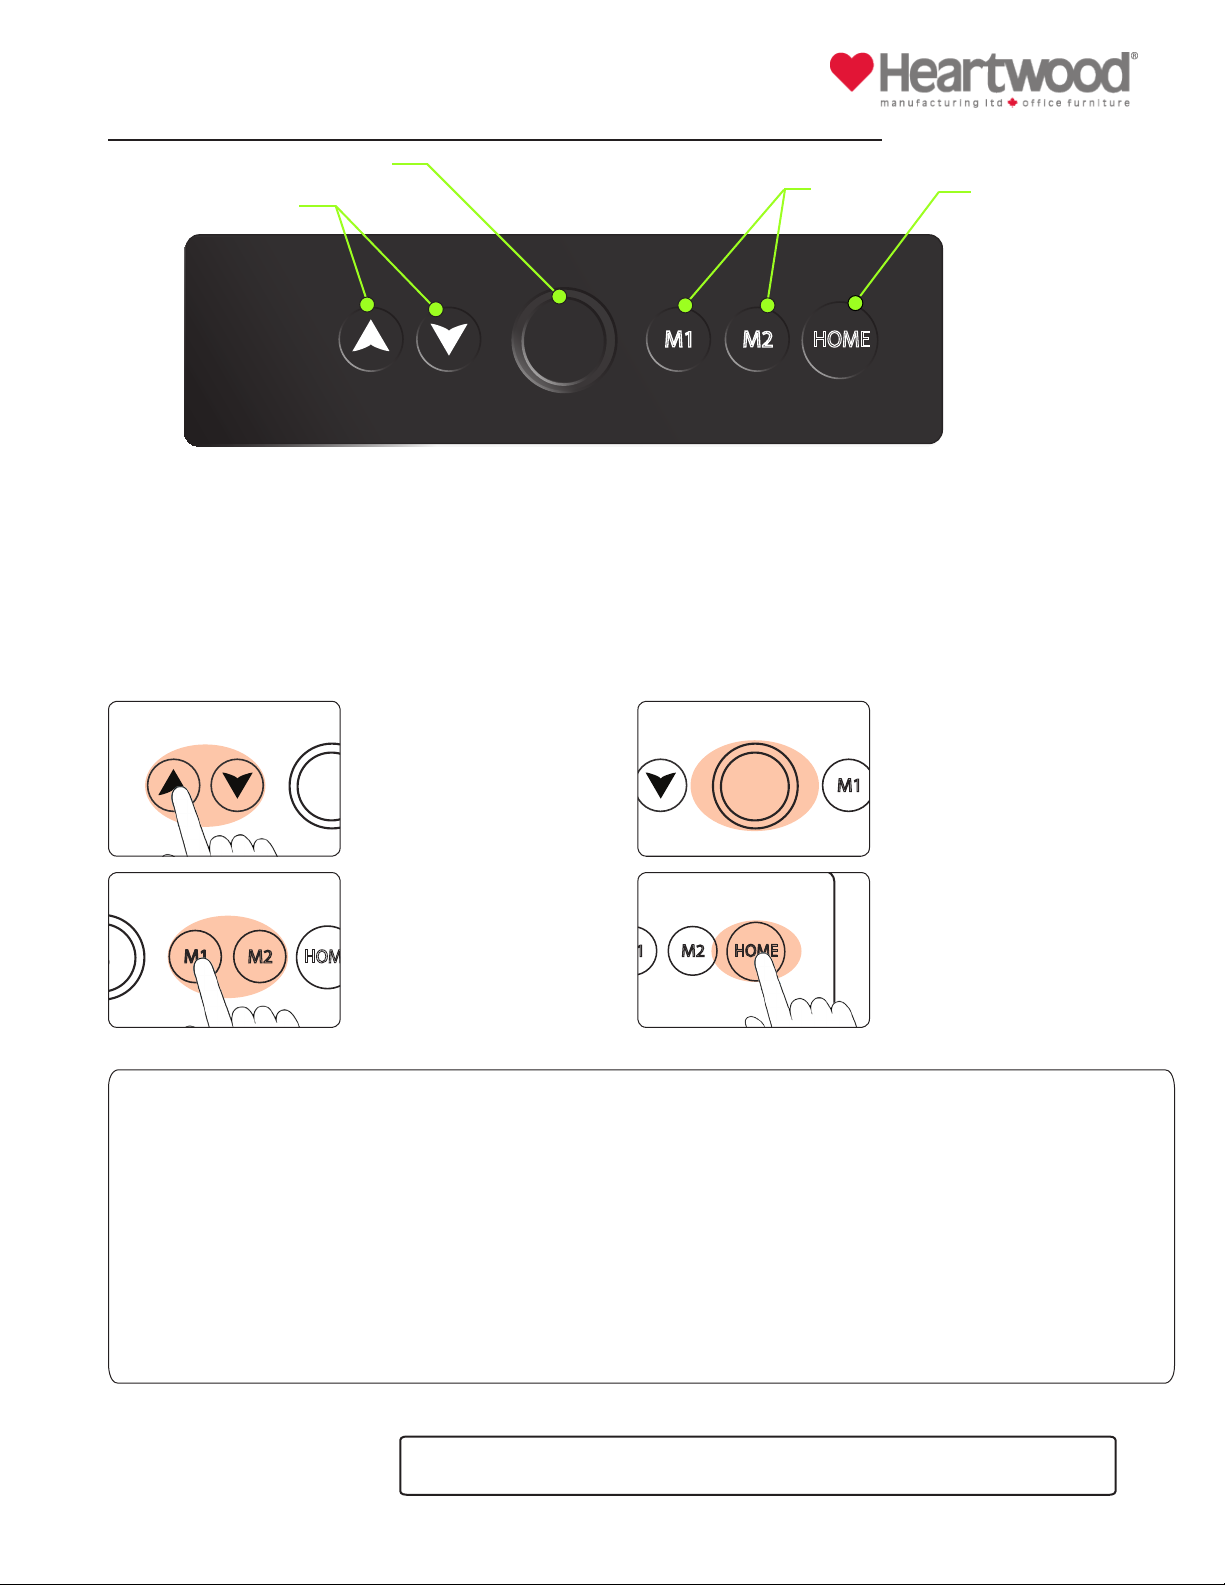
Heartwood CALYPSO CAL-E1-3LEG User manual


Other Heartwood Indoor Furnishing manuals

Heartwood
Heartwood CALYPSO CAL-E1-2LEG User manual

Heartwood
Heartwood Hazel MONTESSORI CLIMBING TRIANGLE User manual

Heartwood
Heartwood ATL-E1-1LEG User manual

Heartwood
Heartwood CALYPSO CAL-E1-2LEG User manual

Heartwood
Heartwood 900-CRANK-SL User manual

Heartwood
Heartwood ATHENA ATH-E1-3LEG User manual

Heartwood
Heartwood RIS-E1-2LEG User manual
Popular Indoor Furnishing manuals by other brands

Mayline
Mayline Realoffice Aberdeen Series Assembly instructions

Camaflexi
Camaflexi Armario Assembly instructions

Furniture of America
Furniture of America CM3387T Assembly instructions

SHANGRI-LA
SHANGRI-LA ORLANDO SLORLAWBDNA user guide

NetApp
NetApp DS2246 Installing

Hillsdale Furniture
Hillsdale Furniture 6532-881 manual

Avenue Six
Avenue Six RHODES RHD51 manual

FMD Furniture
FMD Furniture LINA 1 649-001 Assembly instruction

Habitat
Habitat Twiggy 900558 manual

Lightolier
Lightolier Alcyon 23C20BT Instructions for installation and operation

EURO3PLAST SPA
EURO3PLAST SPA PLUST A4461 Assembly instructions

GLITZHOME
GLITZHOME 1005004488 Assembly instruction

Oxford Garden
Oxford Garden SIENA OTTOMAN - SOTT Assembly instructions

Woodendot
Woodendot Alba L Assembly instructions

Acme Furniture
Acme Furniture 90314 Assembly instructions

Karla Dubois
Karla Dubois Manhattan Assembly instructions

Coaster
Coaster 102722 Assembly instructions

Riverside Furniture
Riverside Furniture Terra Vista #98833 Assembly instructions