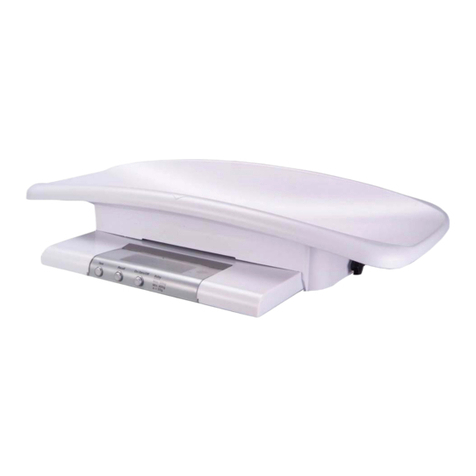
Helmac GP User manual

GP - GPE
Schnellanleitung
Guida rapida utente
Quick start guide NoƟce rapide uƟlisateur
Guía rápida del usuario
Retail scales - Balances poids/prix - Einzelhandel Waagen - Balanzas
comerciales - Bilance retail

GP / GPE models quick start guide
Notice rapide modèles GP / GPE
Bedienungsanleitung für die GP / GPE-Modelle
Guía rápida del usuario modelos GP / GPE
Guida rapida utente modelli GP / GPE
English
1
Français 14
Deutsch 27
Español 40
Italiano 53

Rev 1.1
1
GP/GPE models quick start guide
Index
Chap. 1. Power supply: ...................................................................................................................2
Chap. 2. Display: ...............................................................................................................................2
Chap. 3. Keyboard:............................................................................................................................2
Chap. 4. Type of Paper .....................................................................................................................2
Chap. 5. Language selection.............................................................................................................3
Chap. 6. Scales reset ........................................................................................................................3
Chap. 7. How to tare..........................................................................................................................3
Chap. 8. Pre-stored tare ....................................................................................................................3
Chap. 9. Deleting the tares................................................................................................................3
Chap. 10. Tare associated to an operator .........................................................................................4
Chap. 11. Single fixed price transaction ............................................................................................4
Chap. 12. Multiple fixed price transaction..........................................................................................4
Chap. 13. Weight transaction ............................................................................................................4
Chap. 14. Deleting a transaction on a receipt ...................................................................................5
Chap. 15. Reopening a closed receipt ..............................................................................................5
Chap. 16. Cash register management...............................................................................................6
Chap. 16.1 Example of payment in cash on operator #1 ................................................................6
Chap. 16.2 Example of payment with several types of payment on an operator #1........................6
Chap. 17. Discount on a transaction .................................................................................................7
Chap. 18. Discount on total ...............................................................................................................7
Chap. 19. Entering a PLU..................................................................................................................8
Chap. 20. PLU price change .............................................................................................................8
Chap. 21. Print the PLU list ...............................................................................................................8
Chap. 22. Transmission of PLUs to other scales (in case of scales in network) ...............................9
Chap. 23. Creation of a PLU group (PLU family)...............................................................................9
Chap. 24. Add operators onto the keyboard......................................................................................9
Chap. 25. Printing total levels I..........................................................................................................10
Chap. 26. Printing total levels II.........................................................................................................10
Chap. 27. Change Date/Time............................................................................................................10
Chap. 28. Setting of backlight............................................................................................................10
Chap. 29. Ticket Headings ................................................................................................................10
Chap. 29.1 Headings formatting (Position and characters height) ..................................................11
Chap. 30. Operators ..........................................................................................................................11
Chap. 30.1 Printing of the operator’s name on the ticket ................................................................11
Chap. 31. Advertising messages.......................................................................................................12
Chap. 31.1 To define the type of advertising (fixed, descending or scrolling) .................................
12
Chap. 31.2 Selecting of advertising texts to display .......................................................................12

Rev 1.1
2
1. Power supply .
The scales can be powered at 230 Vac or operate with the rechargeable internal batteries.
(Autonomy 40h)
(the recharge time is about 8 hours)
Recharge can be carried out both with the scales
switched on and off.
Do not let the battery run down completely
To see the battery status + +
2. Display .
3. Keyboard .
The keyboard is made up of:
- Function keys
- Alphabetic / PLU keyboard and Operator tare
- Numerical Keyboard.
- Transactions keyboard ( Operator keys ).
- The number and position of the buttons changes according to the model.
4. Type of paper .
Gpe scales can manage two different types of paper:
Thermal paper:
Width 57mm / Outer diam. 50mm /length 30m (Ref:880043)
Linerless (Without support) :
Width. 57mm / Outer diam.50mm /length 21m (Ref: 880042)
Func. Net Weight
Tare <Pre-stored>
Pre-stored tare
Operation in progress
Fixed Tare
Network Active
A
ctive totals
GROSS/NET PRICE/kg
TARE PRICE TO PAY
USER MESSAGES
Ctr
0 Esc
0,000 0,00
0,000 0,00
Batt 12.00V 100%

Rev 1.1
3
5. Language selection .
+
The scales restart automatically in the selected language
6. Scales reset .
Make sure the plate is empty, press the key and the weight value is reset.
Use ..
7. How to tare? .
Position an empty container on the plate, press , the NET icon switches on
The tare is reset when the plate is emptied.
One can store the tare by pressing the key. The TF icon switches on.
8. Pre-stored tare: (One knows the tare value) .
Enter the tare value to validate (the NET and PT icons switch on) .
NOTE: One cannot enter a tare manually if a Semi-automatic one is already active
9. Tare deletion .
To cancel the tare, empty the plate and press
If the tare value is not fixed, it is automatically removed after having stored the transaction
Pro
3
1
7
# Language #
Italian ( )
(Conf.)
ATTENTION!! when the tare is fixed, one can no longer access the
programming menu using the direct code.
_

Rev 1.1
4
10.Tare associated to an operator .
Note: Before using this function, from the menu one must first activate
+ Then enable OPERATOR TARE to confirm ( )
The operator puts a container on the plate, presses and
The tare is saved on the operator
The operator takes the container and fills it
When the operator goes back to the scales, by pressing the Tare value is recharged.
After having registered the transaction the tare is deleted
11.Single fixed price transaction .
12.Multiple fixed price transaction .
Example of 3 articles at 1,55€
13.Weight transaction .
1
_
# 1
# 1
# 1
# 1
1
# 1
*
,
1
5
# 1
5
Digit the
unit price
,
1
5
# 1
5
Digit the
unit price
3
# 1
*
Articles number
# 1
# 1
,
5
5
5
Position
the
container
Empty the
plate
Repeat the
procedure for the
other
p
roducts
*
Position the
item on the
plate
Digit the
price per
kg

Rev 1.1
5
14.Deleting a transaction on a receipt .
Note: Before using this function, one must activate it in the programming menu
Then Rebate to confirm ( )
- Proceed with another operation or close the receipt.
15.Reopening a closed receipt .
Note :The receipt reopening function must be activated in the programming menu.
+ Then Rebate to confirm ( )
To reopen the last closed receipt and write off a line:
-
Note : one can make one or more cancellations of the new carried out transactions on the
reopened receipt
# 1
1
1
_
# 1
*
# 1
+
1
_
# 1
Choose the
operator
_
Choose the
transaction
To confirm the
cancellation.
# 1
*
Choose
the
operator
_
Choose the
transaction
to delete
1

Rev 1.1
6
16. Cash register management .
Note :the cash register management function must be enabled from the programming menu
+ then Cash register management to confirm ( )
By default the types of payment are in cash, return and credit are already configured
Note :one can configure different types of payment (from 0 to 7).
a. Example of payment in cash on operator #1 : .
Register an operation on an operator #1 ( E.g.: + 1,23€ #1 ) then:
b.Example of payment with several types of payment on an operator #1 : .
Register an operation on an operator #1 ( E.g.: + 12,50 € #1 ) then:
The ticket shows the types of payment used in the last lines.
Choose the second
type of payment
1
1
_
*
# 1
Enter the
value of
the
received
cash
# Cash 1,23 #
#1 1 Art. 1,23*
1
23 6
# Payment type #
0
# Payment type #
0 Line 1
Che
q
ue
Digit the
text of
payment
type 0
# Payment type #
1
Repeat the operation
for the other types of
payments
# Cash 10.00 #
Change 8,77
#1 1 Art. 1,23*
*
_
*
# 1
# Cash 12.50 #
#1 1 Art. 12.50*
Digit the
payment
value in
cash
# Cash 5.00 #
Due 7,50
#1 1 Art. 1,23*
Enter the
value
# cheque 7,50 #
Change 7.50
#1 1 Art. 1,23*
_
# cheque 7,50 #
#1 1 Art. 1,23*
*

Rev 1.1
7
17.Discount on a transaction .
Note :the discount function on a transaction must be enabled from the programming menu
then Discounts to confirm ( )
Perform the desired operation
The transaction shows
«Discount 10.00% - 0.35»
18.Discount on total .
Note :the function must be enabled in the programming menu
then Discounts to confirm ( )
Perform the desired operation
1
1
_
,
0
0
# 1
0
Enter the discount
value in %
1
1
1
_
*
Discount 0,00
*
,
0
0
# 1
0
Enter the
discount value
1
,
3
5
# 1
5
Enter the unit
p
rice
,
3
5
# 1
5
Enter the unit
p
rice
_
_
_
*

Rev 1.1
8
19.Entering a PLU .
+
Until when one exits programming
20.PLU price change .
+
21.Print the PLU list .
+
Pro
2
1
1
# PLU-Item #
Complete
----
(DBase)
# Complete #
0000 PLU Nr.
Choose the
PLU
number
# Complete #
0001 PLU-Text 1
Parma Ham
# Complete #
0001 PLU type
Weight
To choose the
type of PLU
0/
# Complete #
0001 PLU- group
01
# Complete #
0001 Price
13,40
Press
to delete the
price per kg
C
Esc
2
1
1
2
Pro
# Price only #
0000 PLU Nr.
Enter the number
of the PLU to be
changed
then
# Price only #
0001 Price
13,40
Press
to delete.Enter the
price per kg
C
2
2
1
Pro
# PLU-Items #
Complete
(DBasic)
Print the
complete
PLU list
Enter the
text of the
PLU « C»
To delete
# Complete #
0001 Chg PLU Pri
no
Choose yes or no.
Allows to choose
whether one can
change the price
during the sale.

Rev 1.1
9
22.Transmission of PLUs to other scales (in case of scales in network) .
It’s possible to force the PLUs transmission to other scales in network.
Example : case of modification of a scale in network, while the others are off.
When the scales will be reconnected, it will require a transmission from the modified scale.
23.Creation of a PLU group (PLU family) .
+
24. Add operators onto the keyboard .
+
3
1
3
1
Pro
# PLU / TLU #
24Plu 0T 0# ( )
(Conf.)
24 Plu
T = Number of TLU
# = Number of
additional operators
2
2
1
Pro
# PLU-groups #
00
Enter the name of the group
(from 10 to 50 groups depending
if one works on GPE or GP)
1
To confirm
_
2
Pro
3
1
# Transmission #
PLU Article
2
Pro
3
2
# Transmission #
PLU General
For the articles transmission.
For the transmission of the TAX
of the PLU groups
of the ingredients

Rev 1.1
10
25. Print total levels I .
+
26.Print total levels II .
+
27.Change Date/Time .
+
28.Setting of backlight .
29.Ticket Headings .
To exit from the programming
Enter the date and time
18 :32 28 – 04 - 12
4
2
Pro
# Totals I #
PLU- Item
(Total)
Choose the total to print
Esc
4
2
Pro
# Totals II #
PLU- Items
(Total)
3
1
Pro
5
5
2
To exit without
deletin
g
To delete the
totals
3
Choose the total to print
Esc
To exit without
deletin
g
To delete the
totals
To confirm
_
_
# Backlight #
Always ON ( )
(conf.)
_
# Backlight #
Always Off ( )
(conf.)
_
# Backlight #
Automatic ( )
(conf.)
2
1
3
5
# Ticket #
1
# Ticket #
1 Line 1
HELMAC -
1
# Ticket #
1 Line 2
5th Avenue
Press enter for the 6
lines

Rev 1.1
11
29.1 Headings formatting (Position and characters height) .
Next line Previous line
30.Operators .
+
Shows:
Or
30.1 Printing of the operator’s name on the ticket .
+
5 x
# Ticket #
Headline
(conf.)
Pro
3
1
1
1
# Ticket #
Logo
(conf.)
-/
# Ticket #
(1) ( )
(conf.)
# ( 1 ) #
Com
p
an
y
HELMAC-
+
/
-
/
Ticket heading format
–
legend
Heading N° 1-2 or 3
X – Line position on the ticket
[ ] – Do not print
[↖] – Print high
key to choose
[↙] – Print below
Y – Characters height
– Normal
– Double height
Z – Characters format
[] – Normal
[] – Bold
K – Justification
[ ] – None
[►] – Right
[ = ] – Center
[◄] – Left
# Operators #
01
# Operators #
01 Name
John
+
/
-/
Type the operator’s name
(C for clear)
Pro
2 1
3
1
# Ticket #
Logo
(
conf.
)
-/
# Ticket #
Operator [ ]
(conf.)
Pro
3
1
1
1

Rev 1.1
12
31.Advertising texts .
+
31.1 To define the type of advertising (fixed, descending or scrolling) .
+
The scales offer the possibility to view fixed or scrolling advertising messages on the customer
side of the display. One can store ten different advertising messages on 5 lines of 26 characters.
31.2 Selecting of advertising texts to display .
With
_
choose the way
the advertising is displayed
then
Enter the
advertising
line
2 1
Pro
3
4
# Advertising #
01
# Advertising #
1 line 1
Advertising text--
1
1
Pro
6
1
# View Mode #
None ( )
(Oper.)
Esc
To exit
To confirm
With select the N° of
lines to display.
Confirm with
-
/
1
1
Pro
6
# Advertising #
List
(Oper.)
-
/

Rev 1.1
13
DECLARATION OF CONFORMITY
This device meets the essential requirements and other relevant
conditions of the applicable European regulations. The Declaration
of Conformity is available at this Internet address www.helmac.it.
WARRANTY
The warranty term is one year from delivery of the instrument and
consists of free labour and spare parts cover for INSTRUMENTS
RETURNED TO SELLER PREMISES and in case of faults NOT
attributable to the Customer (faults resulting from misuse are
therefore excluded from the warranty) and NOT attributable to
transport.
If, for any reason, service is required (or is necessary) at the place
of use, technician transfer expenses shall be charged to the
Customer: travel times and expenses and eventually board and
lodging.
If the instrument is shipped by courier, the travel expenses (round
trip) shall be charged to the Customer.
This WARRANTY is VOID in the event of faults due to work
performed by unauthorised personnel or connections to equipment
installed by others or incorrect connection to the mains.
THERE IS NO compensation for damages, direct or indirect,
incurred by the Customer due to full or partial operation of
instruments or systems sold, even during the warranty period.
AUTHORISED SERVICE CENTRE STAMP

Rev 1.1
14
Notice rapide modèles GP / GPE
Sommaire
Chap 1. Alimentation : ................................................................................................. 15
Chap 2. Présentation de l’afficheur : ............................................................................. 15
Chap 3. Clavier ............................................................................................................. 15
Chap 4. Gestion du papier ............................................................................................ 15
Chap 5. Sélection de la langue d’affichage................................................................... 16
Chap 6. Mise à zéro du poids de la balance ................................................................. 16
Chap 7. Comment faire une tare................................................................................... 16
Chap 8. Tare prédéterminée ......................................................................................... 16
Chap 9. Effacement de la tare ...................................................................................... 16
Chap 10. Tare associé à un opérateur.......................................................................... 17
Chap 11. Exécution d’une transaction à prix fixe .......................................................... 17
Chap 12. Exécution d’une transaction multiple à prix fixe............................................. 17
Chap 13. Exécution d’une transaction pesée................................................................ 17
Chap 14. Effacement d’une transaction sur le ticket en cours ...................................... 18
Chap 15. Réouverture d’un ticket clôturé...................................................................... 18
Chap 16. Gestion des paiements.................................................................................. 19
Chap 16.1 Exemple de Paiement par espèces sur vendeur #1 : ............................... 19
Chap 16.2 Exemple de Paiement plusieurs type de paiements sur vendeur #1 : ....... 19
Chap 17. Rabais sur une transaction............................................................................ 20
Chap 18. Rabais sur le Total d’une transaction ............................................................ 20
Chap 19. Création ou modification d’un PLU ................................................................ 21
Chap 20. Changement du prix d’un PLU....................................................................... 21
Chap 21. Impression de la liste de PLU........................................................................ 21
Chap 22.Transmission des PLU aux autres balances (cas de balances en réseau ) ... 22
Chap 23. Création d’un groupe de PLU ........................................................................ 22
Chap 24. Rajout de vendeurs sur clavier ...................................................................... 22
Chap 25. Impression des Totaux Niveaux I .................................................................. 23
Chap 26. Impression des Totaux Niveaux II ................................................................. 23
Chap 27. Changement de la date et heure ................................................................... 23
Chap 28. Réglage du rétro éclairage ............................................................................ 23
Chap 29. Création de l’entête du ticket ......................................................................... 23
Chap 29.1 Format de l’entête (position et taille des caractères) ................................ 24
Chap 30. Création et impression du nom des vendeurs ............................................... 24
Chap 30.1 Impression du nom des vendeurs sur le ticket........................................... 24
Chap 31. Textes Publicitaires ....................................................................................... 25
Chap 31.1 Pour définir le type d’affichage publicitaire (fixe, défilant ou clignotant)..... 25
Chap 31.2 Sélection des textes publicitaire à afficher................................................. 25

Rev 1.1
15
1. Alimentation .
La balance peut être alimenté en 230 Vac ou fonctionnement sur batterie interne rechargeable.
(Autonomie 40h)
(Le temps de charge est d’ environ 8h)
La recharge de la balance se fait allumé ou éteinte.
Ne jamais décharger complètement la batterie
Pour voir l’état de la batterie +
2. Présentation de L’Afficheur .
3.Clavier .
Le clavier se compose de :
- Touches de fonction
- Touches alphabétiques / PLU et TLU
- Touches numériques.
- Touches de transaction ( Touches "opérateur" ).
- Le nombre et la position des touches changent selon le modèle.
4. Gestion du papier .
La balance série GPE utilise deux type de rouleaux de papier différents
Papier thermique :
Largeur 57mm / Diam.ext 50mm /longueur 30m (Réf :880043)
Papier therm autocoll. linerless (sans support) :
Larg. 57mm / diam ext.50mm /longueur 21m (Réf: 880042)
Poids Net actif
Tare «prédéfinie»
Tare Fixe
Transactions en cours
Tare Fixe
Reseau actif
Total Niveau II pas à
zéro
POIDS BRUT/NET PRIX/kg
TARE PRIX A PAYER
MESSAGE UTILISATEUR
Ctr
0 Esc
0,000 0,00
0,000 0,00
Batt 12,00V 100%

Rev 1.1
16
5. Sélection de la langue d’affichage .
+
La balance reboote automatiquement et la langue choisie est activée.
6. Mise a zéro du plateau .
Assurez vous que le plateau est vide, Appuyez sur la touche la valeur du poids passe à
zéro.
Utilisation. .
7. Comment faire une tare ? .
Placer un récipient vide sur le plateau l’icône NET qui s'allume.
La tare se remet à zéro au déchargement du plateau .
On peut mémoriser la tare en appuyant sur l’icône TF s’allume.
8. Tare prédéterminée : (on connait le poids de la tare) .
Entrez la valeur de tare pour valider (l’icône NET et PT s'allume).
NOTE : Il n’est pas possible de saisir une tare manuellement si une tare semi-automatique est
déjà active.
9. Effacement de la tare .
Pour annuler la tare, décharger le plateau et appuyer sur la touche
Si la valeur de la tare n’est pas fixée, elle s’efface automatiquement après la mémorisation de la
transaction.
Pro
3
1
7
# Langue #
French ( )
(Conf.)
ATTENTION !! lorsque la tare est fixe, on ne peut plus avoir accès au menu de
programmation par code direct.
_

Rev 1.1
17
10.Tare associée a un opérateur .
REMARQUE : avant d’utiliser cette fonction, il faut l’activer dans le menu de programmation
+ Puis Jusqu’à Tare vendeur pour valider ( )
L’opérateur pose un récipient sur le plateau puis &
La tare est enregistrée dans
Le vendeur prends le récipient et va le remplir avec le client.
Quand le vendeur revient, il appuie sur pour rappeler sa tare.
Après l’enregistrement de la transaction la tare s’efface.
11.Exécution d’une transaction Unitaire à prix fixe .
12.Exécution d’une transaction multiple à prix fixe .
Exemple 3 articles à 1.55€
13.Exécution d’une transaction pesée .
1
1
_
# 1
# 1
# 1
# 1
# 1
*
,
1
5
# 1
5
Tapez le
prix
unitaire
,
1
5
# 1
5
Tapez le
prix
unitaire
3
# 1
*
Nbre articles
# 1
# 1
,
5
5
5
Posez le
récipient
Décharger
le plateau
Répéter la
procédure les autres
p
roduits
*
Poser
l’article sur
le plateau
Tapez le
prix au kg

Rev 1.1
18
14.Effacement d’une erreur sur une transaction en cours .
REMARQUE : avant d’utiliser cette fonction, il faut l’activer dans le menu de programmation
+ Puis Jusqu’à Annulation pour valider ( )
- Procéder avec une autre transaction ou sortir le ticket du montant.
15.Réouverture du dernier ticket clôturé .
REMARQUE :la fonction de réouverture d’un ticket clôturé doit être activée par le menu de la
programmation.
+ Puis Jusqu’à réouverture pour valider ( )
Pour rouvrir le dernier ticket clôturé :
-
REMARQUE : Sur le ticket ré-ouvert, on peut effectuer une ou plusieurs annulations que de
nouvelles transactions.
# 1
1
1
_
# 1
*
# 1
1
1
_
# 1
Choisir le
vendeur
_
Choisir la
transaction à
effacer
Pour confirmer
l’annulation.
# 1
*
Choisir le
vendeur
à modifier
_
Choisir la
transaction à
effacer
This manual suits for next models
1
Table of contents
Languages:

