Hendi 222836 User manual

You should read this user manual carefully before
using the appliance
Bevor Sie das Gerät in Betrieb nehmen, sollten
Sie diese Gebrauchsanweisung aufmerksam lesen
Alvorens de apparatuur in gebruik te nemen dient
u deze gebruiksaanwijzing aandachtig te lezen
Przed uruchomieniem urządzenia należy koniecznie
dokładnie przeczytać niniejszą instrukcję obsługi
Lisez attentivement ce mode d’emploi avant d’utiliser
l’appareil .
Prima di utilizzare l’apparecchio in funzione leggere
attentamente le istruzioni per l’uso.
Citiţi cu atenţie prezentul manual de utilizare înainte
de folosirea aparatului
Внимательно прочитайте руководство пользователя
перед использованием прибора
User manual
Gebrauchsanweisung
Gebruiksaanwijzing
Instrukcja obsługi
Mode d’emploi
Istruzioni per l’utente
Instrucţiunile utilizatorului
Руководство по эксплуатации
Item: 222836
222843
HEAVY DUTY MIXER

2
Keep this manual with the appliance.
Diese Gebrauchsanweisung bitte beim Gerät aufbewahren.
Bewaar deze handleiding bij het apparaat.
Zachowaj instrukcję urządzenia.
Gardez ces instructions avec cet appareil.
Conservate le istruzioni insieme all’apparecchio.
Păstraţi manualul de utilizare alături de aparat.
Хранить руководство вместе с устройством.
For indoor use only.
Nur zur Verwendung im Innenbereich.
Alleen voor gebruik binnenshuis.
Do użytku wewnątrz pomieszczeń.
Pour l’usage à l’intérieur seulement.
Destinato solo all’uso domestico.
Doar pentru uz la interior.
Использовать только в помещениях.

Dear Customer,
Thank you for purchasing this Hendi appliance. Before using the appliance for the first time, please read
this manual carefully, paying particular attention to the safety regulations outlined below.
Safety regulations
• This appliance is intended for commercial use only and must not be used for household
use.
• The appliance must only be used for the purpose for which it was intended and designed.
The manufacturer is not liable for any damage caused by incorrect operation and
improper use.
• Keep the appliance and electrical plug away from water and any other liquids. In the
event that the appliance should fall into water, immediately remove plug from the socket
and do not use until the appliance has been checked by a certified technician. Failure to
follow these instructions could cause a risk to lives.
• Never attempt to open the casing of the appliance yourself.
• Do not insert any objects in the casing of the appliance.
• Do not touch the plug with wet or damp hands.
• Danger of electric shock! Do not attempt to repair the appliance yourself. In case of
malfunctions, repairs are to be conducted by qualified personnel only.
• Never use a damaged appliance! Disconnect the appliance from the electrical outlet and
contact the retailer if it is damaged.
• Warning! Do not immerse the electrical parts of the appliance in water or other liquids.
Never hold the appliance under running water.
•Regularly check the power plug and cord for any damage. If the power plug or power cord
is damaged, it must be replaced by a service agent or similarly qualified persons in order
to avoid danger or injury.
•Make sure the cord does not come in contact with sharp or hot objects and keep it away
from open fire. To pull the plug out of the socket, always pull on the plug and not on the
cord.
•
Ensure that the cord (or extension cord) is positioned so that it will not cause a trip hazard.
• Always keep an eye on the appliance when in use.
•
Warning! As long as the plug is in the socket the appliance is connected to the power source.
• Turn off the appliance before pulling the plug out of the socket.
• Never carry the appliance by the cord.
• Do not use any extra devices that are not supplied along with the appliance.
• Only connect the appliance to an electrical outlet with the voltage and frequency
mentioned on the appliance label.
• Connect the power plug to an easily accessible electrical outlet so that in case of
emergency the appliance can be unplugged immediately. To completely switch off the
appliance pull the power plug out of the electrical outlet.
• Always turn the appliance off before disconnecting the plug.
3
NLEN

4
EN
• Never use accessories other than those recommended by the manufacturer. Failure to do
so could pose a safety risk to the user and could damage the appliance. Only use original
parts and accessories.
•This appliance is not intended for use by persons (including children) with reduced
physical, sensory or mental capabilities, or lack of experience and knowledge.
•This appliance must not be used by children under any circumstances.
•Keep the appliance and its cord out of reach of children.
•Always disconnect the appliance from the mains if it is left unattended or is not in use,
and before assembly, disassembly or cleaning.
•Never leave the appliance unattended during use.
Special Safety Regulations
• This machine is designed for mixing, kneading and emulsifying/whipping food products
(e.g. flour, sugar, oils, fat, eggs and other ingredients) operated in the food industry and
shops (e.g. catering, bakery, pizza, pastry and confectionary industry).
• Use the machine only as described in this manual.
• This machine should be operated and installed by specialized trained personnel in the
kitchen of the food industry such as catering, bakery, pizza, pastry, etc.
• All maintenance, installation and repair works should be performed by specialized
trained authorized technicians.
• An equipotential bonding terminal is provided at the rear side of the appliance
to allow cross bonding with other equipment.
• Do not place the machine on a heating object (gasoline, electric, charcoal cooker, etc.)
Keep the appliance away from any hot surfaces and open flames. Always operate the
machine on a level, stable, clean, heat-resistant and dry surface.
• Do not use the machine near explosive or flammable materials, credit cards, magnetic
discs or radios.
• Wear protective clothing, mask, or protective glasses if necessary during operation.
• This machine is not intended to be operated by means of an external timer or separate
remote-control system.
• Never bypass any safety interlocks on the machine.
• WARNING: Keep all ventilation openings in the appliance clear of obstruction.
• WARNING: ALWAYS switch off the machine and unplug from electrical power supply
before cleaning, maintenance or changing attachments.
• Allow at least 30 cm spacing around the appliance for ventilation purpose during use.
• Caution! Securely route the power cord if necessary in order to prevent unintentional
pulling or contact with the heating surface.
• WARNING! ALWAYS keep hands, long hair and loose clothing away from the moving
parts.
• Do not put hands into the guarded area and mixing bowl when the machine is in opera-
tion.

5
EN
• Do not load too much ingredients in order to prevent overflow of the food products. Max-
imum capacity of the bowl is 10 litres for 222836 and 20 litres for 222843.
• Do not wash the machine with water or a waterjet. Washing with water can cause leakage
and increase the risk of electric shock. No parts are dishwasher safe.
• Do not clean or store the machine unless it is completely cooled down.
• Special care should be taken when moving or transporting the machine as it is too heavy.
With at least 2 people or using a trolley for assistance. Move the machine slowly, carefully
and never be inclined over 45°C.
Grounding installation
This appliance is classified as protection class I
appliance and must be connected to a protective
ground. Grounding reduces the risk of electric
shock by providing an escape wire for the electric
current. This appliance is equipped with a cord
having a grounding wire with a grounding plug. The
plug must be plugged into an outlet that is properly
installed and grounded.
Main parts of the machine
1. Rigid stand support
2. Bowl
3. Bowl clamp (x2)
4. Bowl handles (x2)
5. Bowl guard
6. Speed control lever
(3 settings for 3 attachments)
7. ON button (GREEN, I)
8. STOP button (RED, O)
9. Bowl lift / lower handle
10.RESET button (at the rear)
11.Bowl guard handle
12.Bowl cradle
1
2
4
6
5
312
11
7
8
9
10
Attachments

6
EN
Preparations before installation
• Carefully unbolt the machine from the skid using
wrench if necessary.
• Remove all protective packaging and wrapping.
• Check the machine for completeness and trans-
port damages. In case of incomplete delivery (e.g.
Whisk, flat beater and dough hook) or damage,
contact supplier immediately. DO NOT use the
machine. (See == > Warranty).
• Clean the machine and attachments before use
(See ==> Cleaning and Maintenance).
• Make sure the appliance is completely dry.
Installation
• Read this manual thoroughly and carefully before
installation and operation.
• Ensure the machine is placed in a dry area that
have sufficient strength surface to support with
no any obstruction during operation nearby.
• Ensure that the electrical power supply corre-
sponds with the rating label on the machine.
• There should have adequate space around the
machine for the operator to operate. It should be
clean and free from obstructions, e.g. Nothing
placed on or around the machine, such as scrap-
ers, knives etc.
• Do not wear loose fitting clothing such as scarf,
etc and long hair should be tied up and keep away
from the moving parts.
CAUTION! Never bypass any safety switch.
Transportation and handling
• Do not move the machine while it is under op-
eration.
• Unplug the machine, remove the bowl (2) and all
attachments (whisk, flat beater or dough hook)
when moving the machine.
• Hold the base of the machine (1) when moving to
have better support.
• With at least 2 people or using trolley for assis-
tance to move the machine due to heavy weight.
Special safety features
Attention: This machine has the following 3 safety switches. The machine only be started with all the safety
switches are at the proper positions.
• Bowl position safety switch: The machine can be
started up once the bowl is positioned at the cor-
rect position.
• Bowl guard (5) safety switch: The machine can
only be started up once the bowl guard (5) is in
the closed position.
• Bowl lift up handle (9) safety switch: The machine
can only be started up once the bowl lift up han-
dle (9) is located in the upwards position.
Do not wear loose fitting clothing such as scarf, etc
and long hair should be tied up and keep away from
the moving parts
Operation
To avoid serious personal injury:
• DO NOT operate the machine without reading the
instruction manual.
• ALWAYS STOP the machine by pressing RED
“O” button (8) and unplug from electrical power
supply before cleaning, maintenance, repair or
changing any attachments.
• ALWAYS keep hands, hair and loose clothing
away from the moving parts.

7
EN
a) About the bowl guard
Note: When bowl guard (5) is open or not properly closed in lock position, the machine will not operate.
1. To open the bowl guard (5), hold the bowl guard
handle (11) and rotate it clockwise. To close the
bowl guard (5), hold the bowl guard handle (11)
and rotate it anti-clockwise.
2. When the bowl guard handle (11) is lined up at
the right side of the machine, the bowl guard (5)
is in the is in the rocked position and ready for
operation.
b) Install the bowl (2) to the machine
Note: Install the bowl (2) BEFORE fixing the attach-
ments. Use the supplied bowl (2) only.
1. Lower the bowl by pulling the bowl lift-up lever
(12) downwards until it stops. So that the bowl
cradle (12) is in a lower position.
2. Place the bowl (2) carefully and slowly using the
bowl handles (4) at 2 sides and
i) With the locking pin into the hole at the
middle of the bowl cradle (12) and
ii) Secure the bowl (2) by pull each
bowl clamp (3) forward until the
bowl (2) is locked tight.
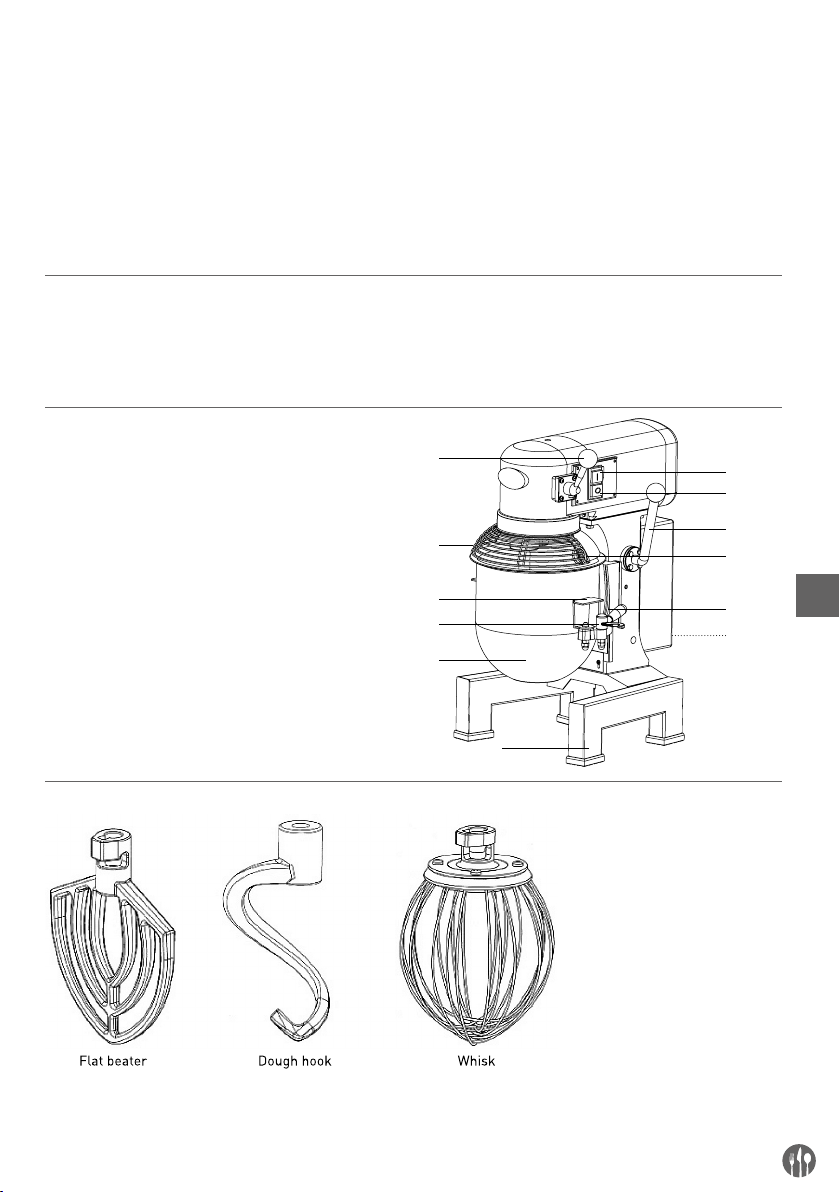
c) Install different attachments (Flat beater, Dough hook or Whisk) to the machine
Note: It is more convenient and easier to install the
attachments prior to adding the ingredients
into the bowl (2).
1. Rotate the bowl guard (5) clockwise gently with
the bowl guard handle (6), so that it is in the open
position.
2. CAUTION! Use excessive force to open or close
the bowl guard (5) may damage the safety lock
micro switch. Be careful when open or close the
bowl guard (5).
3. Slide the attachments (Flat beater, Dough hook
or Whisk) slowly upwards onto the planetary
shaft fitting the shaft pin through the slot in the
attachments.
4. Rotate the attachments to secure it onto the
planetary shaft.
d) Pouring and mixing ingredients
Note: Follow the “Mixing ingredients capacity” ta-
ble in this manual. Overloading will lead to
overflow or damage to the machine.
IMPORTANT: Make sure the speed control lever (6)
is set at the “dough hook” position.
1.
Add all the appropriate ingredients into the bowl (2).
2. Lift upwards the bowl lift lever (9) until the bowl
(2) locks into the position.
3. Rotate the bowl guard (5) anti-clockwise and
locks into the position.
Attention: The machine will not start if the bowl
guard (5) is open / not closed properly or the bowl
(2) is at the lower position.
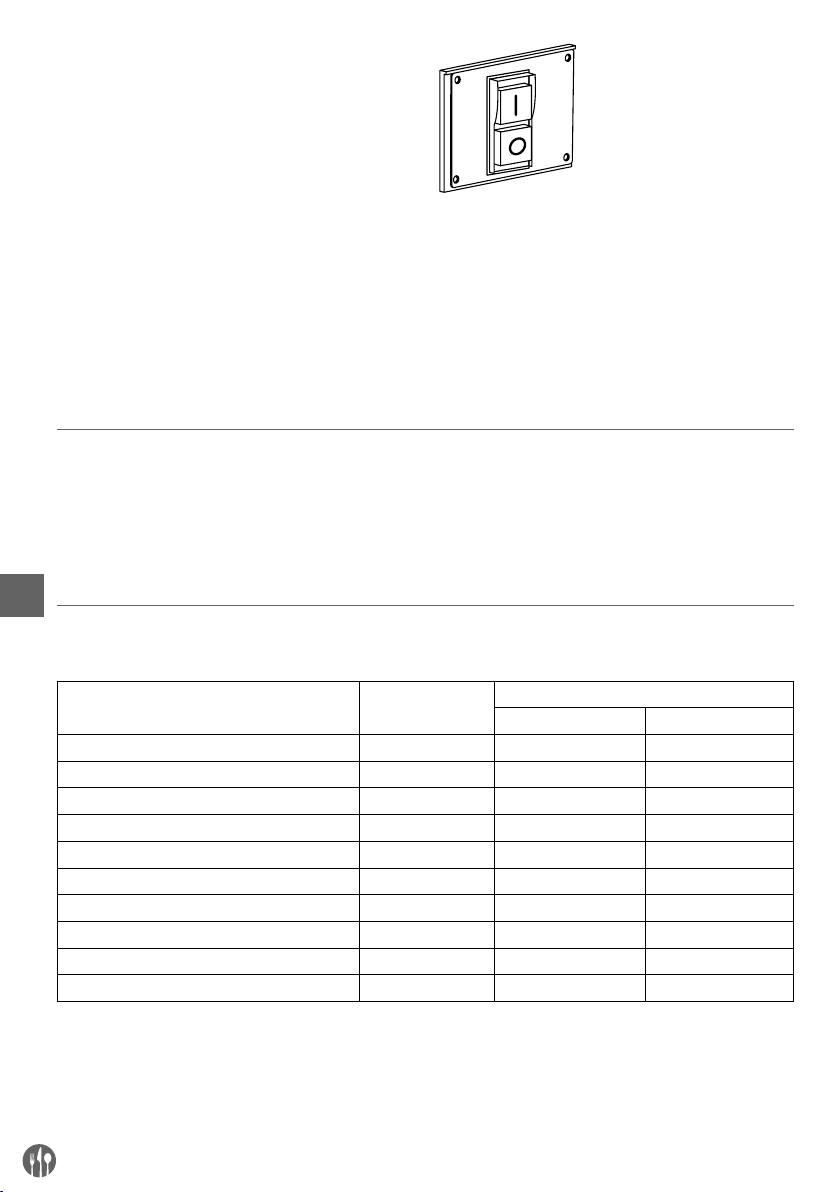
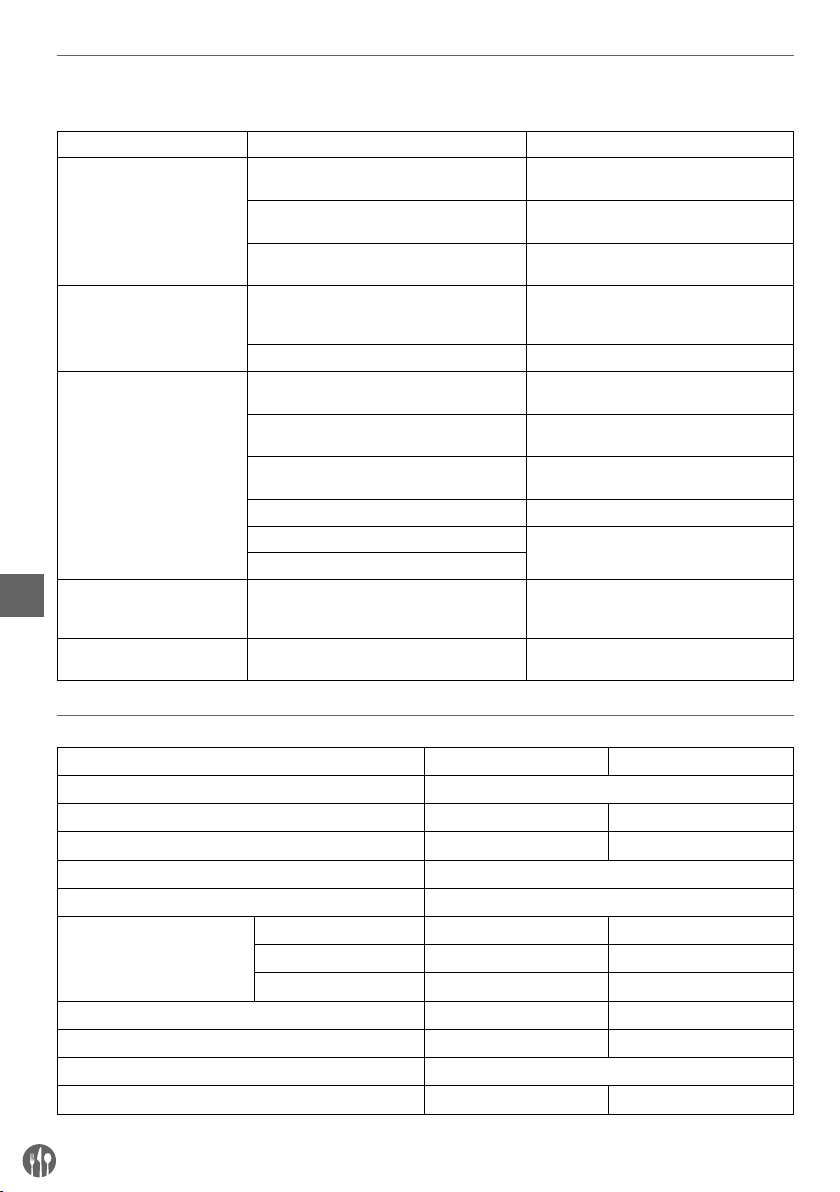
e) Set the speed, attachment & start up the machine
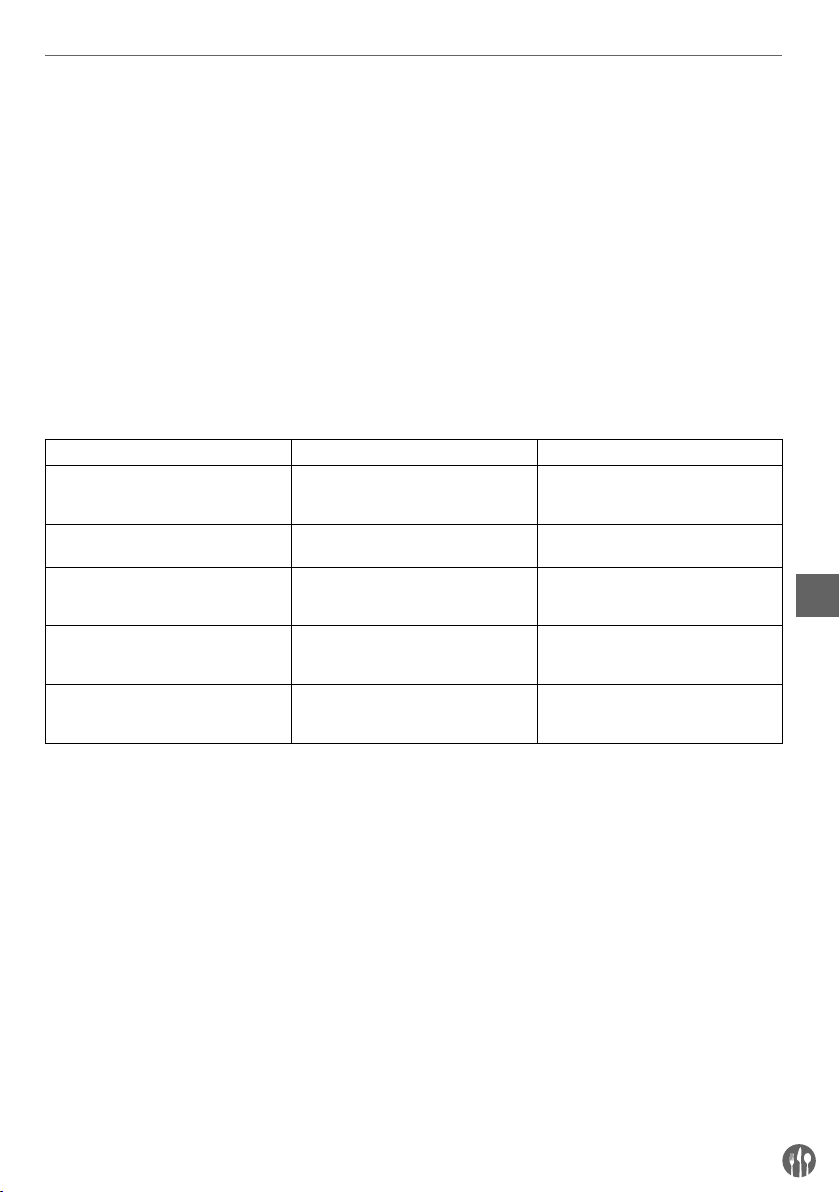
1. Select the appropriate speed by lifting or low-
ering the speed control lever (6). Three fixed
speeds are available for different attachments:
Rotation speed Type of ingredient
Dough hook (Low) Heavy: Mixing pizza, bread,
pasta and
Flat beater (Medium) Medium: 2nd stage of mixing
for donut dough, etc.
Whisk (High) Light: Whipping cream, egg
whites, meringue.
IMPORTANT: ALWAYS follow the recommended
attachment used and speed setting according to
the capacity table and indication next to the speed
control lever (6).
ATTENTION: Be careful about the risk of dust and
flour escape when slitting of bagsof ingredient into
bowl (2). Wear protective mask or glasses if nec-
essary.

8
EN
2. After that, press the GREEN “I” button (7) to
switch ON the machine. Press RED “O” button
(8) to STOP the machine.
The machine will rotate in clockwise direction
for item 222843 whereas and anti-clockwise
direction for 222836.
3. CAUTION! ALWAYS STOP the machine BEFORE
changing speeds. Failure to do so may damage
the internal gear construction.
4.
To change the speed during the operation:
a)
Press the RED “O” button (8) to STOP the ma-
chine.
b) Unplug the machine and change the attach-
ment. [See == > part c)].
c)
Change the speed by raising or lowering the speed
control lever (6) with the correct attachment.
d) Press the GREEN “I” button (7) to restart the
machine.
RESET the Hi-limiter (thermal cut-out)
Please note that the RESET button (10) is located
at the rear of the machine in order to prevent
overheated.
• Unplug the machine from the electrical power
outlet first.
• Let the machine to cool down completely.
• Press the RESET button (10) of the Hi-limiter
(thermal cut-out)
• Then, plug into the electrical power outlet and
start up the machine again.
Mixing ingredients capacity
Below table is just a reference about the maximum
quantity for making the different food. There are
many factors affecting such as the type of the flour,
temperature of water, etc.
Product Attachment Max. quantity
222836 222843
Egg white Whisk 1kg 1,5kg
Mashed potato Flat beater 2kg 2,5kg
Meringue (Qty of water) Whisk 1,5 litre 2,0 litre
Waffle or pancake batter Flat beater 2,5 litres 3,0 litre
Whipped cream Whisk 3,5 litres 4,0 litre
Pizza dough (Medium, 50% water) Dough hook 2,0 kg 2,5 kg
Pizza dough (Thick, 60% water) Dough hook 2,5 kg 3,0 kg
Sponge cake Whisk 1,5 kg 2,0 kg
Pie Dough Flat beater 2,0 kg 2,5 kg
Bread or Roll Dough (Light/ Medium, 60% water) Dough hook Water 1,5 kg/ Flour 2,5kg Water 3,0 kg/ Flour 5,0kg

9
EN
Cleaning and Maintenance
Attention: Always unplug the appliance from the electrical power outlet and let it cool down completely
before cleaning, maintenance, repair & storage.
Cleaning
• Always remove all the attachments before easy
cleaning, otherwise it will become stuck on the
shaft and difficult to remove later.
• Clean the machine and its attachments thor-
oughly after each use and ensure all food resi-
dues are removed.
• Never immerse the appliance in water or other
liquids.
• Clean the surface with a slightly damp cloth or
sponge with some mild soap solution.
• Never use abrasive sponges, detergents, steel
wool or metallic utensils to clean the interior or
exterior parts of the appliance.
• DO NOT wash the appliance with water or water-
jet. Washing with water can cause leakage and
increase the risk of electric shock.
• No any parts or attachments are dishwasher
safe.
Recommended cleaning procedure:
Parts How to clean Frequency
Bowl Using a sponge or damp cloth with
mild soap and water, rinse, sanitize
and dry thoroughly.
Clean after each use
Attachments (Dough hook, beater
and whisk) Hand wash using mild soap and wa-
ter, rinse, sanitize and dry thoroughly. Clean after each use
Bowl guard Hand wash using a sponge or damp
cloth with mild soap and water, rinse,
sanitize and dry thoroughly.
Clean after each use
Outer surface Wipe with a clean damp cloth using
soap and water, rinse, sanitize and
dry. Do not use water jet.
Twice a week
Planetary Shaft Wipe with a clean damp cloth using
soap and water, rinse, sanitize and
dry.
Clean after each use
Storage
• Before storage, always make sure the appliance
has already been disconnected from the electri-
cal outlet and cooled down completely.
• Store the appliance in a cool, clean and dry place.

10
EN
Troubleshooting
If the machine does not function properly, please check the below table for the solution. If you are still una-
ble to solve the problem, please contact the supplier/service provider. DO NOT repair yourself.
Problems Possible causes Possible solution
Machine do not start running
Bowl guard (5) is not in properly closed position. Rotate the bowl guard (5) to the right until ful-
ly closed properly.
Bowl (2) is not raised to the proper location. Raise the bowl (2) to the correct position by
using the level (9).
The power plug is not connected properly. Check to make sure the power plug is con-
nected properly.
Machine stops during operation
Internal overload activates to prevent overheat. Press RED, “O” button (8), unplug the ma-
chine, leave for cook down completely, press
RESET button (10) at the back.
Damage or broken transmission belt Check with the supplier
Machine sound too noisy
Machine is not placed on a horizontal surface. Adjust the surface or move to another hori-
zontal surface.
Bowl (2) is not placed correctly. Make sure the bowl (2) is placed into the bowl
cradle (12) correctly with the guided pins (3).
Attachments not fitted properly. Remove and install the attachments into po-
sition again.
Bowl is overloaded. Reduce ingredients capacity.
Damaged or worn transmission belt. Check with the supplier.
Planetary gear needs lack of lubricant.
Attachments cannot install
onto the planetary shaft easily Lack of lubricant and / or cleaning of the plane-
tary shaft required.
Wipe planetary shaft with a clean damp cloth
and lubricate the shaft with mineral oil or
grease.
Bowl lift / lower handle (9) not
operation easily Lack of lubricant on the bowl slides. Lubricate bowl slides with mineral oil or
grease.
Technical specification
Item no. 222836 222843
Operating voltage and frequency 220 – 240 V~ 50Hz
Rated input power 600W 1100W
Net weight (approx.) 53kg 78kg
Protection class Class I
Waterproof protection class IP23
Rotation speed (r.p.m.)
Dough hook 148 197
Flat beater 244 317
Whisk 480 462
Maximum bowl capacity 10L 20L
Maximum amount flour mixing 2,5 kg 5,0 kg
Max noise level < 70 dB (A)
Outer dimension 470 x 380 x (H) 730mm 540 x 470 x (H) 870mm
Remark: Technical specification is subjected to change without prior notification

11
EN
Exploded drawing and part list for 222836 and 222843
Attention: The exploded drawing and part list consists of below parts:
- Transmission gear system at the top, bowl cradle
and stand (Figure 1);
- Axle assembly (Figure 2);
- Gear axle assembly (Figure 3);
- Motor assembly (Figure 4);
- Bowl lift up assembly (Figure 5);
-
Bowl guard turning plate and mixing axle (Figure 6);
- Speed control assembly (Figure 7)
1
2
3
44
56
8
7
910 11
13
12
23
23
24
25
16
15
17
18
21
19
14
20 22
Figure 1: Transmission gear at the top, bowl cradle
and stand
Part no. Part name Quantity
1 Screw M5*35 1
2 Top cover 1
3 Cover plate 1
4 Screw M5*12 5
5 Bearing 1
6 Bearing 1
7 Bearing cover 1
8 Screw M5*20 4
9 Main body part 1
10 Rear cover 1
11 Screw M6*55 4
12 Ventilation cover 1
13 Screw M5*12 1
14 Bowl cradle 1
15 Rigid stand 1
16 Capacitor board 1
17 Capacitor 1
18 Base 1
19 Safety covering switch 1
20 Fluctuate safety switch 1
21 Overload protection 1
22 PCB control board 1
23 AC contact devices 2
24 Reactor 1
25 Timer relay 1

12
EN
1
2
3
4
5
6
16
15
14
13
12
11
10
9
8
7
Figure 2: Axle assembly
Vertical sides of jaws
on another.
RIGHT WRONG
Figure 2-1 Figure 2-2
Remark:
1. Be sure to install correct position and lubricate
all the pins in figure 2-1.
2. Check if oil seal occur after reassembly.
Part no. Part name Quantity
1Cover 1
2 Oil seal 25*40*10 1
3 Bearing 1
4 Big joint gear 1
5 Bearing ring 1
6 Axle 1
7 Joint 1
8 Bearing ring 1
9 Joint gear 1
10 Washer 1
11 Engager 1
12 Spring 8
13 Roller 4
14 Ring gear 1
15 Ring plate 1
16 Bearing 1

13
EN
Part no. Part name Quantity
1 Bearing 2
2 Gear axle 1
3 Key 5*58 1
4 Gear 1
5 Collar 1
6 Gear 1
7 Long collar 1
8 Gear 1
9 Ring 1
1
2
3
4
5
6
7
8
9
1
Figure 3: Gear axle assembly
Remark: Make sure the keys are all inserted to
each gear.

14
EN
1
2
6
389
10 11
3
4
5
Figure 4: Motor assembly
Part no. Part name Quantity
1 Spiral 1
2 Oil seal 1
3 Bearing 2
4 Key 4*22 1
5 Axle 1
6 Switch 1
7 Plastic switch plate 1
8 Screws M4*8 2
9 Screws M6*16 4
10 Bearing cover 1
11 Fan 1
Axle
Bearing 203
Spiral
Bearing cover
Switch
Oil seal
Switch plastic
fan
Figure 4-1

15
1
2
13
10
3
3
3
4
4
5
11
12
6
7
8
9
Figure 5: Bowl lift up assembly
Part no. Part name Quantity
1 Spiral 1
2 Oil seal 1
3 Bearing 2
4 Key 4*22 1
5 Axle 1
6 Switch 1
7 Plastic switch plate 1
8 Screws M4*8 2
9 Screws M6*16 4
10 Bearing cover 1
11 Fan 1
7
5
9
6
8
11
10 3
2
12
1
4
Figure 6: Turning plate and mixing axle
Part no. Part name Quantity
1 Mixing axle 1
2 Oil seal 20*40*10 1
3 Bearing 1
4 Bowl guard 1
5 Planetary gear 1
6 Turning plate 1
7 Inner gear 1
8Cover 1
9 Bearing 1
10 Screw M8*20 1
11 Spring washer 1
12 Back cover of bowl guard 1
EN

16
EN
1
2
3
4
4
3
2
7
12
6
89
10
11
13
5
Part no. Part name Quan-
tity
A
1Rod 1
2 Nut 1
3 Spring 1
4 Shaft 1
5 Fork 1
B
6 Pin 3*20 1
7 Knot 1
8 Steel ball bearing 3
9 Spring 3
10 Block cover 1
11 Screw M5*10 1
12 Shaft 1
13 Lever 1
Speed block
Fork
Figure 7: Speed control assembly

17
EN
Circuit diagram
K1 Overload protection (Thermal cut-out)
K2 Bowl lift lever safety switch
K3 Bowl guard saftey switch
K4 STOP switch
K5 ON switch
K Reactor
K0 Bowl position safety switch
CA Capacitor
M Motor
EARTH
M
K
K1
LN
K2 K3 K4
K0
CAK5
Warranty
Any defect affecting the functionality of the ap-
pliance which becomes apparent within one year
after purchase will be repaired by free repair or re-
placement provided the appliance has been used
and maintained in accordance with the instructions
and has not been abused or misused in any way.
Your statutory rights are not affected. If the appli-
ance is claimed under warranty, state where and
when it was purchased and include proof of pur-
chase (e.g. receipt).
In line with our policy of continuous product devel-
opment we reserve the right to change the product,
packaging and documentation specifications with-
out notice.
Discarding & Environment
At the end of the life of the appliance, please dis-
pose of the appliance according to the regulations
and guidelines applicable at the time.
Throw packing materials like plastic and boxes in
the appropriate containers.

18
DE
Sehr geehrte Kundin, sehr geehrter Kunde,
wir danken Ihnen für den Kauf des Gerätes Hendi. Machen Sie sich bitte mit dieser Anleitung noch vor der
Inbetriebnahme des Gerätes vertraut, um Schäden durch die unsachgemäße Bedienung zu vermeiden. Den
Sicherheitsregeln ist besondere Aufmerksamkeit zu widmen.
Sicherheitsregeln
• Die unsachgemäße Bedienung des Geräts kann zur schweren Beschädigung des Geräts
sowie zu Verletzungen führen.
• Das vorliegende Gerät ist ausschließlich für den gewerblichen Gebrauch bestimmt und
darf nicht im Haushalt verwendet werden.
• Das Gerät ist ausschließlich zu dem Zweck zu benutzen, zu dem es hergestellt wurde.
Der Hersteller haftet nicht für Schäden, die auf unsachgemäße Bedienung des Geräts
zurückzuführen sind.
• Den Kontakt des Gerätes und des Steckers mit Wasser oder einer anderen Flüssigkeit
vermeiden. Den Stecker unverzüglich aus dem Stecker ziehen und das Gerät von einem
anerkannten Fachmann prüfen lassen, wenn das Gerät unbeabsichtigterweise ins Was-
ser fällt. Bei Nichteinhaltung dieser Sicherheitsvorschriften besteht Lebensgefahr.
• Nie eigenständig das Gehäuse des Gerätes zu öffnen versuchen.
• In das Gehäuse des Gerätes keine Gegenstände einführen.
• Den Stecker nicht mit nassen oder feuchten Händen berühren.
• Gefahr eines Stromschlags! Das Gerät darf nicht selbstständig repariert werden. Sämt-
liche Mängel und Unzulänglichkeiten sind ausschließlich durch qualifiziertes Personal
zu beseitigen.
• Niemals ein beschädigtes Gerät benutzen! Das beschädigte Gerät vom Netz trennen
und sich mit dem Verkäufer in Verbindung setzen.
• Warnung: Die Elektroteile des Gerätes dürfen weder in Wasser noch in andere Flüssig-
keiten getaucht werden. Ebenso ist das Gerät nicht unter fließendes Wasser zu halten.
• Der Stecker und die Stromversorgungsleitung sind regelmäßig auf Beschädigungen zu
prüfen. Der beschädigte Stecker oder Leitung sind an eine Servicestelle oder einer an-
deren qualifizierten Person zur Reparatur zu übergeben, um eventuellen Gefahren und
Verletzungen des Körpers vorzubeugen.
• Man muss sich davon überzeugen, ob die Stromversorgungsleitung weder mit scharf-
kantigen noch mit heißen Gegenständen in Berührung kommt; halten Sie die Leitung
weit entfernt von einer offenen Flamme. Um den Stecker aus der Netzsteckdose zu neh-
men, muss man immer am Stecker und nicht an der Leitung ziehen.
• Die Stromversorgungsleitung (oder Verlängerungsleitung) ist vor dem zufälligen Heraus-
ziehen aus der Steckdose zu schützen. Die Stromversorgungsleitung muss so geführt
werden, dass niemand zufällig darüber stolpern kann.
• Das Gerät muss während seiner Anwendung ständig kontrolliert werden.
• Warnung! Wenn der Stecker in der Netzsteckdose ist, muss man das Gerät als an die
Stromversorgung angeschlossen betrachten.

19
DE
• Bevor der Stecker aus der Netzsteckdose genommen wird, ist das Gerät auszuschalten.
• Das Gerät darf beim Tragen nicht an der Leitung gehalten werden.
• Benutzen Sie kein Zubehör, das nicht mit diesem Gerät mitgeliefert wurde.
• Das Gerät muss man ausschließlich an die Steckdose mit solch einer Spannung und
Frequenz anschließen, wie auf dem Typenschild angegeben wird.
• Stecken Sie den Stecker in die Steckdose, die an einem leicht und bequem zugänglichen
Ort angeordnet ist, und zwar so, dass das Gerät bei einer Störung sofort abgeschaltet
werden kann. Um das Gerät vollständig auszuschalten, muss man es von der Stromquel-
le trennen. Zu diesem Zweck muss man den Stecker, der sich am Ende der vom Gerät
getrennten Leitung befindet, aus der Netzsteckdose ziehen.
• Vor dem Abtrennen des Steckers ist das Gerät auszuschalten!
• Benutzen Sie kein Zubehör, das nicht vom Hersteller empfohlen wird. Die Anwendung
vom nicht empfohlenen Zubehör stellt eine Gefahr für den Nutzer dar und kann zur Be-
schädigung des Gerätes führen. Benutzen Sie ausschließlich Ersatzteile und Zubehör im
Original.
• Dieses Gerät eignet sich nicht für den Gebrauch durch Personen (gilt auch für Kinder)
mit geringerer Motorik, Sensorik oder geistiger Fähigkeit oder mangelhafter Erfahrung
und Wissen.
• Auf keinen Fall darf das Bedienen des Gerätes durch Kinder zugelassen werden.
• Das Gerät mit Stromversorgungsleitung ist außerhalb der Reichweite von Kindern zu
lagern.
• Ebenso muss dafür gesorgt werden, dass die Kinder das Gerät nicht zum Spielen benut-
zen.
• Das Gerät ist immer dann von der Stromversorgung zu trennen, wenn es ohne Aufsicht
bleiben soll bzw. auch vor der Montage, Demontage und Reinigung.
• Während der Nutzung darf das Gerät nicht ohne Aufsicht gelassen werden.
Besondere Sicherheitsvorschriften
• Das Gerät ist zum Mixen, Kneten und Emulgieren/Schlagen von Lebensmittelprodukten
(z.B. Mehl, Zucker, Öle, Fette, Eier und andere Bestandteile) an den Stellen der Lebens-
mittelindustrie und in den Geschäften (z.B. Cateringleistungen, Bäckereien, Pizzerien,
Konditoreien und andersartigen Verkaufsstellen der Süßwarenindustrie) bestimmt.
• Benutzen Sie das Gerät ausschließlich nur entsprechend der Anleitung.
• Der Planetenmixer sollte nur von qualifiziertem Küchenpersonal in den Verkaufsstellen
der Lebensmittelindustrie, z.B. Cateringleistungen, Bäckereien, Pizzerien, Konditoreien
usw. montiert und bedient werden.
• Sämtliche Wartungs- und Montagetätigkeiten sowie die Reparatur des Gerätes sollte von
qualifizierten, dazu bevollmächtigten Technikern durchgeführt werden.
• Hinten am Gerät befindet sich eine äquipotentielle Steckdose, die einen Kreuzan-
schluss an ein anderes Gerät ermöglicht.

20
DE
• Stellen Sie den Planetenmixer nicht auf ein Objekt, das Wärme emittiert (Gas- oder Elek-
troherd, Grill, usw.). Außerdem muss man das Gerät von irgendwelchen heißen Flächen
bzw. offener Flamme fernhalten. Das Gerät ist auf eine ebene, stabile, saubere und tro-
ckene Fläche zu stellen, die auch gegen hohe Temperaturen beständig ist.
• Verwenden Sie das Gerät nicht in der Nähe von explosiven oder leicht brennbaren Mate-
rialien, Zahlkarten, Magnetplatten oder Rundfunkempfängern.
• Falls notwendig, dann muss man während der Bedienung des Gerätes Schutzkleidung,
Schutzmaske oder Schutzbrille anlegen.
• Der Planetenmixer ist nicht für die Bedienung durch eine externe Schaltuhr oder ge-
trenntes Fernsteuerungssystem geeignet.
• An den Sicherheitsblockaden darf nicht manipuliert werden.
• WARNUNG: Die Belüftungsöffnungen des Gerätes dürfen nicht verdeckt werden.
• WARNUNG: Vor dem Reinigen, der Wartung oder dem Wechseln des Zubehörs muss
man IMMER daran denken, das Gerät auszuschalten und von der Stromversorgungs-
quelle zu trennen.
• Rund um das Gerät muss man einen Abstand von mindestens 30 cm gewährleisten, da-
mit eine richtige Belüftung ermöglicht wird.
• Hinweis! Man muss auch die Stromversorgungsleitung entsprechend führen und si-
chern, damit einem zufälligen Ziehen vorgebeugt bzw. der Kontakt mit der Heizplatte
vermieden wird.
• WARNUNG! Es ist IMMER daran zu denken; Keine lose Kleidung tragen und die beweg-
lichen Teile des Gerätes nicht mit der Hand berühren bzw. auch die Haare zusammen-
zubinden.
• Während des Betriebes des Planetenmixers darf man die Hände weder unter die Abde-
ckung noch in die Schüssel legen.
• Legen Sie keine zu große Mengen der Zutaten in die Schüssel, damit einem Überlaufen
des Inhalts vorgebeugt wird. Die Schüssel hat Platz für maximal 10 Liter (Modell 222836)
oder 20 Liter (Modell 222843).
• Waschen Sie das Gerät nicht mit Wasser oder auch nicht mit einem starken Wasser-
strahl. Das Waschen des Gerätes mit Wasser kann zur Folge haben, dass in die elekt-
rischen Teile Wasser gelangt und dadurch ein elektrischer Stromschlag hervorgerufen
werden kann. Die Teile des Gerätes dürfen auch nicht in einer Geschirrspülmaschine
gewaschen werden.
• Am Lagerort darf man das Gerät weder reinigen noch aufbewahren, bevor es nicht völlig
abgekühlt ist.
• Während des Herumtragens des Gerätes muss man in Bezug auf sein Gewicht beson-
ders vorsichtig sein. Das Gerät muss von 2 Personen getragen oder mit einem Wagen
verlagert werden. Tragen Sie das Gerät langsam und vorsichtig, wobei es nicht mehr als
in einem Winkel von 45° geneigt wird.
Other manuals for 222836
1
This manual suits for next models
1
Table of contents
Languages:
Other Hendi Mixer manuals