Henry Schein HS-LED LIgHt 1200 User manual
Y
900-6369
1
1
%-!%%&,*!,&(#))+(!%#! *
%%&,&(#/$'(&*&'&#!$(!.!0%)!%#
&+,##!%%&,*!&%$')%)!#
)%+!%%&,*!,"##&)$'
+&,$')%.!#!

PREFACE..........................................................................................1
DISCLAIMER....................................................................................1
SAFETY PRECAUTIONS..................................................................2
PARTS AND FUNCTIONS................................................................3
GENERAL INSTALLATION ...............................................................4
PANEL OPERATIONS.......................................................................5
COOLING SYSTEM..........................................................................6
CHARGER SIGNALS........................................................................7
TROUBLE SHOOTING TIPS ............................................................8
DEVICE SPECIFICATION.................................................................8
MAINTENANCE CHECK LIST..........................................................9
8C7+60?8->39890>23=:<9.?->-+?=/.,CA/+>2/<>/7:/<+
>?</9<?=/.7+>/<3+69<+8C9?>=3./3806?/8-/=A/</=/<@/>2/
<312>>98/1+>/>2/A+<<+8>C
Concerning the discrepancy of the product, which caused by
weather, temperature and used materials, we reserve the rights
of explanation. <9.?-> =:/-303-+>398= +</ =?,4/-> >9 -2+81/
+8.</@3=398A3>29?>:<39<89>3-/
$+,6/9098>/8>=

/A+</902312>/7:/<+>?</+8.=><9816312>
989>6995.3</->6C38>9>2/6312>=9?<-/A3>29?>/C/:<9>/->398
Prior to using the product, please read this USER MANUAL carefully and thoroughly as
it provides details of correct usage, maintenances, and troubleshooting instructions.
Please keep this manual in a safe place for future reference.
1. The manufacturer shall not assume any responsibility for any malfunction, damage, or
accident of personal bodily injury caused by improper removal, modification, mainte-
nance or repair conducted by an unauthorized technical personnel.
2. The manufacturer shall not assume any responsibility if any malfunction, damage, or
personal bodily injury is caused by the use of this product in conjunction with other
non-regulated products.
3. The manufacturer shall not assume any responsibility if any malfunction, damage, or
personal bodily injury is caused by improper removal, modification, maintenance, or
repair with device components not supplied by the manufacturer or their authorised
representative.
4. The manufacturer shall not assume any responsibility if any malfunction, damage, or
personal bodily harm is caused by improper operation that is not compliant with the
manual instructions.
5. The manufacturer shall not assume any responsibility if any malfunction, damage, or
personal bodily harm is caused by inappropriate modifications to the power supply,
installation environment or any other safety-regulated operating conditions as spec-
ified in this manual.
'"
#"
"
#

Please follow instruction steps in this manual for correct and safe operations of the
device. Pay special attention to the following warning signs beside the operation
descriptions where applicable.
a) DANGER
• This message appears where the operation may potentially cause severe
injury if instruction not followed correctly.
b) WARNING
• This message appears where the operation may cause serious damage or
defect to other objects.
c) CAUTION
• This message appears where the operation may cause slight damage to other
objects or slight bodily harm if operational instructions are not followed correctly.
d) IMPORTANT
• This message appears where the operation may involve risk of defect to the
device if not instructions are not followed correctly.
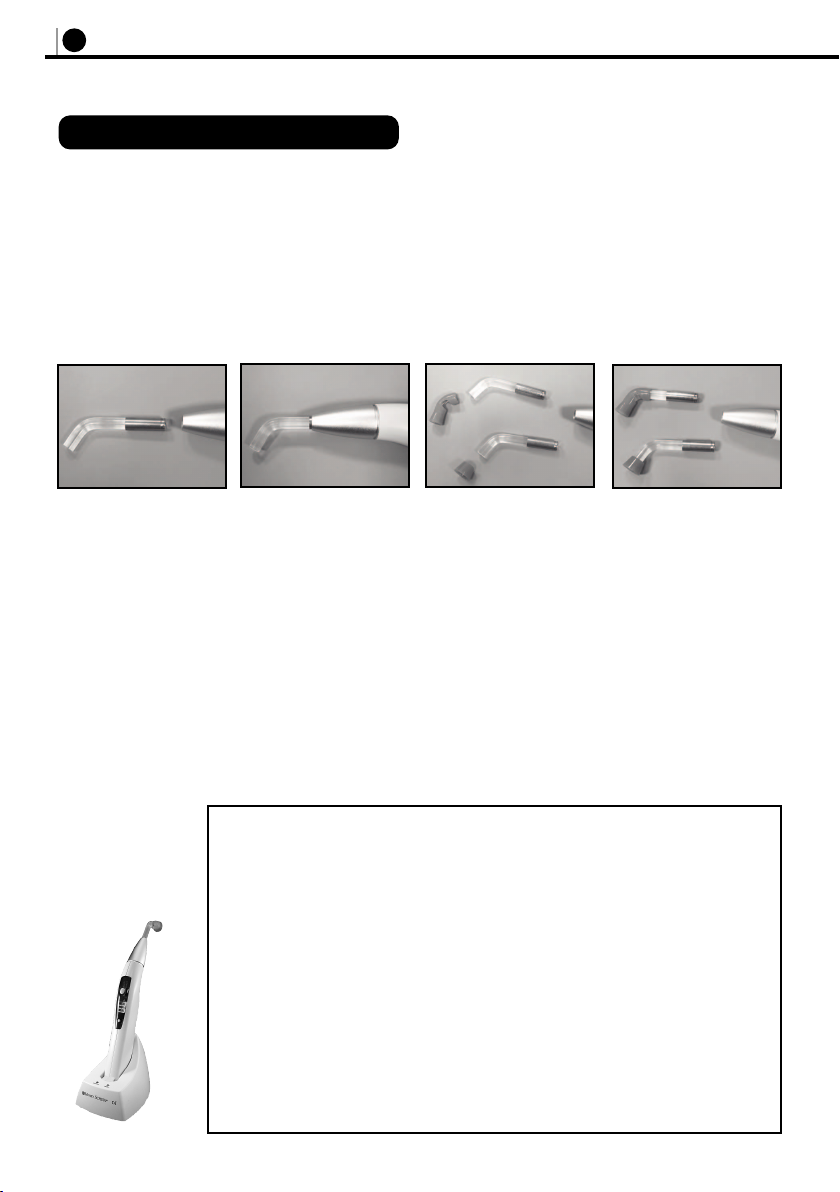
Sterilization of the Fibre-Optic Probe:
Before first use and after use on each patient, the fibre-optic probe should be disinfec-
ted or sterilized. It is recommended that the Probe be autoclaved at 134°C for 5 min-
utes.
Suggestion is to use autoclave at 134°C for maximum results. The sterilization time
at 134°C should be 5 minutes.
Note: Please disconnect the Anti glare cone (orange) from the handpiece and
autoclave separately.
Product Cleaning:
If there is any dirt or stains on the surface of the control panel or surface of the hand-
piece, use a cloth to wipe clean. You can also use a neutral cleansing agent.
Note: Never use a solvent or volatile oil for cleansing as this can lead to fading
of the markings on the control panel.
#$) "%$#

PART A. The LED Handpiece :
(1) Button switch TIME (Power on)
(2) Button switch START/STOP
(3) Fibre optic probe (8 mm)
(4) Body cover
(5) Anti-glare cone
(6) DC Charger input
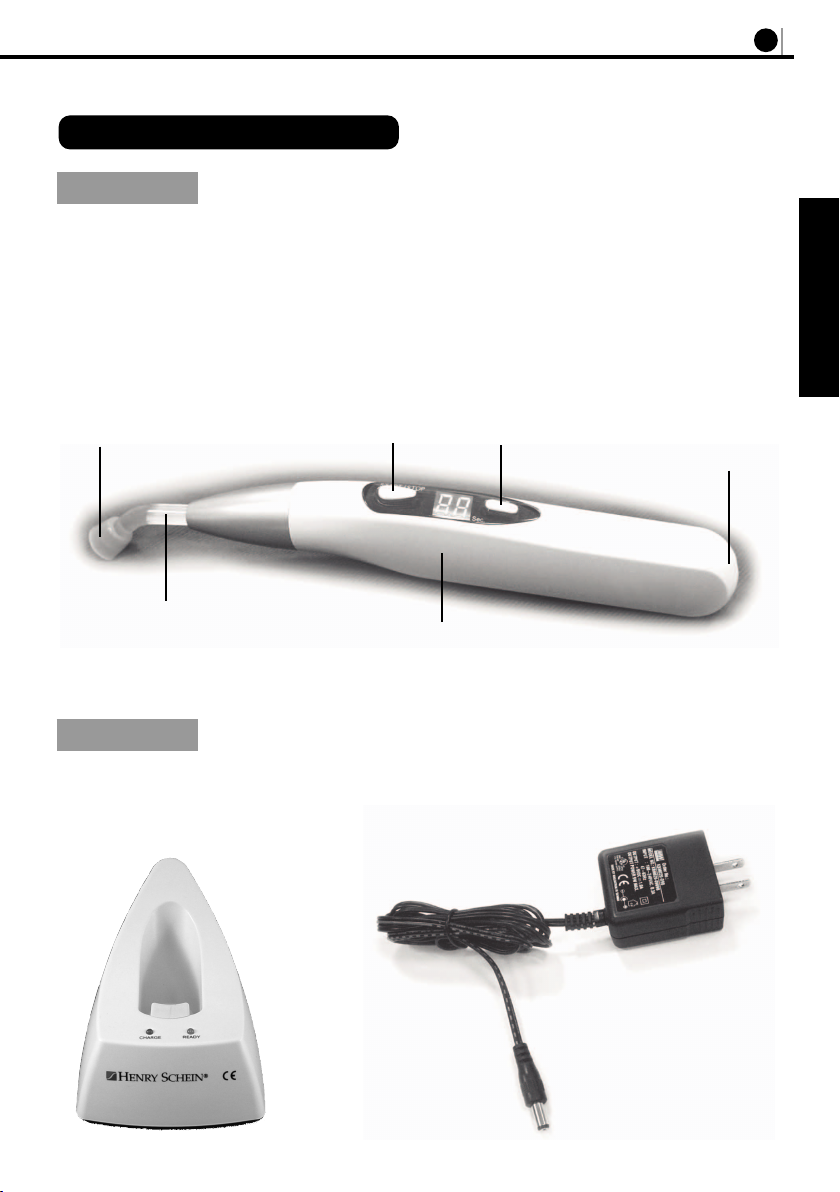
PART B. The Charger :
(1) DC Charger stand (2) DC Adapter (9V)
"$#%$#
(5)
(3) (4)
(1) (2) (6)
#

** Please follow the instructions below carefully to insure correct function of this device.
1. Insert the fibre optic probe into the handpiece and ensure that it is securely installed
at the fixed position (2mm of the fiber optic metal colour will remain visible).
2. Place the orange anti-glare cone onto the fibre optic probe and adjust the cone
position according to the dentist's preference.
3. Connect the DC adapter to the charger stand and plug the adapter into the mains.
** NOTE: Check to make sure the RED led light is lit and immediately switch to GREEN
led light at this point.
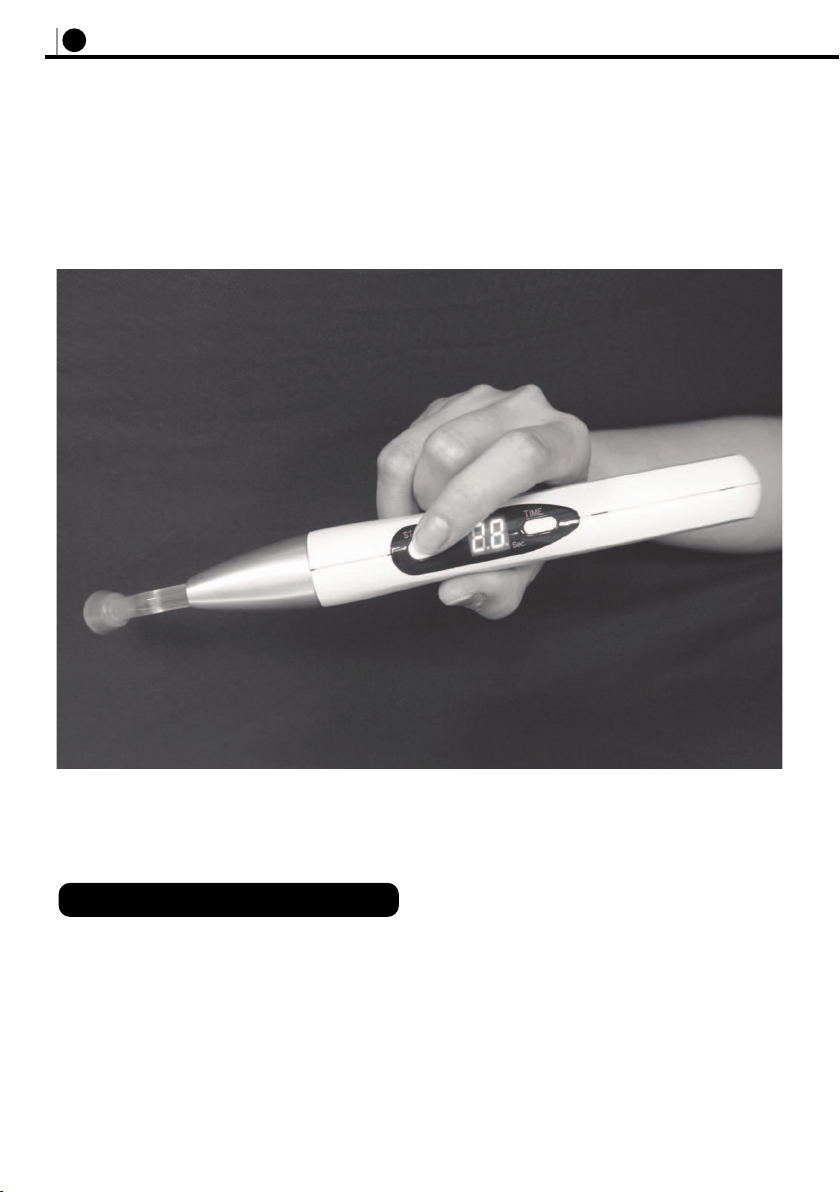
4. Place the handpiece in the charger stand to begin the initial charging.
(As shown in picture below)
"#$$
** IMPORTANT :
> Please make sure the initial charge of the battery
is for at least 5 hours before the FIRST use.
This will insure the maximum length of the
battery life.
> A continuous alarm will sound in the form of
"beeps" when the item needs recharging.

(A) TIME (Power on) :
> Function 1 : Press the “TIME” button once to turn on the operation panel.
The digital display will show the curing time set from the previous working cycle.
> Function 2 : Hold down the button
until the numbers on the display
flash to reset the required curing
time. By pushing the “TIME” button
the time setting increases in
2 seconds increments. When the
required setting time is reached, press
the “START/STOP” button to confirm.
The maximum setting time is 30 sec
and then the display starts
again at 2 seconds.
IMPORTANT :
** This device will automatically switch “off “ after being left at rest for 25 seconds.
Press the ”TIME” button to turn the power back on again.
"$#
(B) (A)
#
(B) START / STOP :
> Press once to begin or stop the curing cycle. At the last 3 seconds a “Beep” will sound
indicating that the cycle is almost finished.
The HS-LED is equipped with a special self-cooling system.
This completely shuts off the handpiece control panel to prevent overheating, after con-
secutively running 10 full curing cycles (of 30 seconds).
The machine should stay "off" for at least 6 minutes to allow complete cooling.
When repetitive curing process is required, please ensure the "time" for each curing
cycle is reduced.
The HS-LED is not suitable for the use in "Bleaching".
#)#$
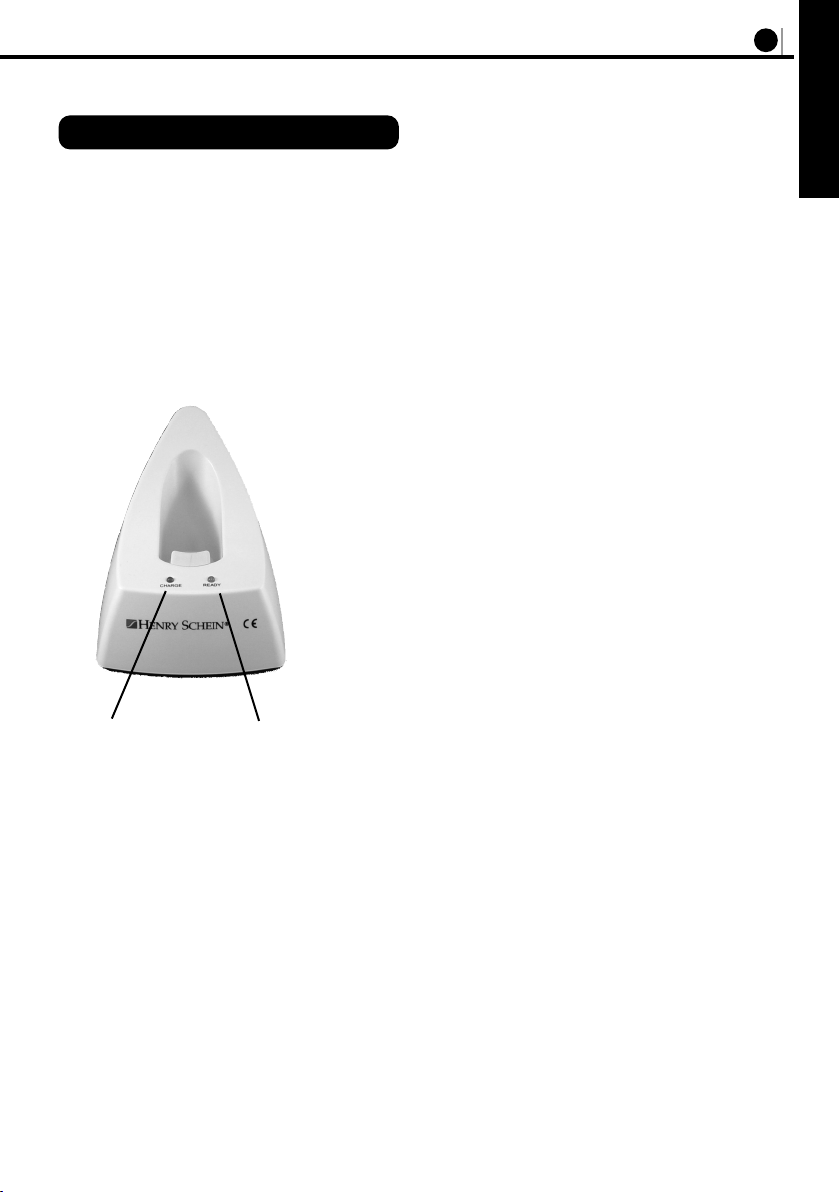
** Please note the following different colour signals indicating the current status of the
charger stand, to charge or recharge the LED handpiece.
Charge Ready
Current Status Signal Signal
(RED) (GREEN)
Charger is Ready Off On
Charging in Progress On Off
Charging is Finished Off On
Battery is Defective Flash Off
""##
RED
(charge)
GREEN
(ready)
#

CAUTION :
In the event of failures or errors please use the following table to identify.
If the error or problem still occurs, please return to the manufacture for repair.
;018A9.1> $
';8@-31 'G'F
(1534@ 3-:0<51/134->31>$@-:0
;:?A9<@5;: (-@@
534@:@1:?5@E 9(/9
(-B181:3@4 G:9;95:-:@#-:31
&# $#
$"%#$
$#!% $
&$&#
;<;C1>;>@59105?<8-E
1B1:C41:.A@@;:
?C5@/45?<>1??10
%414-:0<51/15?:;@
/4->35:3C41:5:?1>@10
5:@41/4->31>
121/@5:5;:.-@@1>E
121/@5:9-5:.;->0
121/@5:9;0A818-9<5?A:-.81@;195@
!;;>/;::1/@5;:.1@C11:
/4->31>-:0<;C1>-0-<@;>
%414-:0<51/15?5:?1>@10
5:@;@41/4->31>.-/7C->0
121/@5:/4->31>
#1@A>:@;@4101-81>;>
9-:A2-/@A>1>2;>>1<-5>
#1@A>:@;@4101-81>;>
9-:A2-/@A>1>2;>>1<-5>
#1@A>:@;@4101-81>;>
9-:A2-/@A>1>2;>>1<-5>
41/7@41/;::1/@5;:
.1@C11:@41/4->31>
-:0<;C1>-0-<@;>
41/7@41/;B1><-31
<5/@A>12;>/;>>1/@
/4->35:3<;?5@5;:
#1@A>:@;@4101-81>;>
9-:A2-/@A>1>2;>>1<-5>
$ &%

• Please charge the battery every 2-months even when not in use
• Please recycle the battery.
• Do not dispose in fire to prevent injury or burns.
• Do not short circuit.
• Do not disassemble.
• Do not crush.
• Keep the batter dry.
• Keep away from high temperature
PASS / REPLACE X TIGHTEN T
CHECK V REPAIR ∆ CLEAN C
DISASSEMBLE O TUNE-UP U LUBRICATE L
%4125>?@5:?<1/@5;:C-?0;:1;:,,,,,,,,,,,,0099EE
%41<>1B5;A?5:?<1/@5;:C-?0;:1;:,,,,,,,,,,,,0099EE
%$ '#*,,,,,,, %
$%%
,,,,$%% $% # &%
,,,,!&%' %$ ##%
,,,,# &%#$ %$!#$%
#(#'
,,,,% #$$(! (#$
,,,, #$%%$!!
,,,, #*&% $# #
! (#$&!!*
,,,,%! (# #$ %
)%# #
,,,, $&##
'"398+>>/<C
$#
$#$
#

INTRODUCCIÓN ..............................................................................1
ADVERTENCIAS...............................................................................1
PRECAUCIONES DE SEGURIDAD..................................................2
PIEZAS Y FUNCIONES....................................................................3
INSTALACIÓN ..................................................................................4
PANEL DE OPERACIONES..............................................................5
SISTEMA DE REFRIGERACIÓN......................................................6
SEÑALES DEL CARGADOR............................................................7
PROBLEMAS FRECUENTES...........................................................8
ESPECIFICACIONES DEL DISPOSITIVO........................................8
LISTA DE MANTENIMIENTO ...........................................................9
8 </6+-3P8 + 6+ .3=-</:+8-3+ ./6 :<9.?->9 -+?=+.+ :9< /6
-637+ >/7:/<+>?<+ C 7+>/<3+6/= ?=+.9= 89= </=/<@+79= 69=
./</-29=.//B:63-+-3P8+=/=:/-303-+-398/=/=>J8=?4/>+=+
-+7,39==388/-/=3.+../3809<7+<
$+,6+./-98>/83.9=

9/B:981+6+6J7:+<+++6>+=>/7:/<+>?<+=83+6+6?D=96+<.3</->+
973</.3</->+7/8>/+6+6?D=38:<9>/--3P8:+<+=?=949=
Ha adquirido usted una lámpara de fotopolimerización LED (Light Emitting Diode) “HS-
LED” de alta eficiencia, por favor, preste atención a los siguientes contenidos.
Antes de usar este producto, por favor lea este MANUAL DEL USUARIO cuidadosa y
completamente ya que ofrece detalles sobre el uso correcto de las operaciones, man-
tenimiento, y problemas frecuentes.
Por favor, guarde este manual para futuras referencias.
1. El fabricante no asumirá ninguna responsabilidad sobre ningún mal funcionamiento,
daño, o accidente físico causado por modificación, mantenimiento, o reparación, por
personal técnico no autorizado.
2. El fabricante no asumirá ninguna responsabilidad sobre mal funcionamiento, daño o,
accidente físico causado en conjunción con otros productos regulares.
3. El fabricante no asumirá ninguna responsabilidad sobre mal funcionamiento, daño, o
accidente físico si es causado por extraer, modificar o reparar componentes no facilita-
dos por el fabricante.
4. El fabricante no asumirá ninguna responsabilidad sobre mal funcionamiento, daño, o
accidente físico causado por una operación inadecuada que se contradiga con el man-
ual de instrucciones.
5. El fabricante no asumirá ninguna responsabilidad sobre mal funcionamiento, daño, o
accidente físico causado por modificaciones inapropiadas en las fuentes de energía, el
lugar de instalación o cualquier otra condición de seguridad de operación como se
define en este manual.
"%V
&"$#
$"%V
# G

Por favor, siga paso a paso las instrucciones en este manual para una operación cor-
recta y segura del dispositivo. Siga con especial atención los apartados en que se indi-
can las precauciones a tomar, cuando sean aplicables.
a) PELIGRO
• Este mensaje aparece cuando la operación puede causar daños severos si
no se siguen correctamente las instrucciones .
b) AVISO
• Este mensaje aparece cuando la operación puede causar serios daños al dis-
positivo o a otros aparatos.
c) PRECAUCIÓN
• Este mensaje aparece cuando la operación puede causar daños ligeros a
otros objetos o al operador si no se realiza correctamente.
d) IMPORTANTE
• Este mensaje aparece cuando la operación conlleva el riesgo de dañar el
aparato si no se realiza correctamente.
Esterilización de la punta de fibra óptica:
Antes del primer uso y después de la operación con cada paciente, la punta de esteril-
ización debe ser desinfectada o esterilizada. Se sugiere usar un autoclave a 134°C para
el mejor resultado. El tiempo de esterilización a 134°C debería ser 5 minutos.
Nota: Por favor, desconecte la punta de fibra óptica (naranja) de la pieza de mano y
esterilizela aparte.
Limpieza del Producto:
Si hay suciedad en la superficie del panel de control o en la pieza de mano, por favor,
use un paño para limpiarla. Lo puede limpiar también con un agente limpiador neutro.
Nota: Nunca use disolvente o aceite volátil para limpiar la fibra óptica.
"%##%"
PARTE A. La pieza de mano LED :
(1) Botón TIME (Power on)
(2) Botón START/STOP
(3) Fibra óptica (8 mm)
(4) Carcasa del cuerpo
(5) Cono anti deslumbramiento
(6) Toma de carga
PARTE B. El cargador :
(1) Base para el cargador (2) Cargador (9V)
"$#)%#
(5)
(3) (4)
(1) (2) (6)
# G
** Por favor, siga las instrucciones de abajo cuidadosamente para asegurar el correcto
funcionamiento del dispositivo.
1. Inserte la punta de fibra óptica en la pieza de mano y asegúrese de que está conectada
correctamente (2mm de la fibra óptica color metalizado continuarán siendo visibles).
2. Coloque el cono antideslumbrante en la salida de la fibra óptica y ajústelo a la posición
preferida por el dentista.
3. Conecte el adaptador DC a la base cargador y conecte el enchufe a la corriente
eléctrica.
** NOTA: Asegúrese de que la luz ROJA está encendida y que inmediatamente cam-
bia a verde en este punto.
4. Coloque la pieza de mano en el cargador para comenzar la carga inicial.
(Como se muestra en el dibujo de abajo)
#$V"
** IMPORTANTE :
> Asegúrese de cargar la pieza al menos 5 horas,
antes del primer uso. Esto alargará la vida de la
batería.
> Cuando la energía de la batería se esté agotan-
do, una alarma sonora en forma de continuos
"beeps" le recordará que debe recargarla.

(A) TIEMPO (Encendido) :
> Función 1 : Pulse una vez el botón “TIME” para cambiar al panel de operaciones.
El display digital mostrará el tiempo de polimerización del anterior ciclo de trabajo.
> Función 2 : Mantenga pulsado el
botón hasta que los números del display
se enciendan para cambiar el tiempo de
polimerización requerido. Pulsando el
botón “TIME” el tiempo se incrementa
en 2 segundos. Si ha alcanzado el tiem-
po requerido, pulse “START/STOP” para
confirmar. El máximo tiempo predefinido
es 30 segundos, después de esto el dis-
play empieza otra vez en 2 segundos.
IMPORTANTE :
** Este dispositivo se apagará automáticamente “off” después de permanecer inactivo
25 segundos. El usuario puede pulsar de nuevo el botón “TIME” para volverlo a activar.
"#
(B) (A)
# G

(B) START / STOP :
> Pulse una vez para comenzar o parar el ciclo de polimerización con la cuenta atrás en
el display. Los últimos 3 segundos también suenan como un “Beep” e indican que el
ciclo está a punto de terminar.
La HS LED está equipada con un sistema especial de auto-refrigeración, que apaga
completamente el panel de control después de funcionar 10 ciclos de polimerización
completos (de 30 segundos) para prevenir el sobrecalentamiento.
La máquina debe permanecer apagada "off" al menos 6 minutos para permitir una
refrigeración completa.
Cuando se requieran repetidos ciclos de polimerización, por favor, asegúrese de reducir
el tiempo "time" para cada ciclo.
LA HS-LED NO SIRVE PARA BLANQUEAMIENTOS
##$"""V

** Por favor, recuerde las señales de diferentes colores que indican el estado actual de
carga, para cargar o recargar la pieza de mano LED.
Carga Preparado
Situación actual Señal Señal
(ROJO) (VERDE)
Cargador preparado Off On
Carga en proceso On Off
Carga finalizada Off On
Batería defectuosa Flash Off
#G#""
ROJO
(carga)
VERDE
(listo)
# G

PRECAUCIÓN :
Cuando haya fallos o errores, por favor use la siguiente tabla para intentar solucionarlo. Si el dis-
positivo sigue dando problemas, por favor envíese de vuelta al fabricante para su reparación.
V91>;01;018; $
';8@-61 'G'F
!1?; 3!51F-019-:;3->3-0;>
;:?A9; (-@@
:@1:?50-001AF 9(/9
;:35@A001;:0- G:9#-:3;0;95:-:@1
# ## #$&
"#"%$#
$#!`
&$
;4-E?1T-801/;>>51:@1
;1:1805?<8-E/A-:0;18
.;@U:%1?@L<A8?-0;
-<51F-:;?1/->3-
/A-:0;?15:?1>@-
1:18/->3-0;>
121/@;1:8-.-@1>S-5;:
121/@;1:8-<8-/-
121/@;1:9U0A8;-8L9<->-:;8A/1
;:1D5U:<;.>11:@>1
/->3-0;>E-0-<@-0;>
01/;>>51:@1
-<51F-1?@L9-8
5:?1>@-0-1:18/->3-0;>
121/@;1:18/->3-0;>
1BAP8B-8;-8B1:010;>
;2-.>5/-:@1<->->1<->->
1BAP8B-8;-8B1:010;>
;2-.>5/-:@1<->->1<->->
1BAP8B-8;-8B1:010;>
;2-.>5/-:@1<->->1<->->
;9<>A1.18-/;:1D5U:
1:@>1/->3-0;>E-0-<@-0;>
01/;>>51:@1
;9<>A1.18;?05.A6;?
<->-B1>8-<;?5/5U:
01/->3-/;>>1/@-
1BAP8B-8;-8B1:010;>
;2-.>5/-:@1<->->1<->->
$ &`
This manual suits for next models
1
Table of contents
Languages:
Other Henry Schein Power Tools manuals

Popular Power Tools manuals by other brands


King Canada
King Canada KC-108C instruction manual

Bosch
Bosch GST Professional 14 Original instructions

Stihl
Stihl HSA 25 instruction manual

Lee Precision
Lee Precision Classic Turret Press Complete instructions

Tohnichi
Tohnichi TiQL operating instructions

EIBENSTOCK
EIBENSTOCK ETN 162/3 Original instructions