HENX H20DC250 User manual

Original Instructions
1
USER MANUAL
Henx 20V Cordless String Trimmer
H20DC250,H20DC250B

Original Instructions
2
TABLE OF CONTENTS:
Intended Use........................................................................................................3
Safety Instructions...............................................................................................3
Training................................................................................................................. 3
Preparation...........................................................................................................3
Operation..............................................................................................................4
Maintenance and storage.................................................................................. 4
Key Information You Should Know...................................................................4
Know Your Tool..............................................................................................4
Specific Safety Rules....................................................................................4
Explanation of Safety Symbols.........................................................................5
Technical Data..................................................................................................... 6
Product Features.................................................................................................7
Charging the Battery........................................................................................... 7
Assembly Instructions.........................................................................................8
Operation............................................................................................................10

Original Instructions
3
Note:
Before using this product, read this manual and follow all safety rules
and Operating Instructions.
Intended Use
This lawn trimmer is designed for cutting grass and similar soft vegetation in garden areas, not
used for any other purpose.
Safety Instructions
WARNING! When using the machine the safety rules must be followed. For your own safety
and that of bystanders please read these instructions before operating the machine. Please
keep the instructions safe for later use.
Training
a) Read the instructions carefully. Be familiar with the controls and the correct use of the
machine.
b) Never allow children or people unfamiliar with these instructions to use the machine. Local
regulations can restrict the age of the operator.
c) Keep in mind that the operator or user is responsible for accidents or hazards occurring to
other people or their property.
Preparation
a) Before use check the supply and extension cord for signs of damage or aging. If the cord
becomes damaged during use, disconnect the cord from the supply immediately. DO NOT
TOUCH THE CORD BEFORE DISCONNECTING THE SUPPLY. Do not use the machine if the cord
is damaged or worn.
b) Before use, always visually inspect the machine for damaged, missing or misplaced guards
or shields.
c) Never operate the machine while people, especially children, or pets are nearby.
d) Children should be supervised to ensure that they do not play with the appliance.

Original Instructions
4
Operation
a) Keep supply and extension cords away from cutting means.
b) Wear eye protection and stout shoes at all times while operating the machine.
c) Avoid using the machine in bad weather conditions especially when there is a risk of
lightning.
d) Use the machine only in daylight or good artificial light.
e) Never operate the machine with damaged guards or shields or without guards or shields in
place.
f) Switch on the motor only when the hands and feet are away from the cutting means.
g) Always disconnect the machine from the power supply (i.e. remove the plug from the mains,
remove the disabling device or removable battery)
1) whenever the machine is left unattended.
2) before clearing a blockage.
3) before checking, cleaning or working on the machine.
4) after striking a foreign object.
5) whenever the machine starts vibrating abnormally.
h) Take care against injury to feet and hands from the cutting means.
i) Always ensure that the ventilation openings are kept clear of debris.
Maintenance and storage
a) Disconnect the machine from the power supply (i.e. remove the plug from the mains, remove
the disabling device or removable battery) before carrying out maintenance or cleaning work.
b) Use only the manufacturer’s recommended replacement parts and accessories.
c) Inspect and maintain the machine regularly. Have the machine repaired only by an authorized
repairer.
d) When not in use, store the machine out of the reach of children.
KEY INFORMATION YOU SHOULD KNOW
The guard must be installed before trimming, if not, the motor will overheat, and void your
warranty.
Know Your Tool
· Warning! Carefully read the instructions in this manual to reduce the risk of injury or material
damage.
· Read all of this manual carefully before operating the tool.
· Before operating the tool, make sure that you know how to switch the tool off in an emergency.
· Retain this manual for future reference.
Specific Safety Rules
1. Before use check the supply and extension cord for signs of damage or aging. If the cord becomes
damaged during use, disconnect the cord from the supply immediately.
2. DO NOT TOUCH THE CORD BEFORE DISCONNECTING THE SUPPLY. Do not use the appliance
if the cord is damaged or worm.
3. Read the instructions carefully. Be familiar with the controls and proper use of the equipment.
4. Keep extension cord away from cutting elements.
5. Wear protective glasses or goggles.
6. Never allow children or people unfamiliar with the instructions to use the machine.
7. Stop using the machine while people, especially children, or pets are nearby.
8. Only use the machine in daylight or good artificial light.
9. Before using the machine and after any impact, check for signs of wear or damage and repair as
Original Instructions
5
necessary.
10. Never operate the machine with damaged guards or without the guarding place
11. Keep hands and feet away from the cutting means at all times especially when switching on the
motor.
12. Take care against injury from any device fitted for trimming the filament line length.
13. Never fit metal cutting elements.
14. Never use replacement parts or accessories not provided or recommended by the manufacturer.
15. Disconnect the machine from the mains before checking, cleaning or working on the machine and
when it is not in use.
16. Inspect and maintain the trimmer regularly. Have the trimmer repaired only by an authorized
repairer.
17. Take care against injury from the blade fitted for trimming the filament line length. After extending
the new cutter line, always return the trimmer to its normal operating position before switching on.
18. Always ensure that ventilation openings are kept clear of debris.
19. When not in use, store the trimmer out of the reach of children.
20. For additional protection, it is advised to install a residual current device (RCD) with a rated residual
operating current not exceeding 30 mAh.
21. This appliance is not intended for use by persons (including children) with reduced physical,
sensory or mental capabilities, or lack of experience and knowledge. Children should be supervised
to ensure that they do not play with the appliance.
22. The nylon line will run on for a few seconds after the tool is switched off!
Residual risks
Even when the tool is used as prescribed it is not possible to eliminate all residual risk factors.
The following hazards may arise in connection with the tool’s construction and design:
1. Damage to lungs if an effective dust mask is not worn.
2. Damage to hearing if effective hearing protection is not worn.
3. Health defects resulting from vibration emission if the power tool is being used over a longer
period of time or not adequately managed and properly maintained.
WARNING! This machine produces an electromagnetic field during operation. This field may under
some circumstances interfere with active or passive medical implants. To reduce the risk of serious or
fatal injury, we recommend persons with medical implants to consult their physician and the medical
implant manufacturer before operating this machine.
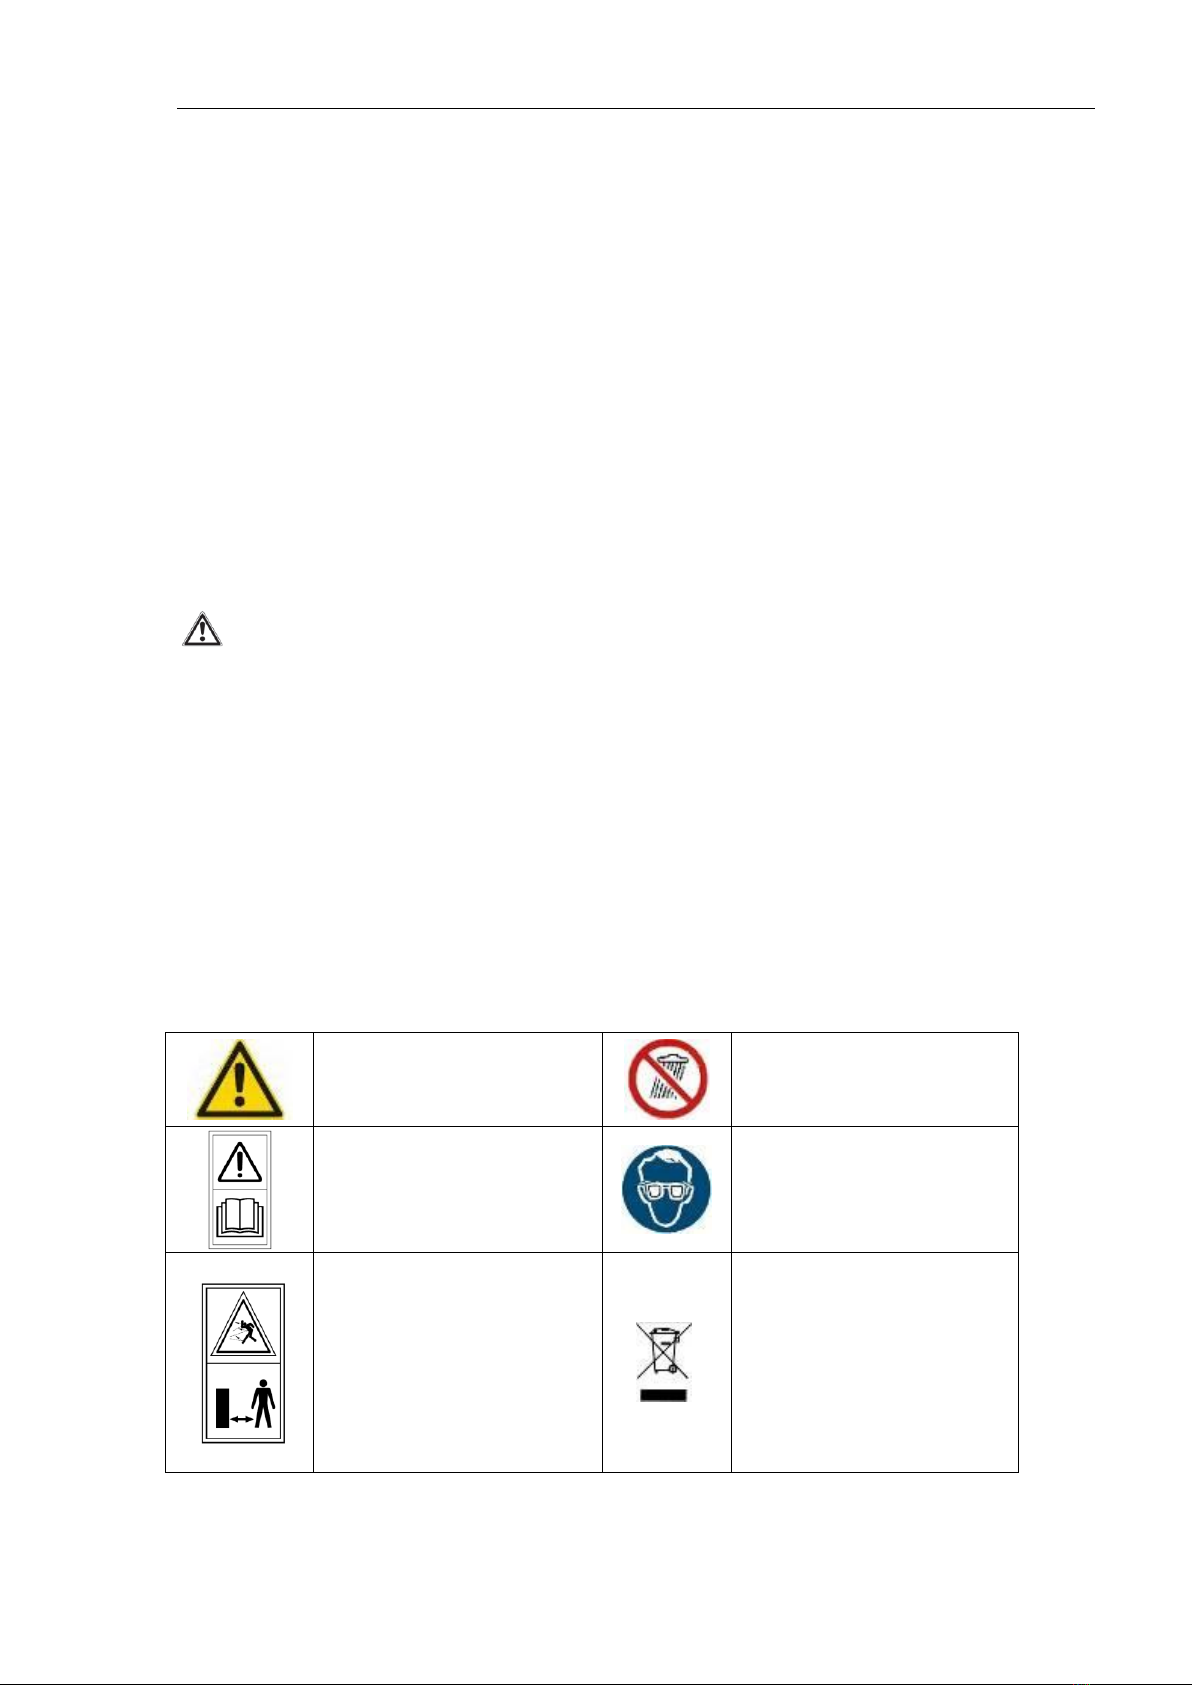
EXPLANATION OF SAFETY SYMBOLS
- Warning!
- Do not use in rain or wet
conditions.
- Read operator’s manual
-Always wear eye protection.
-Keep bystanders away
Waste electrical products
should not be disposed of
with household waste. Please
recycle where facilities exist.
Check with your local
Authority or retailer for
recycling advice.

Original Instructions
6
In accordance with essential
applicable safety standards of
European directives
TECHNICAL DATA
Type
H20DC250, H20DC250B
Voltage
20VDC
Battery type
Lithium-Ion
No load speed
8000rpm /min
Cutting width
250mm
Battery capacity
2Ah & 4Ah
Net Weight (kg)
2.0Kg
Charging time
60min for 2.0Ah battery pack if H18KC40 charger is
used; 240min for 2.0Ah battery pack if H18MC10
charger is used. 120(min) for 4.0Ah battery pack if
H20KC40 charger is used; 480(min) for 4.0Ah battery
pack if H18MC10 charger is used.
A-weighted sound pressure level
LpA
77dB(A)
Uncertainty KpA
3dB(A)
A-weighted sound power level
LWA+KWA
96dB(A)
Vibration
Ah=3.8m/s2
Wear hearing protection while operating the power tool.
The declared vibration total value has been measured in accordance with a standard test method and
may be used for comparing one tool with another.
The declared vibration total value may also be used in a preliminary assessment of exposure.
Warning
The vibration emission during actual use of the power tool can differ from the declared total value
depending on the ways in which the tool is used.
There is a need to identify safety measures to protect the operator that are based on an estimation of
exposure in the actual conditions of use (taking account of all parts of the operating cycle such as the
times when the tool is switched off and when it is running idle in addition to the trigger time).
Original Instructions
7
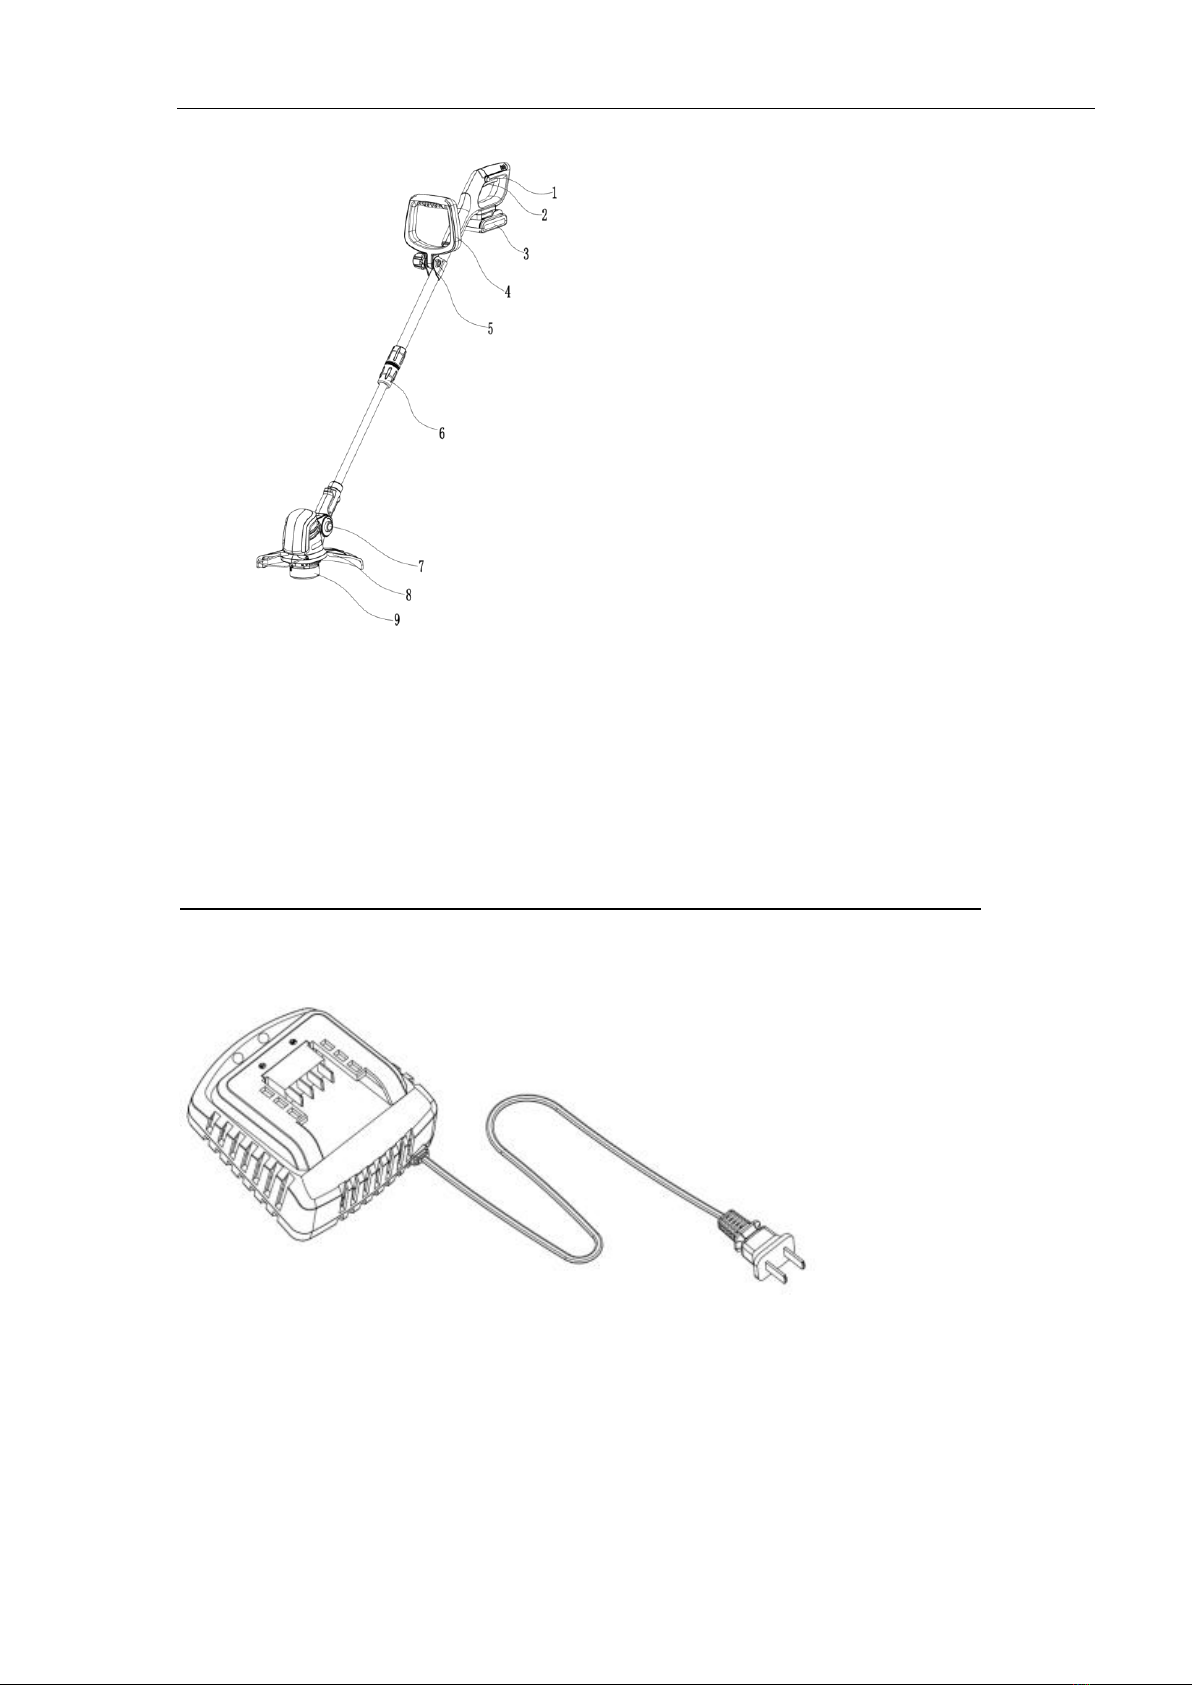
Product Features
Charging the Battery
The battery needs to be charged before first use and whenever it fails to produce sufficient power on
jobs that were easily done before.
The battery may become warm while charging; this is normal and does not indicate a problem.
NOTE: After several charge and discharge cycles, the battery will attain full capacity.
DO NOT CHARGE THE BATTERYAT AMBIENT TEMPERATURES BELOW 4ºC OR ABOVE 40ºC.
RECOMMEND CHARGING TEMPERATURE: APPROX. 24ºC.
(1) Connect the charger to the charger station.
(2) Plug the charger into an appropriate AC power outlet. The LED lights green to tell you that the
charger is ready for use.
(3) Insert the charger station into the battery pack, making sure the charger station is fully seated in the
battery pack. The LED lights red to tell you that the battery pack is charging.
Attention! Battery cannot be charged immediately after use. The battery pack should cool down
1 Safety lock-off button
2 Start button
3 Battery pack
4 Front handle
5 Lock knob
6 Threaded tube
7 Rotary button
8 Cutting means guard
9 Bump head

Original Instructions
8
for a period of time. The LED lights from green to red meaning that it can be charged.
(4) The battery pack will be fully charged in about 1 hour. And the LED lights green again to tell you that
the battery pack is fully charged.
Important charging notes
Longest life and best performance can be obtained if the battery pack is charged when the air
temperature is between 18-24℃. Do not charge the battery pack in a very low or very high air
temperature. This is important and will prevent serious damage to the battery pack.
1. When using your tool continuously, the batteries in your battery pack will become hot. You
should let a hot battery pack cool down for approximately 30 minutes before attempting to
recharge.
2. The charger and battery pack may become warm while charging. This is a normal condition, and
does not indicate a problem.
3. Use the charger in normal room temperatures whenever possible. To prevent overheating, do not
cover the charger and do not charge battery packs in direct sunlight or near heat sources.
4. If the battery pack does not charge properly –(1) check current at receptacle by plugging in a lamp or
other appliance. (2) move the charger and battery pack to a location where the surrounding air
temperature is approximately 18-24℃. (3) if charging problems persist, take or send the tool, battery
pack and charger to your local service center.
5. The battery pack should be recharged when it fails to produce sufficient power on jobs which were
easily done previously. DO NOT CONTINUE to use under these conditions. Follow the charging
procedure. You may also charge a partially used pack whenever you desire with no adverse effect on
the battery pack.
6. Under certain conditions, with the charger plugged in to the power supply, the exposed charging
contacts inside the charger can be shorted by foreign material. Foreign materials of a conductive nature
such as, but not limited to, steel wool, aluminum foil, or any buildup of metallic particles should be kept
away from charger cavities. Always unplug the charger from the power supply when there is no battery
pack in the cavity. Unplug charger before attempting to clean.
7. Do not immerse the charger in water or any other liquid.
8. WARING! Don’t allow any liquid to get inside the charger. Electric shock may result. To facilitate the
cooling of the battery pack after use, avoid placing the charger or battery pack in a warm environment
such as in a metal shed, or an uninsulated trailer.
9. CAUTION! Never attempt to open the battery pack for any reason. If the plastic housing of the battery
pack breaks or cracks, return to a service center for recycling; do not put it into further use
ASSEMBLY INSTRUCTIONS
For Your Safety
Warning! Remove the battery pack before guard installation or blade installation or
changing the blade or cleaning the tool.

Original Instructions
9
Insert/remove the battery pack
Always release the On/Off switch before insertion or removal of the battery pack.
To remove the battery pack, depress the button on the end of the battery pack, and then remove
the pack from the tool.
To insert the battery pack, align the latches on both sides of the battery cartridge with the groove in
the housing and slide it into place. Always insert it all the way until it locks in place with a little click.
If not, it may accidentally fall out of the tool, causing injury to you or someone around you.
Do not use force when inserting the battery pack. If the cartridge does not slide in easily, it is not being
inserted correctly.
Guard installation
a. Remove two screws from the motor housing.
b. Slide guard over motor housing.
c. Re-insert two screws into the guard and tighten.
Mount the Front Handle
As shown in the picture, after taking the trimmer out of package:
1. Turn the seat of the front handle until the front handle reaches its normal operating position.
1.cutting blade
2.4*16 screw
3.cutting means
guard
Original Instructions
10
2. Tighten the locking knob to lock the front handle.
Operation
RISK OF INJURY!
Risk of injury if the grass trimmer does not switch off when you release the start button.
Never bypass the safety devices (by binding the start button to the handle, for
example).
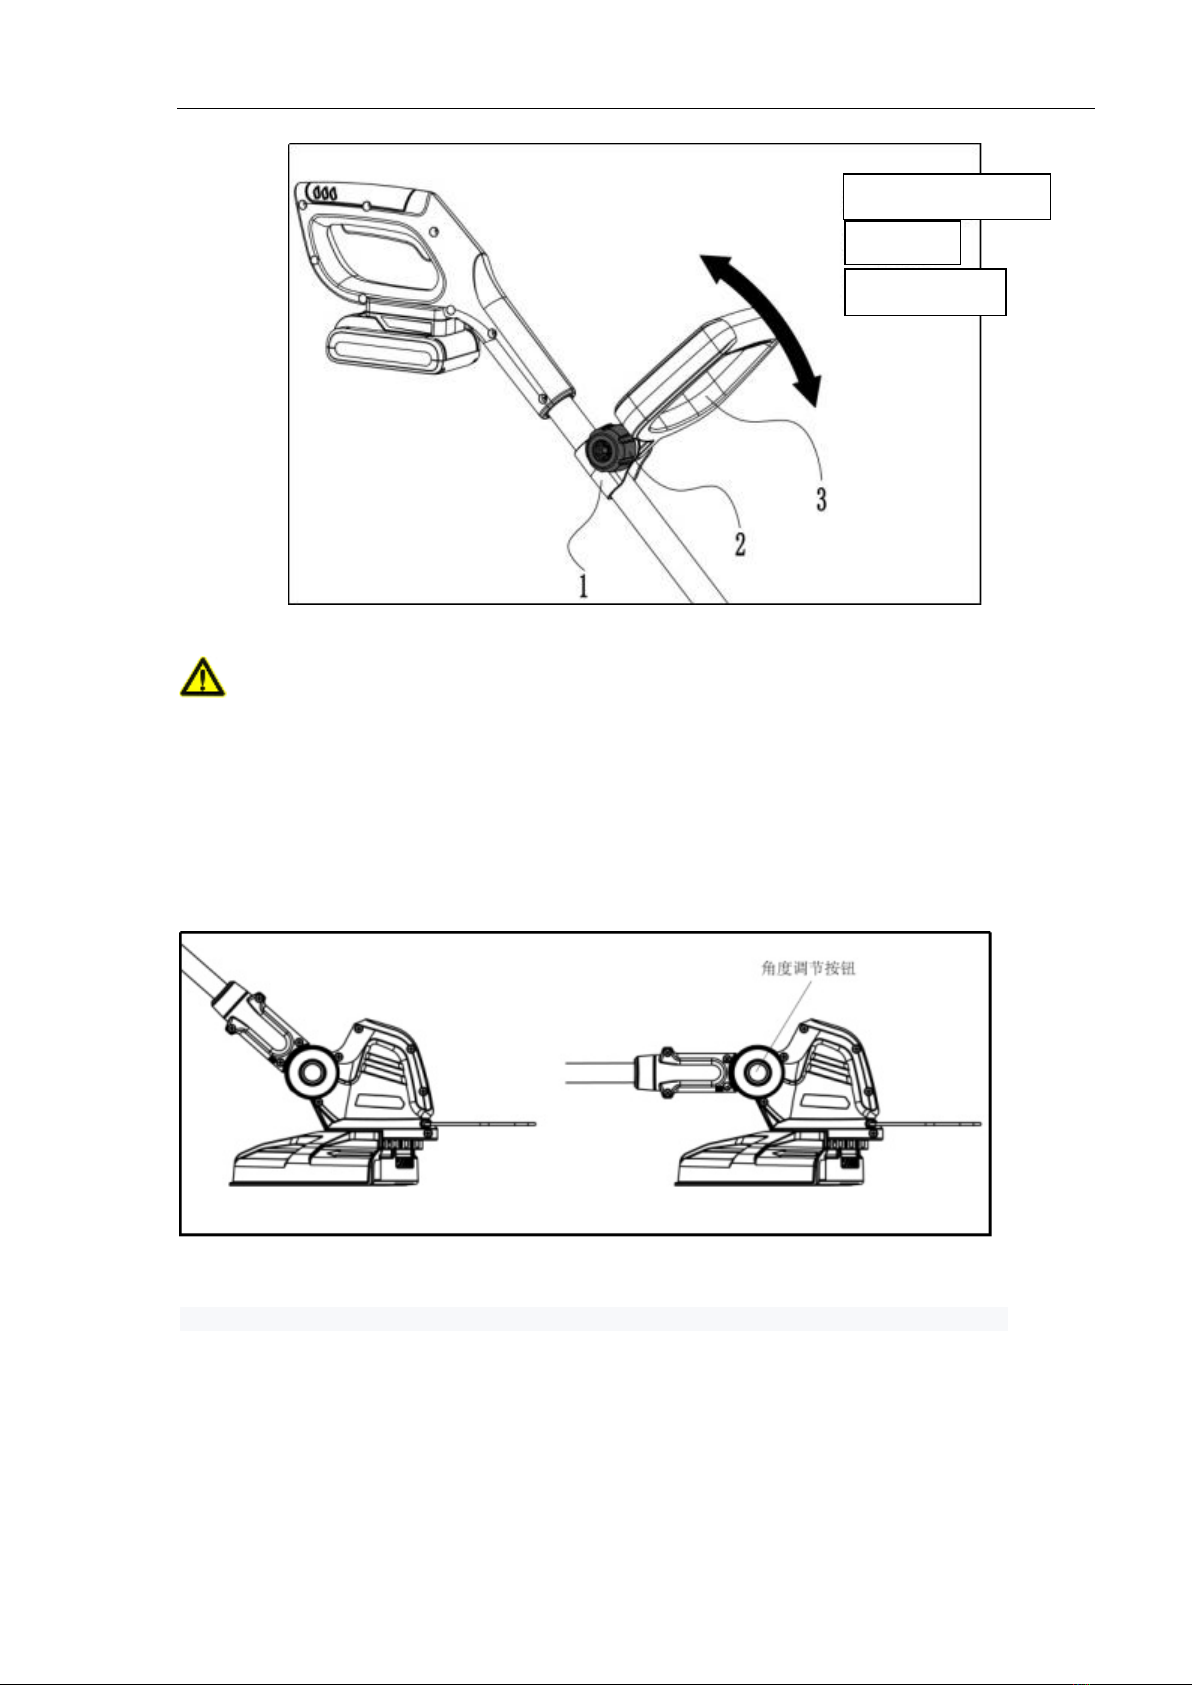
Setting the trimmer head angle:
Push the “PUSH” button with one hand and turn the trimmer head to a suitable position. The
“PUSH” button can lock the handle automatically.
Setting the handle length:
Rotate the threaded tube to secure the rod body to its own comfortable operating position
1.seat of front handle
2.knob
3.front handle

Original Instructions
11
Starting the trimmer:
Switching the trimmer on:
1,Press and hold the safety lock-off button 1 and then press the start button 2 on the handle.
2,Release the safety lock-off button 1 again.
Switching the trimmer off:
1,Release the start button 2 on the handle.
RISK OF INJURY! Cutting elements continue to rotate after the motor is switched
off. Do not try to stop the cutting device (nylon blade) with your hands. Always let it
come to a stop by itself.
Suggestion:If you are trimming the lawn in Working Position A, in order to trim better,
the angle between the blades and the horizon level should be set to about 10°. When
trimming, you can hold the machine and move it from left to right and then from right to left.
In this means you can get better trimming effects.

Original Instructions
12
HENX LIMITED WARRANTY
HENX String Trimmer Two Year Limited Warranty
H20LJ08
HENX String Trimmer are warranted (to the original purchaser) to be free from defects in materials and
workmanship for a period of One year from the date of original purchase. HENX Products used for commercial
or rental has a warranty period of 30 days from date of original purchase.
HENX will replace, at its discretion, any part that is proven to be defective in materials or workmanship under
normal use during the warranty period. Warranty replacements will be made without charge for parts or labor.
Parts replaced during warranty will be considered as part of the original product and will have the same

Original Instructions
13
warranty period as the original product.
TO EXERCISE WARRANTY COVERAGE:
Do not return to retailer! For warranty and technical support call the Customer Service
Number: (866) 678-8989
WARRANTY COVERAGE:
This warranty is conveyed to the original purchaser and is not transferable.
HENX String Trimmer contains parts that will wear out with usage and parts that need maintenance. The
warranty does not cover wear or maintenance parts.
Warranty does not extend to HENX String Trimmer damaged or affected by accidents, neglect, misuse,
contaminated fuel, unauthorized alterations, use in applications beyond product design and any other
modification, In addition, this warranty does not cover general check-ups on electrical equipment, tune-ups on
gasoline engines, or replacement of non-defective parts (such as electrical brushes, cables, plugs, spark plugs,
filters, starter ropes, etc.) that may wear and need to be replaced with reasonable use within the warranty
period or which may require replacement in connection with normal maintenance.
HENX is not liable for any indirect, incidental or consequential damages from the sale or use of this product. Any
implied warranties are limited to period as stated in this written limited warranty. Some states do not allow
limitation on the length of an implied warranty. Some states do not allow the exclusion or limitation of incidental
or consequential damages. This warranty gives you the specific legal right, and you may have other rights that
vary by state.
For questions / comments, technical assistance or repair parts
Please Call US at: (866) 678-8989
SAVE YOUR RECEIPTS. THIS WARRANTY IS VOID WITHOUT THEM.
This manual suits for next models
1
Table of contents
Other HENX Trimmer manuals


