Heras B700 User manual

EN –Translation of the original installation manual - 1.0 | 2020
Installation manual
Heras Cloud Unit on B700
Read this installation manual before connecting the Heras Cloud Unit
to the B700! Act according to the manual and keep it in a safe place.

EN –Translation of the original installation manual -1.0 | 2020
2

EN –Translation of the original installation manual -1.0 | 2020
3
CONTENTS
FOREWORD .............................................................................................................. 4
THE HCU ON THE B700 ......................................................................................... 51
CONNECTIONS TO THE B700............................................................................ 51.1
POSITIONING THE UNIT, MAGNET AND CONTACT................................................. 61.2
ACTIVATING THE UNIT.......................................................................................... 92
USE OF THE QR CODE .................................................................................... 92.1
USE OF THE WEBLINK................................................................................... 11
2.2

EN –Translation of the original installation manual -1.0 | 2020
4
FOREWORD
With this installation guide you can correctly commission and configure the Heras
Cloud Unit. To ensure that the user receives the correct information via the Heras
Cloud Portal, it is mandatory to follow these instructions.
Read this installation manual carefully before using the turnstile and the
Heras Cloud Unit.
Save the installation manual so that you can consult it if necessary.

EN –Translation of the original installation manual -1.0 | 2020
5
THE HCU ON THE B7001
Make sure you make the connections according to the instruction below. Because
the Heras Cloud Unit uses a predefined template, it is mandatory to connect it ex-
actly as indicated.
CONNECTIONS TO THE B7001.1

EN –Translation of the original installation manual -1.0 | 2020
6
HCU
B700
Wire color
Description
Signal levels
Note
GND
- CT
Dark blue
(-) GND
0 VDC
Power -
24 VDC
+ CT
White
(+) 24V DC
24 VDC
Power +
In 1
2, 4
Green
Cycle counter
0V Inactive / +24V +1
Including diodes
In 2
2
Orange
Open entry
0V Inactive / +24V Acti-
ve
In 3
4
Grey
Open exit
0V Inactive / +24V Ac-
tive
In 4
7
Light blue
Proximity switch entry
+24V OK / 0V Active
In 5
8
Brown
Proximity switch exit
+24V OK / 0V Active
In 6
Purple
In 7
Yellow
In 8
White(MC)
Lid
+4V Closed / 0V Open
Magnet contact
4V Ref
White(MC)
Battery backup +4V Out
Magnet contact
4V Ref
Red
Battery backup +4V Out
Relay 1
Black
N/O (Open via GSM)
Relay 1
Black
N/O (Open via GSM)
Relay 2
Pink
N/O (extra relay)
Relay 2
Pink
N/O (extra relay)
POSITIONING THE UNIT, MAGNET AND CONTACT1.2
The figures below shows how to place the unit, magnet and the contact. Both mag-
net and contact have a self-adhesive side. Make sure the surface is clean before
you stick it in position.
First attach the contact to the cabinet and then determine the exact position of the
magnet. This requires a bracket to achieve the correct distance.

EN –Translation of the original installation manual -1.0 | 2020
7
Unit on inside of the cover:

EN –Translation of the original installation manual -1.0 | 2020
8
Magnet on lid and case:

EN –Translation of the original installation manual -1.0 | 2020
9
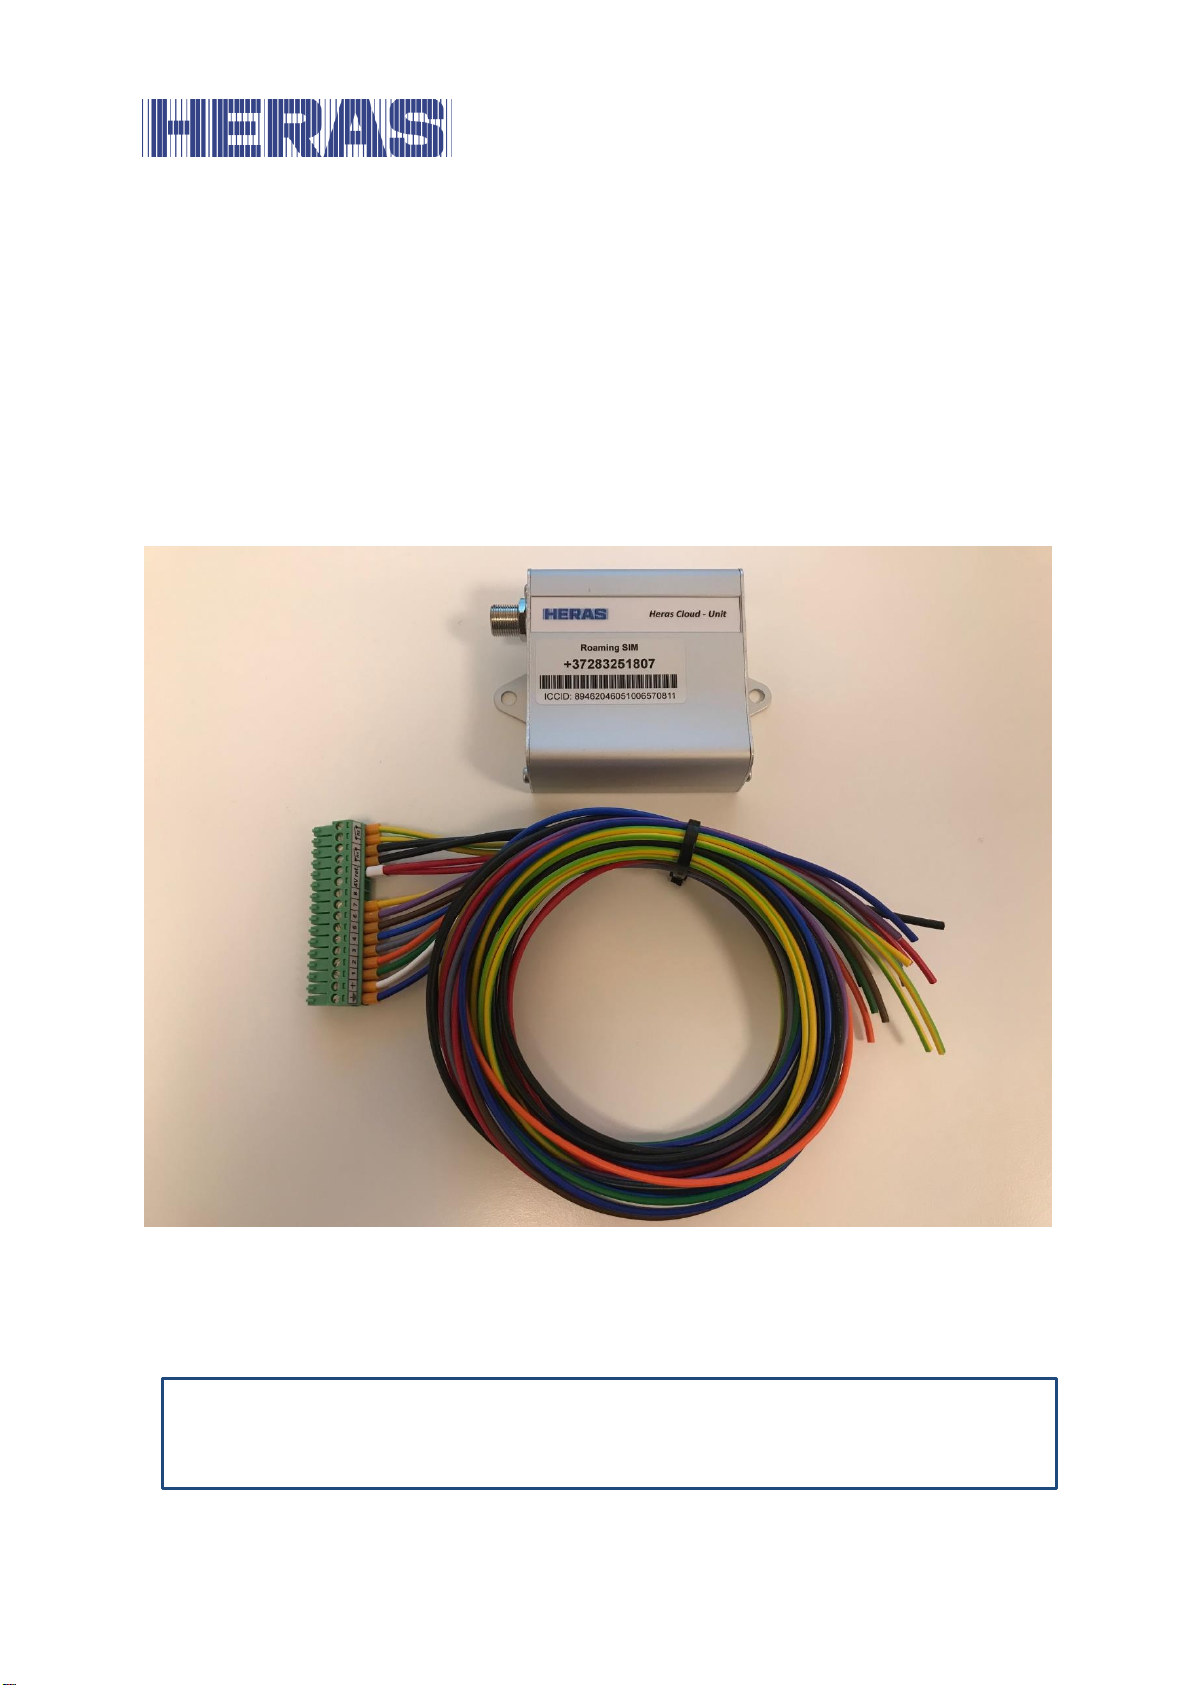
Ensure that the correct wires are used. Only the loose wires must be used; the
others are to be cut off.
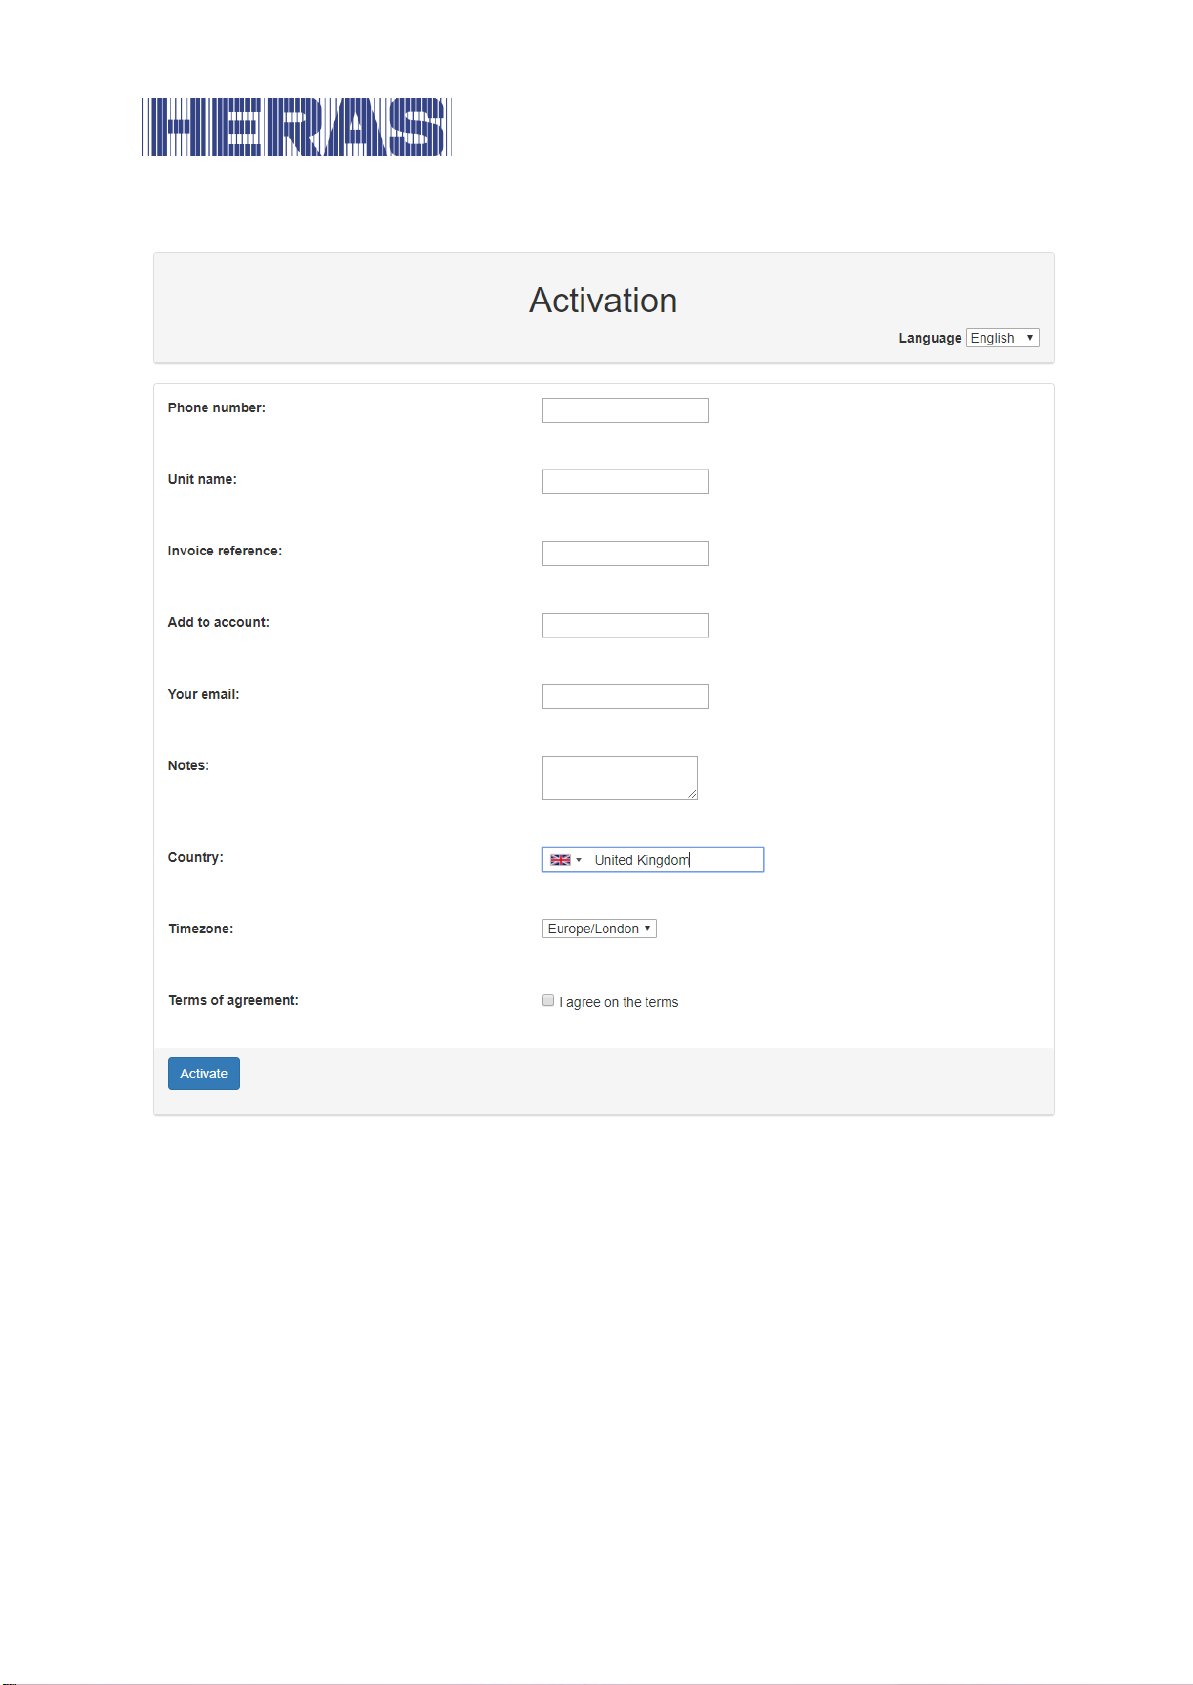
ACTIVATING THE UNIT2
USE OF THE QR CODE2.1
The HCU has a sticker with a QR code and information about the phone number
and SIM serial number (ICCID) in the device.
Scan the QR code using the camera of your mobile phone. The browser opens a
web form in which the telephone number of the HCU is already entered. If the HCU
is already activated, you will be redirected to Heras Connect, where you can log in
to gain access to the HCU.
Fill in the fields of the form.

EN –Translation of the original installation manual -1.0 | 2020
10
Language: Select the language in which the form will be displayed.
Phone number: Is automatically filled with the telephone number.
Unit name: Enter Site name + location + gate description; this
is how the unit will be shown in the Heras Cloud Portal.
For example: DPD Leeds main gate or Amazon Man-
chester barrier 1. This name must be clear to both the
customer and us.
Invoice reference: n.a.

EN –Translation of the original installation manual -1.0 | 2020
11
Add to account: E-mail address to the cloud account to which the device
Your email: Enter your own email address.
Notes: n.a.
Country: Enter the country in which the unit will be installed.
Tim zone: Select the time zone if there is more than one.
Terms of agreement: Accept the conditions that are available on the Heras
website.
Activate: Click to activate the HCU.
USE OF THE WEBLINK2.2
The same form can be accessed via https://connect.heras.com/activation
Please note: the telephone number must be entered manually and must contain
the telephone number as stated on the HCU (e.g. including + 46 or +31 ...)
Contact the office staff to continue testing.

Local supplier stamp
Table of contents
Popular Desktop manuals by other brands

Lenovo
Lenovo ThinkCentre Edge 71z Guida per l'utente

Lenovo
Lenovo ThinkStation P300 user guide

Lenovo
Lenovo ThinkStation E31 user guide

HP
HP ProDesk 680 G4 PCI Microtower Business Maintenance and service guide

Moxa Technologies
Moxa Technologies MC-7400 Series user manual

Acer
Acer Altos 330 Series user guide