Hermstedt StingRay 3.0 User manual

Hermstedt StingRay 3.0
The Local Users Guide
v 1.2
Publication Date - March 2011
Hermstedt StingRay
The multi protocol File Transfer Server
© Pro2col Limited and/or its Affiliates. All rights reserved.

www.hermstedtstingray.com - 2 - The Local User’s Guide
CONTENTS
1 Introduction
3
1.1 About this Local User Guide
3
2 StingRay Server Models
4 -5
2.1 2U StingRay Server
4
2.2 1U StingRay Server
4
3 StingRay Web Browser Interface
6
4 Local User Mode
7 - 24
4.1 General
7
4.2 User Settings
7 -8
4.3 Address Book Management
8 - 14
4.3.1 Address Book Overview
4.3.1.1 Creating a New Address Book Entry
4.3.1.2 Creating a New Address Group
8 – 10
10 – 13
14
4.4 Job Management
15 - 24
4.4.1 Creating a Send Job
4.4.1.1 SendJob Confirmation
4.4.2 Outgoing Jobs
4.4.3 Incoming Jobs
4.4.3.1 Downloading Jobs from the Incoming jobs List
4.4.4 Email Notifications
4.4.5 Setting Up Retrieve Jobs
4.4.5.1 Creating a New Retrieve Job
4.4.6 Transmission Status
15 – 16
16
16 – 18
18 – 20
20 – 21
21 – 22
22 – 23
23 – 24
24 – 25

www.hermstedtstingray.com - 3 - The Local User’s Guide
1 Introduction
1.1 About this Local User Guide
This is the definitive local user guide for Hermstedt StingRay, a multi-protocol, on premise file
transfer server used for sending and receiving large files securely. Connected via Ethernet to a
local network (LAN), once also connected to an external network such as the Internet, StingRay
enables users to send and receive large files from their local computer via a selection of file
transfer protocols and delivery options.
These include:
Outgoing
FTP
HTTP(S) (Quicksend option available)
Leonardo/IP
ISDN (optional in 2U server models only)
Incoming
FTP
HTTP(S) (external web browser upload)
Email Attachments
Leonardo/IP
ISDN (optional in 2U server models only)
Exchange
HTTP(S) Upload and Download
FTP Upload and Download
Broken down into four distinct chapters, this guide provides an overview of the file sending
options available when logged into the internal web browser interface as a local user.

www.hermstedtstingray.com - 4 - The Local User’s Guide
2 StingRay Server Models
Originally developed by Hermstedt AG in 2002, StingRay was first manufactured as a 2U
server. Since it’s inception, StingRay has seen a number of major developments, one of those
being the transition from a 2U server to a faster, more robust 1U hardware model. This section
outlines the major differences between the two server models.
PLEASE NOTE: It is important to establish which server model you
are currently running, as some sections within the internal web
interface may not be relevant to your server.
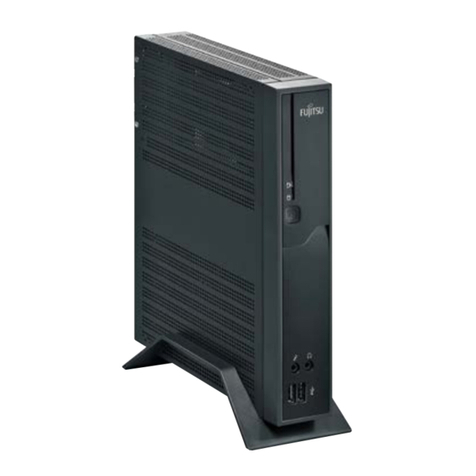
2.1 2U StingRay Server
Image A – Front of 2U Server
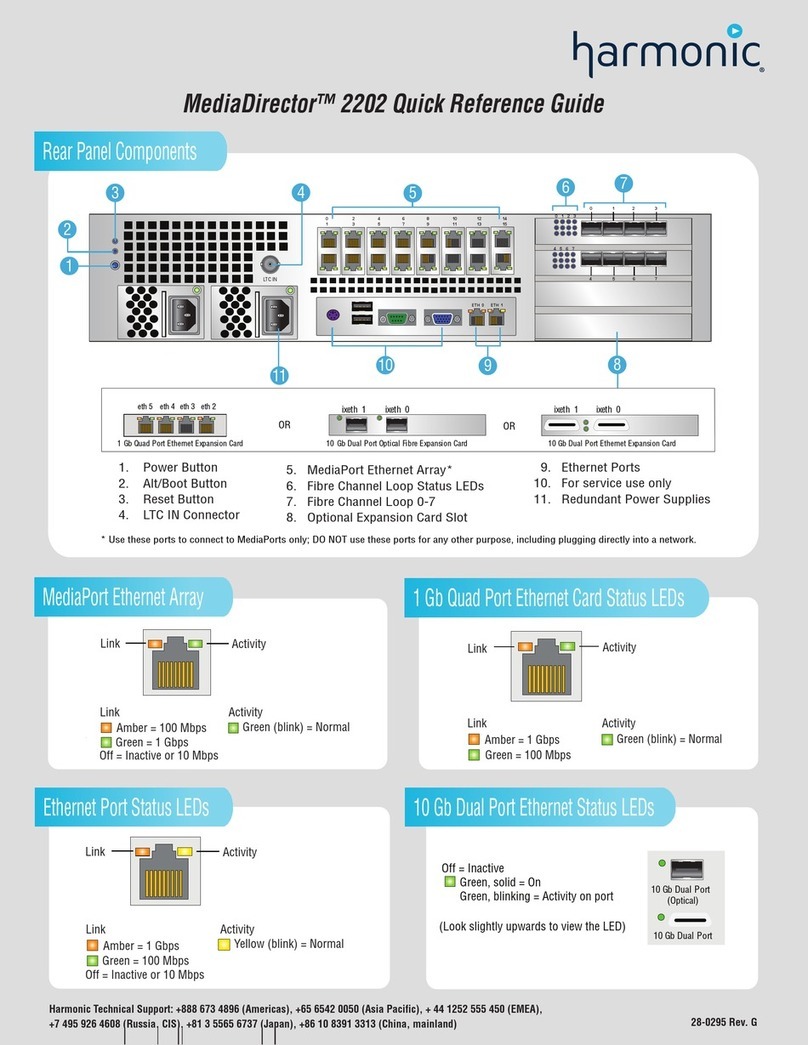
Image B – Back of 2U Server (without ISDN card)
The 2U StingRay server comprises of the following components:
2U, desktop/shelf-mounted server
250Gb Hard Disk Drive (previously 40/120Gb options)
2 x Ethernet adapters
CPU: 1 Ghz
RAM: 128MB
Most significantly, the 2U server provides the option for ISDN communications. The optional
ISDN capabilities are:
4 channel basic rate (256kbit/s) ISDN communication adapter
8 channel basic rate (512kbit/s) ISDN communication adapter
Primary Rate ISDN communication adapter (up to 1920kbit/s)
PLEASE NOTE: All references to ISDN are ONLY applicable to 2U
StingRay users with an ISDN card fitted.

www.hermstedtstingray.com - 5 - The Local User’s Guide
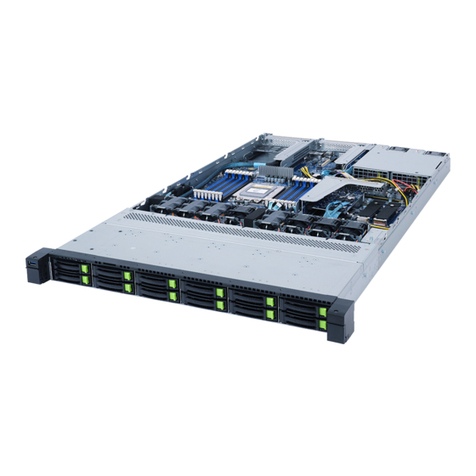
2.2 1U StingRay Server
Image C – Front of 1U Server
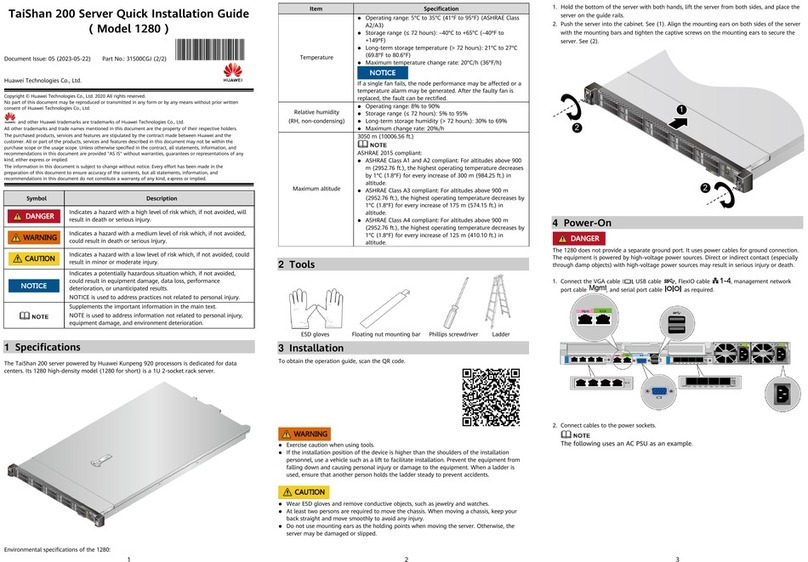
Image D – Back of 1U Server
The 2U StingRay server comprises of the following components:
1U, rack mountable server unit
500Gb Hard Disk Drive
2 x Ethernet adapters
CPU: Intel Celeron 430 (1.80 GHz)
RAM: 1GB
Gigabit Ethernet (10/100/1000)
The new 1U hardware provides users with the following enhancements:
Faster processing of files - great for those heavy users
Gigabit networking - helping to achieve up to 313% speed increases
More resilient and robust hardware architecture
Rack-mounted server - saving you server space
PLEASE NOTE: 1U StingRay server’s are ONLY FTP/IP enabled,
therefore any references to ISDN within the internal web interface
are not applicable.

www.hermstedtstingray.com - 6 - The Local User’s Guide
3 StingRay Internal Web Browser Interface
The internal web browser interface is StingRay’s primary access point, enabling users to send
and receive file(s)/folder(s) and monitor the status of jobs in progress.
Your IT administrator should provide you with the following details to enable you to log onto the
StingRay server:
StingRay IP/Web Address
Username
Password
PLEASE NOTE: Username and password are case sensitive.
To access the internal web browser interface as a local user:
Enter the IP address/domain name of the StingRay server into a standard web browser, we
would recommend using:
Firefox version 2 to 3
Safari version 3 to 5
Internet Explorer version 5 to 7
Once the web browser has loaded, the following login page will appear:
Image E – External Web Browser Login
Sign in with the unique username and password supplied by your administrator.
Image F - Main Menu
Once logged in, use the main menu that runs vertically down
the left-hand side of the window to navigate and select the
desired features and functionality.
The user options displayed in this menu bar are dependant
on the privileges granted during the creation of an individual’s
local user profile. The menu to the left contains the basic
options available to all local users.

www.hermstedtstingray.com - 7 - The Local User’s Guide
4 Local User Mode
4.1 General
Depending on the rights granted by the StingRay administrator, local users are able to complete
the following ‘Address Book’ and ‘Job Management’ tasks via StingRay’s internal web browser
interface:
Create and change address book entries.
Send files and folders to remote sites.
Download files received onto their local computer (assuming they have access rights to
the files in question).
Monitor the status of StingRay connections.
This guide details exactly how to complete each of these tasks via the internal web browser
interface, using the options listed in the main menu to navigate between the applicable pages.
PLEASE NOTE: The available task options will vary from user to
user, depending upon the tasks that have been enabled by the
StingRay Administrator. Clicking on the desired menu item will open
the corresponding pages in the right hand side of the browser
window.
It is also possible for the StingRay administrator to grant administration rights to local users. If
this is the case, please refer to the document ‘StingRay – The Administrator’s Guide’ for full
details of the configuration options made available in administration mode.
4.2 User Settings
Image G – Local User Settings
Even if a local user has not been granted administration rights, they will still have the ability to
configure their own password and amend details relating to the automatic update of
incoming/outgoing jobs via the user settings page.
To amend these settings, the following details must be completed:
In order to change their password, the user must enter their old password, the new
password and then confirm the new password.
Once all information has been correctly entered and the ‘Save’ button selected, the new

www.hermstedtstingray.com - 8 - The Local User’s Guide
password will be ready to use for login.
The ‘Refresh job lists’ box must be ticked to activate the automatic update of the outgoing
and incoming jobs lists, as well automatic job retrieval. If this functionality is not required,
simply ensure this box is not ticked.
4.3 Address Book Management
Image H – Address Book (List View)
StingRay stores all remote site addresses and address groups centrally in one of the server’s
databases. The advantage of this setup is that all remote site addresses can be accessed
regardless of which workstation or user profile is used to log onto StingRay.
There are however two different types of address book that can be used to enter and store
remote site details. The first, referred to as the ‘Global Address Book’ contains addresses and
groups that are shared with, and can be accessed by all StingRay users on the internal network.
The second option is the ‘Local Address Book’ that individual local users can use to save
address details personally to their profile, prohibiting access to other StingRay users within the
internal network.
Addresses can also be grouped together, which allows files and folders to be sent to several
addresses in one job. More significantly, each address entry within a group can be configured
to use a different file transfer protocol and upon sending a single job to a group; separate jobs
will automatically be created for each individual remote site. This enables local users to
independently monitor the transmission status of jobs sent to each remote site within the group.
The address book is an integral part of the StingRay file transfer server as in order to send and
receive file(s)/folder(s); the remote site details must be entered accurately.
PLEASE NOTE: If these details are not correct, you will encounter
problems when sending and receiving file(s)/folder(s)!
4.3.1 Address Book Overview
When the ‘Address Book’ option is selected from the main menu, a list view of all address
entries will be displayed on this page.
The following details for each address book entry are shown in list view:

www.hermstedtstingray.com - 9 - The Local User’s Guide
Address Book
Search Field
As the list of address book entries can become quite extensive, a search
field is provided to save users from having to scroll down the list in
search of the entry they wish to view or amend.
Simply type, or begin typing the remote site’s name in the search field
and then click on the ‘Search’ button to locate the desired address book
entry.
New Group Button
Clicking on the ‘New Group’ button will open a new page where address
groups can be created. This is explained in further detail on page 14 of
this guide.
New Button
The ‘New’ button, if selected, opens a new page where an address book
entry can be created for a new remote site. See page 10 of this guide for
further details.
Tick Boxes
Selecting the tick box next to an address book entry (or multiple address
book entries) allows certain actions to be performed via the list view, as
detailed in the dropdown at the bottom of the page.
The actions that can be performed are as follows:
Delete
Copy Entry
Select the desired action from the dropdown list then click on the ‘Go’
button to the right of the dropdown to complete the action.
Type Symbol
One of the following symbols will appear in this column, and they
represent:
This symbol indicates that the corresponding address
entry is stored within the Global address book.
This symbol means that the corresponding address
entry is saved in the local users address book only.
This symbol represents a group address entry that is
stored within the Global address book.
This symbol represents a group address entry that is
saved in the local users address book only.
Company
This column displays the name of the remote site company, as recorded
during the creation of their initial address book entry.
Recipient
The contact name of the intended recipient at the remote site is detailed
in this column, as recorded in their address book entry.
Protocol
The protocol by which the remote site sends files (as set in their address
book entry) is listed in this column.
Address
An IP address, host name or email address will display in this column.
This is the remote site address that files will be sent to, as recorded in
their address book entry.
Mailbox
If this remote site’s incoming jobs have been assigned to a mailbox, the
name of this mailbox can be found in this column.
Mailbox assignment is a feature that must be configured by your
StingRay administrator.

www.hermstedtstingray.com - 10 - The Local User’s Guide
Out
This box, if ticked, indicates that the remote site has been enabled for
outgoing transmissions i.e. internal users can send jobs to this site. If left
unticked, internal users will not be able to send to this remote site.
In
This box, if ticked, indicates that the remote site has been enabled for
incoming transmissions i.e. they can send jobs to the StingRay. If
unticked, the StingRay will not accept incoming jobs from this site.
Exch.
If ticked, this remote site will have the ability to log into StingRay’s
Dataserver to either upload files for internal collection or download files
that have been placed in their secure folder on the server.
Glasses Symbol
Clicking on the glasses symbol will open the corresponding address book
entry.
Trash Symbol
Clicking on the trash symbol will delete the corresponding address book
entry.
4.3.1.1 Creating a New Address Book Entry
To create a new address book entry, first select the ‘New’ button, which can be found in the
top right hand corner of the address book overview page.
Once selected, a new page will appear and the following details must be completed:
Image I – New Address Book Entry (General Information)
General Information
Company name
Enter the name of the remote site.
Recipient Name
Enter the name of the remote site contact.
Phone Number
Enter the remote site contact number.
E-Mail
This should be the email address of the remote site contact – this is the
address that any external email notifications will be sent to, if this
functionality is enabled in the address book entry.
Notification
This field provides a dropdown list of the different notification options
available. If a remote site email address has been provided, then select
the email option from the dropdown menu and an external email
notification will be sent to this address when a new job is created.
The actions that will trigger this email notification (e.g. when a job is
created, when a job is successfully sent etc.) can be controlled and
modified by the StingRay administrator. If an email notification is not
being sent when activated within an address book entry, please contact
the StingRay administrator for further details.
The notification options provided in the dropdown are as follows:
None
E-Mail

www.hermstedtstingray.com - 11 - The Local User’s Guide
Mailbox
This field provides a dropdown list of the mailboxes configured on the
StingRay server. If selected, files/folders received from the remote site,
can be directed into the mailbox.
PLEASE NOTE: Individual mailboxes can be configured to
periodically forward all files contained into an internal workflow.
Please contact your administrator for further details.
Job Tickets
Select the Job Ticket form you want to display to your customer when
they upload files via the external web interface.
Postal Address
Enter the full postal address of the remote site.
Global Address
This box should be ticked if this remote site’s details are to be stored in
the Global address book and made accessible to all local users. If the
local user creating the entry just wants it to be visible in their local address
book, please ensure this box is not ticked.
Image J – New Address Book Entry (Outgoing Settings)
Outgoing Settings
Outgoing Transmission
Enabled
This box must be ticked if outgoing files/folders are to be sent to this
remote site.
ISDN number / IP Address /
email
These details must be provided, if jobs are to be sent to this remote site
by ISDN or FTP/Email. ISDN will require the remote site’s ISDN number;
FTP will require the IP address of the remote site or the web address, e.g.
stingray.pro2col.com and Email will require the Email address of the
designated contact at the remote site.
Protocol
This dropdown allows users to select the file transfer protocol used to
send files to the remote site. The selection will depend upon the file
transfer protocols available at the remote site. Options provided within
the dropdown include:
Leonardo over IP (StingRay to StingRay ONLY)
FTP
ISDN Manager over IP
Email (SMTP)
HTTP Link (HTTP link by mail)
User Name
This will be the username for the receiving server at the remote site; these
details must be obtained from the remote site IF they operate a password
protected file transfer system.
FTP Passive mode
If this box is ticked, FTP file transfers will be executed in passive mode
but passive mode will only work for networks with a certain configuration.
Please contact the StingRay administrator to find out if your network will
support passive FTP.
Retrieve enabled for FTP
This option, if ticked enables the periodic retrieval of data from the remote
site’s server via FTP. This option will only be active if FTP is the selected
file transfer protocol. See page 23 of this guide for details of how to setup
a retrieve job.

www.hermstedtstingray.com - 12 - The Local User’s Guide
Destination folder
This field defines the path to the correct folder on the remote server. Use
a colon (:) for the AFP protocol or a slash (/) for FTP, as path separator.
Max. Channels
This relates to the number of ISDN channels that are available (if sending
via ISDN). This is judged on the amount of data being sent and the speed
at which it needs to be transmitted. A greater number of ISDN lines must
be used for larger files/folders that need to go at a greater speed.
Password
Allows access to the remote site’s server; it will need to be obtained from
them IF they operate a password protected file transfer system.
Mac Extra
This field determines the format of the files that are transferred from
StingRay to the remote site. This setting can depend upon the remote
site’s chosen protocol and the type/format of data being sent. There are
three options to choose from:
Full - All file information is transferred to the remote site. (DEFAULT).
Data-fork only - Only the data-fork is extracted from the file and sent
to the remote site.
MacBinary - The file is transferred to the remote site as a MacBinary
file.
Skip transferring folder
structure
If the receiving folder at the remote site is unable to accept a folder
hierarchy, this option can be used to send all files within a single folder to
a remote site by flattening the folder structure. You do not have to change
your local file and folder structure. The folders will be removed
automatically during the data transfer.
Image K – New Address Book Entry (Incoming Settings)
Incoming Settings
Incoming Transmission
Enabled
This box must be ticked if files/folders are to be received from this remote
site.
User Name
This is a unique username that must be assigned to the remote site so
that StingRay can validate the incoming job as being sent by an
authorised user. Once assigned, these details should be provided to the
contact at the remote site (please see information regarding ‘Mail Access
Data Button’ on page 13).
Password
A unique password must also be assigned to each remote site to enable
them to send files/folders into the StingRay. Once assigned, these details
should be provided to the contact at the remote site (please see
information regarding ‘Mail Access Data Button’ on page 13).
Image L – New Address Book Entry (Dataserver Access Settings)

www.hermstedtstingray.com - 13 - The Local User’s Guide
Settings for Data server access (Exchange)
Data server access enabled
This box must be ticked if files/folders are to be shared with this remote
site via the Dataserver.
User Name
Enter a unique username to enable the remote site to logon as an
authorised user. Once assigned, these details should be provided to the
contact at the remote site (please see information regarding ‘Mail Access
Data Button’ below).
Access rights
These tick boxes dictate which actions the remote site can perform once
logged into their secure exchange folder on the StingRay data server.
There are 3 ‘rights’ that can be assigned as follows:
Write (Add Files)
Delete
Hide username/password
Simply tick the boxes next to the rights to be enabled for this remote site.
Password
A unique password must also be assigned to each remote site to enable
them to login to the StingRay Dataserver. Once assigned, these details
should be provided to the contact at the remote site (please see
information regarding ‘Mail Access Data Button’ below).
Notification due to actions
to following users
This box allows the creator to select which local users are to receive an
email notification when this remote site uploads or downloads files/folders
via the Dataserver.
The top left-hand box shows a list of all local users registered on the
StingRay unit. Local users can be selected to receive an email
notification when a job is sent/received by this remote site via the
Dataserver, by highlighting and moving the desired local user details from
the left hand box to the right hand box.
Image M – New Address Book Entry (Receiver Assignment Settings)
Receiver assignment
Assigned Receivers
The bottom left-hand box lists all incoming delivery protocols. Selecting
protocols and moving them over to the right-hand window allows internal
users to stipulate which delivery protocol the remote site can use to
deliver files to StingRay.
Save Button
Click on the ‘Save’ button to complete the group address book entry.
Mail Access Data Button
Click on this button to automatically generate and send an email to the
remote site contact detailed within the address book entry. This email will
contain the usernames and passwords required to send incoming jobs to
the StingRay and retrieve jobs from StingRay’s Dataserver.

www.hermstedtstingray.com - 14 - The Local User’s Guide
4.3.1.2 Creating a New Address Group
Image N – New Address Group
The StingRay address book provides users with the option to group selected remote site
addresses together, enabling local users to send one job to several external companies at the
same time. Moreover, a group can contain addresses specified to use different file transfer
protocols and upon sending a single job to a group; separate jobs will automatically be created
for each remote site within that group. This allows users to independently monitor the
transmission status of jobs sent to each remote site within the group.
To create an address group, click on the ‘New Group’ button in the top right hand corner of
the page and a new page will appear with the following details, which must be completed:
Address Book – New
Group name
Enter any applicable identifying name for the address group in this field.
This is the name that will display under the ‘Name’ column within the
address book list view.
Description
This box enables the group creator to add a description of the address
group.
Global group
This box should be ticked if the creator wishes for all local users to be
able to send jobs to this group.
Visible for data server
(outgoing jobs)
This box should be selected if the creator requires the group to be visible
on the Dataserver for outgoing group sending.
Edit address group members
Group member addresses
These boxes are used to assign the remote sites that are to be included in
the group address book entry. All remote site addresses (that the local
user creating the group is enabled to access) will be listed in the left box,
simply select the ones to be included in the group and use the arrow
buttons to transfer them over to the right hand box.
Save Button
Click on the ‘Save’ button to complete the group address book entry.

www.hermstedtstingray.com - 15 - The Local User’s Guide
4.4 Job Management
The ‘Job Management’ page enables users to send outgoing files and download incoming files
to their local hard disk.
4.4.1 Create a SendJob
Image O – Create New Outgoing Job
To send an outgoing job via StingRay’s internal web interface, the ‘Create SendJob’ option
under ‘Job Management’ in the main menu should be selected.
Once selected, a ‘New Job’ page will appear and the following details must be completed:
Create SendJob
Address
This box contains all of the global addresses/address groups and the
personal addresses/personal address groups created by the local user
currently logged onto the StingRay.
The address or group of the remote site(s) that the user wants to send the
job to should be highlighted in purple.
Search Field
The search field can be used to search the list for a specific company
name, contact person or communication address (ISDN number or IP
address).
Subject
Additional information that will help the remote site identify the job can be
entered in this field.
Files
Clicking on the ‘Browse’ button next to each field in this section enables a
single file to be uploaded to the StingRay. Due to the security rules
governing the web browser, it is not technically possible to transfer folders
or all the elements of a Macintosh file (e.g. resource fork) when using the
internal web browser interface.
However, folders can be sent when using the StingRay client application.

www.hermstedtstingray.com - 16 - The Local User’s Guide
Priority
As some jobs are more important than others, individual jobs can be
assigned a priority level. The administrator can control the maximum
priority level each individual local user is allowed to allocate to a job.
There are a total of 3 priority levels to choose from:
Normal
The job is added to the job list and is handled in turn.
High
The job is added to the job list above the ‘normal’ jobs
and will be processed before them.
Maximum
Any job classified, as having maximum priority will
supersede the processing of all jobs marked with a
'normal' or 'high' priority and will rise to the top of the
outgoing jobs queue.
Send Job
Once all details have been entered for a job, i.e. the addressee and a
minimum of one file selected, then the job send can be initiated by clicking
on the “Send job” button. The internal web browser interface
subsequently transfers the files to StingRay - once StingRay has
successfully received the job, a confirmation page will appear.
4.4.1.1 SendJob Confirmation
Image P – SendJob Confirmation Page
Once the job has been created and sent to the StingRay server, a confirmation page will be
displayed. This page provides a list of the files sent and their size in bytes.
The links beneath this information can be used to either proceed directly onto the ‘Outgoing
Jobs’ section where the progress of the job can be monitored (‘View job progress’), or to return
to the ‘Create SendJob’ page (‘Create new SendJob’).
4.4.2 Outgoing Jobs
Image Q – Outgoing Jobs List
This page provides an overview of all outgoing jobs that have been sent, and are currently
being processed by the StingRay server. The list is updated regularly, according to the time
interval set by the administrator. This ensures that local users can monitor the current status of
StingRay jobs at all times.
The outgoing jobs list contains the following information:

www.hermstedtstingray.com - 17 - The Local User’s Guide
Outgoing Jobs
ISDN/IP
When each of the status lights displays as green, this indicates that the
service is available to the current user. If displayed as a red light, this
indicates that the service has not been made available to the user.
Green Refresh Symbol
(with red line through)
By default, the outgoing jobs list is automatically updated. Clicking on the
green refresh icon in the top right-hand corner of the page will disable this
default.
To update manually, click the now displayed left-hand arrow icon. Clicking
the right-hand double arrow icon will re-activate the automatic update
function.
Tick Box
In order to apply a specific action to all the jobs in the list, each job can be
ticked and processed individually or, simply select the ‘All’ box to tick all
jobs in one go. As this selection is lost when the page is refreshed, the
automatic refresh functionality should be deactivated before selecting the
jobs by clicking on ‘Manual refresh’
Select the required action from the list at the bottom of the page and click
on the ‘Go’ button to initiate the action. The following actions can be
performed:
Restart transfer
Abort transfer
Delete
Disk Symbol
The disk symbol indicates whether or not the job has been sent. The
colours signify:
Red
Failed
Green
Successful
ID
To help with internal job identification, logging and tracking, a unique ID is
automatically assigned to each job in list view.
Remote Site
The name of the remote site that the files are being sent to.
Subject
This displays the subject that was entered when the send job was initially
created.
Status
This field shows the current status of the job. One of the following status
will be displayed:
Ready
Job is about to be transferred to the remote site.
Waiting
Job is in the re-dial loop and is waiting for the next
attempt to start the transfer.
Sending
Files are currently being sent to the remote site.
Sent
Job has been successfully sent to the remote site.
Stopped
Job stopped by the user.
Failed
After all re-dial attempts, job could still not be transferred
or was cancelled.

www.hermstedtstingray.com - 18 - The Local User’s Guide
Send time
The time and date the job was sent or is due to be sent, if the job is
currently in a re-dial loop.
Priority
Priority of the job.
Size
Size of the job in bytes.
%
Job progress in percent.
Glasses Symbol
Click to view the detail view of a particular job.
Blue Repeat Symbol
Click to reattempt a job send that was not transferred successfully OR to
re-send a job that has already been sent.
Stop Symbol
Click to stop the transfer process and disconnect from the remote site.
Trash Symbol
Click this icon to delete the job from the list.
4.4.3 Incoming Jobs
Image R – Incoming Jobs List
The incoming jobs list provides an overview of all the jobs received by StingRay and summaries
some of the most important details regarding these jobs and the files contained in them. The
details provided are as follows:
Incoming Jobs
Receiver
Selecting a value from the receiver dropdown will provide the user with an
overview of all jobs received using the corresponding receiver (ONLY if the
user has been enabled to view all the remote sites in question).
If files are received via a particular receiver to which the user has not been
granted access rights, but the remote station has been assigned a mailbox
to which the user has access rights, then the user can view the job by
selecting ‘All’ in the dropdown provided next to the receiver.
&
Ticking the ‘&’ box launches a search combining both the receiver and
mailbox information. If the box ‘&’ is not ticked, the results will be grouped
according to either all those received via the receiver or those in the
mailboxes.
Mailbox
The mailbox dropdown provides a list of the mailboxes that the current local
user is enabled to view. Selecting a mailbox from this dropdown will
provide the user with a list of jobs contained within the mailbox.
ISDN/IP
When each of these status lights display as green, this indicates that these
services are available to the user currently logged on. If displayed as red,
these services are not available.

www.hermstedtstingray.com - 19 - The Local User’s Guide
Green Refresh Symbol
(with red line through)
By default the incoming jobs list is automatically updated. Clicking on the
green refresh icon will disable this default setting.
To update manually click the now displayed, left-hand arrow icon. Clicking
the right hand double arrow icon will reactivate the automatic update
function.
Tick Box
In order to apply a specific action to a number of jobs in the list, either mark
each job individually or select the ‘All’ box to tick all jobs in one go. As this
selection is lost when the page is refreshed, the automatic refresh
functionality should be deactivated before selecting the jobs by clicking on
the ‘Manual refresh’ icon described above.
Select the required action from the list at the bottom of the page and click
on ‘Go’ to initiate the action. The following actions can be performed:
Delete
The selected jobs will be deleted.
Mark job as
processing
Signals to other users that the job is currently being
worked on (yellow floppy disk symbol).
Clear processing
status
Signals that the job is waiting to be processed.
Mark job as
finished
Setting this status activates the automatic delete
function for incoming jobs. Once activated, the job
will be deleted after the time delay period set for
deleting files under ‘System Configuration’. If this
time has not yet elapsed, the job is marked with a
blue floppy disk symbol until it is deleted in due
course. Otherwise, the job will be directly deleted.
Forward Job
If the receiver is linked to a mailbox for which job
forwarding has been activated, then the files within
this job can be forwarded manually to a particular
server (i.e. re-sent) using this action. If this is not
possible, a message will be shown accordingly.
Disk Symbol
The floppy disk symbol indicates the current status of each job. If this
symbol is clicked, the user is taken to the job download page where they
can download the files from StingRay to a location of their choice, e.g. their
local hard disk or a server in the network.
Different coloured floppy disk symbols are used to indicate the varying
status of incoming jobs:
Blinking, green
floppy disk
Job is currently being received.
Green floppy disk
Job was successfully received.
Red floppy disk
Receipt failed.
Yellow floppy disk
Job currently being processed by other user.
Blue floppy disk
Job has been completed.
Green floppy disk
with arrow
Job is currently being forwarded.
Blue floppy disk
with arrow
Job was forwarded successfully.
Red floppy disk
with blue arrow
Job forwarding has failed.

www.hermstedtstingray.com - 20 - The Local User’s Guide
ID
To help job identification, a unique ID is automatically assigned to each job
in list view.
Remote Site
This column displays the name of the remote site that has sent the files to
StingRay.
Subject
The subject that the remote site assigned to a particular job.
Size
Size of the received job in bytes.
%
Job progress in percent.
Glasses Symbol
Click on the glasses symbol to view the details of a particular job.
Stop Symbol
If clicked, the transfer process will stop and disconnect from the remote site.
Trash Symbol
Click on the trash symbol to delete a job from the incoming jobs list.
4.4.3.1 Downloading Jobs from the Incoming Jobs List
Image S – Job Download Detail View
The files contained within an incoming job can be downloaded directly from the incoming jobs
page to the users local workstation.
The files contained within a job can be viewed by selecting the floppy disk symbol displayed
next to the job within list view.
The following job information will display when the job is opened:
Download Job
Actions
The status of a job can be set within the job download page as well as
directly from the incoming jobs list. The options provided in the dropdown
list are as follows:
Mark job as processing
Clear processing status
Mark job as finished
Forward job
File name
This column shows the name of each file contained within the job. Each is
displayed as a link, and this link has several functions. In the case of a
standard file type, e.g. a JPG picture, clicking on the link will open the file
directly within the web browser.
The file can however be saved directly to the local hard disk without prior
previewing. If using Windows, the applicable ‘Save’ options are displayed
by clicking the right hand mouse button and selecting ‘Save under…’.
On a Macintosh this is done by pressing the ‘Control’ button on the
keyboard at the same time as clicking on the link. In the resulting window
the user can specify where to save the file and under which name it is to
be saved.
Table of contents
