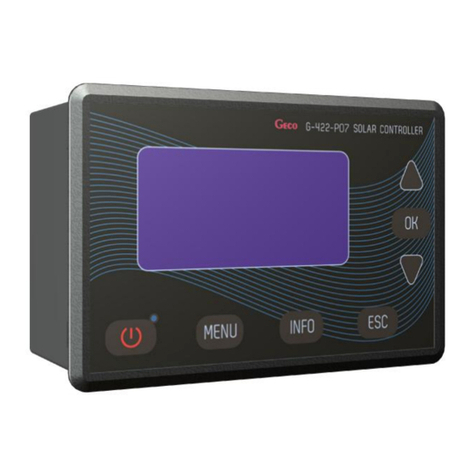
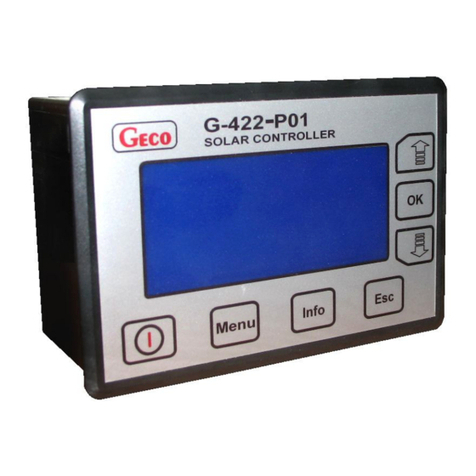
Hewalex GH26-P09 User manual

USER MANUAL OF AN INDEPENDENT
REGULATION BLOCK
GH26-P09
GH26-P09A
Controller of a solar collector system
applicable from version 0.1a

2
1. Controller description
The GH26 controller is a device designed and made for controlling solar collector systems. The product has been made with the use of modern and reliable microprocessor
technology. Design of the controller is modern and the controller itself is very user-friendly thanks to the use of a user panel with a clear keyboard and an LCD display. The GH26
controller has to be mounted on the wall.
The
General dimensions of the controller: 145mm 95mm 65mm.
An extensive basic option pack makes the controller extremely practical which is certainly of an advantage. These options include:
multiple system configurations,
displaying system diagram and animation of the working devices,
possibility of connecting the devices for monitoring the installation via a LAN module,
protecting the pump against damage resulting from lack of flow,
adjusting efficiency of the solar collector pump,
possibility of controlling manually all the devices connected to the controller,
calculating instantaneous power of a collector and summing up all the energy produced by solar collectors,
in-built real time clock.
controller memory after switching off the voltage
protection against freezing and overheating of solar collectors
the possibility of switching on night-time cooling and vacation option
switching off the LCD display in order to minimize energy consumption
2. Connecting external devices
The G422 controller has been equipped with 6 inputs making it possible to connect temperature sensors of the NTC10kΩ type, three inputs for connecting external devices,
pumps or three-way valves depending on the installation scheme chosen and two electronic flow meters. Moreover, the controller has been equipped with control of electric power
outages for UPS and ability to connect pressure switch. Graphical representation of outputs and inputs has been presented in Figure 1 whereas descriptions of controller inputs and
outputs have been presented in Table 1.
Fig. 1. Controller inputs and outputs
Input /
Output Description
230V~ Connection to 230V~/50Hz mains – Maximum current intensity: 6A
O1 Main pump input – Maximum current intensity: 2A
O2
Transmitter output - no voltage output, (relay) – Maximum current intensity 2A
– S1-S2 – NC (normally closed), – S2-S3 – NO (normally open).
May operate as voltage output - applying voltage to S2 will result in changeover voltage output.
O3 230V~ output (relay) – Maximum current intensity 2A
O4 230V~ output – bridging inside the controller. It is allowed to bridge outside with a terminal of a relay O2. This enables changeover voltage output for controlling a
three-way valve, for example.
T1 T4
GND
T1 – T4………….. Temperature sensor inputs - NTC10kΩ
GND……………… Ground input “-” for temperature sensors or other devices
+A
-B
GND
PWM
PRES
FLOW1
GND
+12V
+A.......................... RS485 communication input for connecting a communication device (e.g. EKOLAN modem).
-B .......................... RS485 communication input for connecting a communication device (e.g. EKOLAN modem).
GND ...................... Ground output “-” for PWM pump control signal.
PWM ..................... Positive output „+” for PWM pump control signal.
PRES .................... Pressure switch input
FLOW1 ................. Flowmeter no.1 input
GND ..................... Ground “-” for flowmeter no.1, no.2, EKO-LAN modem, pressure switch or control of electric power outages
+12V ..................... Constant voltage +12V for flowmeter no.1, no.2 or EKO-LAN modem
T5, T6
GND
FLOW2
UPS
T5, T6.................... Temperature sensor inputs - NTC10kΩ
GND ..................... Ground input “-” for temperature sensors or other devices
FLOW2 ................. Pulse input for electronic flowmeter 2 series G-916
UPS ....................... Control of electric power outages input. Short-circuiting the UPS, GND terminals switches the controller to the power saving mode for
maintaining power supply (supplied from UPS). When in UPS mode, the P pump rotational speed symbol blinks (additionally, when the P pump is active, 6 dots
blink indicating that the P pump operates in 6th gear) and any additional devices connected to the controller, except for the P collector pumps, are disabled
(scheme 15 and 16 for the K pump)..
ANODA+
ANODA-
+ ............................ Titanium anode supply output – anode contact – applies to the GH26-P09A controller only
- ............................. Titanium anode supply output – water heater contact – applies to the GH26-P09A controller only
Table 1. Controller inputs and outputs description.
When connecting any devices to controller outputs you need to remember that the outputs marked O1 and O3 are voltage outputs to which external devices can be connected
directly. The O2 output is a no voltage one and it must be connected in series between the power source and the external device.

3
ATTENTION !
If a power cord gets damaged it should be substituted with new one.
For specific installation schemes with the description of connecting devices to the controller, see section 4 (Installation schemes).
3. Switching on and using the controller
3.1 First switch on of the controller
Upon connecting the controller to a power source it will be switched on in the stand-by mode and a diode will get lit. In this mode the LCD display gets slightly back-lit and the current
controller software version appears on the screen. When the controller is in the stand-by mode you can switch it off with the button. During regular controller operation it is always
possible to get it back into the stand-by mode by pressing the button. In the standby mode all the inputs and sound alarms are switched off. Full description of the messages
displayed on the controller screen has been presented in Figure 2.
ATTENTION ! The controller has a system password 0110 to secure its functions against unauthorised persons and children.
With the first switch on of the controller in a regular operation mode the keyboard and temperature sensors will get calibrated. During calibration it is strictly prohibited
to touch the controller keyboard as it may result in abnormal controller operation.
Fig. 2. Description of the basic screen on the LCD display
ATTENTION !
Remember to install temp. sensors correctly as described in the selected scheme. Change in sensor location might result in irregular operation of the control system.
Insulate the points where sensors are connected with additional wires or insulate all blocks connecting sensors with wires.
When the collector pump is switched off or the T3 sensor on collector return is disconnected, dashes appear on the display in place of instantaneous power of the solar
collectors (- - - - -). The power calculation option is unavailable for the schemes no 10, 12, 15 and 16.
When the controller is in regular operation and during the blanking period no key is pressed, the LCD screen will be switched off. After pressing any key on the keyboard
the LCD back light will switch on for the blanking period set. Screen blanking aims at limiting energy consumption.
Connect the electrical plug to the socket equipped with a protective terminal and protected with RCD.
It is forbidden to install pump units in close vicinity of open flames, high temperatures and storage of flammable materials.
3.2 Controller keyboard description.
The controller has a touch keyboard with 7 keys which call the following functions:
- switching the controller on into regular operation or switching it off into the stand-by mode.
- entry into the controller MENU from the main screen level
- contact data
- cancelling all the controller operations or return to the previous screen
- confirming all the controller operations or moving to the next screen
- selection of all the controller options (down) or change (reduction) of all the values available for the controller
- selection of all the controller options (up) or change (increase) of all the values available for the controller
ATTENTION ! Excessive dirt on the display and the keyboard might result in irregular key operation.
3.3 Controller operation
Current day of the week
Pump rotation, Range 1-15
(only when the solar panel
pump is on)
(tylko przy włączonej
pompie kolektorowej)
Number of the selected installation scheme
Installation schematic diagram
with working devices animated
z
animacją pracujących
urządzeń
Current date (dd : mm : yy)
Current time
LED indicating that the controller
is connected to the mains
Touch buttons
Screws holding the front panel.
Under the display there are connection
terminals for temperature sensors and
electrical devices.
Antilegionella function switched on
:
Continuous light function enabled
Readings of temperature sensors T1
T6 as well as
of the instantaneous power of additional device (Pe)
and the additional flow rate value of flowmeter (Fe).
Err Damage or lack of a sensor needed in the
selected installation scheme (except T5)
- - - Damage or lack of a sensor not needed in the
selected installation scheme.
The following values are displayed when the
pump is in operation:
-
Instantaneous collector power
- Current heat carrier flow
- Pump power consumption(If pump is switched
off “- - - - -“ is displayed).
Information on the existence of additional
readings (“down arrow” key):
temp. T5, T6, flow 2 (Fe), power 2 (Pe)
return from readings (“up arrow” key).

4
If the controller has been switched into regular operation mode, you can access the main controller MENU by pressing the key. Navigation keys or serve the
purpose of selecting some options. Then you can enter the selected option by pressing the key.
In order to edit controller parameters use navigation keys or to select a given parameter and press to confirm parameter editing (the values will flash). Then use
navigation keys or to change the required value and press in order to accept it. By pressing you will return to the previous screen.
ATTENTION ! The operation scheme presented applies for almost all the controller options. After any changes of the scheme or parameters in the controller,
it is recommended to switch it off and then on again with ON/OFF button.
4. Installation schemes (scheme selection)
This option makes it possible to select an appropriate installation scheme necessary for correct operation of the controller. In order to select an installation scheme:
Press the following key combination: starting point - MAIN SCREEN: enter into the MENU , Select scheme , Select an appropriate scheme or , confirm (a
continuous sound signal), return to the main screen .
ATTENTION ! Broken lines in all the installation schemes refer to temperature sensors which can be connected to the controller, but are not required for its proper
operation for the selected scheme. Connection of titanium anode is marked on the diagrams (applies to the GH26-P09A controller only)
4.1 Tap water heating system - controlling solar collector pump – scheme no 1
Controlling the P collector pump - Regulation of collectors’ pump – scheme no 1
The P collector pump will be switched on if the T1 solar collector gets hotter by the “Temp. T1&T2 difference - pump ON” value than the T2 temperature in the lower part of the
heater. If the heater’s temperature reaches the set value of “MaxTemp. T2 OFF collector’s pump”, the P pump will be switched off. Additionally, in order to avoid unstable pump
operation when the temperature on the sensor changes, switch on and switch off hysteresis has been used.
Controlling the P collector pump - Regulation of collector’s pump - YES
Applies to the electronic pumps controlled with PWM signal only. When a normal circulation pump is connected, the pump will operate on an on/off basis although the
control is enabled.
The P collector pump will be switched on and off in the case described above but the collector changes the rotational speed of the P collector pump depending on the difference in temperature (T1-
T2) and the set parameter “Temp. T1&T2 difference - pump ON”. This option makes it possible to effectively collect energy from the collectors with variable solar radiation.
Fig. 3. Schematic and electrical diagram of installation no 1.
4.2 Tap water heating system - controlling solar collector pump and a circulation pump - scheme no 2
Controlling the P collector pump
Similarly as in scheme no 1 - description in point 4.1.
Controlling the C circulation pump
The C circulation pump is only switched on in the time programmed by the user in the “Time program C” setting. The C pump can work in two modes set by the user, that is, continuous or
discontinuous (“Time of switching on the circulating pump” and “Time of switching off the circulating pump”) in the “Circulation param.” setting.
Moreover, C pump operation is limited by T4 temperature in the upper part of the heater; if the T4 temperature is lower than the set value of “Min. temp. T4 switching on the circulation pump” in
the “Circulation param.” setting. C circulating pump operation mode can be selected in the “Parameter settings” menu.
Fig. 4. Schematic and electrical diagram of installation no 2.

5
4.3 Tap water heating system - controlling solar collector pump, circulation pump and a boiler - scheme no 3
Controlling the P collector pump
Similarly as in scheme no 1 - description in point 4.1.
Controlling the C circulation pump
Similarly as in scheme no 2 - description in point 4.2.
K boiler control for tap water heating
The K boiler is only switched on for water heating in the time programmed in the “Time program K” option to be found in the “Parameter settings” menu. The boiler will switch off if
the temperature of the upper part of the T4 heater is lower than the set “Max. temp. T4 OFF heat source”. If the temperature of water in the T4 heater reaches to set value of “Max.
temp. T4 OFF heat source”, the boiler will be switched off. Additionally, the controller makes it possible to make boiler operation independent of the solar collectors. Boiler may be
switched off if the calculated collector power is higher than the “Coll. power OFF boiler, heater, heat pump” value set in control parameters.
ATTENTION ! Connecting the T3 sensor is necessary for calculating collector instantaneous power.
Tap water boiler can be controlled in two ways.
1. Switching the boiler on with a fault of appropriate contacts inside the boiler.
2. Switching the boiler on with temperature sensor input in the boiler by simulation of appropriately selected resistors corresponding to boiler switch on and switch off
temperatures. An example of a table of resistances depending on the manufacturer of a given boiler has been presented in the table below.
ATTENTION ! The original tap water temperature sensor remains disconnected and replaced by 2-wire cable from the controller GH26.
Table 2. Resistor resistance for selected boiler manufacturers
Fig. 5. Schematic and electrical diagram of installation no 3.
4.4 Tap water heating system - controlling solar collector pump, circulation pump and an electrical heater – scheme no 4
Controlling the P collector pump
Similarly as in scheme no 1 - description in point 4.1.
Controlling the C circulation pump
Similarly as in scheme no 2 - description in point 4.2.
Controlling electrical heater for tap water heating
Similarly as for the boiler in scheme no 3 - description in point 4.3.
The heater is switched on indirectly by passing voltage to transmitter coil which leads to a fault of appropriate connectors inside such a transmitter.
Sample
boiler manufacturer
R1 resistor [kΩ]
Temp. 20 30°C
R2 resistor [kΩ]
Temp. 70 80C
Sample
boiler manufacturer
R1 resistor [kΩ]
Temp. 20 30°C
R2 resistor [kΩ]
Temp. 70 80C
Acv 12,0 15,0 1,5 2,0 Brotje Heizung 8,0 12,5 1,2 1,7
Ariston 8,0 12,0 1,5 2,0 Buderus 8,0 12,5 1,2 1,7
Beretta 9,0
14,0 1,8
2,0 De-Dietrich 10,0
15,0 1,8
2,3
Ferolli 8,0
12,5 1,2
1,7 Vaillant 3,5
3,3 0,4
0,6
Junkers 10,0 14,8 1,9 2,4 Viessmann (new boilers) 9,0 15,0 1,5 1,8
Stiebel Eltron 10,0 15,0 1,0 1,5 Viessmann (old boilers) 0,54 0,56 0,64 0,66
Termet 10,0 11,0 1,4 1,8 Wolf 5,0 7,0 1,8 2,6

6
ATTENTION ! An additional relay adjusted to the power consumption of the electrical heater is needed to switch the heater on.
Fig. 6. Schematic and electrical diagram of installation no 4.
4.5 Tap water heating system - controlling solar collector pump, circulation pump and a heat pump – scheme no 5
Controlling the P collector pump
Similarly as in scheme no 1 - description in point 4.1.
Controlling the C circulation pump
Similarly as in scheme no 2 - description in point 4.2.
Controlling heat pump for tap water heating
Similarly as for the boiler in scheme no 3 - description in point 4.3.
The heat pump is switched on by a fault of appropriate connectors inside the heat pump.
Fig. 7. Schematic and electrical diagram of installation no 5.
4.6 Tap water heating system - controlling solar collector pump, circulation pump, a fireplace pump or a solid-fuel boiler pump – scheme no 6
Controlling the P collector pump
Similarly as in scheme no 1 - description in point 4.1.
Controlling the C circulation pump
Similarly as in scheme no 2 - description in point 4.2.
Controlling K boiler pump
The K boiler pump will be switched on if the T5 temperature at the boiler outlet gets higher by the “Temperature difference ON add. pump, valve” value than the T4 temperature in
the upper part of the heater. The pump will remain switched on until the difference in temperatures (T5-T4) falls below the set value and the temperature in the heater reaches the set
value of “Max. temp. T4 OFF heat source”. Moreover K pump operation is limited by the “Min. temp. T5 ON Boiler pump” parameter. If the T5 temperature at boiler outlet is lower
than the set parameter value, the K pump remains off.
The K pump can operate in the “Overheating protection of the heater” mode. The K pump will be activated when the “Overheating protection of the tank” option is enabled and the T2
temperature in the lower part of the heater exceeds the "MaxTemp. T2 OFF collector's pump " parameter.
ATTENTION ! When the cooling function is active, the T2 temperature value flashes on the screen.

7
Fig. 8. Schematic and electrical diagram of installation no 6.
4.7 Double heater system - makes it possible to provide additional solar energy for the boiler heater with the use of a mixing pump - scheme no 7
Controlling the P collector pump
Similarly as in scheme no 1 - description in point 4.1.
Controlling the C circulation pump
Similarly as in scheme no 2 - description in point 4.2.
Controlling the K mixing pump
The K mixing pump will be switched on if the T2 temperature at the collector heater gets higher by the “Temperature difference ON add. pump, valve” value than the T4
temperature in the boiler heater. The pump will remain switched on until the difference in temperatures (T2-T4) falls below the set value and the temperature in the boiler heater
reaches the set allowable value of “Max. temp. T4 OFF heat source”.
Fig. 9. Schematic and electrical diagram of installation no 7.
4.8 Double heater system - makes it possible to provide additional solar energy heating for the boiler heater with the use of a circulation return - scheme no 8
Controlling the P collector pump
Similarly as in scheme no 1 - description in point 4.1.
Controlling the C circulation pump
Similarly as in scheme no 2 - description in point 4.2.
Controlling the U three-way valve.
The three-way valve will be switched into the A heater direction if the T2 temperature at the collector heater gets higher by the “Temperature difference ON add. pump, valve” value
than the T4 temperature in the circulation return. The valve will switch into the direction of A heater if the difference in temperatures (T2-T4) falls below the set value. Else, circulation
return will always be directed to the B boiler heater.
Fig. 10. Schematic and electrical diagram of installation no 8.

8
4.9 Tap and pool water heating with the use of a three-way valve, controlling operation of the pool water pump - scheme no 9
Controlling collector pump and U three-way valve – selected priority: B > A
Supplying solar energy to B heater is analogical as in the scheme no 1 and has been described in point 4.1.
The A pool constitutes yet another heat receiver. If conditions do not allow for heating the B heater or the “MaxTemp. T2 OFF collector’s pump”, set by the user has been reached,
the controller will automatically start heating water in the A pool. This happens once the U three-way valve gets switched into the A pool direction if the T1 temperature of the solar
collector gets higher, by the “Temperature difference ON add. pump, valve”, than the T4 temperature of water in the pool.
The pump will remain switched on until the difference in temperatures (T1-T4) falls below the set value and the temperature in the pool reaches the set value of „ Max. temp. T4 OFF
heat source”. When the T4 temperature reaches the set value, the controller will switch the U valve back into the B heater direction and will switch the collector pump off.
When the collectors heat the water in the A pool, the controller will force the collector pump to switch off once an hour for 10 minutes in order to check the conditions for heating the B
heater and switch heating back to B heater (testing active if the B heater is underheated).
ATTENTION !
When the test is active, the T1 sensor temperature value flashes on the screen.
Heating the B heater and water in the A pool has been described for priority B > A. If priority A > B is set, the heating plan is the reverse of the one presented above.
In addition, it is possible to select the absolute priority of the B heater. Heating the B heater will only take place when:
- the value “MaxTemp. T2 OFF collector’s pump” set by the user is reached and “Overheat protection of collectors” is disabled;
- the value “MaxTemp. T2 OFF overheat protection” set by the user is reached and “Overheat protection of collectors”is enabled.
Controlling pool pump
The C pool pump is switched on in the time programmed by the user in the “C time program” option to be found in the “Parameter settings” menu. The C pool pump is always
switched on when pool water is heated with solar collectors.
ATTENTION ! If the C pool pump is switched off when the solar collector pump is working and the U valve is set to the pool may damage the piping system of the pool circuit.
In order to protect the exchanger against lack of heat collection by the pool pump, a T4 sensor should be installed on the exchanger shell surface.
Fig. 11. Schematic and electrical diagram of installation no 9.
4.10 Tap and pool water heating with the use of an additional pump, controlling operation of the pool water pump - scheme no 10
Controlling P collector pump for heating the heater and K collector pump for heating the pool exchanger – selected priority: B > A
Heating with the use of B heater collector is analogical as in the scheme no 1 and has been described in point 4.1.
The A pool constitutes yet another heat receiver. If conditions do not allow for heating the B heater or if “MaxTemp. T2 OFF collector’s pump” set by the user has been reached, the
controller will automatically start heating water in the A pool. This happens by switching the P pump off and the K collector pump and the C pool pump on if the solar collector T1
temperature gets higher by the value of “Temperature difference ON add. pump, valve”, than the T4 temperature of water in the pool. The pumps will remain switched on until the
difference in temperatures (T1-T4) falls below the set value and the temperature in the pool reaches the set value of “Max. temp. T4 OFF heat source”. When the T4 temperature
exceeds the set value, the controller will switch the K collector pump and C pool pump off. When the collectors heat the water in the A pool, the controller will force the collector pump
to switch off once an hour for 5 minutes in order to check the conditions for heating the B heater and switch heating back to B heater (testing active if the B heater is underheated).
ATTENTION !
Heating the B heater and water in the A pool has been described for priority B > A. If priority A > B is set, the heating plan is the reverse of the one presented above.
Selecting priority B will result in the operation as described in the scheme 9 – see point 4.9.
Controlling pool pump
Similarly as in scheme no 9 - description in point 4.9.
Fig. 12. Schematic and electrical diagram of installation no 10.

9
4.11 Double heater system with the use of a three-way valve, controlling operation of the circulation pump - scheme no 11
Controlling collector pump and U three-way valve
Similarly as in scheme no 9 - description in point 4.9. The A heater plays the role of A pool in the described scheme.
Controlling the C circulation pump
Similarly as in scheme no 2 - description in point 4.2.
Fig. 13. Schematic and electrical diagram of installation no 11
4.12 Double heater system with the use of an additional pump, controlling operation of the circulation pump - scheme no 12
Controlling P and K collector pumps
Similarly as in scheme no 9 as described in point 4.9. The A heater plays the role of A pool in the described scheme.
Controlling the C circulation pump
Similarly as in scheme no 2 - description in point 4.2.
Fig. 14. Schematic and electrical diagram of installation no 12
4.13 The system with a buffer tank used for cooperation with a central heating installation - scheme no 13
Controlling the P collector pump
Similarly as in scheme no 1 - description in point 4.1.
Controlling the C boiler pump
The C boiler pump is only switched on during the hours programmed by the user in the “Time program C” option in the “Parameters settings” menu.
Controlling the U three-way valve
Once the T2 temperature in the A buffer exceeds the T4 temperature for the fluid return from the central heating system by a value higher than “Temperature difference ON add.
pump, valve”, the three-way valve directs the fluid returning from the central heating installation to the A buffer. Else, the fluid return is always directed to the B boiler return.

10
Fig. 15. Schematic and electrical diagram of installation no 13.
4.14 System for heating a combi heater with solar collector, an electrical boiler or liquid-fuel boiler and a solid-fuel boiler - scheme no 14
Controlling the P collector pump
Similarly as in scheme no 1 - description in point 4.1.
Controlling the K boiler
Similarly as in scheme no 3 - description in point 4.3.
Controlling the C solid-fuel boiler pump
Similarly as in scheme no 6 (in scheme 6 the pump is denoted as K) - description in point 4.6.
Moreover, C pump operation results in switching the K boiler off if the option K boiler blockade when C boiler switch on is on in control parameters. If the blockade is off, the K
boiler can work simultaneously with the solid-fuel boiler.
ATTENTION ! Different parameters have been used in the diagram (“Max. temp. T4 OFF heat source” – for heating with the use of an electrical boiler or a liquid fuel boiler
and “Max. water temperature from boiler C” – for heating with the use of a fireplace or a solid-fuel boiler) for heating water in the upper part of the combi heater
measured by the T4 sensor.
Fig. 16. Schematic and electrical diagram of installation no 14.
4.15 Tap water heating system - controlling operation of solar collector pumps located in various directions - scheme no 15
Controlling the P collector pump
Similarly as in scheme no 1 - description in point 4.1.
Controlling the K collector pump
The K collector pump will be switched on if the solar collector reaches a temperature of T3 which is hotter by the “Temp. T1&T2 difference – pump ON” value than the T2
temperature in the lower part of the heater. The pump will remain switched on until the difference in temperatures (T1-T3) falls below the set value and the temperature in the heater

11
reaches the set value of “MaxTemp. T2 OFF collector’s pump”. Additionally, in order to avoid unstable pump operation when the temperature on the temperature sensor changes,
switch on and switch off hysteresis has been used.
ATTENTION! In case of simultaneous operation of the P pump and the K pump, the current value of the PWM control signal is determined by the higher temperature
difference.
Controlling the C circulation pump
Similarly as in scheme no 2 - description in point 4.2.
Fig. 17. Schematic and electrical diagram of installation no 15.
4.16 Double-heater system using a three-way valve - controlling operation of solar collector pumps located in various directions - scheme no 16
Controlling P and K collector pumps and the U three-way valve – selected priority: B > A.
Solar heating of B heater is analogical as in scheme no 15, and described in point 4.15.
The A heater is the second heat receiver. If the user-set temperature “MaxTemp. T2 OFF collector’s pump” is reached, the controller will automatically start heating water in the A
heater. This is done by switching the U three-way valve into the A heater direction if the T1 solar collector temperature gets higher, by the value of “Temp. T1&T2 difference – pump
ON”, than the T4 temperature in A heater. The pump remains switched on until the difference in temperatures (T1-T4) falls below the set value and the temperature in the A heater
reaches “Max. temp. T4 OFF heat source”. When the T4 temperature exceeds the set value, the controller switches the valve back into the B heater direction and switches the P
collector pump off. When water is being heated in the A heater, once an hour for 5 minutes the controller forces P collector pump switch off in order to check the conditions for heating
the B heater and switch heating back to B heater. K collector pumps work analogically.
ATTENTION ! Operation of two heaters, A and B, has been described for priority B >A. If priority A > B is set, the heating plan is the reverse of the one presented above.
Selecting priority B will result in similar operation as in scheme no 9 for both pumps – description in point 4.9.
Fig. 18. Schematic and electrical diagram of installation no 16.
4.17 Tap water heating system - controlling solar collector pump, circulation pump and a heater cooling system - scheme no 17
Controlling the P collector pump
Similarly as in scheme no 1 - description in point 4.1.
Controlling the C circulation pump
Similarly as in scheme no 2 - description in point 4.2.
Controlling the heater cooling system with the use of the K release valve
The K release valve gets open if the T4 temperature of the upper part of the heater reaches the value of the set “Max. temp. T4 OFF heat source” parameter.
Closing the release valve (switching the electrical equipment off) will take place when the T4 temp. in the upper part of the heater is reduced by 10°C.
For example: switch on, T4 temp. increase to above 60°C – switch off, T4 temp. decrease to below 50°C.

12
Fig. 19. Schematic and electrical diagram of installation no 17
4.18 Tap water heating system – controlling solar collector pump, solar energy heating for the boiler heater with the use of a pump and controlling the operation of
fireplace or solid-fuel boiler pump – scheme no 18
Controlling the P collector pump
Similarly as in scheme no 1 – description in point 4.1.
Controlling the K mixing pump
Similarly as in scheme no 7 – description in point 4.7.
Controlling the C solid-fuel boiler pump
Similarly as in scheme no 6 (the pump in scheme 6 is denoted by K) – description in point 4.6.
Fig. 20. Schematic and electrical diagram of installation no 18.
4.19 Tap water heating system – controlling solar collector pump, mixing pump and system of solar energy heating for the boiler heater with the use of a circulation
return – scheme no 19
Controlling the P collector pump
Similarly as in scheme no 1 – description in point 4.1.
Controlling the K mixing pump
Similarly as in scheme no 7 – description in point 4.7.
In addition, the pump operation depends on enabling the protection against Legionella function and results in heating the solar heater while the function is active if the boiler heater is
heated up to at least 60C.
Controlling the U three-way valve
Similarly as in scheme no 8 – description in point 4.8.
Fig. 21. Schematic and electrical diagram of installation no 19.

13
5. Parameter settings
5.1 Control parameters
This option makes it possible to change the value of parameters available in the selected installation scheme. In order to change parameters:
Press the following key combination: starting point - MAIN SCREEN: entry into the MENU , get to the option named Parameters settings , enter the Parameter settings
menu , get to the Control parameters option , choose appropriate parameters or , edit , change values or , accept values (a continuous sound
signal), return to the main screen .
ATTENTION ! Description of all the available parameters can be found in Table 3 – pages16-17
The display shows current option level and the controller values with the use of the ▼and ▲ cursors. The down cursor ▼ shows that there are parameters available
below the currently displayed options, whereas the up cursor ▲, indicates that there are parameters available above the currently displayed ones. The combination of
buttons for selected scheme no 3 is presented below.
5.2 Time program C
This option allows for setting a time program in which a device denoted by C (circulation pump, pool pump) in a given installation scheme will be working. In order to set or change the
C time program of devices:
Press the following key combination: starting point - MAIN SCREEN: enter the MENU with (enter password), get to the option named Parameters settings with , enter the
Parameter settings menu with , get to the option named Time program C with , enter the option named Time program C with , select time with or , accept
operation time (white square) or cancel operation time with , accept and return (a continuous sound) with , return to the main screen with .
ATTENTION ! Time intervals are divided into 24h operation periods, settings for each hour are selected separately by marking it with a white square. The number of
squares marks the number of operation hours. Week days have been divided into three groups: Monday - Friday (Mo-Fr), Saturday (Sat), Sunday (Sun).
5.3 Circulation parameters
This option allows for setting all parameters connected with the operation of the tap water circulation pump. To change parameters of the C pump:
Press the following key combination: starting point – MAIN SCREEN: enter the MENU with (enter password), get to the option named Parameters settings with , enter the
Parameters settings menu , get to the option named Circulation param. , select the parameter to be changed with or , edit the parameter , change its value
with or , accept (a continuous sound) , return to the main screen with .
ATTENTION! For description of all available parameters for the circulation pump, see Table 3 – pages 16-17
5.4 Time program K
This option allows for setting a time program in which a device denoted by K (boiler, electrical heat, heat pump) in a given diagram will be working. In order to set or change the K time
program of devices:
Press the following key combination: starting point - MAIN SCREEN: enter the MENU with (enter password), get to the option named Parameters setting with , enter the
Parameter settings menu with , get to the option named Time program K with , enter the option named Time program K with , select time with or ,
accept operation time (white square) or cancel operation time with , accept and return (a continuous sound) with , return to the main screen with .
ATTENTION! Hourly setting of K are identical to those of the Time program C.
5.5 Heat transfer fluid
A parameter connected with liquid specific heat, it corresponds to a given solidification temperature of a heat carrier. In order to define this parameter read liquid solidification
temperature from the package or contact the seller. In order to set or change the solidification temperature of the liquid used:
Press the following key combination: starting point - MAIN SCREEN: entry into the MENU with (enter password), get to the option named Parameters setting with , enter the
Parameter settings menu with , get to the option named Heat carrier with , enter the option named Heat carrier with , change values with or ,
accept and return (a continuous sound) with , return to the main screen with .
ATTENTION ! This parameter is needed for correct calculation of solar collector instantaneous power and summing thermal energy.
5.6 Flow rate
A parameter connected with heat carrier flow. In order to make correct settings:
Press the following key combination: starting point - MAIN SCREEN: enter the MENU with (enter password), get to the option named Parameters setting with , enter the
Parameter settings menu with , get to the option named Flow rate with , enter the option named Flow rate with , select the parameter to be changed
with or , edit with , change values with or , accept (a continuous sound) with , return to the main screen with .
ATTENTION ! Correct flow rate depends on the sort of collectors, type of collectors and overall dimensions.
Set the recommended minimum flow rate to 0.3 l/min for 1 m2 of active area of the collector (example: 2 collectors with active area of 2.0 m2 each – minimum flow rate is: 2
2 = 4
0.3 = 1.2 l/min.
Set the nominal (maximum) flow rate to 1 l/min for 1 m2 of active area of the collector (example: 2 collectors with active area of 2.0 m2 each – nominal flow rate is: 2
2 = 4
1.0 =
4.0 l/min.
The controller enables cooperation with a mechanical rotameter or an electronic flow meter of the G-916 type or any other electronic flow meter.
Select the main flow meter connected to FLOW1 terminals. The second flow meter connected to FLOW2 terminals is by default set as Electronic G-916.
Measurement: Electr.G916 – cooperation with an electronic G-916 flow meter. The controller reads the number of impulses and converts it into the real flow (liters per minute).
Nominal flow rate – entry to the nominal flow rate option results in switching P collector pumps on with maximum efficiency. Enter the calculated flow rate value that
results from the number of collectors in the system into the edition field. Next, set the required flow in such a way that the “Current” value corresponds to the calculated
value entered before. The required flow can be obtained by changing the rotational speed in option Collector Pump.

14
ATTENTION ! Leaving the field unchanged or entering wrong value does not affect the operation of the controller and the system (the controller reads the actual flow rate
from the electronic flow meter).
Measurement: Rotameter – cooperation with a mechanical flow meter (rotameter). The controller works with declared values (calculating power and energy outputs).
ATTENTION ! The bottom of the rotameter float indicates the actual flow rate value.
Nominal flow rate – entry to the nominal flow rate option results in switching P collector pump on with maximum efficiency - this value results from the number of solar
collector employed. Enter the calculated flow value resulting from the number of collectors in the system in the edition field and set the required flow in option Pump
collector column Max (example: rotational speed of the pump set to 3500 rpm – the obtained flow rate is 6 l/min) – 6 l/min is entered into the field.
Minimum flow rate – switching into the minimum flow rate option results in switching P collector pumps on with minimum efficiency and reducing flow.
– entry to the minimum flow option results in switching P collector pump on with minimum efficiency – the value results from the number of solar collectors used. Set the
value obtained by changing the pump speed in the edition field in option Pump collector column Min (example: rotational speed of the pump set to 1000 rpm – the
obtained flow rate is 2 l/min) – the value of 2 l/min is entered into the field.
The flow rate values set as above determine the linear characteristic of flow used for computing power output of collectors at variable speed of P collector pump (Fig. 22).
Fig. 22. Graphical representation of flow settings.
ATTENTION ! If after entering the minimum flow rate option, there is no flow shown by rotameter float, it is recommended to increase the speed of the pump.
Nominal and minimum flow rate settings are only relevant when P collector pump adjustment is switched on. When this adjustment option is switched off it is only the
nominal flow rate to be regulated.
Leaving the field unchanged or entering wrong value may cause incorrect calculating of the power and thermal energy coming from solar collectors, but it does not
affect the operation of the controller and the system.
Measurement: Electr-OTHER – integration with any electronic flow meter. The controller reads the number of pulses declared by the user via the Weight parameter and converts
into the actual flow rate (l/min).
“Nominal” flow rate – entry to the nominal flow rate option results in switching P collector pump on with maximum efficiency. Enter the flow value that results from the
number of collectors in the system into the edition field. Next, set the required flow rate value in such a way that the “Current” value corresponds to the calculated value
entered before. The required flow can be obtained by changing the rotational speed in option Collector pump.
ATTENTION!!! Leaving the field unchanged or entering wrong value does not affect the operation of the controller and the system (the controller reads the actual flow
rate from the electronic flow meter – on the basis of entered “pulse weight”).
Selecting the option Measurement: Electr-OTHER sets the same values for the second flow rate meter connected to the FLOW2 terminal.
5.7 Collector pump
The controller has the ability to control rotational speeds of different circulation pumps controlled by PWM signal. For proper operation of the system in the controller, a proper type of
pump installed in the ZPS pump control unit is to be set as follows:
Press the following combinations of keys: starting point – MAIN SCREEN: entering the MENU (enter password), moving to the option Parameters settings , entering the
menu Parameter settings , moving to the option Collector pump , entering the option Collector pump , choosing the parameter to be changed
or , editing , changing the values or , acceptance (continuous tone) .
Minimum value – make the speed conditional on the required minimum and actual flow rate resulting from the type and number of solar collectors (see 5.6)
Maximum value – make the speed conditional on the required and actual flow rate resulting from the type and number of solar collectors (see 5.6)
Return to the main screen .
5.8 Default settings
There are optimal factory settings pre-programmed in the controller for correct controller operation (List of factory settings values – see Table 3).
In order to restore the controller to factory settings:
Press the following key combination: start – MAIN SCREEN: enter the MENU with (enter password), get to the option named Parameter settings with , enter the Parameter
settings menu with , get to the option named Default with , enter the option named Default with , restore to default settings and return with
, return to the main screen with .
6. Controller settings
6.1 Date and time
This option makes it possible to set current date and time. In order to change date or time:
Press the following key combination: starting point - MAIN SCREEN: enter the MENU with , get to the option named Controller settings with , enter the Controller
settings menu with , get to the option named Date and time with , choose appropriate parameters with , change values with or , accept values with , leave
the option named Date and time with or use the key to run through all the parameters, return to the main screen with .
6.2 Display
Pump efficiency
Minimum Nominal Flow [l/min]

15
This option allows setting brightness and back-light time for the display. In order to change parameters:
Press the following key combination: starting point - MAIN SCREEN: enter the MENU with , get to the option named Controller settings with , enter the Controller
settings menu with , get to the option named Display with , enter the Display option with , choose appropriate parameters with or , edit with , change values
with or , accept values with (a continuous sound signal), return to the main screen with .
6.3 Sounds
This options allows to switch sound signals for controller key and controller alarms on and off. In order to change parameters: Press the following key combination: starting point -
MAIN SCREEN: enter the MENU with , get to the option named Controller settings with , enter the Controller settings menu with , get to the option named
Sounds with , enter the Sounds option with , choose appropriate parameters with or , edit with , change values with or , accept values with (a
continuous sound signal), return to the main screen with .
6.4 Language
This option allows you to choose one of the available language versions for the controller. In order to change language:
Press the following key combination: starting point - MAIN SCREEN: enter the MENU with , get to the option named Controller settings with , enter the Controller
settings menu with , get to the option named Language with , enter the Language option with , choose the appropriate language version with or , accept
and leave the Language option with (a continuous sound signal), return to the main screen with .
Language versions available: Polish, English, German, French, Portuguese, Spanish, Dutch, Italian, Czech, Slovak, Romanian, Swedish, Norwegian, Finnish, Danish,
Estonian, Lithuanian, Latvian, Slovenian, Hungarian, Croatian, Russian.
6.5 RS485 port
This option allows setting the parameters relating to the controller communication through monitoring.
7. Manual control
This option makes it possible to manually switch all the devices in a given installation scheme on. In order to switch the devices on:
Press the following key combination: starting point - MAIN SCREEN: enter the MENU with , get to the option named Manual control with , enter the option named
Manual control with , chose a device to be switched on with or , edit with , switch the device on with or (the word ON, in the case of a three-way valve -
selection of servo position [A or B]), accept the value with , return to the main screen with .
ATTENTION !Exiting the Manual control option results in returning to automatic operation regardless of the settings done.
8. Cooling - this option is only available for flat plate solar collectors.
This option makes it possible to cool the tap water heater by switching the solar collector pumps on in a specific time interval starting from 0.00 to the time set in the “Stop cooling at
[h]” parameter. The cooling option will be active if cooling is on (Night cooling – Yes) and the T2 temperature in the heater is higher or equal to the set “Start cooling” temperature.
Cooling will remain active until the heater gets cooler to the “Stop cooling” temperature or until the set time interval ends.
When the collectors are being cooled only the P collector pump operates. All the additional devices connected to the controller are switched off.
In order to switch cooling on: Press the following key combination: starting point - MAIN SCREEN: enter the MENU with , get to the option named Cooling with ,
enter the option named Cooling with , select parameters with or , edit , change values with or , accept values with , return to the main screen with
.
9. Energy Statistics
The controller has a built in module for gathering information about collectors` overheating and calculating energy generated by the collectors.
The following data record is available in the statistics option:
9.1. Solar overheating – information about the occurrence of solar collector overheating (date and time) – the last 50 overheating events can be saved.
9.2. Thermal energy – collecting and saving data on thermal energy of collectors as daily, weekly, monthly and yearly reports.
9.3. Total energy yield – displaying total thermal energy computed by the controller.
9.4. Reset total energy yield – resetting the total energy data (press the OK button twice to reset the counter)
9.5. Reset energy statistics – resetting the statistics (thermal energy) counter (press the OK button twice to reset the counter)
9.6. Anode operation time – counting the operating time of titanium anode connected to the controller. After 72 hours (time to stabilise the system) from having connected
the controller to the mains, the controller will display the date on which it has started counting the anode operating time and saving the anode operating time in days.
The controller makes it possible to save and read energy statistics for the following time intervals:
- statistics for the last 31 days starting from the date currently set in the controller,
- monthly statistics for the last 60 months, with possibility of reading the value for a chosen day of the month,
- yearly statistics for the last 10 years.
Moreover, for the daily, monthly and yearly statistics there is a possibility of graphical editing of time intervals with the use of bar diagrams.
When a graphical representation of bar diagrams is being prepared, the largest value presented in a given interval appears in the left upper corner of the screen and the height of
each bar will be scaled according to this value. Moreover, the right upper corner features date of the recording.
Fig. 23. Graphical representation of thermal energy

16
In the Energy Statistics menu there is also a total energy counter. This counter sums all the produced energy.
Statistics and total counter can be cleared any time. The clearing option can be found in the Energy Statistics menu and is available separately for the total counter and the statistics.
In order to view or clear energy counters select the "Energy Statistics” option. In order to do this:
Press the following key combination: starting point - MAIN SCREEN: enter the MENU with , get to the option named Energy Statistics with , enter the
Energy Statistics option with , select the option with or , enter the options with , select time intervals (day, week, month, year) with or , accept the interval
with which results in displaying a graph, return to the main screen with .
ATTENTION ! A change in date may result in distorting the chronology of recorded events or display of incorrect energy values. For the statistics counters to work
correctly it is necessary to clear them after each date change. It is not necessary to clear the total energy yield counter after a date change.
10. Vacation function
Vacation function switches on the option of night cooling and collector overheating protection. Additionally, this option allows disabling additional heating devices
connected to the controller in the active time period declared by the user – applies to scheme no. 3, 4, 5, 14. Active vacation option is indicated by the display of the
screen HOLIDAY alternating with the scheme on the main screen of the controller.
11. Software update
This option makes it possible to update the software using an appropriate cable and the application installed on the computer. In order to do this, use port RS485 in the controller.
12. Description of control parameters (parameter settings)
Parameter Description Scope Factory
settings
Solar
collector
type
The parameter makes it possible to select solar collector type (flat or tube).
If a tube collector is selected, then between 8.0017.00, every full hour, the collector pump is switched on for a minute. Because
of the fact that temperature sensors are located at the bottom of the collector, in case of extremely low ambient temperatures the
temperature inside the collector might deviate from the temperature indicated by the sensor. If the T1 sensor reaches a
temperature required for system operation, the P pump will continue operating
Flat / Tube Flat
Temp. T1&T2 difference
– pump ON
This parameter defines the conditions for switching the collector pump on and off. If the T1 temperature is higher than the sum of
the “Temp. T1&T2 difference – pump ON ” parameter and the T2 temperature of water in the heater, the collector pump will be
switched on.
415C 6C
Temperature difference
ON
add. pump, valve
This parameter is used for controlling advanced systems and therefore its description has been included in point 7 only for
selected external devices. 215C 5C
MaxTemp. T2
OFF
collector’s pump
This parameter is related to the T2 sensor located at the heater bottom. It defines the maximum allowable temperature of water
in the heater measured by the T2 sensor up to which solar collector pumps keep operating. 1085C 65C
Min. temp. T5
ON
Boiler pump
A parameter used in schemes 6, 14 and 18. It defines the minimum boiler temperature (T5 sensor) for switching boiler pump on. 1085C 41C
Max. temp. T4
OFF
heat source
Maximum temperature for switching an additional heat source, such as boiler, electrical heater or a heat pump, OFF. This
parameter is used in advanced schemes. Because of the variety of roles it plays in specific schemes, the description of its
functions has been included in point 4 for selected external devices only.
1085C 50C
Max. water temperature
from boiler C
A parameter only used in schemes no 14 and 18. It defines the maximum temperature of water measured by the T4 sensor for
the operation of C pump cooperating with the water circuit of fireplace or solid-fuel boiler. 1085C 60C
Regulation of collector’s
pump
P solar collector pump circulation adjustment. Switching this option on results in smooth changes the pump’s rotational speed.
When the option is switched off, the controller only distinguishes between collector pump being switched on or off. Yes / No Yes
Coll. power
OFF
boiler, heater, heat pump
A parameter used in installation
schemes
3, 4, 5 and 14. The controller forces additional heating devices (boiler, heater, heat
pump) to switch off once the set collector power parameter is exceeded.
In order to eliminate too frequent on/off cycles of the devices during transient insolation conditions, the controller accounts for a 5
minute delay in switch off and switch on of heating devices.
ATTENTION! Setting the value of 9900W makes the operation of heating devices independent from the operation of solar
collectors.
1009900W 1500W
Overheat protection of
collectors
This parameter defines switch on and switch off of the option protecting solar collectors from overheating.
When switched on, P collector pump gets switched off once the collector temperature exceeds 110C. If the collector
temperature falls below 99C or once the T2 heater temperature “MaxTemp. T2 OFF overheat protection” is exceeded the P
collector pump gets switched off. This function works even if the maximum water temperature MaxTemp. T2 OFF collector’s
pump” in the heater is exceeded.
Yes / No No
MaxTemp. T2
OFF
overheat protection
The parameter defines maximum temperature of water in the heater up to which collector pumps keep working when the option
“Protection against collector overheating” is active. 6080C 80C
Freezing protection of
collectors ON
The parameter is used in those countries where water serves as heat transfer fluid in solar collectors.
This parameter defines switch on and switch off of the option protecting solar collectors from freezing.
If this function is switched on, the P solar collector pump gets switched on once the temperature in the water heater as measured
by the T2 sensor is higher than 7C, and the temperature on collectors falls below the temperature set in the Heat transfer fluid
option. Once the temperature of water in the heater falls to 4C or the temperature on collectors exceeds the temperature set in
the Heat transfer fluid option, the solar collector pump switches off.
ATTENTION! Original heat transfer fluid(with no water added) does not freeze, so it is not necessary to use the
"Protection against collector freezing” option.
Unjustified activation of the function may result in cooling water in the heater.
Yes / No No
Selection of heating
priority
This parameter def
ines the selection of heating priority in schemes
with two heat receivers
(e.g. heater + pool).
Selecting A > B results in setting priority heating to the pool or additional heater. If the conditions are not suitable for heating the
pool or an additional heater, heating is switched to the solar heater. Selecting B > A results in setting priority heating to the solar
heater. If the conditions are not suitable for the solar heater, heating is switched to the pool or an additional heater.
Selecting B results in setting absolute heating priority of the solar heater. Heating will be directed to the pool or an additional
heater only after reaching preset temperature of the solar heater.
A and B letter
s are
connected with three
-
way valve outlets
or the name
of hea
t
receivers
.
B > A
A > B
B
B > A

17
Protection against
Legionella
(bacteria)
Enabling the function Protection against Legionella causes periodic (once a week – from Sunday to Monday from 12.00 a.m.
up to 6.00 a.m.) heating of water in the water heater up to temp. of 70C. After enabling the option the L symbol will be displayed
on the main screen of the controller. The active function is indicated by the blinking L symbol and starts the boiler, pump or
electric heater K, and circulation pump C.
Attention! In Scheme 19 the function will be active when T4 > 60C.
Yes / No No
Lock boiler K
with boiler C
A parameter only used in scheme no 14.
Switching on the” Lock boiler K with boiler C” function results in switching off the K boiler if the C fire place or solid-fuel boiler
operates.
Yes / No No
Min. time before pump
speed level increases
This parameter determines the time delay when changing to a higher rotation of solar panel pump.
Additionally, the parameter causes smooth operation of the solar installation with variable weather conditions and affects the
efficient use of solar energy especially on cloudy days.
10 – 300s 150s
Min. time before pump
speed level decrease
This parameter determines the time delay when changing to a lower rotation of solar panel pump.
Additionally, the parameter causes smooth operation of the solar system with variable weather conditions and affects the
efficient use of solar energy especially on cloudy days.
2 – 300s 10s
Pump speed level during
start-up
This parameter is available for the selected type of pump controlled with PWM signal (ST7PWM2) and determines the rotation of
the pump during its start-up. The pump operation is divided into 15 ranges. 1 – 15 1
Pressure switch This parameter defines the on and off function of the pressure control in the solar collectors by working with a pressure switch Yes / No No
Overheating protection
of the tank
A parameter used in schemes no 6, 14, 18. Switching protection off makes it possible to cool the lower part of the heater. When
temperature measured by the T2 sensor of parameter “MaxTemp. T2 OFF collector's pump” is exceeded, the solid-fuel boiler
pump will be switched on and the T2 sensor value will be blinking.
Yes / No No
Parameters of circulation pump (Circulation param.)
Switching on the
circulation pump
Option that makes it possible to enable / disable the circulation pump at the times set in “Time Program C” option. This option
refers to the schemes with connected tap water circulation pump only. Yes / No Yes
Circulation pump
operation
mode
Circulation pump operation option. This option only refers to schemes which include tap water circulating pump.
It defines C circulating pump operation in the time set in “Time program C” option:
- Continuous - C circulating pump works in the continuous mode,
-
Discon
. (
Discontinuous
)
-
the C circulating pump operates in cycles
according to the work periods set
.
Continuous /
Discontinuous Discontinuous
Min. temp. T4
switching on the
circulating pump
Parameter associated with the T4 sensor placed in the upper part of the heater. It determines the minimum water temperature in
the heater (T4) required to switch on the circulation pump. This parameter prevents the water heater from being completely
cooled down.
1085C 35C
Time of switching on the
circulating pump Time of switching on the C circulation pump in a set cyclic mode according to the preset working times. 159min 10min
Time of switching off the
circulating pump Time of switching off the C circulation pump in a set cyclic mode according to the preset working times. 159min 10min
Table 3. Controller parameter description
13. Error alarms and controller notifications
Temperature sensor error (check sensors for visual condition or for proper connection to the controller.)
The controller checks whether temperature sensors have been connected. If a temperature sensor gets damaged, a cable gets broken, a sensor gets disconnected, the controller will
raise sensor alarm. During an alarm all the outputs are disconnected. Moreover, when the controller displays the main screen, the alarm might be signaled by sound. In the alarm
mode it is possible to browse the menu, configure parameters or manually control external devices. Information on which sensor raises alarm is available on the main screen. Next to
the sensor marking, "Err” will be displayed instead of temperature. If the controller raises sensor alarm it should be checked whether the system has been assembled correctly, the
sensor have been correctly connected and whether the temperature sensor is not damaged. When a sensor that is not necessary for controlling is not connected to the controller, the
controller will not raise an alarm and the display will show dashes (- - - -) instead of temperature.
The exception is the T5 sensor – the missing T5 sensor in the selected diagram will show dashes ( - - - - ) and switch off the device related to the T5 sensor.
Too high temperature of the heat transfer fluid returning to solar collectors – (check pressure and passability of the solar system, eliminate air from the system, check the
collector pump)
In case of selecting the flow meter type as ELECTRONIC G-916, the controller is provided with return temperature control to prevent the flow meter from getting damaged by too high
temperature.
When the temperature of T3 reaches 85°C, the solar collector pump is switched off and the T3 sensor temperature value is blinking.
ATTENTION! In case the value of T3 drops to 83°C or below, the blinking and the circulation pump blockage stops automatically.
No information on flow from the G-916 electronic flow meter – (check the G916 flow meter for correct connection to the controller.)
The information that the electronic flow meter does not operate when the Measurement: Electr.G916 is enabled in the option Flow / rotameter: if the collector pump is switched on
and there is no pulse from the electronic flow meter for 5 minutes, the controller will display the following message once: NO INFORMATION ON FLOW FROM THE G-916
ELECTRONIC FLOW METER.
The message and the sound alarm are off after acceptance with the key or when pulses appear again. This information is always displayed once after the pump is switched on
again and when the lack of pulse condition exists for the above-mentioned time.
ATTENTION! The lack of flow will only display a message without interfering with the operation of the controller and devices connected to it.
Lack of required flow (check pressure and passability of the solar system, eliminate air from the system, check the collector pump).
The controller checks heat transfer fluid flow for solar collector`s pump P and K. Lack of flow is controlled in two steps:
I step – If collector pumps operate on top gear and the condition T1-T2 > 50°C for the P pump or T3-T2 > 50°C (scheme no 15 and 16) for the K pump is fulfilled for 10 minutes
– the controller generates a sound signal and displays the following message: LACK OF REQUIRED FLOW. CHECK AND ADJUST. After acceptance with the key, the
message disappears and the sound alarm is off.

18
II step – (When the T1-T2 > 50°C or T3-T2 > 50°C condition is fulfilled for another 10 minutes), the controller switches off the specific solar collector pump and generates a
sound signal and displays the following message: LACK OF FLOW, FAILURE OF THE P OR K PUMP, AIR-LOCKED SYSTEM, BLOCKED FLOW. By pressing the key for
acceptance the user will switch on the solar collector pump again. If the above-mentioned conditions continue, the alarm will be cyclically repeated.
ATTENTION! The LACK OF FLOW... message is off and the circulation pumps get unlocked automatically when the T1 or T3 temperature (scheme no 15 and 16) on solar
collectors falls below 50°C.
Lack of required pressure of the heat transfer fluid in the installation
The controller is equipped with a pressure control of the heat transfer fluid (the function Pressure switch enabled – see Control parameters).
The pressure drop below 1.5 bar for 30 minutes is indicated by the following message: LACK OF REQUIRED PRESSURE. By pressing the key for acceptance the user will
return to the main screen of the controller. If the lack of pressure continues, the alarm will be cyclically repeated. The removal of the alarm consists in completing the installation with
the heat transfer fluid to the pressure of 2 bar.
ATTENTION! Lack of required pressure will only display a message without interfering with the operation of the system and the controller.
Lack of required heater protection by titanium anode (applies to the GH26-P09A controller only).
The controller is used as a power supply for the titanium anode placed in the water heater for protection of the latter against corrosion.
The lack of anode, incorrect connection or damage to the anode circuit will switch on the sound alarm and display the message. NO SUFFICIENT TANK PROTECTION BY
TITANIUM ANODE. The controller distinguishes the error type and displays the above-mentioned message with the relevant failure code:
No code – information on the occurrence of a temporary failure
(1) – open circuit of titanium anode,
(2) – short circuit of titanium anode,
(3) – controller error.
By pressing the key for acceptance the user will switch off the controller. If the failure continues, the alarm will be cyclically repeated.
ATTENTION! The lack of proper protection of the water heater by the anode may cause corrosion and damage of the heater.
14. Information on marking and collecting used electrical and electronic equipment
A symbol found on the product or its packaging points to the necessity of separate collection of used electronic
equipment. This means that the product must not be thrown away together with other household waste. Correct disposal of old and used
electrical equipment may help to avoid potential damage to the environment and human health.
A user who should give the used equipment to a collector should be responsible for separate collection of used electronic equipment.
This manual suits for next models
1
Table of contents
Other Hewalex Controllers manuals
Popular Controllers manuals by other brands
NTN
NTN K-ECK96 instruction manual
Multiplex
Multiplex ROXXY BL-Control 712 BEC operating instructions
Solarbayer
Solarbayer PROMATIC D10 user manual
Allen-Bradley
Allen-Bradley CompactLogix 1769-L20 installation instructions
SKYDANCE
SKYDANCE DSA user manual

Johnson Controls
Johnson Controls tyco Power Pro Series Reference manual
