Step 1 - Unpack Hideaway Bin
• Remove all polystyrene.
• Remove the hamper.
Step 2 - Remove the door bracket
• Remove door bracket from the brown box found inside the hamper and set aside
until step 5.
• NOTE: VERY IMPORTANT - Do not remove the runners from the top mounting panel.
• See (g 2) to identify unit parts.
Step 3 - Install your bin within your cupboard / carcass (top mounting)
• Position the top mounting panel inside, beneath your carcass / shelf.
• NOTE: VERY IMPORTANT - Set the top mounting panel back 2mm from front of carcass.
• Position in the centre of the carcass. Mounting holes are located in the top mounting
panel for xing. Secure the top mounting panel into place with the Surex screws
and washers provided. Any additional mounting holes added by the installer will null and
void warranty.
Step 4 - Install your bin within your cupboard / carcass (side mounting)
• Your unit has side mounting dimples, as shown in g 2 & 3. If side mounting, the internal
space of the cabinet must be within the advertised width.
• The side mounting dimples are to be secured with the Surex screws and washers provided.
Step 5 - Door bracket (g 4, 5)
• Align the door bracket (g 6) to the collar (g 7) and lightly tighten in place using the
nuts provided.
• NOTE: Lightly tighten nuts to allow xing of door front. (Refer g 4 & 5)
Hideaway®Soft Close Range
Installation Instructions
60L Laundry Hamper
PLEASE READ BEFORE YOU BEGIN
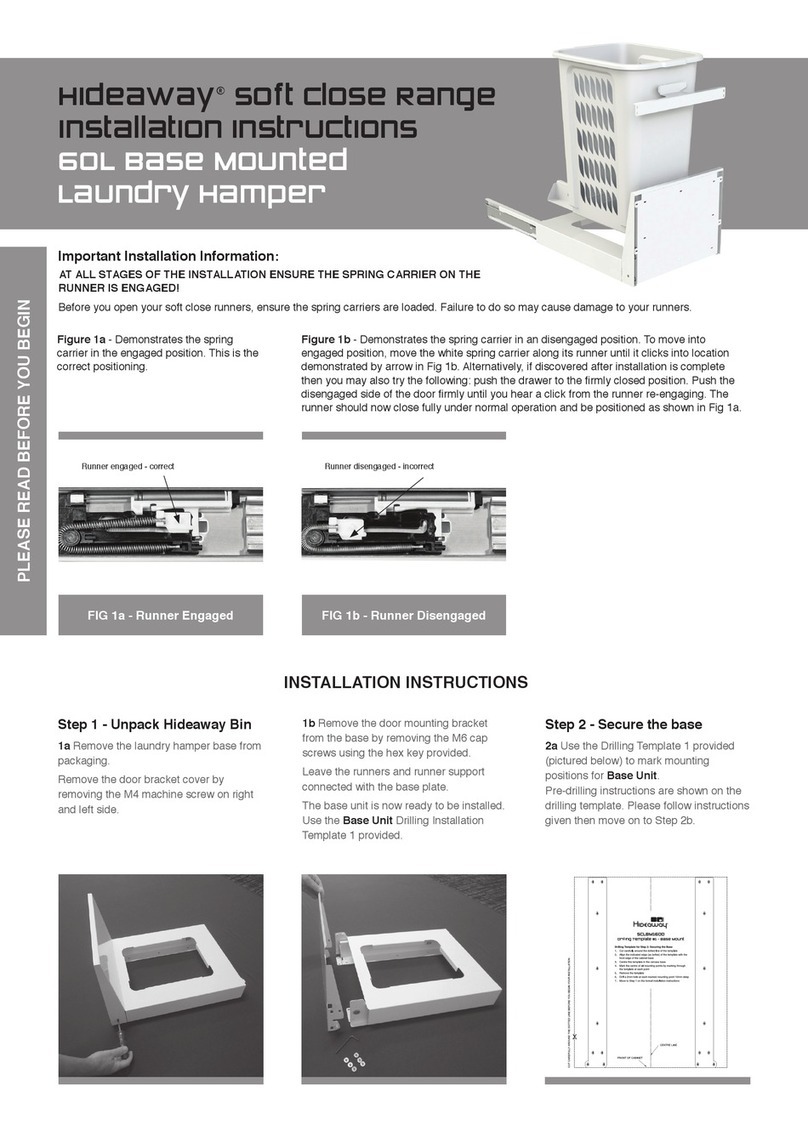
Important Installation Information:
AT ALL STAGES OF THE INSTALLATION ENSURE THE SPRING CARRIER ON THE
RUNNER IS ENGAGED!
Before you close the unit ensure the spring carrier is loaded on your soft close runner.
Failure to do so may cause damage to your runners.
Figure 1a - Demonstrates the spring carrier in the engaged position. This is the correct
positioning and the laundry hamper is ready to be closed and used.
Figure 1b - Demonstrates the spring carrier in an disengaged position. To move into
engaged position, move the white spring carrier along its runner until it clicks into location
demonstrated by arrow in Fig 1b. Alternatively, if discovered after installation is complete
then you may also try the following: push the drawer to the rmly closed position. Push the
disengaged side of the door rmly until you hear a click from the runner re-engaging. The
runner should now close fully under normal operation and be positioned as shown in Fig 1a.
FIG 2 - Unit Parts
Side mounting
dimples
Top mounting panel
Collar
Door bracket
Runners
FIG 1b - Runner Disengaged
Runner disengaged - incorrect
Runner engaged - correct
FIG 1a - Runner Engaged
FIG 3 - Mounting
Side mounting holes
Top mounting holes
