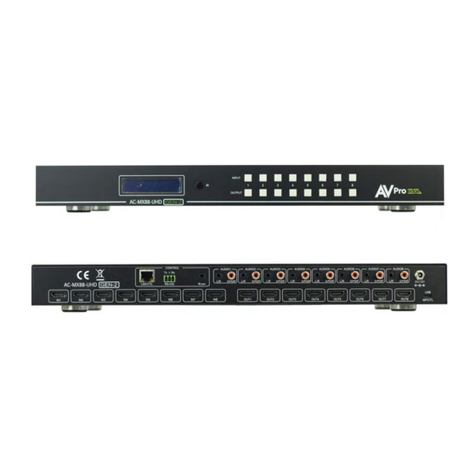
High Sec Labs HVS100 User manual

1
Secure Isolator KVM User Manual
Secure Isolator KVM User Manual
User Manual
Model covered in this user manual:
HVS100I Secure Isolator: DVI-I Video & Audio
HKS100 Secure Isolator: DVI-I Video, Audio & USB
Rev 1.0
Secure KVM Isolator User Manual

2
Secure Isolator KVM User Manual
Secure Isolator KVM User Manual
Table of Contents
Record of Revisions............................................................................ 2
Introduction ....................................................................................... 3
Package contents ............................................................................... 3
Features ............................................................................................. 4
Equipment Requirements .................................................................. 5
Safety Precautions ............................................................................. 6
Panel Features ................................................................................... 7
Tamper Evident Labels....................................................................... 8
Specifications ..................................................................................... 9
Before Installation............................................................................ 10
Installation ....................................................................................... 11
Typical System Diagram ................................................................... 12
Copyright and Legal Notice.............................................................. 13
Record of Revisions
Rev
Date
Description of changes
1.0
August 18, 2015
Initial release

3
Secure Isolator KVM User Manual
Secure Isolator KVM User Manual
Introduction
Thank you for purchasing this High Sec Labs (HSL) Secure product
designed for use in secure defense and intelligence installations.
The product offers safe centralized control, which prevents
unintended data transfer between computers and peripherals
running at different security levels.
Various users connecting to the same network source via secure and
non-secure PCs require the ability to prevent security threats by
attaching Isolators to the non-secure PCs.
Additionally, secure meeting rooms require the ability to project
various sources with different classification levels to be presented on
a single display. Isolators ensure that video, audio and USB data
coming from a non-secure source, such as guest laptop, flows in a
single direction, preventing security threats.
This User Manual provides all the details you’ll need to install and
operate your new product, which is NIAP PSS Protection Profile Rev
3.0-certified.
Package contents
Inside product packaging you will find the following:
HSL Secure KVM Isolator
12V/1.5A DC Power Supply
User Manual
Important: This product is equipped with always-on active anti-tampering system. Any attempt to
open the product enclosure will activate the anti-tamper triggers and render the unit inoperable.
If the unit’s enclosure appears disrupted or if all the channel-select LEDs flash continuously, please
remove product from service immediately and contact HSL Technical Support.

4
Secure Isolator KVM User Manual
Secure Isolator KVM User Manual
Features
Highest security by design:
designed to support isolation of large KVM matrix and conference
room equipment
Hardware Based peripheral protection/isolation:
Absolutely no dependency on firmware or software, unidirectional
optical data diodes assuring USB peripherals isolation. Data can flow
from devices to host only. No reverse data flow possible by design
Peripherals security:
Full USB devices filtering to assure support for keyboard and mouse
only
All firmware is in ROM - Read Only Memory
Analog Audio Data Diode:
Assuring that audio out channel would not be abused to send data
back to the computer
Display Plug & Play (EDID) protection:
Leakage prevention through patented emulated technology.
Signaling attacks prevented by design. DDC/EDID fully functional
Active anti tampering:
Always-on active anti-tampering with 10 years battery. Special
holographic tampering evident labels
Support for wide range of video standards:
DVI-I dual-link interface can be used for VGA, DVI-D and HDMI as well
Tamper Evident Label:
Providing clear visual indication of product was tampered with or
opened in any way

5
Secure Isolator KVM User Manual
Equipment Requirements
Cables
It is highly recommended to use HSL Cable Kits for product to ensure
optimal security and performance.
One Cable Kit is required per connected computer.
Operating Systems
Product is compatible with devices running on the following
operating systems:
• Microsoft® Windows®
• Red Hat®, Ubuntu® and other Linux® platforms
• Mac OS® X v10.3 and higher.
USB Keyboard console port
The product console USB keyboard port is compatible with Standard
USB keyboards.
Notes:
a. For security reasons products do not support wireless
keyboards. In any case do not connect wireless keyboard to
product.
b. Non-standard keyboards, such as keyboards with integrated
USB hubs and other USB-integrated devices, may not be fully
supported due to security policy. If they are supported, only
classical keyboard (HID) operation will be functional. It is
recommended to use standard USB keyboards.
USB Mouse console port
The product console USB mouse port is compatible with standard
USB mice.
Notes:
a. Console USB keyboard and mouse ports are switchable, i.e.
you can connect keyboard to mouse port and vice versa.
However, for optimal operation it is recommended to
connect USB keyboard to console USB keyboard port and
USB mouse to console USB mouse port.
b. Console USB mouse port supports Standard KVM Extender
composite device having a keyboard/mouse functions.
c. For security reasons products do not support wireless mice.
In any case do not connect wireless mouse to product.
Video/Audio Support
All single-link and Dual-link DVI resolutions up to 2560 x
1600.
All VGA resolutions up to 2048x1536 [cable/adaptor
required].
HDMI 1.0 support all resolutions up to 1920 x 1200
[cable/converter required].
Unidirectional audio out over HDMI supported
Note: In any case do not connect a microphone to product
audio output port including headsets.

6
Secure Isolator KVM User Manual
Safety Precautions
Please read the following safety precautions carefully before using
the product:
Before cleaning, disconnect the product from DC
power.
Be sure not to expose the product to excessive
humidity.
Be sure to install the product on a clean secure
surface.
Do not place the DC power cord in a path of foot
traffic.
If the product is not used for a long period of time,
remove the product’s wall-mount power supply from
the mains jack.
If one of the following situations occurs, get the
product checked by a qualified service technician:
The product’s power supply is overheated,
damaged, broken, causes smoke or shortens
the mains power socket.
Liquid penetrates the product’s case.
The product is exposed to excessive moisture
or water.
The product is not working well even after
carefully following the instructions in this
user’s manual.
The product has been dropped or is physically
damaged.
The product has obvious signs of breakage or
loose internal parts.
The product should be stored and used only in
temperature and humidity controlled environments
as defined in the product’s environmental
specifications.
The wall-mount power supply used with this product
should be the model supplied by the manufacturer
or an approved equivalent provided by HSL or an
authorized service provider. The use of improper
power source will void product warranty.

7
Secure Isolator KVM User Manual
Panel Features
Note: HVS100I has the same ports excluding the USB ports

8
Secure Isolator KVM User Manual
Tamper Evident Labels
HSL Secure Isolator uses holographic tamper evident labels to
provide visual indications in case of enclosure intrusion attempt.
These labels indicate white dots or the text “VOID” once removed.
When opening product packaging inspect the four tampering evident
labels.
If for any reason one or more tamper-evident label is missing,
appears disrupted, or looks different than the example shown here,
please call HSL Technical Support and avoid using that product.
HSL Holographic Tampering Evident Label
Active Anti-Tampering System
HSL Secure Isolator Switch is equipped with always-on active anti-
tampering system. If mechanical intrusion is detected by this
system, the Switch will be permanently disabled and LED will blink
continuously.
If product indication tampered state (all LEDs blinking) - please call
HSL Technical Support and avoid using that product.

9
Secure Isolator KVM User Manual
Specifications
Enclosure: Steel metal enclosure
Power Requirements: DC input 12V / 1.5A maximum.
Power Supply: Power input 100-240V AC
Console ports: - DVI-I Female video output
connector
-USB Type-A jack for keyboard
(HKS100I)
-USB Type-A jack for mouse
(HKS100I)
-Audio output 3.5 mm stereo jack
Computer ports: - DVI-I Female video input connector
- USB Type-B jack for keyboard and
mouse (HKS100I)
-Audio input 3.5 mm stereo jack
Video/Audio support: - All single-link and Dual-link DVI
resolutions up to 2560 x 1600
-All VGA resolutions up to
2048x1536 [cable/adaptor
required]
-HDMI 1.0 support all resolutions
up to 1920 x 1200
[cable/converter required]
-Unidirectional audio out over
HDMI supported
Operating Temp: 32° to 104° F (0° to 40° C)
Storage Temp: -4° to 140° F (-20° to 60° C)
Humidity: 0-80% RH, non-condensing
Regulatory Compliance
Safety: UL/cUL60950, EN60 950
EMI/EMC: FCC Class B, CE Mark,
EN55022B
Product design life-cycle: 10 years
Warranty: 2 years

10
Secure Isolator KVM User Manual
Before Installation
Unpacking the Product
Before opening the product packaging, inspect the packaging
condition to assure that product was not damaged during delivery.
When opening the package, inspect that the product Tamper Evident
Labels are intact.
Where to locate the Product?
The enclosure of the product is designed for desktop or under the
table configurations. An optional Mount Kit is available.
Product must be located in a secure and well protected environment
to prevent potential attacker access.
Consider the following when deciding where to place product:
Product front panel must be visible to the user at all times.
The location of the computers in relation to the product and
the length of available cables (typically 1.8 m)
Warning: Avoid placing cables near fluorescent lights, air-
conditioning equipment, RF equipment or machines that create
electrical noise (e.g., vacuum cleaners).
Important:
1. If the unit’s enclosure appears disrupted or if all channel-
select LEDs flash continuously, please remove product
from service immediately and contact HSL Technical
Support at http://highseclabs.com/support/case/.
2. Do not connect product to computing devices:
a. That are TEMPEST computers;
b. That include telecommunication equipment;
c. That include frame grabber video cards
d. That include special audio processing cards.

11
Secure Isolator KVM User Manual
Installation
Step 1 Connecting the Console devices to product
Connect the user display/s.
Connect the user keyboard
Connect the user mouse
Notes:
1. Console USB keyboard and mouse ports are switchable, i.e. you
can connect keyboard to mouse port and vice versa. However,
for optimal operation it is recommended to connect USB
keyboard to console USB keyboard port and USB mouse to
console USB mouse port.
2. For security reasons products do not support wireless keyboards.
In any case do not connect wireless keyboard to product.
3. Non-standard keyboards, such as keyboards with integrated USB
hubs and other USB-integrated devices, may not be fully
supported due to security policy. If they are supported, only
classical keyboard (HID) operation will be functional. It is
recommended to use standard USB keyboards.
4. Console USB mouse port supports Standard KVM Extender
composite device having a keyboard/mouse functions.
5. In any case do not connect a microphone to the switch audio
output port, including headsets.
Step 2 Connecting the Computers
Connect the computers to the Secure KVM Isolator through the
following steps:
Connect each computer with KVM cable. USB cable can be
connected to any free USB port on the computer.
Note: If computer is having more than one video output connector –
first test for video output availability by connecting a display directly
to that port and then connect via the KVM Isolator.
Note: The USB cable must be connected directly to a free USB port
on the computer, with no USB hubs or other devices in between.
Connect an audio cable to the computer audio output (lime green
color) or line output (blue color) jacks.
Step 3 Power up
Power up user display. Select proper input if applicable (VGA or
DVI; DisplayPort).
Power up the Secure KVM Isolator by connecting DC power
supply. The display diagnostic LEDs should be solid green for a
few seconds after power up. This indicates the display EDID
information has been captured and secured. If the display
diagnostic LED remains blinking for longer than 10 seconds after
power up, refer to the Troubleshooting section of this user
manual.
Power up the connected computers.
Note: When you power on your computers, the Isolator emulates
both a mouse and keyboard to the connected PC and allows your
computer to boot normally. Check to see that the keyboard, display,
and mouse are working normally.
If you encounter an error, check your cable connections for that
computer and reboot. If the problem persists, please refer to the
Troubleshooting section in this User Manual.

12
Secure Isolator KVM User Manual
Typical System Diagram

13
Secure Isolator KVM User Manual
Copyright and Legal Notice
© 2015 High Sec Labs Ltd. (HSL) All rights reserved.
This product and/or associated software are protected by copyright,
international treaties and various patents.
This manual and the software, firmware and/or hardware described
in it are copyrighted. You may not reproduce, transmit, transcribe,
store in a retrieval system, or translate into any language or
computer language, in any form or by any means, electronic,
mechanical, magnetic, optical, chemical, manual, or otherwise, any
part of this publication without express written permission from HSL.
HSL SHALL NOT BE LIABLE FOR TECHNICAL OR EDITORIAL ERRORS OR
OMISSIONS CONTAINED HEREIN; NOR FOR INCIDENTAL OR
CONSEQUENTIAL DAMAGES RESULTING FROM THE FURNISHING,
PERFORMANCE, OR USE OF THIS MATERIAL.
The information contained in this document represents the current
view of HSL on the issues discussed as of the date of publication.
Because HSL must respond to changing market conditions, it should
not be interpreted to be a commitment on the part of HSL, and HSL
cannot guarantee the accuracy of any information presented after
the date of publication. PRODUCT DESIGN AND SPECIFICATION IS
SUBJECT TO CHANGES WITHOUT NOTICE
This Guide is for informational purposes only. HSL MAKES NO
WARRANTIES, EXPRESS OR IMPLIED, IN THIS DOCUMENT.
PATENTS AND TRADEMARKS
The products described in this manual are protected by multiple
patents.
HSL Product/s and logo are either trademarks or registered
trademarks of HSL.
Products mentioned in this document may be registered trademarks
or trademarks of their respective owners
U.S. GOVERNMENT RESTRICTED RIGHTS
The Software and documentation are provided with RESTRICTED
RIGHTS.
You agree to comply with all applicable international and national
laws that apply to the Software, including the U.S. Export
Administration Regulations, as well as end-user, end-use and country
destination restrictions issued by U.S. and other governments.
The information and specifications in this document are subject to
change without prior notice.
Images are for demonstration purposes only.
This manual suits for next models
1
Table of contents
Other High Sec Labs Matrix Switcher manuals
