HIGH VOLUME O2 HVO GO+GO NAKED User manual

Setup Guide for your
HVO 60 + 60 Naked Drone
1

The Big Picture
1. Choose The System Location
2. Get the Power Ready
3. Get an Approved Oxygen Regulator
4. Get the Tools You’ll Need
5. Unpack the crate
6. Prepare the Master
7. Prepare the Naked Drone
8. Prepare the Oxygen Concentrators
9. Connect the components
10. Power Up!
You can do steps 1-4
while your system is
in transit.
2
Click this link to watch a video about the basic HVO setup.

Step 0 -- Let’s talk about Safety
During the setup process, as well as during daily operation of your HVO system, be aware that you will be working with
oxygen under pressure, which, when combined with a fuel, is potentially explosive. To avoid injury or death, follow these
safety precautions:
● Wear safety glasses.
● Work in a clean, dust-free, flame-free (during setup),
well-ventilated environment.
● Ensure that you have proper power. Leave all electrical
work to a professional.
● Do not use extension cords or power strips.
● Never use parts that have been treated with oil.
● Do not use replacement compressors from a third-party
as they may not be oxygen rated or otherwise
compatible with the HVO system.
● Be advised that tanks not specifically designed to
contain oxygen and which have not been treated for
oxygen use may be extremely hazardous. For example,
propane tanks should never under any circumstances
be used as oxygen storage tanks.
● HVO tanks are designed to store oxygen generated by PSA
(oxygen concentrator) systems only. The pressure in these
tanks should not exceed 150 psi.
● HVO tanks are equipped with a 200 psi blow-off valve. Do
not tamper with or replace the blow-off valve.
● Never fill HVO storage tanks with liquid oxygen, as this may
cause an explosion.
● Never fill HVO storage tanks using homefill compressors as
these compressors create extremely high pressure and may
explode the tank.
● Do not attempt to transport the HVO system when the tank is
pressurized. Follow the recommended procedure for
emptying the oxygen storage tank before transporting.
● Use only oxygen-rated tubing and fittings.
● Use only HVO approved replacement parts.
Call us if you have questions. We are happy to help! (402) 476-0555 3

Step 1: Choose the System Location
●Choose an indoor location that is Clean, Dust-Free, dry, &
well-ventilated
●ambient room temperature must be 45-90
●If you plan to build shelving or cabinets for your HVO system:
○Make sure the enclosure is well-ventilated
○Locate the oxygen concentrators low to the ground, where it is coolest, and where
oxygen density is highest.
○Keep in mind that you’ll need to look in on your system from time-to-time.. It
should be easy to access.
4

Step 2: Get the Power Ready
●Work with a certified electrician to determine
power requirements Based on your configuration
●Click here for more information about HVO Power.
NOTE
We recommend against the use
of extension cords and power
strips. Ensure that your power
connections are located within
5 feet of your HVO system.
5
Master
5 amps
Drone
(naked or
dressed)
5 amps
3-Outlet
Relay Box
20 amps
5-Outlet
Relay Box
30 amps
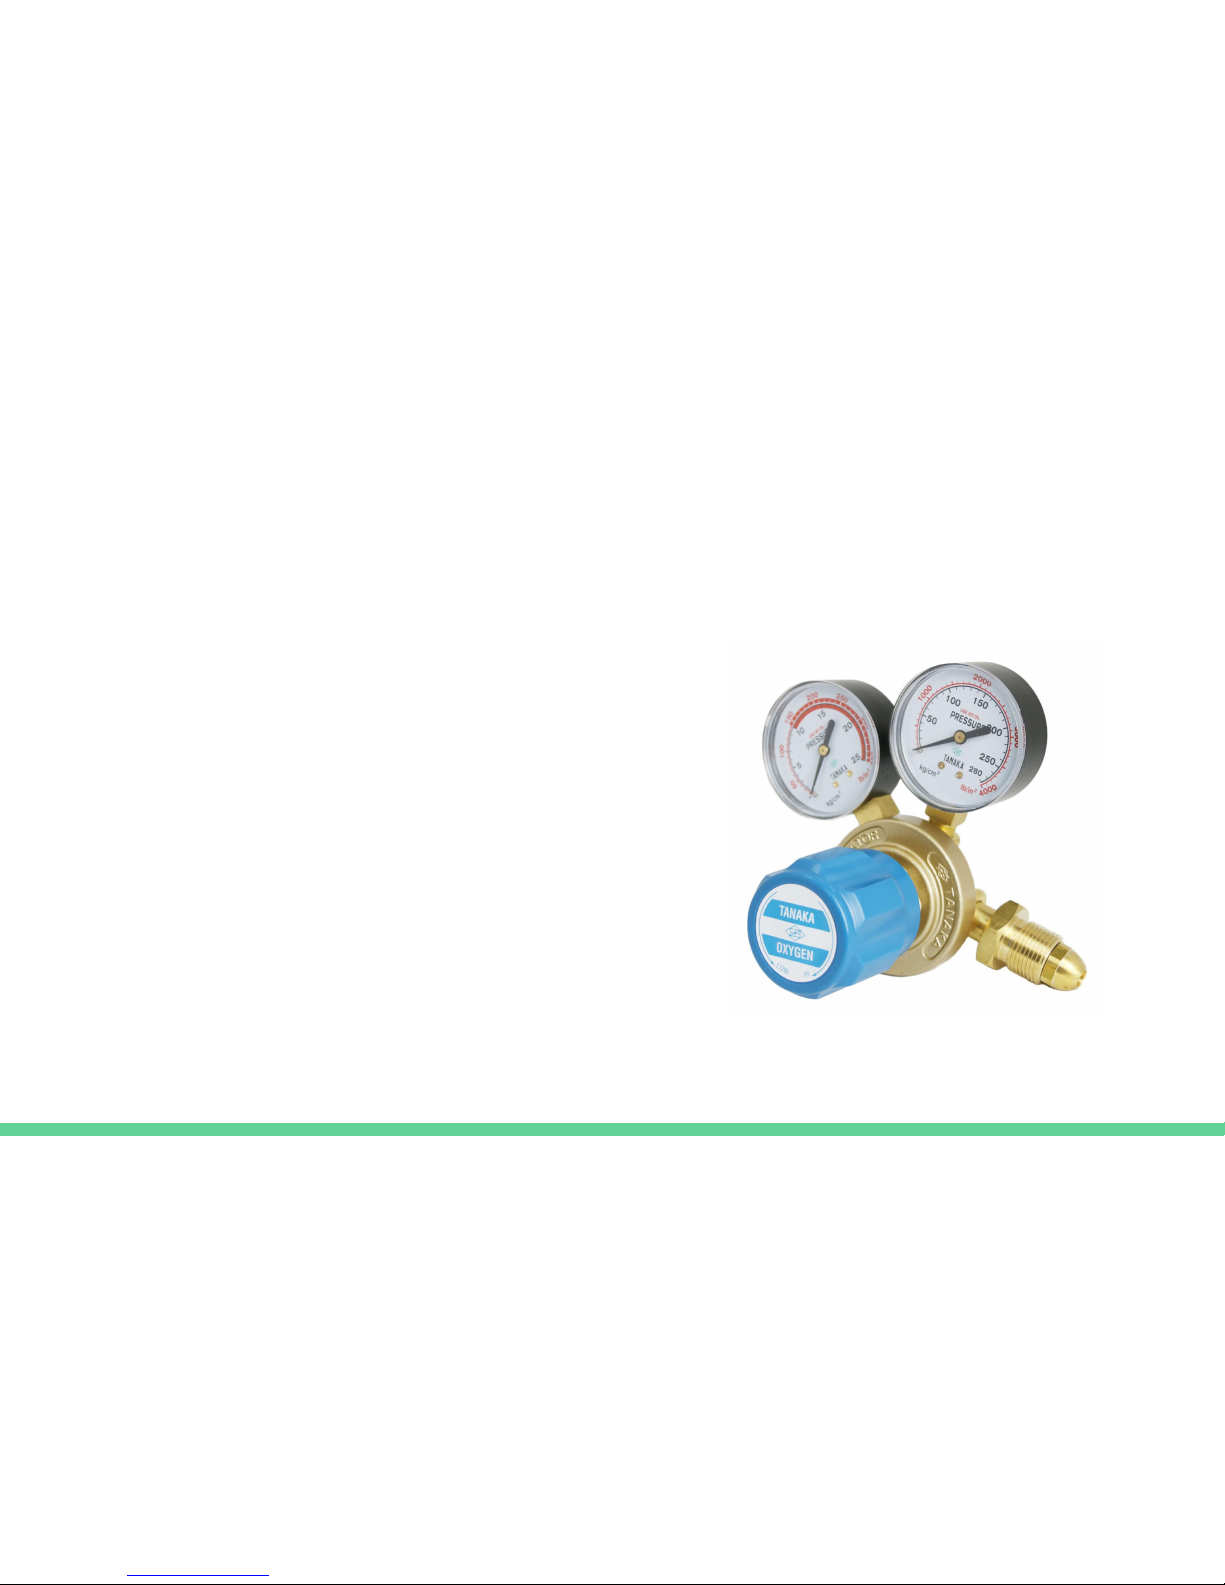
Step 3: Get an Approved Oxygen Regulator
●Use an oxygen regulator with a flow rate
That matches your usage.
●If you have questions about the right
Regulator for your setup, give us a
Call.
●Nut size is about 1.25” (CGA standard).
6
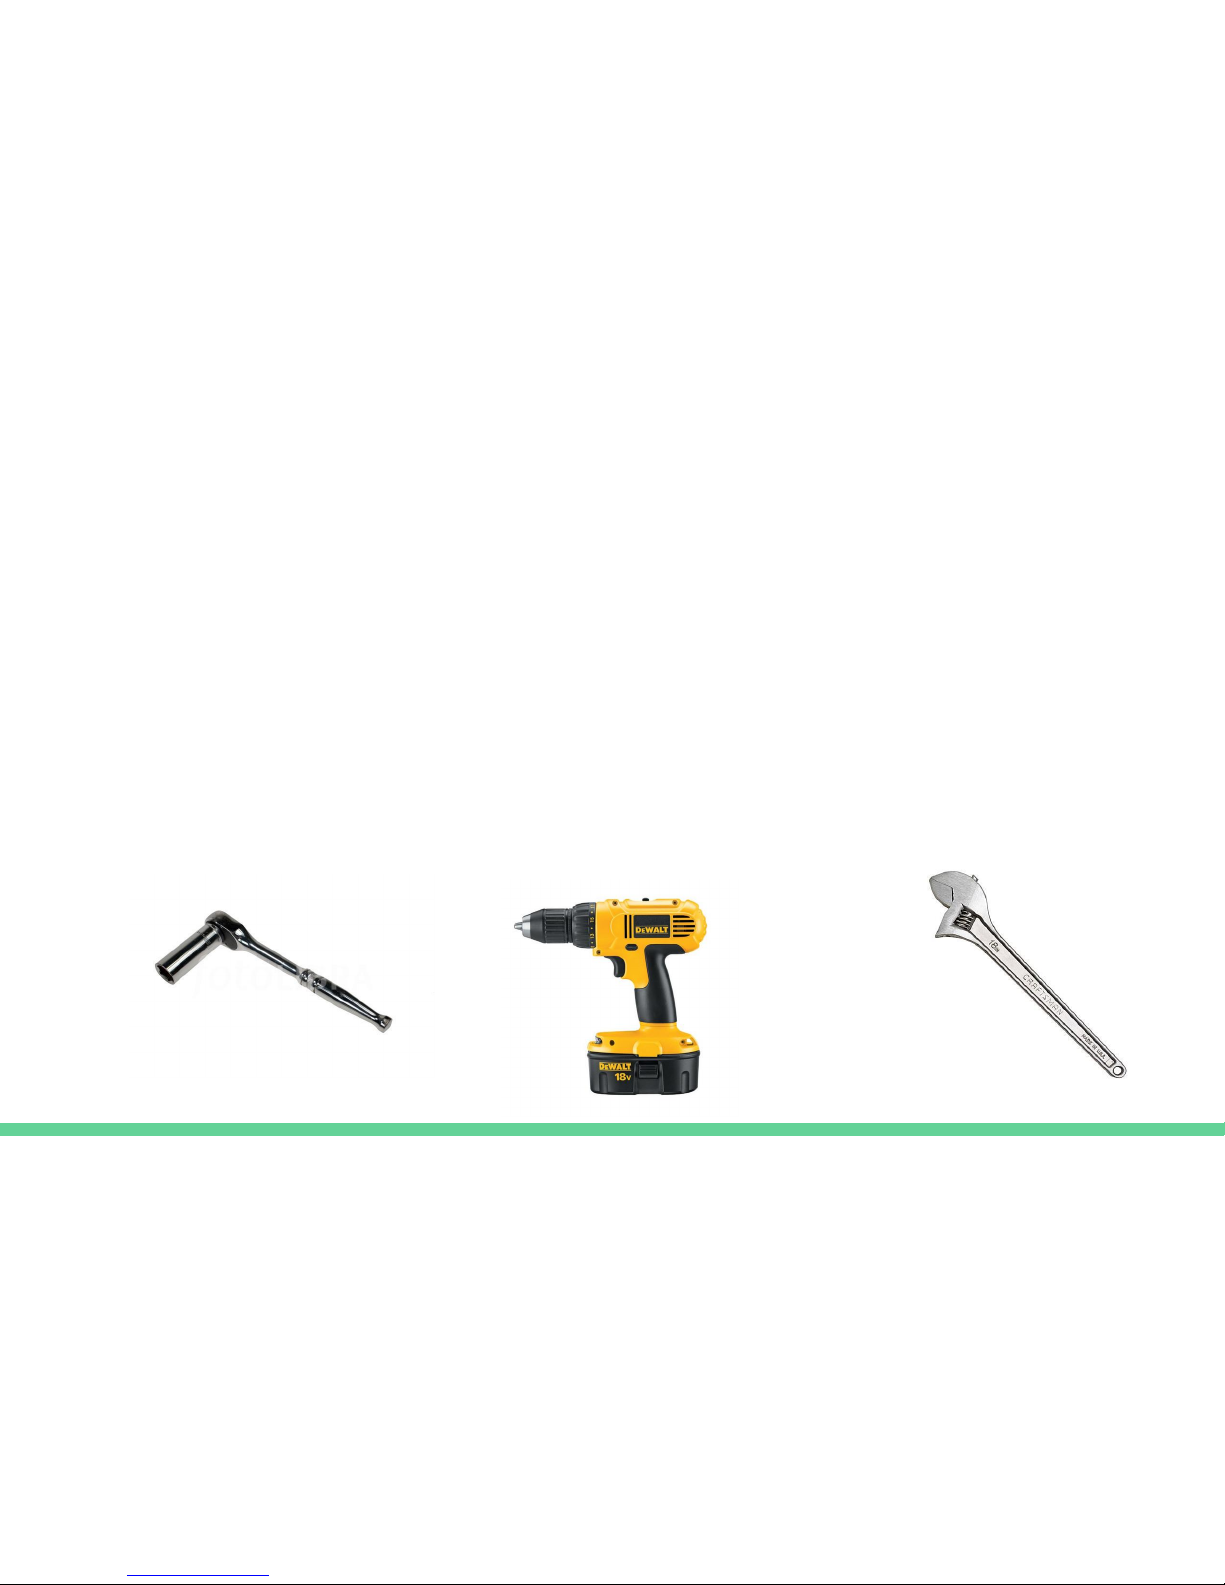
Step 4: Get the Tools You’ll Need
●Electric Drill with Phillips-Head Bit (to open the crate)
●Socket Set (To remove tank from crate base)
●Two 18” adjustable wrenches (To gently connect O2 regulator)
●Dish Soap Solution in a Spray Bottle (to bubble-test for leaks)
●Zip-ties (to secure power cords and oxygen lines)
7

Step 5: Unpack the crate
●Place the crate on a level surface
●Unscrew and remove the lid (#1)
●Unscrew and Remove the front panel (#2)
●Using the proper socket size, remove the
Bolts from the base of the tank
●Lift the tank off the base and place on
the floor
●Carefully remove the remaining contents
2.
1.
8

Step 6: Prepare the Master
●The master is the head box and tank combo.
●Place the master in its permanent location.
●Ensure that the ball valve is in the open position. the tank MUST
NOT be under pressure.
●remove the hex nut cap and install a bushing in the opening. The
bushing will be used to connect the braided steel line that runs
between The master and Drone tanks.
9
NOTE
Don’t plug the system in until the
last step. No power is needed yet!
side view
Remove hex nut “cap”

Step 7: Prepare the Drone
●The naked drone is the tank with the exposed compressor on top.
●Position the drone so that the braided steel line can reach between
the two tanks, leaving at least 2-3 inches of slack.
●connect the braided steel line to the two tanks:
○The steel line is shipped with teflon tape on both ends. Do not install without
teflon tape or the fitting will leak oxygen.
○Ensure that the opening in each tank has a bushing into which you can thread the
ends of the steel line.
○Use two adjustable wrenches to tighten each
End of the steel line -- One to stabilize the
bushing and the other to tighten the fitting..
10
dronemaster
●The oxygen concentrators (oxycons) will be split into two sets
(A&B), with at least 2 per set.
●Watch a video to learn how to remove batteries from M10 oxycons
●Connect ¼” oxygen “manifold” lines (shown in green below) from set
“A” (hand tighten the brass fittings) to a push-to-connect manifold
(black plastic block) that terminates with a 3/8” line.
●Repeat for set “B”.
●Position two relay boxes (A&B) near the tanks.
●Plug in the oxycon power cords from set A to relay box A. Repeat
for set B.
Step 8: Prepare the Oxygen Concentrators
11
Set A Set BBox A Box B

Step 9A: Connect the Components
●Firmly push the 3/8“ oxygen line from oxycon set A into the
push-to-connect in the back of the master.
●Repeat for set B into the naked drone’s push-to-connect.
●Use an adjustable wrench to Connect the oxygen regulator to the
master ball valve assembly. Do not over-tighten!
●Double-check all connected components.
●Close the ball valve in preparation to pressurize your system.
12

Step 9B: Connect the Components
●Ensure that the master switch is in the “0” (Off) position.
●Attach a power cord to the master and plug into household power.
●Attach power to the relay boxes.
●plug each relay box into a separate dedicated circuit.
●Plug the naked drone power into one of the relay boxes.
●Attach a coaxial cable from master to relay A.
●Connect a second coaxial cable from relay A to relay B.
●Connect a third coaxial cable from relay box B to the drone.
13

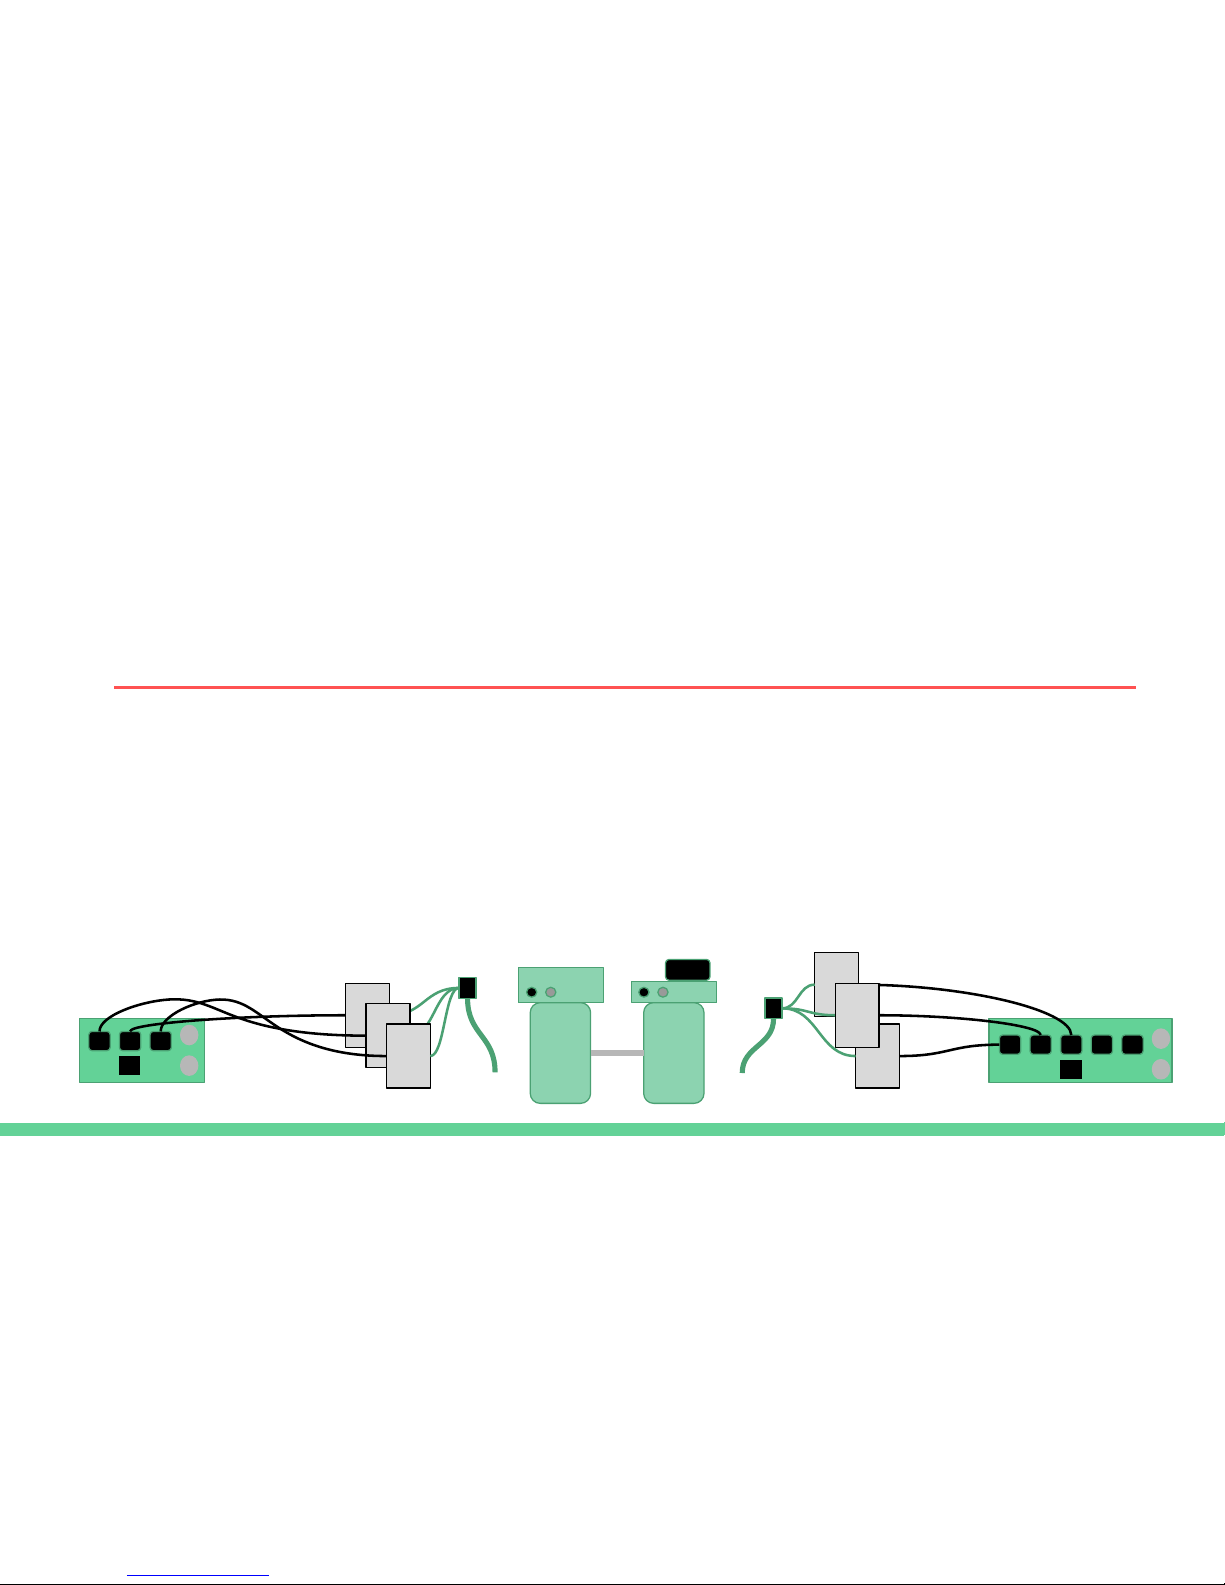
Your system should look like this*
14
Drone
Set A
Box A
14
Set B Box B
Rear View
Power
Oxygen
Coaxial
Key
20 AMP 30 AMP
Master
O2
*Assumes 6 oxycons. Your power requirements may differ.

Step 10: Power Up!
●Turn all of the oxycon power switches on, and leave them on at all
times. At this point, the oxycons will not power up until the master
is turned on.
●Turn the master power switch on. Now the system should come to
life. You should see the lights on the oxycons turn on, and you’ll
hear the compressors running in both the master and the drone.
●Watch the analog pressure gauge. In a few minutes you should see
pressure building up.
●Once there is visible pressure, begin testing all fittings for leaks
using a sprayer with soapy water. If you find a leak, turn the system
off, Drain the tanks, fix the leak, and try again.
15

Congratulations!
●Your system should build pressure until it reaches the maximum for
the model you’re using (100 psi for the Standard, 150 psi for the
Mighty Mite and MAX).
●When the pressure falls below the lower threshold (30 psi or 100
psi, depending on the model), the system will automatically turn on
and begin recharging your tanks with oxygen.
●You can leave your system on 24x7. Switch off and close the ball
valve when the system will be unused for a period of days.
●Please Remember to mail in your warranty card.
●If you have any questions or issues, please call (402) 476-0555 or
email [email protected]
●Enjoy your new HVO System!!! 16
Table of contents


