HighGear TerraTech User manual

TrailDrop TerraTech
INSTRUCTION MANUAL

1
english
T
H
E
R
M
A
-
S
E
N
S
O
R
N
W
W
S
W
S
S
E
E
N
E
N
B
E
A
R
I
N
G
N
E
X
T
/
S
T
A
R
T
/
S
P
L
I
T
M
O
D
E
/
S
E
L
E
C
T
S
E
T
/
S
T
O
P
/
L
I
G
H
T
FEATURES
Digital Compass
Time / Date
2 Time Zones
2 Alarms
Temperature with therma sensor technology
Chronograph
Timer
Backlight
Navigation Bezel
L.E.D Flashlight
Level Bubble
TerraTechTrailDrop

2 3
engl sh
english
S3
S1
S2
S4
S3
T
H
E
R
M
A
-
S
E
N
S
O
R
N
W
W
S
W
S
S
E
E
N
E
N
B
E
A
R
I
N
G
N
E
X
T
/
S
T
A
R
T
/
S
P
L
I
T
M
O
D
E
/
S
E
L
E
C
T
S
E
T
/
S
T
O
P
/
L
I
G
H
T
PM
T
1
S4
S3
S1
S2
LIGHT BUTTON
To activate flashlight LED
To read compass press
S1 at any time.
TIME
TEMPERATURE
CHRONOTIMER
ALARM
HOW TO USE ELECTRONIC COMPASS FEATURE
Compass must be calibrated before first use.
Press S1 to take compass reading. For accurate reading, make sure to level the
compass using the level bubble.
CAUTION: The Digital Compass function is very sensitive to magnetic and elec-
tric fields. The direction will be affected by nearby magnetic or electronic
devices.
CALIBRATION: Allows user to align the Compass magnetic sensor with the
earth’s magnetic field so that the Compass can detect the correct direction. With
the declination angle added, the magnetic North will be adjusted by the clock-
wise shift or anti-clockwise shift of this angle, giving you the true North reading.
The range of declination angle is 00 E to 99 E and 00 W to 99 W. The declination
angles for major world cities are listed on the following page.
DECLINATION: The difference in degrees, or angle, between North and mag-
netic North.
TRUE NORTH: Also, known as geographic North, this is map North (North Pole)
MAGNETIC NORTH: The geographical region toward which all magnetic nee-
dles point. This point is 1300 miles south of the North. (This is why it’s important
to calibrate!)
The declination angles for major world cities are included.

4 5
english
english
HOW TO CALIBRATE COMPASS
•Press S1 to enter compass mode, then press and hold S4, "CAL" will be dis-
played.
•Holding the unit on a flat surface, rotate the unit three times 360 degrees
clockwise, each rotation lasting between 10-15 seconds, then press S4 to
end calibration.
•Set the flashing digits in 00 degree to the declination in your area (S2 is for
adjusting and S3 is for selecting), after the setting is complete press S4 to
set.
•To exit to another mode, press S3.
CITY DECLINATION ANGLE
Anchorage 22 E
Atlanta 4 W
Bombay 1 W
Boston 16 W
Calgary 18 W
Chicago 5 W
Denver 10 E
Jerusalem 3 E
London 4 W
Little Rock 3 E
Livingston, MT 14 W
Munich 1 E
CITY DECLINATION ANGLE
New York City 14 W
Orlando 5 W
Olso 2 W
Paris 2 W
Rio De Janeiro 21 W
San Francisco 15 E
Seattle 19 E
Shanghai 5 W
Toronto 11 W
Vancouver 20 W
Washington DC 10 W
Waterbury, CT 14 W
To locate declination angle in your city not listed in this chart, go to
www.ngdc.noaa.gov.

6 7
english
english
TEMPERATURE MODE
You can toggle between F or C display. You can also offset the displayed temper-
ature -+4 degree from the detected temperature. For example, if the
TerraTech/TrailDrop shows 77F (detected temperature) and another thermometer
shows 74F then you can set the TerraTech/TrailDrop to show 74F (displayed tem-
perature), and from then onwards, displayed temperature is offset by
-3 degrees from the detected temperature.
•Press S2 for 3 seconds to toggle between F or C display
HOW TO OFFSET TEMPERATURE
•Press S3 until "TE" displays.
•Press S4 for 3 seconds to start the offsetting process; the digits start to
flash. Press S2 to adjust and press S3 to select. After the setting is complete
press S4 to set.
NOTE: When unit is worn, body heat can cause an increase in temperature reading.
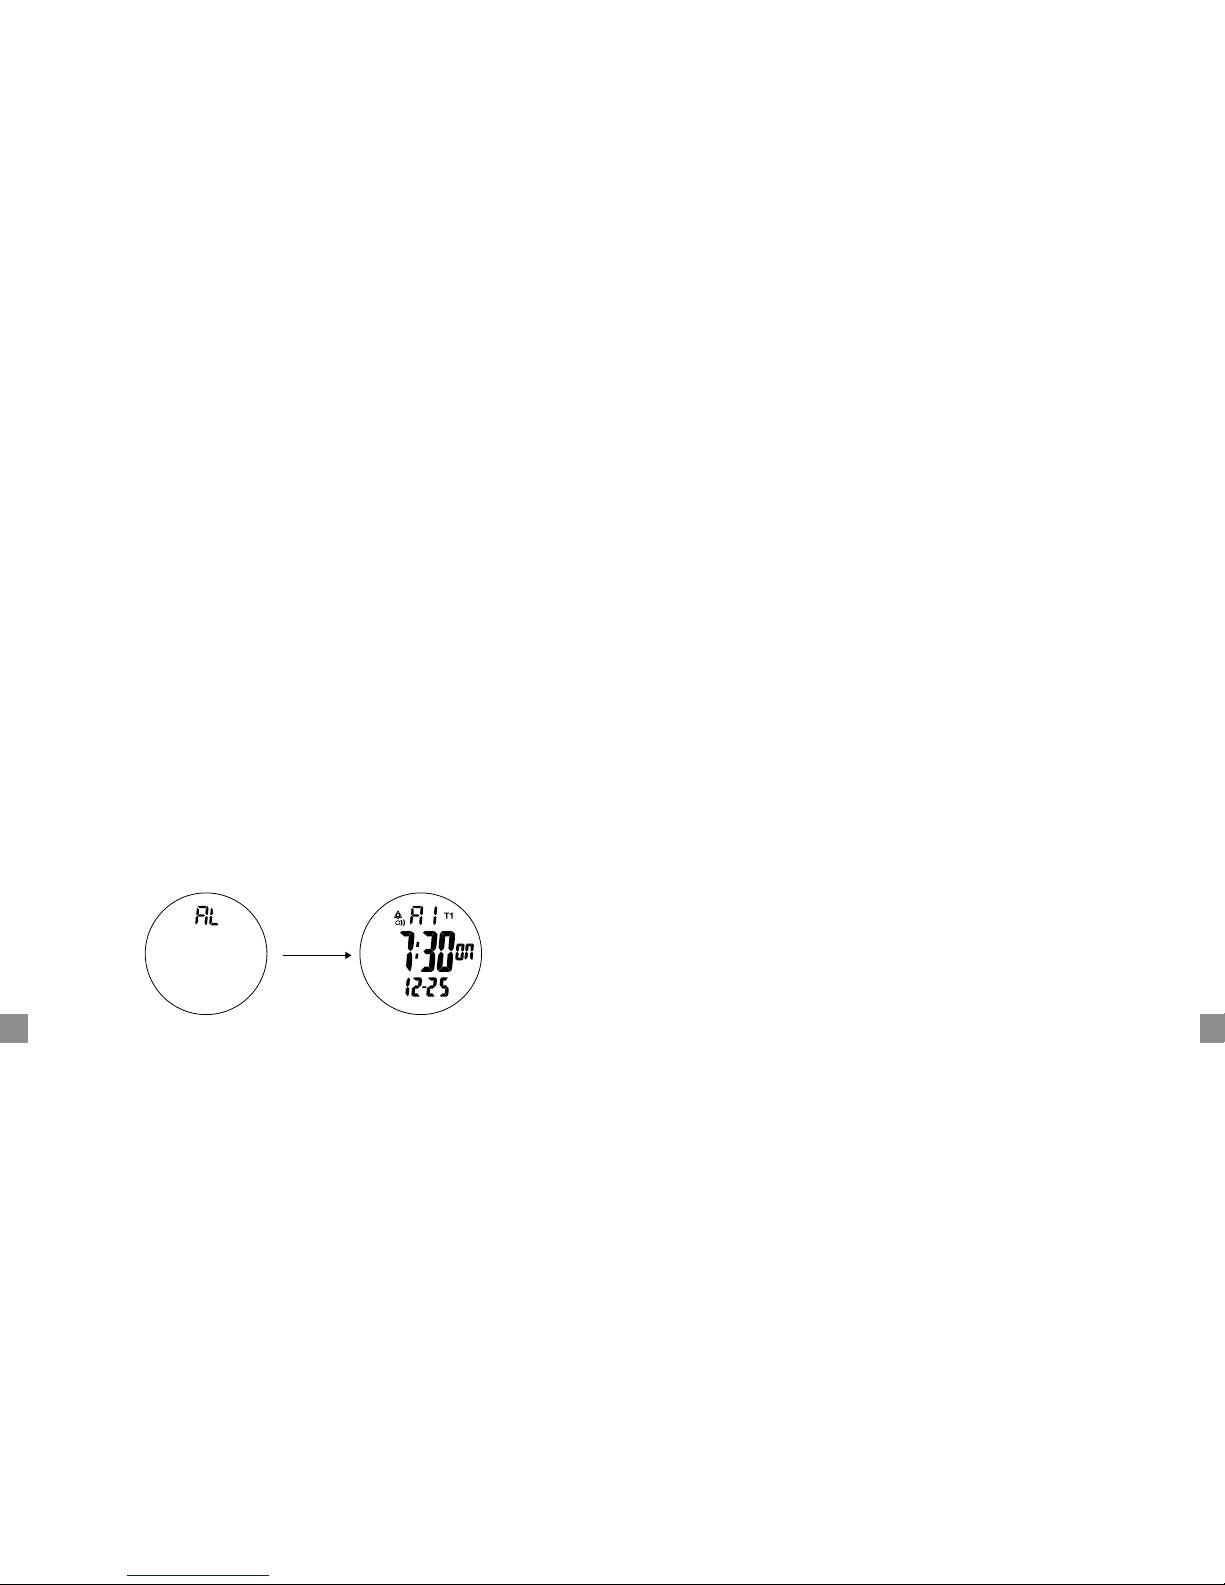
TIME MODE
Normal time mode displays the hour, minutes, seconds, month, date and day of
the week. You can also toggle between 12 hr and 24 hr time display. Also, you
can select two time zones, "T1" and "T2".
•Press S3 until "TM" is displayed
•Press S2 for 3 seconds to switch from "T1" and T2".
•Press S4 for 3 seconds to make adjustment; the digits start to flash, then
press S3 to select the position, when digits are flashing, press S2 to adjust
the seconds, minutes, hours, date, month, day of the week and year, and tog-
gle between 12hr and 24hr time display. After the setting is complete press
S4 to set.
1 SEC AUTO
1 SEC AUTO

8 9
english
english
CHRONOGRAPH MODE
The chronograph counts up in 1/100 sec resolution with working range of 24
hours.
•Press S3 until "CH" is displayed.
•Press S2 for start / split operation, press S2 again and "SPL" will be dis-
played when split is selected.
•Press S4 to stop the running chronograph, and hold S4 to reset the stopped
chronograph back to zero.
1 SEC AUTO
TIMER MODE
Timer mode present the count down time at the upper row and the current time
at the lower row.
"CS" Count Down Stop
"CR" Count Down Repeat
"CU" Count Down Up
Working range of the timer is 24 hours with the resolution of 1 second.
TO OPERATE TIMER MODE
•Press S3 to timer mode "TR".
•Press S4 for 3 seconds to start setting timer time and timer function; the dig-
its start to flash.
•Press S3 to switch between seconds, minutes and hours, press S2 to adjust
desired numbers. Press S3, when "CS" is flashing, press S2 to change to
"CR" or "CU" or remain with "CS" mode.
•Press S4 to exit setting, then press S2 to start timer and S4 to stop.

10 11
english
english
ALARM MODE Displays Hour and Minute Alarm Setting
Displays to set the desired hour and minute alarm. The alarmsound repeats
everyday if the alarmmark is in the "on" position. There are two alarms, "A1" and
"A2".
¥ Press S3 until "AL" is displayed
¥ Press S2 to select "AL" (chime), "A1" (alarm1) and "A2" (alarm2).
¥ Press S2 for 3 seconds to toggle the alarmmark and chime mark on
("on" shown) or OFF ("- - " shown). When the chime mark is ON, there is a
beep sound every hour and confirmation key tone every time a button is
pressed.
¥In"A1" or "A2" display, press S4 for 3 seconds until the digits start flashing;
then press S3 to select hour, minutes, month, day and T1/T2. Press S2 to
adjust desired number.
¥ Press S4 to set the Alarmand exit adjust mode.
BATTERY REPLACEMENT
If the LCD display or LED light is dim, replace the battery with the following;
LED Light: V392 x 3
TerraTech: 2032 x 1
TrailDrop: SR936SW x 2
REMARK: Compass mode EL backlight and LED flashlight cause large consump-
tion of the battery power.


Printed in China
HighGear USA, Inc.
190 ContinuumDrive, Fletcher, NC 28732
One Year Limited Warranty
WWW.HIGHGEAR.COM
This manual suits for next models
1
Table of contents
Other HighGear Compass manuals