True North Revolution User manual

Revolution™ Compass Kit
User’s Guide

True North Technologies Document No. 1554-B
Revisions
November 2002, Rev A, First Release
March 2003, Rev B, New J2 Wiring Instructions
Copyright © 2002 True North Technologies LLC
Revolution™ is a trademark of True North Technologies LLC
Contact:
True North Technologies
Two Clock Tower Place, #335
Maynard, MA 01754
Voice: 978-897-5400
Fax: 978-897-1144
Web: www.tntc.com

True North Technologies Document No. 1554-B
Contents
Introduction ...........................................................................................................1
Contents of the Kit ................................................................................................1
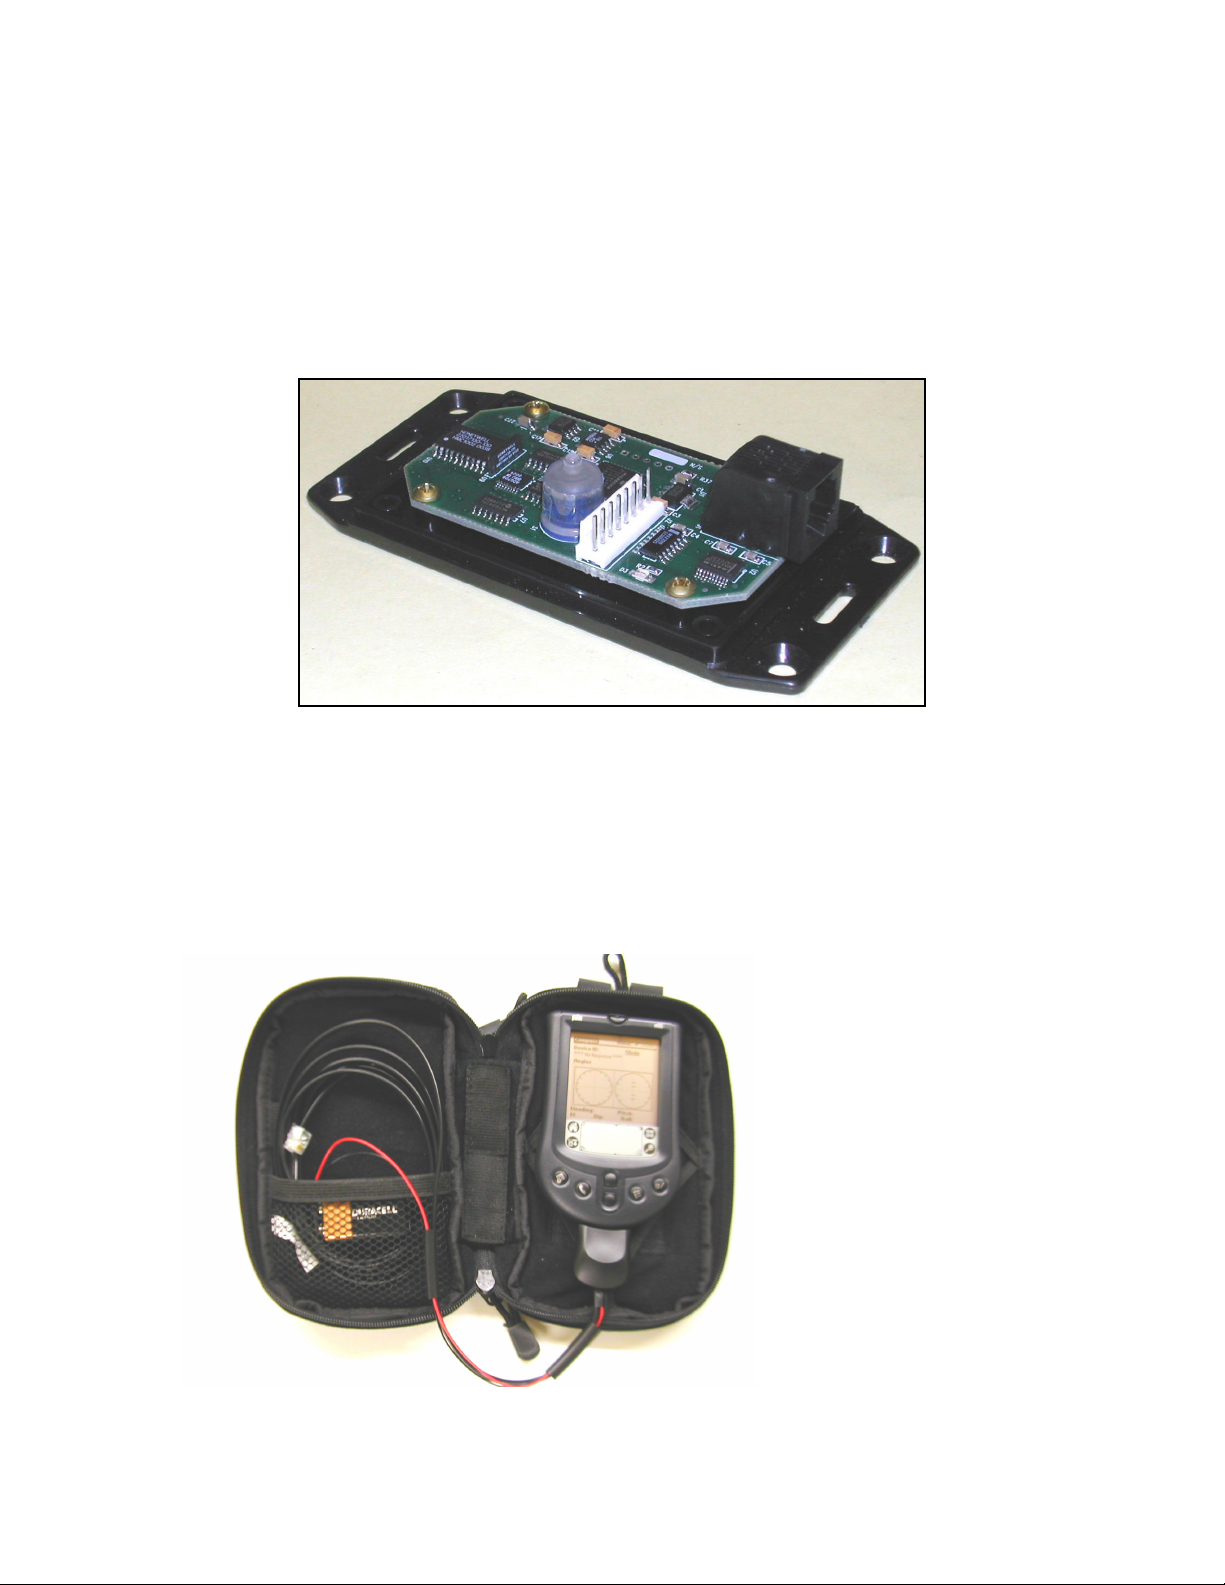
Revolution Compass .........................................................................................2
Palm PDA and Carrying Case...........................................................................2
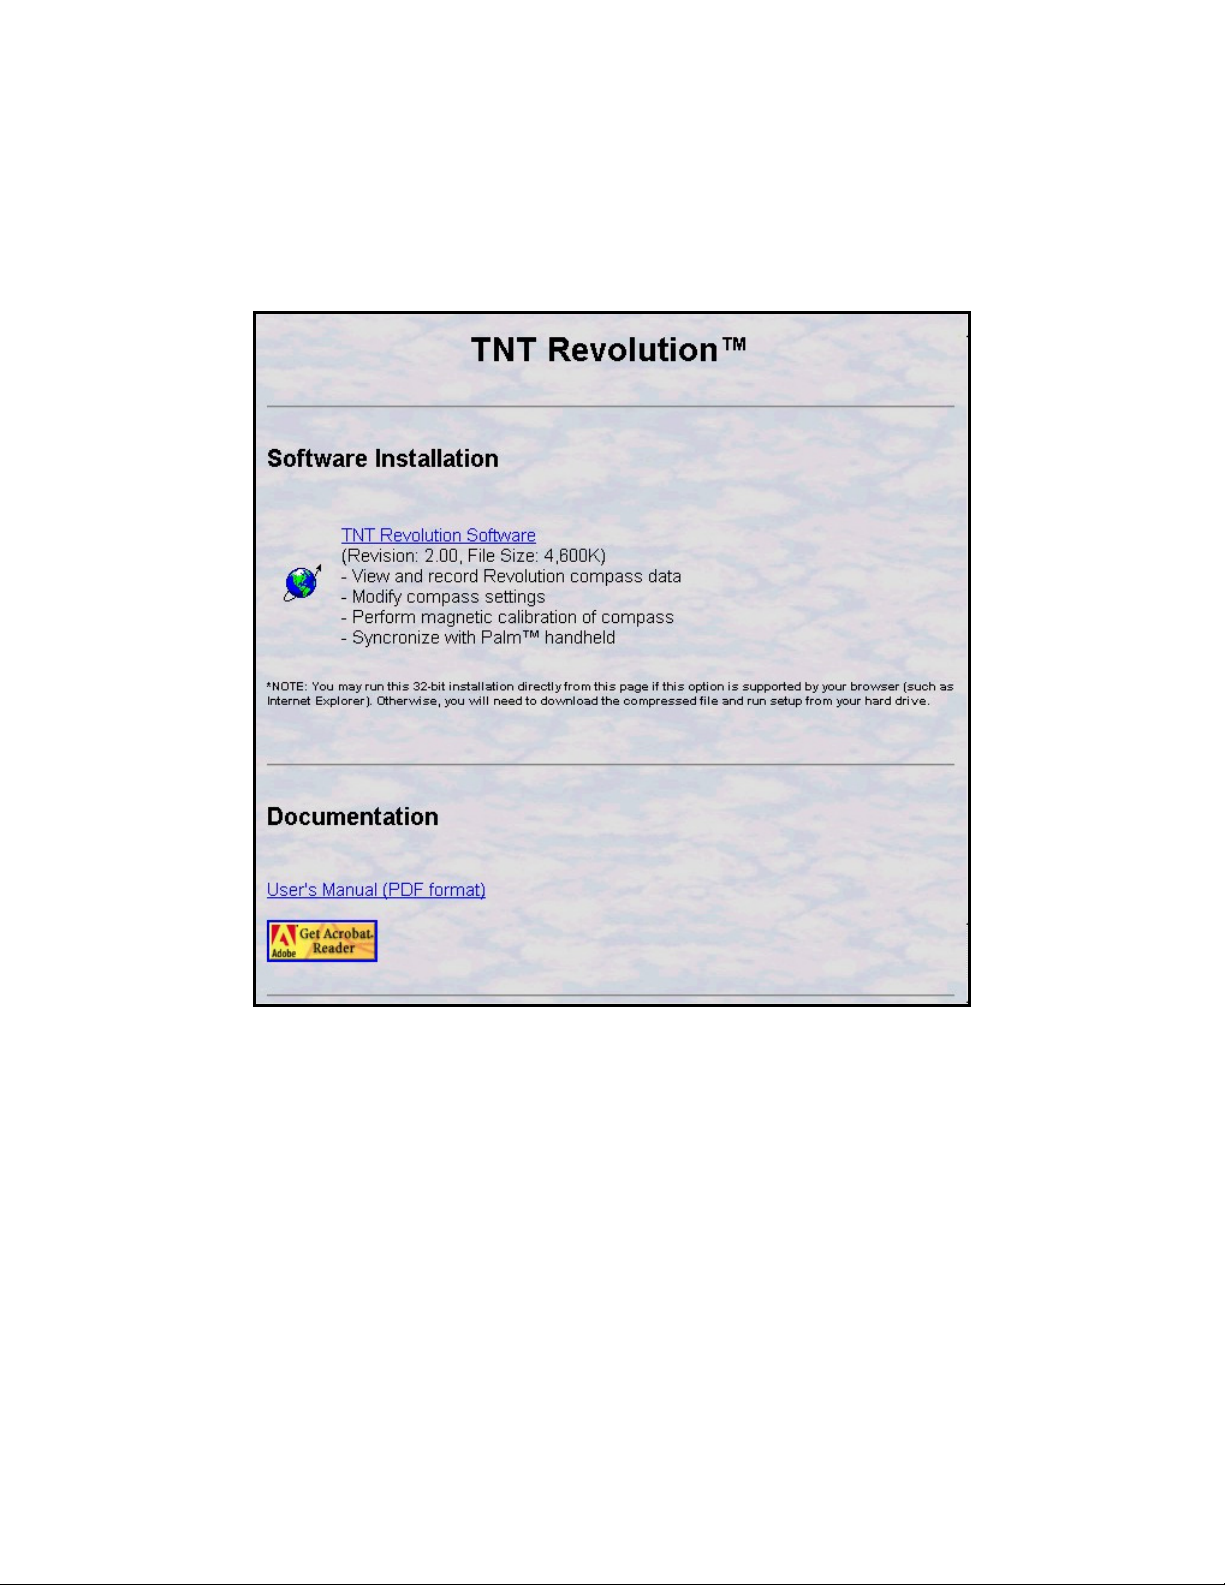
Revolution Software CD ....................................................................................3
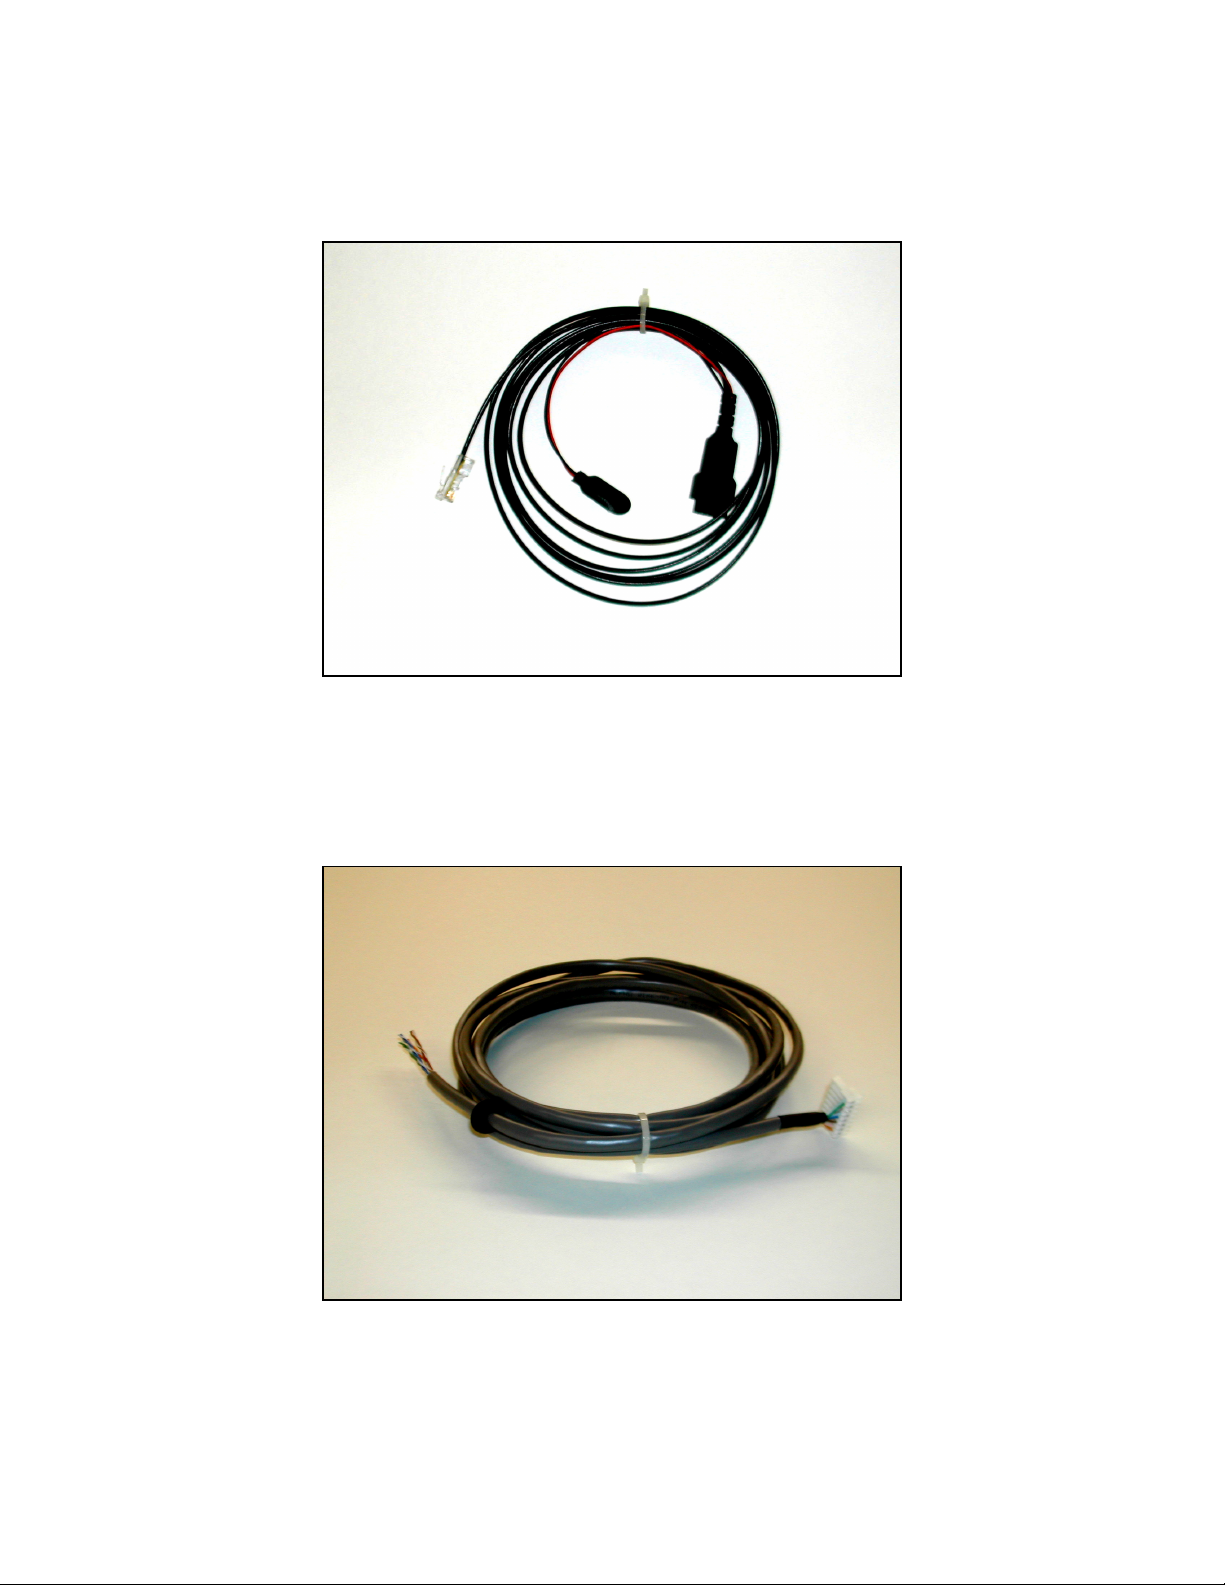
Cables and Batteries .........................................................................................3
4-Wire PDA to Compass: True North P/N 1570............................................3
4-Wire PC to Compass: True North P/N 1540 ..............................................4
8-Wire Compass Interface (Optional): True North P/N 1580 ........................4
Palm Hot Sync® Cradle: Palm P/N P10700U...............................................4
Features................................................................................................................5
Compass Features ............................................................................................5
PDA Features....................................................................................................5
PC Software Features .......................................................................................6
Getting Started......................................................................................................7
Starting Up the PDA ..........................................................................................7
How the PDA is Prepared..............................................................................7
PDA Battery Power........................................................................................7
Calibrating the Touch Screen and Setting Local Time...................................8
Connecting the Revolution.............................................................................8
Verifying Correct Operation ...........................................................................8
Capturing Data.............................................................................................10
Getting to Know the PC Software....................................................................11
System Requirements .................................................................................11
System Recommendations..........................................................................11
Revolution Software.....................................................................................12
Palm Desktop Software ...............................................................................13
Preliminary Compass Evaluation.....................................................................13
How the Revolution Compass is Prepared ..................................................13
Pitch and Roll Check ...................................................................................14
Magnetometer Check ..................................................................................14
Dip Angle Check ..........................................................................................14
Using the PC Revolution Program ......................................................................15
Running the Revolution Software for the First Time ........................................15
Description of the Software Main Screen ........................................................17
Compass Installation...........................................................................................17
Location...........................................................................................................17
Mounting .........................................................................................................18
Wiring to the Internal Connector (J2)...............................................................18
Selecting RS-232 or RS-485 ...........................................................................20
Connecting the PDA While the Compass is Operating....................................20
Calibrating the Compass.....................................................................................20
Capturing a Vertical Reference .......................................................................21
Collecting Data in Continuous, Circular Motion ...............................................22
Collecting Discrete Samples when Stopped....................................................23
Applying Calibration Results ...........................................................................24

True North Technologies - 1 - Document No. 1554-B
Introduction
The Revolution compass combines a precision 3-axis solid-state magnetometer
and a rugged 2-axis electrolytic tilt sensor that have been factory calibrated to
provide accurate heading and tilt measurements. The unit has been verified for
accuracy at room temperature in an environment free from magnetic, electrical,
and mechanical disturbances. Using the PDA provided, the compass can be
immediately tested in an out-of-doors location away from any ferrous material
and isolated from severe vibration.
A good first test is to hold the compass steady at different attitudes (heading,
pitch, and roll), take readings, and verify that the horizontal field strength remains
roughly the same for different orientations. Refer to the section on Verifying
Correct Operation in Starting Up the PDA for instructions on how to take
readings. Be careful to keep the PDA and 9V battery away from the compass, as
they can affect the readings. Expect to see some variation in the horizontal field
strength, but it should be less than one or two percent if the compass is steady
and tilt is less than 20°.
Before installing the Revolution, make note of the dip angle measurement and
compare it to the published value for your location. The two values should be
very close, usually within 0.5°. It is also a good idea to capture and save a
vertical reference as described in the section on Calibrating the Compass. After
the compass is mounted in-situ, this reference is used to partially compensate for
any local permanent magnetism (hard-iron) that may be present.
Contents of the Kit
The Revolution compass kit contains the following primary items described in
detail in this section:
•Revolution Compass
•Palm™ PDA and Carrying Case
•Revolution Software CD
•Cables and Batteries

True North Technologies - 2 - Document No. 1554-B
Revolution Compass
The Revolution represents the state of the art in magnetic compassing. It
consists of a PC card housed in an ABS enclosure. The base of the enclosure
has 4 mounting holes for permanent installation. Only brass or non-magnetic
stainless steel screws should be used. Connection to the compass may be
made via the RJ12 connector (for the PDA or PC) or by the 8 pin header (for
system wiring). See the diagrams included with the cables.
Palm PDA and Carrying Case
The Palm m105 features 8MB of memory, a touch screen graphical display, and
an integral serial RS-232 interface. It is pre-loaded with True North’s Compass
interface program. While the compass is in-place and without disconnecting
system wiring, the PDA can be temporarily connected via the RJ12-style modular
jack. This allows easy access during installation for calibration and tuning. It also
provides a valuable diagnostic port and can be used for an auxiliary read-out
when needed. In
situations where a fixed
installation is not
desirable, the RJ12
connection can be used
exclusively.
The carrying case holds
the PDA, compass
interface cable, a 9V
battery for compass
power, and two extra AA
batteries for the PDA.
There’s extra room
available in several
pockets.

True North Technologies - 3 - Document No. 1554-B
Revolution Software CD
This is a mini, business-card style CD with both the Revolution interface software
for a Microsoft Windows PC and software for the PDA. When the CD is loaded
into a CDROM drive, the display shown in Figure 1 will automatically appear if
the auto-run feature is enabled.
Figure 1
Cables and Batteries
Two AAA batteries are loaded in the PDA, and there are 2 extras in the PDA
carrying case. A 9V battery for compass power is connected to the PDA cable in
the carrying case.
The following cable assemblies are included:
4-Wire PDA to Compass: True North P/N 1570
8 ft. cable with Palm connector and 9V battery strap going to 6-pin RJ12 plug.

True North Technologies - 4 - Document No. 1554-B
4-Wire PC to Compass: True North P/N 1540
8 ft. cable with DB9F connector and 9V battery strap going to 6-pin RJ12 plug.
This cable is shown in Figure 2.
Figure 2
8-Wire Compass Interface (Optional): True North P/N 1580
8 ft. cable with 8-pin, 0.1” MTA connector going to open wire pairs (not
terminated). Used for both RS-232 and RS-485 signals. This cable is shown in
Figure 3.
Figure 3
Palm Hot Sync® Cradle: Palm P/N P10700U
Connects PDA to PC. Included with Palm m105 retail box.

True North Technologies - 5 - Document No. 1554-B
Features
Compass Features
The Revolution compass is a third-generation, strap-down device that delivers
high accuracy for its small size, low cost, and low power consumption. It provides
both RS-232 and RS-485 communication links. For battery operation, a low-
power standby mode is incorporated to reduce required current to 1mA. Wake
up from standby requires only 1 millisecond.
Additional features of the compass include:
•Run (continuous) or Sample mode operation
•NMEA 0183 output data format with the following available sentences:
⇒HDT (True heading – standard sentence)
⇒HDG (Heading, deviation, and variation – standard sentence)
⇒XDR (Transducer data: pitch, roll, magX, magY, and magZ –
standard sentence)
⇒HTM (Heading, tilt, and magnetic field – proprietary sentence)
⇒NCD (Normalized compass data – proprietary sentence)
⇒CCD (Conditioned compass data – proprietary sentence)
•Output data available:
⇒Heading, pitch, and roll
⇒Magnetometer X, Y, Z, and calculated total field
⇒N, E, H, and V - normalized magnetic field components
⇒Magnetic inclination (dip angle)
•Angles in degrees (0.0 to 359.9°), mils (0 to 6399), milliradians (0 to
6282), or 16-bit integer (0 – 65535)
•Tunable alarm on H field deviation in Run mode
•Selectable averaging time in Sample mode
•Separate magnetic and tilt IIR single-pole filters in Run mode
•Tunable heading filter in Run mode for quick response in hand-held
applications where fast movements should be ignored
•Magnetic field measurement range: ±1.6 G (gain 100)
•Magnetic field measurement sensitivity: 0.3 mG (30 nT, gain 500)
•Serial EEPROM for calibration coefficients and setup parameters
PDA Features
The Palm PDA is a convenient service and evaluation tool that can also be used
for routine data acquisition tasks. It is used to perform the calibration procedure
required to compensate for local hard and soft iron, to change compass tuning
parameters, and to capture and store compass measurement data. For stand-

True North Technologies - 6 - Document No. 1554-B
alone operation, the serial interconnect cable attaches to a 9V battery that can
power the compass for over 500 hours (3 weeks) of continuous operation
(standby mode). For servicing a compass attached to a host computer, it can be
plugged in without disconnecting the system wiring. Calibration, tuning, and
capture functions can be performed without affecting the host.
Additional features of the PDA software are:
•Database of calibration, tuning, and capture data that can be transferred
to a PC or laptop using Hot Sync
•A single PDA can be used with more than one compass. Stored data
automatically tagged with compass device ID
•Graphical user interface layout and navigation similar to what is used with
PC software (Revolution PC program)
•Serial port hardware is turned off so that compass can automatically enter
low-power standby mode when measurements are not needed. Also
reduces PDA battery drain
•Straightforward calibration procedures minimize required user interaction
and generate optimal compensation coefficients
PC Software Features
The Revolution PC program is designed to run on most Microsoft Windows
platforms: 95, 98, NT, 2000, ME, and XP. There are two main components:
•A Visual Basic program (Revolution.Exe) that provides the graphical user
interface, database, and logging functions, and
•A windowless ActiveX control (Compass.Ocx) that implements the
compass serial interface, calibration functions, and Palm PDA data
conversion routines.
The ActiveX control can be used separately from the Revolution PC program to
simplify the task of integrating the compass into an end-user system. It provides
methods for reading and writing parameters; for reading, parsing, and converting
NMEA sentence data; for performing hard and soft iron calibration functions, and
for converting a PDA database file to tab-delimited text records. It also maintains
a text log of communication between the PC and compass that can be read by a
host application.
Functions provided by the Revolution PC software are:
•Cockpit attitude display of heading, reciprocal heading, pitch, and roll
•Display and capture NMEA sentence data
•Modify Revolution operating parameters
•Perform hard and soft-iron calibration procedures
•Provide electronic compass deviation table
•Transfer PDA data using HotSync® manager, then convert to text files
•View and maintain communication logs

True North Technologies - 7 - Document No. 1554-B
Getting Started
Starting Up the PDA
How the PDA is Prepared
We unpacked and tested the PDA and cable assembly at the factory. Two AAA
batteries are already installed. Batteries in the carrying case pouch are extras.
The PDA touch screen has been calibrated, and the time is set to USA Eastern
Standard Time. The Revolution Compass program is already loaded, but a user
account has not been assigned for the HotSync operation.
We also loaded the freeware program GeoMagInfo Version 1.1. For a given
longitude and latitude, this program calculates magnetic declination (variation),
inclination (dip angle), and total magnetic field based on the year 2000 USGS
models. This program is unrelated to the Revolution compass program and can
be deleted if no longer desired.
Before using the PDA extensively, it’s probably a good idea to recalibrate the
touch screen, set the time to your local time zone, and verify that the PDA
batteries have adequate charge remaining. You may also need to adjust the
screen contrast, and in low-light conditions, you may need to turn on the display
backlight. If you have not used a Palm PDA before, familiarize yourself with the
basic features of the device by skimming Getting Started.pdf on the Palm
Desktop Software CD.
You will need to install the Palm Desktop Software on your PC or laptop prior to
performing a HotSync operation to transfer PDA data to the PC. See Getting
Started.pdf on the Palm Desktop Software CD for detailed instructions. You can
install it either before or after the Revolution program is installed.
Once the Palm Desktop Software is installed, you can use the Revolution
program to initiate a HotSync operation. Any compass data captured on the PDA
will automatically be transferred to the PC or laptop. The Revolution program
finds the data in a file named Compass.pdb, converts it to a tab-delimited, ASCII
text format, and archives the raw data file in a separate folder.
PDA Battery Power
Turn the PDA on by pressing the power button
located at the top center of the device. You
should see the Application Launcher screen with
the Compass category as shown in Figure 4. Tap
the Home icon (picture of a house) to see the
Application Launcher screen if it is not already
shown. Continue tapping the Home icon to
change categories.
Figure 4

True North Technologies - 8 - Document No. 1554-B
The current time is shown in the upper left corner of the screen. To its right is a
battery icon that will be completely shaded in black when the batteries are fully
charged. As the batteries discharge, the shaded area recedes to the left. When
the batteries need to be replaced, you have about one minute from the time you
remove the old ones before memory is lost. You won’t lose any programs or
data if the new batteries are installed in time. Otherwise, the data will be
permanently lost, and you will have to use HotSync manager to restore
programs.
Calibrating the Touch Screen and Setting Local Time
Go to the Compass category in Application Launcher by tapping the Home icon.
Tap the Welcome icon and follow the onscreen instructions. Be careful when
calibrating the touch screen to orient the PDA as it will be held in normal
operation.
Once you tap on the Welcome icon, you cannot exit without calibrating the touch
screen and proceeding through the date and time setup. To avoid getting into
this mode accidentally, you can change the Welcome category to System. To do
this, tap the time in the upper left of the Application Launcher screen and choose
“Category…” from the drop-down menu. Scroll down to Welcome and tap the
inverted triangle ▼to change the category.
Connecting the Revolution
Remove the connecting cable from the pocket in the PDA carrying case and
insert the RJ12 plug into the jack on the compass. Verify that the 9V battery is
connected properly to the battery strap. If the Revolution is operating in Run
mode as shipped from the factory, you will hear an audible ticking that is
amplified by the compass housing. This is normal and is an indication that the
magnetometer Set-Reset circuit is operating properly.
The compass draws its power from the 9V battery wired to the PDA connector.
This battery is not needed when the compass is already powered via the system
wiring. It can, however, remain connected without damaging the compass or
either power source. The compass incorporates protection diodes that prevent
current flow from the higher to lower voltage source.
You can expect roughly 25-30 hours of Run-mode operation from a new 9V
battery. Until the PDA is able to communicate with the compass, it cannot
change to a lower power operating mode. To preserve 9V battery power, either
remove the RJ12 plug from the compass or disconnect the 9V battery from the
battery strap. Disconnecting the 10-pin PDA connector from the PDA does
not disconnect the 9V battery from the compass.
Verifying Correct Operation
With the compass connected to the 9V battery, you can tap on the Compass
icon. You should see the Compass display as shown in Figure 5. If the display
appears as shown in Figure 6, then there is a communication problem. If this is

True North Technologies - 9 - Document No. 1554-B
the case, first check that the PDA connector is completely seated in the PDA.
Next, inspect the cable and make sure there are no wire breaks. If this is a new
compass, verify that there is an audible ticking. Check the terminal voltage on
the 9V battery and verify that it is 6V or greater.
Figure 5
Figure 6
The display does not automatically update even when the compass is
communicating properly. Tap anywhere in the heading or attitude display area to
trigger an update, or press either of the hard plastic scroll buttons located at the
bottom center of the PDA. Move the compass around as you trigger updates to
see that the heading, pitch, and roll values change as expected.
The baud rate that the PDA uses to communicate with the compass is in the
upper right of the display. Change to another baud rate, and the display will
show no response as in Figure 6. Change back to 19200 to restore
communication. This baud rate must correspond to the rate stored in the
compass EEPROM. Once communication is established, you can change both
the compass and PDA rates using the Serial category of the Settings page.
There are a few subtle features of the Compass display that require further
explanation. Note that when you request an update, a black dot flashes to the
right of the Run mode selection. This indicator is turned on when a query for
compass data is sent and is extinguished when the response is received. In Run
mode, the dot flashes quickly because data is returned quickly. In Sample mode,
the dot is shown for a longer time while the compass averages data before it is
sent. The sample averaging time is changed from the General category of the
Settings page.
In Run mode, you may see that the heading value is followed by either an upper
case M or lower case m. This happens because the compass is entering low-
power standby mode between PDA updates. The M means that a magnetic
alarm is indicated: upper case for a high excursion, lower case for a low
deviation. The alarm is asserted because the compass has not run long enough
to acquire the horizontal field strength. If you set the acquire time to zero
(Magnetic category of Settings page – Filter section) the indicator will disappear.
Also, the indicator does not appear in sample mode because the magnetic field
alarm is disabled.

True North Technologies - 10 - Document No. 1554-B
Other letter indicators that may follow the heading value are C, H, L, or V. These
are indications of failures and will cause the heading direction arrow to blank.
The specific failures are:
•C: offset calibration for magnetic sensors failed
•H: measured total magnetic field strength too high
•L: insufficient total magnetic field strength
•V: magnetic sensor bridge voltage too low
The value for H just below the heading is an indication of the horizontal magnetic
field strength, and the Dip value that follows is the calculated magnetic
inclination. For a properly calibrated compass, these values should not change
as you rotate, pitch, and roll. Any local magnetic field (permanent or induced), or
horizontal component of acceleration, or other uncompensated measurement
error will result in deviations. The magnitude of the deviation is a measure of
compass inaccuracy.
You will probably notice that there is more variation between successive updates
in Run mode than in Sample mode. This is because the Run mode smoothing
filters on tilt and magnetic signals are reset when the compass enters low-power
sleep mode. To let the filters stabilize, keep the compass in Run mode by
disabling the “Sleep between samples” check box on the Preferences page (on
the Options menu). Be aware that the 9V battery life is reduced by roughly a
factor of 20 when the compass operates in continuous Run mode, and that the
9V battery remains connected even when the PDA powers down.
Capturing Data
A quick way to record discrete data points is to capture any of 5 available NMEA
sentences: HDT (Heading True), HDG (Heading, Deviation, and Variation), HTM
(Heading, Tilt, and Magnetic Field), CCD (Conditioned Compass Data), or NCD
(Normalized Compass Data). Tap on the Compass title at the top left of the
screen (or the menu icon at the bottom left of the silk screen) and select Capture.
The display should appear as shown in Figure 7. Now tap the Capture button at
the lower left of the page. If the compass is operating in Run mode, you will see
the display in Figure 8 flash by quickly. In Sample mode, it will persist for the
sample average time (see General category of Settings page). Then the details
of the sample will appear as in Figure 9.

True North Technologies - 11 - Document No. 1554-B
Figure 7
Figure 8
Figure 9
The compass device ID and a date-time stamp are saved with the data to help
identify the sample. Tap on the Note line to enter a note (40 characters max)
using either Graffiti or the pop-up keypad. Save or discard the sample by tapping
Done or Delete… See the details of a previous sample by tapping on the sample
line in the Capture display.
The saved samples remain in PDA memory until they are transferred to the PC
using Palm HotSync operation. Following a successful transfer, the data in the
PDA is automatically deleted. There is an audible beep at the end of the
successful HotSync operation to confirm that PDA data has been deleted.
When you use more than one compass with the PDA, only samples for the
current or last known compass device ID are shown on the Capture display.
When switching between multiple compasses, the PDA finds and presents only
data saved for the connected compass. Data associated with other device IDs
remains stored in memory, but cannot be accessed until the corresponding
compass is reconnected.
Getting to Know the PC Software
System Requirements
•PC running Windows 95 or greater
•VGA
•Keyboard
•5 Mb disk space (more for log files, recorded data files, synchronized files)
•RS-232 serial port
System Recommendations
•PC running Windows 98 or greater
•SVGA 1024 x 768, High Color (16-bit), Large Fonts
•Keyboard and Mouse
•50 Mb disk space

True North Technologies - 12 - Document No. 1554-B
Revolution Software
The Revolution software allows you to use your PC to communicate with the
Revolution compass and to retrieve data captured using the handheld device.
To install the Revolution software, insert the Revolution CD into the CD-ROM
drive of your PC. If the CD does not autorun, run the RevolutionSetup.exe
application from the Revolution directory on the CD. The InstallShield® wizard
will guide you through the installation process.
During the installation, you may select the directory in which the Revolution
software will be installed or accept the default directory of C:\Program Files\True
North Technologies\Revolution. The installation will create the PalmData
subdirectory to store any captured data files that will be transferred from the
PDA. Once you run the Revolution software, the LogFiles subdirectory will be
created to store log files. Once you record data using the Revolution software,
the RecordedData subdirectory will be created to store files of data recorded
from the compass.
The following list describes the files placed in the application directory:
•Revolution.exe TNT Revolution software application
•Revolution.ini Initialization file for Revolution software
•Revolution.hlp Help file for Revolution software
•Revolution.cnt File required by help file
•Revolution.gid File used by help file
•Compass.ocx ActiveX control for communicating with Revolution
compass
•PalmCntl.ocx ActiveX control for performing the HotSync operation
•ComConduit.dll DLL required by PalmCntl.ocx
•Condmgr.dll DLL required by PalmCntl.ocx
•Hsapi.dll DLL required by PalmCntl.ocx
•Instaide.dll DLL required by PalmCntl.ocx
•Userdata.dll DLL required by PalmCntl.ocx
•TNTCompass.prc TNT Revolution PDA application
•Mathlib.prc Math library required by Revolution PDA application
•Geomag11.prc GeoMagnetic Info freeware PDA application by David
W. Bray
•Gmillib.prc File required by GeoMagnetic PDA application
•WMM-2000.pdb File required by GeoMagnetic PDA application
•Upd352.prc Update for Palm operating system
To remove the Revolution software, use the Add/Remove Programs function
from the Control Panel, or run the Revolution setup again and chose Remove.
Do not simply delete the Revolution directory and files. Please note that any log
files, PDA files, or recorded data files created since the software was installed

True North Technologies - 13 - Document No. 1554-B
will not be deleted by the uninstall process. Once you have properly uninstalled
the software, you may freely delete the additional files.
Palm Desktop Software
This software comes with the Palm PDA and is required to transfer data between
the PDA and PC.
Insert the Palm Desktop Software CD into the CD-ROM drive of your PC and
follow the instructions for installing the Palm Desktop Software. When prompted
to enter a User Name, enter the name with which you desire to identify the
handheld device. This name is required for HotSync operations.
See the Palm documentation for system requirements.
NOTE: If you experience problems with the Palm Desktop Software installation
or the HotSync operation, refer to the Palm documentation. Also, if
you experience problems using the Sync PDA feature of the
Revolution software, try synchronizing through the Palm Desktop
application to verify that the HotSync manager is configured properly.
Preliminary Compass Evaluation
How the Revolution Compass is Prepared
After factory calibration, test, and verification, the Revolution is setup as follows:
•19200 baud serial data rate
•Run mode – no automatic NMEA data output
•0.4 s magnetometer time constant (Mag TC)
•0.8 s pitch and roll time constant (Tilt TC)
•4.0 s magnetic field alarm time constant (Alarm TC)
•2.0 s magnetic field alarm acquire time (Acquire Time)
•5% magnetic field deviation limit (Alarm Limit)
•1.5 s sample averaging time (used in Sample mode only)
•35° pitch and roll warning level
•44° pitch and roll alarm level (heading blanks above this)
The three time constants are for single pole, low-pass IIR filters that are enabled
in Run mode. If you switch to Sample mode, these filters are reset and the
magnetic field alarm is disabled.
The magnetometer gain is factory set to accommodate a full-scale range of
approximately ± 750 mG (± 75 µT). The gain can be reduced to allow more hard-
iron, or it can be increased to provide greater sensitivity. A magnetic calibration
procedure must be performed after changing the gain.
Prior to factory calibration, the compass is demagnetized to eliminate any
residual magnetic fields from the circuit components. If the compass is exposed

True North Technologies - 14 - Document No. 1554-B
to a strong magnetic field of 10 G or more, then it should be demagnetized again
before performing a magnetic calibration. The residual magnetic field due to
circuit components is compensated by the magnetic calibration procedure.
In the Magnetic category of the Settings page, you can see the results of factory
calibration of the magnetometer. The X, Y, and Z offsets can only be viewed on
this form. X, Y, and Zr are changed automatically after acquiring data using the
Calibrate page. The value for Vref will be 32767 if a vertical reference has not
been saved. Vref is changed automatically when a good vertical reference is
calculated using the “Vertical Reference” category of the Calibrate page.
Pitch and Roll Check
This is a simple test to check pitch and roll accuracy near zero degrees tilt.
Place the compass on a flat surface and take readings for pitch and roll angles.
Now rotate the compass precisely 180° and take another set of readings. The
second pitch and roll readings should be the same magnitude but opposite signs
of the first, i.e. the sum of the two pitch readings should be zero and the sum of
the two roll readings should be zero.
This test is valid even when the flat surface is oriented at a steep angle of 20° to
40°. It does not, however, verify the scale factor accuracy of the tilt sensor. A
known angle reference is needed to verify that the scale factor is also correct.
Magnetometer Check
To verify that the magnetometer is calibrated and operating properly, place the
compass on a flat surface along the edge of a fixed, non-magnetic straight-edge,
like a wooden ruler. Make sure the compass environment is magnetically clean
(no motors, ferrous materials, etc.). Using the Sample mode on the PDA
Capture page, capture CCD samples to see MagX, MagY, and MagZ
measurements from the magnetometer.
Rotate the compass and straight edge until either MagX or MagY approaches
zero. Once there, hold the straight edge and rotate the compass exactly 180° by
aligning the opposite side with the straight edge. Capture additional CCD
samples to verify that the measurement that was near zero, MagX or MagY, is
still near zero and ideally the opposite sign. Any variation should be within 1% of
the magnitude of the other measurement which is near full scale.
This technique works with a flat surface at any orientation; it doesn’t have to be
perfectly level. The test verifies that the magnetometer offset is null. Additional
steps can be performed to verify that the full-scale readings for MagX and MagY
are the same.
Dip Angle Check
Use the PDA GeoMagInfo program to determine the predicted inclination for your
location. To find your latitude and longitude, you can either use a GPS device or
look up your city or zip code on the Internet. Compare the reference value for
inclination to the value shown for dip angle on the PDA Compass page.

True North Technologies - 15 - Document No. 1554-B
If the values do not correspond, try a different location nearby. Underground
pipes, iron ore deposits, or steel reinforcement in concrete can affect the local dip
angle.
Using the PC Revolution Program
Running the Revolution Software for the First Time
The first time you run the Revolution software, you will see the dialog in Figure
10 prompting you to enter the serial communication port and baud rate. The
baud rate defaults to 19200 which is the rate used by the compass when it is
shipped. Once you have established communication with the compass, you will
not be prompted in this way unless the software is unable to communicate with
the compass.
Figure 10
If the software cannot communicate with the compass, you will receive the dialog
in Figure 11:
Figure 11
Click Yes from the dialog in Figure 11 to try again. You will be prompted to enter
the communication port and baud rate as in Figure 10. Clicking No allows you to
proceed without connecting a compass (in order to perform the HotSync
operation with the PDA, for example).
If the software is able to communicate with the compass, a window similar to the
one in Figure 12 (showing correct version information for the compass) will
appear centered in the application’s main window.

True North Technologies - 16 - Document No. 1554-B
Figure 12
If you choose to proceed without connecting a compass, the window in Figure 13
will appear centered in the application’s main window.
Figure 13
Any menu items and toolbar buttons requiring a compass will be disabled, but
you will still be able to do the following functions:
•View log information
•View settings log information
•Modify software options
•Reconnect to the compass
•Test communication with the compass
•Synchronize with the PDA
•Convert the Compass.pdb file to text files containing data captured on the
PDA
•View help
If there is only one serial communication port on your PC, you will need to switch
between the compass and the HotSync cradle as necessary. To communicate
with the compass, you must be connected to the compass, and the HotSync
manager cannot be running. To perform a HotSync operation outside of the
Revolution software, connect the HotSync cradle and make sure the HotSync
manager is running. If you want to perform the Revolution software’s Sync PDA
function, switch the connection from the compass to the cradle when prompted.
After the HotSync process, you will be prompted to switch back to the compass.

True North Technologies - 17 - Document No. 1554-B
Description of the Software Main Screen
The Revolution Software Main Screen contains a menu, toolbar, information bar,
and a scrollable area to hold application dialogs and windows. The toolbar
allows easy access to a subset of the menu items. The information bar shows
the Compass ID, Port, Baud rate, unique Unit ID, and Angles value. The Main
Screen appears as shown in Figure 14.
Figure 14
Compass Installation
Before installing the compass, consider the following:
•Verify that the compass performs as expected in a test location free from
magnetic interference and mechanical vibration.
•If the target location is free of local magnetic fields (permanent and
induced), then the magnetic calibration procedure should not be
necessary.
•If a magnetic calibration will be needed, you will need to capture a vertical
reference in a magnetically clean location. Refer to section on Capturing
a Vertical Reference. The reference is used to determine the
magnetometer Z-axis offset during calibration.
•If system wiring is going to be used, install the cable before permanently
mounting the compass.
Location
Choose a location with as little magnetic interference as possible. If there is a lot
of ferrous metal, it may be necessary to decrease magnetometer gain to keep
Table of contents