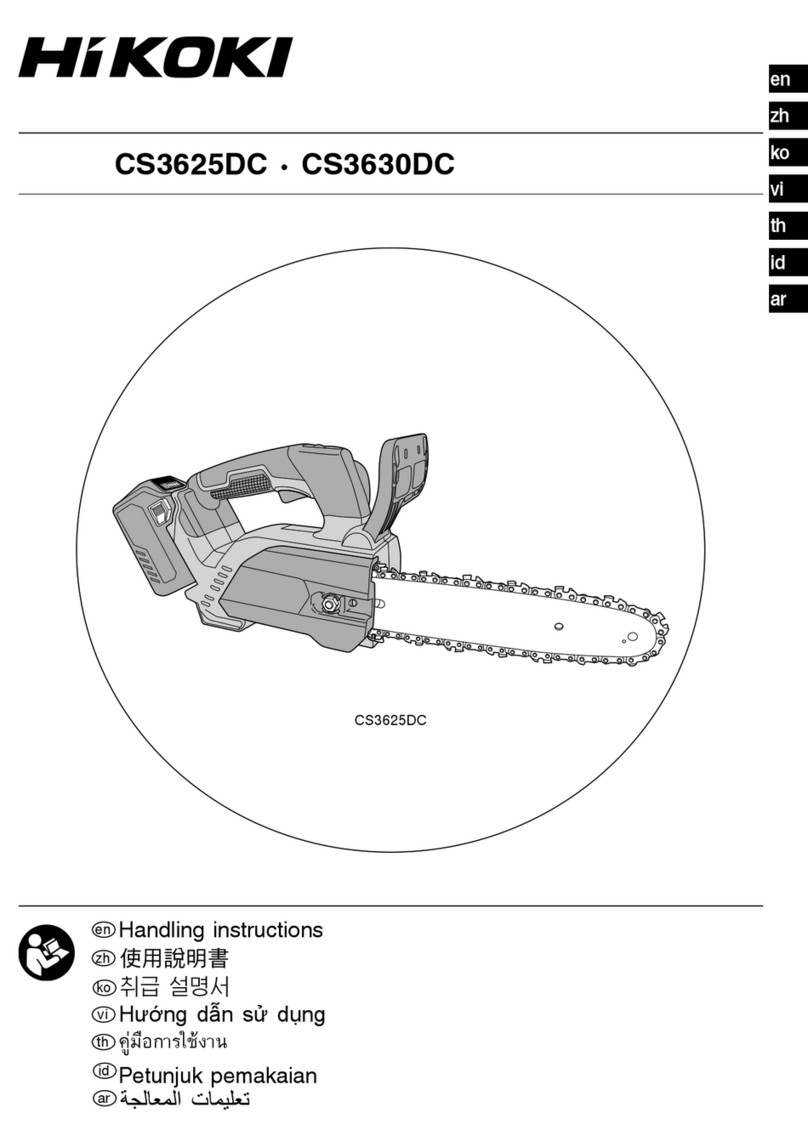
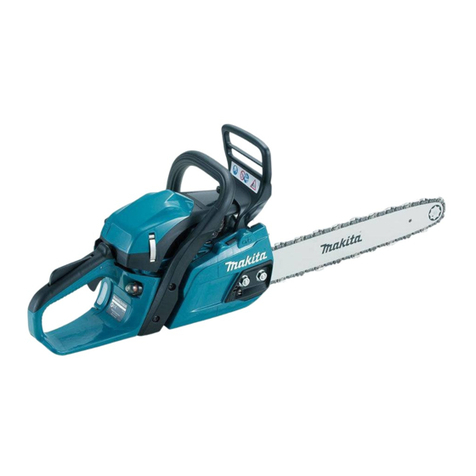
HIKOKI CS 30Y User manual

Chain Saw
電動鏈鋸機
체인톱
Máy cưa xích
เลื่อยโซยนต
CS 30Y •CS 35Y •CS 40Y •CS 45Y
Handling instructions
使用說明書
㋽༦#⒢ᴮ⒚
Hướng dẫn sửdụng
คูมือการใชงาน
Read through carefully and understand these instructions before use.
使用前務請詳加閱讀
#⒢ᴮ⒚ᰅ#⯙Ⓑ㷎#⯄ේ#ሧ⫔⮃#▵⹐㭛#ᚖ#ⱶ㩬⮃#␚⫔㭗⚣⚑⩁1
Đọc kỹvà hiểu rõ các hướng dẫn này trước khi sửdụng.
โปรดอานโดยละเอียดและทําความเขาใจกอนใชงาน
000BookCS30YASIA.indb1000BookCS30YASIA.indb1 2019/01/119:58:052019/01/119:58:05

1234
5678
9 101112
13 14 15 16
17 18 19 20
2
1
3
4
2
78
6
5!0
#@!0
$
%
6
&
^*
#
6
0
!
(
0)
wqre
tio
p
i
0
0
0.5~1 mm
9
7
8
u
y
000BookCS30YASIA.indb2000BookCS30YASIA.indb2 2019/01/119:58:052019/01/119:58:05

21 22 23 24
25 26 27
28 29 30 31
32
3
5 cm
sa
1/3
45oa
30o
a
90od
0
f
85o
30o
60o
g
h
j
k
l
65
;
6 mm
17 mm
cx
z
110 V – 120 V 38
220 V – 240 V 65
000BookCS30YASIA.indb3000BookCS30YASIA.indb3 2019/01/119:58:062019/01/119:58:06

English 中國語 㭛⧄
1Kickback zone 反彈區域 Ỵᖯ#㰘#Ỹ#⨗⨂
2Chain brake 鏈條制動器 ㆠ⮿#℧ᩣ⮻㗏
3Free 解開 ⨉ᱍ
4Lock 鎖定 ⯩༤
5Knob 旋鈕 ┛⯫⮻
6Tension dial 張力轉盤 ⯯᪄#ᒜ⮻⧌
7Loosen 鬆開 ᐾ♕㭗ൺ#㩬
8Tighten 鎖緊 Ⳗ⯋
9Side cover 側蓋 ␚⮻ᛓ#㐘ὰ
0Guide bar 導板 ೝ⮻ᛓ#㐘ὰ
!Saw chain 鋸鏈 㜼#ㆠ⮿
@Bolt 螺栓 㡤
#Sprocket 鏈輪 ♑㫹㑉
$Hook portion 鉤部 㳱㗏₊
%Housing 外殼 㭗⫞
^Pin 銷㬽
&Hole 孔ᳱ
*Special nut 特殊螺帽 㡥▴#ኇ㡤
(Drive link 驅動鏈 ᛓᧆ⮻℧#᱓㗏
)Plug clip 插頭固定夾 㬁ᩆ༔#㗗ᱏ
qPlug 插頭 㬁ᩆ༔
wExtension cord 延長線 ⨅⯯⒞
eSwitch 開關 ♑⬾㍺
rLocking button 鎖定按鈕 ⯩༤#ὰ㡨
tOil pump adjustment 調整油泵 ⩁⯃#㥒㫹#Ⳗⱡ
yIncrease 增加 ጟ⯋
uLower 減少 ሞ㊭
iSpiked bumper 尖刺保險槓 ♑㣂⮻㗏#ᾀ㥂
oFront handle 前把手 ⱝᴜ#㭻ᛛ
pRear handle 後把手 㳱ᴜ#㭻ᛛ
aRound file 圓銼刀 ᙌ༘#
s1/5 of diameter of file 銼刀的1/5直徑 428#⹑ධ#
dSaw chain 鋸鏈 㜼#ㆠ⮿
fKeep all cutters the same length 維持所有刀片的長度相同 ᵘᛗ#㐘㚭ᰅ#ᖯ⯃㭛#ཛྷ⮻#⭛⹐
gDepth gauge 深度規 ⮻#ൺ⮻⹐
hDepth gage jointer 深度規接頭 ⮻#ೝ⮻ᛓ#Ⳗ⮿㚭
jFile away this portion 銼去此部份 ⮻#₊₎⮃##༝⧄ሷ
kFile 銼刀
lSlotted screwdriver 一字螺絲起子 㱤₤⮻#♑㗏ᯝᛓᧆ⮻ὰ
;Wear limit 磨損極限 ᱛᵘ#㭛ය
zNo. of carbon brush 碳刷數量 ㎘#℧ᩆ⚑#ὴ㱔
xBrush cap 碳刷蓋 ℧ᩆ⚑#㏊
cCarbon brush 碳刷 ㎘#℧ᩆ⚑
4
000BookCS30YASIA.indb4000BookCS30YASIA.indb4 2019/01/119:58:062019/01/119:58:06

Tiếng Việtไทย
1Vùng dễbịgiật lùi จุดสะทอน
2Hãm xích เบรกราวโซ
3Mởฟรี
4Khóa ล็อค
5Tay vặnแปนควบคุม
6Nút vặnแปนปรับตึง
7Nới lỏng คลายออก
8Siết chặtขันแนน
9Vỏmáy bên ฝาครอบดานขาง
0Vỏthanh dẫnฝาครอบตัวนํา
!Xích máy cưaราวโซเลื่อยยนต
@Bulông สลักเกลียว
#Bánh xích โซฟนเฟอง
$Đoạn mấuสวนขอเกี่ยว
%Hộp chứaตัวเรือน
^Chốtสลัก
&Lỗรู
*Đai ốc đặc biệtน็อตพิเศษ
(Truyền động จุดตอขับเคลื่อน
)Phích kẹpคลิปหนีบปลั๊ก
qPhích ปลั๊ก
wDây nốiสายพวง
eCông tắcสวิตช
rNút khóa ปุมล็อค
tĐiều chỉnh bơm dầuปรับปมนํ้ามัน
yTăng เพิ่ม
uGiảmลด
iThanh giảm xóc mấu nhọnตัวกันกระแทกแบบหนามแหลม
oTay cầm trướcมือจับดานหนา
pTay cầm sau มือจับดานหลัง
aGiũa tròn ตะไบมน
s1/5 đường kính giũa1/5 ของเสนผานศูนยกลางตะไบ
dXích máy cưaราวโซเลื่อยยนต
f
Đảm bảo tất cảlưỡi cưa dài bằng nhau
ใบมีดทั้งหมดจะตองยาวเทากัน
gThước đo chiều cao เกจวัดความลึก
hKhớp nối thanh dẫn đo chiều cao ขอตอนํากําหนดความลึก
jGiũa tròn đoạn này ตะไบสวนนี้ออก
kGiũaตะไบ
lTua vít có rănh ไขควงหัวแบน
;Giới hạn mòn จุดจํากัดการสึกหรอ
zChổi than sốจํานวนแปรงคารบอน
xNắp chổiฝาครอบแปรง
cChổi than แปรงคารบอน
5
000BookCS30YASIA.indb5000BookCS30YASIA.indb5 2019/01/119:58:062019/01/119:58:06

English 中國語 㭛⧄
Symbols
WARNING
The following show symbols used
for the machine. Be sure that you
understand their meaning before
use.
符號
警告
下列為用於機械的符號。請確保您在
使用前明白這些符號的意思。
기호
경고
ᒜ⮋⭿#པཔ⧡#␚⫔ᗶᑂ#
པ㱔⯍ᑾᒜ1#པ㱔⮛#⮛Ồᰅ#
⮻㭷㭛#㳱⧡#པཔᰅ#␚⫔㭷#⚑པ#
Ự᧘ᑾᒜ1
Read all safety warnings and all
instructions.
Failure to follow the warnings and
instructions may result in electric
shock, fire and/or serious injury.
閱讀所有安全警告和指示。
未遵守警告和指示,可能會導致觸
電、火災和/或嚴重傷害。
모든 안전 경고 사항과 지침을 읽어
주십시오.
⥈ⱝ#ධේ#␚㭭#⹐㎊⮃#ᜱ᯽⹐#
⥊⮃#⚑⧡ᑂ#೭ⱝ#␚ේሇ#㱴⯹ೝ#
Ỹ㭟#▴#⯐⭻ᴘ#⚡ೞ㭛#₊⮃#
⯍⮃#▴ᖙ#⯐♣ᑾᒜ1
Do not use a power tool in the rain
and moisture or leave it outdoors
when it is raining.
不要在雨中和潮濕處使用本電動工
具,或在下雨時將其放置於室外。
Ⅷೝ#⩁൝ሇ#♣པㄇ#⯯┗⧡⒚#ⱝᖯ#
㟏⮃#␚⫔㭗⹐#ᱛ⚣⚑⩁1#ᠮ㭛/#Ⅷೝ#
⩉#ᝑ#ⱝᖯ#㟏⮃#⪞₊⧡#ἆ㍺㭗⹐#
ᱛ⚣⚑⩁1
Read, understand and follow all
warnings and instructions in this
manual and on the unit.
閱讀、理解並遵守本手冊和機體上的
所有警告及說明。
#␚⫔⒢ᴮ⒚⩡#པཔ⮛#ᵘᛗ#ධේ#
␚㭭#⹐㎊⮃#⯄ේ#⮻㭷㭛#㳱#
▴㭷#⚣⚑⩁1
Always wear eye protectors when
using this unit.
使用本工具時,請全程戴上護目鏡。 #པཔ#␚⫔#⚑#㭭#⚑᪄#῭㱔ᰅ#
⫔㭗⚣⚑⩁1
Always wear ear protectors when
using this unit.
使用本工具時,請全程戴上耳罩。 #པཔ#␚⫔#⚑#㭭#㆙᪄#῭㱔ᰅ#
⫔㭗⚣⚑⩁1
Pull out the power supply plug if the
cable is damaged.
如果纜線損壞,請將電源插頭從插
座拔出。
㐵⮻ℯ⮻#┛ᗺ#ධ⫞#ⱝ⬂#
㬁ᩆ༔ᰅ#⊔⭻⚣⚑⩁1
Oil pump adjustment 調整油泵 ⩁⯃#㥒㫹#Ⳗⱡ
Chain oil fill 填充鏈條油 ㆠ⮿#⩁⯃#ㄣ⫞པ
6
000BookCS30YASIA.indb6000BookCS30YASIA.indb6 2019/01/119:58:062019/01/119:58:06

Tiếng Việtไทย
Biểu tượng
CẢNH BÁO
Các biểu tượng sau đây được sử
dụng cho máy. Hãy chắc chắn rằng
bạn hiểu ý nghĩa của các biểu tượng
này trước khi sửdụng.
สัญลักษณ
คําเตือน
สัญลักษณตอไปนี้ใชกับเครื่องนี้ กรุณาศึกษาราย
ละเอียดกอนใช
Đọc kỹtất cảcác cảnh báo an toàn
và hướng dẫn trước khi sửdụng.
Việc không tuân theo các cảnh báo
và hướng dẫn có thểdẫn đến bịđiện
giật, cháy và/hoặc bịchấn thương
nghiêm trọng.
อานคําเตือนดานความปลอดภัยและคําแนะนํา
โดยละเอียด
หากไมปฏิบัติตามคําเตือนและคําแนะนําในการใช
อาจทําใหเกิดไฟฟาช็อต เพลิงไหมและ/หรือการ
บาดเจ็บรุนแรงได
Không được sửdụng dụng cụđiện
lúc trời mưa và ẩm ướt hoặc để
dụng cụởngoài trời khi đang mưa.
อยาใชเครื่องมือไฟฟาขณะฝนตกหรือในที่ชื้นหรือ
ปลอยไวนอกอาคารขณะฝนตก
Đọc, hiểu và tuân theo tất cảcác
cảnh báo và hướng dẫn trong sổ
tay hướng dẫn sửdụng này và trên
thân máy.
อาน ศึกษาและปฏิบัติตามคําเตือนและคําแนะนํา
ในการใชงานทั้งหมดในคูมือนี้และที่ระบุบนตัว
เครื่อง
Luôn đeo dụng cụbảo vệmắt khi sử
dụng thiết bịnày. สวมแวนตาปองกันทุกครั้งขณะใชเครื่อง
Luôn đeo dụng cụbảo vệtai khi sử
dụng thiết bịnày. สวมอุปกรณปองกันหูทุกครั้งขณะใชเครื่อง
Rút phích cắm điện nếu dây cáp bị
hưhỏng. ดึงสายไฟออกหากพบวาสายไฟเสียหาย
Điều chỉnh bơm dầuปรับปมนํ้ามัน
Đổ dầu phun xích เติมนํ้ามันราวโซ
7
000BookCS30YASIA.indb7000BookCS30YASIA.indb7 2019/01/119:58:062019/01/119:58:06

English
8
1
2
3
4
6
5
15
14
7
8
10
9
12
11
13
WHAT IS WHAT?
1. Lock-offbutton: Button that prevents the accidental
operation of the trigger.
2. Oil tank cap: Cap for closing the oil tank.
3. Saw chain: Chain, serving as a cutting tool.
4. Guide bar: The part that supports and guides the saw
chain.
5. Spiked bumper: Device for acting as a pivot when in
contact with a tree or log.
6. Oil sight glass: Window to check chain oil amount.
7. Chain brake: Device for stopping or locking the saw
chain.
8. Front handle: Support handle located at or towards the
front of the main body.
9. Rear handle: Support handle located on the top of the
main body.
10. Switch: Device activated by the finger.
11. Side cover: Protective cover to the guide bar saw chain,
clutch and sprocket when the chain saw is in use.
12. Tension dial: Device for adjusting tension of saw chain
13. Knob: Knob for securing tension dial and side cover
14. Chain case: Case for covering the guide bar and saw
chain when the unit is not being used.
15. Plug clip: A tool to prevent the power plug from slipping
free of an extension cord’s socket.
000BookCS30YASIA.indb8000BookCS30YASIA.indb8 2019/01/119:58:062019/01/119:58:06

English
9
GENERAL POWER TOOL SAFETY WARNINGS
WARNING
Read all safety warnings and all instructions.
Failure to follow the warnings and instructions may result in
electric shock, fire and/or serious injury.
Save all warnings and instructions for future reference.
The term “power tool” in the warnings refers to your mains-
operated (corded) power tool or battery-operated (cordless)
power tool.
1) Work area safety
a) Keep work area clean and well lit.
Cluttered and dark areas invite accidents.
b) Do not operate power tools in explosive
atmospheres, such as in the presence of
flammable liquids, gases or dust.
Power tools create sparks which may ignite the dust
of fumes.
c) Keep children and bystanders away while
operating a power tool.
Distractions can cause you to lose control.
2) Electrical safety
a) Power tool plugs must match the outlet.
Never modify the plug in any way.
Do not use any adapter plugs with earthed
(grounded) power tools.
Unmodified plugs and matching outlets will reduce
risk of electric shock.
b) Avoid body contact with earthed or grounded
surfaces such as pipes, radiators, ranges and
refrigerators.
There is an increased risk of electric shock if your
body is earthed or grounded.
c) Do not expose power tools to rain or wet
conditions.
Water entering a power tool will increase the risk of
electric shock.
d) Do not abuse the cord. Never use the cord for
carrying, pulling or unplugging the power tool.
Keep cord away from heat, oil, sharp edges or
moving parts.
Damaged or entangled cords increase the risk of
electric shock.
e) When operating a power tool outdoors, use an
extension cord suitable for outdoor use.
Use of a cord suitable for outdoor use reduces the
risk of electric shock.
f) If operating a power tool in a damp location
is unavoidable, use a residual current device
(RCD) protected supply.
Use of an RCD reduces the risk of electric shock.
3) Personal safety
a) Stay alert, watch what you are doing and use
common sense when operating a power tool.
Do not use a power tool while you are tired
or under the influence of drugs, alcohol or
medication.
A moment of inattention while operating power tools
may result in serious personal injury.
b) Use personal protective equipment. Always
wear eye protection.
Protective equipment such as dust mask, non-skid
safety shoes, hard hat, or hearing protection used for
appropriate conditions will reduce personal injuries.
c) Prevent unintentional starting. Ensure the
switch is in the offposition before connecting to
power source and/or battery pack, picking up or
carrying the tool.
Carrying power tools with your finger on the switch or
energising power tools that have the switch on invites
accidents.
d) Remove any adjusting key or wrench before
turning the power tool on.
A wrench or a key left attached to a rotating part of the
power tool may result in personal injury.
e) Do not overreach. Keep proper footing and
balance at all times.
This enables better control of the power tool in
unexpected situations.
f) Dress properly. Do not wear loose clothing or
jewellery. Keep your hair, clothing and gloves
away from moving parts.
Loose clothes, jewellery or long hair can be caught in
moving parts.
g) If devices are provided for the connection of
dust extraction and collection facilities, ensure
these are connected and properly used.
Use of these devices can reduce dust related
hazards.
4) Power tool use and care
a) Do not force the power tool. Use the correct
power tool for your application.
The correct power tool will do the job better and safer
at the rate for which it was designed.
b) Do not use the power tool if the switch does not
turn it on and off.
Any power tool that cannot be controlled with the
switch is dangerous and must be repaired.
c) Disconnect the plug from the power source
before making any adjustments, changing
accessories, or storing power tools.
Such preventive safety measures reduce the risk of
starting the power tool accidentally.
d) Store idle power tools out of the reach of children
and do not allow persons unfamiliar with the
power tool or these instructions to operate the
power tool.
Power tools are dangerous in the hands of untrained
users.
e) Maintain power tools. Check for misalignment or
binding of moving parts, breakage of parts and
any other condition that may affect the power
tools’ operation.
If damaged, have the power tool repaired before
use.
Many accidents are caused by poorly maintained
power tools.
f) Keep cutting tools sharp and clean.
Properly maintained cutting tools with sharp cutting
edges are less likely to bind and are easier to control.
g) Use the power tool, accessories and tool bits
etc., in accordance with these instructions and
in the manner intended for the particular type
of power tool, taking into account the working
conditions and the work to be performed.
Use of the power tool for operations different from
intended could result in a hazardous situation.
5) Service
a) Have your power tool serviced by a qualified
repair person using only identical replacement
parts.
This will ensure that the safety of the power tool is
maintained.
PRECAUTION
Keep children and infirm persons away.
When not in use, tools should be stored out of reach of
children and infirm persons.
000BookCS30YASIA.indb9000BookCS30YASIA.indb9 2019/01/119:58:072019/01/119:58:07

English
10
CHAIN SAW SAFETY WARNINGS
1. Keep all parts of the body away from the saw chain when
the chain saw is operating. Before you start the chain
saw, make sure the saw chain is not contacting anything.
A moment of inattention while operating chain saws may
cause entanglement of your clothing or body with the saw
chain.
2. Always hold the chain saw with your right hand on the rear
handle and your left hand on the front handle. Holding the
chain saw with a reversed hand configuration increases
the risk of personal injury and should never be done.
3. Hold the power tool by insulated gripping surfaces only,
because the saw chain may contact hidden wiring or its
own cord. Saw chains contacting a “live” wire may make
exposed metal parts of the power tool “live” and could
give the operator an electric shock.
4. Wear safety glasses and hearing protection. Further
protective equipment for head, hands, legs and feet is
recommended. Adequate protective clothing will reduce
personal injury by flying debris or accidental contact with
the saw chain.
5. Do not operate a chain saw in a tree. Operation of a chain
saw while up in a tree may result in personal injury.
6. Always keep proper footing and operate the chain saw
only when standing on fixed, secure and level surface.
Slippery or unstable surfaces such as ladders may cause
a loss of balance or control of the chain saw.
7. When cutting a limb that is under tension be alert for
spring back. When the tension in the wood fibers is
released the spring loaded limb may strike the operator
and/or throw the chain saw out of control.
8. Use extreme caution when cutting bush and saplings.
The slender material may catch the saw chain and be
whipped toward you or pull you offbalance.
9. Carry the chain saw by the front handle with the chain
saw switched offand away from your body. When
transporting or storing the chain saw always fit the guide
bar cover. Proper handling of the chain saw will reduce
the likelihood of accidental contact with the moving saw
chain.
10. Follow instructions for lubricating, chain tensioning
and changing accessories. Improperly tensioned or
lubricated chain may either break or increase the chance
for kickback.
11. Keep handles dry, clean, and free from oil and grease.
Greasy, oily handles are slippery causing loss of control.
12. Cut wood only. Do not use chain saw for purposes not
intended. For example: do not use chain saw for cutting
plastic, masonry or non-wood building materials. Use
of the chain saw for operations different than intended
could result in a hazardous situation.
Causes and operator prevention of kickback (Fig. 1)
Kickback may occur when the nose or tip of the guide
bar touches an object, or when the wood closes in and
pinches the saw chain in the cut.
Tip contact in some cases may cause a sudden reverse
reaction, kicking the guide bar up and back towards the
operator.
Pinching the saw chain along the top of the guide bar may
push the guide bar rapidly back towards the operator.
Either of these reactions may cause you to lose control of
the saw which could result in serious personal injury. Do
not rely exclusively upon the safety devices built into your
saw. As a chain saw user, you should take several steps
to keep your cutting jobs free from accident or injury.
Kickback is the result of tool misuse and/or incorrect
operating procedures or conditions and can be avoided
by taking proper precautions as given below:
○ Maintain a firm grip, with thumbs and fingers encircling
the chain saw handles, with both hands on the saw
and position your body and arm to allow you to resist
kickback forces.Kickback forces can be controlled by
the operator, if proper precautions are taken. Do not let
go of the chain saw.
○ Do not overreach and do not cut above shoulder height.
This helps prevent unintended tip contact and enables
better control of the chain saw in unexpected situations.
○ Only use replacement bars and chains specified by the
manufacturer. Incorrect replacement bars and chains
may cause chain breakage and/or kickback.
○ Follow the manufacturer’s sharpening and maintenance
instructions for the saw chain. Decreasing the depth
gauge height can lead to increased kickback.
Chain brake operation:
If a chain saw hits a solid object at a high speed it reacts
violently and kicks back. This is difficult to control and
could be dangerous, especially with lightweight tools
that tend to be used in all kind of positions. The chain
brake immediately stops the chain from rotating if there
is an unexpected kickback. The chain brake can be
activated by pressing your hand against the handguard
or automatically by the kickback itself.
The chain brake can only be reset after the motor has
stopped completely. Reset the handle to the rear position
(Fig. 2). Check the function of the chain brake every day.
ADDITIONAL SAFETY WARNINGS
1. Use the electrical voltage listed on the name plate for the
power source.
The use of a voltage that exceeds this may result in
injury.
2. Work without pressure. In addition, always keep your
body warm.
3. Before commencing work, reflect fully on the work
procedures involved and work to avoid accidents,
otherwise injury may occur.
4. Do not use in the event of bad weather, such as strong
wind, rain, snow, fog, or in areas prone to rockfall or
avalanches.
In bad weather, judgment may be impaired and the
vibration may result in disaster.
5. When visibility is poor, such as during bad weather or
night, do not use the unit. In addition, do not use it in rain
or in a location exposed to rain.
Unstable foothold or loss of balance may result in an
accident.
6. Check the guide bar and saw chain before starting the
unit.
○If the guide bar or saw chain is cracked, or the product is
scratched or bent, do not use the unit.
○Check if the guide bar and saw chain are securely
installed. If the guide bar or saw chain is broken or
dislodged, this may result in an accident.
7. Before starting work, check to ensure the switch does not
engage unless the lock-offbutton is pressed.
If the unit does not working properly, immediately stop
using and request repair from your HiKOKI Authorized
Service Center.
8. Install the saw chain properly, in accordance with the
instruction manual.
If installed incorrectly, the saw chain will come offthe
guide bar and injury may occur.
9. Never remove any of the safety devices equipped on the
chain saw (brake lever, lock-offbutton, chain catcher
etc.).
In addition, do not alter or immobilize them.
Injury may occur.
000BookCS30YASIA.indb10000BookCS30YASIA.indb10 2019/01/119:58:072019/01/119:58:07


English
11
10. In the following cases, switch the unit offand ensure the
saw chain is no longer moving:
○When not in use or being repaired.
○When shifting to a new work location.
○When inspecting, adjusting or replacing the saw chain,
guide bar, chain case and any other part.
○When refilling the chain oil.
○When removing dust etc. from the body.
○When removing obstacles, trash or sawdust generated
from work from the work area.
○When you take offthe unit, or when you get away from
the unit.
○Otherwise, if you sense danger or anticipate risk.
If the saw chain is still moving, an accident may occur.
11. Work should generally be performed individually. When
multiple individuals are involved, ensure sufficient
spacing between them.
In particular, when felling standing trees or working on
a slope, if you anticipate trees falling, rolling or sliding,
ensure there is no danger to other workers.
12. Remain more than 15 m away from other people.
In addition, when working with multiple persons, remain
15 m or more apart.
○There is a risk of impact with scatters and other accidents.
○Prepare a whistle alert etc. and determine appropriate
contact method for other workers beforehand.
13. Before felling standing trees, ensure the following:
○Determine a safe evacuation location prior to felling.
○Remove obstacles (e.g., branches, shrubs) in advance.
○Based on a comprehensive evaluation of the state of the
tree to be felled (e.g., trunk bend, tension of branches)
and the surrounding situation (e.g., state of adjacent
trees, presence of obstacles, terrain, wind), decide on
the direction in which the standing tree will fall and then
plan the felling procedure.
Careless felling may result in injury.
14. When felling standing trees, ensure the following:
○During work, be very careful of the direction in which
trees fall.
○When working on a slope, ensuring the tree will not roll,
always work from the uphill side of the terrain.
○When the tree starts falling, switch the unit off, alert the
surroundings, and immediately retreat to a safe location.
○During work, if the saw chain or guide bar become
entangled in the tree, switch offand use a wedge.
15. During use, if the unit performance deteriorates, or you
notice any abnormal sound or vibration, immediately
switch offand discontinue use, and return to your HiKOKI
Authorized Service Center for inspection or repair.
If you continue using, injury may occur.
16. If the unit is accidentally dropped or exposed to impact,
inspect carefully for damage or cracks and ensure there
is no deformation.
If the unit is damaged, cracked or deformed, injury may
occur.
17. When transporting the unit by car, secure the unit to
prevent it moving.
There is a risk of accident.
18. Do not switch the unit on while the chain case is attached.
Injury may occur.
19. Ensure there are no nails and other foreign objects in the
material.
If the saw chain impact on the nail etc., injury may occur.
20. To avoid the guide bar becoming entangled with the
material when chopping on a verge or when subject to
the weight of material while cutting, install a supporting
platform close to the cutting position.
If the guide bar becomes entangled, injury may occur.
21. If the unit is to be transported or stored after use, either
remove the saw chain, or attach the chain cover.
If the saw chain comes into contact with your body, injury
may occur.
22. Adequately care for the unit.
○To ensure work can be performed safely and efficiently,
care for the saw chain to ensure it provides optimal
cutting performance.
○When replacing the saw chain or guide bar, maintaining
the body, filling oil etc., follow the instruction manual.
23. Ask the shop to repair the unit.
○Do not modify this product, since it already complies with
the applicable safety standards.
○All repairs have to be done by your HiKOKI Authorized
Service Center.
Attempting to repair the unit yourself may result in an
accident or injury.
24. When not using the unit, ensure it is properly stored.
Drain offthe chain oil, and keep in a dry place out of
reach of children or a locked location.
25. If the warning label is no longer visible, peels offor is
otherwise unclear, apply a new warning label.
For the warning label, refer to your HiKOKI Authorized
Service Center.
26. When working, if local rules or regulations apply, comply
with the same.
27. The use of a residual current device (RCD) with a tripping
current of 30 mA or less is recommended.
28. During cutting, be sure to position the cord so that it will
not be caught on branches and the like.
000BookCS30YASIA.indb11000BookCS30YASIA.indb11 2019/01/119:58:072019/01/119:58:07

English
12
SPECIFICATIONS
Model CS30Y CS35Y CS40Y CS45Y
Guide bar length (Maximum cutting length) 300 mm 350 mm 400 mm 450 mm
Guide bar type P012-50CR P014-50CR P016-50CR P0H18-50CR
Voltage (by areas)* (110 V, 220 V, 230 V, 240 V)
Power Input* 110 V: 1560 W 220 V, 230 V, 240 V: 2000 W
No-load chain speed 14.5 m/s
Type of chain 91PX-45
(Oregon)
91PX-52
(Oregon)
91PX-57
(Oregon)
91PX-64
(Oregon)
Chain pitch / Gauge 9.53 mm (3/8") / 1.27 mm (0.05")
Sprocket Number of teeth: 6
Oil pump Automatic
Chain oil tank capacity 150 ml
Overload protection Electrical
Chain brake Manually actuated
Weight (without cord) 5.2 kg 5.4 kg 5.4 kg 5.5 kg
* Be sure to check the nameplate on product as it is subject to change by areas.
STANDARD ACCESSORIES
(1) Chain case................................................................... 1
(2) Guide bar ..................................................................... 1
(3) Chain ........................................................................... 1
(4) Plug clip*...................................................................... 1
* Not supplied in certain sales areas.
Standard accessories are subject to change without notice.
OPTIONAL ACCESSORIES (sold separately)
(1) Chain Saw Oil
(2) Round File
(3) Depth Gauge Jointer
Round File and Depth Gauge Jointer are to be used for
sharpening of chain blades. As to its application, please
refer to the item titled “Sharpening of the Chain Blade”.
(4) Chain Case
Always keep the chain cover on the chain while carrying
the chain saw or while storing it.
Optional accessories are subject to change without notice.
APPLICATIONS
○General wood cutting.
PRIOR TO OPERATION
1. Power source
Ensure that the power source to be utilized conforms to the
power requirements specified on the product nameplate.
2. Power switch
Ensure that the power switch is in the OFF position. If the
plug is connected to a receptacle while the power switch
is in the ON position, the power tool will start operating
immediately, which could cause a serious accident.
3. Extension cord
When the work area is remote from the power source,
use an extension cord of sufficient thickness and rated
capacity. The extension cord should be kept as short as
practicable.
4. Confirm the chain tension
Improper chain tension may result in damage to the chain
and the guide bar, and could cause a serious accident.
Always confirm that there is proper tension on the chain
prior to operation.
5. Fill the oil tank with oil
This unit is shipped without oil in the oil tank.
Prior to operation, remove the oil cap and fill the tank with
accessory oil.
This unit is shipped without oil in the oil tank.
Prior to operation, remove the oil cap and fill the tank with
chain saw oil (sold separately), or SAE 20 or 30 motor
oil. Do not use stained or degraded motor oil. Check oil
reservoir periodically and keep it filled while running saw.
6. It is recommended to use an earth-leakage circuit
breaker or a residual current device.
SAW CHAIN AND GUIDE BAR ASSEMBLY
WARNING
○Don’t use the saw chain or the guide bar other than those
specified in “SPECIFICATIONS”.
○Make sure the switch is turned offand the plug
disconnected from the socket.
○Always wear gloves when handling the saw chain.
○The tightening tension for the special nut has been
adjusted to the optimal level. Do not loosen it or tighten it
under any circumstances.
1. Removing the Saw Chain
(1) Check to make sure the chain brake has been released
before removing the side cover. (Fig. 2)
(2) Loosen the knob slightly and then loosen the tension dial
to release the tension on the saw chain. (Fig. 3)
(3) Completely loosen the knob and gently remove the side
cover.
(4) Gently remove the guide bar and saw chain.
2. Attaching the Saw Chain
(1) Set the guide bar on the attachment bolt.
(2) Loop the saw chain over the sprocket while taking care
over the direction it is facing, and then set the saw chain
in the guide bar groove. (Fig. 4)
000BookCS30YASIA.indb12000BookCS30YASIA.indb12 2019/01/119:58:072019/01/119:58:07

English
13
(3) Set the clip on the side cover in the housing, put on
the side cover, rotate the tension dial, align the chain’s
tension pin with the hole on the guide bar and attach it to
the side cover. (Figs. 5 and 6)
CAUTION
If the knob is tightened before the tension dial is rotated,
the tension dial will be locked and it will not rotate.
(4) Gently press the top of the knob to insert it into the
screw hole, tighten it and then follow the instructions in
“Adjusting the Chain Tension”.
CAUTION
○When looping the saw chain over the sprocket, hold the
special nut in place to prevent the sprocket from rotating.
(Fig. 7)
○If the special nut is accidently loosened or tightened,
cease use immediately and request repairs.
Using the chain saw as it is may prevent the chain
brake from operating normally and result in dangerous
situations.
ADJUSTING THE CHAIN TENSION
WARNING
○Make sure switch is turned offand the plug disconnected
from the socket.
○Always wear gloves when handling the saw chain.
○The tightening tension for the special nut has been
adjusted to the optimal level. Do not loosen it or tighten it
under any circumstances.
(1) Raise the end of the guide bar and rotate the tension dial
to adjust the saw chain’s tension. (Fig. 8)
(2) Adjust the saw chain tension so that the gap between
the edge of the chain’s drive links and the guide bar is
between 0.5 mm and 1 mm when the chain is lightly
raised from the center of the guide bar. (Fig. 9)
(3) Once adjustment has been completed, raise the end of
the guide bar and firmly tighten the knob. (Fig. 8)
(4) Rotate the saw chain approximately one half of a rotation
while wearing gloves to reconfirm that the tension on the
chain is correct.
CAUTION
If it is not possible to rotate the saw chain, check to make
sure that the chain brake has not been applied.
ATTACHING THE PLUG CLIP
The cord leading from the power plug is prevented from
being pulled out by the plug clip. (Fig. 10)
SWITCH OPERATIONS
WARNING
Do not secure the switch lock offbutton while it is
pressed. Accidently pulling the switch may result in the
chain saw unexpectedly starting up, which could lead to
injuries.
(1) Make sure that the chain saw is not switched on, and
then insert the power plug into a power socket.
(2) The chain saw is switched on when the lock offbutton is
pulled, and switched offwhen it is released. (Fig. 11)
CHECKING FOR CHAIN OIL EJECTION
○The saw chain and guide bar are automatically lubricated
with chain oil when the chain saw is switched on.
Check to make sure that chain oil is being applied from
the end of the guide bar normally. (Fig. 12)
○If the oil is not ejected after rotating the chain for two or
three minutes, check to make sure that sawdust has not
collected around the oil outlet.
○The amount of chain oil ejected can be adjusted with the
oil adjustment screw. (Fig. 13)
Cutting thick pieces of wood places a heavy load on the
saw chain, so make sure the amount of oil ejected is
increased at these times.
CAUTION
A soft-start function is activated when the chain saw is
switched on and the saw chain rotations start offslowly.
Wait until the rotations have built up before starting work.
PROTECTION CIRCUIT
The chain saw is equipped with a protection circuit to prevent
it from being damaged. The motor will automatically stop if
excessive load is placed on the chain saw, such as when
forcing it to cut through hard wood, etc.
In this event, switch the chain saw off, isolate the reason for
the motor stopping, and then switch it on again and resume
work once the cause of the problem has been completely
eradicated.
Wait for at least two seconds after switching the chain saw
offfollowing an automatic halt before switching it on again.
CUTTING PROCEDURES
1. General cutting procedures
(1) Switch ON the power while keeping the saw slightly away
from the wood to be cut. Start sawing only after the unit
has reached full speed.
(2) When sawing a slender piece of wood, press the base
section of the guide bar against the wood and saw
downward as shown in Fig. 14.
(3) When sawing a thick piece of wood, press the spike on
the front section of the unit against the wood and cut it
with a lever action while using the spike as a fulcrum as
shown in Fig. 15.
(4) When cutting wood horizontally, turn the unit body to the
right so that the guide bar is below and hold the upper
side of the side handle with your left hand. Hold the guide
bar horizontally and place the spike that is on the front of
the unit body on the lumber. Using the spike as a fulcrum,
cut into the wood by turning the handle to the right. (Fig.
16)
(5) When cutting into wood from the bottom, touch the upper
part of the guide bar to the wood lightly. (Fig. 17)
(6) As well as carefully studying the handling instructions,
ensure practical instruction in the operation of the chain
saw prior to use, or at least practice working with the
chain saw by cutting lengths of round timber on a sawing
trestle.
(7) When cutting logs or timbers which are not supported,
support them properly by immobilizing them during
cutting by a sawing trestle or another proper methods.
CAUTION
○When cutting wood from the bottom, there is the danger
that the unit body may pushed back toward the user if the
chain strongly impacts with the wood.
○Do not cut all the way through the wood by starting from
the bottom since there is the danger of the guide bar
flying up out of control when the cut is finished.
○Always prevent the operating chain saw from touching
the ground or wire fences.
2. Branch cutting
(1) Cutting branches from a standing tree:
A thick branch should initially be cut offat a point away
from the trunk of the tree.
First cut in about one third of the way from below, and
then cut offthe branch from above. Finally, cut offthe
remaining portion of the branch even with the trunk of the
tree. (Fig. 18)
000BookCS30YASIA.indb13000BookCS30YASIA.indb13 2019/01/119:58:072019/01/119:58:07

English
14
CAUTION
○Always be careful to avoid falling branches.
○Always be alert for chain saw recoil.
(2) Cutting branches from fallen trees:
First cut offbranches that do not touch the ground, then
cut offthose which touch the ground. When cutting thick
branches that touch the ground, first cut in about half of
the way from above, then cut the branch offfrom below.
(Fig. 19)
CAUTION
○When cutting offbranches which touch the ground, be
careful that the guide bar does not become bound by
pressure.
○During the final cutting stage, beware of the log suddenly
rolling.
3. Log cutting
When cutting a log positioned as shown In Fig. 20, first
cut in about one third of the way from below, then cut
down all the way from above. When cutting a log that
straddles a hollow as shown in Fig. 21, first cut in about
two thirds of the way from above, then cut upward from
below.
CAUTION
○Ensure the guide bar does not become bound in the log
by pressure.
○When working on inclined ground, be sure to stand on
the uphill side of the log. If you stand on the downhill side,
the cut-offlog may roll toward you.
4. Felling trees
(1) Undercut (1as shown in Fig. 22) :
Make undercut facing the direction in which you want the
tree to fall.
The depth of undercut should be 1/3 of tree’s diameter.
Never fell trees without proper undercut.
(2) Backcut (2as shown in Fig. 22):
Make backcut about 5 cm above and parallel to the
horizontal undercut.
If the chain becomes entangled during cutting, stop the
saw and use wedges to free it. Do not cut through the tree.
CAUTION
○Trees should not be felled in a manner that would
endanger any person, strike any utility line or cause any
property damage.
○Be sure to stand on the uphill side of the terrain as the
tree is likely to roll or slide downhill after it is felled.
SHARPENING OF THE CHAIN BLADE
CAUTION
Ensure the power source has been disconnected from
the tool before performing the steps below.
Wear gloves to protect your hands.
Dull and worn chain blades will decrease the efficiency
of the tool and place unnecessary overload on the motor
and various parts of the machine. In order to maintain
optimum efficiency, it is necessary to check the chain
blades often and keep them properly sharpened and
adjusted. Blade sharpening and depth gauge adjustment
should be accomplished at the center of the guide bar,
with the chain properly mounted to the machine.
1. Blade sharpening:
The accessory round file should be held against the chain
blade so that one-fifth of its diameter extends above the
top of the blade, as shown in Fig. 23. Sharpen the blades
by keeping the round file at a 30° angle in relation to the
guide bar, as shown in Fig. 24, ensuring that the round
file is held straight, as shown in Fig. 25. Ensure that all
saw blades are filed at the same angle, or the cutting
efficiency of the tool will be impaired. Appropriate angles
for sharpening the blades correctly are shown in Fig. 26.
Keep all cutters the same length.
2. Adjustment of depth gauge:
To perform this work, please use the optional accessory
depth gauge jointer and a standard flat file obtainable in
local markets. The dimension shown in Fig. 27 is called
the depth gauge. The depth gauge dictates the amount of
incision (cut-in), and must be accurately maintained. The
optimum depth gauge for this tool is 0.635 mm.
After repeated blade sharpening, the depth gauge will
be decreased. Accordingly, after every 3-4 sharpenings,
place the depth gauge jointer as shown in Fig. 28, and
file away that portion that protrudes above the upper
plane of the depth gauge jointer.
MAINTENANCE AND INSPECTION
1. Inspecting the Chain:
(1) Be sure to occasionally inspect the chain tension. If the
chain has become slack, adjust the tension as directed in
the section entitled “Adjusting the chain tension”.
(2) When the chain blades become dull, sharpen them as
directed in the section entitled “Sharpening of the Chain
Blade”.
(3) When sawing work has been completed, thoroughly oil
chain and guide bar by depressing the oil button three
or four times while the chain is rotating. This will prevent
rusting.
2. Cleaning the Guide Bar:
When the guide bar groove or the oil hole becomes
clogged with sawdust, oil circulation becomes impaired,
which could result in damage to the tool. Occasionally
remove the chain cover and clean the groove and oil hole
with a length of wire, as shown in Fig. 29.
3. Cleaning the inside of side cover:
Tension dial and knob operations will become sluggish
if sawdust or other foreign matter builds up inside the
side cover, and there are cases in which they will cease
to move completely. After using the chain saw and
after replacing the saw chain, etc., insert a flat-headed
screwdriver into the gap beneath the tension dial as
shown in Fig. 30, lift up the knob and tension dial and
slowly remove the screwdriver to clean the inside of the
side cover and remove all sawdust.
4. Inspecting the carbon brushes (Fig. 31)
The motor employs carbon brushes which are
consumable parts. Since an excessively worn carbon
brush can result in motor trouble, replace the carbon
brushes with new ones having the same carbon brush
No. shown in the figure when it becomes worn to or near
the “wear limit”. In addition, always keep carbon brushes
clean and ensure that they slide freely within the brush
holders.
The number of the carbon brush will differ in accordance
with the voltage being used.
5. Replacing the carbon brushes
Disassemble the brush caps with a slotted-head
screwdriver. The carbon brushes can then be easily
removed. (Fig. 32)
CAUTION
Be careful not to deform the brush holder during this
operation.
6. Inspecting the mounting screws
Regularly inspect all mounting screws and ensure that
they are properly tightened. Should any of the screws be
loose, retighten them immediately. Failure to do so could
result in serious hazard.
7. Maintenance of the motor
The motor unit winding is the very “heart” of the power
tool. Exercise due care to ensure the winding does not
become damaged and/or wet with oil or water.
000BookCS30YASIA.indb14000BookCS30YASIA.indb14 2019/01/119:58:072019/01/119:58:07

English
15
8. Service parts list
CAUTION
Repair, modification and inspection of HiKOKI Power
Tools must be carried out by a HiKOKI Authorized
Service Center.
This Parts List will be helpful if presented with the tool to
the HiKOKI Authorized Service Center when requesting
repair or other maintenance.
In the operation and maintenance of power tools, the
safety regulations and standards prescribed in each
country must be observed.
MODIFICATIONS
HiKOKI Power Tools are constantly being improved
and modified to incorporate the latest technological
advancements.
Accordingly, some parts may be changed without prior
notice.
NOTE
Due to HiKOKI’s continuing program of research and
development, the specifications herein are subject to
change without prior notice.
000BookCS30YASIA.indb15000BookCS30YASIA.indb15 2019/01/119:58:072019/01/119:58:07

中國語
16
部位名稱:
1. 鎖定按鈕:防止扳機意外操作的按鈕。
2. 油箱蓋:關閉油箱的蓋子。
3. 鋸鏈:鏈條,作為切削刀具使用。
4. 導桿:支撐和引導鋸鏈的零件。
5. 尖刺保險槓:接觸樹木或圓木時,具有支點作用
的裝置。
6. 油視鏡:檢查鏈條油量的視窗。
7. 鏈條制動器:停止或鎖定鋸鏈的裝置。
8. 前把手:位於或朝向主機體前端的支撐把手。
9. 後把手:位於主機體頂部上的支撐把手。
10. 開關:用手指啟動電源的裝置。
11. 側蓋:使用鏈鋸時,保護導桿、鋸鏈、離合器和
鏈輪的蓋子。
12. 張力轉盤:調整鏈條張力的裝置。
13. 旋鈕:固定張力轉盤和側蓋的旋鈕。
14. 鏈條箱:工具不使用時,用來覆蓋導桿和鋸鏈的
箱蓋。
15. 插頭固定夾:防止電源插頭從延長線插座滑脫的
工具。
1
2
3
4
6
5
15
14
7
8
10
9
12
11
13
000BookCS30YASIA.indb16000BookCS30YASIA.indb16 2019/01/119:58:072019/01/119:58:07

中國語
17
一般安全規則
警告
閱讀所有安全警告說明
未遵守警告與說明可能導致電擊、火災及或其他嚴
重傷害。
請妥善保存所有警告與說明,以供未來參考之用。
「電動工具」一詞在警告中,係指電源操作(有線)
之電動工具或電池操作(無線)之電動工具。
1) 工作場所安全
a) 保持工作場所清潔及明亮。
雜亂及昏暗區域易發生意外。
b) 勿在易產生爆炸之環境中操作,譬如有易燃液
體、瓦斯或粉塵存在之處。
電動工具產生火花會引燃粉塵或煙氣。
c) 當操作電動工具時,保持兒童及過往人員遠
離。
分神會讓你失去控制。
2) 電氣安全
a) 電動工具插頭必須與插座配合,絕不可以任何
方法修改插頭,且不得使用任何轉接插頭於有
接地之電動工具。
不修改插頭及所結合之插座可減少電擊。
b) 避免身體接觸到接地面諸如管子、散熱器、爐
灶及冰箱。
如果你的身體接地或搭地,會增加電擊的危
險。
c) 勿讓電動工具淋雨或曝露在潮濕的環境下。
電動工具進水會增加電繫的危險。
d) 勿濫用電源線。絕勿使用電源線去纏繞、拖拉
電動工具或拔插頭,保持電源線遠離熱氣、油
氣、尖角或可動零件。
損壞或纏繞的電源線會增加電繫之危險。
e) 電動工具在室外操作時要使用一適合室外用的
延長線。
使用合適之室外用延長線會減少電擊的危險。
f) 若無法避免在潮濕地區操作電動工具,請使用
以殘餘電流裝置 (RCD) 保護的電源。
使用 RCD 可降低觸電危險。
3) 人員安全
a) 保持機警,注意你正在做什麼,並運用普通常
識操作電動工具。
當你感到疲勞或受藥品、酒精或醫療影響時,
勿操作電動工具。
操作中瞬間的不注意可能造成人員嚴重的傷
害。
b) 使用個人防護裝備,經常配戴安全眼鏡。
配戴防塵口罩、防滑安全鞋、硬帽等防護裝
備,或在適當情況下使用聽覺防護,可減少人
員傷害。
c) 防止意外啟動。在連接電源及或電池組、拿
起或攜帶工具前,請確認開關是在「off」(關
閉)的位置。
以手指放在開關握持電動工具,或在電動工具
的開關於“on”的狀況下插上插頭,都會導致
意外發生。
d) 在將電動工具啟動前,先卸下任何調整用鑰匙
或扳手。
扳手或鑰匙遺留在電動工具的轉動部位時,可
能導致人員傷害。
e) 身體勿過度伸張,任何時間要保持站穩及平
衡。
以便在不預期的狀態下,能對電動工具有較好
的控制。
f) 衣著要合宜,別穿太鬆的衣服或戴首飾。
保持你的頭髮、衣服及手套遠離轉動部位。
寬鬆的衣服、手飾及長髮會被捲入轉動部位。
g) 如果裝置要用於粉塵抽取及集塵設施,要確保
其連接及正當使用。
使用此類裝置能減少與粉塵有關之危害。
4) 電動工具之使用及注意事項
a) 勿強力使用電動工具,使用正確之電動工具為
你所需。
正確使用電動工具會依其設計條件使工作做得
更好更安全。
b) 如果開關不能轉至開及關的位置,勿使用電動
工具。
任何電動工具不能被開關所控制是危險的,必
須要修理。
c) 在做任何調整、更換配件或收存電動工具時,
要將插頭與電源分開,且/或將電池從電動工
具中取出。
此種預防安全措施可減少意外開啟電動機之危
險。
d) 收存停用之電動工具,遠離兒童,且不容許不
熟悉電動工具或未瞭解操作電動工具說明書的
人操作電動工具。
在未受過訓練的人手裡,電動工具極為危險。
e) 保養電動工具,檢核是否有可動零件錯誤的結
合或卡住、零件破裂及可能影響電動工具操作
的任何其他情形。
電動工具如果損壞,在使用前要修好。許多意
外皆肇因於不良的保養。
f) 保持切割工具銳利清潔。
適當的保養切割工具,保持銳利之切削鋒口,
可減少卡住並容易控制。
000BookCS30YASIA.indb17000BookCS30YASIA.indb17 2019/01/119:58:072019/01/119:58:07

中國語
18
g) 按照說明書使用電動工具、配件及刀具等,使
用特殊型式之電動工具時要考量工作條件及所
執行之工作。
使用電動工具未如預期用途之操作時,會導致
危害。
5) 維修
a) 讓你的電動工具由合格修理人員僅使用相同的
維修零件更換。
如此可確保電動工具的安全得以維持。
注意事項
不可讓孩童和體弱人士靠近工作場所。
應將不使用的工具存放在孩童和體弱人士伸手不及的
地方。
鏈鋸機安全警告
1. 鏈鋸機運轉時,讓身體的所有部位遠離鏈鋸機。
開始操作鏈鋸之前,確認鋸鏈機未與任何物品接
觸。操作上的一時疏忽,可能會導致您的衣服或
身體捲入鏈鋸機。
2. 務必用右手握持鏈鋸機的後把手,用左手握持鏈
鋸機的前把手。左右手相反握持鏈鋸機將增加人
體傷害的風險,應絕對禁止。
3. 由於鏈鋸機可能會接觸到暗線或鏈鋸機上的纜
線,操作時請握著電動工具的絕緣手柄表面。接
觸到「通電」電線的鏈鋸機可能會使電動工具的
金屬零件「通電」,而造成操作人員觸電。
4. 配戴護目鏡和耳罩。建議另穿戴可保護頭、手、
腿和腳的裝備。適當的保護裝備可減少因飛濺的
碎片或意外接觸鋸鏈而造成的人體傷害。
5. 不要在樹上操作鏈鋸機。在樹上操作鏈鋸機可能
會導致人體傷害。
6. 始終保持穩健步伐,只有站在固定且安全、平坦
的表面上時才能操作鏈鋸機。滑溜或不穩定的表
面如梯子等,可能會導致失去平衡或無法控制鏈
鋸機。
7. 鋸割處於拉緊狀態的枝葉時要提防枝葉發生反
彈。當木質纖維中的張力被釋放時,加載於枝葉
的彈力可能會向操作人員反彈,並/或使鏈鋸機失
控拋出。
8. 鋸割灌木和樹苗時請格外小心。細長的鋸切物可
能會糾結在鏈鋸機上,使鏈鋸機突然向您揮擊或
牽動您的身體導致失去平衡。
9. 攜帶鏈鋸機時,請握持前把手,並將電源關閉,
與身體保持距離。搬運或存放鏈鋸機時,請務必
安裝導槓蓋板。正確的處理方式將減少與移動中
的鏈鋸機意外接觸的可能性。
10. 按照說明書 指示塗抹潤滑油,調整鏈條張力度及
更換配件。不適當的鏈條張力,潤滑油過多或不
足可能會導致工具損壞或增加反彈的危險。
11. 保持把手乾燥、清潔,不可沾到油脂和潤滑油。
沾上油脂的油膩把手容易滑脫而造成失控。
12. 用途僅限鋸切木材。請勿將鏈鋸機用於其他目
的。例如:不要將鏈鋸機用於鋸切塑料、磚石或
非木材建材。將鏈鋸機使用於其他操作用途,可
能會導致危險發生。
反彈的原因和操作人員的預防措施(圖1)
當導桿的前端或頂部觸碰到物體時,或當木材在鋸切
時併攏而夾到鋸鏈時,可能會發生反彈的情形。
在某些情況下,前端的接觸可能會導致突然的反作用
力,使導桿向上或向後甩向操作人員。
沿導桿頂部夾住鋸鏈可能會將導桿快速地反推向操作
人員。
這些反作用力都可能使您失去對電鋸的控制,而導致
嚴重的人體傷害。請勿完全依賴鏈鋸機中搭載的安全
裝置。身為鏈鋸機的使用者,應採取多重措施,以避
免在鋸切作業中發生意外事故或傷害。
工具的誤用和/或不正確的操作程序或環境是導致反
彈的原因,可透過採取下列的適當預防措施,以避免
反彈:
○ 保持緊握姿勢,用雙手拇指與其他手指環繞緊握
鏈鋸機的把手,且身體和手臂的位置要讓您可以
抵制反彈的力量。在採取適當預防措施的狀況
下,操作人員可以控制反彈的力量。請勿放開鏈
鋸機任其運轉。
○ 請勿將手伸得過長,或在超過肩膀以上的高度進
行鋸切。這有助於防止前端意外接觸,並在意外
情況發生時能善加控制鏈鋸。
○ 只能使用製造商指定的導桿和鏈條進行更換。更
換指定以外的導桿和鏈條可能會導致鏈條斷裂和/
或反彈。
○ 按照說明書指示進行鋸鏈的磨銳和保養。降低深
度規的高度可能會導致反彈的增加。
鏈條制動器的操作:
鏈鋸機在高速下撞擊固體會產生激烈反應並反
彈。這是難以控制的,並可能發生危險,尤其是
輕量級的工具,往往用在各種位置。若發生意外
的反彈,鏈條制動器會立即停止鏈條的轉動。可
用手對著護木按壓以啟動鏈條制動器,或反彈本
身也會自動啟用制動器。
鏈條制動器只能在馬達完全停止後才能復位。將
把手復位到後部(圖2)。請每天檢查鏈條制動器
功能是否正常。
000BookCS30YASIA.indb18000BookCS30YASIA.indb18 2019/01/119:58:072019/01/119:58:07

中國語
19
額外的安全警告
1. 使用符合銘牌上所標示電壓的電源。
超過此電壓的使用可能會導致人體傷害。
2. 作業時請放鬆。並務必使身體保持溫暖。
3. 在開始作業之前,請充分確認相關作業程序和內
容,以避免發生意外,否則可能發生人體傷害。
4. 不要在刮強風、下雨、降雪、起霧等惡劣天候下
或在容易發生落石或雪崩的地方使用。
天候惡劣時,可能會減弱您的判斷力,工具的振
動亦可能導致災害。
5. 在惡劣天候或夜間等能見度差時,請勿使用本工
具。亦不要在雨中或會被雨淋到的地方使用。
不穩定的立足點或失去平衡可能會導致事故的發
生。
6. 啟動工具前,請檢查導桿和鋸鏈。
○ 若導桿或鋸鏈斷裂,或工具有刮傷或彎曲時,請
勿使用。
○ 檢查導桿和鋸鏈是否安裝牢固。若導桿或鋸鏈損
壞或脫落,可能會導致事故的發生。
7. 在開始作業之前,除非鎖定按鈕被按下,請檢查
並確保電源開關處於關閉狀態。
若本工具不能正常運作,請立即停止使用,並要
求HiKOKI授權服務中心進行維修。
8. 請按照使用說明書正確安裝鋸鏈。若未安裝正
確,鋸鏈會從導桿脫落並可能導致人體傷害。
9. 不要移除任何安裝在鏈鋸上的安全設備(制動
桿,鎖定按鈕,擋鏈器等)。
另外,不要改變或固定這些安全設備。
否則可能會發生人體傷害。
10. 在下列情況下,請關閉工具的電源,並確保鋸鏈
不再轉動:
○ 不使用或修理時。
○ 移動到新的作業地點時。
○ 檢查、調整或更換鋸鏈、導桿、鏈條箱和任何其
他零件時。
○ 補充鏈條油時。
○ 從機體移除灰塵等時。
○ 從作業區移除障礙物、垃圾或作業時產生的鋸屑
時。
○ 放下或離開工具時。
○ 除上開情況之外,當您感覺到危險或有預期的風
險時。
若鋸鏈仍持續轉動,可能會發生事故。
11. 應單獨進行作業。若有多數人員參與作業,請確
保彼此之間有足夠的間距。
特別是砍伐立木或在斜坡上作業時,若您預期樹
木將倒下、滾動或滑動,請確保不會對其他工作
人員造成危險。
12. 與其他人員之間保持15公尺以上的距離。
另外,與多數人員一同作業時,請保持15公尺或
更遠的距離。
○ 否則有發生撞擊等意外事故的危險。
○ 準備一個警示笛等,事先決定與其他人員取得聯
繫的適當方法。
13. 砍伐立木之前,請確認下列幾點:
○ 砍伐之前,請決定一個安全的疏散場所。
○ 預先移除障礙物(如樹枝、灌木)。
○ 以綜合評估將被砍伐的樹枝狀態(如樹幹彎曲
度、樹枝張力)和周圍情況(如鄰近樹木的狀
態、障礙物的存在、地形、風)為基準,決定立
木倒下的方向後,再計劃砍伐程序。
砍伐作業的疏失可能會導致人體傷害。
14. 砍伐立木時,請確認下列幾點:
○ 作業過程中必須謹慎小心樹木倒下的方向。
○ 在斜坡上作業時,確保樹木不會滾動,務必從地
形的上坡側進行作業。
○ 當樹木開始倒下時,請關閉本工具的電源,注意
周圍情況,並立即撤離到安全的位置。
○ 若鏈條或導桿在作業過程中纏在樹木上,請關閉
工具的電源並使用楔子。
15. 在使用過程中,若發現工具性能不佳,或出現任
何異常的聲音或振動,請立即關閉電源並停止使
用,並將工具送往HiKOKI授權服務中心進行檢查
或維修。
若您繼續使用,可能會發生人體傷害。
16. 若本工具意外掉落或受到撞擊,請仔細檢查有無
損壞或裂縫,並確保沒有變形。
若工具損壞、斷裂或變形,可能會發生人體傷
害。
17. 以車輛搬運本工具時,請將工具固定住以免滑
動。
否則有發生意外的危險。
18. 不要在工具裝有鏈條箱的狀態下打開電源。
否則可能會發生人體傷害。
19. 確保鋸切物內無釘子和其他異物。
若鋸鏈碰撞到釘子等,可能會發生人體傷害。
20. 鋸切時為避免導桿和鋸切物纏住,在邊緣進行截
斷或容易受到鋸切物重量影響時,請在靠近鋸切
位置的地方設置支撐平台。
若導桿纏住,可能會發生人體傷害。
21. 若使用後要搬運或存放本工具,請將鋸鏈卸下,
或安裝鏈條蓋。
若鋸鏈接觸到您的身體,可能會發生人體傷害。
22. 妥善維護本工具。
○ 為確保安全且有效率地執行作業,請妥善維護鋸
鏈以確保其維持最佳的鋸切功能。
○ 更換鋸鏈或導桿、維修機體、塗抹潤滑油等時,
請按照使用說明書的指示進行。
000BookCS30YASIA.indb19000BookCS30YASIA.indb19 2019/01/119:58:072019/01/119:58:07

中國語
20
23. 修理工具時請洽詢經銷商。
○ 本產品已符合適用的安全標準,請勿進行改造。
○ 所有的維修必須由HiKOKI授權服務中心進行。
試圖自行修理本工具,可能會導致意外或人體傷
害。
24. 不使用本工具時,請確保其妥善存放。
瀝乾鏈條油,將工具存放於乾燥且兒童接觸不到
或加鎖保管的地方。
25. 若警告標籤不清晰、脫落或模糊時,請更換新的
警告標籤。
請向HiKOKI授權服務中心洽詢以取得警告標籤。
26. 作業時請遵循當地相關法令或規章。
27. 推薦使用跳閘電流為30mA或更少的剩餘電流裝置
(RCD)。
28. 在切割過程中,請確保將電線放置在不會被樹枝
和類似物夾住的地方。
規 格
型號 CS30Y CS35Y CS40Y CS45Y
導桿長度(最大切割長度) 300 mm 350 mm 400 mm 450 mm
導桿類型 P012-50CR P014-50CR P016-50CR P0H18-50CR
電壓(按地區)* (110 V,220 V,230 V,240 V)
輸入功率* 110 V: 1560 W 220 V,230 V,240 V: 2000 W
無負載鏈條速度 14.5 m/s
鏈條類型 91PX-45
(Oregon)
91PX-52
(Oregon)
91PX-57
(Oregon)
91PX-64
(Oregon)
鏈條節距 / 量規 9.53 mm (3/8") / 1.27 mm (0.05")
鏈輪 齒數:6
油泵 自動
鏈油箱容量 150 ml
超載保護 電動
鏈條制動器 手動啟動
重量(不含線纜) 5.2 kg 5.4 kg 5.4 kg 5.5 kg
* 當須改變地區時應檢查產品上的銘牌。
標準附件
(1) 鏈條箱 ............................................................... 1
(2) 導桿 .................................................................. 1
(3) 鏈條 .................................................................. 1
(4) 插頭固定夾* ...................................................... 1
* 特定銷售區域不予提供。
標準附件可能不預先通告而徑予更改。
選購附件(分開銷售)
(1) 鏈鋸油
(2) 圓銼刀
(3) 深度規接頭
圓銼刀和深度規接頭用於磨銳鏈刀。操作程序請
參閱「磨銳鏈刀」項目的說明。
(4) 鏈條箱
攜帶或存放鏈鋸機時請務必在鏈條上安裝鏈條
蓋。
選購附件可能不預先通告而徑予更改。
用 途
○ 一般木材鋸切。
作業之前
1. 電源
確認所使用的電源與工具銘牌上標示的規格是否
相符。
2. 電源開關
確認電源開關是否切斷。若電源開關接通,則插
頭插入電源插座時電動工具將出其不意地立刻轉
動,從而招致嚴重事故。
000BookCS30YASIA.indb20000BookCS30YASIA.indb20 2019/01/119:58:072019/01/119:58:07
Other manuals for CS 30Y
1
This manual suits for next models
3
Table of contents
Languages:
Other HIKOKI Chainsaw manuals

HIKOKI
HIKOKI CS 33EDP User manual

HIKOKI
HIKOKI CS 33EB User manual

HIKOKI
HIKOKI CS 3630DB User manual

HIKOKI
HIKOKI CS 3630DB User manual

HIKOKI
HIKOKI CS 3630DB User manual

HIKOKI
HIKOKI CS 30Y User manual

HIKOKI
HIKOKI CS 3630DA User manual

HIKOKI
HIKOKI CS 3630DA User manual

HIKOKI
HIKOKI CS 51EA User manual

HIKOKI
HIKOKI CS 3625DC User manual
Popular Chainsaw manuals by other brands

Scheppach
Scheppach CSE2600 Translation of the original instruction manual

Dolmar
Dolmar PS-6400 Spare parts list

CSA
CSA ER2 Series owner's manual

Husqvarna
Husqvarna 445 EPA II, 445e EPA II, 450e Operator's manual

Husqvarna
Husqvarna 335XPT California Operator's manual

Stihl
Stihl MSA 160 C instruction manual