HIKOKI CS 30Y User manual

Chain Saw
Kettensäge
Scie à chaîne
Motosega
Motor Kettingzaag
Motosierra
Motoserra
Read through carefully and understand these instructions before use.
Diese Anleitung vor Benutzung des Werkzeugs sorgfältig durchlesen und verstehen.
Lire soigneusement et bien assimiler ces instructions avant usage.
Prima dell’uso leggere attentamente e comprendere queste instruzioni.
Deze gebruiksaanwijzing s.v.p. voor gebruik zorgvuldig doorlezen.
Leer cuidadosamente y comprender estas instrucciones antes del uso.
Antes de usar, leia com cuidado para assimilar estas instruções.
Handling instructions
Bedienungsanleitung
Mode d’emploi
Istruzioni per l’uso
Gebruiksaanwijzing
Instrucciones de manejo
Instruções de uso
CS 30Y •CS 35Y •CS 40Y •CS 45Y
CS35Y
000BookCS30YWE.indb1000BookCS30YWE.indb1 2017/11/1516:03:102017/11/1516:03:10

2
1234
5678
9101112
13 14 15 16
17 18 19 20
1
3
4
2
78
6
5!0
#@!0
$
%
6
&
^*
#
6
0
!
(
0)
wqre
tio
p
i
0
0
0.5~1 mm
9
7
8
u
y
000BookCS30YWE.indb2000BookCS30YWE.indb2 2017/11/1516:03:102017/11/1516:03:10

3
5 cm
sa
1/3
45oa
30o
a
90od
0
f
85o
30o
60o
g
h
j
k
l
65
;
6 mm
17 mm
cx
z
110 V – 120 V 38
220 V – 240 V 65
21 22 23 24
25 26 27
28 29 30 31
32
000BookCS30YWE.indb3000BookCS30YWE.indb3 2017/11/1516:03:102017/11/1516:03:10

4
English Deutsch Français Italiano
1Kickback zone Rückstoßzone Zone de recul Zona di contraccolpo
2Chain brake Kettenbremse Frein de chaîne Freno catena
3Free Frei Libre Rilascio
4Lock Verriegeln Verrou Blocco
5Knob Drehknopf Bouton Manopola
6Tension dial Spannungswählschalter Bouton de tension Regolatore di tensione
7Loosen Lösen Desserrez Allentare
8Tighten Anziehen Serrez Serrare
9Side cover Seitliche Abdeckung Capot latéral Coperchio laterale
0Guide bar Schwert Guide-chaîne Barra di guida
!Saw chain Sägekette Chaîne de scie Catena della sega
@Bolt Schraube Boulon Bullone
#Sprocket Kettenzahnrad Pignon Pignone
$Hook portion Hakenteil Partie crochet Parte di aggancio
%Housing Gehäuse Boîtier Alloggiamento
^Pin Stift Broche Perno
&Hole Loch Orifice Foro
*Special nut Spezialmutter Écrou spécial Dado speciale
(Drive link Antriebsverbindung Maillon-guide Maglia motrice
)Plug clip Steckerklemme Attache de la fiche Fermaglio per spina
qPlug Stecker Fiche Spina
wExtension cord Verlängerungskabel Rallonge Prolunga
eSwitch Schalter Interrupteur Interruttore
rLocking button Verriegelungsknopf Bouton de verrouillage Pulsante di blocco
tOil pump adjuster Ölpumpenregler Régulateur de la pompe
à huile Regolatore pompa
dell’olio
yIncrease Erhöhen Augmenter Aumentare
uLower Verringern Diminuer Diminuire
iSpiked bumper Stoßfänger mit Dorn Griffe d'abattage Rampone
oFront handle Vorderer GriffPoignée avant Impugnatura anteriore
pRear handle Hinterer GriffPoignée arrière Impugnatura posteriore
aRound file Rundfeile Lime ronde Lima tonda
s1/5 of diameter of file
1/5 des Feilendurchmessers
1/5 de diamètre de la lime 1/5 del diametro della lima
dSaw chain Sägekette Chaîne de scie Catena della sega
fKeep all cutters the same
length Alle Schneidklingen auf
gleicher Länge halten
Tous les maillons-gouge
doivent garder la même
longueur
Tenere tutte le lame alla
stessa lunghezza
gDepth gauge Tiefenanzeige Limiteur de profondeur Delimitatore di profondità
hDepth gage jointer Tiefenanzeigenverbinder Guide de jauge de
profondeur Giuntatore delimitatore di
profondità
jFile away this portion Diesen Teil abfeilen Limez cette partie Rimuovere questa parte
con una lima
kFile Feile Lime Lima
lSlotted screwdriver Schlitzschraubenzieher Tournevis pour écrous
à fente Cacciavite a lama piatta
;Wear limit Verschleißgrenze Limite d’usure Limite di usura
zNo. of carbon brush Nr. der Kohlebürste
Numéro du balai de charbon
N. di spazzole al carbonio
xBrush cap Motorsensenaufsatz Bouchon de porte-balai Coperchio della spazzola
cCarbon brush Kohlebürste Balai de charbon Spazzola al carbonio
000BookCS30YWE.indb4000BookCS30YWE.indb4 2017/11/1516:03:112017/11/1516:03:11

5
Nederlands Español Português
1Teruslagzone Zona de rebote Zona de recuo
2Kettingrem Freno de cadena Travão de corrente
3Vrijzetten Libre Livre
4Vergrendelen Bloquear Bloqueio
5Knop Perilla Manípulo
6Spanningsregelaar Control de tensión Selector de tensão
7Losdraaien Aflojar Desapertar
8Vastdraaien Apretar Apertar
9Zijafdekking Cubierta lateral Tampa lateral
0Zwaard Barra de guía Barra-guia
!Zaagketting Cadena de sierra Corrente de serra
@Bout Perno Parafuso
#Kettingwiel Piñón Roda dentada
$Haakgedeelte Parte de gancho Parte de gancho
%Behuizing Alojamiento Alojamento
^Pen Pasador Pino
&Gat Orificio Orifício
*Speciale moer Tuerca especial Porca especial
(Kettingschakel Eslabones impulsores Ligação de accionamento
)Stekkerklem Pinza del enchufe Ficha de clip
qStekker Enchufe Ficha
wVerlengsnoer Alargador Cabo de extensão
eSchakelaar Interruptor Interruptor
rVergrendelknop Botón de bloqueo Botão de bloqueio
tOliepompafsteller Ajustador de bomba de
aceite Regulador da bomba de
óleo
yVermeerderen Aumentar Aumentar
uVerminderen Bajar Diminuir
iGepunte bumper Parachoques punzante Protecção com picos
oVoorste handgreep Empuñadura delantera Pega frontal
pAchterste handgreep Empuñadura trasera Pega traseira
aRonde vijl Lima redonda Lima redonda
s1/5 van diameter van vijl 1/5 de diámetro de lima 1/5 do diâmetro da lima
dZaagketting Cadena de la sierra Corrente de serra
f
Zorg ervoor dat alle
zaagschakels even lang
zijn
Mantenga todos los
cortadores a la misma
longitud
Mantenha todos os
cortadores ao mesmo
comprimento
gDieptestellernok Calibre de profundidad Medidor de profundidade
hVerbindingsdeel
dieptemeter Igualador de calibre de
profundidad Medidor de profundidade
jDit gedeelte wegvijlen Recorte esta parte Lime esta parte
kVijl Lima Lima
lSleufschroevendraaier Destornillador plano Chave de fenda
;Slijtagegrens Límite de uso Limite de desgaste
zNr. van koolborstel Nº de cepillo de carbono N.º de escova de carvão
xBorstelkap Tapa del cepillo Tampa da roçadora
cKoolborstel Cepillo de carbono Escova de carvão
000BookCS30YWE.indb5000BookCS30YWE.indb5 2017/11/1516:03:112017/11/1516:03:11

6
English Deutsch Français Italiano
Symbols
WARNING
The following show
symbols used for the
machine. Be sure that you
understand their meaning
before use.
Symbole
WARNUNG
Die folgenden Symbole
werden für diese Maschine
verwendet. Achten Sie
darauf, diese vor der
Verwendung zu verstehen.
Symboles
AVERTISSEMENT
Les symboles suivants
sont utilisés pour l’outil.
Bien se familiariser avec
leur signification avant
d’utiliser l’outil.
Simboli
AVVERTENZA
Di seguito mostriamo i
simboli usati per la macchina.
Assicurarsi di comprenderne
il significato prima dell’uso.
Read all safety warnings
and all instructions.
Failure to follow the
warnings and instructions
may result in electric
shock, fire and/or serious
injury.
Lesen Sie sämtliche
Sicherheitshinweise und
Anweisungen durch.
Wenn die Warnungen
und Anweisungen nicht
befolgt werden, kann es
zu Stromschlag, Brand
und/oder ernsthaften
Verletzungen kommen.
Lire tous les avertissements
de sécurité et toutes les
instructions.
Tout manquement à observer
ces avertissements et
instructions peut engendrer
des chocs électriques, des
incendies et/ou des blessures
graves.
Leggere tutti gli
avvertimenti di sicurezza
e tutte le istruzioni.
La mancata osservanza
degli avvertimenti e delle
istruzioni potrebbe essere
causa di scosse elettriche,
incendi e/o gravi lesioni.
Do not use a power tool in
the rain and moisture or
leave it outdoors when it is
raining.
Verwenden Sie die
Heckenschere nicht im Regen
oder bei Feuchtigkeit, und
belassen sie das Gerät bei
Regen nicht im Freien.
N’utilisez jamais un outil
électrique sous la pluie ou en
présence d'humidité. Ne le
laissez jamais sous la pluie,
même à l'arrêt.
Non usare un utensile
elettrico sotto la pioggia
e nell’umidità né lasciarlo
all’aperto quando piove.
Only for EU countries
Do not dispose of electric
tools together with household
waste material!
In observance of European
Directive 2002/96/EC
on waste electrical and
electronic equipment
and its implementation in
accordance with national
law, electric tools that
have reached the end of
their life must be collected
separately and returned to an
environmentally compatible
recycling facility.
Nur für EU-Länder
Werfen Sie
Elektrowerkzeuge nicht in
den Hausmüll!
Gemäss Europäischer
Richtlinie 2002/96/
EG über Elektro- und
Elektronik- Altgeräte und
Umsetzung in nationales
Recht müssen verbrauchte
Elektrowerkzeuge
getrennt gesammelt und
einer umweltgerechaten
Wiederververtung
zugeführt werden.
Pour les pays européens
uniquement
Ne pas jeter les appareils
électriques dans les ordures
ménagères!
Conformément à la directive
européenne 2002/96/
EG relative aux déchets
d’équipements électriques ou
électroniques (DEEE), et à sa
transposition dans la législation
nationale, les appareils
électriques doivent être
collectés à part et être soumis
à un recyclage respectueux de
l’environnement.
Solo per Paesi UE
Non gettare le
apparecchiature elettriche
tra i rifiuti domestici.
Secondo la Direttiva
Europea 2002/96/CE sui
rifiuti di apparecchiature
elettriche ed elettroniche
e la sua attuazione
in conformità alle
norme nazionali, le
apparecchiature elettriche
esauste devono essere
raccolte separatamente, al
fine di essere reimpiegate
in modo eco-compatibile.
Read, understand and
follow all warnings and
instructions in this manual
and on the unit.
Lesen, verstehen und
befolgen Sie alle Warnungen
und Anweisungen in dieser
Anleitung und am Gerät
selbst.
Lisez, comprenez et suivez
toutes les instructions et tous
les avertissements donnés
dans ce manuel et sur le
produit.
Leggere, comprendere a fondo
e osservare tutte le avvertenze
e le istruzioni riportate nelle
presenti istruzioni per l’uso e
sulla motosega.
Always wear eye
protectors when using
this unit.
Bei der Benutzung dieses
Gerätes immer einen
Augenschutz tragen.
Utilisez toujours des lunettes
de protection lorsque vous
utilisez cet appareil.
Indossare sempre protezioni
per gli occhi durante l’uso di
questa unità.
Always wear ear
protectors when using
this unit.
Bei der Benutzung dieses
Gerätes immer einen
Ohrenschutz tragen.
Utilisez toujours des
protections auditives lorsque
vous utilisez cet appareil.
Indossare sempre protezioni
per le orecchie durante l’uso di
questa unità.
Pull out the power supply
plug if the cable is
damaged.
Wenn das Kabel beschädigt ist,
den Stecker des Stromkabels
herausziehen.
Retirez la fiche
d’alimentation si le câble
est endommagé.
Se il cavo è danneggiato,
estrarre la spia elettrica
dalla presa.
Oil pump adjustment Ölpumpenregelung Ajustement de la pompe
à huile Regolazione pompa
dell’olio
Guaranteed Sound power
level Garantierter
Schalldruckpegel Niveau de puissance
sonore garanti Livello di potenza sonora
garantito
Chain oil fill Kettenöl zugeben Remplir l’huile de chaîne Rabbocco olio catena
000BookCS30YWE.indb6000BookCS30YWE.indb6 2017/11/1516:03:112017/11/1516:03:11

7
Nederlands Español Português
Symbolen
WAARSCHUWING
Hieronder staan symbolen
afgebeeld die van toepassing
zijn op deze machine. U moet
de betekenis hiervan begrijpen
voor gebruik.
Símbolos
ADVERTENCIA
A continuación se muestran
los símbolos usados para
la máquina. Asegúrese de
comprender su significado
antes del uso.
Símbolos
AVISO
A seguir aparecem os
símbolos utilizados pela
máquina. Assimile bem
seus significados antes
do uso.
Lees alle waarschuwingen en
instructies aandachtig door.
Nalating om de
waarschuwingen en
instructies op te volgen kan in
een elektrische schok, brand
en/of ernstig letsel resulteren.
Lea todas las instrucciones y
advertencias de seguridad.
Si no se siguen las
advertencias e instrucciones,
podría producirse una
descarga eléctrica, un
incendio y/o daños graves.
Leia todas as instruções
e avisos de segurança.
Se não seguir todas as
instruções e os avisos,
pode provocar um choque
eléctrico, incêndio e/ou
ferimentos graves.
Gebruik een elektrisch
gereedschap niet in de regen of
in een erg vochtige omgeving
en laat het ook niet buiten liggen
wanneer het regent.
No utilice una herramienta
eléctrica con lluvia y
humedad ni la deje fuera
cuando esté lloviendo.
Não utilize uma ferramenta
eléctrica em condições de
chuva e humidade, nem a
deixe no exterior quando
estiver a chover.
Alleen voor EU-landen
Geef elektrisch
gereedschap niet met het
huisvuil mee!
Volgens de Europese
richtlijn 2002/96/EG
inzake oude elektrische en
elektronische apparaten
en de toepassing daarvan
binnen de nationale
wetgeving, dient gebruikt
elektrisch gereedschap
gescheiden te worden
ingezameld en te worden
afgevoerd naar een
recycle bedrijf dat voldoet
aan de geldende milieu-
eisen.
Sólo para países de la Unión
Europea
¡No deseche los aparatos
eléctricos junto con los
residuos domésticos!
De conformidad con la
Directiva Europea 2002/96/
CE sobre residuos de
aparatos eléctricos y
electrónicos y su aplicación
de acuerdo con la legislación
nacional, las herramientas
eléctricas cuya vida útil haya
llegado a su fin se deberán
recoger por separado y
trasladar a una planta de
reciclaje que cumpla con las
exigencias ecológicas.
Apenas para países da UE
Não deixe ferramentas
eléctricas no lixo
doméstico!
De acordo com a directiva
europeia 2002/96/CE
sobre ferramentas
eléctricas e electrónicas
usadas e a transposição
para as leis nacionais, as
ferramentas eléctricas
usadas devem ser
recolhidas em separado
e encaminhadas a uma
instalação de reciclagem
dos materiais ecológica.
Lees alle waarschuwingen
en aanwijzingen in deze
gebruiksaanwijzing en op de
machine zelf, zorg ervoor dat u
ze begrijpt en volg ze stipt op.
Lea, comprenda y siga
todas las advertencias y
demás instrucciones de
este manual y las que hay
en el aparato.
Leia, compreenda e siga
todas as advertências e
instruções contidas neste
manual e no aparelho.
Draag altijd oogbescherming
wanneer u dit gereedschap
gebruikt.
Utilice siempre protectores de
ojos cuando utilice esta unidad. Use sempre protecções oculares
ao utilizar esta unidade.
Draag altijd
gehoorbescherming wanneer
u dit gereedschap gebruikt.
Utilice siempre protectores
de oídos cuando utilice
esta unidad.
Use sempre protecções
auriculares ao utilizar esta
unidade.
Trek de stekker van de
stroomkabel los als de
stroomkabel beschadigd is.
Quite el enchufe de
alimentación si el cable
está dañado.
Retire a ficha da fonte de
alimentação se o cabo
estiver danificado.
Afstellen van de oliepomp Ajuste de la bomba de
aceite Regulação da bomba de
óleo
Gewaarborgd
geluidsdrukniveau Nivel de potencia acústica
garantizado Nível de potência sonora
garantido
Vullen met kettingolie Relleno de aceite de la
cadena Enchimento de óleo da
corrente
000BookCS30YWE.indb7000BookCS30YWE.indb7 2017/11/1516:03:122017/11/1516:03:12

8
English (Original instructions)
WHAT IS WHAT?
1. Lock-offbutton: Button that prevents the accidental
operation of the trigger.
2. Oil tank cap: Cap for closing the oil tank.
3. Saw chain: Chain, serving as a cutting tool.
4. Guide bar: The part that supports and guides the saw
chain.
5. Spiked bumper: Device for acting as a pivot when in
contact with a tree or log.
6. Oil sight glass: Window to check chain oil amount.
7. Chain brake: Device for stopping or locking the saw
chain.
8. Front handle: Support handle located at or towards the
front of the main body.
9. Rear handle: Support handle located on the top of the
main body.
10. Switch: Device activated by the finger.
11. Side cover: Protective cover to the guide bar saw chain,
clutch and sprocket when the chain saw is in use.
12. Tension dial: Device for adjusting tension of saw chain
13. Knob: Knob for securing tension dial and side cover
14. Chain case: Case for covering the guide bar and saw
chain when the unit is not being used.
15. Plug clip: A tool to prevent the power plug from slipping
free of an extension cord's socket.
1
2
3
4
6
5
15
14
7
8
10
9
12
11
13
000BookCS30YWE.indb8000BookCS30YWE.indb8 2017/11/1516:03:122017/11/1516:03:12

9
English
GENERAL POWER TOOL SAFETY WARNINGS
WARNING
Read all safety warnings and all instructions.
Failure to follow the warnings and instructions may result in
electric shock, fire and/or serious injury.
Save all warnings and instructions for future
reference.
The term “power tool” in the warnings refers to your mains-
operated (corded) power tool or battery-operated (cordless)
power tool.
1) Work area safety
a) Keep work area clean and well lit.
Cluttered or dark areas invite accidents.
b) Do not operate power tools in explosive
atmospheres, such as in the presence of
flammable liquids, gases or dust.
Power tools create sparks which may ignite the dust
or fumes.
c) Keep children and bystanders away while
operating a power tool.
Distractions can cause you to lose control.
2) Electrical safety
a) Power tool plugs must match the outlet.
Never modify the plug in any way.
Do not use any adapter plugs with earthed
(grounded) power tools.
Unmodified plugs and matching outlets will reduce
risk of electric shock.
b) Avoid body contact with earthed or grounded
surfaces, such as pipes, radiators, ranges and
refrigerators.
There is an increased risk of electric shock if your
body is earthed or grounded.
c) Do not expose power tools to rain or wet
conditions.
Water entering a power tool will increase the risk of
electric shock.
d) Do not abuse the cord. Never use the cord for
carrying, pulling or unplugging the power tool.
Keep cord away from heat, oil, sharp edges or
moving parts.
Damaged or entangled cords increase the risk of
electric shock.
e) When operating a power tool outdoors, use an
extension cord suitable for outdoor use.
Use of a cord suitable for outdoor use reduces the
risk of electric shock.
f) If operating a power tool in a damp location
is unavoidable, use a residual current device
(RCD) protected supply.
Use of an RCD reduces the risk of electric shock.
3) Personal safety
a) Stay alert, watch what you are doing and use
common sense when operating a power tool.
Do not use a power tool while you are tired
or under the influence of drugs, alcohol or
medication.
A moment of inattention while operating power tools
may result in serious personal injury.
b) Use personal protective equipment. Always
wear eye protection.
Protective equipment such as dust mask, non-skid
safety shoes, hard hat, or hearing protection used
for appropriate conditions will reduce personal
injuries.
c) Prevent unintentional starting. Ensure the
switch is in the offposition before connecting
to power source and/or battery pack, picking
up or carrying the tool.
Carrying power tools with your finger on the switch
or energising power tools that have the switch on
invites accidents.
d) Remove any adjusting key or wrench before
turning the power tool on.
A wrench or a key left attached to a rotating part of
the power tool may result in personal injury.
e) Do not overreach. Keep proper footing and
balance at all times.
This enables better control of the power tool in
unexpected situations.
f) Dress properly. Do not wear loose clothing or
jewellery. Keep your hair, clothing and gloves
away from moving parts.
Loose clothes, jewellery or long hair can be caught
in moving parts.
g) If devices are provided for the connection of
dust extraction and collection facilities, ensure
these are connected and properly used.
Use of dust collection can reduce dust related
hazards.
4) Power tool use and care
a) Do not force the power tool. Use the correct
power tool for your application.
The correct power tool will do the job better and
safer at the rate for which it was designed.
b) Do not use the power tool if the switch does not
turn it on and off.
Any power tool that cannot be controlled with the
switch is dangerous and must be repaired.
c) Disconnect the plug from the power source
and/or the battery pack from the power tool
before making any adjustments, changing
accessories, or storing power tools.
Such preventive safety measures reduce the risk of
starting the power tool accidentally.
d) Store idle power tools out of the reach of
children and do not allow persons unfamiliar
with the power tool or these instructions to
operate the power tool.
Power tools are dangerous in the hands of untrained
users.
e) Maintain power tools. Check for misalignment
or binding of moving parts, breakage of parts
and any other condition that may affect the
power toolsʼoperation.
If damaged, have the power tool repaired
before use.
Many accidents are caused by poorly maintained
power tools.
f) Keep cutting tools sharp and clean.
Properly maintained cutting tools with sharp cutting
edges are less likely to bind and are easier to
control.
g) Use the power tool, accessories and tool bits
etc. in accordance with these instructions,
taking into account the working conditions and
the work to be performed.
Use of the power tool for operations different
from those intended could result in a hazardous
situation.
000BookCS30YWE.indb9000BookCS30YWE.indb9 2017/11/1516:03:122017/11/1516:03:12

10
English
5) Service
a) Have your power tool serviced by a qualified
repair person using only identical replacement
parts.
This will ensure that the safety of the power tool is
maintained.
PRECAUTION
Keep children and infirm persons away.
When not in use, tools should be stored out of reach
of children and infirm persons.
CHAIN SAW SAFETY WARNINGS
1. Keep all parts of the body away from the saw chain when
the chain saw is operating. Before you start the chain
saw, make sure the saw chain is not contacting anything.
A moment of inattention while operating chain saws
may cause entanglement of your clothing or body with
the saw chain.
2. Always hold the chain saw with your right hand on the rear
handle and your left hand on the front handle. Holding the
chain saw with a reversed hand configuration increases
the risk of personal injury and should never be done.
3. Hold the power tool by insulated gripping surfaces only,
because the saw chain may contact hidden wiring or its
own cord. Saw chains contacting a “live” wire may make
exposed metal parts of the power tool “live” and could
give the operator an electric shock.
4. Wear safety glasses and hearing protection. Further
protective equipment for head, hands, legs and feet
is recommended. Adequate protective clothing will
reduce personal injury by flying debris or accidental
contact with the saw chain.
5. Do not operate a chain saw in a tree. Operation of
a chain saw while up in a tree may result in personal
injury.
6. Always keep proper footing and operate the chain saw
only when standing on fixed, secure and level surface.
Slippery or unstable surfaces such as ladders may
cause a loss of balance or control of the chain saw.
7. When cutting a limb that is under tension be alert for
spring back. When the tension in the wood fibres is
released the spring loaded limb may strike the operator
and/or throw the chain saw out of control.
8. Use extreme caution when cutting brush and saplings.
The slender material may catch the saw chain and be
whipped toward you or pull you offbalance.
9. Carry the chain saw by the front handle with the chain
saw switched offand away from your body. When
transporting or storing the chain saw always fit the
guide bar cover. Proper handling of the chain saw will
reduce the likelihood of accidental contact with the
moving saw chain.
10. Follow instructions for lubricating, chain tensioning
and changing accessories. Improperly tensioned or
lubricated chain may either break or increase the
chance for kickback.
11. Keep handles dry, clean, and free from oil and grease.
Greasy, oily handles are slippery causing loss of
control.
12. Cut wood only. Do not use chain saw for purposes not
intended. For example: do not use chain saw for cutting
plastic, masonry or non-wood building materials. Use
of the chain saw for operations different than intended
could result in a hazardous situation.
Causes and operator prevention of kickback: (Fig. 1)
Kickback may occur when the nose or tip of the guide
bar touches an object, or when the wood closes in and
pinches the saw chain in the cut.
Tip contact in some cases may cause a sudden reverse
reaction, kicking the guide bar up and back towards the
operator.
Pinching the saw chain along the top of the guide
bar may push the guide bar rapidly back towards the
operator.
Either of these reactions may cause you to lose control
of the saw which could result in serious personal injury.
Do not rely exclusively upon the safety devices built into
your saw. As a chain saw user, you should take several
steps to keep your cutting jobs free from accident or
injury.
Kickback is the result of tool misuse and/or incorrect
operating procedures or conditions and can be avoided
by taking proper precautions as given below:
○Maintain a firm grip, with thumbs and fingers encircling
the chain saw handles, with both hands on the saw
and position your body and arm to allow you to resist
kickback forces. Kickback forces can be controlled by
the operator, if proper precautions are taken. Do not let
go of the chain saw.
○Do not overreach and do not cut above shoulder height.
This helps prevent unintended tip contact and enables
better control of the chain saw in unexpected situations.
○Only use replacement bars and chains specified by the
manufacturer. Incorrect replacement bars and chains
may cause chain breakage and/or kickback.
○Follow the manufacturer’s sharpening and maintenance
instructions for the saw chain. Decreasing the depth
gauge height can lead to increased kickback.
Chain brake operation:
If a chain saw hits a solid object at a high speed it reacts
violently and kicks back. This is difficult to control and
could be dangerous, especially with lightweight tools
that tend to be used in all kind of positions. The chain
brake immediately stops the chain from rotating if there
is an unexpected kickback. The chain brake can be
activated by pressing your hand against the handguard
or automatically by the kickback itself.
The chain brake can only be reset after the motor
has stopped completely. Reset the handle to the rear
position (Fig. 2). Check the function of the chain brake
every day.
ADDITIONAL SAFETY WARNINGS
1. Use the electrical voltage listed on the name plate for
the power source.
The use of a voltage that exceeds this may result in
injury.
2. Work without pressure. In addition, always keep your
body warm.
3. Before commencing work, reflect fully on the work
procedures involved and work to avoid accidents,
otherwise injury may occur.
4. Do not use in the event of bad weather, such as strong
wind, rain, snow, fog, or in areas prone to rockfall or
avalanches.
In bad weather, judgment may be impaired and the
vibration may result in disaster.
5. When visibility is poor, such as during bad weather or
night, do not use the unit. In addition, do not use it in rain
or in a location exposed to rain.
Unstable foothold or loss of balance may result in an
accident.
000BookCS30YWE.indb10000BookCS30YWE.indb10 2017/11/1516:03:132017/11/1516:03:13

11
English
6. Check the guide bar and saw chain before starting the
unit.
○If the guide bar or saw chain is cracked, or the product
is scratched or bent, do not use the unit.
○Check if the guide bar and saw chain are securely
installed. If the guide bar or saw chain is broken or
dislodged, this may result in an accident.
7. Before starting work, check to ensure the switch does
not engage unless the lock-offbutton is pressed.
If the unit does not working properly, immediately stop
using and request repair from your HiKOKI Authorized
Service Center.
8. Install the saw chain properly, in accordance with the
instruction manual.
If installed incorrectly, the saw chain will come offthe
guide bar and injury may occur.
9. Never remove any of the safety devices equipped
on the chain saw (brake lever, lock-offbutton, chain
catcher etc.).
In addition, do not alter or immobilize them.
Injury may occur.
10. In the following cases, switch the unit offand ensure the
saw chain is no longer moving:
○When not in use or being repaired.
○When shifting to a new work location.
○When inspecting, adjusting or replacing the saw chain,
guide bar, chain case and any other part.
○When refilling the chain oil.
○When removing dust etc. from the body.
○When removing obstacles, trash or sawdust generated
from work from the work area.
○When you take offthe unit, or when you get away from
the unit.
○Otherwise, if you sense danger or anticipate risk.
If the saw chain is still moving, an accident may occur.
11. Work should generally be performed individually. When
multiple individuals are involved, ensure sufficient
spacing between them.
In particular, when felling standing trees or working on
a slope, if you anticipate trees falling, rolling or sliding,
ensure there is no danger to other workers.
12. Remain more than 15 m away from other people.
In addition, when working with multiple persons, remain
15 m or more apart.
○There is a risk of impact with scatters and other
accidents.
○Prepare a whistle alert etc. and determine appropriate
contact method for other workers beforehand.
13. Before felling standing trees, ensure the following:
○Determine a safe evacuation location prior to felling.
○Remove obstacles (e.g., branches, shrubs) in advance.
○Based on a comprehensive evaluation of the state of the
tree to be felled (e.g., trunk bend, tension of branches)
and the surrounding situation (e.g., state of adjacent
trees, presence of obstacles, terrain, wind), decide on
the direction in which the standing tree will fall and then
plan the felling procedure.
Careless felling may result in injury.
14. When felling standing trees, ensure the following:
○During work, be very careful of the direction in which
trees fall.
○When working on a slope, ensuring the tree will not roll,
always work from the uphill side of the terrain.
○When the tree starts falling, switch the unit off, alert
the surroundings, and immediately retreat to a safe
location.
○During work, if the saw chain or guide bar become
entangled in the tree, switch offand use a wedge.
15. During use, if the unit performance deteriorates, or you
notice any abnormal sound or vibration, immediately
switch offand discontinue use, and return to your
HiKOKI Authorized Service Center for inspection or
repair.
If you continue using, injury may occur.
16. If the unit is accidentally dropped or exposed to impact,
inspect carefully for damage or cracks and ensure there
is no deformation.
If the unit is damaged, cracked or deformed, injury may
occur.
17. When transporting the unit by car, secure the unit to
prevent it moving.
There is a risk of accident.
18. Do not switch the unit on while the chain case is
attached.
Injury may occur.
19. Ensure there are no nails and other foreign objects in
the material.
If the saw chain impact on the nail etc., injury may occur.
20. To avoid the guide bar becoming entangled with the
material when chopping on a verge or when subject to
the weight of material while cutting, install a supporting
platform close to the cutting position.
If the guide bar becomes entangled, injury may occur.
21. If the unit is to be transported or stored after use, either
remove the saw chain, or attach the chain cover.
If the saw chain comes into contact with your body,
injury may occur.
22. Adequately care for the unit.
○To ensure work can be performed safely and efficiently,
care for the saw chain to ensure it provides optimal
cutting performance.
○When replacing the saw chain or guide bar, maintaining
the body, filling oil etc., follow the instruction manual.
23. Ask the shop to repair the unit.
○Do not modify this product, since it already complies
with the applicable safety standards.
○Always refer to your HiKOKI Authorized Service Center
for all repairs.
Attempting to repair the unit yourself may result in an
accident or injury.
24. When not using the unit, ensure it is properly stored.
Drain offthe chain oil, and keep in a dry place out of
reach of children or a locked location.
25. If the warning label is no longer visible, peels offor is
otherwise unclear, apply a new warning label.
For the warning label, refer to your HiKOKI Authorized
Service Center.
26. When working, if local rules or regulations apply,
comply with the same.
000BookCS30YWE.indb11000BookCS30YWE.indb11 2017/11/1516:03:132017/11/1516:03:13

12
English
SPECIFICATIONS
Model CS30Y CS35Y CS40Y CS45Y
Guide bar length (Max. cutting length) 300 mm 350 mm 400 mm 450 mm
Guide bar Type P012-50CR P014-50CR P016-50CR P0H18-50CR
Voltage (by areas)*1(110 V, 220 V, 230 V, 240 V)
Power Input*1110 V: 1560 W 220 V, 230 V, 240 V: 2000 W
No-load chain speed 14.5 m/s
Type of chain 91PX-45
(Oregon) 91PX-52
(Oregon) 91PX-57
(Oregon) 91PX-64
(Oregon)
Chain pitch / Gauge 9.53 mm (3/8") / 1.27 mm (0.05")
Sprocket Number of teeth: 6
Oil pump Automatic
Chain oil tank capacity 150 ml
Overload protection Electrical
Chain brake Manually actuated
Weight*25.2 kg 5.4 kg 5.4 kg 5.5 kg
*1Be sure to check the nameplate on product as it is subject to change by areas.
*2Weight: According to EPTA-Procedure 01/2003
STANDARD ACCESSORIES
(1) Chain case .................................................................. 1
(2) Guide bar..................................................................... 1
(3) Chain ........................................................................... 1
(4) Plug clip*...................................................................... 1
* Not supplied in certain sales areas.
Standard accessories are subject to change without notice.
OPTIONAL ACCESSORIES (sold separately)
(1) Chain Saw Oil
(2) Round File
(3) Depth Gauge Jointer
Round File and Depth Gauge Jointer are to be used
for sharpening of chain blades. As to its application,
please refer to the item titled “Sharpening of the Chain
Blade”.
(4) Chain Case
Always keep the chain cover on the chain while carrying
the chain saw or while storing it.
Optional accessories are subject to change without notice.
APPLICATIONS
○General wood cutting.
PRIOR TO OPERATION
1. Power source
Ensure that the power source to be utilized conforms
to the power requirements specified on the product
nameplate.
2. Power switch
Ensure that the power switch is in the OFF position. If
the plug is connected to a receptacle while the power
switch is in the ON position, the power tool will start
operating immediately, which could cause a serious
accident.
3. Extension cord
When the work area is remote from the power source,
use an extension cord of sufficient thickness and rated
capacity. The extension cord should be kept as short as
practicable.
4. Confirm the chain tension
Improper chain tension may result in damage to the
chain and the guide bar, and could cause a serious
accident. Always confirm that there is proper tension on
the chain prior to operation.
5. Fill the oil tank with oil
This unit is shipped without oil in the oil tank.
Prior to operation, remove the oil cap and fill the tank
with accessory oil.
This unit is shipped without oil in the oil tank.
Prior to operation, remove the oil cap and fill the tank
with chain saw oil (sold separately), or SAE 20 or 30
motor oil. Do not use stained or degraded motor oil.
Check oil reservoir periodically and keep it filled while
running saw.
6. It is recommended to use an earth-leakage circuit
breaker or a residual current device.
SAW CHAIN AND GUIDE BAR ASSEMBLY
WARNING
○Don’t use the saw chain or the guide bar other than
those specified in “SPECIFICATIONS”.
○Make sure the switch is turned offand the plug
disconnected from the socket.
○Always wear gloves when handling the saw chain.
○The tightening tension for the special nut has been
adjusted to the optimal level. Do not loosen it or tighten
it under any circumstances.
1. Removing the Saw Chain
(1) Check to make sure the chain brake has been released
before removing the side cover. (Fig. 2)
(2) Loosen the knob slightly and then loosen the tension
dial to release the tension on the saw chain. (Fig. 3)
(3) Completely loosen the knob and gently remove the side
cover.
(4) Gently remove the guide bar and saw chain.
000BookCS30YWE.indb12000BookCS30YWE.indb12 2017/11/1516:03:132017/11/1516:03:13

13
English
2. Attaching the Saw Chain
(1) Set the guide bar on the attachment bolt.
(2) Loop the saw chain over the sprocket while taking care
over the direction it is facing, and then set the saw chain
in the guide bar groove. (Fig. 4)
(3) Set the clip on the side cover in the housing, put on
the side cover, rotate the tension dial, align the chain’s
tension pin with the hole on the guide bar and attach it
to the side cover. (Figs. 5 and 6)
CAUTION
If the knob is tightened before the tension dial is rotated,
the tension dial will be locked and it will not rotate.
(4) Gently press the top of the knob to insert it into the
screw hole, tighten it and then follow the instructions in
“Adjusting the Chain Tension”.
CAUTION
○When looping the saw chain over the sprocket, hold
the special nut in place to prevent the sprocket from
rotating. (Fig. 7)
○If the special nut is accidently loosened or tightened,
cease use immediately and request repairs.
Using the chain saw as it is may prevent the chain
brake from operating normally and result in dangerous
situations.
ADJUSTING THE CHAIN TENSION
WARNING
○Make sure switch is tur ned offand the plug disconnected
from the socket.
○Always wear gloves when handling the saw chain.
○The tightening tension for the special nut has been
adjusted to the optimal level. Do not loosen it or tighten
it under any circumstances.
(1) Raise the end of the guide bar and rotate the tension
dial to adjust the saw chain’s tension. (Fig. 8)
(2) Adjust the saw chain tension so that the gap between
the edge of the chain’s drive links and the guide bar is
between 0.5 mm and 1 mm when the chain is lightly
raised from the center of the guide bar. (Fig. 9)
(3) Once adjustment has been completed, raise the end of
the guide bar and firmly tighten the knob. (Fig. 8)
(4) Rotate the saw chain approximately one half of a
rotation while wearing gloves to reconfirm that the
tension on the chain is correct.
CAUTION
If it is not possible to rotate the saw chain, check to
make sure that the chain brake has not been applied.
ATTACHING THE PLUG CLIP
The cord leading from the power plug is prevented from
being pulled out by the plug clip. (Fig. 10)
SWITCH OPERATIONS
WARNING
Do not secure the switch lock offbutton while it is
pressed. Accidently pulling the switch may result in the
chain saw unexpectedly starting up, which could lead to
injuries.
(1) Make sure that the chain saw is not switched on, and
then insert the power plug into a power socket.
(2) The chain saw is switched on when the lock offbutton is
pulled, and switched offwhen it is released. (Fig. 11)
CHECKING FOR CHAIN OIL EJECTION
○The saw chain and guide bar are automatically
lubricated with chain oil when the chain saw is switched
on.
Check to make sure that chain oil is being applied from
the end of the guide bar normally. (Fig. 12)
○If the oil is not ejected after rotating the chain for two or
three minutes, check to make sure that sawdust has not
collected around the oil outlet.
○The amount of chain oil ejected can be adjusted with
the oil adjustment screw. (Fig. 13)
Cutting thick pieces of wood places a heavy load on the
saw chain, so make sure the amount of oil ejected is
increased at these times.
CAUTION
A soft-start function is activated when the chain saw is
switched on and the saw chain rotations start offslowly.
Wait until the rotations have built up before starting
work.
PROTECTION CIRCUIT
The chain saw is equipped with a protection circuit to
prevent it from being damaged. The motor will automatically
stop if excessive load is placed on the chain saw, such as
when forcing it to cut through hard wood, etc.
In this event, switch the chain saw off, isolate the reason for
the motor stopping, and then switch it on again and resume
work once the cause of the problem has been completely
eradicated.
Wait for at least two seconds after switching the chain saw
offfollowing an automatic halt before switching it on again.
CUTTING PROCEDURES
1. General cutting procedures
(1) Switch ON the power while keeping the saw slightly
away from the wood to be cut. Start sawing only after
the unit has reached full speed.
(2) When sawing a slender piece of wood, press the base
section of the guide bar against the wood and saw
downward as shown in Fig. 14.
(3) When sawing a thick piece of wood, press the spike on
the front section of the unit against the wood and cut it
with a lever action while using the spike as a fulcrum as
shown in Fig. 15.
(4) When cutting wood horizontally, turn the unit body to
the right so that the guide bar is below and hold the
upper side of the side handle with your left hand. Hold
the guide bar horizontally and place the spike that is on
the front of the unit body on the lumbar. Using the spike
as a fulcrum, cut into the wood by turning the handle to
the right. (Fig. 16)
(5) When cutting into wood from the bottom, touch the
upper part of the guide bar to the wood lightly. (Fig. 17)
(6) As well as carefully studying the handling instructions,
ensure practical instruction in the operation of the
chain saw prior to use, or at least practice working with
the chain saw by cutting lengths of round timber on a
sawing trestle.
(7) When cutting logs or timbers which are not supported,
support them properly by immobilizing them during
cutting using a sawing trestle or other proper method.
CAUTION
○When cutting wood from the bottom, there is a danger
that the unit body may be pushed back toward the user
if the chain strongly impacts with the wood.
000BookCS30YWE.indb13000BookCS30YWE.indb13 2017/11/1516:03:132017/11/1516:03:13

14
English
○Do not cut all the way thorough the wood by starting
from the bottom since there is the danger of the guide
bar flying up out of control when the cut is finished.
○Always prevent the operating chain saw from touching
the ground or wire fences.
2. Branch cutting
(1) Cutting branches from a standing tree:
A thick branch should initially be cut offat a point away
from the trunk of the tree.
First cut in about one third of the way from below, and
then cut offthe branch from above. Finally, cut offthe
remaining portion of the branch even with the trunk of
the tree. (Fig. 18)
CAUTION
○Always be careful to avoid falling branches.
○Always be alert for chain saw recoil.
(2) Cutting branches from fallen trees:
First cut offbranches that do not touch the ground, then
cut offthose which touch the ground. When cutting
thick branches that touch the ground, first cut in about
half of the way from above, then cut the branch offfrom
below. (Fig. 19)
CAUTION
○When cutting offbranches which touch the ground, be
careful that the guide bar does not become bound by
pressure.
○During the final cutting stage, beware of the log
suddenly rolling.
3. Log cutting
When cutting a log positioned as shown in Fig. 20, first
cut in about one third of the way from below, then cut
down all the way from above. When cutting a log that
straddles a hollow as shown in Fig. 21, first cut in about
two thirds of the way from above, then cut upward from
below.
CAUTION
○Ensure the guide bar does not become bound in the log
by pressure.
○When working on inclined ground, be sure to stand on
the uphill side of the log. If you stand on the downhill
side, the cut-offlog may roll toward you.
4. Felling trees
(1) Undercut (1as shown in Fig. 22):
Make undercut facing the direction in which you want
the tree to fall.
The depth of the undercut should be 1/3 of the tree’s
diameter. Never fell trees without proper undercut.
(2) Back cut (2as shown in Fig. 22):
Make a backcut about 5 cm above and parallel to the
horizontal undercut.
If the chain becomes entangled during cutting, stop the
saw and use wedges to free it. Do not cut thorough the
tree.
CAUTION
○Trees should not be felled in a manner that would
endanger any person, strike any utility line or cause any
property damage.
○Be sure to stand on the uphill side of the terrain as the
tree is likely to roll or slide downhill after it is felled.
SHARPENING OF THE CHAIN BLADE
CAUTION
Ensure the power source has been disconnected from
the tool before performing the steps below.
Wear gloves to protect your hands.
Dull and worn chain blades will decrease the efficiency
of the tool and place unnecessary overload on the
motor and various parts of the machine. In order
to maintain optimum efficiency, it is necessary to
check the chain blades often and keep them properly
sharpened and adjusted. Blade sharpening and depth
gauge adjustment should be accomplished at the
center of the guide bar, with the chain properly mounted
to the machine.
1. Blade sharpening
The accessory round file should be held against the
chain blade so that one-fifth of its diameter extends
above the top of the blade, as shown in Fig. 23.
Sharpen the blades by keeping the round file at a 30°
angle in relation to the guide bar, as shown in Fig. 24,
ensuring that the round file is held straight, as shown
in Fig. 25. Ensure that all saw blades are filed at the
same angle, or the cutting efficiency of the tool will be
impaired. Appropriate angles for sharpening the blades
correctly are shown in Fig. 26.
Keep all cutters the same length.
2. Adjustment of depth gauge
To perform this work, please use the optional accessory
depth gauge jointer and a standard flat file obtainable in
local markets. The dimension shown in Fig. 27 is called
the depth gauge. The depth gauge dictates the amount
of incision (cut-in), and must be accurately maintained.
The optimum depth gauge for this tool is 0.635 mm.
After repeated blade sharpening, the depth gauge
will be decreased. Accordingly, after every 3-4
sharpenings, place the depth gauge jointer as shown in
Fig. 28, and file away that portion that protrudes above
the upper plane of the depth gauge jointer.
MAINTENANCE AND INSPECTION
1. Inspecting the Chain
(1) Be sure to occasionally inspect the chain tension. If the
chain has become slack, adjust the tension as directed
in the section entitled “Adjusting the Chain Tension”.
(2) When the chain blades become dull, sharpen them
as directed in the section entitled “Sharpening of the
Chain Blade”.
(3) When sawing work has been completed, thoroughly oil
chain and guide bar by depressing the oil button three
or four times while the chain is rotating. This will prevent
rusting.
2. Cleaning the Guide Bar
When the guide bar groove or the oil hole becomes
clogged with sawdust, oil circulation becomes impaired,
which could result in damage to the tool. Occasionally
remove the chain cover and clean the groove and oil
hole with a length of wire, as shown in Fig. 29.
3. Cleaning the inside of side cover
Tension dial and knob operations will become sluggish
if sawdust or other foreign matter builds up inside the
side cover, and there are cases in which they will cease
to move completely. After using the chain saw and
after replacing the saw chain, etc., insert a flat-headed
screwdriver into the gap beneath the tension dial as
shown in Fig. 30, lift up the knob and tension dial and
slowly remove the screwdriver to clean the inside of the
side cover and remove all sawdust.
000BookCS30YWE.indb14000BookCS30YWE.indb14 2017/11/1516:03:132017/11/1516:03:13

15
English
4. Inspecting the carbon brushes (Fig. 31)
The motor employs carbon brushes which are
consumable parts. Since an excessively worn carbon
brush can result in motor trouble, replace the carbon
brushes with new ones having the same carbon brush
No. shown in the figure when it becomes worn to or
near the “wear limit”. In addition, always keep carbon
brushes clean and ensure that they slide freely within
the brush holders.
The number of the carbon brush will differ in accordance
with the voltage being used.
5. Replacing the carbon brushes
Disassemble the brush caps with a slotted-head
screwdriver. The carbon brushes can then be easily
removed. (Fig. 32)
CAUTION
Be careful not to deform the brush holder during this
operation.
6. Inspecting the mounting screws
Regularly inspect all mounting screws and ensure that
they are properly tightened. Should any of the screws
be loose, retighten them immediately. Failure to do so
could result in serious hazard.
7. Maintenance of the motor
The motor unit winding is the very “heart” of the power
tool.
Exercise due care to ensure the winding does not
become damaged and/or wet with oil or water.
8. Service parts list
CAUTION
Repair, modification and inspection of HiKOKI Power
Tools must be carried out by a HiKOKI Authorized
Service Center.
This Parts List will be helpful if presented with the tool to
the HiKOKI Authorized Service Center when requesting
repair or other maintenance.
In the operation and maintenance of power tools, the
safety regulations and standards prescribed in each
country must be observed.
MODIFICATIONS
HiKOKI Power Tools are constantly being improved
and modified to incorporate the latest technological
advancements.
Accordingly, some parts may be changed without prior
notice.
GUARANTEE
We guarantee HiKOKI Power Tools in accordance with
statutory/country specific regulation. This guarantee does
not cover defects or damage due to misuse, abuse, or
normal wear and tear. In case of complaint, please send
the Power Tool, undismantled, with the GUARANTEE
CERTIFICATE found at the end of this Handling instruction,
to a HiKOKI Authorized Service Center.
NOTE
Due to HiKOKI’s continuing program of research and
development, the specifications herein are subject to
change without prior notice.
IMPORTANT
Correct connection of the plug
The wires of the main lead are coloured in accordance
with the following code:
Blue: -- Neutral
Brown: -- Live
As the colours of the wires in the main lead of this tool
may not correspond with the coloured markings
identifying the terminals in your plug proceed as follows:
The wire coloured blue must be connected to the terminal
marked with the letter N or coloured black.
The wire coloured brown must be connected to the
terminal marked with the letter L or coloured red.
Neither core must be connected to the earth terminal.
NOTE
This requirement is provided according to BRITISH
STANDARD 2769: 1984.
Therefore, the letter code and colour code may not be
applicable to other markets except The United Kingdom.
Information concerning airborne noise and vibration
The measured values were determined according to
EN60745 and declared in accordance with ISO 4871.
Measured A-weighted sound power level: 103 dB (A)
Measured A-weighted sound pressure level: 90 dB (A)
Uncertainty KpA: 2 dB (A).
Wear hearing protection.
Vibration total values (triax vector sum) determined
according to EN60745.
ah = 4.0 m/s2
Uncertainty K = 1.5 m/s2
The declared vibration total value has been measured in
accordance with a standard test method and may be used
for comparing one tool with another.
It may also be used in a preliminary assessment of
exposure.
WARNING
○The vibration emission during actual use of the power
tool can differ from the declared total value depending
on the ways in which the tool is used.
○Identify safety measures to protect the operator that
are based on an estimation of exposure in the actual
conditions of use (taking account of all parts of the
operating cycle such as the times when the tool is
switched offand when it is running idle in addition to the
trigger time).
000BookCS30YWE.indb15000BookCS30YWE.indb15 2017/11/1516:03:132017/11/1516:03:13

16
Deutsch (Übersetzung der Original-Gebrauchsanweisung)
TEILEBEZEICHNUNGEN
1. Verriegelungsknopf: Dieser Knopf verhindert ein
unbeabsichtigtes Betätigen des Auslösers.
2. Öltankdeckel: Deckel zum Verschließen des Öltanks.
3. Sägekette: Kette, die als Schneidewerk- zeug dient.
4. Schwert: Der Teil, der die Sägekette trägt und führt.
5. Stoßfänger mit Dorn: Diese Vorrichtung dient als
Drehpunkt, wenn sie in Berührung mit einem Baum
oder einem Baumstamm ist.
6. Öl-Sichtglas: Fenster zum Prüfen des Kettenölpegels.
7. Kettenbremse: Vorrichtung zum Stoppen bzw.
Verriegeln der Sägekette.
8. Vorderer Griff: Haltegriffan der Vorderseite des
Gerätkörpers.
9. Hinterer Griff: Haltegriffan der Oberseite des
Gerätkörpers.
10. Schalter: Das Gerät wird mit dem Finger aktiviert.
11. Seitliche Abdeckung: Schutzabdeckung für Schwert
und Sägekette, Vorgelege und Kettenzahnrad, wenn
die Kettensäge in Benutzung ist.
12. Spannungswählschalter: Vorrichtung zum Einstellen
der Spannung der Sägekette.
13. Drehknopf: Knopf zum Sichern des
Spannungswählschalters und der seitlichen
Abdeckung.
14. Kettengehäuse: Gehäuse zum Abdecken von Schwert
und Sägekette, wenn das Gerät nicht in Gebrauch ist.
15. Steckerklemme: Eine Vorrichtung, die verhindert,
dass der Stromstecker aus dem Steckteil eines
Verlängerungskabels heraus rutscht.
1
2
3
4
6
5
15
14
7
8
10
9
12
11
13
000BookCS30YWE.indb16000BookCS30YWE.indb16 2017/11/1516:03:142017/11/1516:03:14

17
Deutsch
ALLGEMEINE SICHERHEITSHINWEISE FÜR
ELEKTROGERÄTE
WARNUNG
Lesen Sie sämtliche Sicherheitshinweise und
Anweisungen durch.
Wenn die Warnungen und Anweisungen nicht befolgt
werden, kann es zu Stromschlag, Brand und/oder
ernsthaften Verletzungen kommen.
Bitte bewahren Sie alle Warnhinweise und
Anweisungen zum späteren Nachschlagen auf.
er Begriff„Elektrowerkzeug“ bezieht sich in den
Warnhinweisen auf Elektrowerkzeuge mit Netz-
(schnurgebunden) oder Akkubetrieb (schnurlos).
1) Sicherheit im Arbeitsbereich
a) Sorgen Sie für einen sauberen und gut
ausgeleuchteten Arbeitsbereich.
Zugestellte oder dunkle Bereiche ziehen Unfälle
förmlich an.
b) Verwenden Sie Elektrowerkzeuge niemals an
Orten,andenenExplosionsgefahrbesteht–zum
Beispiel in der Nähe von leicht entflammbaren
Flüssigkeiten, Gasen oder Stäuben.
Bei der Arbeit mit Elektrowerkzeugen kann es zu
Funkenbildung kommen, wodurch sich Stäube oder
Dämpfe entzünden können.
c) SorgenSiebeiderArbeitmitElektrowerkzeugen
dafür,dass sichkeine Zuschauer(insbesondere
Kinder) in der Nähe befinden.
Wenn Sie abgelenkt werden, können Sie die
Kontrolle über das Werkzeug verlieren.
2) Elektrische Sicherheit
a) Elektrowerkzeuge müssen mit passender
Stromversorgung betrieben werden.
Nehmen Sie niemals irgendwelche Änderungen
am Anschlussstecker vor.
Verwenden Sie bei Elektrowerkzeugen
mit Schutzkontakt (geerdet) niemals
Adapterstecker.
Stecker im Originalzustand und passende
Steckdosen reduzieren das Stromschlagrisiko.
b) Vermeiden Sie Körperkontakt mit geerdeten
Gegenständen wie Rohrleitungen, Heizungen,
Herden oder Kühlschränken.
Bei Körperkontakt mit geerdeten Gegenständen
besteht ein erhöhtes Stromschlagrisiko.
c) Setzen Sie Elektrowerkzeuge niemals Regen
oder sonstiger Feuchtigkeit aus.
Wenn Flüssigkeiten in ein Elektrowerkzeug
eindringen, erhöht sich das Stromschlagrisiko.
d) Verwenden Sie das Anschlusskabel
nicht missbräuchlich. Tragen Sie
das Elektrowerkzeug niemals an der
Anschlussschnur, ziehen Sie es nicht damit
heran und ziehen Sie den Stecker nicht an der
Anschlussschnur aus der Steckdose.
Halten Sie die Anschlussschnur von
Hitzequellen, Öl, scharfen Kanten und
beweglichen Teilen fern.
Beschädigte oder verdrehte Anschlussschnüre
erhöhen das Stromschlagrisiko.
e) Wenn Sie ein Elektrowerkzeug im Freien
benutzen, verwenden Sie ein für den
Außeneinsatz geeignetes Verlängerungskabel.
Ein für den Außeneinsatz geeignetes Kabel
vermindert das Stromschlagrisiko.
f) Falls sich der Betrieb des Elektrowerkzeuges
in feuchter Umgebung nicht vermeiden lässt,
verwenden Sie eine Stromversorgung mit
Fehlerstromschutzeinrichtung (Residual
Current Device, RCD).
Durch den Einsatz einer
Fehlerstromschutzeinrichtung wird das Risiko eines
elektrischen Schlages reduziert.
3) Persönliche Sicherheit
a) Bleiben Sie wachsam, achten Sie auf das, was
Sie tun, und setzen Sie Ihren Verstand ein,
wenn Sie mit Elektrowerkzeugen arbeiten.
Benutzen Sie keine Elektrowerkzeuge, wenn
Sie müde sind oder unter Einfluss von Drogen,
Alkohol oder Medikamenten stehen.
Bei der Arbeit mit Elektrowerkzeugen können
bereits kurze Phasen der Unaufmerksamkeit zu
schweren Verletzungen führen.
b) Benutzen Sie eine persönliche
Schutzausrüstung. Tragen Sie immer einen
Augenschutz.
Schutzausrüstung wie Staubmaske, rutschsichere
Sicherheitsschuhe, Schutzhelm und Gehörschutz
senken das Verletzungsrisiko bei angemessenem
Einsatz.
c) Vermeiden Sie unbeabsichtigtes Einschalten.
Achten Sie darauf, dass sich der Schalter
in der Aus- (Off-) Position befindet, ehe Sie
das Gerät mit der Stromversorgung und/
oder Batteriestromversorgung verbinden, es
aufheben oder herumtragen.
Das Herumtragen von Elektrowerkzeugen mit
dem Finger am Schalter oder das Herstellen der
Stromversorgung bei betätigtem Schalter zieht
Unfälle regelrecht an.
d) Entfernen Sie sämtliche Einstellwerkzeuge
(Einstellschlüssel), ehe Sie das
Elektrowerkzeug einschalten.
EinaneinembeweglichenTeildesElektrowerkzeugs
angebrachter Schlüssel kann zu Verletzungen
führen.
e) Sorgen Sie für einen festen Stand. Achten Sie
jederzeit darauf, sicher zu stehen und das
Gleichgewicht zu bewahren.
Dadurch haben Sie das Elektrowerkzeug in
unerwarteten Situationen besser im Griff.
f) Kleiden Sie sich richtig. Tragen Sie keine lose
Kleidung oder Schmuck. Halten Sie Haar,
Kleidung und Handschuhe von beweglichen
Teilen fern.
Lose Kleidung, Schmuck oder langes Haar kann
von beweglichen Teilen erfasst werden.
g) Wenn Anschlüsse für Staubabsaug- und -
sammelvorrichtungen vorhanden sind, sorgen
Sie dafür, dass diese richtig angeschlossen
und eingesetzt werden.
Durch Entfernen des Staubes können
staubbezogene Gefahren vermindert werden.
4) Einsatz und Pflege von Elektrowerkzeugen
a) Überanspruchen Sie Elektrowerkzeuge nicht.
Benutzen Sie das richtige Elektrowerkzeug für
Ihren Einsatzzweck.
Das richtige Elektrowerkzeug erledigt seine Arbeit bei
bestimmungsgemäßem Einsatz besser und sicherer.
b) Benutzen Sie das Elektrowerkzeug nicht, wenn
es sich nicht am Schalter ein- und ausschalten
lässt.
000BookCS30YWE.indb17000BookCS30YWE.indb17 2017/11/1516:03:142017/11/1516:03:14

18
Deutsch
2. Halten Sie die Kettensäge immer mit Ihrer rechten
Hand am hinteren Griffund ihrer linken Hand am
vorderen Griff. Wird die Kettensäge mit umgekehrter
Handhaltung gehalten, erhöht sich die Gefahr einer
Körperverletzung, das sollte nie getan werden.
3. Halten Sie das Elektrowerkzeug nur an den isolierten
Griffflächen, denn die Sägekette könnte verborgene
Leitungen oder das Kabel des Elektrowerkzeugs
berühren. Eine Kettensäge, die ein unter Strom
stehendes Kabel berührt, kann freiliegende Metallteile
des Elektrowerkzeugs unter Strom setzen und der
Bediener kann einen Stromschlag abbekommen.
4. Tragen Sie Schutzbrille und Gehörschutz. Weitere
Schutzausrüstung für Kopf, Hände, Beine und Füße
wird empfohlen. Eine adäquate Schutzkleidung
verringert Körperverletzung durch fliegende Trümmer
oder zufällige Berührung der Sägekette.
5. Schalten Sie die Kettensäge nicht auf einem Baum ein.
Einschalten einer Kettensäge, während man auf einem
Baum ist, kann zu Körperverletzungen führen.
6. Achten Sie immer auf einen sicheren Stand und
betreiben Sie die Kettensäge nur, wenn Sie auf einer
festen, sicheren und ebenen Fläche stehen. Rutschige
oder instabile Flächen wie etwa Leitern können einen
Verlust des Gleichgewichts oder der Kontrolle über die
Kettensäge verursachen.
7. Seien Sie beim Schneiden eines Astes, der unter
Spannung steht, auf einen Ausschlag gefasst. Wenn
die Spannung in den Holzfasern gelöst wird, kann der
federgeladene Ast auf den Bediener ausschlagen und/
oder die Kettensäge außer Kontrolle bringen.
8. Seien Sie beim Schneiden von Unterholz und
Baumtrieben äußerst vorsichtig. Das dünne Material
kann sich in der Sägekette verfangen und auf Sie
peitschen oder Sie aus dem Gleichgewicht bringen.
9. Tragen Sie die Kettensäge ausgeschaltet am vorderen
Griffund halten Sie sie dabei von Ihrem Körper weg.
Bringen Sie beim Transportieren oder zum Verstauen
der Kettensäge immer die Schwertabdeckung an. Eine
ordnungsgemäße Handhabung der Kettensäge wird
die Wahrscheinlichkeit einer zufälligen Berührung der
sich bewegenden Sägekette reduzieren.
10. Befolgen Sie die Anweisungen für das Schmieren,
Spannen der Kette und für den Wechsel von
Zubehörteilen. Eine nicht richtig gespannte oder
geschmierte Kette kann entweder brechen, oder die
Möglichkeit eines Rückstoßes erhöhen.
11. Halten Sie die Griffe trocken, sauber und frei von Öl und
Schmierfett. Schmierige, ölige Griffe sind rutschig und
verursachen einen Verlust der Kontrolle.
12. Schneiden Sie nur Holz. Benutzen Sie die Kettensäge
nicht für Zwecke, für die sie nicht ausgelegt ist.
Zum Beispiel: Benutzen Sie die Kettensäge nicht
zum Schneiden von Kunststoff, Mauerwerk, oder
Baumaterialien, die nicht aus Holz sind. Eine Benutzung
der Kettensäge für andere als die Arbeiten, für die sie
ausgelegt ist, könnte zu einer gefährlichen Situation
führen.
Ursachen und Verhütung von Rückstoß: (Abb. 1)
Ein Rückschlag kann auftreten, wenn die Nase bzw.
Spitze des Schwertes einen Gegenstand berührt,
oder wenn sich das Holz schließt und die Sägekette im
Schnitt einklemmt.
Eine Berührung der Spitze kann in manchen Fällen
einen plötzlichen Rückschlag verursachen, bei dem
das Schwert nach oben und zurück zum Bediener
geschleudert wird.
Ein Einklemmen der Sägekette entlang des oberen
Teils des Schwerts kann das Schwert rasch zum
Bediener hin zurückschieben.
Jedes Elektrowerkzeug, das nicht mit dem Schalter
betätigt werden kann, stellt eine Gefahr dar und
muss repariert werden.
c) Stecken Sie den Stecker der Stromversorgung
oder Batteriestromversorgung vom Gerät
ab, ehe Sie Einstellarbeiten vornehmen,
Zubehörteile tauschen oder das
Elektrowerkzeug verstauen.
Solche präventiven Sicherheitsmaßnahmen
verhindern den unbeabsichtigten Anlauf des
Elektrowerkzeugs und die damit verbundenen
Gefahren.
d) Lagern Sie nicht benutzte Elektrowerkzeuge
außerhalb der Reichweite von Kindern,
lassen Sie nicht zu, dass Personen das
Elektrowerkzeug bedienen, die nicht mit dem
Werkzeug selbstund/oderdiesen Anweisungen
vertraut sind.
Elektrowerkzeuge in ungeschulten Händen sind
gefährlich.
e) Halten Sie Elektrowerkzeuge in Stand. Prüfen
Sie auf Fehlausrichtungen, sicheren Halt
und Leichtgängigkeit beweglicher Teile,
Beschädigungen von Teilen und auf jegliche
andere Zustände, die sich auf den Betrieb des
Elektrowerkzeugs auswirken können.
Bei Beschädigungen lassen Sie das
Elektrowerkzeug reparieren, ehe Sie es
benutzen.
Viele Unfälle mit Elektrowerkzeugen sind auf
schlechte Wartung zurückzuführen.
f) Halten Sie Schneidwerkzeuge scharf und
sauber.
Richtig gewartete Schneidwerkzeuge mit scharfen
Schneidkanten bleiben weniger häufig hängen und
sind einfacher zu beherrschen.
g) Benutzen Sie Elektrowerkzeuge,
Zubehör, Werkzeugspitzen und Ähnliches
in Übereinstimmung mit diesen
Anweisungen – beachten Sie dabei die
jeweiligen Arbeitsbedingungen und die Art und
Weise der auszuführenden Arbeiten.
Der Gebrauch des Elektrowerkzeuges für andere
als die vorgesehenen Anwendungen kann zu
gefährlichen Situationen führen.
5) Service
a) Lassen Sie Elektrowerkzeuge durch
qualifizierte Fachkräfte und unter Einsatz
passender, zugelassener Originalteile warten.
Dies sorgt dafür, dass die Sicherheit des
Elektrowerkzeugs nicht beeinträchtigt wird.
VORSICHT
Von Kindern und gebrechlichen Personen fernhalten.
Werkzeuge sollten bei Nichtgebrauch außerhalb der
Reichweite von Kindern und gebrechlichen Personen
aufbewahrt werden.
WARNHINWEISE ZUR SICHERHEIT DER
KETTENSÄGE
1. Halten Sie alle Körperteile, wenn die Kettensäge in
Betrieb ist, von der Sägekette fern. Achten Sie vor dem
Einschalten der Kettensäge darauf, dass die Sägekette
nichts berührt. Ein Moment der Unachtsamkeit bei der
Benutzung von Kettensägen kann verursachen, dass
sich Ihre Kleidung oder Körperteile in der Sägekette
verfangen.
000BookCS30YWE.indb18000BookCS30YWE.indb18 2017/11/1516:03:142017/11/1516:03:14

19
Deutsch
Diese Reaktionen können beide verursachen, dass Sie
die Kontrolle über die Säge verlieren, was zu schweren
Körperverletzungen führen könnte. Verlassen Sie sich
nicht ausschließlich auf die Sicherheitsvorrichtungen,
die in Ihre Säge eingebaut sind. Als Benutzer einer
Kettensäge sollten Sie mehrere Maßnahmen ergreifen,
um Ihre Schneidearbeiten frei von Unfällen oder
Verletzungen zu halten.
Ein Rückstoß ist das Ergebnis eines Missbrauchs
des Elektrowerkzeugs und/oder von falschen
Arbeitsverfahren oder Bedingungen und kann
vermieden werden, indem man die nachstehend
angegebenen richtigen Vorsichtsmaßnahmen trifft.
○Bewahren Sie einen festen Griff, bei dem Daumen und
Finger die Griffe der Kettensäge umschließen, halten
Sie die Säge mit beiden Händen und positionieren
Sie Ihren Körper und Ihre Arme so, dass Sie
Rückstoßkräften widerstehen können. Der Bediener
kann Rückstoßkräfte kontrollieren, wenn angemessene
Vorsichtsmaßnahmen ergriffen werden. Lassen Sie die
Kettensäge nicht los.
○Überstrecken Sie sich nicht und schneiden Sie
nicht oberhalb der Schulterhöhe. Das hilft eine
unbeabsichtigte Berührung der Spitze zu verhindern
und gewährt eine bessere Kontrolle der Kettensäge in
unerwarteten Situationen.
○Benutzen Sie nur vom Hersteller angegebene
Ersatzschwerter und –ketten. Falsche Ersatzschwerter
und –ketten können ein Brechen der Kette und/oder
einen Rückstoß verursachen.
○Befolgen Sie die Anweisungen des Herstellers für
das Schärfen und die Wartung der Kettensäge.
Eine Verringerung der Tiefenanzeigenhöhe kann zu
vermehrtem Rückstoß führen.
Funktionsweise der Kettenbremse:
Wenn eine Kettensäge mit hoher Geschwindigkeit
auf einen festen Gegenstand trifft, reagiert sie heftig
und es gibt einen Rückstoß. Dies lässt sich schwer
unter Kontrolle halten und könnte gefährlich sein,
insbesondere bei Geräten mit geringem Gewicht,
die in allen möglichen Stellungen benutzt werden
können. Die Kettenbremse stoppt die Drehung der
Kette sofort, wenn es einen unerwarteten Rückstoß
gibt. Die Kettenbremse kann aktiviert werden, indem
Sie mit der Hand gegen den Handschutz drücken, oder
automatisch durch den Rückstoß selbst.
Erst nachdem der Motor vollständig zum Stillstand
gekommen ist, kann die zurückgesetzt werden.
Verschieben Sie den Griffauf die hintere Position
(Abb. 2).ÜberprüfenSie dieFunktion der Kettenbremse
jeden Tag.
ZUSÄTZLICHE SICHERHEITS- UND
WARNHINWEISE
1. Benutzen Sie die Spannung, die auf der Gerätplakette
für die Energiequelle angegeben ist.
Die Benutzung einer höheren Spannung kann zu
Verletzungen führen.
2. Arbeiten Sie ohne Druck. Halten Sie außerdem Ihren
Körper immer warm.
3. Denken Sie vor Beginn der Arbeit die Arbeitsvorgänge
ganz durch und Arbeiten Sie so, dass Unfälle vermieden
werden, sonst kann es zu Verletzungen kommen.
4. Benutzen Sie das Gerät nicht bei schlechtem Wetter,
wie etwa starkem Wind, Regen, Schneefall, Nebel,
oder in Gebieten, wo es leicht zu Steinschlag oder
Lawinen kommen kann.
Bei schlechtem Wetter kann die Urteilskraft
beeinträchtigt sein und die Vibration kann zu
Katastrophen führen.
5. Benutzen Sie das Gerät nicht bei schlechter Sicht, wie
etwa bei schlechtem Wetter oder nachts. Benutzen Sie
es außerdem nicht im Regen bzw. an einem Ort, der
Regen ausgesetzt ist.
Ein instabiler Stand oder Verlust des Gleichgewichts
kann zu einem Unfall führen.
6. Überprüfen Sie vor dem Starten des Gerätes das
Schwert und die Sägekette.
○Wenn das Schwert oder die Sägekette Risse aufweist,
oder das Produkt verkratzt oder verbogen ist, darf das
Gerät nicht benutzt werden.
○Überprüfen Sie, ob das Schwert und die Sägekette
sicher montiert sind. Wenn das Schwert oder die
Sägekette gebrochen oder verschoben sind, kann das
zu einem Unfall führen.
7. Vergewissern Sie sich vor Beginn der Arbeit, dass der
Schalter nicht einrastet, wenn der Entriegelungsknopf
nicht gedrückt wird.
Sollte das Gerät nicht ordnungsgemäß funktionieren,
stellen Sie seine Benutzung sofort ein und verlangen
Sie eine Reparatur bei Ihrer von HiKOKI autorisierten
Service-Werkstatt.
8. Montieren Sie die Kettensäge ordentlich entsprechend
der Gebrauchsanleitung.
Wenn sie nicht korrekt montiert ist, wird sich die
Kettensäge vom Schwert lösen und es kann zu
Verletzungen kommen.
9. Entfernen Sie nie irgendeine der
Sicherheitsvorrichtungen, mit denen die Kettensäge
ausgestattet ist (Bremshebel, Entriegelungsknopf,
Kettenfänger usw.).
Sie dürfen diese außerdem nicht verändern oder
unbeweglich machen.
Es kann zu Verletzungen kommen.
10. Schalten Sie in folgenden Fällen das Gerät aus und
vergewissern Sie sich, dass sich die Sägekette nicht
mehr bewegt:
○Wenn das Gerät nicht in Gebrauch ist, oder repariert
wird.
○Wenn Sie es an eine andere Arbeitsstelle bringen.
○Bei Inspektion, Einstellung, oder Austausch von
Sägekette, Schwert, Kettengehäuse und anderen
Teilen.
○Beim Nachfüllen von Kettenöl.
○Beim Entfernen von Staub usw. vom Gerätkörper.
○Beim Entfernen von Hindernissen, Abfall, oder
von bei der Arbeit erzeugtem Sägemehl aus dem
Arbeitsbereich.
○Wenn Sie das Gerät ablegen, oder Sie sich von ihm
entfernen.
○Darüber hinaus wenn Sie Gefahr verspüren oder ein
Risiko voraussehen.
Wenn sich die Sägekette noch bewegt, kann es zu
einem Unfall kommen.
11. Die Arbeit sollte allgemein nur von einer Person
ausgeführt werden. Achten Sie, wenn mehrere
Personen beteiligt sind, auf einen hinreichenden
Abstand zwischen ihnen.
Insbesondere wenn Sie beim Fällen von stehenden
Bäumen oder bei der Arbeit auf einem Abhang
voraussehen, dass Bäume fallen, rollen, oder rutschen
werden, müssen Sie sicherstellen, dass andere
Arbeiter nicht gefährdet sind.
12. Halten Sie einen Abstand von mindestens 15 m zu
anderen Personen.
Bei Arbeit mit mehreren Personen muss der Abstand
zwischen ihnen mindestens 15 m betragen.
000BookCS30YWE.indb19000BookCS30YWE.indb19 2017/11/1516:03:142017/11/1516:03:14

20
Deutsch
○Es besteht Gefahr, von herumfliegenden Trümmern
getroffen zu werden, und von anderen Unfällen.
○Bereiten Sie vorher einen Pfeifalarm usw. vor und legen
Sie eine geeignete Kontaktmethode für andere Arbeiter
fest.
13. Stellen Sie vor dem Fällen von stehenden Bäumen
folgendes sicher:
○Bestimmen Sie vor dem Fällen einen sicheren
Evakuierungsort.
○Entfernen Sie vorher Hindernisse (z. B. Zweige,
Unterholz).
○Entscheiden Sie auf Grundlage einer umfassenden
Bewertung des Baums, der gefällt werden soll
(z. B. Stammkrümmung, Spannung von Ästen)
und der Situation der Umgebung (z. B. Zustand
von benachbarten Bäumen, Vorhandensein von
Hindernissen, Gelände, Wind) die Richtung, in
die der Baum fallen soll, und planen Sie dann die
Vorgehensweise beim Fällen.
Ein achtloses Fällen kann zu Verletzungen führen.
14. Stellen Sie beim Fällen von stehenden Bäumen
folgendes sicher:
○Achten Sie bei der Arbeit unbedingt sehr sorgfältig auf
die Richtung, in die Bäume fallen.
○Stellen Sie bei der Arbeit auf einem Abhang sicher,
dass der Baum nicht rollen wird und arbeiten Sie immer
auf der bergauf gelegenen Seite des Geländes.
○Wenn der Baum zu fallen beginnt, schalten Sie das
Gerät aus, Warnen Sie die Umgebung ziehen Sie sich
sofort an einen sicheren Ort zurück.
○Wenn sich die Sägekette oder das Schwert während
der Arbeit im Baum verfängt, schalten Sie das Gerät
aus und benutzen Sie einen Keil.
15. Wenn sich während des Gebrauchs die Leistung des
Geräts verschlechtern sollte, oder Sie ein abnormales
Geräusch oder eine abnormale Vibration bemerken,
schalten Sie das Gerät aus, stellen Sie seine Benutzung
ein und bringen Sie es zu Ihrer von HiKOKI autorisierten
Service-Werkstatt zur Inspektion bzw. Reparatur.
Wenn Sie es weiter benutzen, kann es zu Verletzungen
kommen.
16. Wenn das Gerät zu Boden gefallen ist, oder Stößen
ausgesetzt war, untersuchen Sie es sorgfältig auf
Schäden oder Risse und vergewissern Sie sich, dass
es nicht verformt ist.
Wenn das Gerät beschädigt ist, bzw. Risse oder
Verformungen aufweist, kann es zu Verletzungen
kommen.
17. Sichern Sie das Gerät, wenn Sie es im Auto
transportieren, um zu verhindern, dass es sich bewegt.
Es besteht Unfallgefahr.
18. Schalten Sie das Gerät nicht bei angebrachtem
Kettengehäuse ein.
Es kann zu Verletzungen kommen.
19. Vergewissern Sie sich, dass keine Nägel oder andere
Fremdkörper im Material sind.
Wenn die Sägekette auf den Nagel o.ä. trifft, kann es zu
Verletzungen kommen.
20. Um zu vermeiden, dass sich das Schwert im Material
verfängt, wenn Sie an einem Randstreifen entasten,
oder wenn das Schwert beim Schneiden dem Gewicht
des Materials ausgesetzt ist, installieren Sie eine
stützende Plattform in Nähe der Schnittstelle.
Wenn sich das Schwert verfängt, kann es zu
Verletzungen kommen.
21. Wenn das Gerät transportiert oder nach Gebrauch
gelagert werden soll, entfernten Sie entweder die
Sägekette, oder bringen Sie die Kettenabdeckung an.
Wenn die Sägekette mit Ihrem Körper in Berührung
kommt, kann es zu Verletzungen kommen.
22. Pflegen Sie das Gerät adäquat.
○Um sicherzustellen, dass die Arbeit sicher und effizient
durchgeführt werden kann, pflegen Sie die Sägekette,
damit gewährleistet ist, dass sie eine optimale
Schneideleistung erbringt.
○FürdasAustauschenderSägeketteoderdesSchwertes,
die Wartung des Gerätkörpers, das Nachfüllen von Öl
usw. befolgen Sie die Gebrauchsanweisung.
23. Bitten Sie das Geschäft um die Reparatur des Gerätes.
○Modifizieren Sie dieses Produkt nicht, da es bereits die
geltenden Sicherheitsvorschriften erfüllt.
○Wenden Sie sich für alle Reparaturen stets an ihre von
HiKOKI autorisierte Service-Werkstatt.
Der Versuch, das Gerät selbst zu reparieren, kann zu
einem Unfall oder zu Verletzungen führen.
24. Wenn das Gerät nicht gebraucht wird, stellen Sie
sicher, dass es ordnungsgemäß gelagert ist.
Lassen Sie das Kettenöl ab und verwahren Sie das
Gerät außer Reichweite von Kindern oder an einem
abgesperrten Ort.
25. Wenn die Warnplakette nicht mehr lesbar ist, sich
ablöst, oder anderweitig unklar ist, bringen Sie eine
neue Warnplakette an.
Wenden Sie sich für die Warnplakette an ihre von
HiKOKI autorisierte Service-Werkstatt.
26. Halten Sie etwaige örtliche Vorschriften oder
Regelungen bei der Arbeit ein.
000BookCS30YWE.indb20000BookCS30YWE.indb20 2017/11/1516:03:142017/11/1516:03:14
Other manuals for CS 30Y
1
This manual suits for next models
3
Table of contents
Languages:
Other HIKOKI Chainsaw manuals

HIKOKI
HIKOKI CS 3625DC User manual

HIKOKI
HIKOKI CS 3630DB User manual
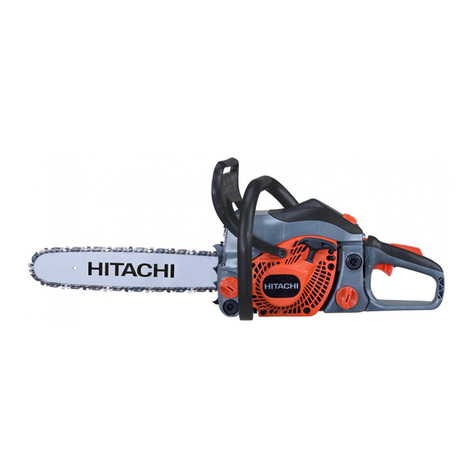
HIKOKI
HIKOKI CS 33EB User manual

HIKOKI
HIKOKI CS 3630DA User manual

HIKOKI
HIKOKI CS 33EDP User manual

HIKOKI
HIKOKI CS 30Y User manual

HIKOKI
HIKOKI CS 3630DB User manual

HIKOKI
HIKOKI CS 3630DB User manual

HIKOKI
HIKOKI CS 3630DC User manual
HIKOKI
HIKOKI CS 51EA User manual
