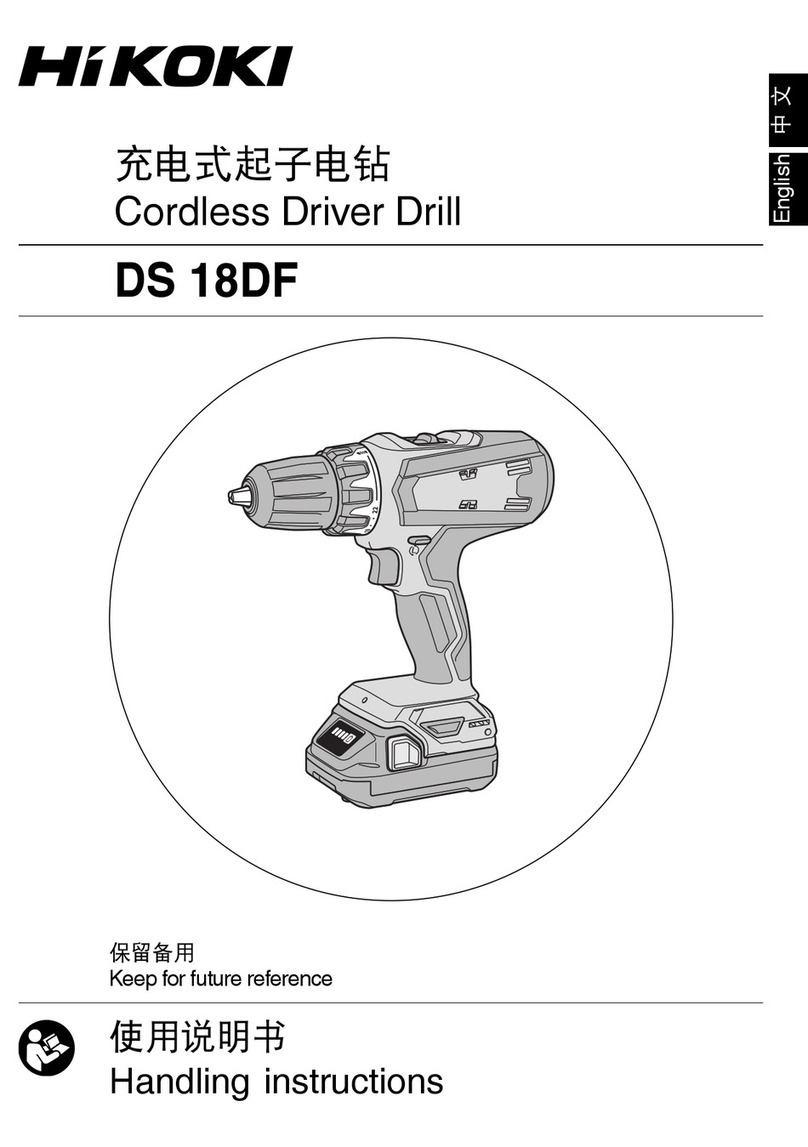
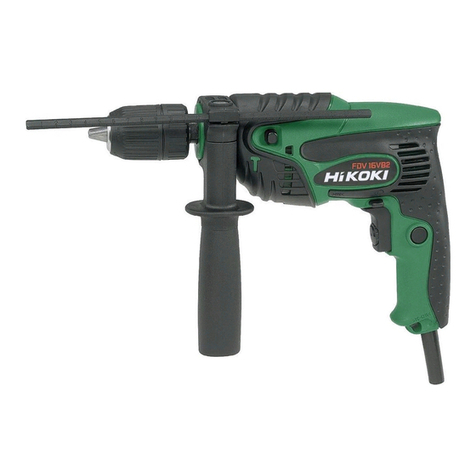
HIKOKI DV 18V User manual

冲击电钻
Impact Drill
DV 18V
使用说明书
Handling instructions
使用前务请详加阅读
Read through carefully and understand these instructions before use.
000BookDV18VChS.indbA000BookDV18VChS.indbA 2018/09/1910:44:582018/09/1910:44:58

12
34
1
2
3
4
56
34
45
7
6!98
0
56
43
7
43
@
7
78
$%
#
^
1
000BookDV18VChS.indb1000BookDV18VChS.indb1 2018/09/1910:44:592018/09/1910:44:59

910
(
8
)
&*
1 Drill chuck
2 Chuck wrench
3 Tighten
4 Loosen
5 Sleeve
6 Retaining ring
7 Side handle
8 Switch trigger
9 Push button
0 mark
! mark
@ Depth gauge
# Change lever
$ Impact
% Rotation
^ Gear shift dial
& Speed control dial
* High speed
( Low speed
) Stopper
警告
Symbols
WARNING
The following show symbols used for the
machine. Be sure that you understand their
meaning before use.
To reduce the risk of injury, user must read
instruction manual.
2
000BookDV18VChS.indb2000BookDV18VChS.indb2 2018/09/1910:44:592018/09/1910:44:59

3
电动工具通用安全警告
警告!
阅读随电动工具提供的所有安全警告、说明、图示和
规定。
保存所有警告和说明书以备查阅。
1) 工作场 地的安全
a) 保持工作场地清洁和明亮。
b) 不要在易爆环境,如有易燃液体、气体或粉尘的
环境下操作电动工具。
c) 操作电动工具时,远离儿童和旁观者。
2) 电气安全
a) 电动工具插头必须与插座相配。绝不能以任何
方式改装插头。需接地的电动工具不能使用任
何转换插头。
b) 避免人体接触接地表面,如管道、散热片和冰
箱。
c) 不得将电动工具暴露在雨中或潮湿环境中。
d) 不得滥用软线。绝不能用软线搬运、拉动电动工
具或拔出其插头。使软线远离热源、油、锐边或
运动部件。
e) 当在户外 使用电动工具时,使用适合户外使用
的延长线。
f) 如果无法避免在潮湿环境中操作电动工具,应
使用带有剩余电流装置(RCD)保护的电源。
3) 人身安全
a) 保持警觉,当操作电动工具时关注所从事的操
作并保持清醒。当你感到疲倦,或在有药物、酒
精或治疗反应时,不要操作电动工具。
b) 使用个人防护装置。始终佩戴护目镜。
c) 防止意外起动。在连接电源和/或电池包、拿起
或搬运工具前确保开关处于关断位置。
d) 在电动工具接通之前,拿掉所有调节钥匙或扳
手。
e) 手不要过分伸展。时刻注意立足点和身体平
衡。
f) 着装适当。不要穿宽松衣服或佩戴饰品。让你的
头发和衣服远离运动部件。
g) 如果提供了与排屑、集尘设备连接用的装置,要
确保其连接完好且使用得当。
h) 不要因为频繁使用工具而产生的熟悉感而掉以
轻心,忽视工具的安全准则。
4) 电动工具使用和注意事项
a) 不要勉强使用电动工具,根据用途使用合适的
电动工具。
b) 如果开关不能接通或关断电源,则不能使用该
电动工具。
c) 在进行任何调节、更换附件或贮存电动工具之
前,必须从电源 上拔掉插头和/或卸下电池包
(如可拆卸)。
d) 将闲置不用的电动工具贮存在儿童所及范围之
外,并且不允许不熟悉电动工具和不了解这些说
明的人操作电动工具。
e) 维护电动工具及其附件。检查运动部件是否调
整到位或卡住,检查零件破损情况和影响电动
工具运行的其他状况。
如有损坏,应在使用前修理好电动工具。
000BookDV18VChS.indb3000BookDV18VChS.indb3 2018/09/1910:44:592018/09/1910:44:59

4
f) 保持切削刀具锋利和清洁。
g) 按照使用说明书,并考虑作业条件和要进行的
作业来选择电动工具、附件和工具的刀头等。
h) 保持手柄和握持表面干燥、清洁,不得沾有油
脂。
5) 维修
a) 由专业维修人员使用相同的备件维修电动工
具。
注意事项
电钻安全警告
1) 带 耳 罩 进 行 冲 击 作业。暴 露 于 噪 声 环 境 会 导 致 失
聪。
2) 使用辅助手柄。失控会导致人身伤害。
3) 当在钻削附件可能触及暗线或其自身导线的场合
进行操作时,要通过绝缘握持面握持工具。钻削附
件碰到带电导线会使工具外露的金属零件带电而
使操作者受到电击。
使用冲击电钻时应注意事项
使用冲击电钻时要戴好耳罩。
使用随工具提供的辅助手柄。
当在钻削附件可能触及暗线或其自身软线之处进
行操作时,要通过绝缘握持面来握持工具。
图 10
规 格
标准附件
选购附件(分开销售)
000BookDV18VChS.indb4000BookDV18VChS.indb4 2018/09/1910:45:002018/09/1910:45:00

5
用 途
○
○
作业之前
1. 电源
2. 电源开关
3. 延伸线缆
4. 选择合适的钻头
○
○
○
5. 钻头的装配和拆卸
癸于带键夹盘 (图 1)
癸于无键夹盘 (图 2)
注∶
图 3
6. 确认钻头旋转方向(图 4)
注意:
7. 装配边柄(图 5)
图 6
8. 冲击式到旋转式的转换(图 7)
注意:
○
○
9. 高低速换档:
图8
000BookDV18VChS.indb5000BookDV18VChS.indb5 2018/09/1910:45:002018/09/1910:45:00

6
使用方法
1. 开关操作
○
○
○
图 9
○
注意:
2. 钻孔
○
○
○
○
○
维护和检查
1. 检查钻头
2. 检查安装螺钉
3. 电动机的维护
4. 检查碳刷
5. 维修零部件一览表
注意∶
改造
注∶
000BookDV18VChS.indb6000BookDV18VChS.indb6 2018/09/1910:45:002018/09/1910:45:00

GENERAL POWER TOOL SAFETY WARNINGS
WARNING
Read all safety warnings, instructions, illustrations and
specifications provided with this power tool.
Failure to follow all instructions listed below may result in
electric shock, fire and/or serious injury.
Save all warnings and instructions for future reference.
The term “power tool” in the warnings refers to your mains-
operated (corded) power tool or battery-operated (cordless)
power tool.
1) Work area safety
a) Keep work area clean and well lit.
Cluttered or dark areas invite accidents.
b) Do not operate power tools in explosive
atmospheres, such as in the presence of
flammable liquids, gases or dust.
Power tools create sparks which may ignite the dust
or fumes.
c) Keep children and bystanders away while
operating a power tool.
Distractions can cause you to lose control.
2) Electrical safety
a) Power tool plugs must match the outlet. Never
modify the plug in any way. Do not use any
adapter plugs with earthed (grounded) power
tools.
Unmodified plugs and matching outlets will reduce
risk of electric shock.
b) Avoid body contact with earthed or grounded
surfaces, such as pipes, radiators, ranges and
refrigerators.
There is an increased risk of electric shock if your
body is earthed or grounded.
c) Do not expose power tools to rain or wet
conditions.
Water entering a power tool will increase the risk of
electric shock.
d) Do not abuse the cord. Never use the cord for
carrying, pulling or unplugging the power tool.
Keep cord away from heat, oil, sharp edges or
moving parts.
Damaged or entangled cords increase the risk of
electric shock.
e) When operating a power tool outdoors, use an
extension cord suitable for outdoor use.
Use of a cord suitable for outdoor use reduces the
risk of electric shock.
f) If operating a power tool in a damp location
is unavoidable, use a residual current device
(RCD) protected supply.
Use of an RCD reduces the risk of electric shock.
3) Personal safety
a) Stay alert, watch what you are doing and use
common sense when operating a power tool.
Do not use a power tool while you are tired
or under the influence of drugs, alcohol or
medication.
A moment of inattention while operating power tools
may result in serious personal injury.
b) Use personal protective equipment. Always
wear eye protection.
Protective equipment such as a dust mask, non-skid
safety shoes, hard hat or hearing protection used for
appropriate conditions will reduce personal injuries.
c) Prevent unintentional starting. Ensure the
switch is in the off-position before connecting to
power source and/or battery pack, picking up or
carrying the tool.
Carrying power tools with your finger on the switch or
energising power tools that have the switch on invites
accidents.
d) Remove any adjusting key or wrench before
turning the power tool on.
A wrench or a key left attached to a rotating part of the
power tool may result in personal injury.
e) Do not overreach. Keep proper footing and
balance at all times.
This enables better control of the power tool in
unexpected situations.
f) Dress properly. Do not wear loose clothing or
jewellery. Keep your hair and clothing away from
moving parts.
Loose clothes, jewellery or long hair can be caught in
moving parts.
g) If devices are provided for the connection of
dust extraction and collection facilities, ensure
these are connected and properly used.
Use of dust collection can reduce dust-related
hazards.
h) Do not let familiarity gained from frequent use
of tools allow you to become complacent and
ignore tool safety principles.
A careless action can cause severe injury within a
fraction of a second.
4) Power tool use and care
a) Do not force the power tool. Use the correct
power tool for your application.
The correct power tool will do the job better and safer
at the rate for which it was designed.
b) Do not use the power tool if the switch does not
turn it on and off.
Any power tool that cannot be controlled with the
switch is dangerous and must be repaired.
c) Disconnect the plug from the power source and/
or remove the battery pack, if detachable, from
the power tool before making any adjustments,
changing accessories, or storing power tools.
Such preventive safety measures reduce the risk of
starting the power tool accidentally.
d) Store idle power tools out of the reach of children
and do not allow persons unfamiliar with the
power tool or these instructions to operate the
power tool.
Power tools are dangerous in the hands of untrained
users.
e) Maintain power tools and accessories. Check
for misalignment or binding of moving parts,
breakage of parts and any other condition
that may affect the power toolʼs operation. If
damaged, have the power tool repaired before
use.
Many accidents are caused by poorly maintained
power tools.
f) Keep cutting tools sharp and clean.
Properly maintained cutting tools with sharp cutting
edges are less likely to bind and are easier to control.
g) Use the power tool, accessories and tool bits
etc. in accordance with these instructions,
taking into account the working conditions and
the work to be performed.
Use of the power tool for operations different from
those intended could result in a hazardous situation.
7
000BookDV18VChS.indb7000BookDV18VChS.indb7 2018/09/1910:45:002018/09/1910:45:00

h) Keep handles and grasping surfaces dry, clean
and free from oil and grease.
Slippery handles and grasping surfaces do not allow
for safe handling and control of the tool in unexpected
situations.
5) Service
a) Have your power tool serviced by a qualified
repair person using only identical replacement
parts.
This will ensure that the safety of the power tool is
maintained.
PRECAUTION
Keep children and infirm persons away.
When not in use, tools should be stored out of reach of
children and infirm persons.
DRILL SAFETY WARNINGS
1) Wear ear protectors when impact drilling. Exposure
to noise can cause hearing loss.
2) Use auxiliary handle(s), if supplied with the tool.
Loss of control can cause personal injury.
3) Hold power tool by insulated gripping surfaces,
when performing an operation where the cutting
accessory may contact hidden wiring or its own
cord. Cutting accessory contacting a “live” wire
may make exposed metal parts of the power tool
“live” and could give the operator an electric shock.
PRECAUTIONS ON USING IMPACT DRILL
1. Wear ear protectors with impact drills.
Exposure to noise can cause hearing loss.
2. Use auxilliary handles supplied with the tool.
Loss of control can cause personal injury.
3. Hold power tool by insulated gripping surfaces,
when performing an operation where the cutting
accessory may contact hidden wiring or its own
cord. Cutting accessory contacting a "live" wire may
make exposed metal parts of the power tool "live" and
could give the operator an electric shock.
4. Before drilling into walls, ceilings or floors, ensure that
there are no concealed power cables inside.
5. Always use the impact drill with clockwise rotation, when
using it as an impact drill. (Fig. 10)
SPECIFICATIONS
Voltage (by areas)* (110 V, 220 V, 230 V, 240 V)
Power input 690 W*
Speed change 1 2
No load speed Forward rotation 0 - 1000/min 0 - 3000/min
Reverse rotation 0 - 600/min 0 - 1800/min
Capacity
Steel 13 mm 8 mm
Concrete 18 mm 13 mm
Wood 40 mm 25 mm
Full load impact rate 8400/min 27300/min
Weight (without cord) 2.0 kg
* Be sure to check the nameplate on product as it is subject to change by areas.
STANDARD ACCESSORIES
(1) Chuck Wrench (Spec. only for keyed chuck) ................ 1
(2) Side Handle .................................................................. 1
(3) Depth Gauge................................................................. 1
Standard accessories are subject to change without notice.
OPTIONAL ACCESSORIES (sold separately)
(1) Impact Drill Bit (for concrete)
3.2 mm - 18 mm dia.
Optional accessories are subject to change without notice.
APPLICATIONS
○By combined actions of ROTATION and IMPACT:
Boring holes in hard materials (concrete, marble, granite,
tiles, etc.)
○By ROTATIONAL action:
Boring holes in metal, wood and plastic.
PRIOR TO OPERATION
1. Power source
Ensure that the power source to be utilized conforms
to the power requirements specified on the product
nameplate.
2. Power switch
Ensure that the power switch is in the OFF position. If the
plug is connected to a receptacle while the power switch
is in the ON position, the power tool will start operating
immediately, inviting serious accident.
3. Extension cord
When the work area is removed from the power source,
use an extension cord of sufficient thickness and rated
capacity. The extension cord should be kept as short as
practicable.
4. Selecting the appropriate drill bit
○When boring concrete or stone
Use the drill bits specified in the Optional Accessories.
○When boring metal or plastic
Use an ordinary metalworking drill bit.
○When boring wood
Use an ordinary woodworking drill bit.
8
000BookDV18VChS.indb8000BookDV18VChS.indb8 2018/09/1910:45:002018/09/1910:45:00

However, when drilling 6.5 mm or smaller holes, use a
metalworking drill bit.
5. Mounting and dismounting of the bit
For keyed chuck (Fig. 1)
(1) Open the chuck jaws, and insert the bit into the chuck.
(2) Place the chuck wrench in each of the three holes in the
chuck, and turn it in the clockwise direction (viewed from
the front side). Tighten securely.
(3) To remove the bit, place the chuck wrench into one of
the holes in the chuck and turn it in the counter-clockwise
direction.
For keyless chuck (Fig. 2)
(1) Mounting the bit
Turn the sleeve counterclockwise and open the chuck.
After inserting the drill bit into the chuck as far it will go,
grip the ring and close the chuck by turning the sleeve
clockwise as viewed from the front.
(2) Dismounting the bit
Grip the ring and open the chuck by turning the sleeve
counterclockwise.
NOTE
When the sleeve does not become loose any further, fix
the side handle to ring, hold side handle firmly, then turn
the sleeve to loosen by hand. (Fig. 3)
6. Check the rotational direction (Fig. 4)
The bit rotates clockwise (viewed from the rear side) by
pushing the R-side of the push button.
The L-side of the push button is pushed to turn the bit
counterclockwise.
(The
and marks are provided on the body.)
CAUTION:
Always use the impact drill with clockwise rotation, when
using it as an impact drill.
7. Fixing the side handle (Fig. 5)
Attach the side handle to the mounting part.
Rotate the side handle grip in a clockwise direction to
secure it.
Set the side handle to a position that is suited to the
operation and then securely tighten the side handle grip.
To attach a depth gauge on the side handle, insert the
gauge into the U-shaped groove on the side handle,
adjust the position of the depth gauge in accordance with
the desired depth of the hole, and firmly tighten the side
handle grip. (Fig. 6)
8. IMPACT to ROTATION changeover (Fig. 7)
Shift the change lever between the right and left positions
to switch easily between IMPACT (rotation and impact)
and ROTATION (rotation only), respectively.
To bore holes in hard materials such as concrete, stone
and tiles, shift the change lever to the right-hand position
(as indicated by the mark). The drill bit operates by
the combined actions of impact and rotation.
To bore holes in metal, wood and plastic, shift the change
lever to the left-hand position (as indicated by the " "
mark). The drill bit operates by rotational action only, as
in the case of a conventional electric drill.
CAUTION:
○Do not use the impact drill in the IMPACT function if the
material can be bored by rotation only. Such action will
not only reduce drill efficiency, but may also damage the
drill tip.
○Operating the impact drill with the change lever in mid-
position may result in damage. When switching, make
sure that you shift the change lever to the correct position.
9. High-speed/Low-speed changeover:
Prior to changing speed, ensure that the switch is in the
OFF position, and the drill has come to a complete stop.
To change speed, rotate the gear shift dial as indicated
by the arrow in Fig. 8. The numeral "1" engraved on the
drill body denotes low speed, the numeral "2" denotes
high speed.
If it is hard to turn the gear shift dial, turn the chuck slightly
in either direction and then turn the gear shift dial again.
HOW TO USE
1. Switch operation
○When the trigger is depressed, the tool rotates. When the
trigger is released, the tool stops.
○The rotational speed of the drill can be controlled by
varying the amount that the trigger switch is pulled.
Speed is low when the trigger switch is pulled slightly and
increases as the trigger switch is pulled more.
○The desired rotation speed can be pre-selected with the
speed control dial.
Turn the speed control dial clockwise for higher speed
and counterclockwise for lower speed. (Fig. 9)
○Pulling the trigger and pushing the stopper, it keeps
the switched-on condition which is convenient for
continuous running. When switching off, the stopper can
be disconnected by pulling the trigger again.
CAUTION:
If the L-side of push button is pressed for reverse bit
rotation, the stopper cannot be used.
2. Drilling
○When drilling, start the drill slowly, and gradually
increasing speed as you drill.
○Always apply pressure in a straight line with the bit. Use
enough pressure to keep drilling, but do not push hard
enough to stall the motor or deflect the bit.
○To minimize stalling or breaking through the material,
reduce pressure on drill and ease the bit through the last
part of the hole.
○If the drill stalls, release the trigger immediately, remove
the bit from the work and start again. Do not click the
trigger on and offin an attempt to start a stalled drill. This
can damage the drill.
○The larger the drill bit diameter, the larger the reactive
force on your arm.
Be careful not to lose control of the drill because of this
reactive force.
To maintain firm control, establish a good foothold, use
side handle, hold the drill tightly with both hands, and
ensure that the drill is vertical to the material being drilled.
MAINTENANCE AND INSPECTION
1. Inspecting the drill bits
Since use of an abraded drill bits will cause motor
malfunctioning and degraded efficiency, replace the drill
bits with a new one or resharpening without delay when
abrasion is noted.
2. Inspecting the mounting screws
Regularly inspect all mounting screws and ensure that
they are properly tightened. Should any of the screws be
loose, retighten them immediately. Failure to do so could
result in serious hazard.
3. Maintenance of the motor
The motor unit winding is the very "heart" of the power
tool. Exercise due care to ensure the winding does not
become damaged and/or wet with oil or water.
9
000BookDV18VChS.indb9000BookDV18VChS.indb9 2018/09/1910:45:012018/09/1910:45:01

4. Inspecting the carbon brushes
For your continued safety and electrical shock protection,
carbon brush inspection and replacement on this tool
should ONLY be performed by a HiKOKI Authorized
Service Center.
5. Service parts list
A : Item No.
B : Code No.
C : No. Used
D : Remarks
CAUTION
Repair, modification and inspection of HiKOKI Power
Tools must be carried out by an Authorized Service
Center.
This Parts List will be helpful if presented with the power
tool to the Authorized Service Center when requesting
repair or other maintenance.
In the operation and maintenance of power tools, the
safety regulations and standards prescribed in each
country must be observed.
MODIFICATIONS
HiKOKI Power Tools are constantly being improved
and modified to incorporate the latest technological
advancements.
Accordingly, some parts (i.e. code numbers and/or
design) may be changed without prior notice.
NOTE:
Due to HiKOKI’s continuing program of research and
development, the specifications herein are subject to
change without prior notice.
10
000BookDV18VChS.indb10000BookDV18VChS.indb10 2018/09/1910:45:012018/09/1910:45:01
11
000BookDV18VChS.indb11000BookDV18VChS.indb11 2018/09/1910:45:012018/09/1910:45:01
ABC D
1995-3441M6×25
2987-5761
3 1 321-814 1 13VLRB-D
3 2 322-357 1 13VLRH-N
4322-8571
5939-5561
6322-8511
7 620-2DD 1 6202DDCMPS2L
8322-8501
9984-1011
10 959-150 1 D6.35
11 32 2- 8 4 5 1
12 316-321 4 D5×45
13 322-852 2
14 322-858 1
15 322-841 1
16 322-842 1
17 322-840 1
18 322-859 1
19 322-847 1 "20-22"
2 0 ------------ 1
21 322-848 1
22 306-353 1 S-22
23 981-328 1
24 319-535 1 D3.5
25 322-844 1 "11"
2 6 ------------
27 322-849 1
28 322-860 1 D5
29 322-846 1
30 608-DDM 1 608DDC2PS2L
31 939-553 1
32 1 360-654C 1 110V
32 2 360-654E 1 220V-230V
32 3 360-654F 1 240V
33 322-843 1
34 981-824 2 D4×45
35 1 340-589C 1 110V
35 2 340-589E 1 220V-230V
35 3 340-589F 1 240V
36 608-VVM 1 608VVC2PS2L
37 322-861 1
3 8 ------------ 1
39 301-653 3 D4×20
40 322-862 1
41 322-853 1
42 322-854 1
43 321-630 1 100L
44 1 322-517 1 220V-240V
44 2 322-518 1 "GBR (110V)"
45 999-041 2
46 955-203 2
4 7 ------------ 1
48 994-273 1
49 992-635 1
50 321-631 1 55L
51 1 1321-634 1 110V-240V
51 2 322-519 1 "GBR (110V)"
52 984-750 2 D4×16
53 937-631 1
ABC D
54 953-327 1 D8.8
5 5 ------------ 1
5 0 1 ------------ 1
5 0 2 ------------ 1
503 303-709 1
12
000BookDV18VChS.indb12000BookDV18VChS.indb12 2018/09/1910:45:012018/09/1910:45:01
13
000BookDV18VChS.indb13000BookDV18VChS.indb13 2018/09/1910:45:012018/09/1910:45:01
14
000BookDV18VChS.indb14000BookDV18VChS.indb14 2018/09/1910:45:012018/09/1910:45:01
810
Code No. C99131625 F
Printed in China
服务中心
工机商业(上海)有限公司
上海市闵行区浦江工业园区三鲁路3585号7幢3楼
制造商
福建高壹工机有限公司
福建省福州市福兴投资区湖塘路
000BookDV18VChS.indb15000BookDV18VChS.indb15 2018/09/1910:45:012018/09/1910:45:01

Other manuals for DV 18V
3
Table of contents
Other HIKOKI Drill manuals

HIKOKI
HIKOKI DS 14DJL User manual

HIKOKI
HIKOKI DS 12DD User manual

HIKOKI
HIKOKI D 6VA User manual

HIKOKI
HIKOKI DM 20V User manual

HIKOKI
HIKOKI DB 3DL2 User manual

HIKOKI
HIKOKI D 10VC3 User manual

HIKOKI
HIKOKI DV 22V User manual

HIKOKI
HIKOKI D 13VL User manual

HIKOKI
HIKOKI DV 13SS User manual

HIKOKI
HIKOKI DS 12DA User manual

HIKOKI
HIKOKI DM 20V User manual

HIKOKI
HIKOKI DV 13VSS User manual

HIKOKI
HIKOKI D 6SH User manual

HIKOKI
HIKOKI D 13VL User manual

HIKOKI
HIKOKI D 10VG User manual

HIKOKI
HIKOKI DS18DF User manual

HIKOKI
HIKOKI DN 18DSL User manual

HIKOKI
HIKOKI DS 18DD User manual

HIKOKI
HIKOKI DS 14DJL User manual

HIKOKI
HIKOKI DS 14DSDL User manual