Hilka S1J-AJ10-10 Quick start guide

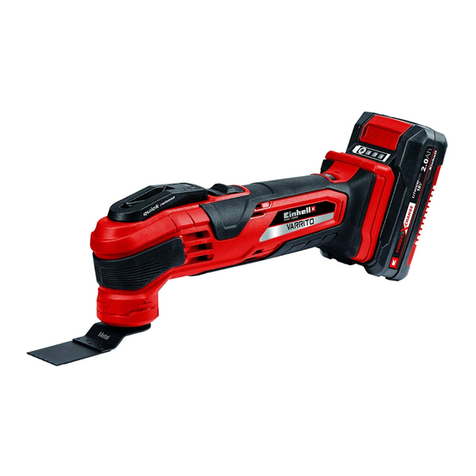
9.6V Rotary Tool Kit
Model: S1J-AJ10-10
Waste electrical products should not be disposed of with household waste.
Please recycle where facilities exist.
Check with your local authority or retailer for recycling advice.

SAFETY & OPERATING INSTRUCTIONS
Please retain these instructions for future use and referral.
READ THESE INSTRUCTIONS IN FULL BEFORE ATTEMPTING TO USE THE ROTARY TOOL KIT.
Safety
This equipment is not intended for use by persons (including children) with reduced physical, sensory or
mental capabilities, or lack of experience and knowledge, unless they have been given supervision or
instruction concerning the use of the machine by a person responsible for their safety. Children should be
supervised to ensure that they do not play with this equipment.
Stay alert, watch what you are doing and use common sense when operating a power tool. Do not use•
apowertoolwhileyouaretiredorundertheinuenceofdrugs,alcoholormedication.Amomentof
inattention while operating power tools may result in serious personal injury.
Usesafetyequipment.Alwaysweareyeprotection.Safetyequipmentsuchasdustmask,non-skid•
safety shoes, hard hat, or hearing protection used for appropriate conditions will reduce personal
injuries.
Avoidaccidentalstarting.Ensuretheswitchisintheoffpositionbeforepluggingin.Carryingpower•
toolswithyourngerontheswitchorplugginginpowertoolsthathavetheswitchoninvitesaccidents.
Removeanyadjustingkeyorwrenchbeforeturningthepowertoolon.Awrenchorakeyleftattached•
to a rotating part of the power tool may result in personal injury.
Do not overreach. Keep proper footing and balance at all times. This enables better control of the•
power tool in unexpected situations.
Dress properly. Do not wear loose clothing or jewellery. Keep your hair, clothing and gloves away from•
moving parts. Loose clothes, jewellery or long hair can be caught in moving parts.
If devices are provided for the connection of dust extraction and collection facilities, ensure these are•
connected and properly used. Use of these devices can reduce dust related hazards.
Keep work area clean and well lit• . Cluttered and dark areas invite accidents.
Donotoperatepowertoolsinexplosiveatmospheres,suchasinthepresenceofammable•
liquids, gases or dust. Power tools create sparks which may ignite the dust or fumes.
Power tool use and care
Do not force the power tool. Use the correct power tool for your application. The correct power tool will•
do the job better and safer at the rate for which it was designed.
Donotusethepowertooliftheswitchdoesnotturnitonandoff.Anypowertoolthatcannotbe•
controlled with the switch is dangerous and must be repaired.
Disconnect the plug from the power source before making any adjustments, changing accessories,•
or storing power tools. Such preventive safety measures reduce the risk of starting the power tool
accidentally.
Store idle power tools out of the reach of children and do not allow persons unfamiliar with the power•
tool or these instructions to operate the power tool. Power tools are dangerous in the hands of
untrained users.
Maintain power tools. Check for misalignment or binding of moving parts, breakage of parts and any•
other condition that may affect the power tools operation. If damaged, have the power tool repaired
before use. Many accidents are caused by poorly maintained power tools.
Keep cutting tools sharp and clean. Properly maintained cutting tools with sharp cutting edges are less•
likely to bind and are easier to control.
Use the power tool, accessories and tool bits etc., in accordance with these instructions and in the•
manner intended for the particular type of power tool, taking into account the working conditions and
the work to be performed. Use of the power tool for operations different from intended could result in a
hazardous situation.
-1-

COMPONENTS
-2-
Rotary tool1.
Battery pack2.
Charger base3.
ON/OFF rotary speed control switch4.
Spindle lock button5.
Spindle clamp6.
Locking spanner7.
Set of collets8.
Attachmentspindles9.
Drill set10.
Mounted grinding wheels11.
Grinding wheels12.
Polishing wheels13.
Grinding disks14.
Mounted brushes15.
Charging adaptor: 12V ac16.
TechnicalSpecications
Rotary Drill
Model:
Voltage:
No Load speed:
Mains Charger
Voltage:
Hertz:
Output:
Class:
S1J-AJ10-10
9.6V dc
2500 to 5000 / min
220 – 240 Vac
50 Hz
12V dc
II
109
8
7
65
4
3
12
11
12 13
16
14
15

-3-
Assemblyofaccessories
Remove the spindle clamp (6) by pressing down on the spindle lock (5) and unscrewing the spindle•
clamp. If the spindle clamp is locked ON it will be necessary to use the locking spanner (7).
Insert a suitable sized collet (8) for the attachment to be used and replace the spindle clamp.•
Place the attachment within the collet and lock down the spindle clamp (6) with the locking spanner (7)•
Note:
-Alwaysinserttheaccessoryintothecolletasfaraspossibletominimizerunoutandunbalance.
Grinding wheel assembly (item 12 or 14) with the appropriate spindle (9).
Placeabrewashereithersideofthegrindingwheel/diskforcorrectassembly.
---------------------------------------
Polishing wheel assembly (item 13) with the appropriate spindle (9).
Screw the spindle (9) into the polishing wheel (13).
Note: There is a central pin hole on the polishing wheel to locate the spindle into.
--------------------------------------
Operation
Switch ‘ON’ the unit by turning the rotary speed control (4). The speed can be regulated as required. Do
not put the unit down when the motor is still running.
Note: High loading at low speeds can reduce the life of the motor.

-4-
Battery Charging
Remove the battery from the unit by pressing both sides of the battery to release the catches•
Place the battery into the charger base (3)•
Insert the charger base lead into the charging adaptor (16)•
Insertthechargingadaptor(16)intoamainsoutlet.TheredLEDonthechargingbasewillilluminate•
indicating charging is in progress.
Maintenance
This unit has been designed to operate over a long period of time with a minimum of maintenance.
Continuous satisfactory operation depends upon care and regular cleaning.
Cleaning
Keep the ventilation slots of the unit clean to prevent overheating of the motor. Regularly clean the
housing with a soft cloth, preferably after each use. Keep the ventilation slots free from dust and dirt.
If heavier cleaning is required use a soft cloth moistened with soapy water. Never use solvents such as
petrol, alcohol, ammonia water, etc., as these solvents may damage the plastic parts.
Lubrication
This unit requires no additional lubrication.
Special safety instructions
When you put the unit away the motor must be switched off and moving parts must have reached a
standstill.
Never use the axle locking button if the unit is operating.
Make sure that the spring chuck diameter is the same as the axle diameter of the accessory.
Use a clamping device for securing the work piece.
Keep your hands away from the work piece.

267-1224-Issue1-R.W.23-10-09
If faults cannot be remedied, contact the Helpline on 020 8391 6767
GUARANTEE
This product is guaranteed for domestic use for a period of 12 months against faulty manufacture or materials.
This guarantee does not affect the statutory rights of the consumer. In the event of any problem occurring
please contact our Helpline at the number above for advice. This product is not guaranteed for HIRE purposes.
Home Retail Group
489-499AveburyBoulevard,
Central Milton Keynes,
MK9 2NW
Table of contents
