Hills FD52012 User manual

Everyday™
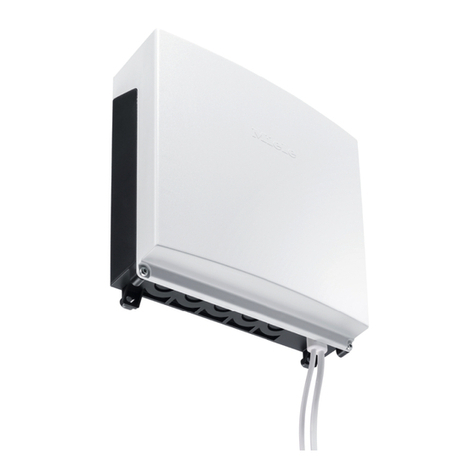
Retracting Clothesline
Product Manual
A
A
A
TO SUIT MODEL:
Retracting 5 Line
PD4205c Everyday Retracting Product Manual.indd 1 4/11/11 11:24 AM

2
Congratulations
Congratulations on the purchase of your new Hills Everyday Retracting Clothesline,
which will bring you many years of trouble free and efficient drying.
It is important that you read this Product Manual thoroughly before installation and use.
In this way you will benefit from all the design features and enjoy safe use of the product.
Thank you for choosing Hills.
Warning
• DonotallowchildrenorpetstoswingontheClotheslineoritemsoflaundry.
• Donotuseforanypurposeotherthantohanganddrywashing.
• DonotuseyourClotheslineifpartsarewornordamaged.
• Donotreleasethelockingmechanismwhenthereareclothesattachedtothelines.
• ThecontentsofthisRetractingLineareunderspringtension.
• DonotremovetheendplatesorattempttodismantletheRetractingLinecabinet.
• Donotallowthearmandlinestoretractuncontrolledasthismayleadtopersonalinjury
or property damage. Hold the arm securely and walk it back to the cabinet.
• Patentsandregistereddesignsapplytothisproduct.
Carton Contents
Part name Qty.
Retracting line cabinet 1
Receivingbracket 1
Introduction
Optional Post Mounting Kits
IfyouchoosetomountyourRetractingClotheslinecabinetorreceivingbracketonposts,
thefollowingproductsareavailable.
Post Kits:
FD52012–HillsEveryday™Post Kit Retracting Clothesline
Mount Bar Kits:
FD52008–HillsMountBarRetractingClothesline
PD4205c Everyday Retracting Product Manual.indd 2 4/11/11 11:24 AM

3
Mounting Options
Mounting Options
Determinewhichofthefourmountingoptionsmostsuitsyourrequirements.
Wall to Wall
Wall to Post
Requires:
1 Post Kit
Post to Wall
Requires:
1 Post Kit
1MountBarKit
Post to Post
Requires:
2PostKits
1MountBarKit
Volume 1426795 (mm³)
MID MARKET RETRACTING LINE
D434
2010
Revision 4 - 09.02.10 - DHN
6
D
C
B
A
E
F
G
H
E
A
B
C
D
F
54321 211101987
87654321
G
019
SCALE:1:5
A2
2111
H
Project:
X. Xxxxxxxx
DO NOT SCALE DRAWING.
Projection.
:etaD:devorppA
Date:XX.XX.XX
Drawing Number
1
Estimated Mass:
Checked:
XX.XX.XXX. Xxxxxxxx Date:
Drawn:
Issued / Received Issue:
Sheet 1 of 1
TM
Colour:
Material:
Finish:
Project Number
Sheet
DIMENSIONS IN MILLIMETRES.
Third Angle
size
FD52007
RETRACTING - 5 LINE
REFER TO INDIVIDUAL COMPONENTS
2450 (grams)
REFER TO DRAWING SPECIFICATION
REFER TO COLOUR TABLE
Description
Hills Industries Limited
ABN 35 007 573 417
Home & Hardware Products
Unit H, 5 Butler Boulevard
Burbridge Business Park
Adelaide Airport
South Australia 5950
Copyright©
Additives:
Note:Minimumoperatingdistanceis2.0m(6'6").
Maximumoperatingdistanceis6.5m(21'4").
PD4205c Everyday Retracting Product Manual.indd 3 4/11/11 11:24 AM

4
Site Selection
Step 1 - Select a suitable location
1.1 Select a suitable location for either wall or post mounted installations.
1.2 Thisproducthasbeendesignedtomountandoperatebetween2.0m(6'6")and
6.5m(21'4").
1.3 Alwaysleaveapproximately1.5m(5')clearanceeachsideofthelineandanywall
fence/shed etc.
Note: This product must only be installed on sound structural walls. May not
be suitable for mounting on timber or cladded dwelling unless the cabinet or
receivingbracketismounteddirectlytoverticalstuds–NOTTOCLADDING.
Donotmountdirectlyontocladdingmaterials.
Ifyouhaveanydoubt,contactyourlocalhardwarestoreorinstaller.
1.5m(5')clearancefrom
obstructions either side
Receivingbracket
Cabinet
Mounting surface
Arm
Mounting surface
2.0m(6'6")minimumto
6.5m(21'4")maximum
PD4205c Everyday Retracting Product Manual.indd 4 4/11/11 11:24 AM

5
Volume 1426795 (mm³)
MID MARKET RETRACTING LINE
D434
2010
Revision 4 - 09.02.10 - DHN
6
D
C
B
A
E
F
G
H
E
A
B
C
D
F
54321 211101987
87654321
G
019
SCALE:1:5
A2
2111
H
Project:
X. Xxxxxxxx
DO NOT SCALE DRAWING.
Projection.
:etaD:devorppA
Date:XX.XX.XX
Drawing Number
1
Estimated Mass:
Checked:
XX.XX.XXX. Xxxxxxxx Date:
Drawn:
Issued / Received Issue:
Sheet 1 of 1
TM
Colour:
Material:
Finish:
Project Number
Sheet
DIMENSIONS IN MILLIMETRES.
Third Angle
size
FD52007
RETRACTING - 5 LINE
REFER TO INDIVIDUAL COMPONENTS
2450 (grams)
REFER TO DRAWING SPECIFICATION
REFER TO COLOUR TABLE
Description
Hills Industries Limited
ABN 35 007 573 417
Home & Hardware Products
Unit H, 5 Butler Boulevard
Burbridge Business Park
Adelaide Airport
South Australia 5950
Copyright©
Additives:
Cabinet
fasteners
Cabinet
fasteners
User’s
head height
50mm(2")
User’s
head height
50mm(2")
60mm
(2¼")
115mm
(4½")
125mm
(5")
Receiving
bracket
fasteners
Receiving
bracket
fasteners
Note:thereceivingbracketshould
be located at a height to ensure the
clothesline is close to horizontal.
Locationofreceiving
bracket fasteners are
approximately25mm
(1")aboveuser'shead
height(wheninstalled
onlevelground).
For post mounting a
Receivingbracket,the
top of the post should
be approximately
125mm(5")above
user'sheadheight.
(wheninstalledonlevel
ground).
Locationofcabinet
fasteners are
approximately60mm
(2¼")aboveuser's
head height.
For post mounting
a cabinet, the top
of the post should
be approximately
115mm(4½")above
user'sheadheight.
Mount bar
Top of post Top of post
Post kit
Note:thereceivingbracketshould
be located at a height to ensure the
clothesline is close to horizontal.
Installation Height
Wall Installation
Step 2 – Recommended installation height
2.1 For all installations, we recommend the operational height for the line is
approximately50mm(2")abovetheuser’sheadheight.
2.2 For the heights and combinations of wall/post installations refer to the appropriate
details below.
Post Installation
Cabinet
Cabinet
Receiving bracket
Receiving bracket
Post kit
PD4205c Everyday Retracting Product Manual.indd 5 4/11/11 11:24 AM

6
Drill2holesusing
masonry drill
Product centreline
30mm
Mount hole centres
Top of
product
Product centreline
Step 3 – Mounting your cabinet to a wall
3.1 Prepare your cabinet location
Determinethebestlocationfortheinstallationofyourproduct(refertopage4).
Mark out a centre line for your product within your allocated site.
3.2 Ensurethateithersideofthiscentrelineandtheareawherethecabinetistobe
installedonthewallisfreefrompipesandotherobstructions(Fig. 1).
3.3 Mark the cabinet mount centres on the wall at the desired installation height
(refertopage5andthetablebelow).
Centres
(mm)
Centres
(inch)
705 27¾
Fig. 1
Installation
3.4 Drill holes in wall
Masonry fasteners are not included with this product. When attaching to a sound
masonrywall,werecommendusingmasonrysleeve(hexhead)anchors(diameter
8mmx45mm).
3.5 Ifyouareusingthesefasteners,drillaø8mm(5/16")holeusingamasonry
drill(Fig 2).
Note: If you are mounting to a different wall type, consult your hardware store for
adviceontheappropriatefastenerstouse.
Fig. 2
Mount
centres
Ensuresurrounding
area is free from
obstructions
‘Mount Hole Centres’
2.0m(6'6")to
6.5m(21’4")
PD4205c Everyday Retracting Product Manual.indd 6 4/11/11 11:24 AM

7
Installation
Step 3 (continued) – Mounting your cabinet to a wall
3.6 Removethearmfromthecabinetbypullingonthetwoblueendcaps.Removethe
endcoversonlyfromthecabinetbyunscrewingthetwoscrews(Fig 3).
3.7 Locatethecabinetonthewall,ensurecabinetislevel.Usingappropriatewall
fasteners secure cabinet to the wall.
3.8 Reattachthecabinetendcoversandsecurewiththescrews.Retarmintocabinet.
Fig. 3
Masonry anchor
(Notincluded)
Masonry anchor
(Notincluded)
Endcover
Endcoverscrew
Arm
Endcoverscrew
Blueendcap
PD4205c Everyday Retracting Product Manual.indd 7 4/11/11 11:24 AM

8
Step 4 – Mounting your cabinet to a post
4.1 Prepare your cabinet location
Determinethebestlocationfortheinstallationofyourproduct(refertopage4).
Mark out a centreline for your product within your allocated site.
4.2 Determineyourpostlocations.
Install as per the instructions supplied with your post kit.
Refertodiagramonpage5todeterminetheinstallationheight.
Refertopage2forthepostkitavailable.
4.3 To post mount your cabinet you will need to purchase a matching
mountbarkit(refertopage2).
4.4 Attach the mount bar to the post as per instructions supplied with your
mount bar kit.
Fig. 4
Ensuresurroundingarea
is free from obstruction
Product centreline
Installation
2.0m(6'6")to
6.5m(21’4")
PD4205c Everyday Retracting Product Manual.indd 8 4/11/11 11:24 AM

9
Step 4 (continued) – Mounting your cabinet to a post
4.5 Removethearmfromthecabinetbypullingonthetwoblueendcaps.Removethe
endcoversonlyfromthecabinetbyunscrewingthetwoscrews(Fig 5).
4.6 Locatethecabinetwiththepredrilledholesinthemountbar(soldseparately).
Usingthefastenersandinstructionsprovidedwiththemountbarkitsecurethe
cabinettothepostassembly(Fig 5).
4.7 Reattachthecabinetendcoversandsecurewiththescrews.Retarminto
cabinet.
Fig. 5
Post kit
(soldseparately)
Endcover
Endcover
Washer
Washer
M8nylocnut
M8x45
socket
head bolt
Mount bar
(soldseparately)
Installation
Endcover
Endcoverscrew
Endcoverscrew
Arm
Endcoverscrew
Endcoverscrew
Blueendcap
PD4205c Everyday Retracting Product Manual.indd 9 4/11/11 11:24 AM

10
Step 5 – Mounting your receiving bracket to a wall
5.1 Prepare your receiving bracket location
Mark the mount hole centres on your pre-determined centreline at the desired
height(refertopage5).Ensuretherearenopipesorobstructionsinthe
surrounding area.
5.2 Drill holes in the wall
Refertopage6forinstructionsondrillingholesandappropriatefasteners.
5.3 Securing your receiving bracket to the wall
Insertthemasonryfastenersandsecure(notincludedwiththisproduct).(Fig. 6).
Receivingbracket
Product centreline
Masonry anchor
Fig. 6
Installation
PD4205c Everyday Retracting Product Manual.indd 10 4/11/11 11:24 AM

11
Step 6 – Mounting your receiving bracket to a post
6.1 Prepare your receiving bracket location
Onthepre-determinedproductcentre,locatethepositionforyourpostand
receivingbracket.Refertopage4.
6.2 Install your post as per the instructions supplied with your post kit.
Refertodiagramonpage5todeterminetheinstallationheightofyourpost.
Refertopage2forthepostkitavailable.
6.3 Secure the receiving bracket to a post
Usingthefastenerssuppliedwithyourpostkitattachthereceivingbracket
tothepostkitassembly(Fig. 7).
Fig. 7
Receivingbracket
Washer
Washer
M8nylocnut
Post kit
(soldseparately)
BoltM8x70socketheadbolt
Installation
PD4205c Everyday Retracting Product Manual.indd 11 4/11/11 11:24 AM

12
Operation
Step 7 – Operation
WARNING: Do not release the lock mechanism when there are clothes attached to
the lines.
7.1 Toextendthearmandlineassembly,removethearmfromthecabinetbypullingon
thetwoblueendcaps.Holdingthehandlermlywalktowardsthereceivingbracket
(Fig 8).
Fig. 8
Pull both end caps to
removearmfromcabinet
Pull arm out of cabinet and extend
towardsreceivingbracket
Blueendcap
PD4205c Everyday Retracting Product Manual.indd 12 4/11/11 11:24 AM

13
Step 7 (continued) – Operation
7.2 Toattachthearmstothereceivingbracket,gripthearmwitheachhandeitherside
ofthereceivingbracketandplacethearmwithinthebracketensuringthetwopins
inthebracketengageintotheholesinthearm(Fig 9).
Operation
Fig. 9
Ensurepinsareengagedintoarm
Rotate and guide the arm
to secure onto locking pins
withinthereceivingbracket
Blueendcap
PD4205c Everyday Retracting Product Manual.indd 13 4/11/11 11:24 AM

14
Step 7 (continued) – Operation
7.3 To tension the lines:
Withthearmengagedcorrectlyinthereceivingbracketturnthetensionknobon
thecabinetclockwisetotension(Fig 10).
To un-tension the lines:
WARNING:Ensurethelinesarenotundertensionbeforeun-latchingandreleasing
the arm.
7.4 Withalltheclothesandwashingremovedfromthelinesrotatethetensionknobanti
clockwise(Fig 11).
Fig. 10
Tension
Release tension
Operation
Fig. 11
PD4205c Everyday Retracting Product Manual.indd 14 4/11/11 11:24 AM

15
Step 7 (continued) – Operation
7.5 Holdthearmrmly,removeitfromthereceivingbracketandwalkitbacktothe
cabinet keeping the arm horizontal and in line with the cabinet.
WARNING: Do Not release the arm and allow it to retract uncontrolled.
7.6 Replacethearmintoitspositioninthecabinet(Fig 12).
Note:Ifthelinereturnsunevenlytothecabinetpullthearmout1monceortwice
andallowtoreturnuntillineisstoredevenly.
Push and pull up
Push and pull up
Operation
Fig. 12
PD4205c Everyday Retracting Product Manual.indd 15 4/11/11 11:24 AM

16
Operation
Step 8 – Adjusting tension
8.1 If after installation you find your product is not tensioning uniformly, please follow
steps8.2to8.5.
8.2 Withthearmengagedinthereceivingbracketandthetensionerintheunlocked
position,pulldownonthelinesindividuallytoresetthelinetension(Fig 13).
8.3 Removearmfrombracketandreturnittothecabinet.
8.4 Pull out arm again, locate in bracket and tension with knob.
8.5 Repeatiftensionisstillnotadequatelyeven.
Fig. 13
Tensioning knob
in the unlocked
position
Arm engaged in
receivingbracket
Pull down on lines to
help reset line tension
PD4205c Everyday Retracting Product Manual.indd 16 4/11/11 11:24 AM

17
Operation
Fig. 15Fig. 14
Fig. 16
Fig. 17
* Steps8.7to8.10canalsobeusedifyounoticeyourarmisnotsittinginthereceiving
bracketparalleltothewallandrequiresadjustment(Fig 17).
Tensioning knob
in the unlocked
position
'Figure8'knotdiameter
whentight=10mm
PVC line
Grommet
Arm tube
Knot(detailFig15)
Parallel to wall
10mmtail
8.6 Ifaftertryingthemethodinsteps8.2to8.5,yourproductisstillnotevenlytensioned
toyoursatisfaction,youcanmanuallyadjustthetensionofindividuallines.*
8.7 To manually tension a line:
Feed back the particular line through the arm. Make sure tensioning knob is in the
unlockedposition(Fig 14).
8.8 Loosentheknotsecuringtheline(ensurethegrommetdoesn'tfallout)andpullthe
line to your desired tension.
8.9 Ensureknotistiedcorrectlytostoplinepullingthrougharmwhenclothesareapplied
totheline(Fig 15).Re-tieknottore-secureline(Fig 16).
8.10 Repeatmanualtensioningmethodforanyotherlinesthatrequiretensionadjustment.
PD4205c Everyday Retracting Product Manual.indd 17 4/11/11 11:25 AM

18
Hills Handy Hints
Whenhangingthickorbulkyitems,wesuggestyoulaytheitemovermorethanoneline.
When you don’t expect to fill the capacity of your clothesline, hang your clothes on the
outer lines, as this will allow clothes to dry more easily.
Care and Maintenance
Regularly inspect all components and check for wear and tear or damage.
Ensurefastenersaresecure.Ifthereisanydamage,partsshouldbereplacedwith
original Hills spares. The Clothesline should be repaired before using again.
Your Clothesline should be periodically wiped clean with a damp cloth
and mild detergent.
Wedonotrecommendtheuseofoilor‘WD’typelubricantsonanypart
of the Clothesline.
To maintain appearance and durability of coatings on metal components
we recommend a twice yearly application of a reputable brand of car polish or wax.
Handy Hints
Hills Smart Pegs
Available from leading retailers
•Stylish,contemporaryclothespegs
•Dualmouldedforcomfortandgrip
•UVstabilisedforsunprotection
•Rust-resistantstainlesssteelspring
•Selectionoffashioncolours
WARNING:CHOKINGHAZARD!
Smallparts.Notforchildrenunder3yrs.
Nottobeusedasatoy.
PD4205c Everyday Retracting Product Manual.indd 18 4/11/11 11:25 AM

19
Warranty
Hills Warranty
1.HillsprovidesconsumerswiththefollowingwarrantyinrelationtothisProduct,
inadditiontocomplyingwiththerequirementsofanyrelevantlegislation,including
theCompetitionandConsumerAct2010(Cth)inAustraliaandtheConsumer
GuaranteesAct1993inNewZealand(theActs),exceptwhereaNewZealand
consumeracquirestherelevantProductforthepurposesofabusiness.
2.Inthiswarranty,wehaveusedthefollowingdenitions:
(a)Hills, our or wemeansHillsHoldingsLimited(ABN35007573417)
of159PortRoadHindmarshSouthAustralia5007;
(b)ProductsmeansthefollowinggoodsmanufacturedbyHills(includingproducts
manufacturedforHillsbyitscontractmanufacturers):Hills Everyday Retracting
Clothesline;
(c)Material means a material or component used by Hills in the manufacture
oftheProducts;
(d)Warranty Periodmeans10yearsfromthedateofpurchaseoftherelevant
Product and, in relation to polycore line, means a period of 1 year from the date of
purchaseoftheProduct.IftheProductorpart(asthecasemaybe)isrepairedor
replaced,therewillbenoextensiontotheoriginalwarrantyperiod;and
(e)Workmanship means the handling, assembly and manufacturing processes
performed by or on behalf of Hills in order to manufacture the Products.
3. Hills warrants that for the duration of the Warranty Period, all Products will be free
of faults arising from defects in Workmanship or Materials, on the terms and conditions
set out in this warranty.
4.HillsundertakesthatifduringtheWarrantyPeriodanyProduct,oranypart
ofaProduct,hasfailedtooperatecorrectlyduetofaultyWorkmanshipordefective
Material,itwillrepairorreplacetheProductorpart(asthecasemaybe)freeofcharge
providedthatthefollowingprocedureismet:
(a)TheconsumermustcontactHillsuponbecomingawareofanydefecttoa
Product. The contact details for Hills are set out in this warranty and under
the heading “Hills Contacts”.
(b)FollowingconsultationwithHills,Hillswilldeterminewhetherthereisadefect,
andifsoHillsagreesto(atHills’option):
i.inthecaseofgoods–repair,replaceorsupplyequivalentgoods,orpay
thecostofanyofthoseremediestotheconsumer;or
ii.inthecaseofservices–supplytheservicesagainorpaythecostofhaving
theservicessuppliedagain.
(c)IfHillsrequeststhereturnoftheapplicableProductorpart,Hillswillbe
responsible for the collection and freight costs of returning that Product or part.
TheconsumeragreestoassistHillswithanyreasonablerequesttoenableHills
to collect such Product or part.
(d)HillsalsoagreestoberesponsibleforthefreightcoststodeliveranynewProduct
or replacement part to the consumer.
PD4205c Everyday Retracting Product Manual.indd 19 4/11/11 11:25 AM

20
Warranty
5.Thiswarrantyisinadditiontoanynon-excludablelegalrightsorremediesconferred
on the consumer under any applicable Act and any similar laws. To the extent
permittedbylaw,Hills'liabilityforanynon-excludableconditionorwarrantyislimited
torectifyinganydefectatitsoption,assetoutinparagraph4(b).
6.SubjecttotherequirementsofanyapplicableActorlegislationandtotheextent
permittedbylaw,noliability(whetherexpressedorimplied)ofanynaturewhatsoever,
isacceptedbyHillsforanyconsequentialloss,damageorinjuryarisingasaresult
of any fault in the Products.
7. This warranty does not extend to damage to Products which occurs during transit
or transportation, or which is caused by any abuse, accident or improper installation,
connection, use, adjustment or repair or use of goods otherwise than in accordance
with instructions issued by Hills.
8.ThewarrantyonProductsiswaivedifanyadditionorattachmenttotheProducts
donothaveHills'specicapprovalorarenotsoldasHillsproducts.TheProducts
are designed to perform specific tasks under established test loads and unauthorised
attachments may produce stresses for which the design is not appropriate.
9.ThefollowingappliestoconsumerswhopurchasedarelevantProductinAustralia:
OurgoodscomewithguaranteesthatcannotbeexcludedundertheAustralian
ConsumerLaw.Youareentitledtoareplacementorrefundforamajorfailure
and compensation for any other reasonably foreseeable loss or damage.
Youarealsoentitledtohavethegoodsrepairedorreplacedifthegoodsfail
tobeofacceptablequalityandthefailuredoesnotamounttoamajorfailure.
Hills Contacts
Wearecommittedtoprovidingyouwithcompletecustomersatisfaction.Ifyouhave
anyquestionsorcommentsaboutourproductsorservicespleasecontactyournearest
customerservicecentreduringtheirlocalbusinesshours:
Australia
1300300564
New Zealand
092623052
United States
8775341371(Eastern)
Europe
+44(0)1189738971(UK)
enquiries@greenergardensolutions.co.uk
South Africa
0214421540
info@stingray.co.za
Hills Websites
www.hills.com.au
HillsBrandedProducts
www.hillsholdings.com.au
HillsHoldingsLimited
PD4205c Everyday Retracting Product Manual.indd 20 4/11/11 11:25 AM
This manual suits for next models
1
Table of contents
Popular Laundry Accessories manuals by other brands

Whirlpool
Whirlpool LRF4001RY quick start guide

Bosch
Bosch WTVC5330US - 6.7 cu. Ft. Vision 500 Series Electric... installation instructions

GE
GE SBSD137 installation instructions

Xavax
Xavax 111377 operating instructions

Maytag
Maytag 12001908 instruction sheet

American Dryer Corp.
American Dryer Corp. ML-758 parts manual