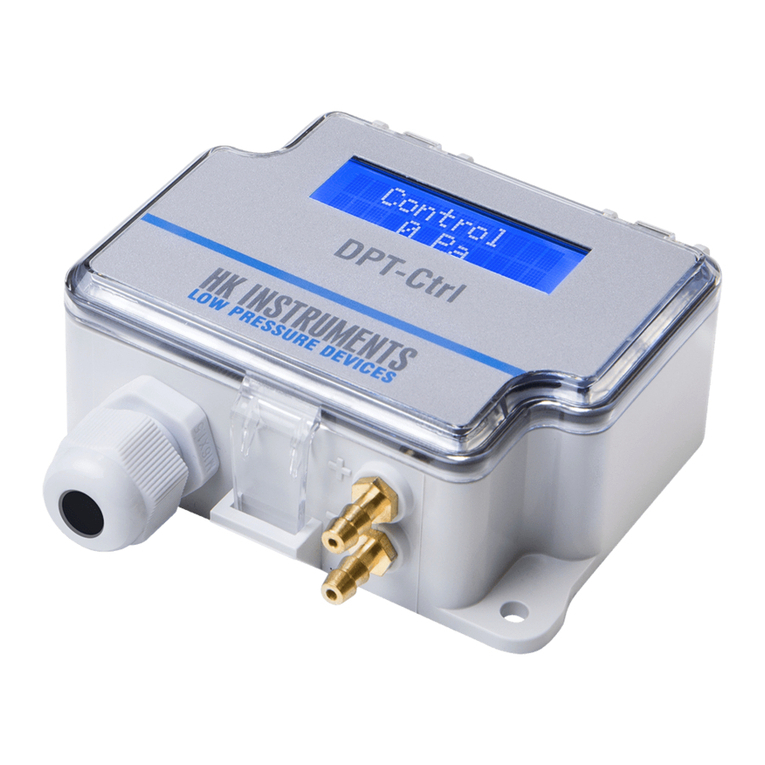
HK Instruments DPT-Ctrl Series User manual

Copyright HK Instruments 2020 www.hkinstruments. Installaon version 9.0 2020
INSTALLATION
INSTRUCTIONS
AIR HANDLING CONTROLLER
DPT-Ctrl Series
• READ THESE INSTRUCTIONS CAREFULLY BEFORE
ATTEMPTING TO INSTALL, OPERATE OR SERVICE THIS
DEVICE.
• Failuretoobservesafetyinformaonandcomplywith
instruconscanresultinPERSONALINJURY,DEATHAND/OR
PROPERTY DAMAGE.
• Toavoidelectricalshockordamagetoequipment,disconnect
powerbeforeinstallingorservicinganduseonlywiringwith
insulaonratedforfulldeviceoperangvoltage.
• Toavoidpotenalreand/orexplosiondonotuseinpotenally
ammableorexplosiveatmospheres.
• Retaintheseinstruconsforfuturereference.
• Thisproduct,wheninstalled,willbepartofanengineered
systemwhosespecicaonsandperformancecharacteriscs
arenotdesignedorcontrolledbyHKInstruments.Review
applicaonsandnaonalandlocalcodestoassurethatthe
installaonwillbefunconalandsafe.Useonlyexperiencedand
knowledgeabletechnicianstoinstallthisdevice.
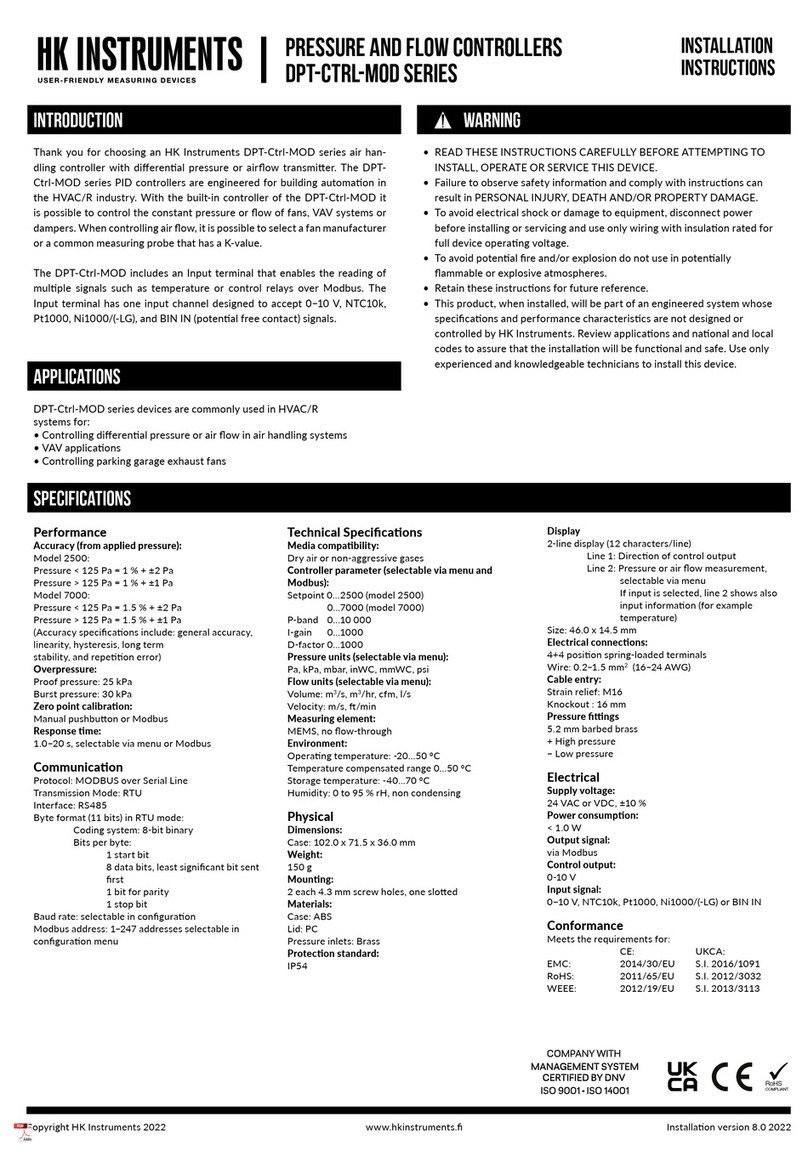
ThankyouforchoosinganHKInstrumentsDPT-Ctrlseriesairhan-
dlingcontrollerwithdierenalpressureorairowtransmier.The
DPT-CtrlseriesPIDcontrollersareengineeredforbuildingautoma-
onintheHVAC/Rindustry.Withthebuilt-incontrolleroftheDPT-
Ctrlit ispossibleto control the constant pressureorowof fans,
VAVsystemsordampers.Whencontrollingairow,itispossibleto
selectafanmanufactureroracommonmeasuringprobethathasa
K-value.
DPT-CtrlseriesdevicesarecommonlyusedinHVAC/Rsystemsfor:
•Controllingdierenalpressureorairowinairhandlingsystems
•VAVapplicaons
•Controllingparkinggarageexhaustfans
SPECIFICATIONS
Performance
Accuracy (from applied pressure):
Model2500:
Pressure<125Pa=1%+±2Pa
Pressure>125Pa=1%+±1Pa
Model7000:
Pressure<125Pa=1.5%+±2Pa
Pressure>125Pa=1.5%+±1Pa
(Accuracyspecicaonsinclude:generalaccuracy,
linearity,hysteresis,longterm
stability,andrepeonerror)
Overpressure:
Proofpressure:25kPa
Burstpressure:30kPa
Zero point calibraon:
Automacautozeroormanualpushbuon
Response me:
1.0−20s,selectableviamenu
Technical Specicaons
Media compability:
Dryairornon-aggressivegases
Controller parameter (selectabe via menu):
Setpoint0...2500/7000Pa
P-band0...100000
I-me0...1000s
D-factor0...100
Pressure units (select via menu):
Pa,kPa,mbar,inWC,mmWC,psi
Flow units (select via menu):
Volume:m3/s,m3/hr,cfm,l/s
Velocity:m/s,/min
Measuring element:
MEMS,noow-through
Environment:
Operangtemperature:-20...50°C,
-40Cmodel:-40...50°C
Modelswithautozerocalibraon-5...50°C
Temperaturecompensatedrange0...50°C
Storagetemperature:-40...70°C
Humidity:0to95%rH,noncondensing
Physical
Dimensions:
Case:90.0x95.0x36.0mm
Weight:
150g
Mounng:
2each4.3mmscrewholes,onesloed
Materials:
Case:ABS
Lid:PC
Protecon standard:
IP54
Display
2-linedisplay(12characters/line)
Line1:Direconofcontroloutput
Line2:Pressureorairowmeasurement,
selectableviamenu
Size:46.0x14.5mm
Electrical connecons:
4-screwterminalblock
Wire:0.2–1.5mm2(12–24AWG)
Cable entry:
Strainrelief:M16
Knockout:16mm
Pressure ngs
5.2mmbarbedbrass
+Highpressure
−Lowpressure
Electrical
Voltage:
Circuit:3-wire(VOut,24V,GND)
Input:24VACorVDC,±10%
Output:0–10V,selectableviajumper
Powerconsumpon:<1.0W
Resistanceminimum:1kΩ
Current:
Circuit:3-wire(mAOut,24V,GND)
Input:24VACorVDC,±10%
Output:4–20mA,selectableviajumper
Powerconsumpon:<1.2W
Maximumload:500Ω
Minimumload:20Ω
Conformance
MeetsrequirementsforCEmarking:
EMCDirecve2014/30/EU
RoHSDirecve2011/65/EU
WEEEDirecve2012/19/EU
WARNINGINTRODUCTION
APPLICATIONS
RoHS 2
2011/65/EU
COMPANY WITH
MANAGEMENT SYSTEM
CERTIFIED BY DNV GL
= ISO 9001 = ISO 14001 =

Copyright HK Instruments 2020 www.hkinstruments. Installaon version 9.0 2020
SCHEMATICS
DIMENSIONAL DRAWINGS
Figure 1 - Mounng orientaon
Connecon for display
Terminal block
Pressure
sensor
Menu buons
LED
SELECT
UP
DOWN
ZERO
CONTROL OUT
P/V OUT
24 V
GND
CTRL OUTPUT
PRESSURE
4–20 mA
Out
0–10 V
90.0
77.0
71.5
53.0
4.2
95.0
36.0
DPT-Ctrl
YES NO NO
INSTALLATION
1)Mountthedeviceinthedesiredlocaon(seestep1).
2)Openthelidandroutethecablethroughthestrainreliefand
connectthewirestotheterminalblock(s)(seestep2).
3)Thedeviceisnowreadyforconguraon.
WARNING!Applypoweronlyaerthedeviceisproperlywired.
STEP 2: WIRING DIAGRAMS
ForCEcompliance,aproperlygroundedshieldingcableisrequired.
1)Unscrewthestrainreliefandroutethecable.
2)Connectthewiresasshowningure2.
3)Tightenthestrainrelief.
Figure 2a - Wiring diagram
Control output
Pressure/Flow output
24 V
GND
+Power supply
24 VDC / 24 VAC
0–10 V / 4–20 mA
0–10 V / 4–20 mA
STEP 1: MOUNTING THE DEVICE
1)Selectthemounnglocaon(duct,wall,panel).
2)Usethedeviceasatemplateandmarkthescrewholes.
3)Mountwithappropriatescrews.
MOUNTING THE DEVICE CONTINUED
Figure 2b - Output mode selecon:
Default selecon 0–10 V for both
Jumper installed to the two upper pins on the le side:
4–20 mA output selected for control output
Ctrl output
Pressure
Jumper installed to the two lower pins on the le side:
0–10 V output selected for control output
Jumper installed to the two upper pins on the right side:
4–20 mA output selected for pressure
Jumper installed to the two lower pins on the right side:
0–10 V output selected for pressure

Copyright HK Instruments 2020 www.hkinstruments. Installaon version 9.0 2020
CONFIGURATION CONTINUED
2)If
Commonprobe
selected:selectmeasurementunitsusedinthe
formula(akaFormulaunit)(i.e.l/s)
b. If
Commonprobe
selectedinstep1:
Each common probe has a specic K-value. Select the K-value from
commonprobemanufacturer’sspecicaons.
AvailableK-valuerange:0.001...9999.000
1)Selectthefunconingmodeofthecontroller
-Select
Manufacturer
whenconnecngDPT-Ctrltoafan
withpressuremeasurementtaps
-Select
Commonprobe
whenusingDPT-Ctrlwithacommon
measurmentprobethatfollowstheformula:
q = k ∙ √∆P
(i.e.FloXact)
MANUFACTURER
Common probe
SELECT
UP
DOWN
Common probe Flakt Woods
SELECT
UP
DOWN
FORMULA UNIT
l/s
SELECT
UP
DOWN
3)SelectK-value
a.Ifmanufacturerselectedinstep1:
EachfanhasaspecicK-value.SelecttheK-valuefromfanmanufac-
turer’sspecicaons.
K-VALUE
9000.000
SELECT
UP
DOWN
3)Selectpressureunitfordisplayandoutput:Pa,kPa,mbar,inWCor
mmWC.
PRESS. UNIT
Pa
SELECT
UP
DOWN
4)Pressureoutputscale(POUT).Selectpressureoutputscaleto
improveoutputresoluon.
P OUTPUT MAX
2000 Pa
SELECT
UP
DOWN
5)Responseme:Selectresponsemebetween1.0-20s.
RESPONSE TIME
20 s
SELECT
UP
DOWN
6)Selectthesetpointofthecontroller.
REF PRESSURE
100 Pa
SELECT
UP
DOWN
7)Selectproporonalbandaccordingtoyourapplicaon
specicaons.
P-VALUE
206
SELECT
UP
DOWN
8)Selectintegraonmeaccordingtoyourapplicaonspecicaons.
I-VALUE
4.00
SELECT
UP
DOWN
9)Selectderivaonmeaccordingtoyourapplicaonspecicaons.
D-VALUE
1.00
SELECT
UP
DOWN
10)Pushselectbuontoexitmenuandtosavechanges.
SELECT
EXIT MENU SELECT
Select FLOW when controlling an air ow.
CONTROL UNIT
FLOW
SELECT
UP
DOWN
4)Selectowunitfordisplayandoutput:
Flowvolume:m3/s,m3/h,cfm,l/s
Velocity:m/s,f/min
FLOW UNIT
m3/s
SELECT
UP
DOWN
5)Flowoutputscale(VOUT):Selectowoutputscaletoimprove
outputresoluon.
V OUTPUT MAX
50.000 m3/s
SELECT
UP
DOWN
6)Responseme:Selectresponsemebetween1.0–20s.
RESPONSE TIME
20 s
SELECT
UP
DOWN
step 3: CONFIGURATION
7)Selectasetpointofthecontroller.
REF FLOW
0.025 m3/s
SELECT
UP
DOWN
CONTROL UNIT
PRESSURE
SELECT
UP
DOWN
2)Selectthefunconingmodeofthecontroller:PRESSUREorFLOW.
Select PRESSURE when controlling a dierenal pressure.
1)AcvatethedeviceMenubypushingthetheselectbuonfor2
seconds.

Copyright HK Instruments 2020 www.hkinstruments. Installaon version 9.0 2020
NOTE! Always zero the device before use.
Tozerothedevicetwooponsareavailable:
1)ManualPushbuonzeropointcalibraon
2)Autozerocalibraon
Does my transmier have an autozero calibraon? See the product
label.Ifitshows-AZinthemodelnumber,thenyouhavetheautozero
calibraon.
1)ManualPushbuonzeropointcalibraon
NOTE:Supplyvoltagemustbeconnectedatleastonehour priorto
zeropointadjustment.
a)Disconnectbothpressuretubesfromthepressureportslabeled+
and–.
b)PushdownthezerobuonunltheLEDlight(red)turnsonand
thedisplayreads“zeroing”(displayopononly).(seegure4)
c)Thezeroingofthedevicewillproceedautomacally.Zeroingis
completewhentheLEDturnso,andthedisplayreads0(display
opononly).
d)ReinstallthepressuretubesensuringthattheHighpressuretube
isconnectedtotheportlabeled+,andtheLowpressuretubeis
connectedtotheportlabeled−.
Thesellerisobligatedtoprovideawarrantyofveyearsforthedeliv-
eredgoodsregardingmaterialandmanufacturing.Thewarrantyperiod
isconsideredtostartonthedeliverydateoftheproduct.Ifadefectin
rawmaterialsoraproduconawisfound,thesellerisobligated,when
theproductissenttothesellerwithoutdelayorbeforeexpiraonof
thewarranty,toamendthemistakeathis/herdiscreoneitherbyre-
pairingthedefecveproductorbydeliveringfreeofchargetothebuy-
eranewawlessproductandsendingittothebuyer.Deliverycosts
fortherepairunderwarrantywillbepaidbythebuyerandthereturn
costsbytheseller.Thewarrantydoesnotcomprisedamagescausedby
accident, lightning, ood or other natural phenomenon, normal wear
andtear,improperorcarelesshandling,abnormaluse,overloading,im-
properstorage,incorrectcareorreconstrucon,orchangesandinstal-
laonworknotdonebythesellerorhis/herauthorizedrepresentave.
Theseleconofmaterialsfordevicespronetocorrosionisthebuyer’s
responsibility,unlessotherwiseislegallyagreedupon.Shouldtheman-
ufactureralterthestructureofthedevice,thesellerisnotobligatedto
makecomparablechangestodevicesalreadypurchased.Appealingfor
warrantyrequiresthatthebuyerhascorrectlyfullledhis/herdues
arisenfromthedeliveryandstatedinthecontract.Thesellerwillgive
anewwarrantyforgoodsthathavebeenreplacedorrepairedwithin
thewarranty,howeveronlytotheexpiraonoftheoriginalproduct’s
warrantyme.Thewarrantyincludestherepairofadefecvepartor
device, orifneeded,a new part or device,but not installaon orex-
change costs. Under no circumstance is the seller liable for damages
compensaonforindirectdamage.
2)Autozerocalibraon
If the device includes the oponal autozero circuit, no acon is re-
quired.
Autozero calibraon (-AZ) isanautozerofunconinthe form ofan
automaczeroingcircuitbuiltintothePCBboard.Theautozerocali-
braon electronically adjusts the transmier zero at predetermined
me intervals(every10 minutes).The funcon eliminatesalloutput
signaldriduetothermal,electronicormechanicaleects,aswellas
theneedfortechnicianstoremovehighandlowpressuretubeswhen
performing inial or periodic transmier zero point calibraon. The
autozeroadjustmenttakes4secondsaerwhichthedevicereturnsto
itsnormalmeasuringmode.Duringthe4secondadjustmentperiod,
theoutputanddisplayvalueswillfreezetothelatestmeasuredvalue.
Transmiers equipped with the autozero calibraon are virtually
maintenancefree.
a) Disconnect both pressure tubes from the pressure ports labeled
+ and –.
b) Push down the zero button (joystick) until the LED light (red)
turns on and the display reads “zeroing” (display option only). (see
Figure 6)
c) The zeroing of the device will proceed automatically. Zeroing is
complete when the LED turns off, and the display reads 0 (display
option only).
d) Reinstall the pressure tubes, ensuring the High pressure tube is
connected to the port labeled +, and the Low pressure tube is
connected to the port labeled −.
Press down buon
LED turns ON
Display reads “Zeroing”
LED
Figure 4
ZEROING THE DEVICE CONTINUED
SELECT
EXIT MENU SELECT
11)Pushselectbuontoexitmenu.
CONFIGURATION CONTINUED
8)Selectproporonalbandaccordingtoyourapplicaon
specicaons.
P-VALUE
206
SELECT
UP
DOWN
9)Selectintegraonmeaccordingtoyourapplicaon
specicaons.
I-VALUE
4.00
SELECT
UP
DOWN
10)Selectderivaonmeaccordingtoyourapplicaon
specicaons.
D-VALUE
1.00
SELECT
UP
DOWN
STEP 4: ZEROING THE DEVICE
WARRANTY POLICY
RECYCLING/DISPOSAL
The parts le over from installaon should be
recycled according to your local instrucons.
Decommissioned devices should be taken to a
recyclingsitethatspecializesinelectronicwaste.
Thelidofthedevicehastobeclosedwhentheoperaontemperature
isbelow0°C.Thedisplayneeds15minutestowarmupifthedevice
isstartedintemperaturebelow0°C.
NOTE!Thepowerconsumponrisesandtherecanbeanaddional
errorof0,015voltswhentheoperaontemperatureisbelow0°C.
-40C MODEL: OPERATION IN COLD ENVIRONMENT
This manual suits for next models
2
Other HK Instruments Controllers manuals
