HKC P7H6 User manual

User Manual
HKC P7H6

2
Introduction
Installation ...............................................3
Safety ........................................................ 3
Warning/Caution ......................................... 4
Main unit description .................................. 7
Remote Control .......................................... 8
OSD basic adjustment ................................ 9
Installation Guide .........................................9
Channels ............................................... 10
Auto tuning ......................................... 10
Tune typ ................................................ 10
DTV Manual Tuning ............................ 11
ATV Manual Tuning ............................ 11
Program Edit ....................................... 12
Delete channels .................................. 12
Skip channels....................................... 12
Move channels .................................... 12
Antenna power ................................... 13
Software update ................................. 13
Image settings ........................................... 14
Sound settings .......................................... 15
Time settings ............................................. 16
Option settings ......................................... 17
Lock settings .............................................. 18
Electronic Program Guide (EPG) .......... 19
Personal Video Recorder (PVR) ............. 20
USB features .............................................. 21
Specications ............................................. 22
Troubleshooting ........................................ 23
Useful Information and Licences........... 25
Index

3
Introduction
Thank you very much for purchasing your LED TV. It serves as a normal colour
TV and a PC monitor. To enjoy your set fully from the very beginning, read this
manual carefully and keep it handy for future reference.
INSTALLATION
1. Locate the TV in the room where direct light does not strike the screen. Total darkness
or a reection on the picture screen can cause eyestrain. Soft and indirect lighting is
recommended for comfortable viewing.
2. Allow enough space between the TV and the wall to permit ventilation.
3. Avoid excessively warm locations to prevent possible damage to the TV or premature
component failure.
4. This TV can be connected to AC 100-240V~ 50/60Hz.
5. Do not install the TV in a location near heat sources such as radiators, air ducts, direct
sunlight, or in closed compartments and closed areas. Do not cover the ventilation
openings when using the TV.
6. The indicator light will last for about 30 seconds after the power has been tumed off.
Wait until the indicator light goes out before repowering the TV.
SAFETY
1. DO NOT expose the television to extremely high temperatures (below 5° C and above
35° C) or extreme humidity (less than 10% and more than 75%).
2. DO NOT expose the television to direct sunlight.
3. Prevent the television from coming into contact with liquids.
4. Make sure that no objects get into the television and do not place vases of water on
the television.
5. Unplug the power cord and remove the antenna cable during a lightning storm
(especially during lightning).
6. Do not walk on the cable and ensure that the cable is fully unrolled.
7. Do not overload outlets or extension cords, as this may result in the risk of re or
electric shock.
8. Use a soft, dry cloth (without volatile substances) to clean the television.
9. Do not attempt to repair the television yourself if it is defective. Contact us by sending

4
Warning
CAUTION: TO AVOID THE RISK OF ELECTRIC SHOCK. DO NOT
REMOVE COVER (OR BACK).
NO USER- SERVICEABLE PARTS INSIDE.
REFER SERVICING TO QUALIFIED SERVICE PERSONNEL.
This symbol is intended to alert the user to avoid the risk
of electric shock, do not disassemble this equipment by anyone
except a qualied service personnel.
This symbol is intended to alert the user to the presence of
important operating and maintenance instructions in
the literature accompanying the equipment.
CAUTION
RISK OF ELECTRIC SHOCK
DO NOT OPEN

5
Caution
Caution
High voltages are used in the operation of this
product.
Do not open the product’s casing. Refer
servicing to qualied service personnel.
Caution
To prevent re or electrical shock hazard, do
not expose the main unit to moisture. Do not
place objects lled with liquids, such as vases,
on the TV.
Caution
Do not drop or push objects into the television
cabinet slots or openings. Never spill any kind
of liquid on the television receiver.
Caution
Avoid exposing the main unit to direct sunlight
and other sources of heat. Do not stand the
television receiver directly on other products
which give off heat: e. g. video cassette
players and audio ampliers. Do not block the
ventilation holes in the back cover. Ventilation
is essential to prevent failure of electrical
components. Do not squash power supply
cord under the main unit or other heavy
objects.
-
-
-
-

6
Caution
Caution
Never stand on, lean on or suddenly push the
product or its stand. You should pay special
attention to children.
Caution
Do not place the main unit on an unstable
cart stand, shelf or table. Serious injury to an
individual, and damage to the television, may
result if it should fall.
Caution
When the product is not used for an extended
period of time, it is advisable to disconnect the
AC power cord from the AC outlet.
Caution
The LED panel used in this product is made of
glass and is therefore breakable. This product
must not be dropped or banged. If the LED
Panel breaks be careful ofbeing injured by
broken glass.

7
tekst
Control Panel Button Function
TV Connections
Connect the USB to the USB jack on the set
Main unit description
VOL+ : Volume up.
VOL- : Volume down
CH+: TV channel up.
CH- : TV channel down.
MENU : Press to select the main menu.
SOURCE : Select the input signal.
POWER : Switch on when in standby mode or to enter the standby mode.
HDMI input terminal
USB input terminal
Headphone output terminal
Mini-AV input terminal
Power switch
DC input terminal
TV input terminal
NOTE
• It is only 500 mA MAX of DC current output when you connect
with USB jack.
• To ensure the mobile HD works well, you should use other
power supply for the mobile HD and don’t use the USB jack in
the same time.
• It supports mobile HD by connecting with USB jack (must be
more than 2 Gb). The partitions of the mobile HD can’t be
more than 4 partitions. The max partition is 2 Tb. It supports
FAT/FAT32 les. The max FAT le is 4Gb and the max FAT32
le is 2Tb.

8
tekstRemote Control
Switch the TV between on and standby mode.
P.MODE
Select the picture mode.
S.MODE
Select the sound mode.
Mute and restore your TV sound.
0-9
0-9 numbers. Press to select a programme.
EPG Displays the EPG (Electronic Programme Guide).
S.TITLE
Start or close subtitles (DTV and MEDIA mode).
TEXT Access the Teletext items, if available (TV mode).
Return to the previous viewing channel
AUDIO
In TV mode, selectable for the audio language (DTV mode).
To put the sound in stereo (ATV mode).
VOL-/VOL+
Adjust the volume (+ higher, - lower).
CH-/CH+
Select a channel (up/down).
TV
RADIO
Switch between TV and radio channels (if available).
SOURCE
Switch between different sources (antenna-USB-HDMI).
ENTER
Run or conrm the selected option.
MENU
MENU
Displays the OSD menu (On Screen Display).
EXIT
Leave the OSD menu (On Screen Display).
HOLD
Fix a passage of several pages on the screen with teletext.
REVEAL
Show any hidden info in teletext.
SIZE
Enlarge the image with teletext.
INDEX
Selecting page numbers from the teletext index.
S.PAGE
Show any hidden pages with teletext.
Go to next le (USB-mode).
Start or pause (USB-mode).
Fast rewind (USB-mode).
Fast forward (USB-mode).
Go to previous image/chapter (USB-mode).
Go to next image/chapter (USB-mode).
Red, green, yellow and blue button: to select the relevant
choices in the various menus
P.MODE
MUTE
POWER
VOL VOL+
S.MODE
EPG
TV
RADIO
S.TITLE
TEXT
AUDIO
SOURCE
HOLD
REVEAL
SIZE
EXIT
INDEX
S.PAGE
ENTER
CH+
MENU

9
Installation Guide
If this is the rst time you are turning on the TV and there are no programs in the
TV memory, the installation Guide menu will appear on the screen.
1. Press the /buttons to select the language.
2. Press the /buttons to select the local country.
Note:
Searching for platform will take a long time, please be patient and don’t turn
off the TV.
OSD basic adjustment
10
OSD basic adjustment
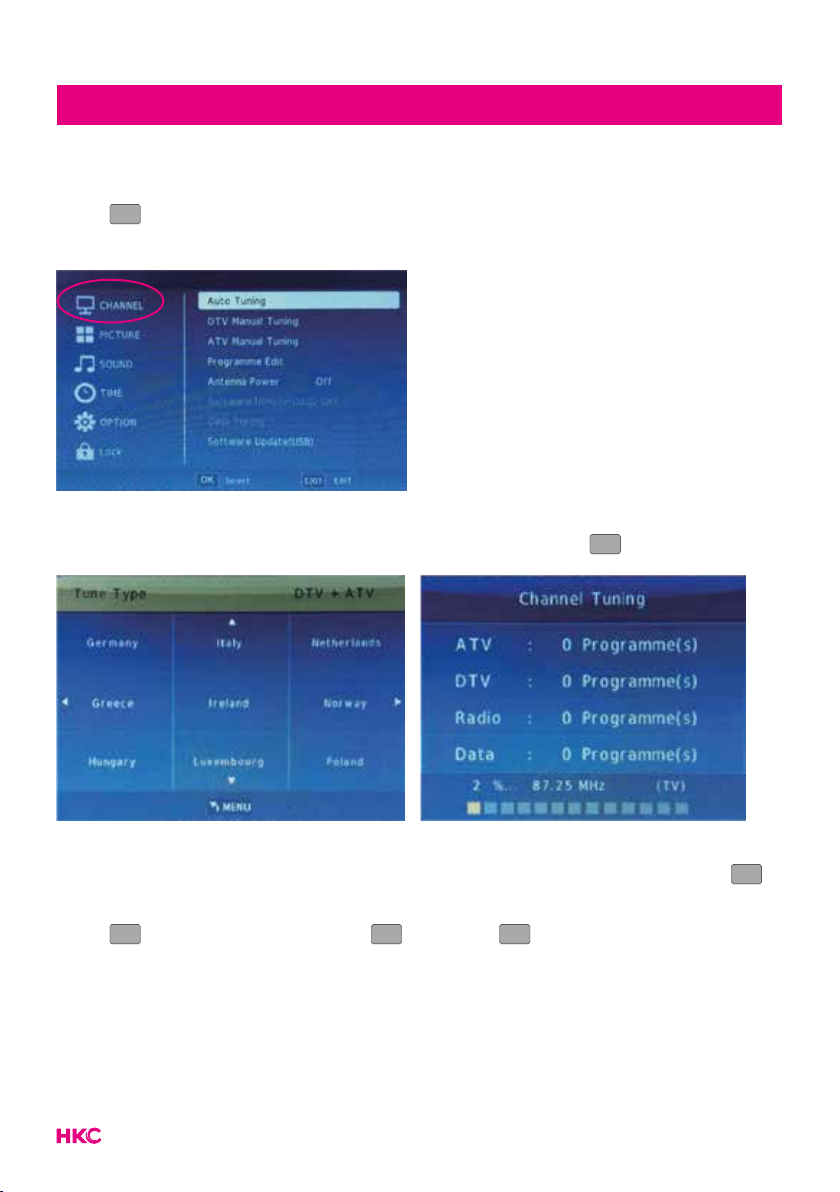
Channels
Press
MENU
MENU
to display the main menu. Press to select ‘CHANNEL’ in the
main menu.
Auto Tuning
Press and select ‘Auto Tuning’. Conrm selection with
ENTER
.
Tune Type (DTV + ATV)
Press and select DTV (digital) or ATV (analog). Conrm selection with
ENTER
.
Press to select the country.
Press
ENTER
to start the search. Press
MENU
MENU
to skip or
EXIT
to stop.
Turn on “Sorting by LCN” to put the channels in logical order.
Searching for channels can take a long time, wait patiently and do not turn the
TV off!

11
tekst
Manual tuning
DTV Manual Tuning (digital)
Press to select ‘DTV Manual Tuning’ in the menu. Conrm selection with
ENTER
.
Press
MENU
MENU
to skip or
EXIT
to stop.
ATV Manual Tuning (analog)
Press to select ‘ATV Manual Tuning’ in the menu. Conrm selection with
ENTER
.
Press
MENU
MENU
to skip or
EXIT
to stop.
OSD basic adjustment
12
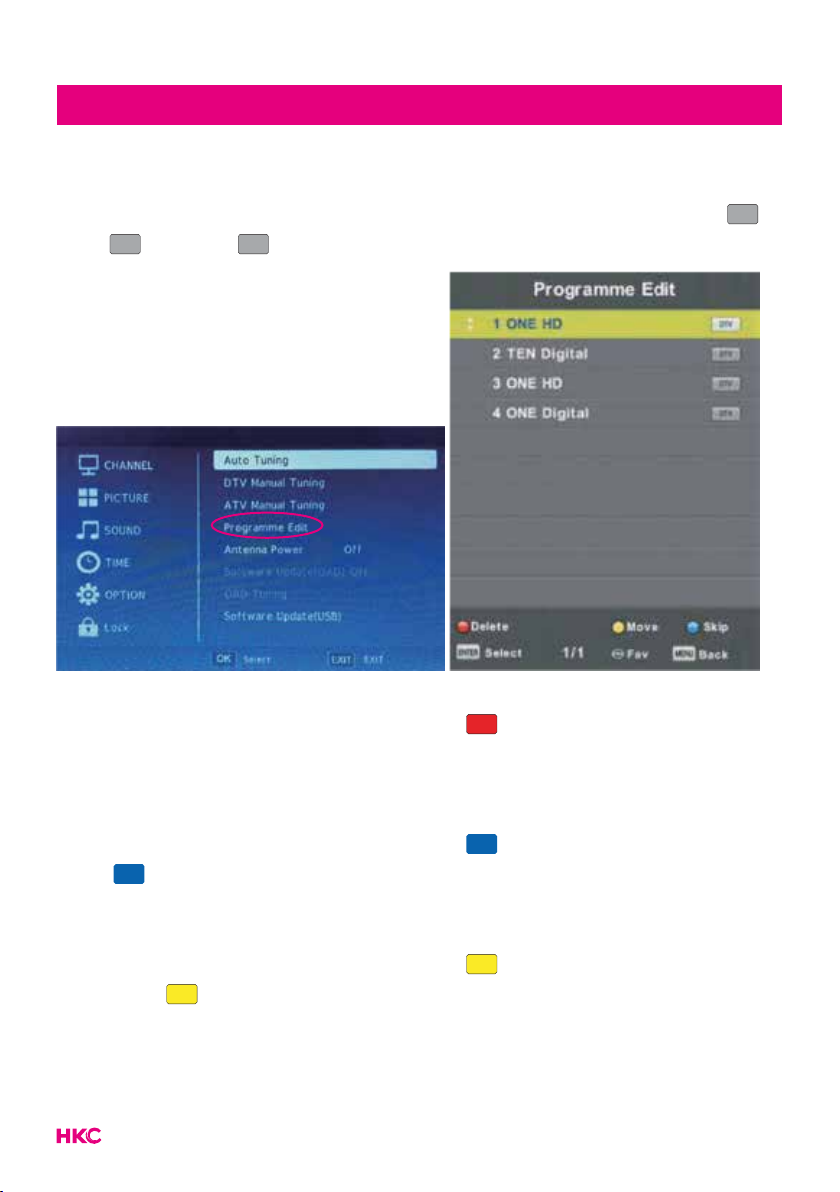
tekst
Program Edit
Press to select ‘Programme Edit’ in the menu. Conrm selection with
ENTER
.
Press
MENU
MENU
to skip or
EXIT
to stop.
Delete channels
Press to select the program. Then press on the remote control to
delete the program.
Skip channels
Press to select the program. Then press to skip the channel. Press
again to cancel.
Move channels
Press to select the program. Then press to move the channel with
. Press again to conrm.
OSD basic adjustment
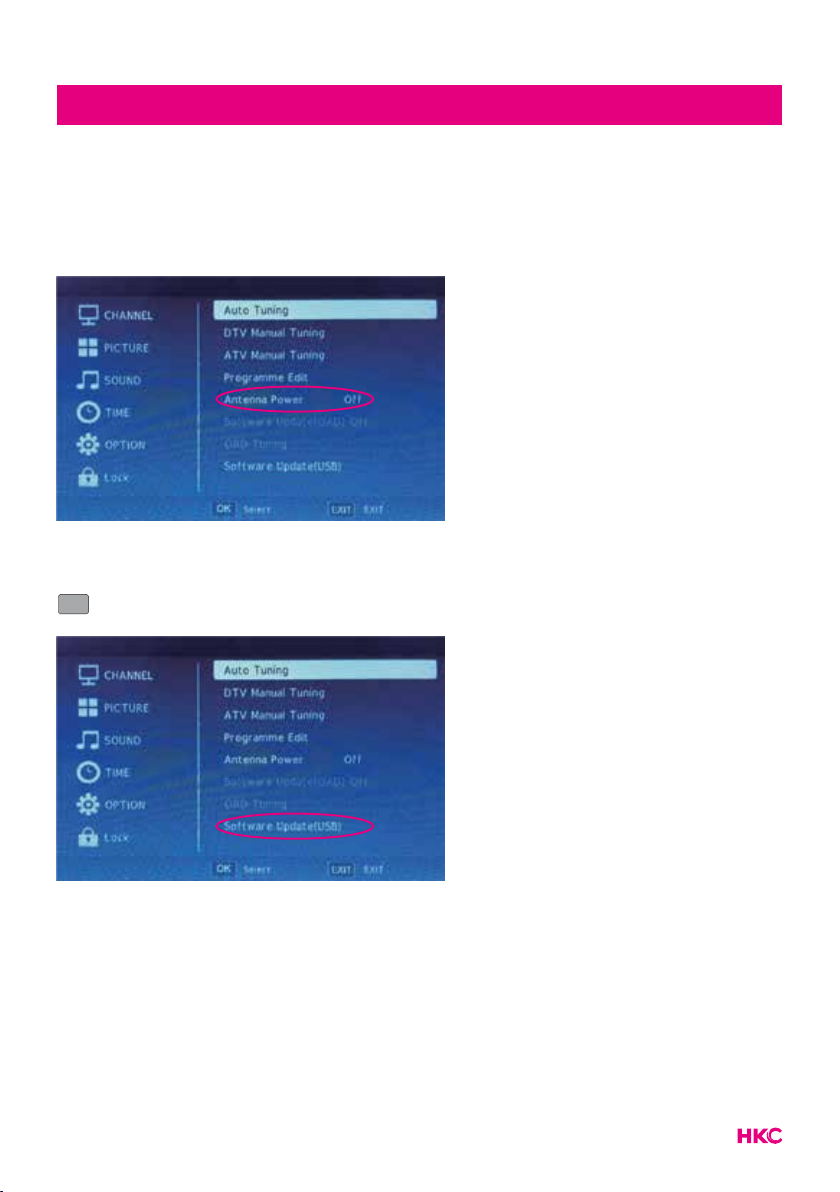
13
tekstOSD basic adjustment
Antenna Power
Press to select ‘Antenna power’ in the menu. If you use the supplied
antenna, it must be switched on. Use to choose between on or off.
Software update (only possible via external USB)
Press to select ‘Software Update USB’ in the menu. Conrm selection with
ENTER
.

14
tekstPicture (image settings)
Picture (image settings)
You can select the type of image that best suits your personal preference.
Press
MENU
MENU
to enter the OSD menu. Then press to select the ‘PICTURE’
menu. Press to select ‘Picture Mode’. Then press
ENTER
to select.
You can change various image options here.
Item Adjustable Standard Description
Picture
settings
• Contrast
• Brightness
• Colour
• Scharpness
• Tint
• Colour Temp
• Aspect Ratio
• Noise Reduction
• MPEG noise
reduction
Default Set the various standard
image settings
You select the item you want to change with the buttons.
Use the buttons to set the desired setting. Then press
ENTER
to conrm.

15
tekstSound (sound settings)
Sound (sound settings)
You can select the type of sound that best suits your personal preference.
Press
MENU
MENU
to enter the OSD menu. Then press to select the ‘SOUND’ menu.
Press to select ‘Sound Mode’. Then press
ENTER
to select.
You can change various sound options here.
Item Adjustable Standard Description
Sound
settings
• Sound Mode
• Balance
• Auto Volume
• Surround Sound
• S/PDIF Mode
• AD switch
• S/PDIF Audio
Delay
Default Set the various default
sound settings
You select the item you want to change with the buttons.
Use the buttons to set the desired setting. Then press
ENTER
to conrm.

16
tekstTime (time settings)
Time (time settings)
You can select the type of sound that best suits your personal preference.
Press
MENU
MENU
to enter the OSD menu. Then press to select the ‘TIME’ menu.
Press and select the desired item that you want to adjust/set. Then press
ENTER
to select.
You can change various time options here.
Item Adjustable Standard Description
Time settings
• Clock
• Off Time
• On Time
• Sleeptimer
• Auto Sleep
• Time Zone
Default Set the various default time
settings
You select the item you want to change with the buttons.
Use the buttons to set the desired setting. Then press
ENTER
to conrm.
17
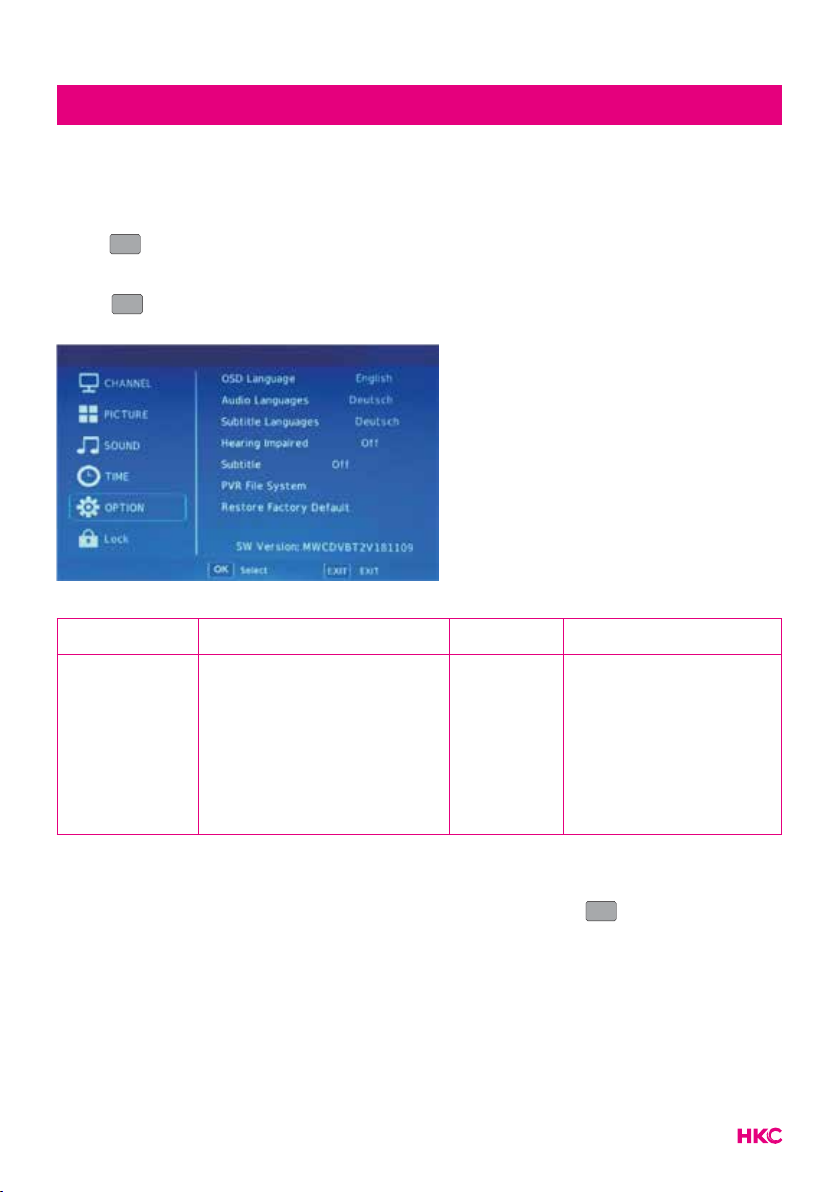
tekstOption (various menu settings)
Option (various menu settings)
You can set various menu preferences here.
Press
MENU
MENU
to enter the OSD menu. Then press to select the ‘OPTION’
menu. Press and select the desired item that you want to adjust/set. Then
press
ENTER
to select.
You can change various menu setting here.
Item Adjustable Standard Description
Options
• OSD Language
• Audio Language
• Subtitle Language
• Hearing Impaired
• Subtitle
• PVR File System
• Restore Factory Default
Default Set the different
settings
You select the item you want to change with the buttons.
Use the buttons to set the desired setting. Then press
ENTER
to conrm.
18
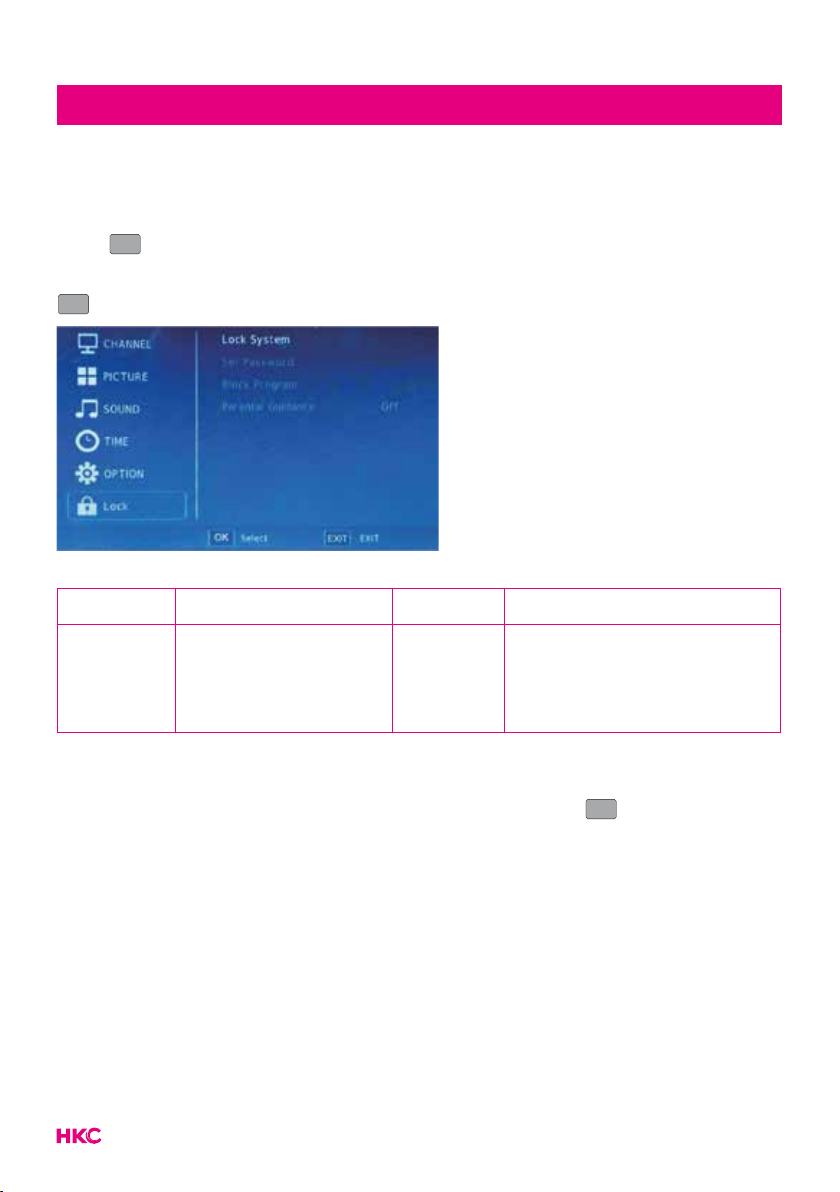
tekstLock (lock/protect settings)
Lock (lock/protect settings)
You can lock/protect various settings here.
Press
MENU
MENU
to enter the OSD menu. Then press to select the ‘LOCK’ menu.
Press and select the desired item that you want to adjust/set. Then press
ENTER
to select.
You can change various lock options here.
Item Adjustable Standard Description
Lock
settings
• Lock System
• Set Password
• Block Program
• Parental Guidance
Default Set the different security
settings
You select the item you want to change with the buttons.
Use the buttons to set the desired setting. Then press
ENTER
to conrm.
The default password is 0000.
NOTE:
The administrator password is 8899.

19
tekstElectronic Program Guide (EPG)
Electronic Program Guide (EPG) provides program information which will be
broadcasted now or in the future. The system will display EPG window by pres-
sing EPG . DATE and TIME information is displayed on the right of the window.
The left side shows all channels. The right side shows the programs in the chan-
nel. The selected program is also displayed on the top of the screen.
Press to select the program. You can press to enter record mode.
Press to to display the program’s detail. Press to check details in the
PVR’s Schedule List introduction. Press to enter a remind setting.
Press to select and press to select the channel number to see the
current channel’s program forecast.
Note:
Recording must be on an external hard drive (PVR). This is formatted for use. So
make sure there are no other important documents on this.

20
tekstPVR Operation (Personal Video Recorder)
PVR systeem (Personal Video Recorder)
Press
MENU
MENU
to enter the OSD menu. Then press to select the ‘OPTION’
menu. Press and select the option PVR.
Press
ENTER
to enter the sub menu.
Here you can select, check and format the external drive.
Note:
Recording must be on an external hard drive (PVR). This is formatted for use. So
make sure there are no other important documents on this.
Table of contents
Other HKC Portable TV manuals

Popular Portable TV manuals by other brands

Philips
Philips Magnavox 19PR15C owner's manual

Visart Technologies
Visart Technologies 10.4 PORTABLE TV with built-in multimedia Card... Operation instructions

Philips
Philips PT902 Specifications

I-View
I-View iVIEW-352PTV user manual

LENCO
LENCO TFT-1028WH user manual

Curtis
Curtis RT250 Specification sheet


