HMDX CUBE Instruction Manual

Instruction Manual and
Warranty Information HX-B440
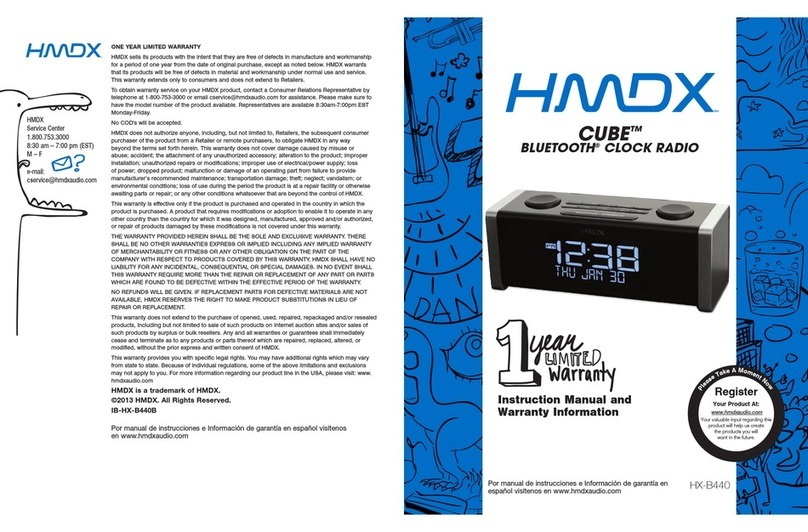
CUBE
Bluetooth®Clock Radio
HMDX y HMDX Audio son marcas comerciales de HMDX.
©2012 HMDX. Todos los derechos reservados.
IB-HXB440A
HMDX Audio
Centro de Servicio
1.800.466.3342
8:30 am – 7:00 pm (EST)
M – F
e-mail:
P
l
e
a
s
e
T
a
k
e
A
M
o
m
e
n
t
N
o
w
Register
Your Product At:
www.hmdxaudio.com
Your valuable input regarding this
product will help us create
the products you will
want in the future.
™ ™
GARANTÍA LIMITADA DE UN AÑO
HMDX vende sus productos con la intención de que no tengan defectos de fabricación ni de mano de
obra por un plazo de 1 año a partir de la fecha de compra original, con las excepciones indicadas a
continuación. HMDX garantiza que sus productos no tendrán defectos de material ni de mano de obra
bajo condiciones de uso y servicio normales. Esta garantía se extiende únicamente a consumidores y no
a minoristas.
Para obtener servicio del producto HMDX durante la garantía, comuníquese con un Representante de
relaciones con el consumidor por teléfono, llamando al 1-800-466-3342, o por correo electrónico,
modelo del producto. Los representantes están disponibles de lunes a viernes, de 8.30 a. m. a 7.00 p.m.,
hora estándar del este de los Estados Unidos.
No se aceptarán pagos contra entrega.
HMDX no autoriza a ninguna persona, incluyendo, pero sin limitarse a, minoristas, posteriores
consumidores compradores del producto a un minorista, o compradores remotos, a obligar a HMDX de
forma alguna más allá de las condiciones aquí establecidas. Esta garantía no cubre daños causados por
uso inadecuado o abuso, accidente, conexión de accesorios no autorizados, alteración del producto,
instalación inadecuada, reparaciones o modificaciones no autorizadas, uso inadecuado de la fuente de
energía/electricidad, cortes de energía, caída del producto, funcionamiento incorrecto o daño de una pieza
de funcionamiento debido al no cumplimiento del mantenimiento recomendado por el fabricante, daños
durante el transporte, robo, descuido, vandalismo, condiciones climáticas, pérdida de uso en el período
durante el cual el producto está en una instalación de reparación o a la espera de piezas o reparación, o
cualquier otra condición, sin importar cual sea, que se encuentre fuera del control de HMDX.
Esta garantía es válida solamente si el producto se compra y se utiliza en el país en que se compra. Un
producto que requiera modificaciones o adaptación para habilitar su funcionamiento en cualquier otro
país que no sea aquel para el que fue diseñado, fabricado, aprobado y/o autorizado, o la reparación de
productos dañados por estas modificaciones no está cubierto en esta garantía.
LA GARANTÍA QUE SE PROPORCIONA EN EL PRESENTE DOCUMENTO SERÁ LA GARANTÍA ÚNICA Y
EXCLUSIVA. NO EXISTIRÁN OTRAS GARANTÍAS EXPRESAS NI IMPLÍCITAS, QUE INCLUYEN CUALQUIER
GARANTÍA IMPLÍCITA DE COMERCIALIZACIÓN O APTITUD NI NINGUNA OTRA OBLIGACIÓN POR PARTE
DE LA COMPAÑÍA CON RESPECTO A LOS PRODUCTOS CUBIERTOS POR ESTA GARANTÍA. HMDX NO
TENDRÁ RESPONSABILIDAD ALGUNA POR NINGÚN DAÑO INCIDENTAL, CONSECUENTE NI ESPECIAL.
EN NINGÚN CASO ESTA GARANTÍA REQUERIRÁ MÁS QUE LA REPARACIÓN O EL REEMPLAZO DE
CUALQUIER PIEZA O PIEZAS QUE SE DETERMINE QUE TIENEN DEFECTOS DENTRO DEL PERÍODO DE
VIGENCIA DE LA GARANTÍA.
NO SE ENTREGARÁN REEMBOLSOS. SI NO HAY PIEZAS DE REPUESTO DISPONIBLES PARA LOS
MATERIALES DEFECTUOSOS, HMDX AUDIO SE RESERVA EL DERECHO DE REALIZAR SUSTITUCIONES
EN VEZ DE REPARAR O CAMBIAR EL PRODUCTO.
Esta garantía no se extiende a la compra de productos abiertos, usados, reparados, vueltos a empacar
y/o vueltos a sellar, que incluyen, entre otras cosas, la venta de dichos productos en sitios de remate
por Internet y/o la venta de dichos productos por revendedores o mayoristas. Todas y cada una de las
garantías cesarán y terminarán inmediatamente con respecto a cualquier producto o
pieza del mismo que se haya reparado, cambiado, alterado o modificado sin el consentimiento previo
explícito y por escrito de HMDX.
Esta garantía le proporciona derechos legales específicos. Es posible que usted tenga derechos
adicionales que pueden variar de un estado a otro. Debido a ciertas regulaciones individuales, es posible
que algunas de las limitaciones y exclusiones no se apliquen en su caso. Para obtener más información
con respecto a nuestra línea de productos en los EE. UU., visítenos en: www.hmdxaudio.com

2 3
Congratulations on your purchase.
Thank you for purchasing the HMDX CUBE, the Bluetooth®Clock Radio for
smartphones, tablets, notebook computers and other Bluetooth enabled
devices. This product, along with the entire HMDX product lineup, combines
high-tech innovation with design to provide you with years of dependability and
enjoyment.
Please take a few moments to read through this manual for a quick and easy
explanation of features and operation of your new CUBE.
Cube Bluetooth®Clock Radio Main Features
• ConnectswirelesslyusingprovenBluetooth®technologywithsmartphones,
tablets and many notebooks and MP3 players
• Fullfunctiondualalarmwithsnoozeandgradualwake
• DigitalFMradiowith10presets
• EnergysavingLEDnightlight
• Superiorsoundquality
• USBchargingport
• EnhancedLCDdisplay
• Batterybackup
Getting Started
Unpack the unit carefully. Remove all the accessories from the display carton.
Do not remove any labels or stickers on the bottom of the unit or adapter.
Before setting up the unit, verify that the following accessories are present:
• CUBEBluetooth®clock radio x 1
• ACpoweradapterx1
• 3.5mmaudiocablex1
5VDC, 2.5A
Fig.1
Fig.2
CUBE Bluetooth®Clock Radio Controls and Connections
1. Set(Time&Alarm)
/ Tune
2. Alarm 1
3. Alarm 2
4. NightLight
5. Source
6. Power
7. Volume +/-
8. TimeSet
9. Memory(FM
Preset)
10. Reverse / Previous
Track/FMScan
Up
11.Snooze/Dimmer/
Sleep
12. Play/Pause
13.Forward/Next
Track/FMScan
Down
FM
Antenna
AUX Line-In
Audio Jack
USB
Charging Port
AC Adapter
Input Jack
5VDC, 2.5A
71 5 62 3 4
10
11
12 13
98

4 5
TochargeyourdeviceusingtheUSBchargingport(locatedonthebackoftheunit):
1.ConnecttheUSBtypeAendofthedevice’scableintotheUSBportontherearofthe
Cube.
2.ConnecttheotherendoftheUSBcabletoyourdevicetobegincharging.
Volume Control (Fig. 2)
To adjust the volume, rotate the volume control clockwise or counterclockwise to the
desired level.
Listening to your device wirelessly over Bluetooth® (Fig. 2)
To listen to your music using the Bluetooth® wireless connection, you need to pair your
device with The CUBE:
1. Make sure your device has Bluetooth® capability.
2.UsetheSOURCEbuttonontheCubetoselectBLUETOOTH.
3.Followtheinstructionsofyourdevicetopairtheunit.
4. Pair your device with the unit by selecting HMDX CUBE from your Bluetooth® listings
onyourdeviceorselectingYES.Ifprompted,enter“0000”asthepasscode.
5.PressplayonyourdeviceandusecontrolsontheCubetoadjustdesiredvolume.
NOTE:Onceyouhavesuccessfullypairedyourdevice,youtypicallywillnotneedto
repeat the above steps. Please ensure the AUX cable is unplugged, the unit source is
set to Bluetooth® and your device has Bluetooth® enabled. The effective range for this
mode is approximately 30 feet.
Listening to a non-Bluetooth® audio device (Figs. 1 & 2)
1.Usingthe3.5mmaudiocable(included),pluginthedeviceviatheAUXaudiolineinput
located on the rear of the Cube.
2. Plug the other end of the audio cable into the line out or headphone jack of your audio
device.
3.PressthePOWERbuttonlocatedontopoftheCube.
4.PresstheSOURCEbuttonontheunituntiltheAUXiconappearsonthedisplay.
5.Pressplayontheconnecteddevice.
NOTE:Youmayneedtoadjustthevolumeonyouraudiodevicetoachieveproper
volume.
Listening to the Radio/Station Presets (Figs. 1 & 2)
Note:Forbestreception,fullyextendthewireantenna.DONOTstrip,alterorattachto
other antennas.
1.Tolistentotheradio,pressthePOWERbuttonlocatedontopoftheCube.
Power Source (Fig. 1)
This unit is supplied with an AC adapter; take the following steps to connect the adaptor.
1. Unwind the power cord of the AC adaptor to its full length.
2.ConnecttheACadaptertotheDCJack(Fig.1).
3.PlugtheACadapterintoanoutlet(100v–240VAC50/60Hz).Connectingthissystem
toanyotherpowersourcemaycausedamagetothesystem.Forsufficientventilation,
keep other objects at least 4 inches away from the unit.
4. To switch the unit off completely, unplug the AC adapter from the wall outlet.
Setting Clock Time (Fig. 2)
AUTOSETCLOCK
The Cube Bluetooth® clock radio is equipped with an autoset clock, meaning the clock
will automatically set itself when first plugged in. Please note: the clock will automatically
defaulttoEasternStandardTimeandwillneedtobeadjustedforothertimezonesby
manually setting the clock.
Manually Setting the Clock (Fig. 2)
1. Make sure the Cube is plugged in, but powered off.
2.PressandholdtheTIMEbuttontoenterTimeSettingmode.Thehourwillbegin
flashing.UsetheSETTUNEdialtoadjustthehour,payingattentiontotheAMand
PM indicators
3.OncethehourhasbeensetpresstheTIMEbuttonagainandtheminutewillbegin
flashing.UsetheSETTUNEdialtoadjusttheminute.
4. Press the TIME button again to set the year, month and day of the week repeating the
steps above.
Display Dimmer Control (Fig. 2)
PresstheSNOOZE/DIMMER/SLEEPbartoadjustthebacklightintensityofclock
display. The power needs to be off to use the dimmer control.
Night Light (Fig. 2)
PresstheLIGHTbuttonontopoftheCube.Thenightlightwillturnonandcanbeset
tooneoffourlevels(High,Medium,Low,Off).Thenightlightcanbeoperatedwiththe
power on or off.
USB Charging Port
• ThisUSBportisforchargingonly.Itcannotbeusedtoplaymusicthroughtheunit.
• InordertousetheUSBchargingfeature,youmusthavethepropercordtoconnect
toyourdevicewithaUSBTypeAconnectorontheotherend.

6 7
2.PresstheSOURCEbuttonontheCubeuntilFMandstationfrequencyappearsonthe
display.
3.UsetheFORWARDandREVERSEbuttonsonthetopoftheunitortheSET/TUNE
dial to select desired station.
4.PressthePOWERbuttontoturnunitoff.
To set/listen to station presets
1.Whileinradiomode,useFORWARDandREVERSEbuttonsortheSET/TUNEdialto
select desired station.
2. Press and hold the MEM button on the top of the Cube to add the station to your
presets.UsetheFORWARDandREVERSEbuttonstoselectthedesiredpreset
number(1-10),thenpressMEMagaintoset.
3. To listen to station presets, press the MEM button on the unit to scroll through the
radio presets.
Sleep Feature
WhilelisteningtotheBluetooth®,radioorAUXsources,presstheSNOOZEbutton
to activate the sleep feature. This allows you to set a sleep timer for 90, 80, 70...10, or
5minutes.Onceset,theunitwillcontinueplayingforthesetlengthoftime,thenwill
automatically turn off.
Setting and Using the Alarms
SETTINGALARM1orALARM2(Figs.1&2)
1. Make sure the unit is plugged in, but powered off.
2.Pressandholdthedesiredalarmbutton(ALARM1orALARM2)locatedonthetopof
the Cube. The hour will begin flashing.
3.UsetheSET/TUNEdialontopoftheCubetoadjustthehour,payingattentiontothe
AM and PM indicators.
4.Pressthealarmbuttonagainandtheminutewillbeginflashing.UsetheSET/TUNE
dial again to adjust the minute.
5.Pressthealarmbuttonagaintoselectthesource.TheCube’salarmcanbesetto
BeeporFMusingtheSET/TUNEdial.ThealarmcannotbesettotheBluetooth®
source.
6.PressthealarmbuttonagainandusetheSET/TUNEdialtoselectEVERYDAY,
WEEKDAYS,WEEKENDSorONEDAYsettings.
7.PressthealarmbuttonagaintoexitAlarmSettingmode.
TURNING OFF THE ALARM / SNOOZE OPERATION (Fig 2)
The Cube Bluetooth® clock radio is equipped with gradual wake, which means that the
alarm begins soft and slowly gets louder over the course of two minutes. This will ensure
a non-jarring wakeup.
• PresstheSNOOZEbarlocatedonthetopoftheCubeandthealarmwillsoundagain
in nine minutes.
Pleasenote:YoumayonlypresstheSnoozebuttonduringtheAlarmmodeforone
hour(7times).Aftertheseventhtime,thealarmwillturnoffandwillnotsoundagain
until the next set time.
• Toturnoffthealarm,pressanybuttononthetopoftheunit(exceptSnooze).
One Day Alarm (Hotel Setting)
This alarm clock is equipped with a 1-Day Alarm feature, which allows the alarm to be
set for one day only. To activate this feature:
1.MovetheHOTELswitchlocatedonthebottomoftheCubetotheONposition.Once
thisswitchisintheONposition,thealarmtimewillneedtobereset.Pleaseseethe
SettingandUsingtheAlarmssectionforinstruction.
Please note:
• Whenthe1-Dayalarmfeatureisactivated,thealarmwillonlysoundonce.Oncethe
alarmisturnedOFF,itwillnotsoundagainuntilthealarmisreset.
• Whensettingthealarmfora1-Dayalarm,youwillbepromptedtosetthehour,
minute,andalarmsource,butwillNOTbepromptedtosetthe7,5,or2-dayalarmas
this feature will be disabled for both alarms.
Battery Precautions
• Useonlythesizeandtypeofbatteriesspecified.
• Wheninstallingbatteries,observeproper+/-polarities.Incorrectinstallationofbattery
may cause damage to the unit.
• Iftheunitisnotgoingtobeusedforalongperiodoftime,removebatteriestoprevent
damage due to possible battery leakage.
• Donotdisposeofbatteriesinfire.Batteriesmayexplodeorleak.
Thisproductcontainssmallpartsthatmaypresentachokinghazardforyoungchildren.
Caution:AllservicingofthisproductmustbeperformedbyauthorizedHMDXService
Personnel only

8 9
Replacing Backup Battery if needed
Thisalarmclockisequippedwithabatterybackupfeature(batteriesincludedand
alreadyinstalled)tokeeptheclocktimeduringpoweroutage.
1.Openbatterycompartmentdoorlocatedonthebottomoftheunit.
2.PleasemakesuretheACadapterisconnected.Otherwiseallsettingsmaybelost
during battery replacement.
3.Insertproperreplacementbattery(CR-2025),checkingthatthepolarity(“+”and“–“
endsofthebattery)matchesthedrawingnearthebatterycompartment.Closethe
compartment door.
Maintenance
To Store
You may leave the unit on display, or you can store it in its box in a cool, dry place.
To Clean
Use only a soft dry cloth to clean the enclosure of the unit.
NEVER use liquids or abrasive cleaner to clean.
Modificationsnotauthorizedbythemanufacturermayvoidusersauthoritytooperatethis
device.
FCC Disclaimer
ThisdevicecomplieswithPart15oftheFCCRules.Operationissubjecttothefollowing
twoconditions:(1)thisdevicemaynotcauseharmfulinterference,and(2)thisdevice
must accept any interference received, including interference that may cause undesired
operation.
Note: The manufacturer is not responsible for any radio or TV interference caused by
unauthorizedmodificationstothisequipment.Suchmodificationscouldvoidtheuser
authority to operate the equipment.
Note: This equipment has been tested and found to comply with the limits for a
ClassBdigitaldevice,pursuanttoPart15oftheFCCRules.Theselimitsaredesigned
to provide reasonable protection against harmful interference in a residential installation.
This equipment generates, uses, and can radiate radio frequency energy and, if not
installed and used in accordance with the instructions, may cause harmful interference
to radio communications. However, there is no guarantee that interference will not occur
in a particular installation. If this equipment does cause harmful interference to radio or
television reception, which can be determined by turning the equipment off and on, the
user is encouraged to try to correct the interference by one or more of the following
measures:
• Reorientorrelocatethereceivingantenna.
• Increasetheseparationbetweentheequipmentandreceiver.
• Connecttheequipmentintoanoutletonacircuitdifferentfromthattowhichthe
receiver is connected.
• Consultthedealeroranexperiencedradio/TVtechnicianforhelp.

11
Manual de instrucciones
e información de garantía HX-B440
T
ó
m
e
s
e
u
n
m
o
m
e
n
t
o
a
h
o
r
a
Registre
su producto en:
www.hmdxaudio.com
Su valioso aporte sobre este
producto nos ayudará a
crear los productos que
desee en el futuro.
CUBE
Bluetooth ® Radio Reloj
HMDX and HMDX Audio are trademarks of HMDX.
© 2012 HMDX. All Rights Reserved.
IB-HXB440A
HMDX Audio
Service Center
1.800.466.3342
8:30 am – 7:00 pm (EST)
M – F
e-mail:
™
ONE YEAR LIMITED WARRANTY
HMDX sells its products with the intent that they are free of defects in manufacture and
workmanship for a period of one year from the date of original purchase, except as noted below.
HMDX warrants that its products will be free of defects in material and workmanship under normal
use and service. This warranty extends only to consumers and does not extend to Retailers.
To obtain warranty service on your HMDX product, contact a Consumer Relations Representative by
to have the model number of the product available. Representatives are available 8:30am-7:00pm
EST Monday-Friday.
No COD's will be accepted.
HMDX does not authorize anyone, including, but not limited to, Retailers, the subsequent consumer
purchaser of the product from a Retailer or remote purchasers, to obligate HMDX in any way
beyond the terms set forth herein. This warranty does not cover damage caused by misuse or
abuse; accident; the attachment of any unauthorized accessory; alteration to the product; improper
installation; unauthorized repairs or modifications; improper use of electrical/power supply; loss
of power; dropped product; malfunction or damage of an operating part from failure to provide
manufacturer’s recommended maintenance; transportation damage; theft; neglect; vandalism; or
environmental conditions; loss of use during the period the product is at a repair facility or otherwise
awaiting parts or repair; or any other conditions whatsoever that are beyond the control of HMDX.
This warranty is effective only if the product is purchased and operated in the country in which
the product is purchased. A product that requires modifications or adoption to enable it to operate
in any other country than the country for which it was designed, manufactured, approved and/or
authorized, or repair of products damaged by these modifications is not covered under this warranty.
THE WARRANTY PROVIDED HEREIN SHALL BE THE SOLE AND EXCLUSIVE WARRANTY. THERE
SHALL BE NO OTHER WARRANTIES EXPRESS OR IMPLIED INCLUDING ANY IMPLIED WARRANTY
OF MERCHANTABILITY OR FITNESS OR ANY OTHER OBLIGATION ON THE PART OF THE COMPANY
WITH RESPECT TO PRODUCTS COVERED BY THIS WARRANTY. HMDX SHALL HAVE NO LIABILITY
FOR ANY INCIDENTAL, CONSEQUENTIAL OR SPECIAL DAMAGES. IN NO EVENT SHALL THIS
WARRANTY REQUIRE MORE THAN THE REPAIR OR REPLACEMENT OF ANY PART OR PARTS
WHICH ARE FOUND TO BE DEFECTIVE WITHIN THE EFFECTIVE PERIOD OF THE WARRANTY.
NO REFUNDS WILL BE GIVEN. IF REPLACEMENT PARTS FOR DEFECTIVE MATERIALS ARE NOT
AVAILABLE, HMDX RESERVES THE RIGHT TO MAKE PRODUCT SUBSTITUTIONS IN LIEU OF
REPAIR OR REPLACEMENT.
This warranty does not extend to the purchase of opened, used, repaired, repackaged and/or
resealed products, including but not limited to sale of such products on Internet auction sites and/
or sales of such products by surplus or bulk resellers. Any and all warranties or guarantees shall
immediately cease and terminate as to any products or parts thereof which are repaired, replaced,
altered, or modified, without the prior express and written consent of HMDX.
This warranty provides you with specific legal rights. You may have additional rights which may vary
from state to state. Because of individual regulations, some of the above limitations and exclusions
may not apply to you. For more information regarding our product line in the USA, please visit:
www.hmdxaudio.com

12 13
Felicitaciones por su compra.
GraciasporcomprarelradiorelojCUBEcontecnologíaBluetooth®de
HMDX para teléfonos inteligentes, tabletas, computadoras portátiles y otros
dispositivosqueaceptantecnologíabluetooth.Esteproducto,comotodala
líneadedispositivosHMDX,combinainnovacióndealtatecnologíacondiseño,
paraproporcionarañosdefiabilidadydisfrute.
Tómeseunosmomentosparaleerestemanualcompletoyobtener,deeste
modo,unadescripciónrápidaysencilladelasfuncionesydelfuncionamiento
de la nueva unidad CUBE.
Funciones principales del radio reloj Cube con tecnología
Bluetooth®
• SeconectademanerainalámbricautilizandolatecnologíaBluetooth®de
comprobada eficacia con teléfonos inteligentes, tabletas y una variedad de
computadoras portátiles y reproductores MP3.
• Doblealarmaconfuncióncompletaderepeticióndealarmayaumento
gradual de sonido.
• RadioFMdigitalconmemoriapara10estacionespredeterminadas.
• LEDdeluznocturna(veladora)paraahorrarenergía.
• Calidaddesonidosuperior.
• PuertodecargaUSB.
• PantallaLCDmejorada.
• Bateríaderespaldo.
Inicio
Desempaque la unidad con cuidado. Retire todos los accesorios de la caja
deexhibición.Noretireningunaetiquetaoadhesivodelaparteinferiordela
unidad o del adaptador. Antes de configurar la unidad, verifique la presencia de
los siguientes accesorios:
• 1radiorelojCUBEcontecnologíaBluetooth®.
• 1adaptadordeenergíadeCA.
• 1cabledeaudiode3,5mm.
5VDC, 2.5A
5VDC, 2.5A
Fig.1
Fig.2
Bluetooth ® CUBE controla el reloj de radio y conexiones
1. Configurar(horay
alarma)/ajustar
2. Alarma 1
3. Alarma 2
4. Luzdenoche(veladora)
5. Fuente
6. Encendido/Apagado
7. Volumen +/-
8. Configuracióndela
hora
9. Memoria(estacionesde
FMpredeterminadas)
10. Retroceso/Pista
anterior/Desplazamiento
porFMhaciaarriba
11.Repetición/Reductorde
luz/Dormir
12.Reproducción/Pausa
13. Avance/Pista siguiente/
DesplazamientoporFM
hacia abajo
FM
Antena
AUX Line-In
Audio Jack
USB
Puerto de carga
Adaptador de CA
Enchufe de entrada
71 5 62 3 4
10
11
12 13
98

14 15
Luz de noche o veladora (Fig. 2)
PresioneelbotónLIGHT(luz)queseencuentraenlapartesuperiordelaunidadCube.
Seencenderálaluzdenoche(oveladora),quesepuedeestablecerenunodecuatro
nivelesdeintensidad(alto,medio,bajo,apagado).Laluzdenochefuncionatantoconla
unidad encendida como apagada.
Puerto de carga USB
• EstepuertoUSBseutilizasolamenteparacargarlaunidad.Nosepuedeusarpara
reproducir música a través de la unidad.
• ParapoderusarlafuncióndecargaUSB,debetenerelcableadecuadopara
conectarsudispositivoconunconectorUSBTipoAenelotroextremo.
ParacargarsudispositivousandoelpuertodecargaUSB(ubicadoenlapartetrasera
delaunidad):
1.ConecteelextremotipoAdeUSBdelcabledeldispositivoalpuertoUSBquese
encuentra en la parte trasera de la unidad Cube.
2.ConecteelotroextremodelcableUSBaldispositivoparaquecomiencelacarga.
Control de volumen (Fig. 2)
Para ajustar el volumen, gire el control de volumen en el sentido de las agujas del reloj o
ensentidocontrariohastaalcanzarelniveldeseado.
Cómo escuchar su dispositivo de forma inalámbrica por medio de la tecnología
Bluetooth® (Fig. 2)
ParaescucharmúsicaatravésdeunaconexióninalámbricaBluetooth®,debeemparejar
su dispositivo con la unidad CUBE:
1.AsegúresedequeeldispositivoaceptetecnologíaBluetooth®.
2.UtiliceelbotónSOURCE(fuente)delaunidadCubeparaseleccionarBLUETOOTH.
3.Sigalasinstruccionesdesudispositivoparaemparejarlaunidad.
4. Empareje el dispositivo con la unidad seleccionando HMDX CUBE en las listas de
Bluetooth®desudispositivooseleccionandoYES(sí).Sisesolicitaunacontraseña,
ingrese“0000”.
5.Presioneelbotóndereproducciónensudispositivoyuseloscontrolesdelaunidad
Cube para establecer el volumen deseado.
NOTA:unavezquehayaemparejadosudispositivocorrectamente,porlogeneral,
no será necesario repetir los pasos anteriores. Asegúrese de que el cable auxiliar
esté desenchufado, la fuente de la unidad esté configurada para Bluetooth® y su
dispositivotengalatecnologíaBluetooth®activada.Elrangoeficazdeestemodoesde
aproximadamente9m(30pies).
Fuente de energía eléctrica (Fig. 1)
EstaunidadseentregaconunadaptadordeCA.Sigalospasosquesemencionana
continuaciónparaconectareladaptador.
1.DesenrolleelcabledecorrientedeladaptadordeCAentodasuextensión.
2.ConecteeladaptadordeCAalaentradadeCC(Fig.1).
3.EnchufeeladaptadordeCAauntomacorriente(110Va240VCA,50/60Hz).
Conectarestesistemaacualquierotrafuentedeenergíapodríaocasionarledaños.
Paraquelaventilaciónseaadecuada,mantengaotrosobjetosaunos10cm(4
pulgadas)dedistanciadelaunidadcomomínimo.
4. Para apagar por completo la unidad, desenchufe el adaptador de CA del
tomacorriente de pared.
Configuración de la hora del reloj (Fig. 2)
RELOJDECONFIGURACIÓNAUTOMÁTICA
ElradiorelojCubecontecnologíaBluetooth®cuentaconunrelojdeconfiguración
automática.Estosignificaqueeldispositivoajustarálahoraautomáticamenteporsí
mismocuandoseloenchufeporprimeravez.Observelosiguiente:lahoradelrelojse
establecerá automáticamente y por defecto en la hora estándar del este de los Estados
Unidos y requerirá ciertos ajustes para adecuarse a otros husos horarios. Para otras
zonashorarias,tendráqueajustarmanualmenteelreloj.
Configuración manual de la hora (Fig. 2)
1. Asegúrese de que la unidad Cube esté enchufado, pero apagado.
2.PresionesinsoltarelbotónTIME(hora)paraingresarenelmododeConfiguraciónde
lahora.Lahoracomenzaráaparpadear.UtiliceeldiscoSET/TUNE(configurar/ajustar)
para establecer la hora teniendo en cuenta los indicadores de A. M. y P. M.
3.Unavezconfiguradalahora,vuelvaapresionarelbotónTIME(hora)y,deeste
modo,comenzaráaparpadearelindicadordeminutos.UtiliceeldiscoSET/TUNE
(configurar/ajustar)paraestablecerlosminutos.
4.VuelvaapresionarelbotónTIME(hora)paraestablecerelaño,elmesyeldíadela
semana repitiendo los pasos anteriores.
Control del reductor de luz de la pantalla (Fig. 2)
PresionelabarraSNOOZE/DIMMER/SLEEP(repetición/reductordeluz/dormir)para
ajustarlaintensidaddelaluzdefondoenlapantalladelreloj.Parautilizarelcontroldel
reductordeluz,launidaddebeestarapagada.

16 17
Cómo escuchar un dispositivo de audio que no esté equipado con tecnología
Bluetooth® (Fig. 1 y 2)
1.Utiliceelcabledeaudiode3,5mm(incluido)paraenchufareldispositivoatravésde
laentradadelíneadeaudioauxiliarubicadaenlapartetraseradelaunidadCube.
2.Enchufeelotroextremodelcabledeaudioenlalíneadesalidaoenelenchufepara
audífonosdeldispositivodeaudio.
3.PresioneelbotónPOWER(encendido/apagado)queseencuentraenlapartesuperior
de la unidad Cube.
4.PresioneelbotónSOURCE(fuente)queseencuentraenlaunidadhastaque
aparezcaenpantallaeliconoAUX(auxiliar).
5.PresionePLAY(reproducir)eneldispositivoconectado.
NOTA:esposiblequedebaajustarelvolumeneneldispositivodeaudioparaalcanzarla
intensidad de volumen adecuada.
Cómo escuchar la radio/estación predeterminada (Fig. 1 y 2)
Nota:paraunamejorrecepción,extiendalaantenadelcableensutotalidad.NOlapele,
altere o conecte a otras antenas.
1.Paraescucharlaradio,presioneelbotónPOWER(encendido/apagado)ubicadoenla
parte superior de la unidad Cube.
2.PresioneelbotónSOURCE(fuente)delaunidadCubehastaqueaparezcanen
pantallaeliconodeFMylafrecuenciadelaestación.
3.UtilicelosbotonesdeFORWARD(avance)yREVERSE(retroceso)ubicadosenla
partesuperiordelaunidadoeldiscoSET/TUNE(configurar/ajustar)paraseleccionar
laestacióndeseada.
4.PresioneelbotóndePOWER(encendido/apagado)paraapagarlaunidad.
Para configurar/escuchar estaciones de radio predeterminadas
1.Enelmododeradio,uselosbotonesFORWARD(avance)yREVERSE(retroceso)oel
discoSET/TUNE(configurar/ajustar)paraseleccionarlaestacióndeseada.
2.PresionesinsoltarelbotónMEM(memoria)queseencuentraenlapartesuperior
delaunidadCubeparaagregarlaestaciónalasestacionespredeterminadas.Utilice
losbotonesFORWARD(avance)yREVERSE(retroceso)paraseleccionarelnúmero
depredeterminacióndeseado(1al10)y,acontinuación,vuelvaapresionarMEM
(memoria)parafinalizarlaconfiguración.
3.Sideseaescucharestacionespredeterminadas,presioneelbotónMEM(memoria)de
launidadparadesplazarseporlasestacionesderadiopredeterminadas.
Función de dormir
Mientras escucha la radio, un dispositivo Bluetooth® o una fuente auxiliar, presione el
botónSNOOZE(repetición)paraactivarlafuncióndedormir.Deestamanera,podrá
establecerelapagadoautomáticoen90,80,70…10o5minutos.Unavezestablecido
el apagado automático, la unidad seguirá reproduciendo música durante el tiempo fijado
y luego se apagará automáticamente.
Ajuste y uso de las alarmas
CONFIGURACIÓNDEALARMA1oALARMA2(Fig.1y2)
1. Asegúrese de que la unidad esté enchufada, pero apagada.
2.Presionesinsoltarelbotóndealarmadeseado(ALARM1oALARM2),ubicadoenla
partesuperiordelaunidadCube.Lahoracomenzaráaparpadear.
3.UtiliceeldiscoSET/TUNE(configurar/ajustar)queseencuentraenlapartesuperiorde
la unidad Cube para establecer la hora teniendo en cuenta los indicadores de A. M. y
P. M.
4.Presionenuevamenteelbotóndealarmaylosminutoscomenzaránaparpadear.
UtiliceeldiscoSET/TUNE(configurar/ajustar)nuevamenteparaestablecerlosminutos.
5.Vuelvaapresionarelbotóndealarmaparaseleccionarlafuente.Laalarmadela
unidadCubesepuedeajustarparaqueemitaunpitidooseactivelaFMutilizandoel
discoSET/TUNE(configurar/ajustar).Nosepuedeestablecerlaalarmaenlafuente
contecnologíaBluetooth®.
6.VuelvaapresionarelbotóndealarmayutiliceeldiscoSET/TUNE(configurar/
ajustar)paraseleccionarEVERYDAY(todoslosdías),WEEKDAYS(díasdesemana),
WEEKENDS(finesdesemana)oONEDAY(undía).
7.PresionenuevamenteelbotóndealarmaparasalirdelmododeConfiguraciónde
alarma.
APAGADO DE LA OPERACIÓN DE ALARMA/REPETICIÓN (Fig. 2)
ElradiorelojCubecontecnologíaBluetooth®estáequipadoconunafunciónde
despertadorgradual,loquesignificaquelaalarmacomienzaasonarsuaveylentamente
se hace más fuerte en el transcurso de dos minutos. Esto asegurará que se despierte
sin sobresaltos.
• PresionelabarraSNOOZE(repetición)ubicadaenlapartesuperiordelaunidadCube
y la alarma volverá a activarse al cabo de nueve minutos.
Atención:solopuedepresionarelbotónderepeticiónenelmododeAlarmadurante
unahora(7veces).Despuésdelaséptimavez,laalarmasedesactivaráynovolveráa
activarsehastalapróximahoraconfigurada.
• Paraapagarlaalarma,presionecualquierbotónenlapartesuperiordelaunidad
(exceptoelbotónderepetición).

18 19
Alarma de un día (configuración de hotel)
Esterelojdespertadorestáequipadoconunafuncióndealarmade1día,queadmiteel
ajustedelaalarmaparaundíasolamente.Paraactivarestafunción:
1.DesliceelinterruptorHOTEL,ubicadoenlaparteinferiordelaunidadCube,ala
posiciónON(encendido).CuandoesteinterruptorestéenlaposiciónON(encendido),
sedeberárestablecerlahoradelaalarma.Paraobtenerinstrucciones,remítaseala
secciónAjusteyusodelasalarmas.
Atención:
• Cuandolafuncióndealarmade1díaestéactivada,laalarmasolosonaráunavez.Al
desactivarla,novolveráasonarhastaqueselarestablezca.
• Alestablecerlaalarmaenlafunciónde1día,selesolicitaráqueestablezcalahora,
losminutosylafuentedealarma,peroNOselesolicitaráqueestablezcalaalarmade
7,5o2días,yaqueestafunciónestaráinhabilitadaenambasalarmas.
Sustitución de la batería de copia de seguridad si es necesario
•Useúnicamenteeltamañoyeltipodepilaespecificado.
•Cuandoinstalelaspilas,respetelaposicióncorrectapolaridades+/-.Lainstalación
incorrectadelaspilaspuedecausardañosalaunidad.
•Silaunidadnovaaserutilizadoduranteunlargoperiododetiempo,retirelaspilas
paraevitardañosdebidosafugasenlabatería.
•Noarrojelasbateríasalfuego.Lasbateríaspuedenexplotarotenerfugas.
Esteproductocontienepiezaspequeñasquepuedanrepresentarunpeligrodeasfixia
paraniñospequeños.
Precaución:TodoelserviciodeesteproductodebeserrealizadaporPersonalde
servicioautorizadoHMDXsólo
Cambio de batería de respaldo (de ser necesario)
Thisalarmclockisequippedwithabatterybackupfeature(batteriesincludedand
alreadyinstalled)tokeeptheclocktimeduringpoweroutage.
1.Openbatterycompartmentdoorlocatedonthebottomoftheunit.
2.PleasemakesuretheACadapterisconnected.Otherwiseallsettingsmaybelost
during battery replacement.
3.Insertproperreplacementbattery(CR-2025),checkingthatthepolarity(“+”and“–“
endsofthebattery)matchesthedrawingnearthebatterycompartment.Closethe
compartment door.
Mantenimiento
Guardado
Puede dejar la unidad exhibida o puede guardarla dentro de la caja en un lugar fresco y
seco.
Limpieza
Usesolamenteunpañosuaveysecoparalimpiarelexteriordelaunidad.
NUNCAuselíquidosnilimpiadoresabrasivosparalimpiarlaunidad.
Lasmodificacionesnoautorizadasporelfabricantepuedenanularlaautoridaddel
usuarioparautilizaresteproducto.
Descargo de responsabilidad de la FCC
Estedispositivocumpleconlasección15delasnormasdelaFCC.Elfuncionamiento
estásujetoalasdoscondicionessiguientes:(1)estedispositivonopuedecausar
interferenciasperjudicialesy(2)estedispositivodebeaceptarcualquierinterferenciaque
reciba, incluso la interferencia que pueda causar un funcionamiento no deseado.
Nota:elfabricantenoseresponsabilizaporningunainterferenciaderadiootelevisión
provocadapormodificacionesnoautorizadasqueserealicenaesteequipo.Tales
modificacionespodríananularlaautoridaddelusuarioparautilizarelequipo.
Nota:esteequipohasidoprobadoysehaobservadoquecumpleconloslímitesparaun
dispositivodigitaldeClaseB,conformealasección15delasnormasdelaFCC.Estos
límitesestándiseñadosparaproporcionarprotecciónrazonablecontrainterferencias
perjudicialesenunainstalaciónresidencial.Esteequipogenera,utilizaypuede
irradiarenergíaderadiofrecuencia,ysinoseinstalayseutilizadeacuerdoconlas
instrucciones, puede causar interferencia perjudicial en las comunicaciones de radio.
Sinembargo,noexisteningunagarantíadequenoseproduciráinterferenciaenuna
instalaciónparticular.Siesteequipocausainterferenciaperjudicialalarecepciónde
radiootelevisión,locualpuededeterminarseencendiendoyapagandoelequipo,se
recomienda que el usuario intente corregir la interferencia mediante una o más de las
siguientes medidas:
• Vuelvaaorientaroaubicarlaantenaderecepción.
• Aumentelaseparaciónentreelequipoyelreceptor.
• Conecteelequipoauntomacorrientedeotrocircuitodondenoestéconectadoel
receptor.
• Consulteconeldistribuidoroconuntécnicoexpertoenradio/televisiónparaobtener
ayuda.
This manual suits for next models
1
Table of contents
Languages:
Other HMDX Clock Radio manuals
