Hobby King OrangeRx R910 User manual

Manual OrangeRx R910 9Ch 2.4Ghz dupla porta compatível DSM2
OrangeRx R910 DSM2 Compatible 9Ch 2.4Ghz TwinPort Rx Manual
Introduction.
The HobbyKing OrangeRx 9 channel is the first DSM2 compatible receiver to support S. Bus technology. This gives DSM2 users the ability to use
S. Bus Servos, Gyros and flybarless systems.
Compatible with all DSM2 Air transmitters.
The new range of OrangeRx R910 receivers are built using original components and MCU's and with state of the art SMT automation to ensure a
quality product each and every time.
All OrangeRx receivers are QC tested before leaving the factory.
The OrangeRx will work with ANY DSM2 compatible 2.4Ghz transmitter.
The OrangeRx 9ch is only 14g in weight and 46x30x14mm in size with case, Great for medium/small planes & heli's, right up to large scale models.
Introdução.
O OrangeRx de 9 canais da HobbyKing é o primeiro receptor compatível com DSM2 para suportar a
tecnologia S. Bus. Isso permite que os usuários do DSM2 usem Servos S. Bus, Giroscópios e
sistemas flybarless.
Compatível com todos os transmissores DSM2 Air.
A nova linha de receptores OrangeRx R910 é construída usando componentes originais e MCU’s e
com automação SMT de última geração para garantir um produto de qualidade sempre.
Todos os receptores OrangeRx são testados antes de saírem da fábrica.
O OrangeRx funcionará com QUALQUER transmissor de 2,4 GHz compatível com DSM2.
O OrangeRx 9ch tem apenas 14g de peso e 46x30x14mm de tamanho com estojo, ótimo para aviões
médios / pequenos e heli, até modelos em grande escala.
Key features.
Super light weight 14g grams with case.
Compatible with DSM2 1024/2048 aircraft radio and module systems.
9 Channels Analog & Digital servo
Compact design 38mm x 26mm x 9mm, with case 46 x 30.7 x 14mm.
Single 195mm antenna for mounting in almost any location.
Input voltage: 3.7~9.6V.
2 x Satellite port included. TWIN SATELLITE PORTS
1 Port S.BUS OUT - Works with S.BUS servos and GY750.
Failsafe: All channels to bind position at signal loss.
Channels: 9chs + S. Bus (S. Bus can support up to 14 channels depending on your transmitter)
Sat Port: 2 (DSM2 remote receiver only)
Fail Safe types: Two (Smart safe or Preset Fail safe)
Características principais.
Super leve: 14g gramas com o estojo.
Compatível com sistemas de rádio e módulo de aeronaves DSM2 1024/2048.
9 canais analógicos e digitais.
Projeto compacto 38 mm x 26 mm x 9 mm, com estojo 46 x 30,7 x 14 mm.
Única antena de 195 mm para montagem em praticamente qualquer local.
Tensão de entrada: 3.7 ~ 9.6v.
2 x portas de satélite incluída. PORTAS DE SATÉLITE GÊMEOS.
1 Porta S.BUS OUT - Funciona com os servos S.BUS e GY750.
Segurança de falhas: Todos os canais para sincronizar a posição em caso de perda do sinal.
Canais: 9chs + S. Bus (o S. Bus pode suportar até 14 canais, dependendo do seu transmissor)
Porta Sat: 2 (apenas receptor remoto DSM2)
Tipos de segurança contra falhas: dois (segurança inteligente ou segurança de falha predefinida)

Binding:
Insert a bind plug in BIND/S.BUS port. Then power on receiver, The LED will flash to indicate that the receiver is in bind mode. Power on your
DSM2 Compatible transmitter while holding the bind button in. Once the receivers LED turns to steady on your receiver has bound. Remove the
power source from your receiver and then remove the bind plug. Power of your transmitter then turn it on again. Connect the power to your receiver
and check that the bind was successful if not repeat the steps above.
Sincronização / Vinculação:
Insira um plugue de ligação na porta BIND / S.BUS. Em seguida, ligue o receptor, o LED irá piscar
para indicar que o receptor está no modo de sincronizaç. Ligue o seu transmissor compatível com
DSM2 enquanto segura o botão de ligação. Uma vez que o LED do receptor fica estável, o receptor
está ligado. Remova a fonte de alimentação do seu receptor e remova o plugue de conexão. Ligue o
seu transmissor e ligue-o novamente. Conecte a energia ao seu receptor e verifique se a ligação foi
bem sucedida se não repetir os passos acima.
Fail Safe Setting:
Smart safe.
Insert the bind plug in your receiver, Power on your receiver and wait for the flashing LED. Power on your transmitter holding the bind button. Once
the LED on the receiver is steady on power of the receiver and radio and remove the bind plug. You are on in Smart safe mode.
Pre-set fail safe.
Insert the bind plug in the receiver. Power on the receiver. Once the LED is flashing remove the bind plug from the receiver. Once you have all
sticks and switches in the desired positions on your transmitter power on the transmitter holding the bind button. This will program the Receivers fail
safe in the positions that the radio was in at the time of binding.
Portas de satélites incluídas. (Maior redundância e força de conexão)
Dois chips CYP usados. Tornando-se um verdadeiro sistema receptor
externo.
Satellite port included. (Increased redundancy and link strength)
Two CYP chips used. Making it a true outdoor receiver system.

Configuração “Segurança de Falhas”:
Segurança inteligente.
Insira o plugue de ligação no seu receptor, ligue seu receptor e aguarde o LED ficar piscando.
Ligue o seu transmissor segurando o botão de ligação. Depois que o LED no receptor estiver
estável na energia do receptor e do rádio, remova o plugue. Você está no modo de segurança
Inteligente.
Segurança de falhas predefinido.
Insira o plugue de ligação no receptor. Ligue o receptor. Quando o LED estiver piscando, remova o
plugue de ligação do receptor. Depois de ter todas as alavancas e interruptores nas posições
desejadas na potência do transmissor e segurando o botão de ligação do módulo. Isso irá
programar os Receptores com segurança nas posições em que o rádio estava no momento da
ligação.
S. Bus
S. Bus is a multi channel signal out mode similar to the Futaba system
The S. Bus port is enabled by default, simply connect your S. Bus equipment and you can begin to use it. You will require S. Bus compatible servos
and an S. Bus programming device. S. Bus servos must be per-programmed to your own channel requirements.
S. Bus servo channel setting mode.
Insert bind plug in BIND/S.BUS port.
Connected the S. Bus servo in correct channel you will use.
S. Bus
S. Bus é um modo de saída de sinal multicanal semelhante ao sistema Futaba
A porta S. Bus está ativada por padrão, basta conectar seu equipamento S. Bus e você pode
começar a usá-lo. Você precisará de servos compatíveis com S. Bus e um dispositivo de
programação S. Bus.
Os servos S. Bus devem ser programados de acordo com seus requisitos de canal.
Modo de configuração do canal de servo S. Bus.
Insira o plugue de ligação na porta BIND / S.BUS.
Conectado o servo de S. Bus no canal correto que você irá usar.
Output Connector
Channel Setting
Mode A
Mode B
CH1
CH1
CH9
CH2
CH2
CH10
CH3
CH3
CH11
CH4
CH4
CH12
CH5
CH5
CH13
CH6
CH6
CH14
CH7
CH7
N/A
CH8
CH8
N/A
Power on the receiver. (DON’T power on your Radio). When the LED is flashing rapidly you are in Mode A, you can set your S. Bus servo to work
with CH1 to CH8. To enter mode B remove the bind plug and wait for the LED to start flashing slowly. You can set your S. Bus to work with CH9 to
CH14. (please note, there are no DSM2 radios with a CH13 or CH14 at the time of printing this manual).
Ligue o receptor. (Não ligue o seu rádio). Quando o LED está piscando rapidamente você está no
Modo A, você pode configurar o seu servo S. Bus para trabalhar com CH1 a CH8. Para entrar no
modo B, remova o plugue e aguarde até que o LED comece a piscar lentamente. Você pode definir
o seu S. Bus para trabalhar com CH9 a CH14. (observe que não há rádios DSM2 com um CH13 ou
CH14 no momento da impressão deste manual).

EXTRA: INSTRUÇÕES PARA SINCRONIZAÇÃO DE TX / RX ORANGE
Guia do Usuário do Receptor HobbyKing OrangeRX DSM2 2.4 Ghz
Tente este link para receptores Orange - http://www.youtube.com/watch?v=KioknwbY1pg
EXTRA: ORANGE TX/RX BINDING INSTRUCTION
Try this link for Orange Receivers - http://www.youtube.com/watch?v=KioknwbY1pg
Hobby King OrangeRX DSM2 2.4 Ghz Receiver User Guide
The HobbyKing Orange Receiver features DSM2™ technology and is compatible with all Spektrum™ and
JR® aircraft transmitters that support DSM2 technology, like the 12X, X9303, DX7, DX6i, DX5e and Module
Systems. Note: The OrangeRX receivers are not compatible with the DX6 park flyer radio system.
Compatible with all Spektrum DSM2 Air transmitters.
Portas de satélites incluídas. (Maior redundância e força de conexão)
Dois chips CYP usados. Tornando-se um verdadeiro sistema receptor externo.
Satellite port included. (Increased redundancy and link strength)
Two CYP chips used. Making it a true outdoor receiver system.
Sincronização / Vinculação
O receptor OrangeRX deve estar sincronizado ao transmissor antes de operar. Sincronização é o
processo de ensinar ao receptor o código específico do transmissor, de modo que ele só se
conecte a esse transmissor específico.
1. Para ligar um OrangeRX a um transmissor DSM2, insira o plugue de ligação na porta BATT /
BIND no receptor.
Nota: Para ligar uma aeronave com um controlador eletrônico de velocidade (ESC) que aciona o
receptor através do canal de aceleração (ESC / BEC), insira o plugue de ligação na porta BATT /
BIND no receptor e o acelerador na porta do acelerador (THRO). Prossiga para o passo # 2.
2. Ligue o receptor. Observe que o LED no receptor deve estar piscando, indicando que o receptor
está no modo de ligação e pronto para ser sincronizado ao transmissor.
3. Mova as alavancas e os interruptores no transmissor para as posições à prova de falhas
desejadas (posições de controle de aceleração baixa e neutra).
4. Siga os procedimentos do seu transmissor específico para entrar no modo de sincronização
(Bind), o sistema conectará em poucos segundos. Uma vez conectado, o LED no receptor ficará
aceso, indicando que o sistema está conectado.
5. Remova o plugue de ligação da porta BATT / BIND no receptor antes de desligar o transmissor.
6. Depois de configurar seu modelo, é importante religar o sistema para que as posições de baixa
aceleração e superfície de controle neutro sejam definidas.
IMPORTANTE: Remova o plugue de conexão para impedir que o sistema entre no modo de
conexão na próxima vez que a energia for ligada.
Binding
The OrangeRX receiver must be bound to the transmitter before it will operate. Binding is the process of teaching the receiver the specific code of
the transmitter so it will only connect to that specific transmitter.
1. To bind an OrangeRX to a DSM2 transmitter, insert the bind plug in the BATT/BIND port on the receiver.
Note: To bind an aircraft with an electronic speed controller that powers the receiver through the throttle channel (ESC/BEC), insert the bind plug
into the BATT/BIND port in the receiver and the throttle lead into the throttle (THRO) port. Proceed to Step #2.
2. Power the receiver. Note that the LED on the receiver should be flashing, indicating that the receiver is in bind mode and ready to be bound to
the transmitter.
3. Move the sticks and switches on the transmitter to the desired failsafe positions (low throttle and neutral control positions).
4. Follow the procedures of your specific transmitter to enter Bind Mode, the system will connect within a few seconds. Once connected, the LED on
the receiver will go solid indicating the system is connected.
5. Remove the bind plug from the BATT/BIND port on the receiver before you power off the transmitter.
6. After you’ve set up your model, it’s important to rebind the system so the true low throttle and neutral control surface positions are set.
IMPORTANT: Remove the bind plug to prevent the system from entering bind mode the next time the power is turned on.
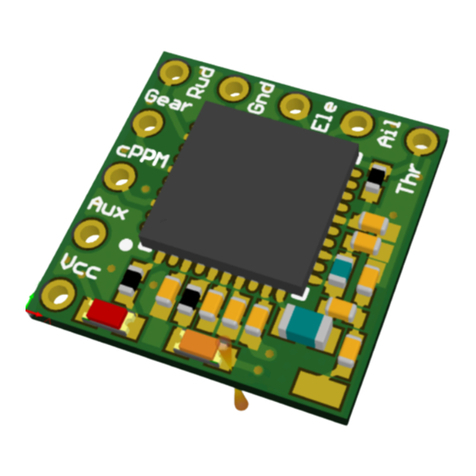
Teste de Alcance
Antes de cada sessão de voo e especialmente com um novo modelo, é importante realizar uma
verificação de alcance. Todos os transmissores de aeronaves Spektrum incorporam um sistema de
teste de alcance que, quando ativado, reduz a potência de saída, permitindo uma verificação de
faixa.
1. Com o modelo imobilizado no solo, mantenha 30 passos (aprox. 90 pés / 28 metros) de distância
do modelo.
2. De frente ao modelo com o transmissor em sua posição normal de vôo, coloque o transmissor
no modo de verificação de alcance.
3. Você deve ter controle total do modelo com o botão pressionado a 30 passos (90 pés / 28
metros).
Range Testing
Before each flying session and especially with a new model, it is important to perform a range check. All Spektrum aircraft transmitters incorporate a
range testing system which, when activated, reduces the output power, allowing a range check.
1. With the model restrained on the ground, stand 30 paces (approx. 90 feet/28 meters) away from the model.
2. Face the model with the transmitter in your normal flying position and place your transmitter into range check mode.
3. You should have total control of the model with the button depressed at 30 paces (90 feet/28 meters).
Requisitos do sistema de energia do receptor
Sistemas inadequados de energia que não são capazes de fornecer a voltagem mínima necessária
ao receptor durante o vôo se tornaram a causa número um de falhas em vôo. Alguns dos
componentes do sistema de energia que afetam a capacidade de fornecer energia adequada
adequadamente incluem:
• Bateria do receptor (número de células, capacidade, tipo de célula, estado de carga)
• A capacidade do ESC de fornecer corrente ao receptor em aeronaves elétricas
• O chicote do interruptor, os cabos da bateria, os cabos do servo, os reguladores, etc.
Os receptores tem uma tensão operacional mínima de 3,5 volts;
É altamente recomendável que o sistema de energia seja testado de acordo com as diretrizes
abaixo.
Receiver Power System Requirements
Inadequate power systems that are unable to provide the necessary minimum voltage to the receiver during flight have become the number one
cause of in-flight failures. Some of the power system components that affect the ability to properly deliver adequate power include:
• Receiver battery pack (number of cells, capacity, cell type, state of charge)
• The ESC’s capability to deliver current to the receiver in electric aircraft
• The switch harness, battery leads, servo leads, regulators etc.
The AR6100/AR6100e has a minimum operational voltage of 3.5 volts; it is highly recommended the power system be tested per the guidelines
below.
Segurança de falhas
O OrangeRX possui Segurança de falhas. Quando o sinal é perdido, o canal do acelerador é
conduzido apenas para a sua posição predefinida de falha (normalmente baixa aceleração)
enquanto todos os outros canais mantêm o último comando.
• Previne a resposta não intencional do motor elétrico no arranque.
• Elimina a possibilidade de excesso de servos na partida, armazenando posições pré-definidas
contra falhas.
• Estabelece resistência à falha de baixa aceleração e mantém a posição da superfície de controle
do último comando se o sinal de RF for perdido.
Failsafe
The OrangeRX features a failsafe. When signal is lost the throttle channel only is driven to its preset failsafe position (normally low throttle) while all
other channels hold last command.
• Prevents unintentional electric motor response on start-up.
• Eliminates the possibility of over-driving servos on start-up by storing preset failsafe positions.
• Establishes low-throttle failsafe and maintains last-commanded control surface position if the RF signal is lost.

Energia somente no receptor
• Em aeronaves elétricas, quando o receptor é ligado somente (nenhum sinal do transmissor está
presente), o canal do acelerador não tem saída, para evitar operar ou armar o controle de
velocidade eletrônico.
Nota: Alguns servos analógicos podem encostar ligeiramente, mesmo que não haja sinal. Isto é
normal.
• Todos os outros canais mantêm suas últimas posições comandadas definidas durante a ligação.
Após conexão
• Quando o transmissor é ligado e depois que o receptor se conecta ao transmissor, ocorre o
controle normal de todos os canais.
• Depois que o sistema fizer uma conexão, se ocorrer perda de sinal, o Failsafe acionará o servo do
acelerador somente para a posição de segurança prescrita (baixa aceleração) que foi definida
durante a ligação.
• Todos os outros canais mantêm sua última posição comandada. Quando o sinal é recuperado, o
sistema imediatamente (menos de 4ms)
Receiver Power Only
• In electric aircraft, when the receiver only is turned on (no transmitter signal is present), the throttle channel has no output, to avoid operating or
arming the electronic speed control.
Note: Some analog servos may coast slightly even though no signal is present. This is normal.
• All other channels hold their last commanded positions set during binding.
After Connection
• When the transmitter is turned on, and after the receiver connects to the transmitter, normal control of all channels occurs.
• After the system makes a connection, if loss of signal occurs, Failsafe drives the throttle servo only to its preset failsafe position (low throttle) that
was set during binding.
• All other channels hold their last commanded position. When the signal is regained, the system immediately (less than 4ms)
Table of contents
Other Hobby King Receiver manuals

Hobby King
Hobby King ORANGE R415X User manual

Hobby King
Hobby King ORANGE R618XL User manual

Hobby King
Hobby King ORANGE R1220 Series User manual

Hobby King
Hobby King orange r410x User manual

Hobby King
Hobby King ORANGE R620 Series User manual

Hobby King
Hobby King ORANGERX R614XN User manual

Hobby King
Hobby King D58-4 User manual

Hobby King
Hobby King ORX TX10i User manual

Hobby King
Hobby King ORANGE R616XN User manual

Hobby King
Hobby King OrangeRX George 4 User manual