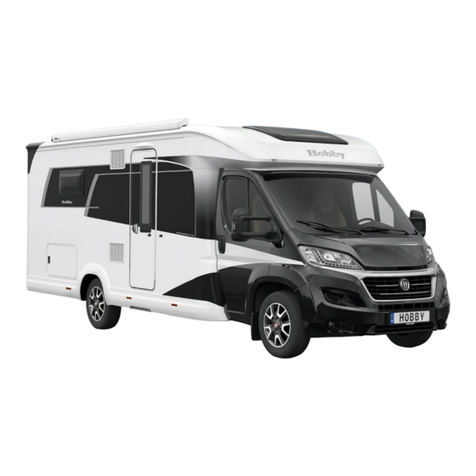
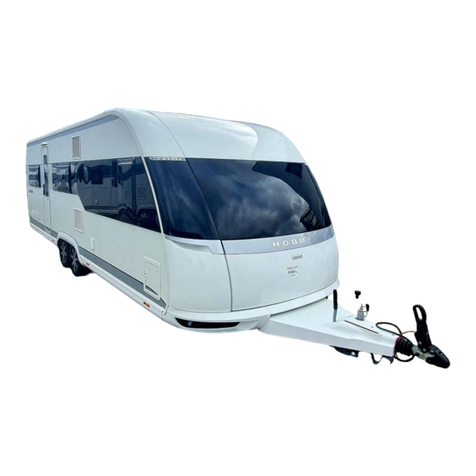
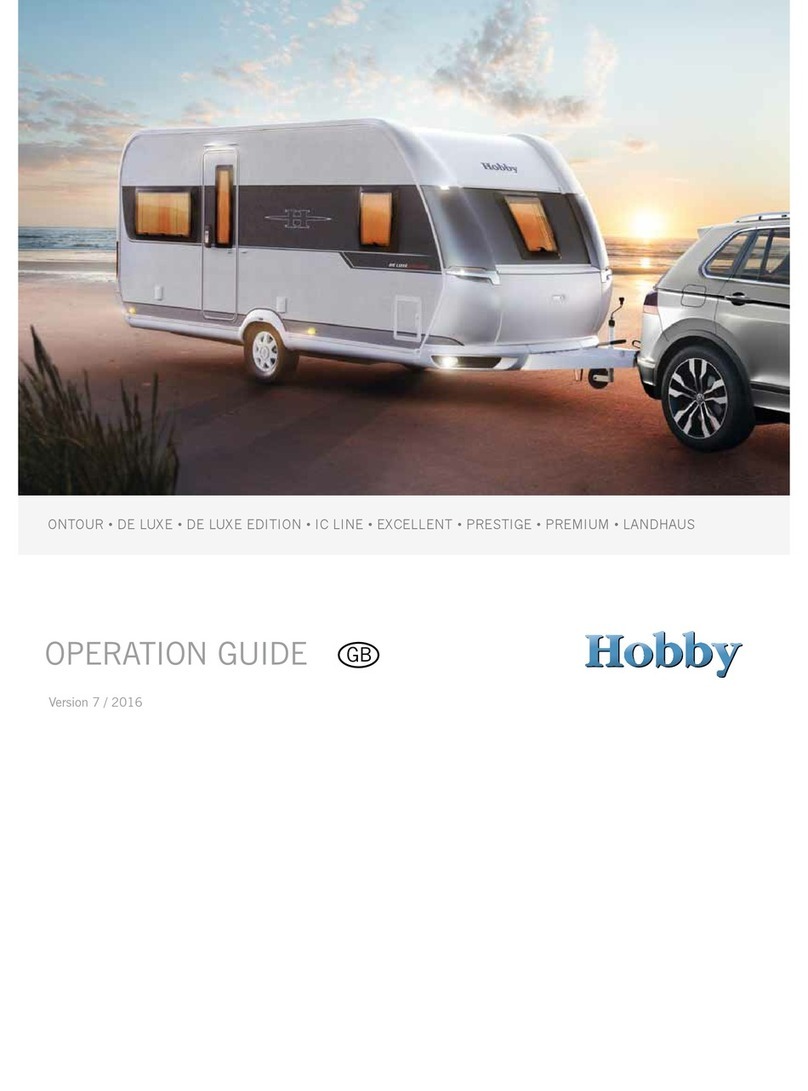
Hobby 400 SB Excellent Easy User manual

Operation Guide
Camper
Hobby-Wohnwagenwerk•Ing. Harald Striewski GmbH•Harald-Striewski-Straße 15• 24787 Fockbek • Tel.: 0 18 05/33 99 09 (0,12 /Min.) • www.hobby-caravan.de
Vers. 12/06
Weltweit Nummer 1
Operation Guide Camper
GB
Weltweit Nummer 1

Dear Motor Home Owners,
We would like to congratulate you on the purchase of your new HOBBY motor home and hope that you
will always enjoy traveling with it.
Please read this manual carefully, even if you have been driving a motor home for a longer period of
time. It will help you to avoid operating errors and damage to the vehicle and its equipment. Correct
handling of all technical details will increase your driving comfort and maintain the value of your motor
home.
We wish you and your companions many enjoyable trips and hope you always have a safe journey.
Your
HOBBY Motor Home Plant
Ing. Harald Striewski GmbH

Table of Contents
1 Introduction..............................................................................................................01-1
1.1 General information ...........................................................................................01-1
1.2 Markings in these operation instructions...........................................................01-2
2 Safety........................................................................................................................02-1
2.1 General information ...........................................................................................02-1
2.2 Before and during the drive ...............................................................................02-1
2.3 Guidelines for the trip ........................................................................................02-4
2.4 Emergency equipment.......................................................................................02-9
2.5 Maximum speeds ............................................................................................02-11
2.6 After the drive ..................................................................................................02-15
3 Undercarriage and vehicle registration.................................................................03-1
3.1 Undercarriage ....................................................................................................03-1
3.2 Vehicle registration.............................................................................................03-7
3.3 General inspection.............................................................................................03-7
3.4 Denitionofmass(weight).................................................................................03-8
3.5 Rotating stanchions...........................................................................................03-9
3.6 Entry step tread ...............................................................................................03-10
3.7 Locking break facilities ....................................................................................03-10
3.8 Overrunning brake facilities .............................................................................03-11
4 Wheels, tires ............................................................................................................04-1
4.1 Tires ...................................................................................................................04-1
4.2 Tire pressure ......................................................................................................04-1
4.3 Proledepthandageoftires.............................................................................04-2
4.4 Rims...................................................................................................................04-2
4.5 Changing the tire ...............................................................................................04-4
5 Exterior structure ....................................................................................................05-1
5.1 Forced ventilation/de-aerating...........................................................................05-1
5.2 Vehicle keys .......................................................................................................05-3
5.3 Exterior mirrors ..................................................................................................05-5
5.4 Roof rail..............................................................................................................05-5
5.5 Entry door ..........................................................................................................05-6
6 Installation of electrical devices ............................................................................06-1
6.1 Safety tips..........................................................................................................06-1
6.2 Service panel .....................................................................................................06-2
6.3 Electrical supply.................................................................................................06-4
6.4 Function of the electrical supply unit.................................................................06-6
6.5 Truma-Vent blower.............................................................................................06-7
6.6 Changing taillight bulbs .....................................................................................06-8
6.7 Circuitdiagram(interior) ....................................................................................06-9
6.8 Circuitdiagram(exterior) .................................................................................06-10
6.9 Lighting in the camper .....................................................................................06-12
6.10Electricoorheating ........................................................................................06-14
7 Interior structure......................................................................................................07-1
7.1 Openingandclosingdoorsandaps................................................................07-1
7.2 Oval media storage cupboard ...........................................................................07-2
7.3 Windows ............................................................................................................07-3
7.4 Roof bonnets .....................................................................................................07-5
7.5 Seat chests and conversion of beds .................................................................07-7
7.6 Children's beds..................................................................................................07-9
8 Water.........................................................................................................................08-1
8.1 Water supply......................................................................................................08-1
8.2 Waterushingtoilet ...........................................................................................08-3
8.3 Warm water supply via Truma-Therme ............................................................08-8
9 Gas ...........................................................................................................................09-1
9.1 General safety rules for the use of liquid gas facilities ......................................09-1
9.2 Gas supply.........................................................................................................09-3
9.3 Heating element.................................................................................................09-5
9.4 Refrigerator........................................................................................................09-7
9.5 Gas cooker ........................................................................................................09-8
9.6 Hot-water heating system .................................................................................09-9
9.7 Boiler..................................................................................................................09-9
9.8 Oven ................................................................................................................09-10
10 Accessories..............................................................................................................10-1
11 Maintenance and upkeep .......................................................................................11-1
11.1 Maintenance ......................................................................................................11-1
11.2Ventilation ...........................................................................................................11-2
11.3 Upkeep ..............................................................................................................11-2
11.4 Winter operation ................................................................................................11-7
12 Wste disposal and environmental protection .......................................................12-1
12.1 The environment and mobile travel ...................................................................12-1
13 Technical data..........................................................................................................13-1
13.1 Tire pressure values.........................................................................................13-1
13.2 Weights in accord. with 97/27/EG Saison 2007..............................................13-1
13.3 Basic equipment..............................................................................................13-3
13.4 Lighting............................................................................................................13-4
Index ............................................................................................................................Ix-1

Our campers are continuously being further de-
veloped. Please understand that we reserve the
right to make changes to their equipment, shape
and technology. Therefore, HOBBY shall not be
liable for any claims arising from the contents of
this handbook. The equipment used at the time of
printing is described in this handbook and should
be transferred accordingly to the layouts of all the
different camper variations. Please understand
that we cannot describe all of the individual vari-
ations. Your dealer will be pleased to answer any
special questions regarding the equipment and
technology of your camper.
Your HOBBY camper has been built in accor-
dance with the latest technology and recognis-
ed safety regulations. Despite all of these safety
measures, it is possible that people may be hurt
or the camper damaged if the safety instructions
in this handbook and the warnings posted on ad-
hesive labels in the camper are not followed.
Please use the camper only when it is in perfect
technical condition.
Any defects that may endanger human safety or
the safety of the camper should be repaired im-
mediately by an expert.
The brakes, electrical and gas equipment should
only be checked and repaired by an authorised
workshop.
Watch the total, technically admissible weight li-
mit and do not carry more personal and/or spe-
cial equipment than allowed.
Ensure that you observe the xed maintenance
and inspection dates.
1. Introduction
1.1 General information
Before the rst trip
You should certainly familiarize yourself tho-
roughly with the contents of this handbook; it is
much more than a reference book.
Fill out the guarantee cards for the built-in appli-
ances in the separate instructions, and send the
guarantee cads to the respective manufacturers.
In doing so, you secure your right to a guarantee
for all devices.
HOBBY grants a 5-year guarantee
on the watertightness of the camper
in accordance with guarantee condi-
tions. When you accept the vehicle
you will receive the guarantee book-
let, "Five-Year Guarantee on Water-
tightness" from your HOBBY dealer.
01-1

1
01-2
Annual leak checks are not free of
charge. Warning: If no leak inspection
is performed, your right to the 5-year
guarantee loses its validity.
Markings in these operation
instructions
The handbook explains the camper as follows:
Texts and illustrations
The texts which accompany illustrations are
found directly to the right of the illustrations. De-
tailsinillustrations(here:entrydoor)aremarked
withpositionnumbers(1).
Lists
- Lists are based on key points and are pre-
ceded by a dash.
Procedural guidelines
•Procedural guidelines are also based on key
points and begin with a round sentence
opener.
1.2 Markings in these operation instructions
Guidelines
Guidelines point out important details
which ensure the trouble-free function
of the camper and its equipment.
Please bear in mind that various
models have different equipment;
therefore, varying descriptions are
possible.
WARNINGS
Warnings point out dangers which, if
they are not followed, could cause
damage to equipment and/or injury
to persons.
Environmental tips
Environmental tips show possible
ways to reduce strain on the environ-
ment.


02-1
2. Safety
2.1 General information
2.2 Before and during the drive
This chapter includes important safety instruc-
tions which will protect both people and property
in the camper.
• Ensure that there is sufcient ventilation. Built-
in forced ventilation (roof bonnets with forced
ventilation or mushroom roof ventilators) must
never be covered. Keep forced ventilation free
of snow and leaves: danger of suffocation!
• Note the height of the entry door.
• Descriptions of built-in devices (refrigerator,
heating, cooker, etc.) as well as more in-depth
operating instructions must always be obser-
ved.
• The measurements, weight and driving perfor-
mance of the camper may change if accessories
or extras requested by the customer are built in.
Please check whether such add-ons must be
entered in the vehicle's registration certicate.
• Use only tires and rims that have been appro-
ved for your camper. Please check vehicle do-
cumentation for information on tire and rim si-
zes.
• The locking brake of the camper must always
be activated whenever the carriage is parked.
• To climb on or load the roof: use only ladders
that meet safety standards and are secure.
Crank the winding stanchions so they are rm-
ly on the ground and/or couple the camper to
the base vehicle. Otherwise, the camper can tilt
backwards.
As the owner and driver, you are responsible for
the condition of your vehicle. Therefore, you must
note the following points:
Warnings and information labels are
attached both inside and outside the
vehicle. These are meant for your
safety and may not be removed.

02-2
Exterior
Go around the carriage and prepare for the drive
as follows:
Preparation of the vehicle
• The camper must be hitched properly (see
guidelines for the safety hitch WS3000).
•The pull rope must be connected to the base
vehicle.
• Tighten the tire bolts after driving the rst 50
km.
• Plug the 13-channel plug in the socket of the
base vehicle.
• Inspect the vehicle lighting.
• Turn the winding stanchions and the front
landing wheel upward and secure them.
• Close gas bottles (heating is forbidden while
driving).
• Empty the waste water tank.
• Close gas bottle compartment.
• Adjust outer mirrors on base vehicle.
• Check camper's tire pressure (see tire
pressure table).
•Close all windows.
• Close and rmly lock roof bonnet.
• Shut off the light on the outer tent.
•Close and secure entry door.
• If necessary, pull electrical cord out of the
exterior socket.
• If necessary, pull television antenna inward as
far as possible.
• If necessary, secure the roof load and lash it
to prevent slippage.
• If necessary, secure all bicycles and lash them
to prevent slippage, ensuring that they do not
cover any lighting equipment.
• In winter, the roof must be free of snow and
ice before you begin to drive.

02-3
Interior
You must also prepare the interior of the vehicle.
Preparing the interior:
•Sort all loose objects and store them in their
respective compartments.
• Heavy and/or voluminous objects (e.g. TV/
radio) should be stored safely and secured
against slipping.
• If necessary, redirect refrigerator to 12-volt
operation.
• Shut off all interior lighting.
•
Ensure that all uids, including those in refrig-
erator, are secured to prevent leakage.
• Close main valve on gas container and quick-
close valves on all gas-powered appliances.
• Close all doors (incl. refrigerator door),
drawers and aps tightly.
• Latch the sliding door.
•Lower table and secure it.
Do not overload the vehicle! Note the
permissible gross weight, permissi-
ble axle load(s) as well as the permit-
ted height, width and length of the
camper.
Post a list with all signicant weights
and measurements of the carriage in
a highly visible place in the base
vehicle.
Do not forget the following:
•Adjust exterior mirrors.
• Check the lights.
Before you start off
Before you leave, you should be able to answer
the following questions with a "yes":
• Do you have a rst-aid kit and warning tri-
angle on board?
• Is the lighting on the front, rear and sides in
prooper condition?

02-4
• Are all passengers restrained in the base
vehicle with seatbelts?
• Have all passengers exited the camper?
Staying in the camper during the
drive is prohibited by law! In the
event of an accident, passengers
can be hurled out and sustain po-
tentially fatal injuries.
2.3 Guidelines for the trip
Loading
Rules for loading:
• Spread the load evenly between the left and
right-hand side of the camper. Heavy or bulky
objects belong in the lower storage compart-
ments and near the axle.
• If your camper has a tandem axle: distribute
the centre of weight between the two axles.
• Never place the entire load at the tail end of
the camper (danger of slewing).
• Heavy objects should be stowed securely to
prevent them from slipping.
• Lighter objects (clothing) should be stowed in
the wall cupboards.
•You may not always be able to follow the re-
recommended stowing arrangement, because
storage possibilities are distributed throughout
the entire interior of the camper. If necessary,
stow heavy objects in the base vehicle.
•Lash the roof load securely.
• Store baggage in the interior in cupboards
and storage compartments.
• Secure doors and aps.
• After loading, check total weight and axle
load(s) at a public weigh station.
The additional load represents the difference
between the gross vehicle weight rating and the
mass in running order. This value must include
the masses for:
- additional equipment (in addition to that which
is pre-installed by the dealer or at the factory),
- personal equipment (i.e., clothing, food, tele-
vision set, tys, pets, etc.).

02-5
The gross vehicle weight rating in-
dicated in the vehicle documents as
well as the permitted drawbar load
may not be exceeded. Also note the
permissible drawbar load of your
base vehicle.
Providing your base vehicle permits
this and depending on the size of the
camper, you can improve the driving
quality by increasing the drawbar
load.
The lower a vehicle's centre of gravi-
ty is, the better its performance in
curves and on the road.
Stowage areas in the camper
- Light objects (1) such as towels and light-
weight laundry.
- Medium-weight objects (2) such as clothing,
laundry and food.
- Heavy objects (3) such as the outer tent and
the motor of your boat.
3
2
1
If your camper is equipped with a rear bicycle
rack, the reduction in the drawbar load created
by the bicycles must be compensated by the
rest of the load. The caravan should be loaded
in such a manner as to take full advantage of
the base vehicle's permissible drawbar load.
(Do not exceed the camper's maximum support
burden of 100 kg.)
Drawbar load
You will only achieve optimum driving stability
and decisively increase your safety on the road if
the drawbar load has been properly adjusted for
your combination of base vehicle and the cam-
per being pulled. The drawbar load indicates the
power the camper's drawbar exerts on the car's
clutch. The drawbar load for your combination
should be oriented towards the highest possib-
le drawbar load, whereby the lower value must
always set the upper limit.
Rules for the drawbar load:
• Set the correct drawbar load by using, for
example, a drawbar load scales, which is held
perpendicular to the clutch module. The
trailer's drawbar must be in a horizontal posi-
tion.

02-6
• Always check the drawbar load before you
start to drive!
• The specied drawbar load (see handbook
or type plate) and the permissible overall
mass of the base vehicle and the camper may
not be exceeded!
How to adjust the correct drawbar load:
1. Determine the maximum drawbar load of your
base vehicle by checking its documentation,
the type plate or the drawbar plate.
2. Your HOBBY camper has a maximum per-
missible drawbar load of 100 kg.
3. Adjust the drawbar load on the camper to the
lower of the two values by loading it careful-
ly. At the same time, try to make full use of
this value.
4. The lower of the two specied values for the
drawbar load, i.e. that of the base vehicle or
the camper, may not be exceeded.
Roof loads
The height of the camper may vary on each drive
depending on the roof load.
Rules for roof load
•Add the measurements of the roof load to
the height of the camper.
• Post a note in a highly visible area of the base
vehicle which lists the total vehicle height.
Then you will no longer have to calculate the
height at bridges and thoroughfares.
• Roof loads have a negative effect on the
camper's driving performance and should,
therefore, be avoided.
The maximum permissible roof load
while driving is 50 kg!
Brakes
A trailer carriage behaves differently from an
individual vehicle while braking. Therefore, it is
advis-able (especially for inexperienced drivers)
to conduct several braking tests on a suitable
surface. The braking distance for a carriage is

02-7
longer than that of an individual vehicle. The load
in the caravan also has a signicant inuence on
the braking distance.
Rules for braking
• Note the longer braking distance on wet
roads.
• When driving down mountains or steep hills,
do not use a higher gear than when driving
uphill.
• Principally, an overrunning brake system
cannot differentiate between a "normal"
braking procedure and driving over a pass,
which lasts for a longer period of time. This
can cause the wheel brakes to heat up
strongly so that, if necessary, you must give
them sufcient time to cool down.
Shunting
Your carriage is signicantly larger than a car.
Rules for shunting
• There is a signicant blind spot in shunting,
even when the exterior mirrors are properly
adjusted.
• Use a guide when turning into difcult parking
spots.
The guide may not position him- or
herself between the base vehicle
and the camper.
Driving
Take a test drive before the rst long drive to
better acquaint yourself with the carriage in driv-
ing conditions. Also practice driving in reverse.
Rules for driving
• Do not underestimate the length of the
carriage.
• Exercise special caution when driving toward
yards and through gates.
• In conditions with strong side winds, slick ice
or wet roads, the carriage could move back
and forth.
• Adjust driving speed to overall street and traf-
c conditions.

02-8
• Long, lightly sloping roads are potentially
dangerous. Measure your speed from the
outset in such a manner that the carriage can
be accelerated, if necessary, without endan
gering other drivers or pedestrians.
• If the carriage moves back and forth on a
sloping road, brake carefully but rapidly if the
carriage forms a line, i.e. if it is stretched.
•Never increase speed if the carriage be-
comes pendulous.
• Do not drive down a hill any faster than you
would drive up one.
• When passing trucks or buses (or if another
truck or bus passes you), the carriage can be
caught up in air suction. Slight counter-steering
can eliminate this effect.
Driving in reverse
Your HOBBY camper has a braking system with
automatic reverse. This makes driving in reverse
possible without activating the overrunning brake.
However, in addition to rolling resistance, the resi-
dual brake force must rst be overcome.
Rules for driving in reverse
•The camper tilts in the opposite direction in
which you steer.
• Use a guide when driving in reverse.
The guide may not position him- or
herself between the base vehicle and
the camper.
Driving around curves
Your carriage is considerably longer than a car.
Rules for driving around curves
• Do not take curves too quickly or too sharply!
• Take the curve at a somewhat wider radius
when turning.
• Note that the camper can sheer out of line over
the rear.

02-9
2.4 Emergency equipment
100 m
To be prepared for an emergency, you need at
lest three basic items of rescue equipment (rst
aid kit, warning triangle and re extinguisher)
which you should carry at all times and know
how to use.
First aid kit
The rst aid kit (standard equipment) should be
within reach at all times and have a xed place
in the base vehicle. Should you remove anything
from the rst aid kit, remember to replace it imme-
diately. Expiry dates should be checked regularly.
Warning triangle
The warning triangle should also be within reach
at all times and preferably stored together with the
rst aid kit.
In an emergency
• Place the warning triangle at least 100 m in
front of the scene of danger!
High-visibility vest (not included)
We recommend that, in accordance with EN 471,
you carry and wear a high-visibility vest with
white retroreective stripes whenever you leave
the vehicle on open roads or the hard shoulder.
The driver should wear a high-visibility vest if the
carriage
• has an accident or breaks down on a section
of country road that, due to weather condi-
tions, is not visible, or at dusk or in the dark,
or
• has an accident or breaks down and comes to
a stop on the hard shoulder of a motorway, and
a warning triangle must be set up to protect it.
Fire extinguisher
(not included)
You should familiarize yourself with the handling of
the re extinguisher early on.
Note the ll date! The re extinguisher must be
inspected every two years.

02-10
Fire prevention measures
• Never leave children unattended in the vehicle.
• Keep ammable materials away from all hea-
ting and cooking appliances.
• Changes to the electrical system, gas system
or built-in devices may only be carried out by
professional, authorised workshops.
• Place a re extinguisher at the main entry door.
• Ensure that everyone is familiar with the guide-
lines on the re extinguisher.
• Place a re cover near the gas cooker.
• Keep all escape routes clear.
• Ensure that everyone is familiar with the re
prevention measures on site.
Fighting a re
• Evacuate all passengers immediately.
• Close the valves on the gas container.
•Shut off the electrical supply
• Sound alarm and call the re department.
• Only ght the re yourself if this is possible
without risk.

02-11
2.5 Maximum speeds
1. Your HOBBY camper is technically equipped for a maximum speed of 100 km/h. Under no
circumstances may this speed be exceeded!
2. Note the permissible maximum speeds for trailer carriages in the country in which you are
travelling!
3. Road trafc regulations in Germany were changed on 22 October 2005. Your camper was
already set to a speed of 100 at the factory, and this has been entered in the camper's
registration documents. Upon request, the 100 km/h sticker will be issued by the road trafc
authority when the camper is initially registered and attached to the back of the vehicle.
4. The following points must be observed, because you are responsible for adhering to them. If
they are not met, the maximum speed for the camper is no more than 80 km/h!
a) The base vehicle must be equipped with an anti-locking system/anti-lock device and may
not exceed an overall mass of 3.5 tons.
b) The camper must be equipped with hydraulic vibration dampers (shock absorbers);
naturally, your new HOBBY camper is equipped with these.
c) The camper's tires may be no more than six years old. They must be marked at least with
an L (= 120 km/h) for the appropriate speed category.
d) The camper must be equipped with a stabilising unit in accordance with ISO 11555-1
(standard in this HOBBY series since 1997).
The overall mass of the camper may not exceed the unladen mass of the car.
5. Free interchangeability of base vehicle and camper:
Different campers may be combined with different base vehicles.
You are responsible for ensuring that the preceding regulations are met if you plan to drive at
100 km/h. Should this not be the case, the maximum speed in Germany is 80 km/h!
6. The correct drawbar load gives you more safety:
Please refer to page 02-5 for the recommended drawbar load.

02-12
Speed Regulation in Europe (km/h)
Motorway
Country
Within
city limits
outside
city limits Cars Trailer Carriages
Belgium 50 90 120 120 [a]
Bosna-Herzeg. 60 80 120 n/a
Bulgaria 50 90 130 120 [a]
Germany 50 [b] 100 130 [c] 80 [d]
Denmark 50 80 130 80
Estonia 50 90 110 90
Finland 50 100 120 80
France 50 90 [e,f,g] 130 [f,g] 130 [a]
Greece 50 90 [t] 120 80
Great Britain 45 96 112 96
Ireland 50 80 [i] 120 120 [a]
Italy 50 90 130 [r,s] 80
Croatia 50 90 [i] 130 80
Latvia 50 90 110 80
Lithuania 60 90 110 110 [a]
Luxemborg 50 90 [k] 130 [j,k] 90 [j]
Malta 50 80 ñ ñ
Macedonia 50 [u] 80 [i] 120 80

02-13
Netherlands 50 80 [i] 120 80
Norway 50 80 90 80 [l]
Austria 50 100 130 [m] 100 [n]
Poland 50/60 [w] 90 [i] 130 80
Portugal 50 90 120 [o] 100
Romania 50 90 120 100 [p]
Sweden 50 90 110 80 [q]
Switzerland 50 80 [i] 120 80
Serbia/Monten. 60 80 [i] 120 80
Slovakia 60 90 130 80
Slovenia 50 90 [i] 130 80
Spain 50 90 [i] 120 90 [v]
The Czech Repub. 50 90 130 80
Türkey 50 90 120 80
Hungary 50 90 [e] 130 80
Cyprus 50 80 100 100
Stand 06/2005
Please note:
[a]
[b] In many areas, zones have been set up in which the maximum speed is limited to 30 km/h
[c] Recommended speed
[d] Maximum speed of 100 km/h under certain circumstances
[e] 110 km/h on the motorway
[f] On wet rads, the speed outside city limits must be reduced by 10 km/h, on expressways by 20 km/h
[g]
[i] Maximum speed of 100 km/h on expressways
If a german trailer carriage is involved in an accident at a speed of more than 100 km/h, you may except only limited
insurance benefits, because due to their construction campers in Germany are only licensed up to 100 km/h
Maximum speed for drivers who have held their driver`s licence for less than two years: outside city limits 80 km/h,
on expressways 100 km/h and on motorways 110 km/h
This manual suits for next models
53
Table of contents
Other Hobby Motorhome manuals

Hobby
Hobby ONTOUR 2018 User manual

Hobby
Hobby ONTOUR Series User manual

Hobby
Hobby Van Exclusive User manual

Hobby
Hobby De Luxe Easy User manual

Hobby
Hobby ONTOUR User manual

Hobby
Hobby VAN Siesta User manual

Hobby
Hobby BEACHY 2022 User manual

Hobby
Hobby Van Exclusive User manual

Hobby
Hobby FIAT Premium Drive User manual

Hobby
Hobby optima User manual