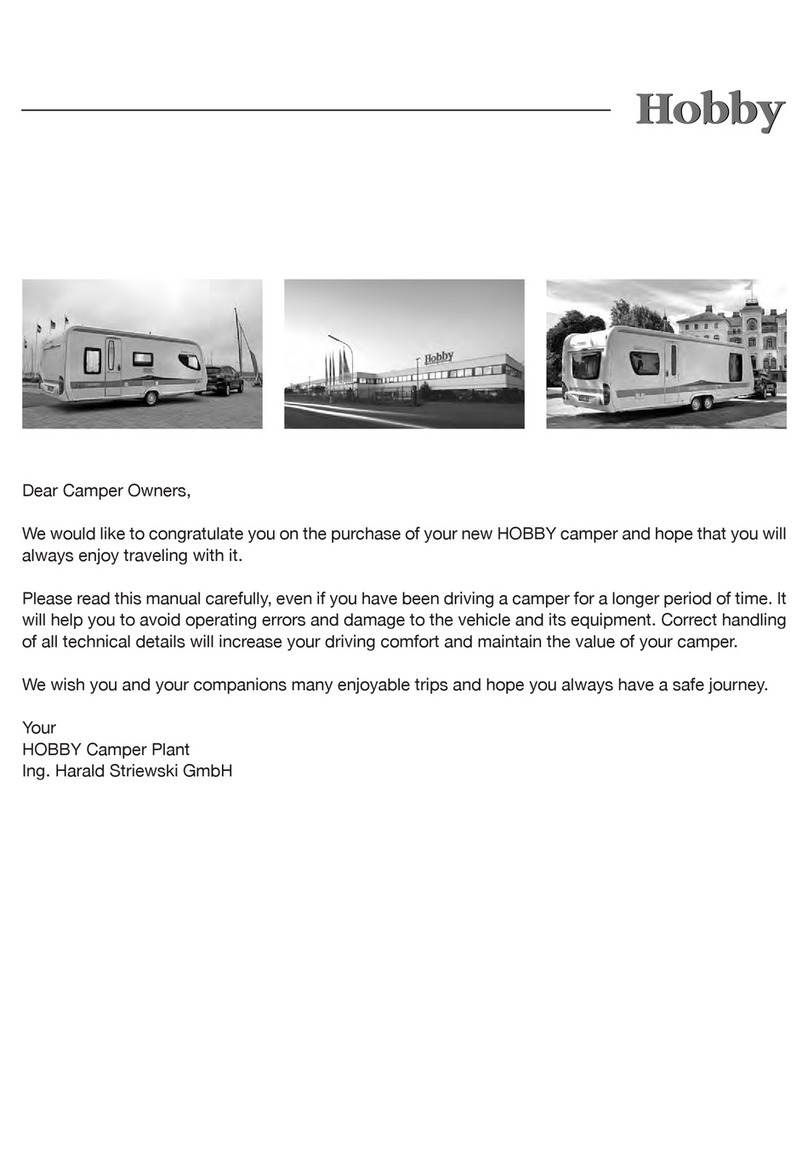
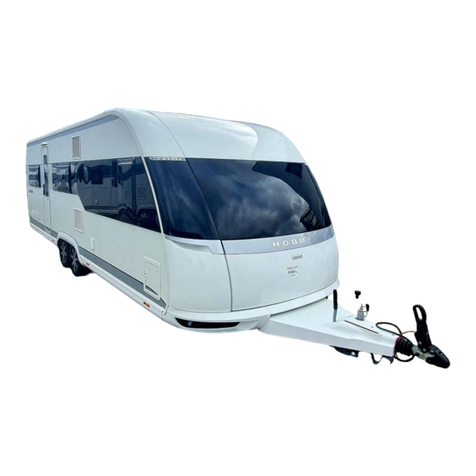
Hobby BEACHY 2022 User manual

OPERATION GUIDE 2022 BEACHY GB

1. Introducon
Dear Caravaner,
Congratulaons on the purchase of your new HOBBY Caravan. The trust you have placed in us is both an incenve
and an obligaon to connuously implement new ideas, technical innovaons and fine touches to design our
caravans even beer. Our fully fited and highly sophiscated models enable us to oer you the perfect seng
for the most enjoyable days of the year.
Please read this manual carefully, even if you have been caravanning for a long me. It will help you to avoid
operang errors or causing damage to the vehicle and its equipment. Following the enclosed instrucons will
increase your driving comfort and maintain the value of your caravan.
If this user manual should be unable to provide the required assistance, a close, pan-European network of dea-
lers is available for further help. Take advantage of your authorised dealer's experience and technical knowledge
- we recommend speaking to him in detail before taking your first trip with your HOBBY caravan.
We wish you and your fellow travellers many enjoyable trips and hope you will always have a safe journey with
your new HOBBY caravan.
Your
HOBBY Caravan Plant
Ing. Harald Striewski GmbH

1. Introducon
Table of Contents
1 Introducon
1.1 General informaon .............................................................................................................................................. 1
1.2 Key to using in These Operang Instrucons ................................................................................................. 2
2 Safety
2.1 Intended use ........................................................................................................................................................... 4
2.2 General informaon .............................................................................................................................................. 4
2.3 Fire protecon ........................................................................................................................................................ 4
2.4 Emergency equipment ........................................................................................................................................... 5
2.5 Before the journey ................................................................................................................................................. 6
2.5.1 What to observe before your first journey ...................................................................................................... 6
2.5.2 Before each journey .............................................................................................................................................. 7
2.6 While driving ........................................................................................................................................................... 9
2.7 Aer each journey ...............................................................................................................................................10
3 Chassis
3.1 General informaon ............................................................................................................................................12
3.2 Vehicle ID number (VIN) ...................................................................................................................................12
3.3 Loading ...................................................................................................................................................................13
3.3.1 General informaon ............................................................................................................................................13
3.3.2 Tow hitch load ......................................................................................................................................................14
3.3.3 Meaning of weights for the Caravan ...............................................................................................................14
3.4 Stabiliser hitch ......................................................................................................................................................16
3.5 Jockey wheel .........................................................................................................................................................19
3.6 Handbrake operaon ..........................................................................................................................................19
3.7 Overrunning equipment and wheel brakes....................................................................................................20
3.8 Electronic Trailer Stabilisaon (ETS plus) ........................................................................................................21
4 Wheels and tyres
4.1 Wheels ...................................................................................................................................................................23
4.2 Tyres........................................................................................................................................................................23
4.3 Tyre pressure ........................................................................................................................................................24
4.4 Profile depth and age of tyres ..........................................................................................................................24
4.5 Rims ........................................................................................................................................................................25
4.6 Changing a wheel tyre ........................................................................................................................................26
4.7 Tyre repair kit ........................................................................................................................................................28
5 Exterior structure
5.1 Forced and fixed venlaon ..............................................................................................................................30
5.2 Opening and closing doors ................................................................................................................................30
5.3 Corner Steadies ....................................................................................................................................................34
5.4 Roof .........................................................................................................................................................................34
5.5 Awning rail ............................................................................................................................................................34
5.6 Bicycle carrier .......................................................................................................................................................35
6 Interior structure
6.1 Opening and closing doors and drawers ........................................................................................................36
6.2 Folding table .........................................................................................................................................................37
6.3 Seang and sleeping areas ................................................................................................................................37
6.4 Rearranging the cushions ...................................................................................................................................38
6.5 Windows ................................................................................................................................................................39
6.6 Roof lights ..............................................................................................................................................................40
7 Installaon of electrical devices
7.1 Safety ps ..............................................................................................................................................................41
7.2 Operaon of the installed electrical systems ................................................................................................41
7.3 Electrical supply ...................................................................................................................................................42
7.4 Electrical system ..................................................................................................................................................46
7.5 Diagram of the electrical distribuon board ..................................................................................................47

1. Introducon
8 Water
8.1 General informaon ............................................................................................................................................48
8.2 Water pump ..........................................................................................................................................................48
8.3 Water ushing toilet ..........................................................................................................................................50
9 Built-in devices
9.1 General informaon ............................................................................................................................................53
9.2 Domec cooler .....................................................................................................................................................53
10 Accessories ........................................................................................................................................................................55
11 Maintenance and upkeep
11.1 Maintenance .........................................................................................................................................................56
11.2 Hitch head ............................................................................................................................................................57
11.3 Brakes .....................................................................................................................................................................58
11.4 Changing bulbs in the rear lights ......................................................................................................................59
11.5 Changing the baery and maintenance of the smoke detector ................................................................60
11.6 Venlaon .............................................................................................................................................................61
11.7 Upkeep ...................................................................................................................................................................62
11.8 Winterising the caravan .....................................................................................................................................67
11.9 Winter useage ......................................................................................................................................................68
12 Waste disposal and environmental protecon
12.1 The environment and mobile travel .................................................................................................................69
13 Technical data
13.1 Chassis data ..........................................................................................................................................................71
13.2 Possibilies for increasing loads .......................................................................................................................71
13.3 Weights of vehicle and equipment ..................................................................................................................71
13.4 Tyres and Rims......................................................................................................................................................71
13.5 Tyre pressures values ..........................................................................................................................................73
13.6 Measurements of Awning Perimeter ...............................................................................................................73
Index .................................................................................................................................................................................74

1. Introducon
Our caravans are connuously being updated. Please understand
that we reserve the right to make changes to the equipment, shape
and technology.
These operang instrucons also describe equipment which may
vary from the standard scope of delivery.
Therefore, HOBBY shall not be liable for any claims arising from the
contents of this handbook. The equipment that has been implemen-
ted at the me of prinng is described in these operang instruc-
ons. Equivalent equipment has been implemented in all of the dif-
ferent layouts. Please understand that we cannot describe all of the
individual variaons. Your dealer will be pleased to answer any special
quesons regarding the equipment and technology of your caravan.
Your HOBBY caravan has been built in accordance with the latest
technology and recognised safety regulaons. Despite all of these
safety measures, it is possible that people may be hurt or the caravan
damaged if the safety instrucons in this handbook and the warnings
posted on adhesive labels in the caravan are not followed.
1.1 General informaon
Before your first journey
You should certainly familiarize yourself thoroughly with the contents
of this handbook; it is much more than a reference book.
Fill out the warranty cards for the built-in appliances in the separate
instrucons, and send the warranty cards to the respecve manu-
facturers. In doing so, you will secure your right to a warranty for all
devices. Your HOBBY dealer will ll out the warranty registraon card
for your caravan.
In accordance with guarantee condions, HOBBY gives
you a 5-year guarantee through your dealer against leaks
in the caravan. When you accept the vehicle you will
receive the guarantee booklet, "Five-Year Guarantee on
Waterghtness" from your HOBBY dealer. Maintenance
must be carried out regularly and maintenance intervals
observed - this is a prerequisite for ensuring warranty.
Maintenance must be carried out at regular intervals by
an authorised HOBBY dealer and documented by him in
the HOBBY Customer Service History booklet. In addi-
on, all inspecons are reported to HOBBY by its dealerst.
1
We would explicitly like to point out that we do not
accept any liability for damages or malfuncons that
arise because these operang instrucons have been
ignored.
• Only operate the caravan if it is in perfect technical
condion.
• Malfuncons that impair the safety of people or the
caravan itself must be repaired immediately by a qua-
lified engineer or company..
• The brake system may only be inspected and re-
paired by an authorised specialist.
• Specified inspecon and MOT deadlines must be
met.

1. Introducon
Indicating details with the help of position
numbers
2
1.2 Key to using in These Operang Instrucons
Guidelines
Warnings
Environmental ps
This operang manual explains the caravan as follows:
Texts and illustraons
The texts which accompany illustraons are found directly to the right
of the illustraons. Details in illustraons (here: habitaon door) are
marked with posion number j.
Lists
Lists are set out in bullet-point form, indicated by a hyphen "-" in front
of the first word of each point.
Procedural guidelines
Procedural guidelines are also based on key points and begin
with a bullet point. "•".
Guidelines point out important details which ensure the
trouble-free operaon of the caravan and its equipment.
Please bear in mind that various models have dierent
equipment; therefore, varying descripons are possible.
Warnings point out dangers which, if they are not fol-
lowed, could cause damage to equipment and/or injury
to persons.
Environmental ps show possible ways to reduce the eects
on the environment.
Annual water ingress checks are annual water ingress
check free of charge.
Warning: If no annual water ingress checkis carried out,
your right to the 5-year guarantee loses its validity.
Art.Nr.:
ProleNr:
durch: gottschling
Letzte Speicherung am: Mittwoch, 16. Juni 2021 08:15:29
H2
Zulieferer
Näherei
ETL.
Konstr.
AV
TI2
TI1
MH2
MH1
H1
Art der Änderung
Name
Datum
Nr.
Zeich.Nr.:
Maßstab
Geprüft
Gezeichnet
Name
Datum
Ing.H. Striewski GmbH, Harald-Striewski-Str.15, 24787 Fockbek
Hobby Wohnwagenwerk
1

1. Introducon
Oponal Extras
You have selected a caravan that is equipped to taste.
This user manual describes all of the models and equipment oered
within the same season. Therefore, it may include equipment that you
have not selected.
Dierences and, thus, all of the oponal extras are marked with an
asterisk “*”.
For technical reasons, oponal extras cannot always be installed in all
models. Should you have any quesons, please speak to your Hobby
dealer.
Relevance of This Manual
The high level of quality and security for caravans is ensured by means
of connuous improvements and development. In very rare cases, there
may be a dierence between the descripon and the vehicle itself.
3
Should there be any equipment or a model that is not
described in this user manual, please note the enclosed
addional operang instrucons.

4
2. Safety
2.2 General informaon
Warnings and informaon labels are aached both
inside and outside the vehicle. These are meant for your
safety and must not be removed.
Fire prevenon measures
• Never leave children and vulnerable persons alone in the vehicle.
• Keep ammable materials away from all heang and cooking ap-
pliances*.
• Changes to the electrical system or built-in devices may only be
carried out by professional, authorised workshops.
• Keep an ABC dry powder fire exnguisher by the entrance door.
• Ensure that everyone is familiar with the guidelines on the fire
exnguisher.
• Place a fire blanket near the gas cooker*.
• Keep all escape routes clear.
• Ensure that everyone is familiar with the fire prevenon measures
on site.
• The caravan may only be driven on public roads by someone with
a valid driving licence category for such vehicles.
• The individual manufacturer's operang and instrucon manual(s)
must be observed when using built-in devices (cooler, etc.).
• The measurements, weight and driving performance of the
caravan may change if accessories or oponal extras have been
installed. Some accessories that are fied aer purchase of the
vehicle must be entered in the registraon document.
• Use only tyres and rims that have been approved for your
caravan. Informaon on tyre and rim sizes can be found in the
vehicle's registraon document or in Chapter 13.4 Tyres and
Rims.
2.3 Fire protecon
This caravan has been designed as a mobile travel accommodaon for
private, not commercial use. This is a recreaonal vehicle that is fit
for habitaon. It oers accommodaon that can be used temporarily
or seasonally and which meets the requirements for the construcon
and use of the vehicle on the road. It is not intended for permanent
residence. Furthermore, no more than the number of people for which
this caravan has been designed may spend the night in the vehicle.
When the caravan is on the road, it may only be used in accordance
with road traffic regulaons and naonal vehicle safety standards.
This caravan is exclusively suited to being towed by a car, not by lor-
ries, buses or similar vehicles. It may not be used to transport people/
animals and/or goods. While driving, people/animals may not remain
in the caravan. When the caravan is on the road, it may only be used
for carrying personal equipment. Transporng unsecured loads and/
or packages is forbidden.
Please ensure that the technically permissible maximum weight of
the caravan and the permied axle load(s) per axle are not exceeded.
No use of the caravan other than that described here is permied; any
other use is regarded as contrary to the intended use.
2.1 Intended use
Label for tyre pressure

5
2. Safety
Smoke detector
The caravan has been ed with a baery-operated smoke detector
on the ceiling. Should smoke be detected inside the vehicle, a loud
alarm will go o, warning any passengers of a possible fire.
The detector's own electricity supply, powered by the built-in 9V block
baery, ensures that the smoke detector will funcon independent
of the vehicle's electric system, even if the power supply has been
switched o.
• To acvate the smoke detector, pull the protecve foil o the
block baery and insert the baery.
• Use the test buon to test the smoke detector.
Smoke detector
Please refer also to the device manufacturer's operang
manual.
For more informaon on using and changing the baery,
please refer to Chapter 11 Maintenance and Upkeep.
A smoke detector will not prevent fires or put them out.
If it is working properly, it will merely provide you with
those possibly decisive seconds to save yourself and
nofy emergency services.
Fighng a fire
• Evacuate all passengers immediately.
• Disconnect the gas supply when using gas-operated devices.
• Gas containers* which cannot be removed should be cooled
with water.
• Shut o the electrical supply.
• Sound the alarm and call the fire service.
• Only fight the fire yourself if this is possible without risk.
2.4 Emergency equipment To be prepared in case of an emergency, you should always carry the
three emergency devices on board and familiarize yourself with them.
First-aid kit
The first aid kit should always be kept handy. It should have a fixed
place in the base vehicle/caravan. If things have been removed from
the rst aid kit or used they must be replaced as soon as possible.
High visibility jacket/vest
Brish regulaons for carrying and wearing a high-visibility vest with
white retro-reecve stripes in accordance with EN 471 whenever
you step outside the vehicle on roads outside built-up areas or on the
hard shoulder.
The driver must put on this high-visibility vest when the vehicle
• comes to a stop outside city limits on an obscure rural road be-
cause of an accident or breakdown, if the visibility is poor due to
bad weather, in twilight or darkness, or
• when it must be highlighted by the use of a warning triangle on
the hard shoulder because of an accident or breakdown.

6
2. Safety
Minimum distance between warning triangle
and caravan
Warning triangle
The warning triangle should also be kept handy in a fixed place in the base
vehicle/caravan, preferably together with the first aid kit.
In an emergency
• Set up the warning triangle at least 100 m in front of the danger
zone!
Please observe the naonal regulaons of the countries
you are driving through with regard to carrying and wea-
ring emergency equipment.
100 m
Art.Nr.:
ProleNr:
durch:gottschling
LetzteSpeicherung am: Mittwoch, 16. Juni 2021 08:15:29
H2
Zulieferer
Näherei
ETL.
Konstr.
AV
TI2
TI1
MH2
MH1
H1
Artder Änderung
Name
Datum
Nr.
Zeich.Nr.:
Maßstab
Geprüft
Gezeichnet
Name
Datum
Ing.H.Striewski GmbH, Harald-Striewski-Str.15, 24787 Fockbek
HobbyWohnwagenwerk
2.5.1 What to observe before your first journey
Vehicle registraon (Germany)
Every vehicle which uses public roads is subject to registraon. This
includes your new caravan. You can register the caravan at your local
registraon office.
The following documents are required to iniate the registraon process:
- Motor Vehicle Registraon Cerficate Part II and/or Cerficate of
Conformity (CoC)
- Electronic Insurance Cerficate/eIC Number
- personal idenficaon or proof of residence
- possibly, power of aorney to have someone else register the ca-
ravan.
- if applicable, direct debit mandate for taxes
If required, please do not forget to apply for a „100“ speed scker.
2.5 Before the journey
General inspecon (Germany)
In accordance with Secon 29 of German Road Traffic Licensing
Regulaons, your caravan must undergo a major inspecon every
two years.
Any changes made to the caravan that fall under na-
onal traffic regulaons must be approved and entered
in the registraon document! If you have any further
quesons or difficules, your authorised Hobby dealer
will always be available to assist you!
The following documents must be presented at each inspecon:
- motor vehicle registraon cerficate, Part I
- valid cerficate of inspecon for gas facilies, documenng installa-
on.Your dealer will give you the inial cerficate.
A general vehicle inspecon can be carried out by an officially re-
cognised expert (e.g. DEKRA Expert mobile home inspecon).

7
2. Safety
"100" speed scker
5. Free interchangeability of tow vehicle and caravan:
Dierent caravans may be combined with dierent tow
vehicles.
You are responsible for ensuring that the preceding
regulaons are met if you plan to drive at 100 km/h.
6. The correct noseweight gives you more safety:
Please refer to chapter 3.3.2 for the recommended
noseweight.
Fit for a Speed of 60 mph (Germany)
1. Your HOBBY caravan is technically equipped for a
maximum speed of 60 mph. Under no circumstances may
this speed be exceeded!
2. Note the permissible maximum speeds for towing in the
country in which you are travelling!
3. Road traffic regulaons in Germany were changed on 22
October 2005. Your caravan was already set to be towed
at 100 KPH at the factory, and this has been entered in
the caravan's registraon documents. Upon request, the
100 KPH scker will be issued by the road traffic authority
when the caravan is inially registered and aached to the
back of the vehicle.
4. The following points must be observed, because you are
responsible for adhering to them. If they are not met, the
maximum speed for the caravan is 50 mph!
a) The base vehicle must be equipped with an an-locking
system/an-lock device and may not exceed an overall
mass of 3.5 tons.
b) The caravan must be equipped with hydraulic vibraon
dampers (shock absorbers); naturally, your new HOBBY
caravan is equipped with these.
c) The caravan's tyres should be changed aer a maximum
of six years. They must be marked at least with an L (=
75 mph) for the appropriate speed category.
d) The caravan must be equipped with a stabilser hitch in
accordance with ISO 11555-1. This is a standard feature
in all Hobby models.
The overall mass of the caravan may not exceed the
unladen mass of the car.
2.5.2 Before each journey Road safety
• The electric connecon between the tow vehicle (your car) and
the caravan must funcon perfectly.
• Before driving, check that the signalling and lighng systems and
brakes funcon correctly.
• If the vehicle has not been used for a longer period of me
(approx. 10 months) have the brake system checked by an autho-
rised specialist.
• Set the vehicle's wing mirror.
• The roof must be cleared of snow and ice before driving.
• Regularly check the tyre pressure before driving. False tyre pres-
sure can cause excessive wear, damage to the tyres or even lead
to a burst tyre. (see also Chapter 13.5 Tyre pressure values)
• Tighten the nuts on the wheels aer driving the first
50 km with your caravan.
Please familiarise yourself abroad about any naonal re-
gulaons that may apply with regard to registraon and
general inspecon and whether you are permied to
tow your caravan at 100 KPH.

8
2. Safety
Prepare the vehicle before driving!
As the driver of this vehicle, you are responsible for the state of the car
and caravan. Therefore, you must note the following points:
Only begin to drive when your caravan fulfils all of the
condions for roadworthiness.
Interior
Preparing the interior:
• Close and firmly lock all of the windows and roof lights.
• Sort all loose objects and store them in their respecve com-
partments.
• Store heavy and / or voluminous objects (e.g. radio, awning, beverage
cases) safely before you start your journey, securing them to prevent
them from shiing (see also Chapter 3.3 Loading).
• If necessary, switch the cooler to operate in 12V mode.
• Ensure that no liquids, including those in the cooler, can leak out.
• Switch o the gas supply from gas-operated devices*.
• Lock all doors and drawers securely (lock the central locking sys-
tem for the kitchen drawers).
• Close and lock the rear ap.
• Store the entry step securely inside the vehicle.
• Secure the table and, if possible, lower it.
• Switch o the interior lighng and move height-adjustable lights
to their upper posion.
Art.Nr.:
ProleNr:
durch: gottschling
Letzte Speicherung am: Mittwoch, 16. Juni 2021 08:15:29
H2
Zulieferer
Näherei
ETL.
Konstr.
AV
TI2
TI1
MH2
MH1
H1
Art der Änderung
Name
Datum
Nr.
Zeich.Nr.:
Maßstab
Geprüft
Gezeichnet
Name
Datum
Ing.H. Striewski GmbH, Harald-Striewski-Str.15, 24787 Fockbek
Hobby Wohnwagenwerk
Do not overload the caravan! The permissible axle loads,
the technically permissible maximum weight as well as
the permissible height, width and length of the caravan
must be observed!
Ensure that there is sufficient venlaon. Never cover up
built-in forced venlaon (skylights with forced venla-
on or mushroom vents). Ensure that forced venlaon
is not covered by snow or leaves as this increases the
danger of suocaon.
Preparaon of the vehicle:
• The caravan must be hitched up correctly (see Chapter 3.4 Stabi-
liser hitch Chapter 3.4).
• Release the hand brake for the caravan.
• Rotate the rotang stanchions and front landing wheel upwards
and secure them.
• If necessary, disconnect the cable for the 230V mains connecon
from the external socket.
• Close and lock the entrance door.
• If necessary, secure any bicycles on the bicycle carrier*, lashing
them with the fastening straps to prevent them from slipping, and
ensure that the rear tail lights are not covered. If the bicycle carrier
has not been loaded, fold it in and secure it. (see Chapter 5.6)
• If necessary, secure the spare tyre holder.
• If necessary, stow the awning inside the vehicle.
Exterior
Check around the caravan and ensure everything is secure for your
journey as follows.

9
2. Safety
2.6 While driving Driving
Take a test drive or a safety training course before the first long drive
to beer acquaint yourself with the carriage in driving condions.
Pracse driving in reverse.
Staying in the caravan during the drive is prohibited by law!
Place a note with all important measurements and
weights in a clearly visible place on the dashboard.
Brakes
A car and caravan together (rig) behaves dierently from an individual ve-
hicle while braking. Therefore, it is advisable (especially for inexperienced
drivers) to conduct several braking tests on a suitable surface. The braking
distance for the rig is longer than that of an individual vehicle. The load
in the caravan also has a signi
fi
cant inuence on the braking distance.
Rules for braking
• Note the longer braking distance on wet roads.
• When driving down a mountain, do not select a gear that is high-
er than the one used when driving up a mountain.
Driving around curves
The combined length of your car & caravan together (rig) is considerably
longer than a car.
The following applies for driving in curves
• Do not take curves too quickly or too sharply!
• Take the curve at a somewhat wider radius when turning.
• Note that the caravan can swing out if you turn too quickly.
Rules for driving
• Do not underesmate the total length of the car & caravan (rig).
Due to the relavely long rear overhang, larger caravan can swing
out and, under adverse condions, the rear end of the caravan can
hit the ground.
• Take extra care when driving toward yards and through gates.
• In condions with strong side winds, slick ice or wet roads, the
caravan could move back and forth.
• Adjust driving speed to overall street and traffic condions.
• Long, lightly sloping roads are potenally dangerous. Measure your
speed from the outset in such a manner that the car & caravan can
be accelerated, if necessary, without endangering other drivers or
pedestrians.
• If the caravan moves back and forth on a sloping road, brake
carefully but rapidly to bring the caravan back into line.
• Never increase speed if the caravan becomes pendulous.
• Do not drive down a hill any faster than you would drive up one.
• Long, gently sloping downhill slopes can be dangerous. Calculate
your speed from the very beginning so that, if necessary, it is sll
possible to accelerate without endangering other road users.
• When overtaking or being overtaken by trucks or buses, the
caravan can be caught up in air sucon. This could cause the
caravan to sway or become pendulous.
• Drive with foresight; on longer trips, stop at regular intervals for
breaks.

10
2. Safety
• During long drives over passes or steep and twisty country lanes,
the can cause the caravan brakes to over run constantly and can
cause the wheel brakes to heat up considerably. If necessary, you
should allow enough me to enable them to cool down again.
Due to the design of the brakes, there may be increased
wear in the brake lining during the inial break-in phase.
Despite carrying out automac brake adjustments on all
HOBBY trailers, the basic seng for the brakes must be
checked by an authorised specialist and adjusted if ne-
cessary (inial inspecon) aer having driven 500 km.
2.7 Aer each journey
Shunng (moving caravan by hand)
In most cases your caravans will be longer and wider than your car.
Tips for maneuvering your caravan.
• There is a significant blind spot when moving the caravan, even
when the exterior mirrors are properly adjusted.
• Use a another person when turning into
difficult parking spots especially in reverse..
Front grab handle
When posioning the caravan manually, only use the
grab handles at the front and rear ends of the caravan.
Never push on the plasc parts or the walls.
Rules for driving in reverse
• The caravan turns in the opposite direcon in which you steer.
• Get one someone to guide you when reversing the caravan.
Driving in reverse
Your HOBBY caravan has a braking system with automac reverse.
It
enables you to drive backwards without applying the brakes, because the
overrun coupling does not dierenate between overrunning or reversing
the caravan. When you back up the caravan, you must
fi
rst overcome a
slight residual brake torque in order to acvate the automac reverse. You
can then back up the caravan without any dif
fi
culty. The next me the
caravan moves forward, the normal braking facility is then automacally
applied again.
The caravan's brakes are deacvated when you drive in
reverse.
Rear grab handle
Should there be any defects or malfuncons in the dri-
ving performance of the caravan, please nofy roadside
assistance and have any maintenance and repair work
carried out by an authorised specialist.
Choosing a parking place
Rules for choosing a parking place:
• If at all possible, check the place selected for parking in daylight.
• The parking place should be as horizontal as possible.
• Check to see that the entry step is posioned horizontally.

11
2. Safety
Do not use the corner steadies to compensate for un-
even ground.
Water installaon
Water le standing in the fresh water tank or the pipes quickly beco-
mes undrinkable.
Therefore, check the water pipes and the fresh water tank before
each journey to ensure they are clean. Disinfect and rinse the drin-
king water facility regularly, and always before each journey.
Please empty any residual water from the water tank
before filling it with fresh water.
Securing the vehicle
Rules for securing the vehicle:
• Apply the handbrake brake.
• Only extend the corner steadies to the point where the axle
sll assists in bearing the weight (The crank is located in the
wardrobe or drawbar stowage box*).
• If the ground is so, place supports under the corner steadies.
• Use the wheel chocks to secure the wheels. They are located on
the drawbar stowage box*.
A spring brake on the brake lever ensures that the
brakes will not disengage by themselves, even if the
rotaon direcon is reversed from driving forwards to
backwards. If you have acvated automac reverse, the
brake lever must be moved beyond the dead centre po-
sion to its final posion.
To ensure that the hand brake does not freeze, only pull
on it gently when the temperature reaches 0° C or lower.
• Level the caravan lengthwise using the jockey wheel.
• If on uneven or sloping ground level the the caravan sideways using
boards or wheel chocks.
Switching over electrical devices
Instrucons for redirecng electrical devices
• Switch cooler from 12V to 230V, because the 12V supply will
automacally be switched o aer a brief period of me when
the (car's) engine is not running.
If the camper socket has been aached to the car in a
manner conforming to standards (DIN ISO 11446), the
car’s baery will not be discharged when the ignion
has been switched o and you have forgoen to switch
the cooler from 12V operaon.

12
3. Chassis
3.1 General informaon
The 17-digit vehicle ID number is located at the front right-hand side of
the forked A frame.
Addionally the Vin number is on the scker in the gas box.
Please have your VIN at hand for any inquiries or whenever vising your
dealer.
Name plate
3.2 Vehicle ID number (VIN)
Frame parts and axles are components of the undercarriage. No tech-
nical modificaons are allowed; otherwise, the terms of operaon are
no longer valid!
For the sake of traffic safety, the vehicle undercarriage must be
maintained just as conscienously as the base vehicle itself.
This
maintenance should be carried out by your HOBBY dealer. If spare parts
are required, use only the original parts supplied by the manu-facturer.
Technical changes are allowed with the manufacturers
permission.
Generally, caravans are not suitable for pulling by
lorries or buses. If this is done permanently, they will
be damaged.
Do not remove or change the name plate.
The name plate is located on the side wall to the right of
the entrance door.
Hobby name plate
Permit number
Vehicle ID number (VIN)
Permissible maximum weight
Permissible axle load, 1st axle
Permissible axle load, 2nd axle
Max. nose weight
1
2
3
4
5
6
1
2
3
4
5
6

13
3. Chassis
3.3 Loading
Rules for loading:
• Distribute the addional load evenly between the le and right-
hand side of the vehicle. Heavy or bulky items should be stored
close to the axles.
• Never load your caravan with the weight towards the rear (dan-
ger of swaying back and forth).
• The lower the caravan's centre of gravity, the beer its driving
performance and response in curves.
• Stow baggage and light objects (clothing) in storage compart-
ments inside the vehicle.
• Heavy objects should be stowed securely to prevent them from
moving.
• You may not always be able to follow the recommended stowing ar-
rangement, because storage possibilies are distributed throughout
the whole interior of the caravan. If necessary, put heavy objects
in the tow vehicle.
• Secure doors and lockers.
• Check the technically permissible maximum weight and the
axle load aer you have finished loading.
3.3.1 General informaon
The maximum axle loads entered in the documentaon for
this vehicle as well as the technically permissible maximum
weight must not be exceeded.
Overloading can cause
the tyres to break down or even burst! This increases the
danger that you may lose control of the vehicle. Therefore,
you endanger yourself and other road users.
If you are not sure whether or not you have overloaded
the caravan, you should have it weighed at a public weigh
bridge.
Stowage areas in the caravan
- Light objects j such as towels and lightweight laundry.
- Medium-weight objects k such as clothing, laundry and food.
- Heavy objects l such as the awning, boat engine or beverage
cases.
Stowage areas
Art.Nr.:
ProleNr:
durch: gottschling
Letzte Speicherung am: Mittwoch, 16. Juni 2021 08:15:29
H2
Zulieferer
Näherei
ETL.
Konstr.
AV
TI2
TI1
MH2
MH1
H1
Art der Änderung
Name
Datum
Nr.
Zeich.Nr.:
Maßstab
Geprüft
Gezeichnet
Name
Datum
Ing.H. Striewski GmbH, Harald-Striewski-Str.15, 24787 Fockbek
Hobby Wohnwagenwerk
3
2
1

14
3. Chassis
You will only achieve opmum driving stability and decisively increase
your safety on the road if the nose weight has been properly adjusted
for your combinaon of base vehicle and the caravan being pulled. The
nose weight indicates the power the caravan's A frame exerts on the
car's clutch.
Rules for the nose weight load:
• Set the nose weight correctly! You can, for example, use normal
bathroom scales: use a strip of wood (approx. 400mm long) to
posion them vercally under the hitch head. It may also be pos-
sible to roughly esmate the nose weight by means of the nose
weight indicator m integrated in the front landing jockey wheel,
to do this the A frame of the caravan must be in a horizontal
posion.
• Always check the nose weight before you start to drive!
• The specied loads (see no. 2. or the Vin scker) as well as the
permissible maximum weight of the car and caravan (the “rig”)
must not be exceeded!
4
3.3.2 Tow hitch load
How to adjust the correct nose weigh:
1. Determine the maximum nose weigh of your tow vehicle by
checking its documentaon, the chassisplate or the drawbar plate.
2. The maximum permissible nose weighor your HOBBY
caravan is 100 kg.
3. Adjust the nose weight on the caravan to the lower of the two
values by loading it carefully. At the same me, try to make full
use of this value.
4. The lower of the two specified values for the nose weight,
i.e. that of the tow vehicle or the caravan, may not be exceeded.
Nose weight display on the jockey wheel
3.3.3 Meaning of weights for the caravan
EU Direcve 1230/2012 applies at a European level for vehicles
when calculang the masses (weights) and resultant addional loads
for caravans. The terms and basic calculaon elements used in this
descripon are explained in the following:
1. Gross vehicle weight rang (g.v.w.r.)
The indicaon of the gross vehicle weight rang is taken directly
from the HOBBY factory. This mass takes into account the specific
operang condions that are based on the model of the caravan and
its specificaons, including such factors as material strength, load-
carrying capacity of the axles and tyres, etc. For safety reasons, this
mass must never be exceeded!
2. Mass in running order
The mass when ready to drive is equal to the weight of the standard
caravan including all of the standard equipment installed by the factory
plus all of the equipment and liquids that are required for the safe and
correct use of the vehicle.
The basic equipment in the BEACHY series
includes the lled 13 litre fresh water canister; thus, it weighs 13 kg.

15
3. Chassis
3. Addional equipment / oponal extras
Mass of the equipment that was assembled by the manufacturer in or
on the caravan in addion to the standard equipment. These oponal
extras will be shown in the actual mass of the vehicle if
− they are not part of the standard spec of equipment,
− Hobby was responsible for assembling them,
− the customer can order them.
If the vehicle does not hold the equipment and liquids set
out in the table in Item 2 (mass when ready to drive), the
loading capacity/addional load (Item 5) can be increased
by this value.
4. Actual mass
Sum of the mass when ready to drive and the oponal extras or
addional equipment assembled by the manufacturer.
5. Loading capacity / addional load
Dierence between the technically permissible maximum weight
and the actual mass of the vehicle.
6. Minimum loading capacity
The loading capacity must be equal at least to the formula:
10 x (n + L), whereby:
n= highest number of sleeping spaces
L= total length of the superstructure
The minimum loading capacity includes objects that users may carry
in the caravan which are not included in the mass when ready to drive
or in the oponal extras (e.g. clothing, toilet and kitchen fings, food,
camping equipment, toys).
The remaining addional load (5.) must always be greater than or equal
to the minimum loading capacity (6.); this must be taken into account
when determining the configuraon of the vehicle.

16
3. Chassis
The caravan has been ed with a stabiliser hitch (class B50-X) with
fricon pads to reduce sh-tailing.
This system conforms to ISO 11555-
1. It has been permied for use up to a maximum speed of 100 km/h.
Please note the addional operang instrucons and the manufacturer's
safety instrucons.
3.4 Stabiliser hitch KS 25
WARNING: A stabiliser hitch does not suspend the laws of
physics.
If the limits (of speed and weight condions) are
exceeded, tracon and cornering force are reduced, which
then becomes the responsibility of the driver. Therefore,
avoid elevated risks.
The stabilising eect on the rig that can be achieved depends
to a great extent on the eecveness of the fricon pads in
the tow bar and the state of the hitch ball. Therefore, always
check the fricon pads regularly for wear and tear. There
must not be any oil or grease on the fricon pads.
The caravan’s driving stability also depends to a great extent
on the load, tyre pressure and condion of the tyres.
Before your first trip, please observe the informaon given
in Chapter 11.2 Maintenance and Upkeep regarding the
ball on the tow bar if it has a Dacromet coang (a dull-silver
coang for corrosion protecon) or is painted / lacquered.
Stabiliser hitch
Opening and closing the stabiliser hitch
1
2
Hitching
• Connect the break-away cable to the eyelet provided for that
purpose (see 3.6 Handbrake, secon on Rapid-emergency brake.
• The open stabiliser hitch is set onto the tow ball of the tow
vehicle. Push down on the handle to shut the safety hitch auto-
macally (handle in posion k). Normally, the support load is
enough to achieve this.
• Insert the 13-pin plug while turning, in accordance with the screw
thread.
• Secure the jockey wheel (see 3.5 Front Landing Wheel).
Preparaon for hitching/unhitching
• To hitch and unhitch, open the stabiliser hitch (lever in posion j).
The stabiliser hitch may only be used with Class A tow
balls (ball with a diameter of 50 mm in acc. with ISO 1103)
as set out in regulaon ECE R55.
WARNING: Ensure that the ball of your tow bar is clean
and free of grease.
Table of contents
Other Hobby Motorhome manuals

Hobby
Hobby T 650 AK FLC User manual

Hobby
Hobby 2015 Vantana User manual

Hobby
Hobby VAN Siesta User manual

Hobby
Hobby Van Exclusive User manual

Hobby
Hobby ONTOUR Series User manual

Hobby
Hobby Van Vantana 2016 User manual

Hobby
Hobby 400 SF De Luxe Easy User manual

Hobby
Hobby 65TL Siesta TI User manual

Hobby
Hobby ONTOUR User manual

Hobby
Hobby optima User manual
Popular Motorhome manuals by other brands

Bessacarr
Bessacarr E330 Owner's service handbook

Fiamma
Fiamma Turbo-Vent P3 Installation and use instructions and warnings

Winnebago
Winnebago Awning Light Switch manual

Winnebago
Winnebago Journey Service manual

Truma
Truma Mover SE R Operating instructions & installation instructions

Triple E
Triple E 1994 EMPRESS 1061 owner's manual