2
1. 3/16” Trolley Line
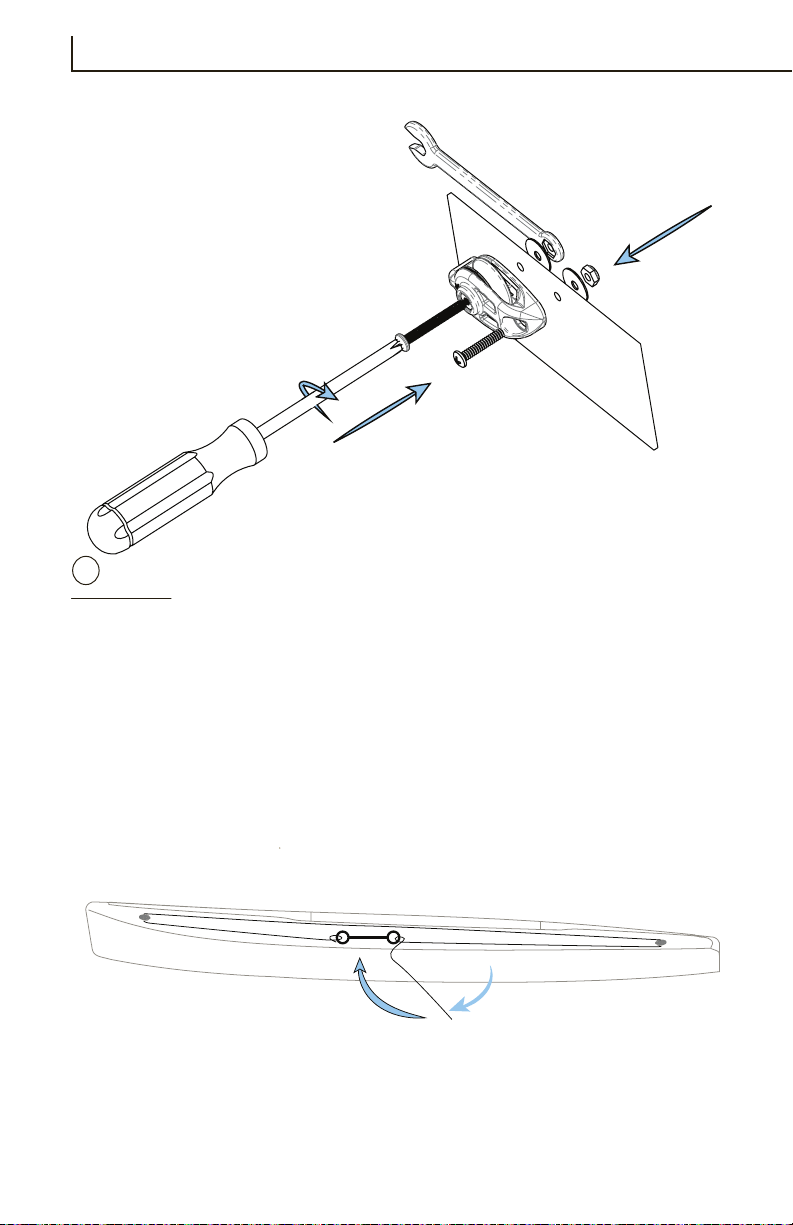
2. Screw, 10-32 X 1 1/2” Pan
3. Screw, 10-32 X 1” Pan
4. Washer, #10 X 1”
5. Nut, #10 Nylock
6. Well Nut Assembly
7. Screw, 10-32 X 3/4” Flat
8. Screw, 10-32 X 1/2” Pan
9. Eye Post Assembly
10. Cheek Block Assembly
11. Loctite®
12. Shock cord with Ring Assembly
Installation
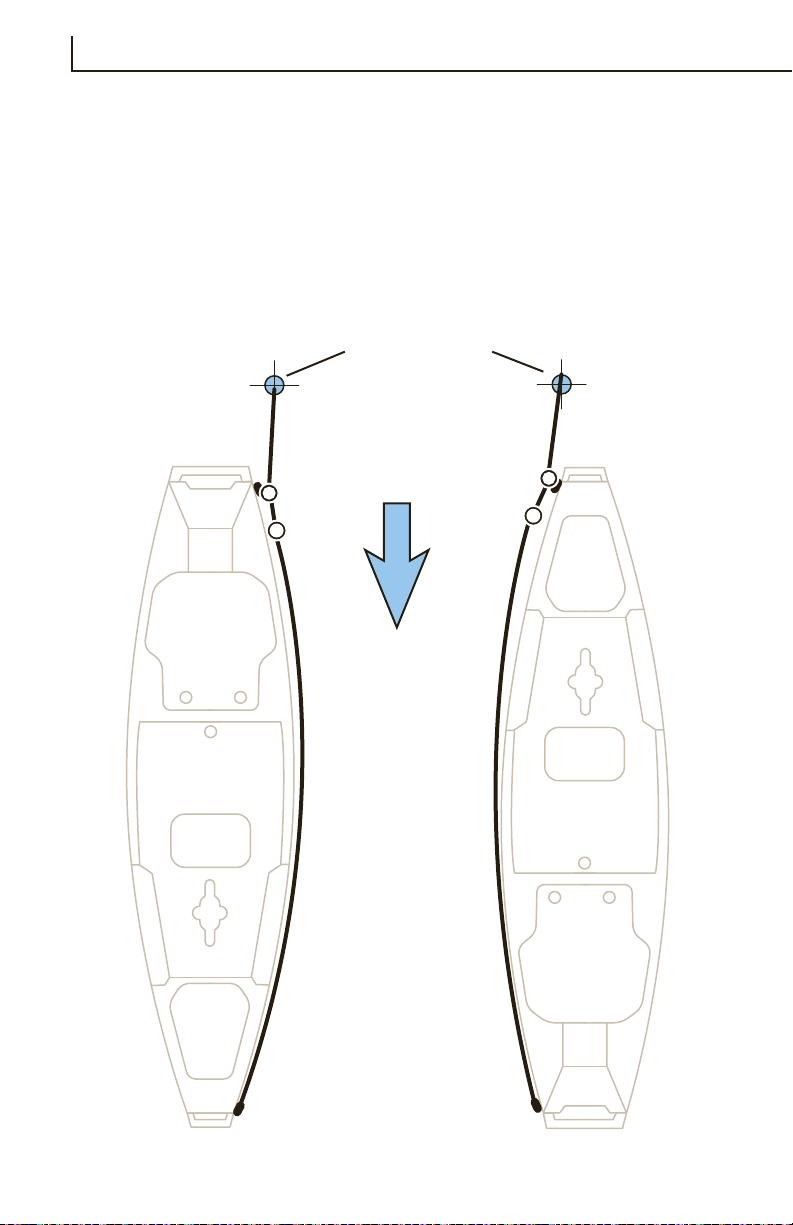
This manual will show the anchor trolley kit being installed on the left–hand
side of the kayak, but it can be put on the right–hand side if preferred.
This is a universal kit and features parts to allow assembly on all Hobie kayaks
excluding inflatables. Some hardwear may go unused depending on kayak type.
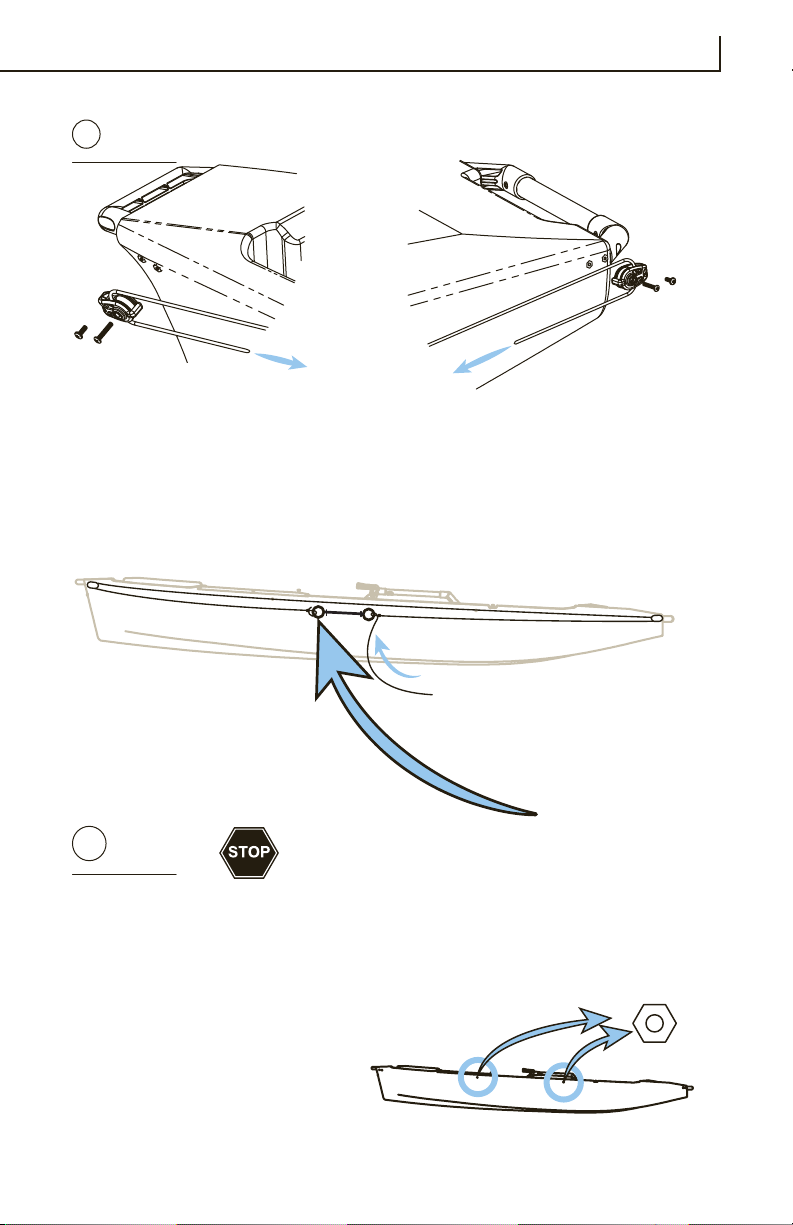
1
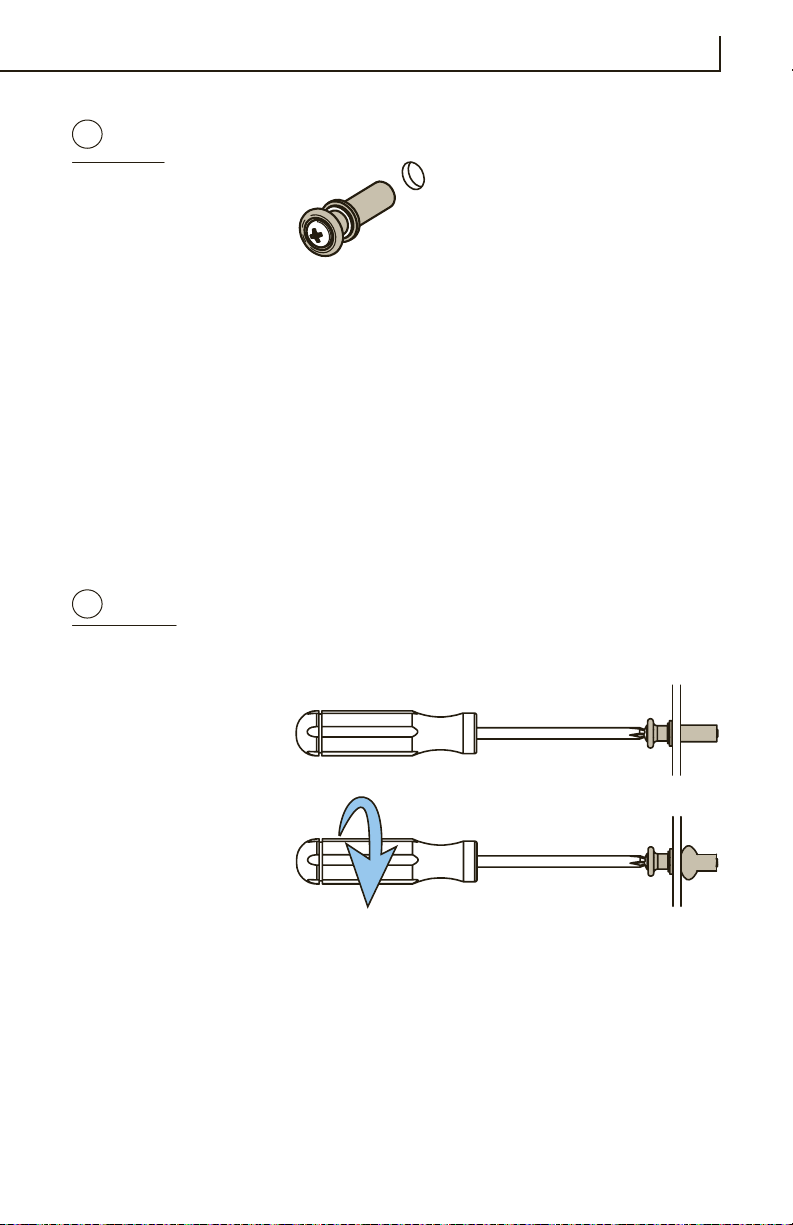
If installing on a Pro Angler,
remove plugs from the boat by
carefully prying off with a
screwdriver. IF YOUR PRO
ANGLER DOES NOT HAVE
INSERTS, FOLLOW KAYAK
INSTALLATION ON PG 5.
1
7 8 9
10 11
12
2 3
4
6
5
Pro Angler Installation