10
MAINTENANCE PROCEDURES
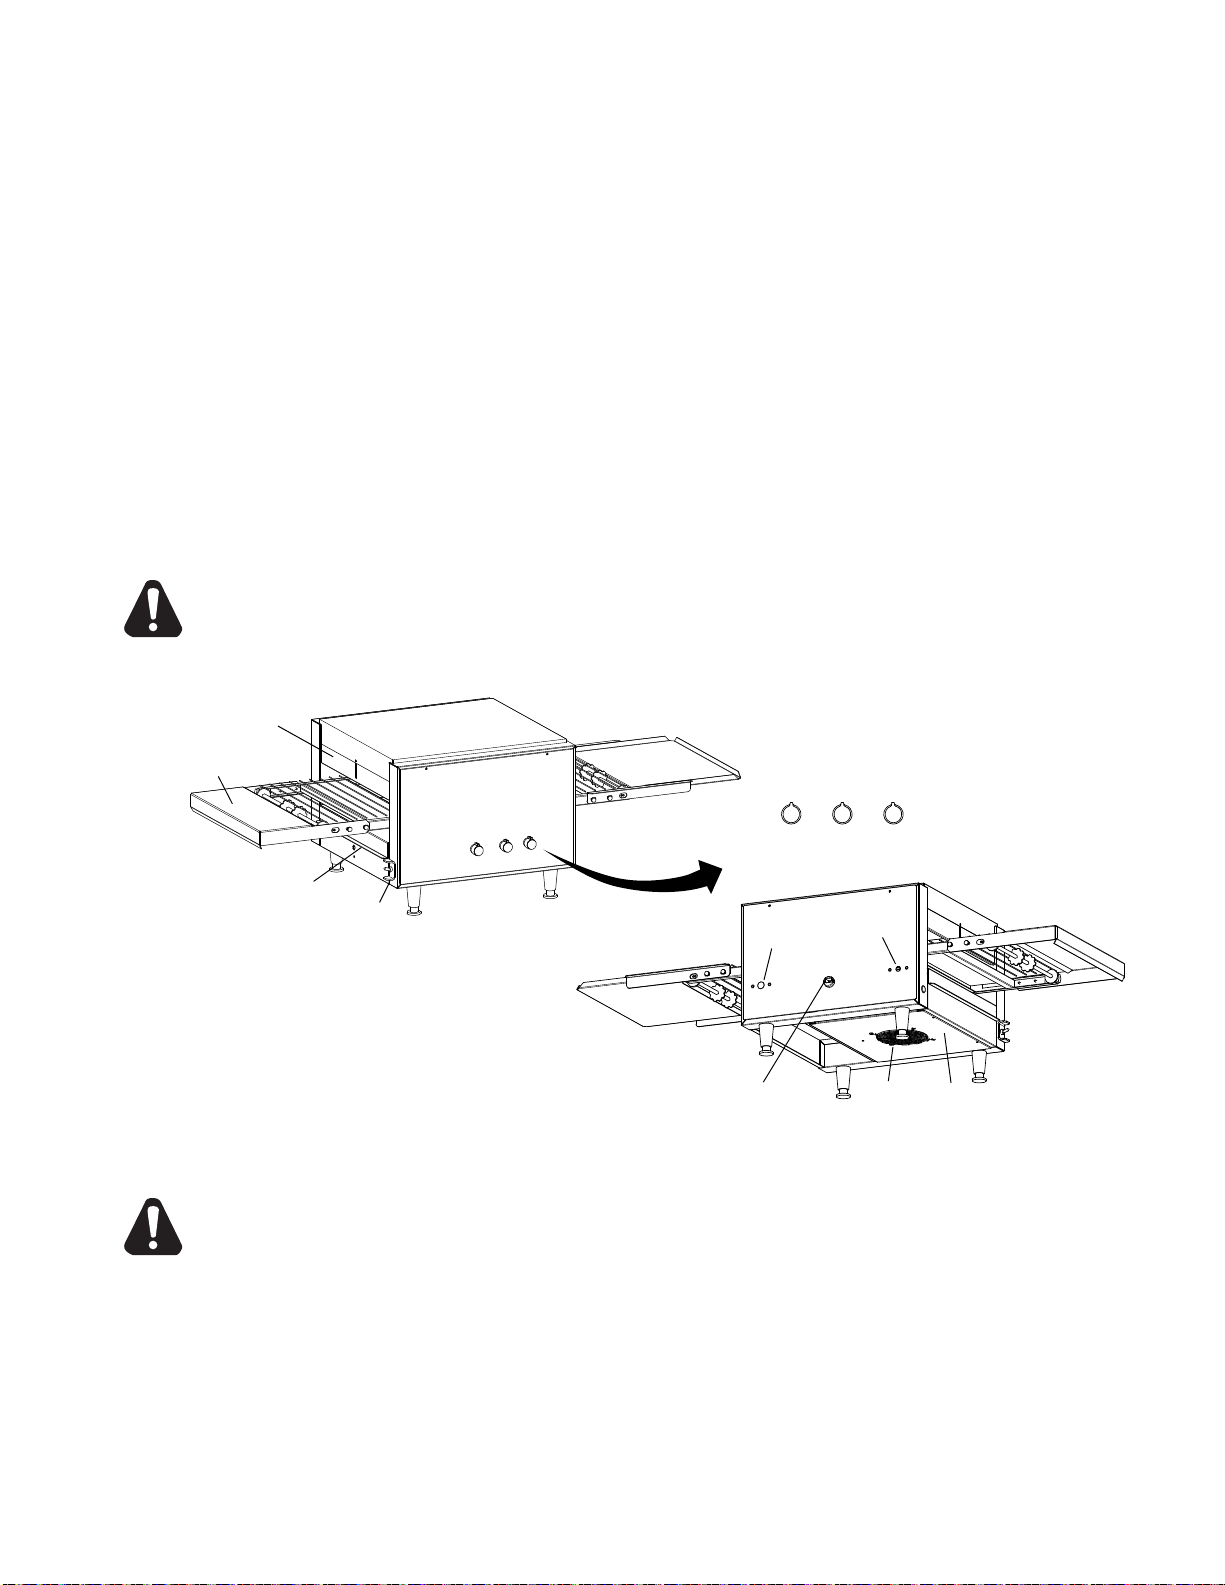
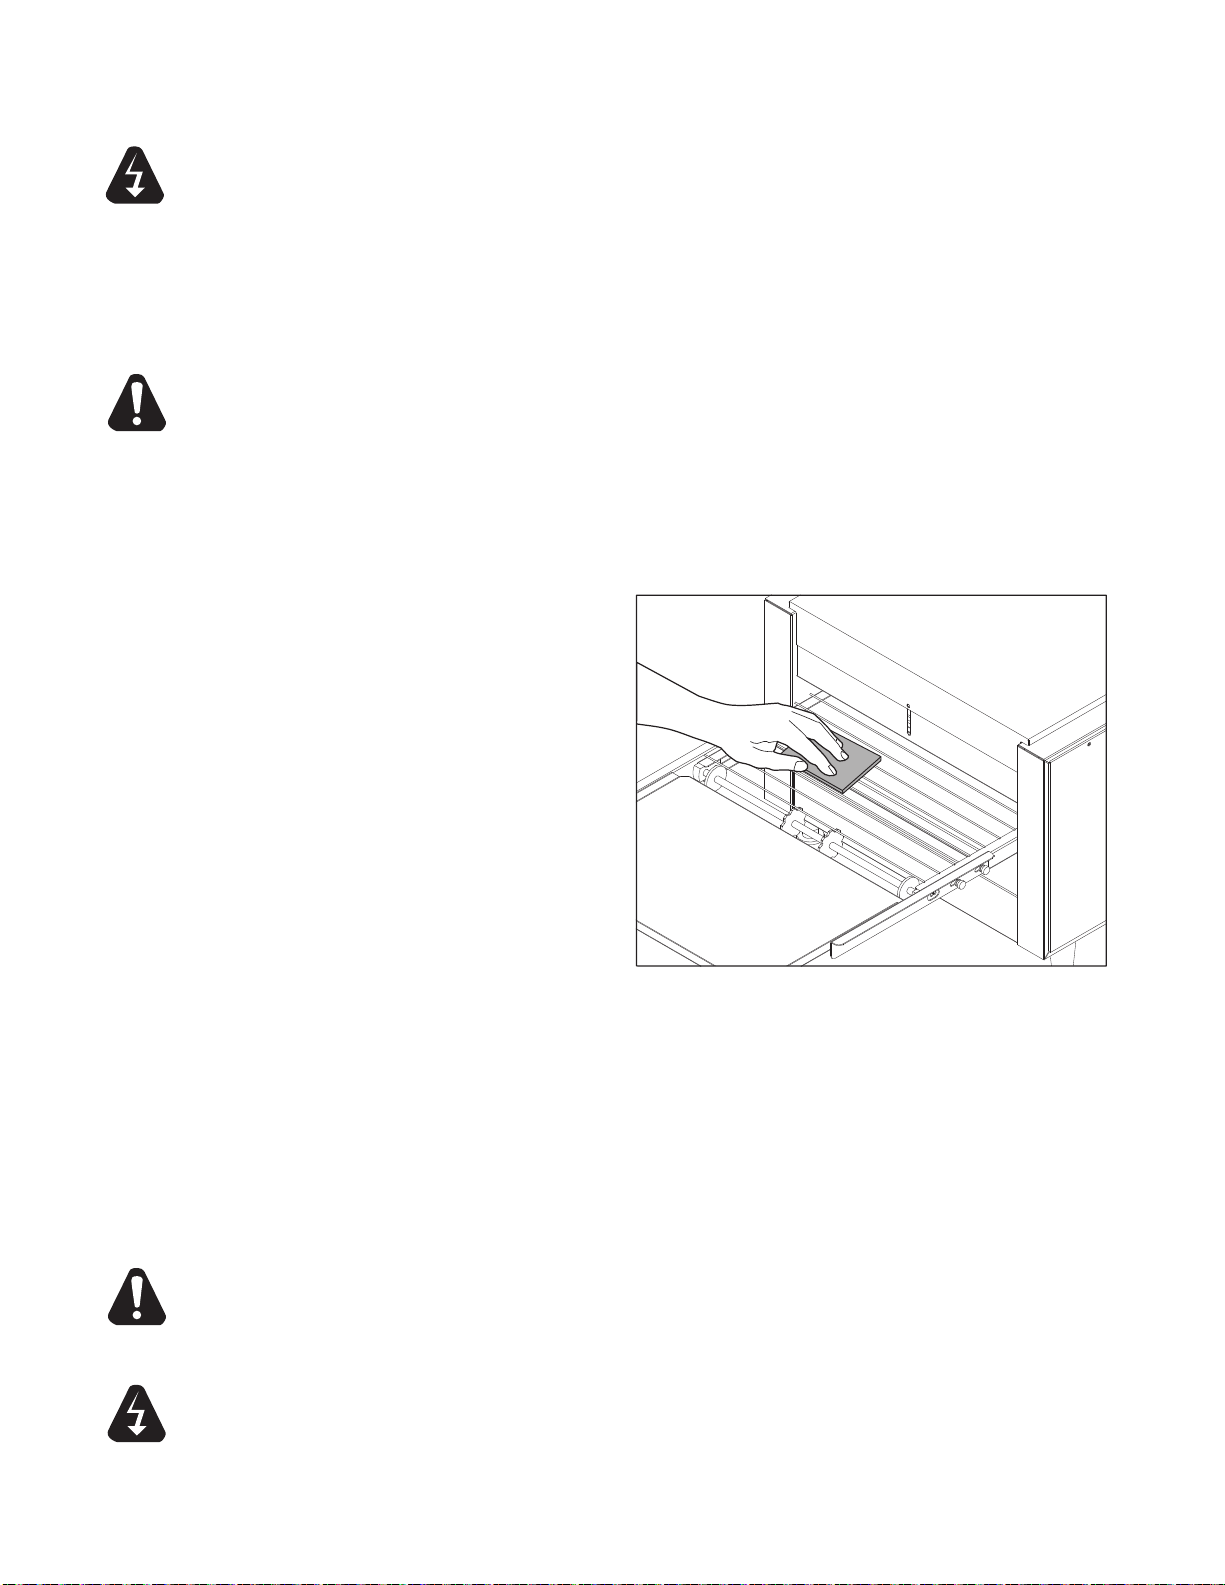
A. REPLACING HEATER TUBES
1) DISCONNECT POWER SOURCE.
2) Remove both the left and right side panels,
by removing the truss head screws. Pull the
top of each panel out slightly and lift up.
3) Remove each heater tube wires which
are requiring replacement from its terminal
block connection. One Tube at a Time.
4) Remove heater tube retainer by removing
retainer screws with washer.
5) Gently, pull defective heater tube out of unit.
6) Gently, put new heater tube into unit.
7) Replace heater tube retainers.
8) Reconnect the heater tube wires to the terminal
block.
9) Install each side panel
10) Connect unit to power source and test unit for proper operation.
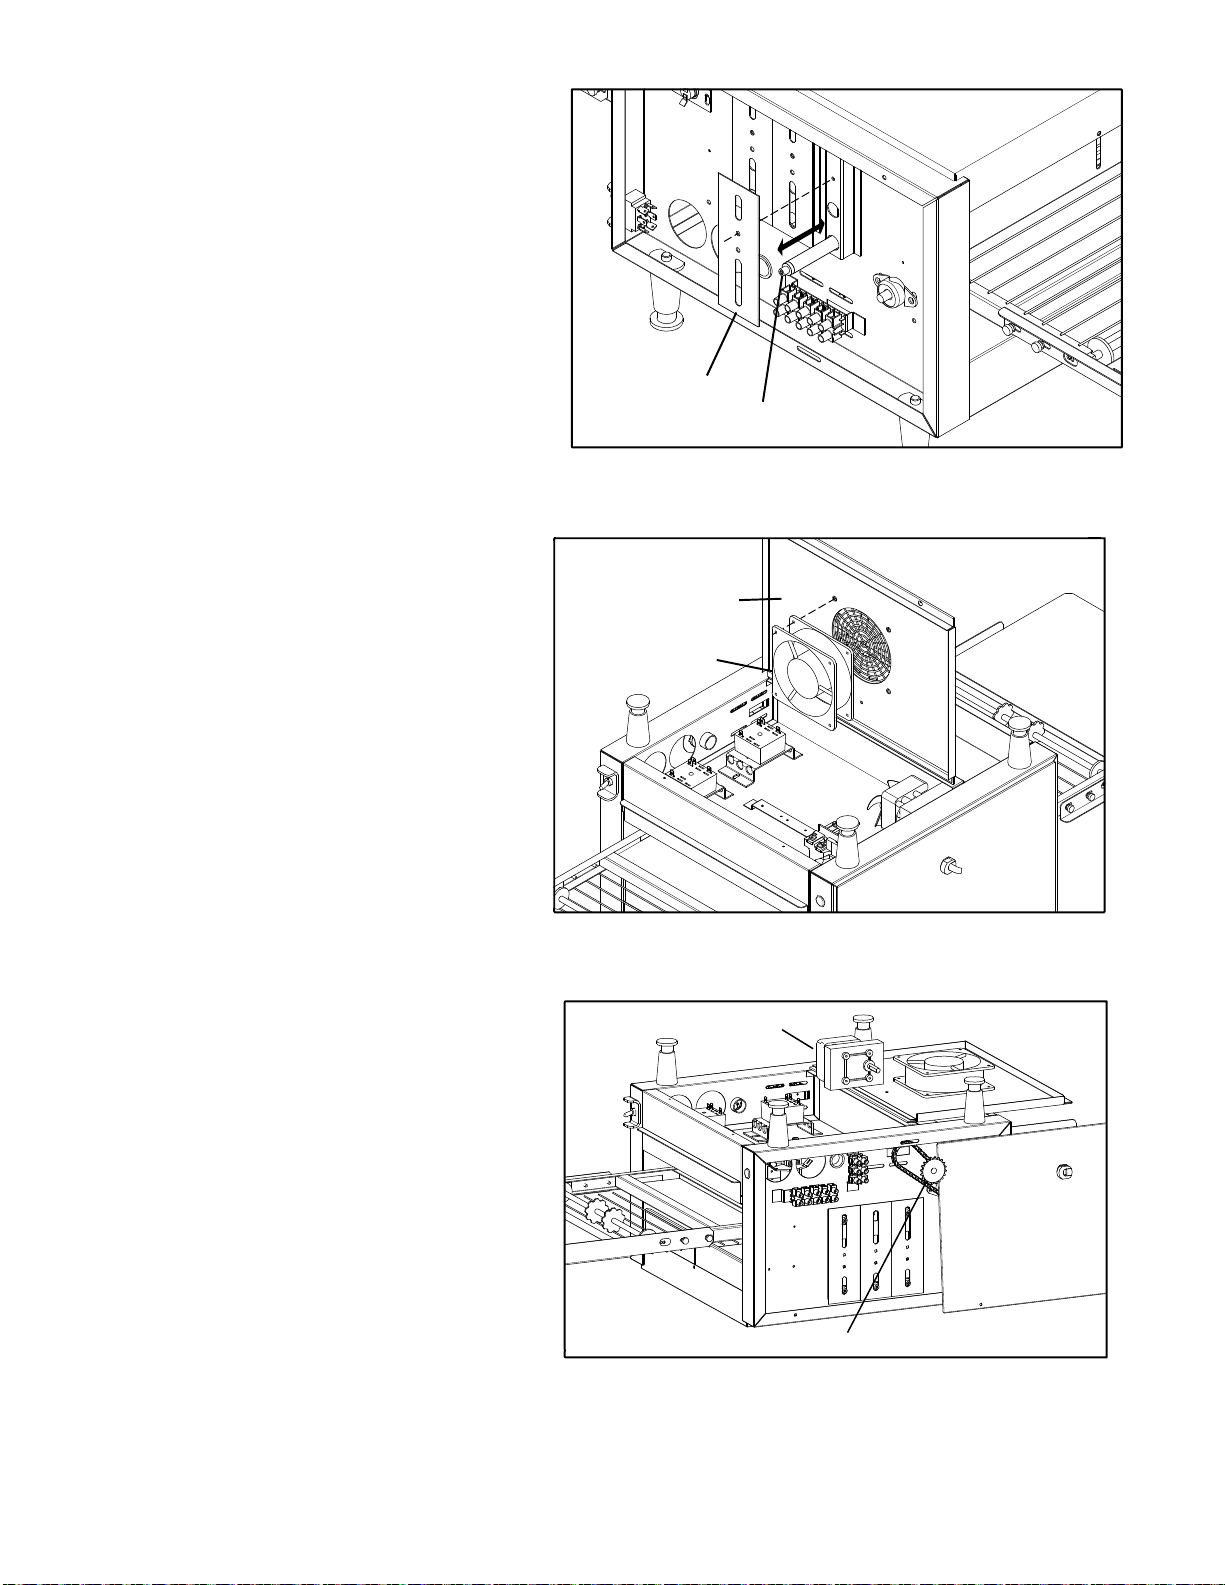
B. REPLACING FAN MOTOR
1) DISCONNECT POWER SOURCE.
2) After unit has cooled, remove the crumb tray,
and turn unit over so the bottom is facing
upward. Never place unit on its side.
3) Remove the control box cover which contains
the fan motor, by removing the 2 screws.
4) Unplug power supply cord from fan motor.
5) Remove (4) screws, which hold fan motor and grill
to the control box cover and remove fan.
6) Once removed, clean fan grill and control box
cover using warm soapy water.
7) Put replacement motor and grill in place and
secure to the control box cover with screws
previously removed.
8) Reconnect power supply cord to fan motor.
9) Replace back panel and enclosure. Fasten with
screws removed in step 3.
10) Connect unit to power source, reinstall the crumb
tray and test unit for proper operation.
C. REPLACING BELT DRIVE MOTOR
1) DISCONNECT POWER SOURCE.
2) After unit has cooled, remove the crumb tray,
and turn unit over so the bottom is facing
upward. Never place unit on its side.
3) Remove the control box cover which contains
the fan motor, by removing the (2) screws.
4) Remove the side panel that will expose the
drive chain and sprockets.
5) Remove sprocket from motor shaft, using an
Allen wrench and loosening the set-screw.
6) Remove the wire from terminal block connecting
the drive motor to the internal wiring.
On units rated 208 or 240 volts, note which
color leads are being used for these connections
and which lead is capped with glass tape. The
new motor should use the same arrangement.
Reference the wiring diagram if needed.
7) Remove screws holding motor in place and
remove motor from unit.
8) Put new motor in place and attach loosely with mounting screws.
9) Replace sprocket on motor shaft.
NOTE: The two sprockets must line up FLUSH with each other, so the chain does not twist any during
operation. Also the hub gets installed closets to the motor.
ELEMENT RETAINER
ELEMENT
Control Side Shown IL1041
IL1042
FAN MOTOR
CONTROL BOX COVER
DRIVE MOTOR
DRIVE SPROCKET IL1043