PAGE 1
OPERATORS MANUAL
HOLMAN FINAL TOUCH FINISHING OVENS (MODEL FT1(W), FT2(W)
HEAT AND HOLD OVENS (MODELS HH1(W), HH2(W)
AND GARLIC BREAD TOAST AND HOLD OVEN (MODEL FT2BH(W)
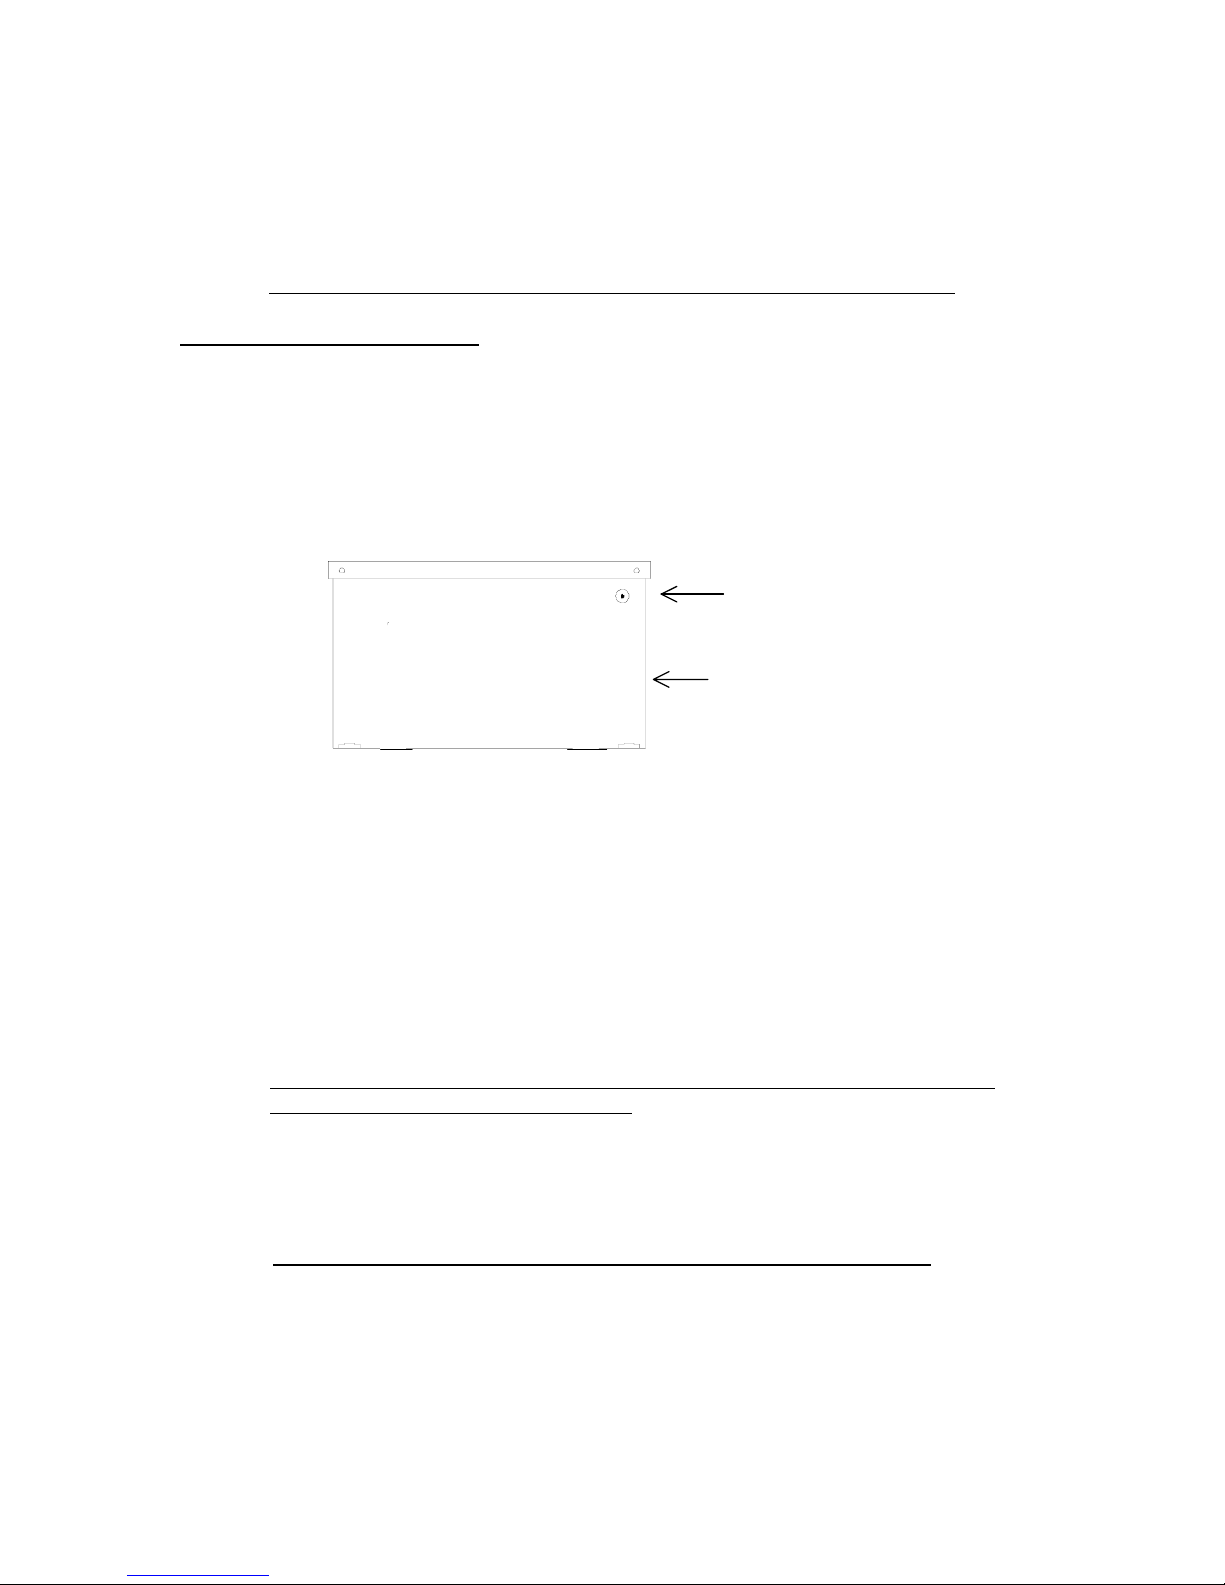
UNCRATING AND INSPECTION
Unpack unit and components from container. Remove all visible packing tapes and
inspect unit for damage. If damage is discovered, file a claim immediately with
carrier that handled the shipment.
ASSEMBLY
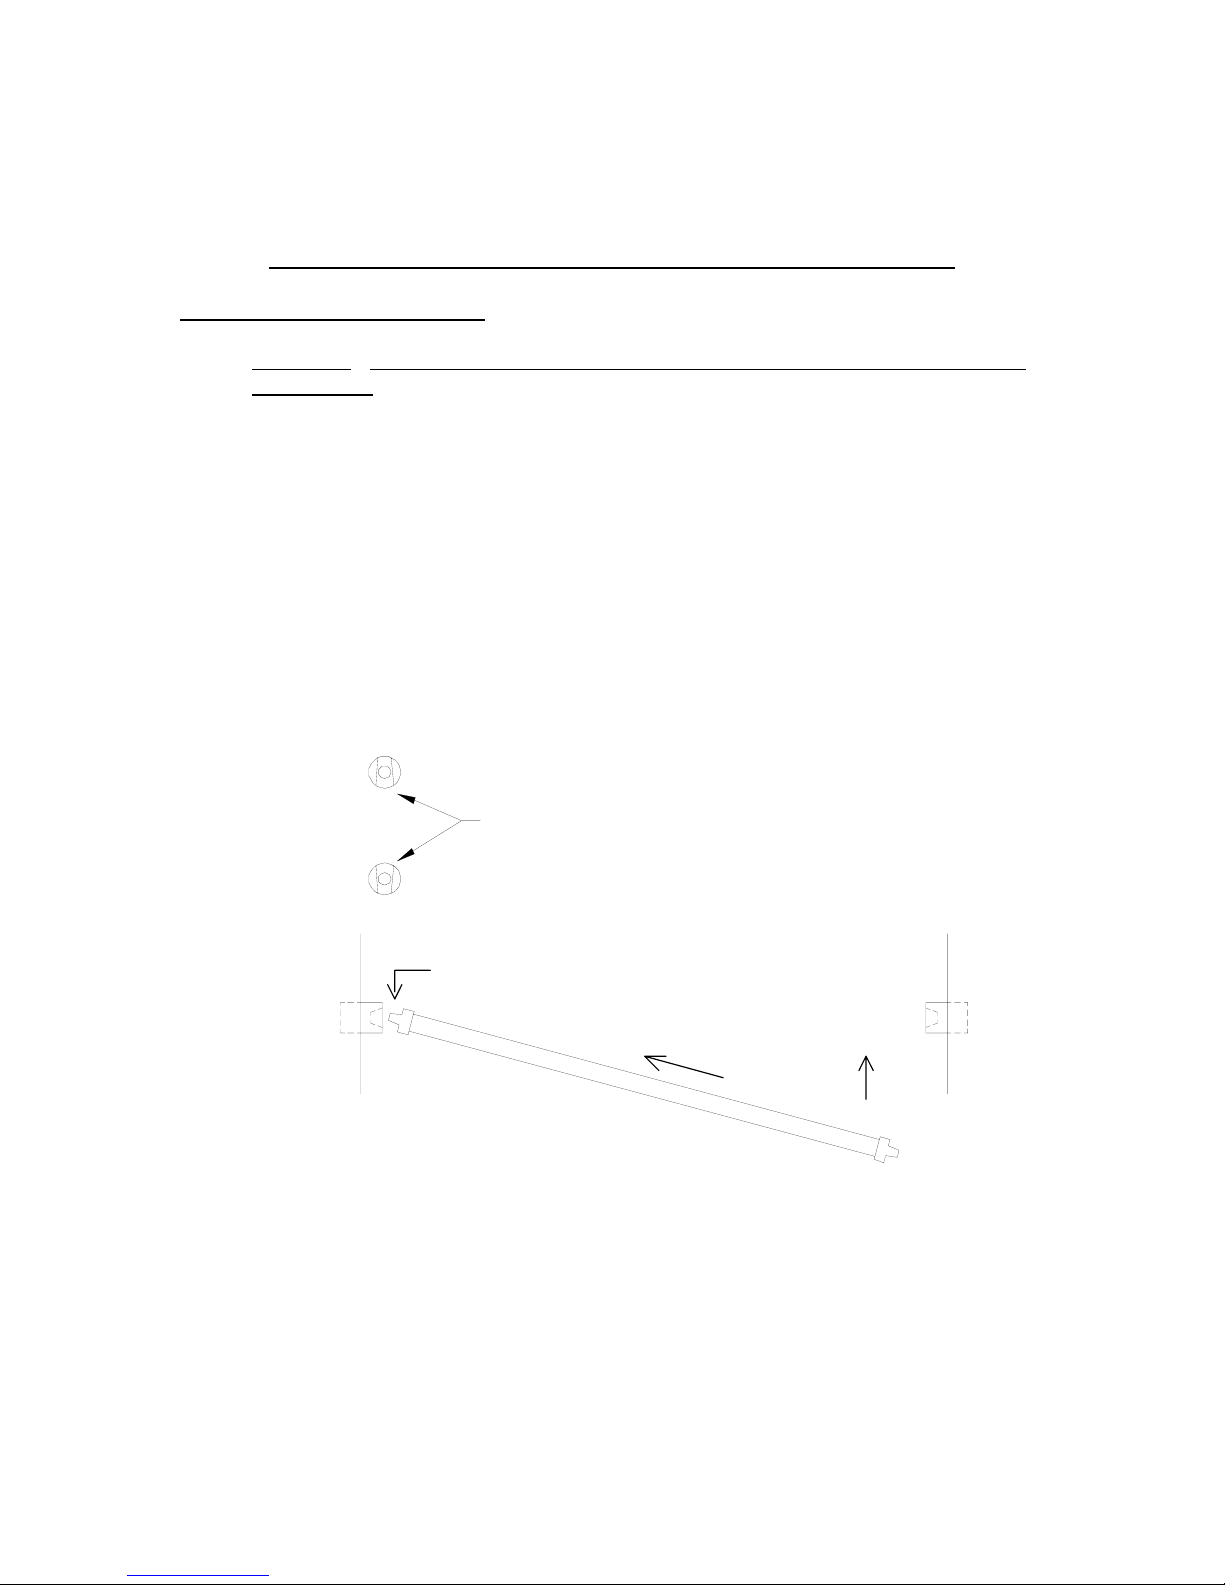
If the unit is to be installed on a counter If the unit is to be wall mounted
attach legs as shown. attach wall mounting brackets as shown.
LOOSEN SCREWS IN TOP COVER TO
ALLOW WALL MOUNTING BRACKETS
TO SLIDE BENIETH BACK EDGE OF
TOP COVER.
LEAVE APPROXIMATELY
1/8" OF BOLT HEAD
EXPOSED FOR MOUNTING
WALL MOUNT BRACKET
TO WALL.
MOUNTING
BOLT. MOUNTING
BRACKET SLIDES OVER
HEAD OF BOLT.
WALL
STUD
MOUNTING BRACKET SLIDES
BENIETH BACK OF TOP COVER
BACK OF UNIT
LEG SCREWS INTO
WELD NUT ON BOTTOM
OF UNIT FOR COUNTER
MOUNTING.
If unit is to be stacked, use the non-slip pads supplied with legs.
CAUTION - THE USE OF NON-SLIP PADS IS NOT N.S.F. APPROVED.
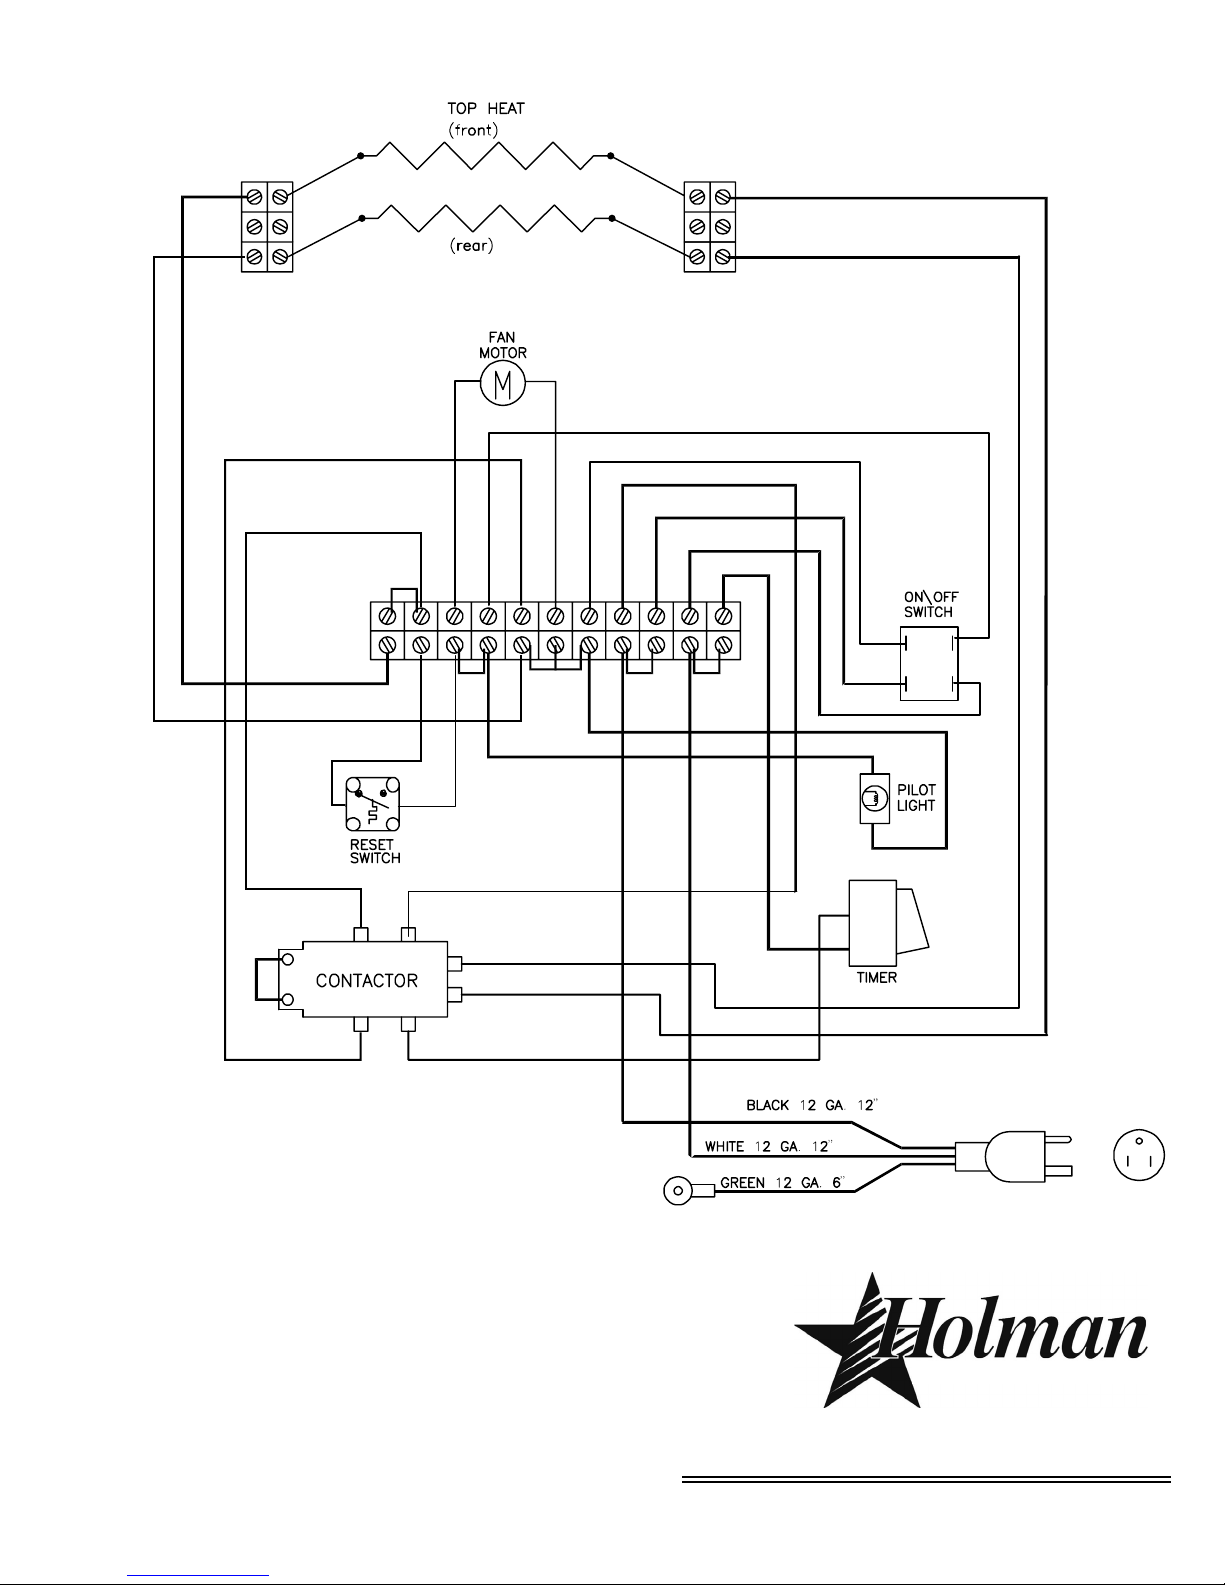
ELECTRICAL INSTALLATION
WARNING: NEVER PLUG A 120 VOLT UNIT INTO 208 VOLTS OR 240 VOLTS.
NEVER PLUG A 208 VOLT UNIT INTO 240 VOLTS OR A 240 VOLT UNIT INTO
208 VOLTS. CHECK WITH POWER COMPANY TO DETERMINE ACTUAL
VOLTAGE AT THE JOB SITE BEFORE INSTALLING UNIT.
WARNING: BE ABSOLUTELY SURE THE GROUND CONNECTION FOR THE
RECEPTACLE IS PROPERLY WIRED. NEVER CONNECT UNIT TO POWER
WITHOUT PROPER GROUND CONNECTIONS. IMPROPER GROUND
CONNECTION MAY RESULT IN SEVERE INJURY OR FATALITY.
Models FT1, FT2, HH1, and HH2 , are furnished with a 4 foot cord and standard
NEMA 5-15 plug for plug in installation in a grounded 120 Volt outlet. Model FT2BH
is furnished with a 4 foot cord and NEMA 6-20 plug. Your HOLMAN oven should be
the only appliance connected to the electrical line and should have its own fuse or
breaker in the electrical box. Wall mounted models FT1W, FT2W, HH1W, and
HH2W, are furnished with a 18" cord and standard NEMA 5-15 plug for plug in
installation in a grounded 120 Volt outlet. Model FT2BHW is furnished with a 18"
cord and NEMA 6-20 plug.
*In Canada, models FT2 and HH2 are furnished with a 4 foot cord and NEMA 5-20
plug for plug-in installation in a 5-20R 20 amp receptacle. Model FT2BH is furnished
with a 4 foot cord and NEMA 6-20 plug. Wall mounted models FT2W, and HH2W
are furnished with a 18" cord and NEMA 5-20 plug for plug-in installation in a 5-20R
20 amp receptacle. Model FT2BHW is furnished with a 18" cord and NEMA 6-20
plug.
REV 07/20/00 RRD