HOLOPHANE DORCHESTER LED Manual

LEDIMPORTANTSAFETYINSTRUCTIONS
Page1of2
Toreducetheriskofdeath,personalinjuryorpropertydamagefromfire,electricshock,fallingparts,cuts/abrasions,and
otherhazardspleasereadallwarningsandinstructionsincludedwithandonthefixtureboxandallfixturelabels.
Beforeinstalling,servicing,orperformingroutinemaintenanceuponthisequipment,followthesegeneralprecautions.
Installationandserviceofluminairesshouldbeperformedbyaqualifiedlicensedelectrician.
Maintenanceoftheluminairesshouldbeperformedbyperson(s)familiarwiththeluminaires’constructionandoperation
andanyhazardsinvolved.Regularfixturemaintenanceprogramsarerecommended.
Itwilloccasionallybenecessarytocleantheoutsideoftherefractor/lens.Frequencyofcleaningwilldependonambient
dirtlevelandminimumlightoutputwhichisacceptabletouser.Refractor/lensshouldbewashedinasolutionofwarm
waterandanymild,non‐abrasivehouseholddetergent,rinsedwithcleanwaterandwipeddry.Shouldopticalassembly
becomedirtyontheinside,wiperefractor/lensandcleaninabovemanner,replacingdamagedgasketsasnecessary.
DONOTINSTALLDAMAGEDPRODUCT!Thisluminairehasbeenproperlypackedsothatnopartsshouldhavebeen
damagedduringtransit.Inspecttoconfirm.Anypartdamagedorbrokenduringorafterassemblyshouldbereplaced.
Recycle:ForinformationonhowtorecycleLEDelectronicproducts,pleasevisitwww.epa.gov.
Theseinstructionsdonotpurporttocoveralldetailsorvariationsinequipmentnortoprovideeverypossiblecontingency
tomeetinconnectionwithinstallation,operation,ormaintenance.Shouldfurtherinformationbedesiredorshould
particularproblemsarisewhicharenotcoveredsufficientlyforthepurchaser’sorowner’spurposes,thismattershouldbe
referredtoAcuityBrandsLighting,Inc.
READANDFOLLOWALLSAFETYINSTRUCTIONS!
SAVETHESEINSTRUCTIONSANDDELIVERTOOWNERAFTERINSTALLATION
Wearglovesandsafetyglassesatalltimes
whenremovingluminairefromcarton,
installing,servicingorperforming
maintenance.
Avoiddirecteyeexposuretothelightsource
whileitison.
CAUTION
RISKOFINJURY
Keepcombustibleandothermaterialsthat
canburn,awayfromlamp/lens.
Donotoperateincloseproximitytopersons,
combustiblematerialsorsubstances
affectedbyheatordrying.
CAUTION
RISKOFFIRE
Disconnectorturnoffpowerbefore
installationorservicing.
Verifythatsupplyvoltageiscorrectby
comparingitwiththeluminairelabel
information.
Makeallelectricalandgrounded
connectionsinaccordancewiththeNational
ElectricalCode(NEC)andanyapplicable
localcoderequirements.
Allwiringconnectionsshouldbecapped
withULapprovedrecognizedwire
connectors.
WARNING
RISKOFELECTRICSHOCK
Allowlamp/fixturetocoolbeforehandling.
Donottouchenclosureorlightsource.
Donotexceedmaximumwattagemarkedon
luminairelabel.
Followallmanufacturer’swarnings,
recommendationsandrestrictionsfor:driver
type,burningposition,mounting
locations/methods,replacementand
recycling.
WARNING
RISKOFBURN

LEDIMPORTANTSAFETYINSTRUCTIONS
Page2of2
Neverconnectcomponentsunderload.
Donotmountorsupportthesefixturesinamannerthatcancuttheouterjacketordamagewireinsulation.
Controlsfordimming,auto‐sensing,orremotecontrolofaluminairethatarenotfactory‐wiredtothe
luminairemustbecheckedforcompatibilitywiththeluminairepriortoinstallation.LEDfixturesmustbe
powereddirectlyoffaswitchedcircuit.
Unlessindividualproductspecificationsdeemotherwise:Donotrestrictfixtureventilation.Allowforsome
volumeofairspacearoundfixture.AvoidcoveringLEDfixtureswithinsulation,foam,orothermaterialthat
willpreventconvectionorconductioncooling.
Unlessindividualproductspecificationsdeemotherwise:Donotexceedfixturesmaximumambient
temperature.
Onlyusefixtureinitsintendedlocation.
LEDproductsarePolaritySensitive.EnsureproperPolaritybeforeinstallation.
ElectrostaticDischarge(ESD):ESDcandamageLEDfixtures.Personalgroundingequipmentmustbeworn
duringallinstallationorservicingoftheunit.
DonottouchindividualelectricalcomponentsasthiscancauseESD,shortenlamplife,oralter
performance.
Somecomponentsinsidethefixturemaynotbeserviceable.Intheunlikelyeventyourunitmayrequire
service,stopusingtheunitimmediatelyandcontactanABLrepresentativeforassistance.
Alwaysreadthefixturescompleteinstallationinstructionspriortoinstallationforanyadditionalfixture
specificwarnings.
AlwaysensurethattheelectricaldistributionsystemisuptoNEC(andanyapplicablelocalcode)
requirements.
Verifythatpowerdistributionsystemhaspropergrounding.Lackofproperearthgroundcanleadtofixture
failureandmayvoidwarranty.
Choose either Part 15 OR Part 18 and move to Page 3 Installation Instructions under Delivery. Lithonia Outdoor will always use Part 15.
Allluminairesthatcontainelectronicdevicesthatgeneratefrequenciesabove9kHzfromanycomponentwithintheluminairecomplywithPart15
oftheFCCRules.Operationissubjecttothefollowingtwoconditions:
(1) Thisdevicemaynotcauseharmfulinterference
(2) Thisdevicemustacceptanyinterferencereceived,includinginterferencethatmaycauseundesiredoperation
ThisdevicecomplieswithPart18oftheFCCRulesbutmaycauseinterferencewithcordlessandcellphones,radios,televisions,andother
electronicdevices.Tocorrecttheproblem,movethedeviceawayfromtheluminaireorplugintoadifferentoutlet.Thisproductmaycause
interferencetoradioequipmentandshouldnotbeinstallednearmaritimesafetycommunicationsequipmentorothercriticalnavigationor
communicationsequipmentoperatingbetween0.45‐30MHz.
Failure to follow any of these instructions could void product warranties. For a complete listing of product Terms and
Conditions, please visit www.acuitybrands.com.
OurBrands Indoor/OutdoorIndoorLightingOutdoorLighting Controls Daylighting
LithoniaLighting Aculux AmericanElectricLighting DARKTOLIGH
T
SunOptics
Carandini Gotham AntiqueStreetLamps LC&D
Holophane Indy Hydrel ROAM
RELOC Juno Tersen SensorSwitch
LightConcepts MarkArchitecturalLighting
Synergy
Peerless
RenaissanceLighting
WinonaLighting
AcuityBrandsLighting,Inc.assumesnoresponsibilityforclaimsarisingoutofimproperorcarelessinstallationorhandlingofitsproducts.
ABLLEDGeneralWarnings,FormNo.503.203©2010,2016AcuityBrandsLighting,Inc.Allrightsreserved.12/01/10
CAUTION:RISKOFPRODUCTDAMAGE

912-00167-001 REV.B
HOLOPHANE®DORCHESTER®LED Installation and
Maintenance
Manual
_______________________________________________________________________
_________________________________
AFTER INSTALLATION DELIVER THIS
MANUAL TO OWNER_______________
Figure 1.
_______________________________
1. Introduction
1.1. Product Description
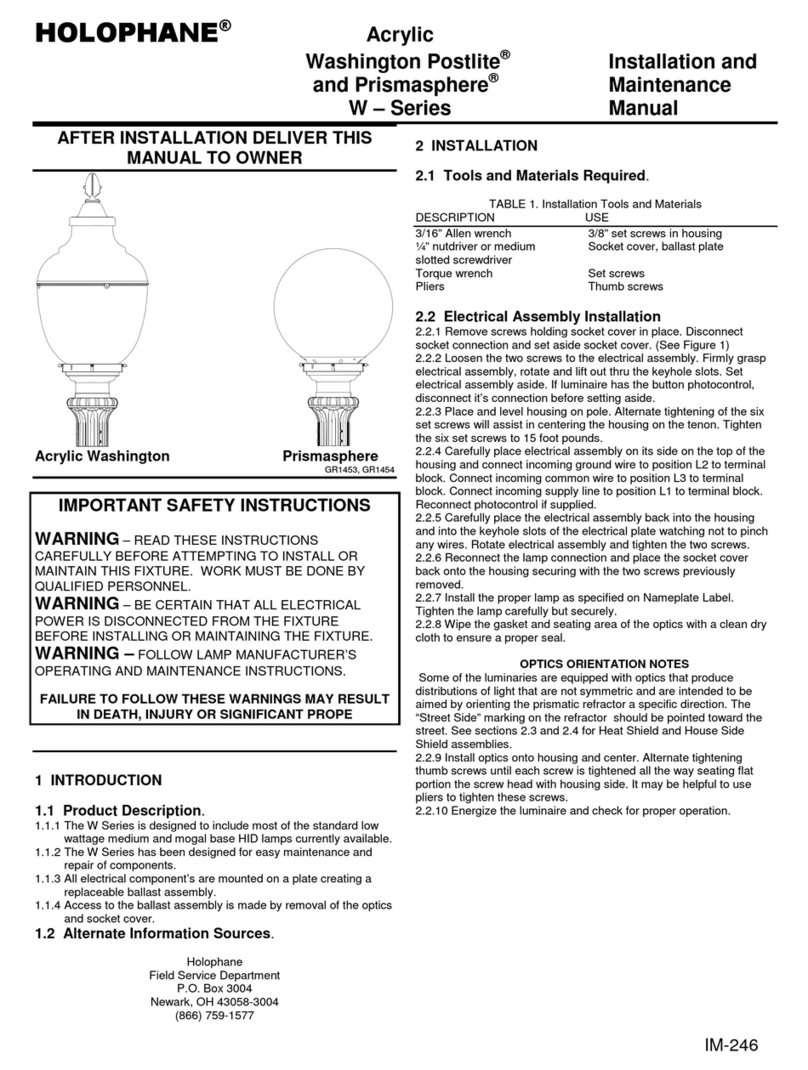
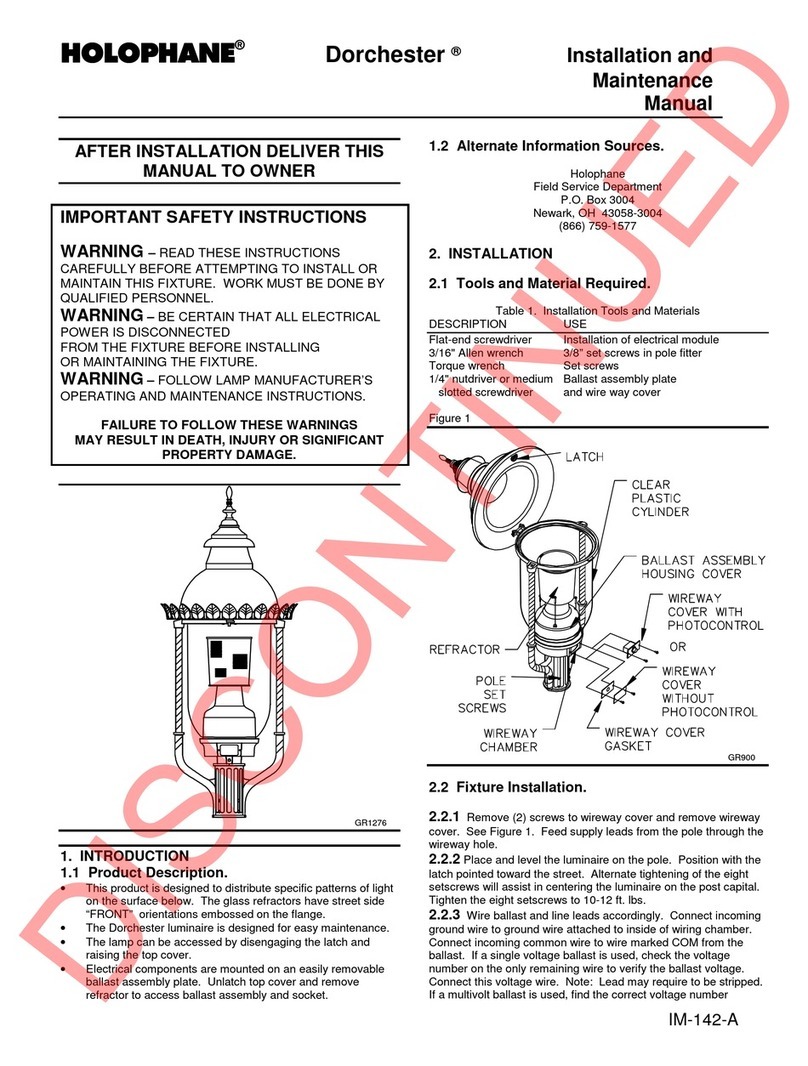
This product is designed to distribute specific patterns of light on the
surface below. The glass refractors have street side “FRONT”
orientations embossed on the flange.
The Dorchester luminaire is designed for easy maintenance.
Electrical components are mounted on an easily removable
electronics bracket. Unlatch utility door to access electronics
bracket and terminal block if present.
1.2 Alternate Information Sources
Holophane
Field Service
Department
P.O. Box
3004 Newark,OH
43058-3004
(866) 759-1577
2. Installation
2.1 Required tools
3/16" Allen wrench
Torque wrench
¼” Nut driver or medium slotted screwdriver
3/8” Set screws in pole fitter
Figure 2.
___________________________________________________
2.2 VCHousingFixtureInstallation
2.2.1 Remove (2) screws to wireway cover and remove
wireway cover. See Figure 2. Feed supply leads from the
pole through the wireway hole.
2.2.2 Place and level the luminaire on the pole. Position
with the wire way cover pointed toward the street.
Alternate tightening of the eight sets screws will assist in
centering the luminaire on the post capital. Tighten the
eight set screws to 10-12 ft. lbs.
2.2.3 Wire input leads accordingly. Connect incoming
ground wire to ground wire attached to inside of wiring
chamber. Connect incoming common wire to white input
lead. Verify the luminaire voltage before connecting this
wire. Carefully place connections in wiring chamber for
future access.
2.2.4 Replace wireway cover. Tighten screws.
2.2.5 Energize the luminaire, check for proper operation.
2.3 MS Housing Fixture Installation
2.3.1 Loosen latch on utility door and swing the door open
to reveal electrical components. Feed supply leads from
the pole to the input leads or terminal bracket if
necessary.
2.3.2 Place and level the luminaire on the pole. Position
with the swing open door pointed toward the street.
Alternate tightening of the six sets screws will assist in
centering the luminaire on the post capital. Tighten the six
set screws to 10-12 ft. lbs.

912-00167-001 REV.B
2.3.3 Wire input leads accordingly. Connect incoming
ground wire to ground wire attached to inside of wiring
chamber. Connect incoming common wire to white input
lead. Verify the luminaire voltage before connecting this
wire. Carefully place connections in wiring chamber for
future access.
2.3.4 Close door and fasten the latch onto the housing.
2.3.5 Energize the Luminaire, check for proper operation.
OPTICS ORIENTATION NOTES
Some of the fixtures in this series are equipped with optical
components that produce distributions of light that are not
symmetric and are intended to be aimed by orienting the
prismatic refractor a specific direction. The “Street Side”
marking on the refractor should be pointed toward the street.
The marking is on the top edge of the refractor.
3. Maintenance
3.1. Cleaning
3.1.1
Wipe off exterior dirt and debris using a soft, clean cloth.
3.1.2
Disengage latch, by rotating flat side toward center of
luminaire, and open top cover. Refer to Figure 1 or 2.
3.1.3
Remove clear plastic cylinder by lifting straight up.
3.1.4
Wipe plastic cylinder with damp soft cloth (do not use
chemical agents on plastic).
3.2
For non-cutoff luminaires wipe the refractor interior with a
clean dry cloth. Do NOT touch LEDs.
3.2.1
Close top cover and engage latch.
3.2.2
Energize the luminaire. Check for proper operation.
CAUTION
DO NOT USE ABRASIVE CLEANSERS ON OPTICAL
SURFACES. THEIR USE MAY RESULT IN THE LOSS OF
OPTICAL EFFICIENCY.
3.2. Electrical Component Replacement – MS
Only
3.2.1. Loosen latch on swing open door. Open the door to
reveal internal components and electronics bracket.
3.2.2.
Disconnect black, green, and white, supply leads or
terminal block connection.
3.2.3.
Disconnect red and blue LED leads from the driver.
Observe how bracket is set on the door.
3.2.4. Remove 2 EA screws at top of electronics bracket
and set aside. Bracket and attached components can
now be removed from the door. Ensure that all
connections to housing have been removed.
3.2.5. Place new electronics bracket into door, replicate the
positioning from step 3.2.3.
3.2.6.
Fasten 2 EA screws from step 3.2.4 to secure the
bracket to the inside of the door.
3.2.7.
Close the door and fasten the latch onto the housing.
3.2.8.
Energize the luminaire. Check for proper operation
4. LIMITED WARRANTY AND LIMITAION OF
LIABILITY
The Holophane limited warranty and limitation of liability is
published in the "Terms and Conditions" section of the
current Holophane buyer's guide and is available from your
local Holophane sales representative.

912-00167-001 REV.B
5. FAO Setting
Field Adjustable Output Module
The Field Adjustable Output (AO) module is an onboard
device that adjusts the light output and input wattage to
meet site specific requirements, allowing a single fixture
configuration to be flexibly applied in many different
applications. The default from the factory is set to 8. The
data is either the percentage of Lumens or Watts.
5.1. AO settings with 3LC, 4LC & 5LC Optics
P10withOptics3LC,4LCor5LC
Dial
Setting
MVOLT HVOLT
Lumens Watts Lumens Watts
8 100% 100% NotAvailable
7 94% 94%
6 83% 81%
5 71% 69%
4 59% 57%
3 48% 44%
2 36% 33%
1 24% 22%
P20withOptics3LC,4LCor5LC
Dial
Setting
MVOLT HVOLT
Lumens Watts Lumens Watts
8 100% 100% NotAvailable
7 94% 94%
6 83% 81%
5 71% 69%
4 59% 56%
3 47% 44%
2 35% 32%
1 22% 22%
P30withOptics3LC,4LCor5LC
Dial
Setting
MVOLT HVOLT
Lumens Watts Lumens Watts
8 100% 100% 100% 100%
7 94% 94% 94% 95%
6 83% 81% 83% 84%
5 71% 68% 71% 73%
4 59% 56% 59% 62%
3 47% 43% 47% 51%
2 34% 31% 34% 41%
1 22% 22% 22% 29%
P40withOptics3LC,4LCor5LC
Dial
Setting
MVOLT HVOLT
Lumens Watts Lumens Watts
8 100% 100% 100% 100%
7 94% 94% 94% 94%
6 83% 82% 83% 83%
5 71% 70% 71% 71%
4 59% 58% 59% 60%
3 46% 47% 46% 49%
2 34% 35% 34% 38%
1 21% 24% 21% 27%
P50withOptics3LC,4LCor5LC
Dial
Setting
MVOLT HVOLT
Lumens Watts Lumens Watts
8 100% 100% 100% 100%
7 94% 94% 94% 94%
6 83% 81% 83% 82%
5 71% 69% 71% 70%
4 59% 57% 59% 58%
3 46% 45% 46% 47%
2 34% 33% 34% 35%
1 21% 22% 21% 24%
P60withOptics3LC,4LCor5LC
Dial
Setting
MVOLT HVOLT
Lumens Watts Lumens Watts
8 100% 100% 100% 100%
7 94% 94% 94% 94%
6 83% 81% 83% 81%
5 71% 69% 71% 69%
4 59% 56% 59% 57%
3 47% 44% 47% 46%
2 34% 32% 34% 34%
1 20% 21% 20% 22%

912-00167-001 REV.B
P70withOptics3LC,4LCor5LC
Dial
Setting
MVOLT HVOLT
Lumens Watts Lumens Watts
8 100% 100% 100% 100%
7 93% 92% 95% 94%
6 81% 79% 83% 81%
5 68% 66% 72% 69%
4 55% 52% 60% 58%
3 40% 37% 47% 46%
2 25% 24% 34% 34%
1 11% 12% 20% 23%
P80withOptics3LC,4LCor5LC
Dial
Setting
MVOLT HVOLT
Lumens Watts Lumens Watts
8 100% 100% 100% 100%
7 93% 92% 95% 94%
6 81% 79% 84% 81%
5 69% 65% 72% 69%
4 55% 52% 60% 57%
3 40% 36% 48% 45%
2 26% 24% 34% 33%
1 11% 12% 21% 22%
5.2. AO settings with 3LS & 5LS Optics
.
P10withOptics3LSor5LS
Dial
Setting
MVOLT HVOLT
Lumens Watts Lumens Watts
8 100% 100% NotAvailable
7 94% 94%
6 82% 81%
5 70% 69%
4 57% 56%
3 45% 44%
2 32% 33%
1 18% 21%
P20withOptics3LSor5LS
Dial
Setting
MVOLT HVOLT
Lumens Watts Lumens Watts
8 100% 100% NotAvailable
7 94% 93%
6 83% 81%
5 70% 68%
4 58% 56%
3 45% 43%
2 32% 31%
1 19% 21%
P30withOptics3LSor5LS
Dial
Setting
MVOLT HVOLT
Lumens Watts Lumens Watts
8 100% 100% 100% 100%
7 94% 93% 94% 94%
6 83% 80% 83% 82%
5 71% 67% 71% 71%
4 59% 55% 59% 59%
3 46% 42% 46% 48%
2 33% 30% 33% 37%
1 19% 19% 19% 26%
P40withOptics3LSor5LS
Dial
Setting
MVOLT HVOLT
Lumens Watts Lumens Watts
8 100% 100% 100% 100%
7 95% 93% 95% 93%
6 84% 80% 84% 81%
5 73% 68% 73% 69%
4 61% 55% 61% 57%
3 48% 43% 48% 45%
2 34% 32% 34% 34%
1 20% 20% 20% 23%
P50withOptics3LSor5LS
Dial
Setting
MVOLT HVOLT
Lumens Watts Lumens Watts
8 100% 100% 100% 100%
7 95% 93% 95% 94%
6 84% 80% 84% 81%
5 72% 68% 72% 69%
4 60% 55% 60% 57%
3 47% 43% 47% 45%
2 34% 31% 34% 33%
1 20% 20% 20% 22%
Acuity Lighting Group, Inc.
214 Oakwood Ave., Newark, OH 43055
IM-142-A, 8/02 ©2002 Acuity Lighting Group Inc.
Visit our web site at www.holophane.com
Printed in USA
Other HOLOPHANE Outdoor Light manuals
Popular Outdoor Light manuals by other brands

Quoizel
Quoizel Stonington SNN8408K Assembly instruction sheet

Quoizel
Quoizel HY2006IB Assembly instruction sheet

Quoizel
Quoizel TML9008K Assembly instruction sheet

Safavieh
Safavieh LIT4316A manual

Acuity Brands Lighting
Acuity Brands Lighting Holophane 25 owner's manual

Dale Tiffany
Dale Tiffany 1610 Assembly instructions

Conrad
Conrad EC23234 installation guide

Malatech
Malatech ONYX TWIN WARM WHITE user manual

LIGMAN
LIGMAN TE-10266-1 installation manual

Würth
Würth WLH 1.5 Translation of the original operating instructions

LED Lovers
LED Lovers ARIZONA LL-OU-LPSOLMD02-B user manual

Probrite
Probrite ASTRA ASTR55-PC-4K-BZ INSTALLATION, USAGE, & CARE GUIDE