iii 1/2 HP Chain Drive Garage Door Opener
Before You Begin........................................................................................................................................ 1
Tools Required for Assembly.................................................................................................................... 3
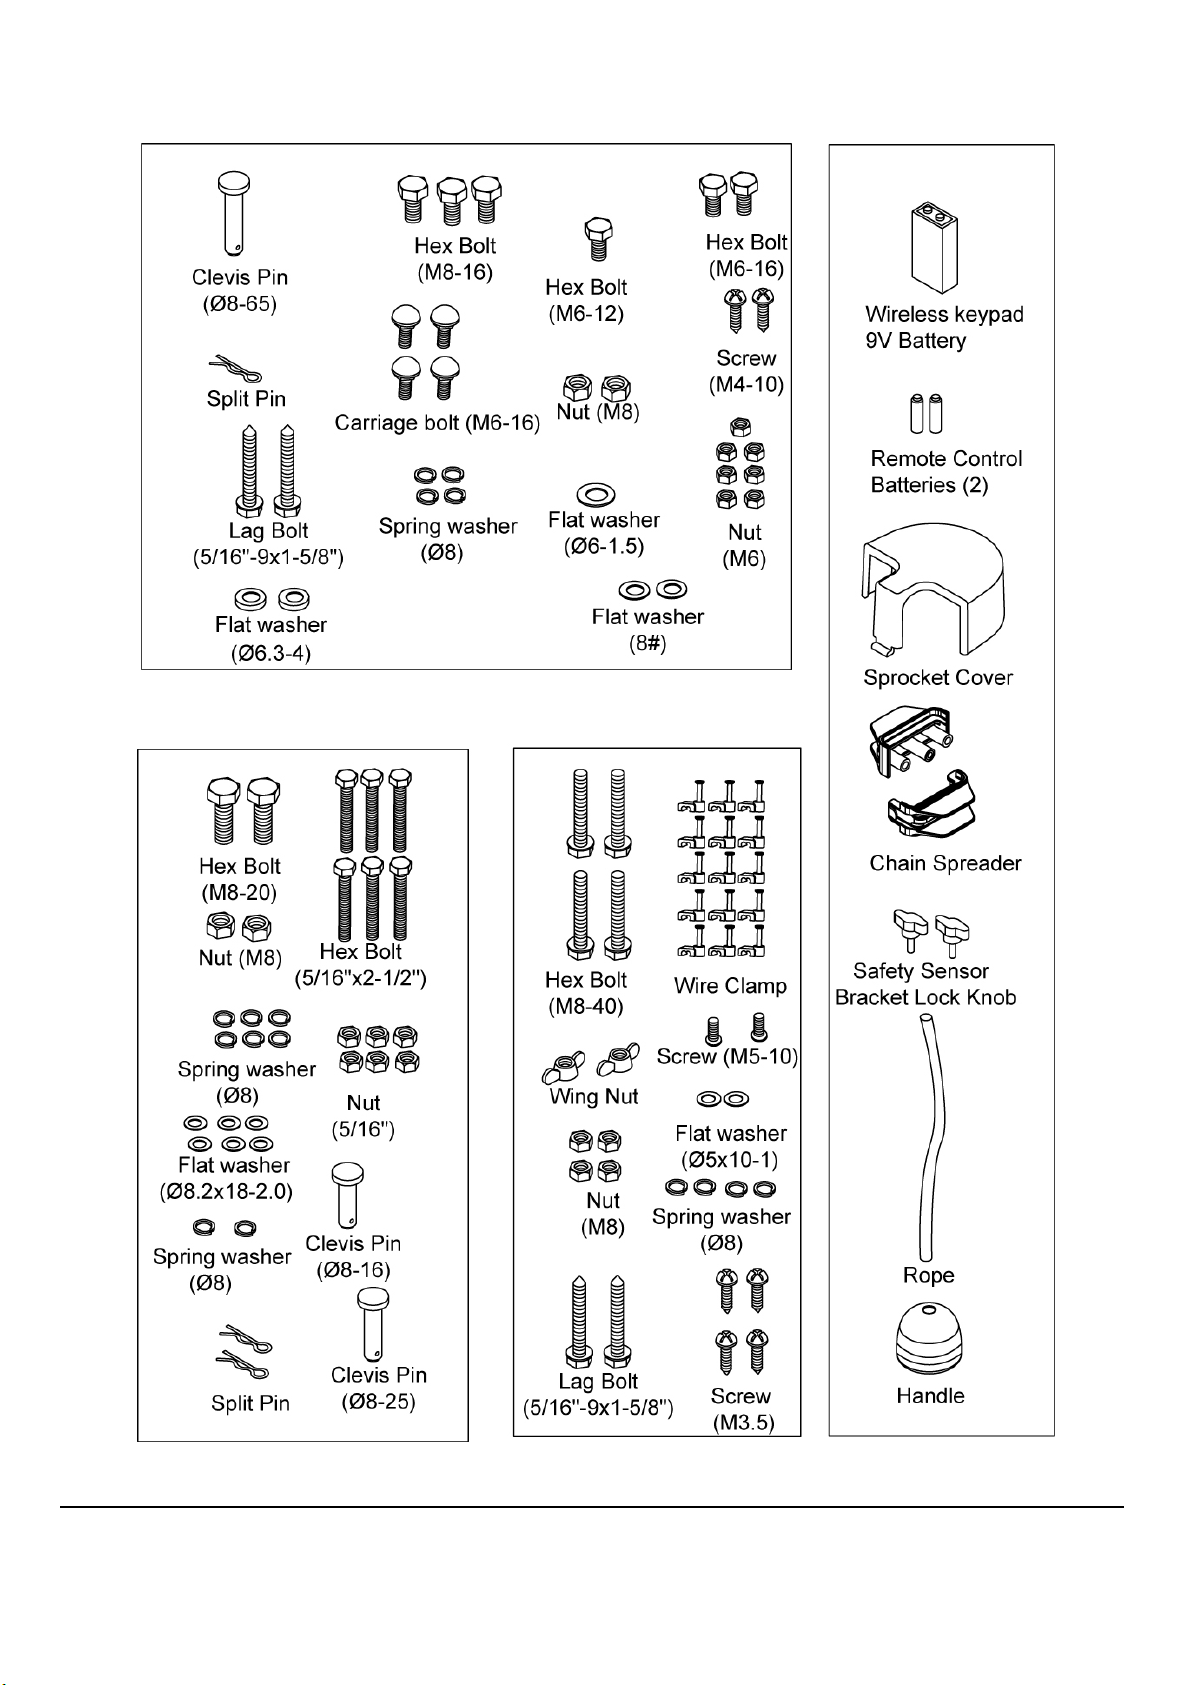
Materials Not Included In The Carton...................................................................................................... 3
Preparing The Installation Site.................................................................................................................. 4
As s embling Rail Components................................................................................................................... 5
A) Attaching the Trolley & Header Bracket to the Rail...................................................................... 5
B) Attaching the Rail to the Motor As sembly...................................................................................... 7
C) Attaching the Chain to the Motor & Rail As sembly....................................................................... 9
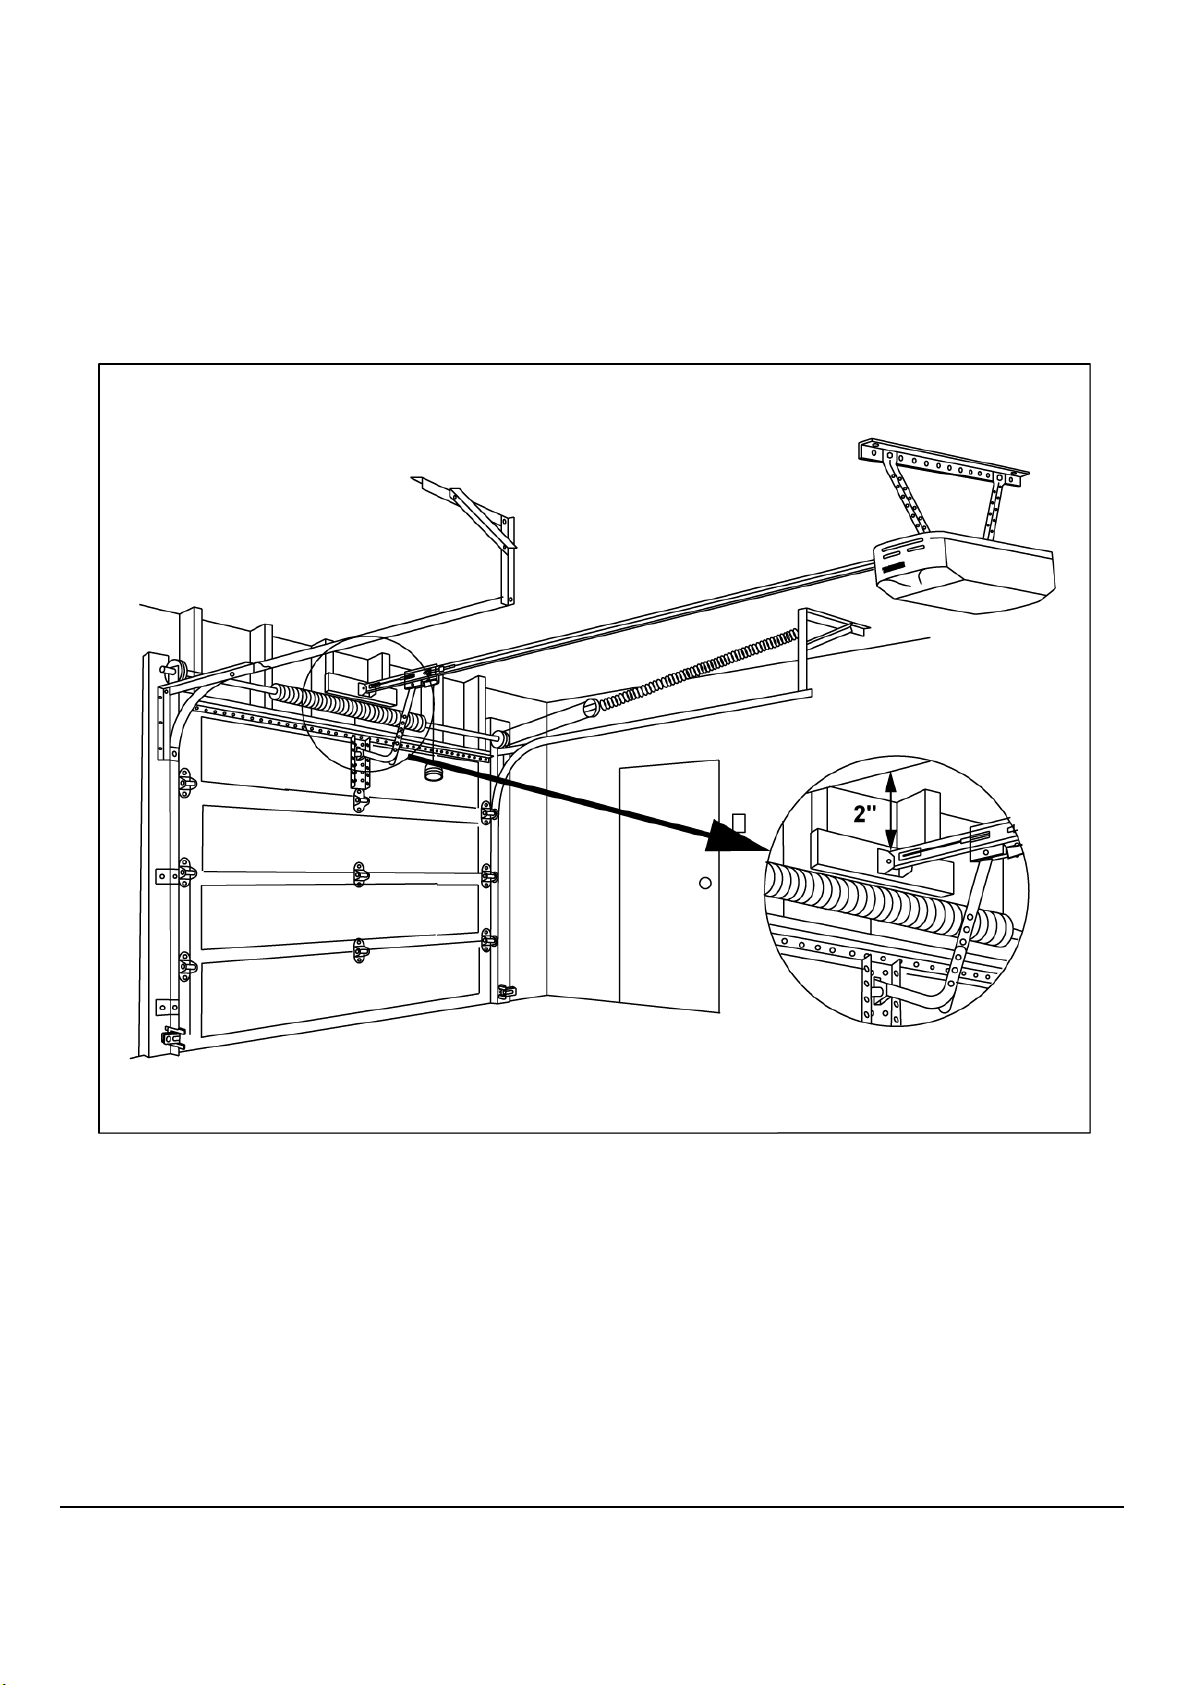
Mounting the Assembled Garage Door Opener...................................................................................12
Attach the Motor Assem bly to Ceiling....................................................................................................16
Ins tall Safety Sens ors and Rem ote Switches ......................................................................................17
A) Install the Safety Revers ing Sens ors ........................................................................................... 17
B) Install The Door Bell........................................................................................................................20
C) Install the Keyless Entry Control Pad...........................................................................................22
Attach The Door Brackets To The Garage Door And Garage Door Bracket...................................23
Testing and Adjusting the Garage Door Opener..................................................................................29
A) Adjus ting the Chain Tens ion...........................................................................................................29
B) Testing and Adjus ting the Door Range of Motion .......................................................................29
C) Testing and Adjus ting the Safety Revers ing Sensors ................................................................31
D) Testing and Adjusting Door Force.................................................................................................31
E) Testing and Adjus ting The Safety Reverse Feature...................................................................32
Programm ing the Remote Controls .......................................................................................................33
Using your Garage Door Opener...........................................................................................................35
Caring for your Garage Door Opener....................................................................................................36
Hom elink Programm ing ...........................................................................................................................37
Troubleshooting........................................................................................................................................39
Parts List and Schematic Diagrams.......................................................................................................41
Parts List: Schematic A- Rail Assemblyand Other Parts ..............................................................41
Parts Lis t: Schem atic B - Motor As s embly........................................................................................43