manuals.online logo
Brands
  1. Home
  2. •
  3. Brands
  4. •
  5. Hongda USA
  6. •
  7. Measuring Instrument
  8. •
  9. Hongda USA AT2150/B series User manual

Hongda USA AT2150/B series User manual

AT2150/B Automotive Tester
User’s Guide
Introduction
AT2150/B series digital multimeter is a 3½ digital with precise
design, convenient for operation, stable performance and with
multi-functions measuring instrument. It was designed with new
style guarantees protective covering, large screen liquid crystal
display. It uniquely incorporate with back light valve features, so it
is suitable to be used in the obscure ray environment operation.
The ”VΩ” is equipped with PTC heat sensitive element at the input
terminal. Therefore, the Function/Range switch has efficient
protection.
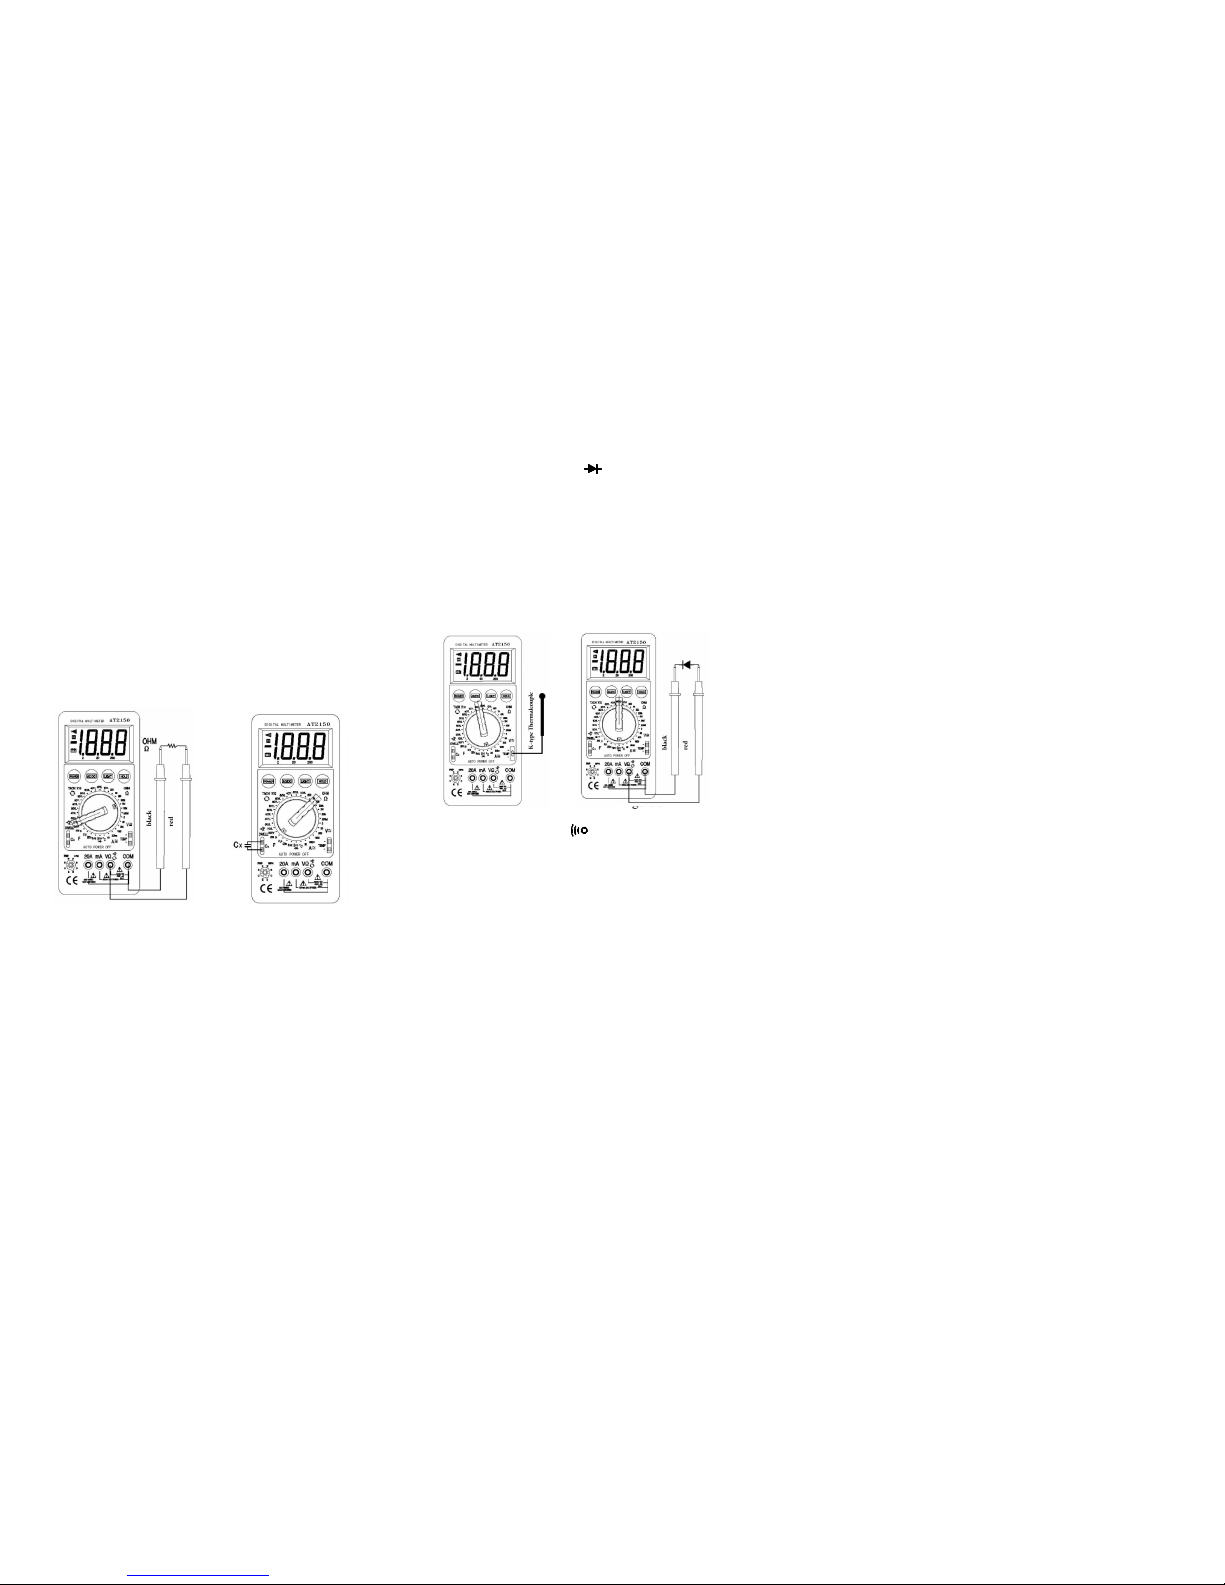
AT2150/B series digital multimeter can measure DC Current
and Voltage, Current, AC Current and Voltage, Resistor, Capacitor,
Temperature, Diode and Transistor, Open Circuit and Short Circuit.
In addition, AT2150/B digital multimeter is also suitable for vehicles.
Safety Precautions and Procedures
for your own safety, you must read and follow the procedure in this
instruction manual.
don’t try to use it if the battery cover is not closed properly,
otherwise you may have the danger of electric shock.
make sure the insulation layer has not any damages before use it.
never input signal electronic level exceeding the limited value to
avoid electronic shock or damaging the instrument.
don’t turn the function/range switch when taking measurement.
the potential difference between the measurement public terminal
COM and earth can’t exceed 1000V to avoid electric short.
pay attention if the tested voltage is over DC 60V and AC 42V to
avoid electric shock
if there have a symbol on the LCD display, it indicates low
battery. replace the battery to ensure measurement accuracy.
For the fuse, it must be replaced with an identical model if necessary.
International Symbols
DC Current or Voltage AC Current or Voltage Diode
Buzzer Low Battery Cautions Double Insulation
Danger High Voltage Rotational Speed Closed Angle
Characteristic
Low power consumption CMOS double integration, A/D transform
integrated circuit, auto zero calibration, auto polarity display, low
battery and over range indication.
DC basic accuracy : +0.5% (3 1/2 digits)
Capacitor measurement : 1pF~200uF
Temperature measurement : -40ºC~1000ºC
Full range over-load protection function.
Have back-light valve features, it is suitable to be used in the obscure
ray environment operation.
Auto power off function: the meter will shut off automatically about
15 seconds after no performance.
Maximum display : 1999 (3 1/2 digits)
LCD display : 70 x 48mm big screen, high contrast, Word height :
28mm
Power : one 9V battery (NEDA 1604, 6F22 model or identical)
Low battery indication: mark on display
Size : 192x88x42mm
Weight : approximate 400g (including battery and cover)
Environment conditions :
Operation temperature : 0ºC~40ºC Relative humidity <85%
Storage Temperature : -10ºC~50ºC Relative humidity <85%
Keeping accuracy temperature : 23ºC+5ºC
Relative humidity <75%
Technical Specifications
Accuracy : + (% reading + digit) one year warranty.
Environmental humidity : 23ºC+5ºC
Relative humidity : <75%
Closed Angle Gauge
Range
Accuracy
Resolution
1CYL
0-180.0º
+(1.2%+2)
0.1º
3CYL
0-120.0º
4CYL
0-90.0º
5CYL
0-72.0º
6CYL
0-60.0º
8CYL
0-45.0º
Overload protection : 250V, DC or AC peak value
Rotational Speed
Range
Accuracy
Resolution
1CYL
500-10000
rotation / min.
+(1.2%+2)
10 rotation /
min.
3CYL
4CYL
5CYL
6CYL
8CYL
Overload protection : 250V, DC or AC peak value
Duty Ratio
Range
Accuracy
Resolution
0-100.0%
+(1.2%+2)
0.1%
Overload protection : 250V, DC or AC peak value
DC Voltage
Range
Accuracy
Resolution
2V
+(0.5%+3)
1mV
20V
10mV
200V
100mV
1000V
+(0.8%+3)
1V
Input impedance : 10MΩ
Overload protection : 1000V, DC or AC peak value
AC Voltage
AC Voltage
Range
Accuracy
Resolution
2V
+(0.5%+3)
1mV
20V
10mV
200V
100mV
700V
+(0.8%+3)
1V
Input impedance: 10MΩ
Frequency range : 40Hz-400Hz
Overload protection : 1000V, DC or AC peak value
Display : Average value (Sine RMS)
DC current
Range
Accuracy
Resolution
200mA
+(1.2%+3)
100uA
20A
+(2%+3)
10mA
Overload protection : 0.2A/250V fuse
Maximum input current : 20A/15 second
Voltage drop measurement : Full-scale voltage drop : 200mV
AC current
Range
Accuracy
Resolution
200mA
+(1.2%+3)
100uA
20A
+(2%+5)
10mA
Overload protection : 0.2A/250V fuse
Maximum input current : 20A/15 second
Voltage drop measurement : Full-scale voltage drop : 200mV
Frequency range : 40Hz-400Hz
Display : Average value (Sine RMS)
Resistance
Range
Accuracy
Resolution
200Ω
+(0.8%+3)
0.1Ω
2kΩ
+(0.8%+2)
1Ω
20kΩ
10Ω
200kΩ
100Ω
2MΩ
1kΩ
20MΩ
+(1%+5)
10kΩ
200MΩ
+(5%+10)
100kΩ
Overload protection : 250V DC or AC peak value
Open circuit voltage : <1V (2.8V in the 200MΩ)
Note : It is normal if the test lead short-circuit displays approx. 10
digits in the 200M Ω . Please deduct these 10 digits when
measuring.
Capacitance
Range
Accuracy
Resolution
20nF
+(3%+3)
10pF
2uF
1nF
200uF
+(5%+3)
100nF
Frequency measurement : approx. 400Hz
Voltage measurement : approx. 40mV
Temperature
Range
Accuracy
Resolution
-40ºC-400ºC
+(0.75%+4)
1ºC
400ºC-1000ºC
+(1.5%+15)
1ºC
Transistor hFE Parameter Test
Range
Accuracy
Resolution
hFE
can measure neither
NPN type or PNP type
Transistor hFE
parameter test from
range 0-1999
Ib approx 10uA,
Vce approx 2.8V
Diode and continuity measurement
Range
Descripition
Resolution
Indicate forward
voltage drop of diode
forward current is approx
1mA. Reverse voltage is
approx 2.8V
the buzzer will beep
when conductance
resistance approx <30Ω
Open circuit voltage is
approx 2.V
Overload protection : 250V DC or AC peak value
Panel Description
1. LCD display
2. Back light key
3. Data hold key
4. Functional/Range switch
5. Temperature measure jack
6. Probe jack
7. DC/AC switch key
8. On/Off switch
9. Capacitor measure jack
10. Transistor measure jack
Instruction manual
Press “POWER” key, if low battery, the LCD display will show “- +
“ symbol on the left side, then replace the battery. Choose the
measurement function and range.
(1)Closed angle gauge measurement
according to the number of engine cylinder, set function/range
switch in “DWELL” range.
insert the black probe into COM jack, and the red probe into V Ω
jack.
connect the black probe on the battery negative pole, connect red
probe to the low voltage connector or the negative pole of ignition
coil “-“ (see figure 2)
start the generator, the Close Angle gauge value will shown on the
display.
(2)Rotational Speed measurement
according to the number of engine cylinder, set function/range
switch in “TACH” range.
insert the black probe into COM jack, and the red probe into V Ω
jack.
connect the black probe on the battery negative pole, connect red
probe to the low voltage connector or the negative pole of ignition
coil “-“ (see figure 3)
start the generator, the result of Frequency speed will shown on the
display. (Rotational speed = reading value x 10 cycle/minute)
Figure 2
(3)Duty Ratio measurement
set the function/range to “DUTY” position.
insert black probe into “COM” jack, insert red probe into VΩ jack
connect the black probe on the battery negative pole, connect red
probe to the low voltage connector or the negative pole of ignition
coil “-“
start the generator, the Duty Ratio will shown on the display.
(4)DC voltage measurement
set function switch to “DCV” position.
insert black lead into “COM” terminal, insert red lead into V Ω
terminal. Connect the test lead to tested load or the signal source in
parallel. The meter will indicate the polarity of the red test lead at
the same time as it indicates the voltage reading. (see figure 4)
Note :
(a) pop up the “AC/DC” button
(b) select highest rang at the beginning if the current value is
unknown.
when “1” mark is blinking indicated in the display, it means that the
tested current has exceeded the range. Should select a higher rang.
(d) “ “ don’t the measure the current if the value is over 1000V, it
will damage to the multimeter even though the current can be read.
(e) please pay special attention when test the high voltage.
(5)ACV measurement
set function switch to “ACV” position.
insert the black test lead into COM terminal and the red test lead into
the exposed V Ω test terminal. Connect the test lead to the tested
load or signal source (see figure 4).
Note:
(a) press down the “AC/DC” button
please refer to the note item b, c & e of DC voltage measurement.
(c) “ ! “ it means don’t’ measure the voltage which is over 700V. It
will damage the meter even thought it can display the reading.
Figure4 Figure 5
(6)DC current measurement
set the function switch to ‘DCA” position.
insert the black test lead into COM terminal and the red lead into the
mA or 20A terminal. Connect the circuit in serial. The meter will
indicate the polarity of the red test lead at the same time when the
meter indicate the current reading (see figure 5).
Note :
(a) pop up the “AC/DC” button
(b) starting select from highest rang at the beginning if the current
value is unknown.
(c) when “1” mark is blinking indicated in the display, it means that
the tested current has exceeded the range. Should select a higher
rang.
using in mA as a input range, the fuse will be damaged if over load.
The specification of fuse should be 0.2A/250V.
(e) when using 20A jack as the input port, the maximum 20A current
can not be exceeded 15 seconds.
(7)AC current measurement
set function switch in “ACA” position. (refer to DCA measurement
procedure).
insert the black test lead to COM terminal and the red test lead into
the mA or 20A terminal. Connect the circuit in serial (for detail see
figure 5)
Note :
(i) press down “AD/DC” button.
(ii) please refer to the note item b, c, d & e of DC current
measurement procedure.
(8)Resistance measurement
set function switch in “Ω” position.
insert the black test lead into COM terminal and the red test lead into
the exposed ΩV terminal (the red test lead is the positive polarity
of the measurement circuit), put the test lead with resistor in parallel.
(see figure 6)
Note :
(i) when input terminal is open, and highest digit “1” is marked on
display. It means the meter is over-range.
As measured resistor is higher then 1M Ω , it is a normal stages to
stabilize the reading within a few seconds.
Turn off the testing circuit power and discharge the capacitor before
measuring the resistor in circuit.
There are about 10 digits when the red & black test leads are in
short-circuit. Deduct the digits when measure 200MΩ range.
(9)Capacitance measurement
set the function in measure CAP position, until the reading is 0. It
is normal if the display shown 1 digit when measuring 20nF range.
Put the capacitor lead direct into the “Cx” terminal when testing. It
is no need to test by test-lead. (see figure 7)
Note :
(i) discharged the loaded capacitor before measuring.
it takes a longer time to measuring the larger capacitor.
Unit: 1pF=10-6uF; 1nF=10-3uF
Don’t insert the charged capacitor into terminal (especially in large
capacitance).
Figure 6 Figure 7
(10) Temperature measurement
Set the function switch into ºC position when measuring the
temperature, insert the black thermocouple into terminal, please note
the “+ -“ pole. The hot terminal thermocouple (testing point) put
into the testing position. Read the temperature value on the LCD
screen. The reading is ºC (for detail see figure 8).
Note :
(i) reading format : the temperature is automatically measured when
connected with thermocouple. When the thermocouple is not
inserted or the thermocouple is at the state of open-circuit, it is
shown the environmental temperature.
(ii) attached with accessory of TP-01 (K type) simple thermocouple,
the maximum temperature is 250ºC (300ºC for instant)
(11) Transistor hFE measurement
set the function switch in “hFE” position.
make sure the transistor is ‘PNP” type or “NPN” type, then insert E,
B, C lead into the related terminal.
the reading is “hFE” approximately value, under the testing
condition of Ib approx 10uA, Vce approx 2.8V.
(12) Diode measuring
(a) set the function switch to position.
(b) connect the black test lead to “COM” terminal, and the red test
lead to “V Ω ” terminal. Please note the inner power of the red test
lead is in “+” polarity. Connect the test lead into the two ends of
tested diode. The display reading is the forward voltage drop of
diode. The unit is in voltage. It will be displayed over-range if the
diode is connected in an opposite direction.
Note :
(i) when the two test leads are in open-circuit, it will be displayed
over-range (only mark “1” on display).
approx 1mA will pass through the tested components.
Figure 8 Figure 9
(13) Open/Shot circuit measurement
(a) set function switch to position
insert black test lead into COM terminal, red test lead into V Ω
terminal. Put the testing lead in parallel with the testing circuit.
The buzzer will “beep --- “ when the resistance in circuit is below 30
Ω.
Note : the power should off when measuring the circuit.
Otherwise, it will damage the meter.
(14) Data Hold switch
Depress this switch when indicated value is desired to be held. “H”
mark is indicated in the display while indicated value is being held
for easy reading. To release “HOLD”, depress the switch or switch
over to function switch. “H” mark will disappear from the display
and return to ready mode.
(15) Backlight function
Depress the “LIGHT” key, the backlight will on. It is very easy to
read the display in the dark environment. Toggle the key, the
backlight will off.
(16) Display Angle section
This series of multimeters are provided with protection holsters,
which can support the meter in different angles as well as protection
to the meter. This is convenient to observe the reading.
Maintenance
It is a precise electronic multimeter. Read and understand the
following instruction fully and maintain your instrument properly.
don’t connect to the voltage which is over 1000 DCV or 700 ACV.
don’t turning the function/range switch while measuring, otherwise it
is very easy to damage the meter.
don’t operate it if the black-cover is not closed properly.
when replace the battery, turn off the power and disconnect the test
lead from the terminal. Unscrew the screw, and remove the battery
cover, replace the identical model battery.
when replace the fuse, turn off the power and disconnect the test lead
from the terminal. Unscrew the back-cover screw, and open the
back-cover.
fuse type : 0.2A / 250V
remove the battery in case of not use for a long time.
don’t change the inner circuit to avoid damage the meter.
Accessories Enclosure
User’s manual
Guarantee certificate
Rubber holder
One pair testing lead
Simple-fixed K-type thermocouple (with one plug)

Popular Measuring Instrument manuals by other brands

SRS Labs SR625 manual

SRS Labs

SRS Labs SR625 manual

Newtons4th PPA4500 Startup guide

Newtons4th

Newtons4th PPA4500 Startup guide

ROVARY RH10 manual

ROVARY

ROVARY RH10 manual

Urma Digiset 5 user manual

Urma

Urma Digiset 5 user manual

VOLTCRAFT MF-90 operating instructions

VOLTCRAFT

VOLTCRAFT MF-90 operating instructions

ABB AX413 user guide

ABB

ABB AX413 user guide

Kenwood VT-172 instruction manual

Kenwood

Kenwood VT-172 instruction manual

MICRO-EPSILON optoCONTROL 2520 Assembly instructions

MICRO-EPSILON

MICRO-EPSILON optoCONTROL 2520 Assembly instructions

BURK Technology ARC Plus Version 3 instruction manual

BURK Technology

BURK Technology ARC Plus Version 3 instruction manual

Lika Posicontrol IF55 LIN CB Series user guide

Lika

Lika Posicontrol IF55 LIN CB Series user guide

ABB Relion RES670 Product guide

ABB

ABB Relion RES670 Product guide

Milwaukee M12 ICAV3 Original instructions

Milwaukee

Milwaukee M12 ICAV3 Original instructions

Joy-it COM-KY051VT instructions

Joy-it

Joy-it COM-KY051VT instructions

wtw inoLab Multi 9620 IDS operating manual

wtw

wtw inoLab Multi 9620 IDS operating manual

Badger Meter ModMAG M Series user manual

Badger Meter

Badger Meter ModMAG M Series user manual

OHAUS ST300-G instruction manual

OHAUS

OHAUS ST300-G instruction manual

Oxford PRECISION OXD-516-1725D Operator's manual

Oxford PRECISION

Oxford PRECISION OXD-516-1725D Operator's manual

CARLO GAVAZZI EM24 W1 user manual

CARLO GAVAZZI

CARLO GAVAZZI EM24 W1 user manual

manuals.online logo
manuals.online logoBrands
  • About & Mission
  • Contact us
  • Privacy Policy
  • Terms and Conditions

Copyright 2025 Manuals.Online. All Rights Reserved.