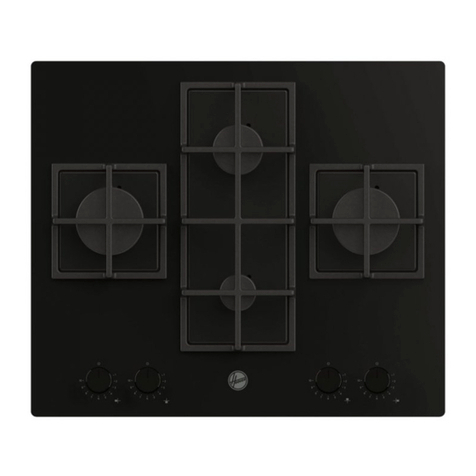
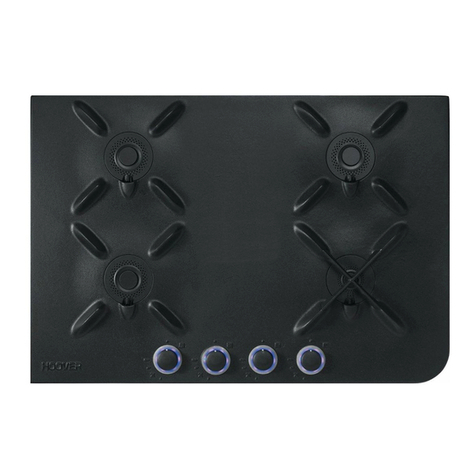
Hoover HGV 7550B Operation manual

1
41016047
GB INSTRUCTIONS FOR USE AND INSTALLATION
IT ISTRUZIONI D’USO E DI INSTALLAZIONE
PT MANUAL DE UTILIZAÇÃO E DE INSTALAÇÃO
~~~

2
UNPACKING THE APPLIANCE
Inside the appliance, you will find :
• a plastic bag containing :
- the new jets for the gas modification, if required,
- according to model, a cylindrical connector and/or a conical connector with seal
forthegasconnection,
- the fixing brackets with screws required for installing the hob in the worktop.
TOGETTHEBESTFROMYOURAPPLIANCE,PLEASEREADTHE FOLLOWING
CAREFULLY.
Pleasekeeptheoperatingandinstallationinstructionsin asafeplacefor futurereference.
Before fixing the hob, note the serial number of the appliance just in case you should
requirefuturerepairsfromouraftersalesserviceorganisationat some time in the future.
RECOMMENDATIONS
Unpackingtheappliance ...................................................................... 2
Recommendations ........................................................................... 2-3
Hobfeatures........................................................................................ 3
•INSTALLATION
Safetyinstructions ............................................................................... 4
Modification of the factory gas setting :
* Fitting of the correct jets .................................................................... 5
Fitting the hob ...................................................................................... 6
Gasconnection.................................................................................... 7
Electricalconnection............................................................................ 8
After final installation of the hob (if modification of the gas setting) :
Adjustingofthelowerflameonthegasburners................................... 9
•USINGTHEAPPLIANCE
Thedifferentgasburners .................................................................... 10
Ignitingandsettingtheburner .............................................................11
The hot plate - some tips............................................................... 12-13
Generalmaintenance .................................................................... 14-15
CONTENTS
All these characteristics are given for information with a constant concern for improving
productionquality,themanufacturermaymakemodificationtotheappliancetoincorporate
technicalimprovements.
The hobs areinconformity with directives89/336/CEE,73/23/CEEand
90/396/CEE.
3
. Rating plate (located under the lower casing of the hob)
•All accessible parts of the hob will become hot while in operation.Always keep children
away from it.
• The hob should be given a quick clean after each use, to avoid the accumulation of
spillagesandgrease.Ifspillagesarenotremoved,theywillharden,andcouldcausethe
productionofsmokeandunpleasantsmells.
•Whencookingwithfatsoroils, never leave gas burnerunattended.Overheatedfatsor
oils can quickly catch fire.
HOB FEATURES
MODELS 60 cm MODELS 75 cm

4
Before installing the hob :
make sure that the appliance is compatible with the gas supply source.
Thehobispre-set inthefactorytowork withthetypeofgas shownonthepacking
and the plate attached to it.
Natural gas G 20-20 mbar / G 25-25 mbar : mains gas
if necessary, adapt the hob for use with another type of gas : if the hob must be
usedwithanothertypeof gasthanthegaspre-setinthe factory, it isnecessaryto
adaptthehobgasburners(page5).
Theprocedureforadaptationconsistsof:
. fitting the correct jets to ensure nominal delivery.
For installation,
built-inhob(page6).
make the gas connection according to the type of gas to be used : based on
the gas to be used, choose the appropriate gas connection (page 7).
make the hob electrical connection according to the instructions (page 8).
adjustingtheminimumflameofthetaps: if necessary, adjusttheminimumflame
of the taps by turning the by-pass screw (page 9).
INSTALLATION
Installingadomesticappliance can beacomplicatedoperationwhich if notcarriedout
correctly, can seriously affect consumer safety.
It is for this reason that the task should be undertaken by a professionally qualified
person who will carry it out in accordance with the technical regulations in force.
Intheeventthatthisadviceisignoredandtheinstallationiscarriedoutbyanunqualified
person, the society declines all responsibility for any technical failure of the product
whether or not it results in damage to goods or injury to individuals.
All modification concerning the hob gas setting must be indicated on the rating
plateof the hob.

5
¤ = Factory setting: Natural gas = G20-20 mbar / G25-25 mbar
X = Gas setting possible according to installation Butane gas G30-29 mbar or Propane gas G 31-37 mbar
INSTALLATION: «GAS CONNECTION»
CHANGINGTHE JETS
To gain access to the jets, remove the pan supports,
andremovetheburnercap andbody,
Take a spanner and unscrew the jet.
According to the table below, fit the correct jet for the
type of gas to be used,
Secure the jet tightly,
Replacetheburnerbody,capandthepansupport.
JET
Each jet is designated by size.
SAG/ZAG 02G 52G03G13G
rabm02 rabm52rabm92
r
abm73
+3H2II.TACSE-TP-TI-BG ¤XX
+3+E2II.TACRF¤ ¤ XX
CHANGING THE GAS TYPE : the calorific power output and gas pressure will
varyaccordingtothegassupply. Burner setting must be carriedoutoncethegasand
electrical installation is complete.
When changing gas type, you must follow the procedure below :
. fit the correct jets,
. adjust the minimum flame on the taps.
SRENRUBBOH
yrailixuadipar-imesdipar -artlu dipar
sgniR4
saGrabmteJWkteJWkteJWkteJteJWk
* 02G 02 67 00,1 101 57,1 811 05,2 441 141 05,3
* 52G 52 67 09,0 101 06,1 811 03,2 441 141 02,3
03G920500,16657,10805,2496905,3
13G730500,16657,10805,2496905,3
* rabm52-52G-rabm02-02G:gnittesyrotcaF

6
Both the worktop where the hob will be fitted and any adjacent kitchen furniture must be
madefromheatresistantmaterialandfixedwithheatresistantadhesive.
If, when installing the hob, the lower hob face is adjacent to an area normally accessible
whenhandling or cleaning, fit a heatproof partition1 cm below the base of thehob with
a10X10cmopeningattherearright-handcorner,toavoidanyriskofscorchingordamage.
Afoam adhesive is supplied with the hob. Stick this seal under the edge of the body as
near as possible to the outer edge of the hob. Press round the edges of the hob, so that
the seal flattens out and ensures an air tight seal.
•BUILDING-IN
OPENING
10 X 10 cm
The body of the hob is fitted with 4 location holes to take the fixing brackets that secure
the hob in the unit. Place the 4 fixing brackets in such a way that the hob is placed
perfectly in the support unit.
SEAL
INSTALLATION : «BUILDING-IN»

7
INSTALLATION: «GAS CONNECTION»
The hob can be built-in ; it is in class 3 (in compliance with gas regulations EN 30.1.1) ;
adjoiningfurnitureshouldnotbehigherthan the level of thehob.
This appliance is not connected to an evacuation device for the products of combustion.
Itmustbeinstalledandconnectedincompliancewiththenorms in force in the country of
installation.Particularattentionshouldbegiventotheavailability of ventilation.
Theturnover of air necessary forcombustion is a minimum of 2 m3/h per kW of power.
Gasconnectionshouldbe carried outincompliancewiththenorms inforceinthecountry
ofinstallation.Astop tap,aregulatorvalveora release valve for propane gas,shouldbe
fitted to the gas supply pipe. Use only taps, regulator valves, connectors and flexible
hoseswiththeofficialmarkofapprovalofthecountryofinstallation.
Built-inappliance
Butane Rigid - Flexible pipe with mechanical connectors (1) -
Propane Rigid - Flexible pipe with mechanical connectors (1) -
Natural Rigid - Flexible pipe with mechanical connectors (1) -
(1) on condition that the hose is accessible along the whole of its length it should be
locatedsoitcannotbe reached bynakedflameoraffectedby combustion gases.Neither
should it be near hot parts of the hob nor anywhere where hot spillages could affect it.
2 POSSIBLES MEANS OF CONNECTION :
Fit the appliance with the cylindrical or the conical gas adaptor, in accordance to
theinstallationCountry standards,andthenproceedtotheconnection,twopossibilites:
•CONNECTIONBY RIGIDPIPE
Connect directly to the threaded end of the inlet pipe.
•CONNECTIONBYFLEXIBLEPIPEWITHMECHANICALCONNECTOR
Screw the nuts of the flexible pipe directly on to the inlet pipe at one end and the
gas supply stop tap at the other.
We recommend this type of connection.
Cylindrical
seal
conical
Conical gas adaptor

8
INSTALLATION: «ELECTRICAL CONNECTION»
Themains electricity supply connected to the appliance shouldcomplywith the norms in
force in the country of installation.
Connection to the mains electricity supply should be through a socket with an earth
terminal, or through an intermediary switching device with a gap between contacts of
at least 3 mm.
The power supply unit must be protected by appropriate fuses and use cables of a large
enough cross section to provide a normal supply to the appliance.
The hob is fitted with a power supply cable* without plug which allow it to be connected
only to a power supply of 230 V between phases, or between phase and neutral.
• Connect to a 10/16 Amp socket. Before connecting, it is compulsory
to check :
. the power supply voltage shown on the electricity meter,
. the adjustment of the circuit breaker, and
. the fuse rating 10A.
Note : the socket must be reachable for any eventual repair. Take care of its location
at the time you install the hob.
Warning : before proceeding with the connection, check the continuity of the
earthing of the power supply unit.
We cannot be held responsible for any accident which has resulting from the use
of an appliance which is not connected to earth, or whose earthing is defective.
* The eventual replacement of the supplying cord must be carried on by theAfter Sales
Serviceorbyan agreed engineer,withacord whosecharacteristicsmustbesimilarto the
originalone.

9
•SETTING THEIDLE FLAME
If you have changed the type of gas, it is important to verify the flame stability at the
minimumregulation.
«Gaining access to the by-pass screw»
To gain access to hob burner by-pass screws, remove the knobs from the control panel.
By-pass screw of the hob burner
Neverloosen
the others screws !
REGULATING THEMINIMUM FLAMEONTHE HOBBURNER
a) Natural gas :
. simply loosen the screw.
. switch on the burner and turn the knob to minimum.
. Turn the by-pass screw until a low flame is visible. Turn the control knob from
minimum to maximum position to check that it is satisfactory.
b)Butane-propanegas:
Theby-pass screw should be screwed fully home, withoutbeing locked.
!
INSTALLATION: «REGULATING THE FLAME»

10
THE ULTRA-RAPID BURNER or "4 RINGS" BURNER, power rating 3,5 kW :
usethisburnerforbringingtoboil, for cooking large quantities,andgenerallyforallfoods
requiringrapidcooking.
THE FAST BURNER, power rating 2,5 kW :
usethelarge burner for all foods requiring rapid cooking.
THESEMI-FASTBURNER,power rating1,75 kWor THEAUXILIARYBURNER,power
rating 1kW :
it is ideal for stewing, sauces and slow cooking.
Thepansupportsfittedonthe1,75kWburners are working as Mijorose when theburner
is set on low rate.
Ontheslowsetting,theflameonlycomesintocontactwiththecastironburnercap.This
isidealforslowcooking,astheheatisevenlydistributedunderthepanandfooddoesn't
dry out or stick to the bottom of the pan.
Onthehigh position, the flames heat directly the pan allowing all cookingsonquick gas.
Foraproper use of the burners, choose pans whichmatchthedimensions given below :
* Ultra-rapid or "4 Rings" Ø 18 cm and more
* Rapid Ø 16 to 18 cm
*Semi-fast Ø 12 cm
* Auxiliary Ø 10 cm
SOME TIPS ....
•Panswithcurved,ridgedorwarpedbottomsarenot recommended.
• Centre the pan on the "pan support".
• Do not place the same pan on two burners.
•Avoid boiling food too intensely. Food is not cooked any more quickly this way. In fact,
it is subjected to severe agitation, which may cause the food to lose some of its flavour.
• To save gas, make sure that the flames do not overlap the bottom of the pan.
• Do not use the gas burner with an empty pan.
WARNING:
. when the burners are not in service, the general gas supply tap should always be
turned off.
. the use of a steak-grid is forbidden. The high temperatures reached on the hob
surface will give to the glass a thermic shock which will lead to an irreversible
brittleness.
THE GAS BURNER

11
Each burner is fitted with automatic ignition. The ignition can be made with one hand,
whileyouhavethepanintheotherhand.
USE:
• Turn on the gas tap,
• Asymbol next to each control knob
indicates which burner is lit.
(example:frontleft burner)
• Hob with automatic ignition integrated :
• Press and turn the knob to position "" keeping it pressed to produce sparks
whichinturnignitetheburner.
• Hob with safety device on the burner and automatic ignition integrated :
The thermocouple fast safety is a device allowing the automatic cut-out of the gas
supplying on the burner, in case the flame dies out accidentally.
• Press and turn the knob to position "high flame" keeping it pressed to
producesparkswhichinturnignitetheburner.
Keep the pressure on the control knob a few seconds to permit the releasing of
thesafetydevice.
• Set the flame according to your cooking requirements.
Intermediatepositionsareavailablebetweenthesettingsonthecontrolknob.
• To turn the flame out, turn the control knob back to stop position.
Please note :
. If there is a power cut, the burner can be ignited by pressing in and turning the knob to
position "high flame" and holding a naked flame to the burner.
Caution:
the heating surface clearly get hot while operating, so make sure that small children are
kept well away from the hob.

12
THE HOT PLATE
THESPEEDPROTECTEDHOTPLATE-1500W.
This is a cast-iron hot plate, controlled by a 7 position switch.
An internal thermostat cuts off part of the power supply if overheating occurs. (if, for
example, a hot plate is working without a pan on it).
BEFOREUSINGTHEELECTRICALHOTPLATE:
• Before using the electric hot plate for the first time, let it heat up for a few minutes,
withouta pan, at maximum temperatureto allow the protective coatingto harden.
HOW TO USE : •Forbestresults,itisadvisabletostartonthemaximumheatand
then turn back toanintermediatetemperaturetakingintoaccount
thetypeandvolumeofthefood.
• Anindicatorlightcomesontoshowthatthehotplateisoperating.
• To switch off, turn the knob back to point "O".
DIFFERENTTEMPERATURESETTINGS:
Belowareafewexampleswhicharegivenasguidelines.Whenyoubecomemore
familiar with the appliance, you will be able to choose settings to suit your own
personaltastesandrequirements.
snoitisoP .....spitemoS
1wolyreV ....etalocohcdnarettubtlem,tohhsidapeekoT
2woL ...sggedehcaop,gniddupecir,s
wets,secuas,gnikoocwolS
3yletaredoM ....retawgniliob,tiurf,sdoofnezorf,snaeB
4muideM ....hsif,seperc,atsap,
selbategevhserf,selppademaetS
5hgiH ....skaets,settelemo,gnikoocesnetnieroM
6hgihyreV ...gniyrf,spohc,skaet
S

13
Cooking with the electrical hot plate
To get the best results from your appliance it is important to observe the following :
• Use thick, flat-based cooking vessel :
a completely flat base prevents overheating to certain parts which causes food to stick.
Thickmetalallowsforgood heat distribution.
• Make sure that the base of the pan is dry :
this will prevent sticking to the hot plate caused by moisture.
•Usepanswithadiameterlargeenoughtocompletelycoverthehotplate,otherwiseenergy
willbewastedandanyspillageswillcausethehotplatetobecomestainedandwillbecome
difficult to maintain (rust, etc.).
•Neverleaveahotplateswitchedonwithoutapanonit:itcanbedamaged,whichwould
reduceits efficiency.
• When cooking with fat or oil, never leave the hob unattented, very hot fats and oils can
quickly catch fire.
•Whenthehotplateishot,avoidanycontactwithmaterialsmadeofplasticoraluminium
foil.
Caution:
theheatingsurfacesclearlygethotwhileoperating,somakesurethatsmallchildren
are kept well away from the hob.
CLEANINGTHEHOTPLATE
To burn off any cooking deposits heat the hob for a short time. After switching off and
thehotplatehascooleddown,wipeitwithabsorbentpaper.Itisimportantthatthehotplate
is protected from moisture.
Donotuseabrasiveproducts.
Tomaintainandpreserveitsappearance,rubadropofneutraloil,suchassewingmachine
oil into the surface of the hot plate.
Thehotplateshouldalwaysbedry,orslightlygreasy.Ifitisnottobeusedforsometime,
removeanyrustusingemerypaperfollowedbyasuitablecommerciallyavailableproduct
forthemaintenanceofsoil hotplates.

14
CLEANING AND MAINTENANCE
30˚
maxi
Racloir
Scraper
Before cleaning or removing the hob, it is imperative to :
• disconnect the hob from the mains supply,
• let all parts of the hob cool down.
Never use harsh abrasives, scouring pads or sharp objects to clean the hob.
Do not use a sponge that it is excessively wet.
Itisadvisabletokeepawayfromthehoballsubstanceswhichareliabletomelt,suchas
plastic items, sugar, or sugar-based products.
MAINTENANCEOFTHEGLASSHOB
. Place a few drops of the specialised cleaning products on the hob surface.
. Rub any stubborn stains with a soft cloth or with slightly damp kitchen paper.
. Wipe with a soft cloth or dry kitchen paper until the surface is clean.
If there are still some stubborn stains :
. place a few more drops of specialised cleaning fluid on
thesurface,
. scrape with a scraper, holding it at an angle of 30° to
the hob, until the stains disappear.
. wipe with a soft cloth or dry kitchen paper
until the surface is clean.
. repeat the operation if necessary.
Ascraperwitharazorbladewillnotdamagethesurface,aslongasitiskeptatanangle
of30°.Never leaveascraperwitharazorblade withinthereachofchildren.
A FEWHINTS :
Frequent cleaning leaves a protective layer which is essential to prevent scratches and
wear.
Make sure that the surface is clean before using the hob again.
To remove marks left by water, use a few drops of white vinegar or lemon juice. Then
wipewith absorbent paper and a few dropsofspecialised cleaning fluid.
MAINTENANCEOFTHEHOB
.Enamelledsteelhob:whenthehobhas cooled completely, simplycleantheenamelled
hob with soapy water, rinse and wipe with a clean dry cloth. If you clean the enamelled
hob when it is hot, you may tarnish it.
. Stainless steel : clean with soapy water, rinse and dry. You can use a special product
tocleanstainlesssteelwhichisavailablefromvariousretailoutlets.Placeafewdropsof
the specialised cleaning products on the hob surface.

15
Pansupport
Burnerhead
Burnercap
•Burnercapsandpansupports: the pan supportismadeof enamelled cast-ironandthe
burner cap is made of enamelled steel, for a maximal protection and an easy cleaning.
They are simply placed. Just lift them off and clean with a damp, slightly soapy sponge.
Do not immerse them in cold water immediately after use to avoid cracking the enamel
from the thermal shock.
Theuseofabrasivecleansersisnotrecommendedastheyscratchanddulltheenamel.
•The burner head : the burner cap is simply placed on the burner head. If the holes are
clogged, brush the caps using soapy water and dry with a clean cloth.
Eachburnerissimplylayedon a flange slightlybossedtodraintheoverflowsfarfrom the
flame and the hot areas which make cleaning easier.
•After cleaning of each element, it is important to wipe them correctly and care of fitting
themrightlyin theirinitialposition.There-fittingmustbe perfectbecauseabadpositioning
can bring serious anomalies in the combustion.
Warning : be careful, not to let any water get into the burners.
THE KNOBS
• For thorough cleaning, the control knobs can be removed by pulling them upwards.
Only clean with soapy water and dry well before replacing them.
•Do not try to pull the watertightness rings. Theyareoriginallyfittedandmustnotbe
pulledout.
THEGASBURNERS
Table of contents
Other Hoover Hob manuals

Hoover
Hoover HTPS64SCTTWIFI User manual

Hoover
Hoover H-HOB 500 User manual

Hoover
Hoover HIES644DC User manual

Hoover
Hoover HI642CTT User manual

Hoover
Hoover HPI44PW User manual

Hoover
Hoover HGV75 User manual

Hoover
Hoover HGH75SWCE User manual

Hoover
Hoover HIFS430B Operation manual

Hoover
Hoover HI642DB1 User manual

Hoover
Hoover HTPS64MCTTWIFI User manual

Hoover
Hoover HGV6040B/1 User manual

Hoover
Hoover HIC642 User manual

Hoover
Hoover HGH64SCE B User manual

Hoover
Hoover HIFD440BC User manual

Hoover
Hoover HGV93SXV User manual

Hoover
Hoover HGVL6040W User manual

Hoover
Hoover HI624TCT/1 User manual

Hoover
Hoover HIS642MCTT/1 User manual

Hoover
Hoover HPI 82 User manual

Hoover
Hoover HTP634DB3 User manual