manuals.online logo
Brands
  1. Home
  2. •
  3. Brands
  4. •
  5. Hoover
  6. •
  7. Vacuum Cleaner
  8. •
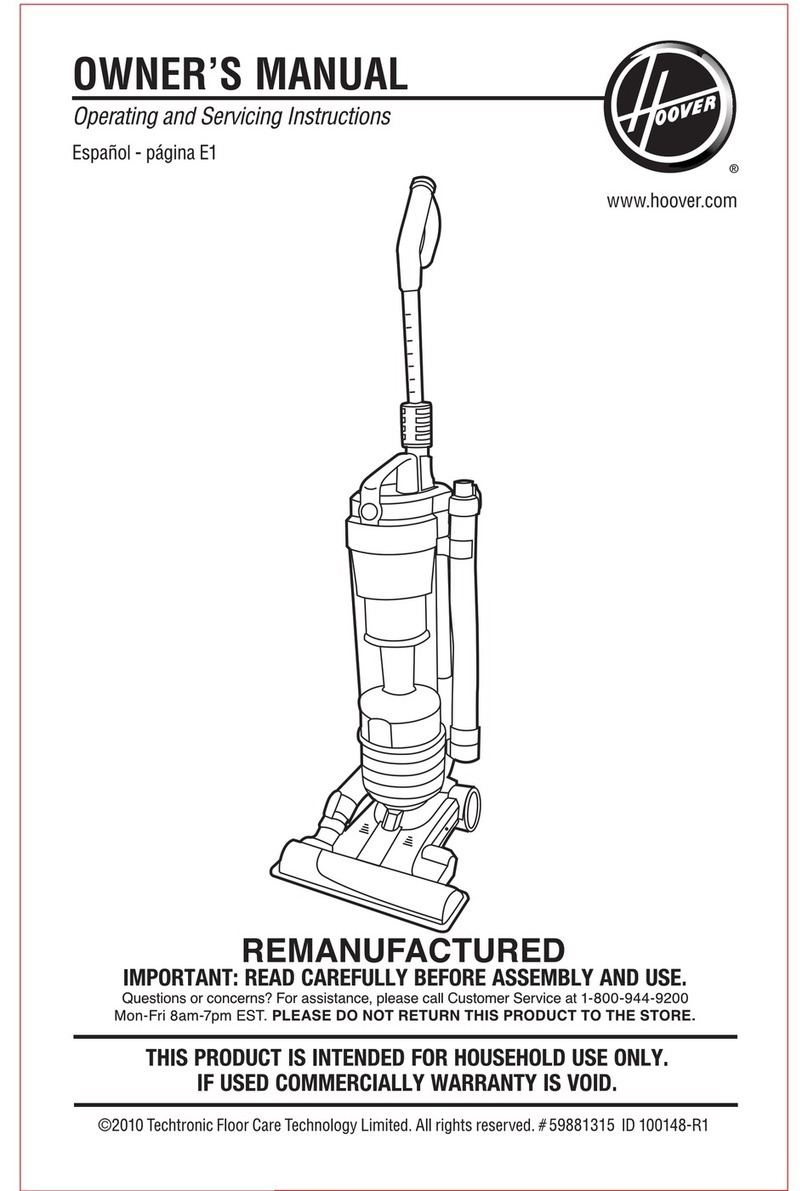
  9. Hoover S3825 - Elite Cyclonic Bagless Canister... User manual

Hoover S3825 - Elite Cyclonic Bagless Canister... User manual

Owner's
Manual
)peroting
ond
Servicing
Instructions
www.hoover.com
Hoover
Elite
Cyclonic
Conister
Please
review
this
manual
before
operating
your
Hoover@
appliance.
02008
Healthy
Gainlnvestments,
Ltd.All
rightsreserved.
#59135305
Rt.B/Oe
Thank
you
forchoosing
Please
enter
the complete
model and serial
numbersin the spaces
provided.
Model
Mfg.
DateCode
Hint:Attach
your
sales
receipt
to this
owner's
manual.
Veriflcation
of date
ofpurchase
may
be
required
forwarranty
service
ofyour
HOOVER
product.
aHOOVER'
product.
/,\ rwJtootcr.con
(f9^ ncuurcurrru
- - ts?rtTEUUlEPtmDom
toDEuroDEoflolau
s3825
stnltvsEllgsEnl:
u!2.0
120t 60llr 12.0L
TFGCODE:
XXXX
HOUSETOU
TYPSTY?T
rttl0Eul|m D0rEsllco
fr-roG2$-srrtl
llg$dcrr.l I
llilffiltiilillili{iirllll
0'73502 029220
rfi",tffiffifl*
c\fl,/w cDh2s.
moiif trfiT:#"tr
tdoil tl$* CAIICSCZU
r
[00YEn,hc.
olcrdllil oil $13S
Irlc lnGti$ .| Clinc
\
Mfg. DateCode
Contents
lmportantSafeguards ....
Quick
Assembly
Guide
Howto use
Cleaner
Descriptions
Thermal
Protector
.
Cleaning
Tools
Storage
Maintenance.
DirtCupand
Filters:
Removal
and
Replacement
....
Power
Nozzle
belt
replacement.
Agitatorbrush
roll
replacement
...
Headlight
replacement
Troubleshooting.
..
Cleaning
Blockages
..
.....3
.....4
.....8
...
..8
.....B
.
...10
....11
....11
....11
....12
....14
....'t4
....15
.
...16
....16
....17
lf you needassistance:
Visit ourwebsite
at hoover.com.
Followtheservice
center
link to find the service
outlet
nearestyouORCall
1-800-944-g2OO
foranautomated
referralofauthorized
service
outlet
locations
(U.S.
only)ORCall
1-800-263-6376
to speakwith arepresentative
in outConsumer
ResponseCenter;
Mon-Fri 8am-7pm
EST.
Pleasedonotreturnthis
product
to thestore.
Thiscarpet
cleaner
isintended
forhousehold
use
only.
Not intended
for commercial
use
in any
household
or for any
other
commercial
purpose.
Operate
carpet
cleaner
only
atvoltage
specified
on data
Plug
carpetcleaner
into aproperly
groundedoutlet. plate
onbackof cleaner.
'(lh
Important
Safety
Instructions
When using an electrical appliance, always follow basicprecautions, including the following:
READALLINSTRUCTIONSBEFOREUSINGTHISAPPLIANCE
WAR N I N G : ," reducetheriskornre,etectricshock,orinjury:
r Onlyusethevacuumcleaner
indoors
ondrysurfacts.
. Donot use
outdoors
oronwetsurfacts.
r Closesupewisionisnecessarywhenanyappliance
isused
byornear
children.
Donot allow
vacuum
cleanerto beusedasatoy.
o Donot run unattendedat anytime.
r Keephair,
looseclothing,fingen,feetandallparts
ofbody away
fiom openings,
rotating
agitator
andothermoving
parts.Donot operatecleaner
in barefeetorwhenwearing
opentoeshoes
or
sandals.
. Donot pick
up anythingthatisbumingorsmoking,such
as
cigarettes,
matchel orhot ashes.
r Donot useto pick
up flammableorcombustible
liquids
suchas
gasoline
orfinewoodsandings
oruse
in areaswheretheymaybepresent.
r Thehosecontains
electrical
wires.Donot useif damaged,cutorpunctured.
o Avoid
picking
uphard,sharpobjectswith thecleaner.
Thqrmay
damagethecleaner.
o Afways
fum off thisappliancebeforeconnectingordismnnecting
hose,
motorizednozzleor
powered
hand
tool.
oDonot use
withoutfiltenin plact.Cleanfilten frequentlywhen
picking
upveryfinematerials
suchas
powder.
. Useextracarewhen cleaningon stain.
o Donotput arryobject
into openings.Donot usewith arryopeningblocked;keepfreeofdust,
lint,hair,or anythingthatmayreduceairflow.
e Donotpull orcarrybycord,
use
cord
asahandle,closedooron cordorpullcord
around
sharp
edgesor comers.Do not run applianceovercord.Keepcordawayfrom heatedsurfacts.
o Always
disconnectcordfromelecfficaloutletbeforeseMcingthecleaner.
o Alwa)s
unplugcleanerwhennot in use.Tum offall controlsbeforeunplugging.
. Donot unplug
bypulling
oncord. Tounplug,
gnsp theplug,
not themrd.
Neverhandle
plugorappliancewithwethands.
o If cleaner
has
a mrd reel,holdon to theplugwhilecord
isbeing
rewound
to
prwent cordfrom whipping.
. Theuseof anextensioncord
isnot recommended.
r Donot usewith damagedcordorplug.
lf applianctisnot working
asit should,
has
been
dropped,damaged,leftoutdoon,or droppedintowater,takeit to aHooverFactory
Sewict
CenterorAuthorizedHooverWanantySewictDealer
(Depot).
. Usevacuumcleaneron! for itsintendeduseasdescribedin theinstructions.Useonly
attachmentsrecommendedbyTheHooverCompany;othersmaycausehazards.
o This
product
containschemicals
known
to thestateof Califomia
to causecancrrand
reproductivetoxicity.Washhandsafterhandling.
Savethese
instructions
!
Guiade ensamblado
rapido
Guide
d'assemblage
rapide
FOLLOWASSEMBLY
STEPS
IN
ORDER!
SIGA
LOSPASOS
DEENSAMBIADOEN
ORDEN!
SUIVEZLESETAPESD'ASSEMBLAGEDANSL'ORDREINAAIJE
!
COMPLEIEASSEMBLY
INSTRUCIIONSare
in
theOwner's
Manual
IAS//VSIRUCCI?NES
C)MPLETASestrinenel
monuol
del
propietario.
tFS
/NSIR
UCTI}NS
D'ASSEMBIAGE
COUptEfSsont
contenuesdons
le
monueldu
proprietoire.
'l
.Carton
Contents
Contenidodelo
cojo
Contenudel'embolloge
1.a)Remove
all
parts
from
cartonand
identify
eachitem
shown.Makesure
all
parts
arelocated
beforedisposing
ofpacking.
A.
Canister
B.
Hose
C.
Telescopic
Wand
D.Powered
Nozzle
E.
Crevicetool
F.HardFloor
Brush
G.
DustingBrush
1.a)Retire
todas
las
piezas
de
la cajae
identifique
cada
articulo
que
se
rnuestra.
Asegurese
deubicartodas
las
piezas
antes
deeliminarelem-
balaje.
A.Receptaculo
B.Manguera
C.
Tubo
telescopico
D.
Boquillatur-
boaccionada
E.Accesorio
para
hendiduras
F.
Cepillo
para
suelosduros
G.Cepillo
para
polvo
l.a)Retirer
toutes
les
pieces
de
I'emballage.
Avant
d'eliminerlesmate-
riaux
d'emballage,
s'assurer
qu'aucune
des
pieces
illustrees
nemanque.
A. Reservoir
B. Tuyau
C.Lance
tele-
scopique
D.Busemotorisee
E.
Suceur
plat
F.Brosse
pour
plancher
dur
G.Brosse
d'epoussetage
A)
l1
lr
ti
l,il
lrii
ii
!'l
C r,'l
\-il tJ
EUF
2.
Connect
hose
Conecte
lomonguero
Roccordement
du
tuyou
Pushhose
connector
end (A)
into
opening(B)
on front of cleaner.
To
disconnect
hosefrom cleaner,
press
release
button (C)
on hoseconnector
and
pull
out.
NOTE:
Theflexiblehosecontains
electricalwiresfor connection
to the
power nozzle
and should
not be used
if
damaged,
cut orpunctured.
Empujeelextremodela monquera
con
elconector
(A)
dentrode
Iaabe
rtura(B)
enIo
parte
frontal
de
Iaaspirodora.
Para
desconecturlamanguerodelaaspira-
dora,
presione
elbotondeIiberacion
(C)
delconeclordelamonquera
y tirehacia
afuera.
NOTA:
Lontottguero
fle.rible
contiene
hilos
electricos
para
laconexion
aIaboquilla
turboaccionada
y no sedeberausarsi esta
da ada.
InserezI'extrdmitedu connecteurde
tuyau (A) dans I'ouuerture(B) a l'auant
del'aspirateur.
Pourenleuer
le tuyau de
l'aspirateur,appuyersur Ieboutonde
deqagement
(C)
sur Ieraccord
du tuyau et
firer le tuyau.
REMARQUE : Le tuyau
flexible comprend
des
fils electriques
pour assurerla con-
nexionauecIesuceur
motorise,
neI'utilisez
jamais s'i/ esfendommage,coup( ou perce.
B
c
A
3.Connect
wand
Conecfeel
tubo
Rocco
rdementde
lolonce
Pushendof
wand
with
pronged
plug
(l)
firmlyinto
endof
the
hose
until
the
latch
(J)
clicks.
To
remove
wand
fromhose,
press
onthumb
latch
(J),
located
onendofwand.
Empuje el extremo
deltuboconel
enchufe
de
patillas
(l)
firmemente den-
tro del ertremo de
la manguera
hasta
que la traba (J)
haga
un chasquido.
Parasacar
eItubo
deIa manguera,
oprima la traba
(J) ubicadaen el
extremodel tubo.
Inserez
fermement
I'extremitede la
rallonge
doteede
Ia prise a
fiche
(l) dans Ie tuyau
jusqu'a ce
que
Ie
loquets'enclenche
(J).
Pour enleuerIa
rallongedu tuyau,
appuyezsur le
Ioquef
(J)
situea
I'extrdmitede la
rallonge.
4.Connect
nozzle
Conecfe
e/tubo
Rocco
rdement
de
lolonce
Pushtheopposite
end
of wand
into
power nozzleuntil button projection
(K)
on endof wandclicks.
Torelease,
stepon wand
release
foot
pedal
(L)andremove
nozzle.
Empuje el extremo opuestodel tubo dentro
dela boquilla
turboaccionada
hasta
quela
proyeccion (K) en el ertremo del tubo haga
un chasquido.
Para soltar,pise eIpedal de desconerion
rdpida (L)
y soque
la boquilla.
Insirez l'ertr(mite oppos(e
de Ia rallonge
dansIe
suceur
motorise
jusqu'a quele bou-
ton en saillie(K) s'enclenche.
Pour degager
Ia rallonge,appuyez
sur Ia
pedalededegagement
rapide (L)et retirez
Iesuceur.
See
Owner's
Manual
forproper
operation
ofthe
cleaner.
Vea
el
monuoldel
propietorio
poro
obener
los
instrucc,ones
poro
el
funcionomiento
correcto
de
lolimpiodors.
Reportez-vous
0u
monuel
du
proprietoire
pour
ossurer
unbon
f
onction
nement
de
l'
ospi
roteu
r
Helpful
Reminders
Recordotorios
utiles
Conseils
utiles
lf you
notice
adecrease
inthecleaner's
ability
to pick
uP'..
5iobse
rvouno
disminucion
de
locopocidod
de
ospirocion.-.
Si
vous
remorquez
une
borsse
depuisslnced'ospiration
de
l'opporeil
...
Unplug
thecleaner
before
doing
any
ofthe
following.
Desenc
hufe
loospirodoro
ontes
de
hocer
losiguiente.
Deb
ron
chez
l'
ospi
rote
u
rovo
nt
d'effectu
e
r/esfoch
es
su
ivo
nfes.
. Check
the
dirtcontainer
and
pre
motor
filter;
it may
fill uP
and
become
dirty
quicker
than
You
think!
Verifique
elcontenedor
poro
polvo
yel
filtro
previo
olmotor;
ipuede
llenorse
y ensuciorse
mos
ropido
de
lo
que
pienso
!
Verifier
le vide-pous-siere
et
/e
fittre
situe
0v0nt
le
motettr,
cor
ils
peuvent
se
remplir
plus
rapidement
que
vous
ne
le
pensez!
. Check
thepower
nozzle
belt;
it may
bebroken
orstretched.
Replace
with
HOOVER
belt
number
AH20000.
Verifique
locorreo
poro
boquillo
motorizodo;
podrio
estar
roto
o
estirodo.
Pidoel
numero
de
correo
de
HOOVER
AH2OOOO.
Verifiez
|dtot de
locourroie
du
suceur
motorise.
Elle
peut
€tre
cossee
ou
detendue.
Remplocez
lo
courroie
ovec
une
courroie
H)}VER
numdro
AH20000.
Before
youreturn
your
product
to thestore
Contact
us
first!
Wecan
help
if youneed
any
assistance.
o
Logonto http://hoover.com
24hours
a day!
Get
answers
to Your
questions,
email
ourexperts
and
more!
. Call
1
-800-9
44-9200
for an
automated
referral
to yournearest
Hoover
Sales
andService
Center.
o
Call
1-800-263-6376
to speak
to aHoover
Consumer
ResPonse
Representative.
(M
ond
ay-Frid
aY
8:00am
- 7:00pm,
EST)
See
owner's
manual
for comPlete
instructions.
Veoel
monuol
del
propietorio
Poro
obten
e
rIos
instru
cciones
com
plefos.
Reportez-vous
ou
monuel
du
proprietoire
pour
obtenir
des
i
n
stru
cti
o
ns
co
m
pl
etes.
nl
. How
to use
This
cleanerwas
inspected
and
packaged
carefully
before
beingshippedfrom
thefactory,If you
shouldhappen
to need
assistance
duringassembly
oroperation,
call
1
-800-944-92O0
for anautomated
referral
of authorized
service
outletlocations
(U.S.
only)
OR
1-800-263-6376
to speakwitha representative
inourConsumer
Response
Center
Mon-Fri
8AM-7PM
EST.OR
Visit
usonline
atwww.hoover.cum
to findtheserviceoutlet
nearest
you
(click
onthe"Service"
button).
Cleaner
Description
4
5
6
7
B
9
l0
Operate
cleaner
onlyat voltage
specified
on data plateon bottom
of cleaner.
This
cleaner
isintended
for
household
use
only.
Not intended
for commercial
use
in anyhousehold
or for any
other
commercialpurpose.
1. Hose
inlet
(Front
of canister)
2. Dirt
container
3. Cyclone
separator
4. Dirt
container
handle
5. Dirt
cuprelease
button
6. Carryhandle
7. Auto
cordrewindpedal
B. On/off
pedal
9. Plug
l0.Exhaust
filter
cover
1l.Wheel
Accessories
I
2.
Hose
13.
Telescopic
wand
14.
Powered
Nozzle
1
5.Crevice
tool
16.
Hard
floor
brush
1
7.Dusting
brush
IMPORTANT:
Thermal
Protector
An internal
thermalprotector
is
installed
in your cleaner
to prevent
overheating
if alarge
item
orclog
gets
caughtin the
nozzle
or if the pre-motor
filter becomes
extremely
dirty.
When theblockage
isnot
removed,
thethermalprotector
will trip
and
cleaner
will stoprunning.
lf thishappens,
turn cleaner
OFFand
disconnect
cleaner
from electrical
outlet.
Then
disconnect
n
ozzle
andremove
ob-
struction.
Within30 minutes
the
thermal
protector
will cool
and
automatically
reset
and
cleaning
may
resume.
lf cleaner
does
not operate,
allow
addi-
tionaltime for thermalprotector
to reset.
Note:
The
canister
must
remain
un-
plugged
during
the30minute
cooling
period.
PolarizedPlug
To
reducetherisk
of electric
shock,thisappliance
hasa
polarizedplug (one
bladeiswider
than the other). This
plug will fit in apolarized
outletonlyoneway. lf the plug doesnot fit
fully in the outlet,
reversethe plug. lf it still does
not fit, contacta qualified
electricianto
installtheproper
outlet. Do not change
theplug in anyway.
Cord
Release
Fullyunwind
the
power
cord.A
yellow
markon
thepower
cord
indicates
the
recommended
cord
length.
Donot
exceedthe cord
length
beyond
the
red
mark.
On/off
Pedal
1.lnsertthe
plug
into the electrical
outlet.
2.Pressthe on/
off pedal
located
on the top of the
vacuumcleaner,to
turn on thevacuum
cleanerand
press
thepedal
again
to
turn the
vacuum
cleaner
off.
Carpet
Cleaning
AttachthePower
Nozzle
to the
end
of the telescopic
wandtube.For
largecarpeted
areas.
HardFloor
Cleaning
For
hardfloor clean-
ing usethe
hard
floor tool forvacu-
uminghardwood,
laminatecoverings,
andceramic
floors.
N0TE:
Whenusing
the PowerNozzle
to
cleanhardfloors,
turn the agitator
"OFF' by pushing
thebrushroll
"0N/
OFF"button on the
hand
grip as
shown
in Fig.
1.6.
ON
5f
E]FF
Suction
Control
Valve
To
cleandelicate
fabrics,
slide
valve
overto lowerthe
suctionand
protect
fabricsand
sur-
faces.
Edge
Cleaning
Guidesideof nozzle
parallel
to edge
of
carpetor furniture
asshown.
Cord
Rewind
Torewindthepow-
ercord,
press
the
cord
rewind
pedal,
located
on the top
of thevacuum
cleaner,and
guide
thepower
cordwith
one
hand.This
will
preventthe cord
from whipping
whichcouldcause
damageor injury.
Carry
Handle
Usethe carry
handlelocated
at
the
rear
endof the
vacuumcleaner
to
move from room to
room.
CleaningTools
The
cleaning
tools
areconveniently
storedunderneath
the
hand
grip.
The
cleaningtools
havemanyuses.
Selectthe tool best
suitedfor the clean-
ing taskfrom the
followingdescrip-
tions.
H
gI
ffi n-t-ut rrFtt
Select
theproper
tool
H. Crevice
tool maybe usedin tight spaces,corners,andalongedges
in such
p'laces
asdresserdrawers,upholsteredfurniture,
stairsand
baseboards.
l. Dusting Brushwith swivel
neckmay
beusedfor carvedfurniture,
tabletops,books,
lamps,lighting fixtures,
venetianblinds,baseboards,
shutters
andregisters.
May alsobe usedfor upholstered
furniture,
draperies,tapestries,
mattresses
andclothing.
J.Hard floor tool maybe used
for wallsand
veryirregularhardsurface
floors
suchasbrickandslate.
Attaching
Tools
Toolsmay
be
attached
directlyto
the
hand
grip orto
thewand.
Firmly
push
tool into the
hand
grip
or
wand.
Twisttool slightly
to tightenorloosen
connection.
How
to CleanStairs
Cleanstairsfrom
bottom to top.
NOTE:Take
extra
carewhenvacuum-
ing stairs.Do not
storecanisterin ver-
ticalposition.
Storage
IMPORTANT:Always
unplugthevacuum
cleanerfrom
the
electrical
outletand
rewind
the
power
cordasdirected
beforestoring.
N0TE:Always
storethevacuumcleaner
base
down.
2.Maintenance
Familiarize
yourself
with these
home
main-
tenance
tasksas
proper
useandcareof
your cleaner
will ensurecontinued
cleaning
effectiveness.
To assure
thatyour HOOVERcleaneroper-
atesat peak
performance,
it isimperative
that
you useonlygenuine
HOOVER
parts.
Dirt
Containertt Filters:
Removal
ft Replacement
IMPORTANT:lt is recommendthat you clean
the filters
everytimethe dirt container
is
emptied
for consistent
cleaning
performance
of your machine.
IMPORTANT:
Alwaysunplug the vacuum
cleanerfrom the electricaloutlet before
removing
the dirt container.
IMPORTANT:Do NOT usethe vacuum clean-
erwithout ALL of the filters
in place.
Emptying
the
Step
I
Press
button on the
handle
located
on
thedirt container
lid and
pull dirt
container
out.
Dirt
Container Step
ll
Holdthedirt con-
tainer overtrash
canandpress
the
quickrelease
but-
ton asdirectedto
empty the con-
tainer. When all
the dirt hasfallen,
close
the dirt con-
tainerflap, a click
will be heard
when
closed. Then
replacethe dirt
container.
CleaningtheCyclone
Separator
StepI
Twistlid to the
unlock
position
and
pull the dirt con-
tainerbin off the
cyclonicseparator.
Step
ll
Theseparator
should
be cleaned
with a soft brush
andwiped
with a
dampcloth.
The
dirt container
bin
maybe wiped to
clean.
Step
lll
Leavethe separator
to dry completely
before
replacing.
IMPORTANT:
The
cyclonic
separator
should
not be sub-
merged
in water
Step
lV
Replacethe dirt
container
asdirect-
ed,
by twisting
lid
to the locked
pos-
tion.
Cleaning
the
Pre-Motor
Filter
NOTE:Thisislocated
underneath
the dirt containerbin.
Step
I
Releasethe pre-
motor filter cover
by lifting up the
tab. Lift off the
filter coverto gain
accessto the filter.
Removethe filter
by pulling the tab
towards
you.
Step
ll
Separatethe foam
filter from the fab-
ric cassette.
Each
filter canbe tapped
againstthe side
of a trash
canto
removethe excess
dirt anddust.
Step
lll
The pre-motor
filter may be
rinsedin warm
water.Allow to air
dry for 24 hours
before
replacing.
NOTE:Do not use
any detergentsor
boiling
waterto
washthe filters.
For bestperfor-
mance,the foam
filter should
be
cleanedeach
time
the dirt containeris
emptied.
Step
lV
0nce completely
dry,return the
pre-motor filter
and cassetteto the
vacuum cleaner.
Replace
the pre-
motor filter cover
beforerestarting
thevacuum cleaner.
Cleaning
theExhaustFilter
NOTE:This
islocated
on the rear
of thevacuum cleaner.
StepI
Release
the exhaust
filter cover
and
remove
the coveras
shown.Remove
the
filter by pulling the
tab towards
you.
Step
ll
Tap
the pleated
filter on the inside
of a trashcanto
remove
excessdust
and
dirt.
WARNING:Do not
applywater to
pleated
filter.
N
OTE: Repla
ce
filter if any sign of
damage.
Step
lll
Once
c'leaned
return the exhaust
filter to the
vacuum cleaner.
Replace
the exhaust
filter cover
before
restarting
thevacu-
um cleaner.
What
to buy
When purchasing
a
new HEPA
Exhaust
Filter,ask
for
HOOVER
part no.
AH400to.
Power
Nozzle
beltreplacement
The belt in your power nozzle
drivesthe
agitator.lt has
beendesigned
specifically
for use
in thiscleaner
andisimportant for
effectiveoperation.
What
to buy
Thereare
other
beltsmanufactured
that
aresimilarin shape
andsize,but arenot
designedfor the HOOVER
power nozzle.
Suchbelts
do not operate
the agitatorcor-
rectlyandmay createstress
which could
damage
your power nozzle. Useonly a
genuine
HOOVER
Belt part no.AH20000
when a belt replacement
isnecessary.
When
to replace
The belt should
be checkedfrom time to
time to be sure
it isin good condition. To
check,remove
the hood (see
following sec-
tion). Replace
the belt if it isstretched,
cut,
or broken.
How
to replace
Step
I
Disconnect
cleaner
from e'lectrical
outletand
discon-
nect power nozzle
from extension
wand.
Toremove
hood,
turn nozzle over
and unscrew
the
7 recessed
Phillips
head
screws.
Step
ll
Return nozzle
to original
posi-
tion. Lower
Quick
Disconnect
by
depressingdown
the
handle
release
pedal
andlift off
thehood.
Step
lll
lf belt isnot broken
but isstretchedor
cut, pull it off the
motor pulley
(D).
Lift up end of
agitatorbrush
roll.
Removeold belt
from agitator
pul-
ley (E)
andreplace
with new belt.
Lettering
on belt
must bevisible.
Stretchbelt back
andattachto motor
pulley.
Step
lV
Hold opposite
end
of agitatorbrush
roll in place.
Push
belt end forward,
rotating endplate
(F)
until it slides
into place. Turn
agitator,
mak-
ing sure
it rotates
freely.
Step
V
Positionhood on
top of nozzlebase.
Turn nozzleover.
Replace
the 7
Philipsheadscrews.
Agitator
brush
rollreplacement
Whento replace
Disconnect cleaner
from electrical outlet.
When agitatorbrush
roll brushesareworn,
the brushroll should
be replaced.
To checkconditionof
brushes,
move
edgeof
a cardacrossbottom
plate
whileturning brush
roll.
cleaningeffectiveness,
replace
brushesdo not touch card.
To maintain
brush
roll if
What
to buy
When
purchasing
a
newagitator
brush
roll,
ask
forHOOVER
part no.
59135316.
Howto replace
Disconnect cleanerfrom electrical outlet.
1. Remove
hood,
belt and
brush
rollas
shown
in Figs.2.9Io 2.11.
2. Discardold brush
roll.
3. Replace
new brush
roll andbelt asshown
in Figs.2.12and
2.13.
Headlightreplacement
The headlight,locatedon top of the powernozzle,
operates
when
the cleaner
isturned on. UseonlyHOOVER
part no. 59135317,
when
replacing
the
headlight.
Howto replace
Disconnect
cleanerfrom electricaloutlet and disconnect
power
nozzlefrom extensionwand.
1.Remove
thehood asshown
in Fig.2.10.
2.Pull oldbulb from socket.
Push
new bulb into socket.
3.
Replacehood.
3.
Troubleshooti
ng
lf a minor problem
occurs,
it usually
using
the checklist below.
Clean
ing
Blockages
Low suctionor pick
up maybedueto
ablockage
in the
system. Refer
to the
followingstepsto
check
for blockages,
continuingwith
eachstepuntil the
blockage
isfound:
can
be solved
quiteeasilywhen the cause
isfound by
Step
ll
The flexible
hose
canbe disconnected
from thevacuum
cleaner
by pressing
thereleasebutton
on hoseconnec-
tor and
pullout as
shown.
Remove
any
blockages
found
thenreconnectthe
hosesecurely.
Step
I
Turnthe
vacuum
cleaneroff and
unplug from the
electrical
outlet.
PROBLEM POSSIBLE
CAUSE POSSIBLESOLUTION
Cleaner
won't run. Not "ON" at cleaner.
Not firmly plugged
in.
No voltagein wall plug.
Blown fuseor tripped
breaker.
Motor ThermalProtector
has
tripped.
Turn 'ON" at cleaner.
Plugunit in firmly.
Checkfuse or breaker.
Replacefuse or resetbreaker.
Switchoff and unplug thevacuum
cleaner.
Leavefor 30 minutes before
switchinq thevacuum cleaner
backon.
Lowsuction.Dirt container
full orblocked.
Dirt container
not installed
properly.
Blockage
in nozzleconnector,
hose
orwands.
Filtersdirty or clogged.
Suction
control
valve
open.
Empty dirt container.
Review
dirt container
replacement.
Remove
blockage.
Clean
or replace
filters.
Close
suction
control
valve
onhand
grip/
Power
nozzle
agitator
brushroll
won't
run
Hose
powercordnot firmly pluggedin.
Brokenorworn belt.
Brushrollswitch setto "OFF".
ThermoProtector
Activated.
Plug firmly into receptacleon cleaner
base.
Replacebelt.
SetBrushroll switch to "ON".
Switch
OFF
andunplugthe
vacuum
cleaner.
Leave
for 30 minutesbefore
switchinq
the
vacuumbackon.
Nozzle
won't pick
up
Low cleaner
suction.
Blockage
in nozzleconnector.
Agitatorbrushrollnot running.
See
section
"Cleaner
suction
low".
Removeblockage.
Seesection
"Agitator
brushrollwon't
run"
Agitatorbrushroll
brushes
worn. Replacebrushes.
CleaningBlockages
(continued)
Step
lll
Plug
cleanerin,
turn on,andcheck
hose
endfor suc-
tion. Remove
anv
obstructions.
StepVl
Remove
power
nozzlefrom wand
and
attachwand
to hose. Checkfor
suctionand remove
any
blockages.
StepV
Makesure
power
nozzleis
discon-
nected
from wand.
Then check
for
blockage
in nozzle
connector
(A).
Step
lV
Make
sure
power
nozzle
is
discon-
nectedfromwand.
Turnnozzle
over
andcheckfor block-
ages.
Service
To
obtainapproved
HOOVER
serviceand
genuine
HOOVER
parts,
locate
thenearest
Hoover
Sales
andService
Center
orAuthorizedHoover
WarrantySewiceDealer
(Depot)
by:
r Checking
theService
SectionofHoover
on-lineathoover.com
OR
o Checking
theYellowPages
under
"Vacuum
Cleaners
- Household"
0R
r Callingl-800-944-9200
foranautomatedreferralof authorized
sewiceoutletlocations
(U.5.
only)
Donotsend
your
cleanertoHooverin Glenwillow,
Ohiofor
service;thiswillonlyresultin delay.
lf furtherassistance
isneeded,
contacttheHoover
ConsumerResponse
Center,Phone:
1
-8OO-263-637
6Mon-Fri8am-7pmEST.
ln Canada,contact
Hoover
Canada,CarsonBuilding,t00CarsonSt.,Etobicoke,
Ontario
MBW
3R9,
Phone:l-800-263-6376
Mon-Fri
8am-7nmEST.
Alwaysidentify
your
cleanerbythe
completemodelnumber
whenrequesting
information
or
ordering
parts.
(The
modelnumber
appearson
thebottomofthecleaner.)
Limited
Two
Year
Warcanty
(Domestic
Use)
WHATTHIS
WARRANTY
COVERS
When usedand maintained
in normal
householduse
andin accordance
with the Owner's
Manual,
yourHOOVER@
product
iswarranted
against
original
defects
in materialandwork-
manshipfor a full two years
from dateof purchase
(the"Warranty
Period").
During the
WarrantyPeriod,Hoover
will provide
laborandparts,
atno costto you, to correctanysuch
defect
in products
purchased
in theUnited
States,
U.S.
MilitaryExchanges
andCanada.
HOWTO MAKE A WARRANTY
CLAIM
lf this product is not as warranted,
take or send the product to eithera Hoover Sales
and ServiceCenter
or HooverAuthorizedWarranty Service
Dealeralong with proof of
purchase.
For an automated
referralto authorized
service
outletsin the U.S.A.,
phone:
1-800-944-92OO0R visit Hooveronline
at www.hoover.com.
For additional
assistanceor
information
concerning
this
Warranty
orthe availability
of warranty
service
outlets,
phone
theHoover
Consumer
ResponseCenter,
Phone
1-800-263-6376,
Mon-Fri Bam-7pm
EST.ln
Canada,
contact
HooverCanada,
Carson
Building,100Carson
St.,Etobicoke,
Ontario
MBW
3R9,
Phone:l-800-263-6376,
Mon-Fri Bam-7pm
EST.
WHATTHIS
WARRANTY
DOES
NOT COVER
This
Warranty
does
not cover:
useof theproduct
in a commercial
operation
(such
as
maid,
janitorialand equipment
rentalservices),
impropermaintenance
of the product, damage
dueto misuse,
acts
of God,
nature,vandalism
or otheracts
beyondthe controlof Hoover,
owner'sactsor omissions,
use
outside
the country in which the product
was
initiallypur-
chased
andresalesof theproduct
by theoriginalowner.
Thiswarranty
does
not cover
pick
up, delivery,transportationor housecal'ls.
However,
if you mail your product to a Hoover
SalesandService
Center
for warranty
service,
costof shipping
will bepaid
one
way.
Thiswarrantydoes
not applyto products
purchased
outside
the:UnitedStates
(including
itsterritories
and
possessions),
U.S.
MilitaryExchangeandCanada.
OTHER
IMPORTANT
TERMS
ThisWarrantyis not transferable
and may not be assigned.
This
Warrantyshallbe gov-
erned
andconstrued
under
thelaws
of the state
of Ohio.
TheWarranty
Period will not be
extended
by anyreplacement
or repair
performed
under
this
Warranty.
TH]SWARRANTY
ISTHE EXCLUSIVE
WARRANTY
AND REMEDY
PROVIDED
BYHOOVER.
ALL OTHER WARRANTIES,
EXPRESSED
OR IMPLIED, INCLUDINGWARRANTIES
OF
MERCHANTABILITY
OR FITNESS
FOR PARTICULAR
PURPOSE,ARE DISCLAIMED. IN
NO EVENT WILL HOOVER
BE LTABLE
FORANY SPECIAL,
INDIRECI INCIDENTIAL0R
CONSENQUENTIAL
DAMAGES
OF ANY KIND OR NATURE
TO OWNERORANY PARTY
CLAIMINGTHROUGHOWNER,
WHETHER BASEDIN CONTRACI NEGLIGENCE,
TORT
ORSTRICTPRODUCTS
LIABLILI-Y
OR
ARISING
FROM
ANY CAUSEWHATSOEVER.
SOMC
states
do not allowthe exclusion
of consequential
damages,
so the above
exclusion
may
not apply to you. This warranty givesyou specific
rights; you may also
haveothersthat
vary from stateto state.

Other Hoover Vacuum Cleaner manuals

Hoover Sensory User manual

Hoover

Hoover Sensory User manual

Hoover VR81-HU01001 User manual

Hoover

Hoover VR81-HU01001 User manual

Hoover Dubl-Duty User manual

Hoover

Hoover Dubl-Duty User manual

Hoover U5165 User manual

Hoover

Hoover U5165 User manual

Hoover U5155-900 User manual

Hoover

Hoover U5155-900 User manual

Hoover HSV600C Installation guide

Hoover

Hoover HSV600C Installation guide

Hoover U5416-900 - TurboPower Upright Vacuum User manual

Hoover

Hoover U5416-900 - TurboPower Upright Vacuum User manual

Hoover Freerounder User manual

Hoover

Hoover Freerounder User manual

Hoover Sprint User manual

Hoover

Hoover Sprint User manual

Hoover ONEPWR FLOORMATE JET User manual

Hoover

Hoover ONEPWR FLOORMATE JET User manual

Hoover HF522NPW 011 User manual

Hoover

Hoover HF522NPW 011 User manual

Hoover DUAL POWER MAX PET User manual

Hoover

Hoover DUAL POWER MAX PET User manual

Hoover Sprint User manual

Hoover

Hoover Sprint User manual

Hoover HC2000 Installation guide

Hoover

Hoover HC2000 Installation guide

Hoover Dual Power User manual

Hoover

Hoover Dual Power User manual

Hoover UH70015 - Platinum Collection Cyclonic Bagless Upright... User manual

Hoover

Hoover UH70015 - Platinum Collection Cyclonic Bagless Upright... User manual

Hoover Pet Max Complete User manual

Hoover

Hoover Pet Max Complete User manual

Hoover ch53010 User manual

Hoover

Hoover ch53010 User manual

Hoover PUREPOWER User manual

Hoover

Hoover PUREPOWER User manual

Hoover FloorMATE H3000 User manual

Hoover

Hoover FloorMATE H3000 User manual

Hoover TurboPOWER User manual

Hoover

Hoover TurboPOWER User manual

Hoover UH40155 User manual

Hoover

Hoover UH40155 User manual

Hoover UH70601 User manual

Hoover

Hoover UH70601 User manual

Hoover FUSION BH53100/CA User manual

Hoover

Hoover FUSION BH53100/CA User manual

Popular Vacuum Cleaner manuals by other brands

BETCO EX3S Operator's manual

BETCO

BETCO EX3S Operator's manual

WilTec XPOtool 63122 Operation manual

WilTec

WilTec XPOtool 63122 Operation manual

CARPOINT 1710013 manual

CARPOINT

CARPOINT 1710013 manual

Russell Hobbs UV Pro RHBV1001 manual

Russell Hobbs

Russell Hobbs UV Pro RHBV1001 manual

Ayce VHS01A17Z0C Operator's manual

Ayce

Ayce VHS01A17Z0C Operator's manual

Vax Air Lift Steerable UCPESHV1 Let's get started

Vax

Vax Air Lift Steerable UCPESHV1 Let's get started

SOLAC AB28 series Instructions for use

SOLAC

SOLAC AB28 series Instructions for use

Fakir ML ROBOTER instruction manual

Fakir

Fakir ML ROBOTER instruction manual

Husqvarna W 70 Operator's manual

Husqvarna

Husqvarna W 70 Operator's manual

Fein ASBS18-10AS manual

Fein

Fein ASBS18-10AS manual

Shark NV22 owner's guide

Shark

Shark NV22 owner's guide

Sunbeam 27509 instruction manual

Sunbeam

Sunbeam 27509 instruction manual

Fakir Prestige 1805 operating instructions

Fakir

Fakir Prestige 1805 operating instructions

Kubota 12001 manual

Kubota

Kubota 12001 manual

Vacmaster VMVQ1530SWDC Operator's manual

Vacmaster

Vacmaster VMVQ1530SWDC Operator's manual

Fagor VCE-306 Instructions for use

Fagor

Fagor VCE-306 Instructions for use

ENKHO 145331.01 user manual

ENKHO

ENKHO 145331.01 user manual

Bort BSS-Vision700W manual

Bort

Bort BSS-Vision700W manual

manuals.online logo
manuals.online logoBrands
  • About & Mission
  • Contact us
  • Privacy Policy
  • Terms and Conditions

Copyright 2025 Manuals.Online. All Rights Reserved.