Table of Contents
Safety Precautions.............................................................................................................................2
Product Application..........................................................................................................................2
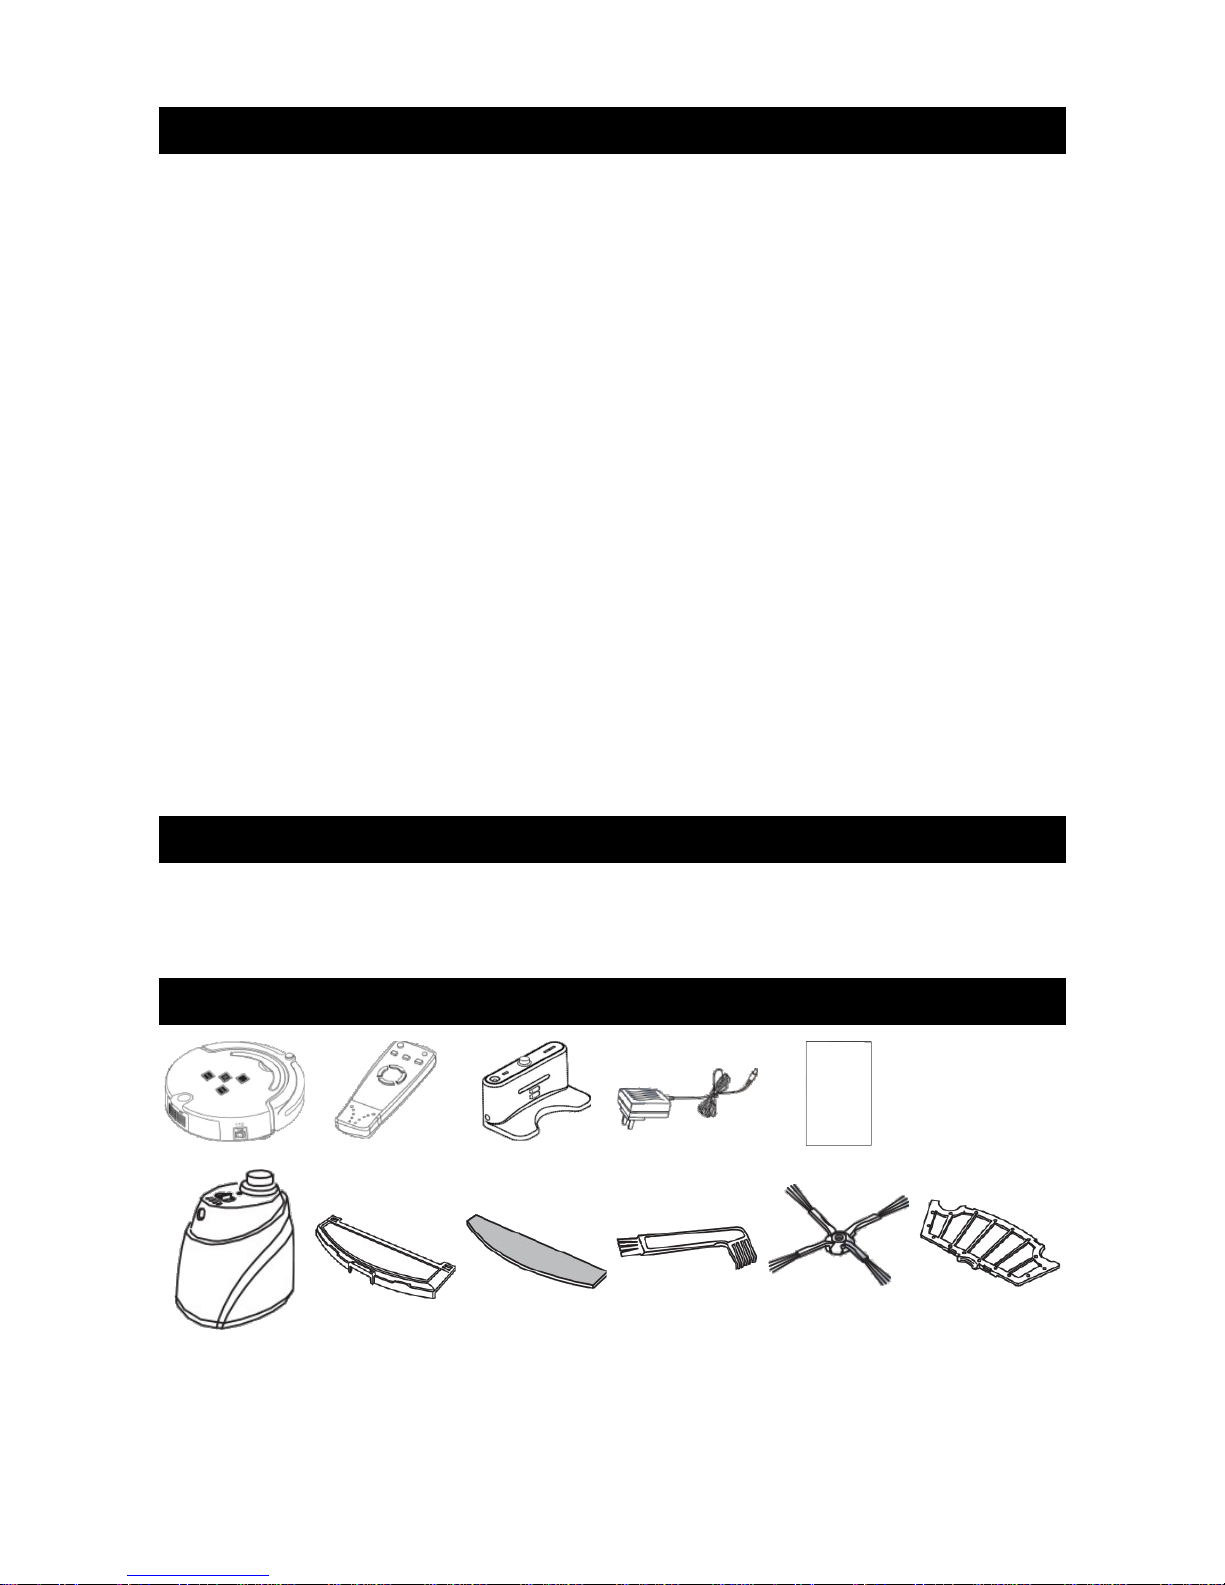
Components of the Cleaner...........................................................................................................2
Introduction..........................................................................................................................................3
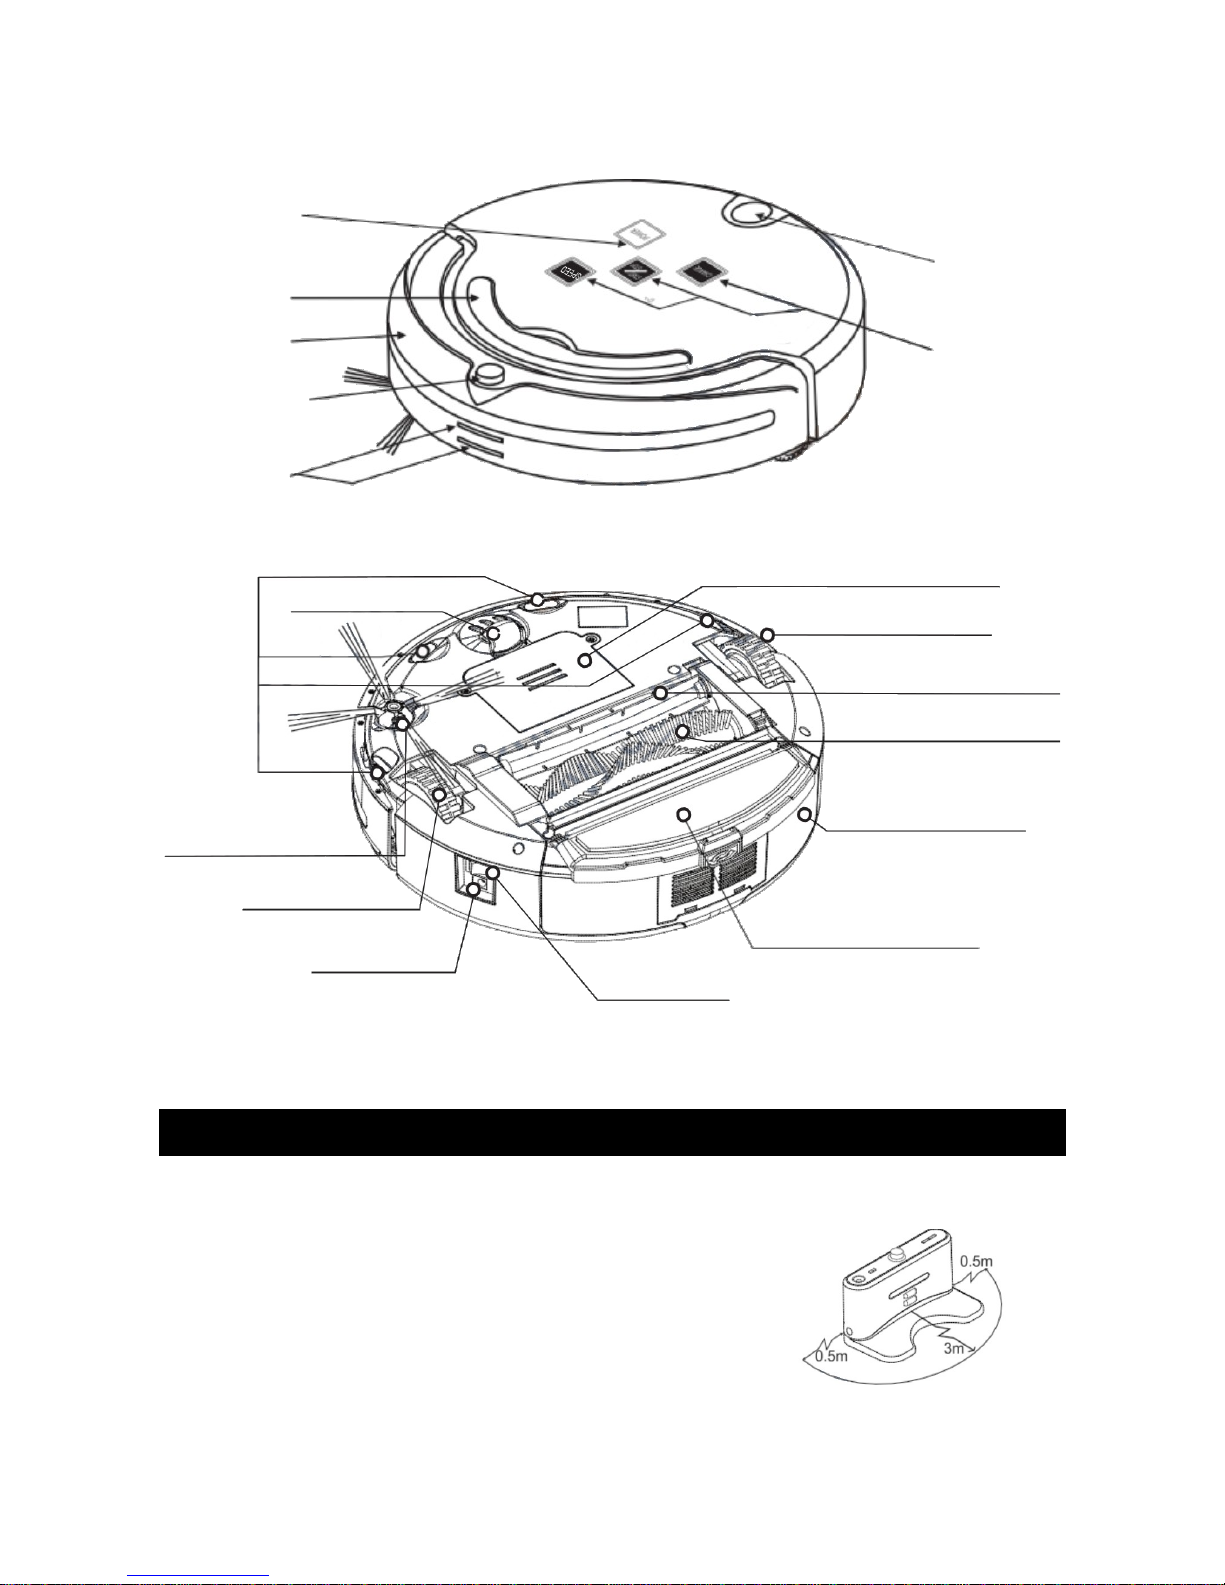
Panel...................................................................................................................................................3
Function Information on Panel................................................................................................3
Product Layout..............................................................................................................................4
Installation of Dockin Station and Char in ........................................................................4
Dockin Station.............................................................................................................................4
Manual Char in ............................................................................................................................5
Automatic Char in .....................................................................................................................5
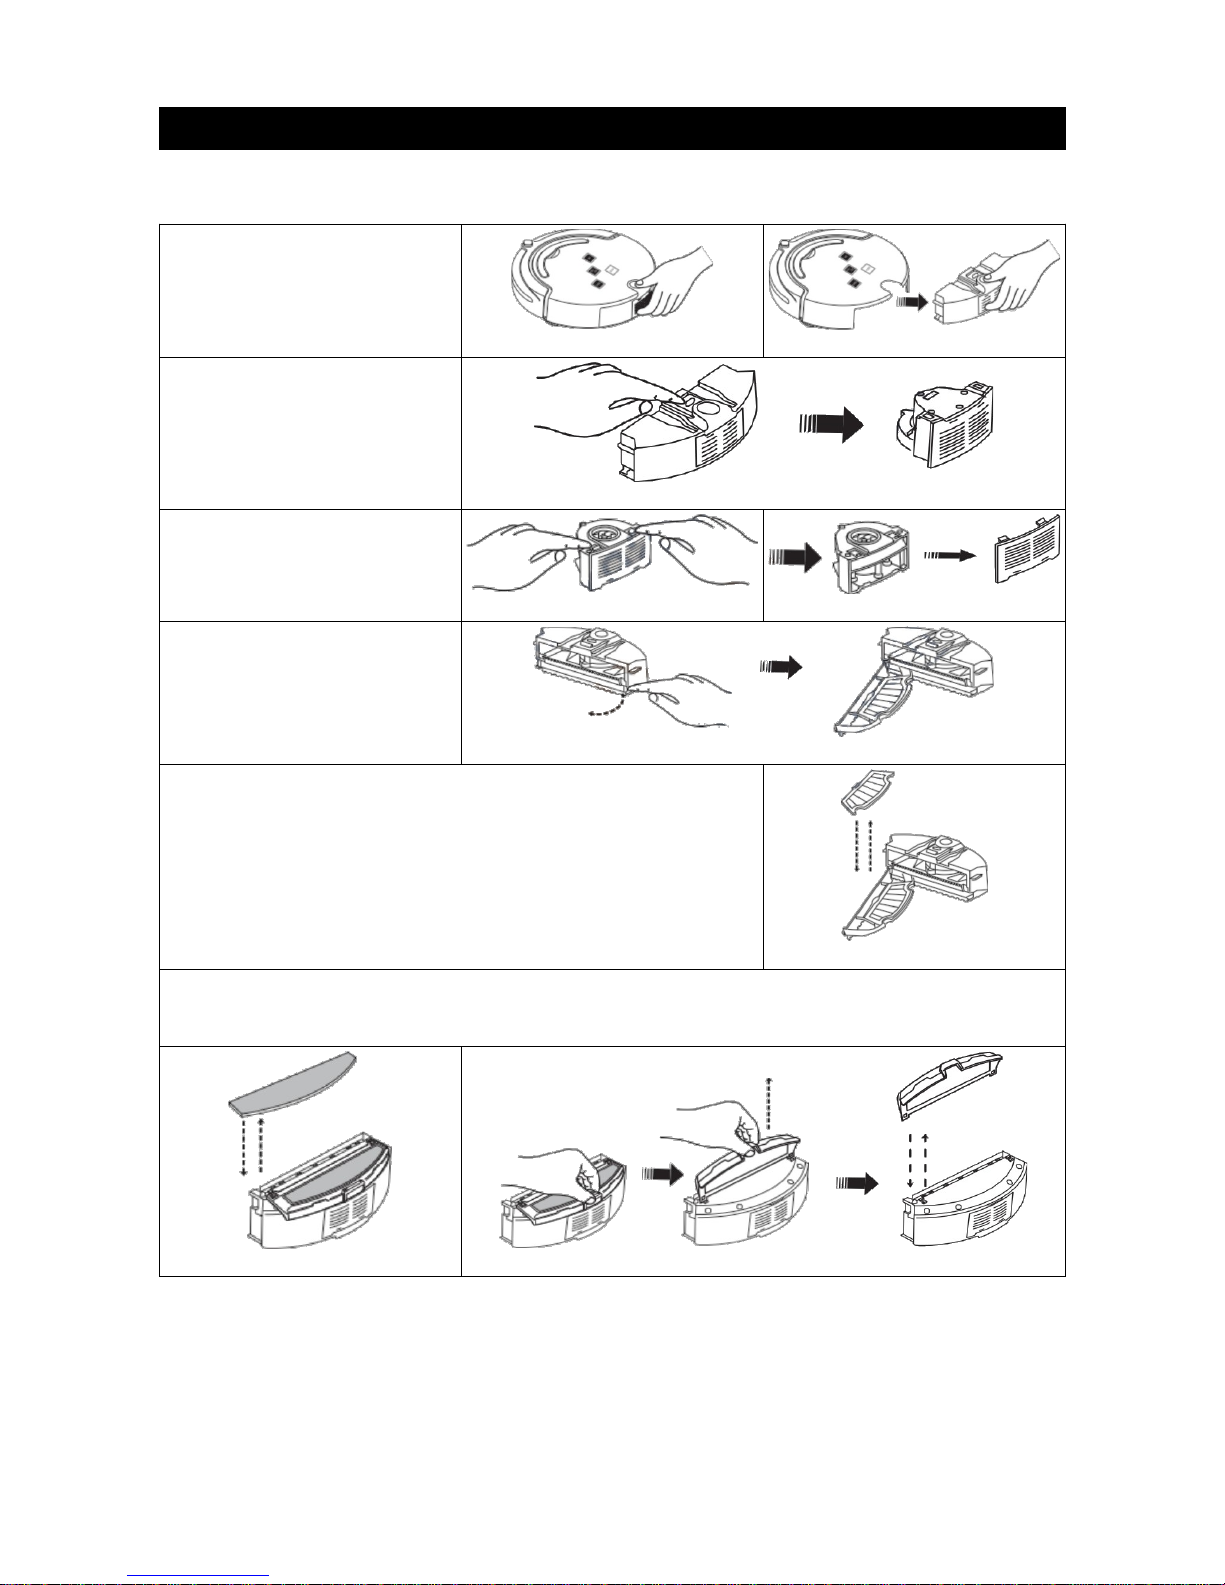
Assembly & Disassembly of Cleanin of Dust Bin...............................................................6
Assembly & Disassembly of Dust Bin...................................................................................6
Cleanin of Dust Bin and Blower............................................................................................7
Main and Side Brush Maintenance..............................................................................................7
Assembly & Disassembly of Main Brush..............................................................................7
Assembly and Disassembly of Side Brush..........................................................................8
Cleanin the Main Brush............................................................................................................8
Left, Ri ht and Front Wheel Maintenance..............................................................................8
Cleanin of the left/ri ht wheel..............................................................................................8
Assembly, Disassembly & Cleanin of front wheel.........................................................8
Cleanin Sensor and Infrared Transparent Window......................................................9
Replacin Battery..............................................................................................................................9
Battery Replacement in Main Body.......................................................................................9
Battery Replacement in Space Isolator...............................................................................9
Battery Replacement in Remote Control............................................................................9
Battery Safety...............................................................................................................................10
Remote Control................................................................................................................................10
Controller Layout........................................................................................................................10
Function Descriptions of Remote Control .......................................................................10
Auto Char in Dockin Station..................................................................................................11
Dockin Station Display and Control Panel.......................................................................11
Function Descriptions of Dockin Station.........................................................................11
Space Isolator....................................................................................................................................12
Space Isolator Display and Control Panel.........................................................................12
Function of Space Isolator.......................................................................................................12
Installation......................................................................................................................................13
Troubleshootin ................................................................................................................................14
Technical Specifications................................................................................................................14
Robot Vacuum..............................................................................................................................14
Remote Control ...........................................................................................................................15
Dockin Station............................................................................................................................15
Space Isolator...............................................................................................................................15
1