www.horizoneducational.com | support@horizoneducational.com
Safe Experimentation
In following section you will find important instructions for parents, teachers, and students. All
activities described in this manual can be conducted without risk if you follow instructions and
rules conscientiously. To avoid the risk of property damage, serious injury or death:
1. Read carefully and fully understand the instructions before assembling this kit.
2. This product is intended only for use by persons 12 years old and up, and only under the
supervision of adults who have read and understood the instructions in this user manual.
3. Pay special attention to the indications of quantity and to the sequence of the individual steps.
4. Some parts are small and fragile: please be careful when handling and connecting parts to avoid
damage. Handle all parts and components with care.
5. Do not attempt to dismantle any part, item or component in this kit.
6. Keep small children away, because this kit contains small parts that could be swallowed.
7. Save these instructions and review frequently during use.
8. Do not eat, drink, smoke near the fuel cell device and hydrogen storage while building DIY car.
9. Clean your hands after use.
10.After using the reversible fuel cell, connect the silicon plugs to the nozzles, and seal the fuel
cell in a zip bag. Improper storing may lead to membrane drying out, which may consequently
result in the fuel cell damage.
Content
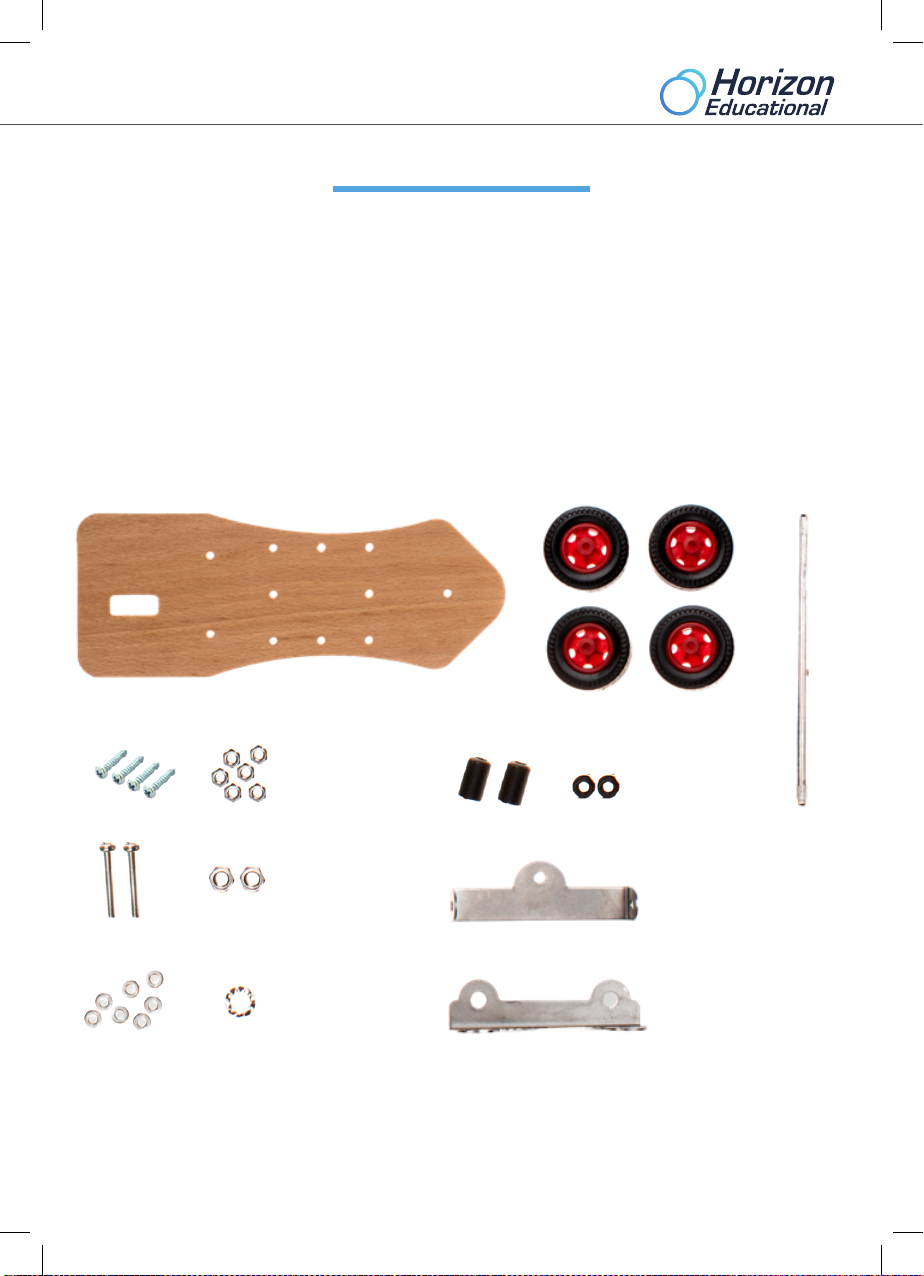
DIY Chassis Kit/DIY Chassis Classroom Pack
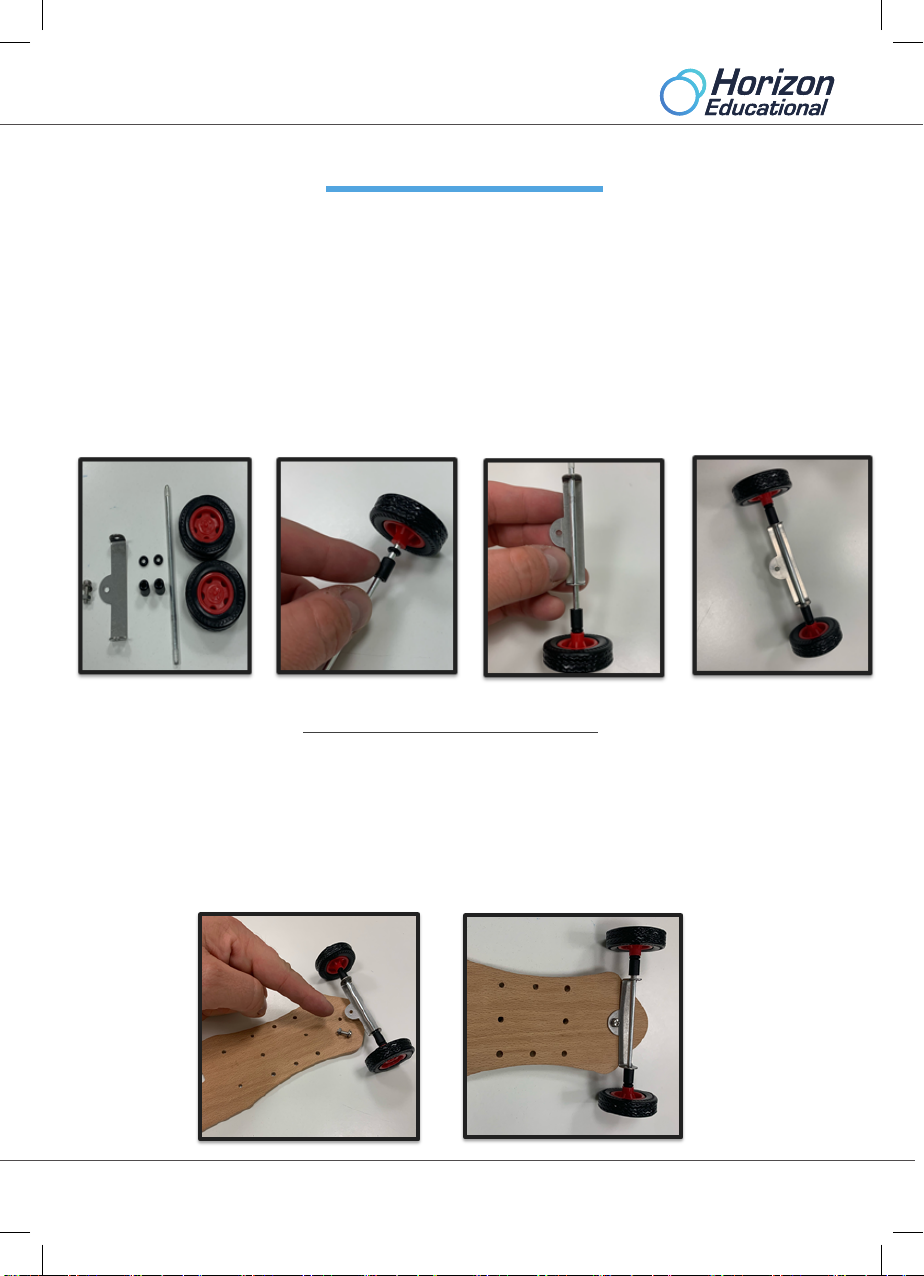
1. Assembling the front axle ............................................................................................1
1.2 Attaching front axle to the chassis ...............................................................1
2. Assembling the rear end .............................................................................................2
2.1. Assemble the gearbox .............................................................................2
2.2. Attaching the gearbox to the chassis ...........................................................2
3. Final assembly ..............................................................................................................3
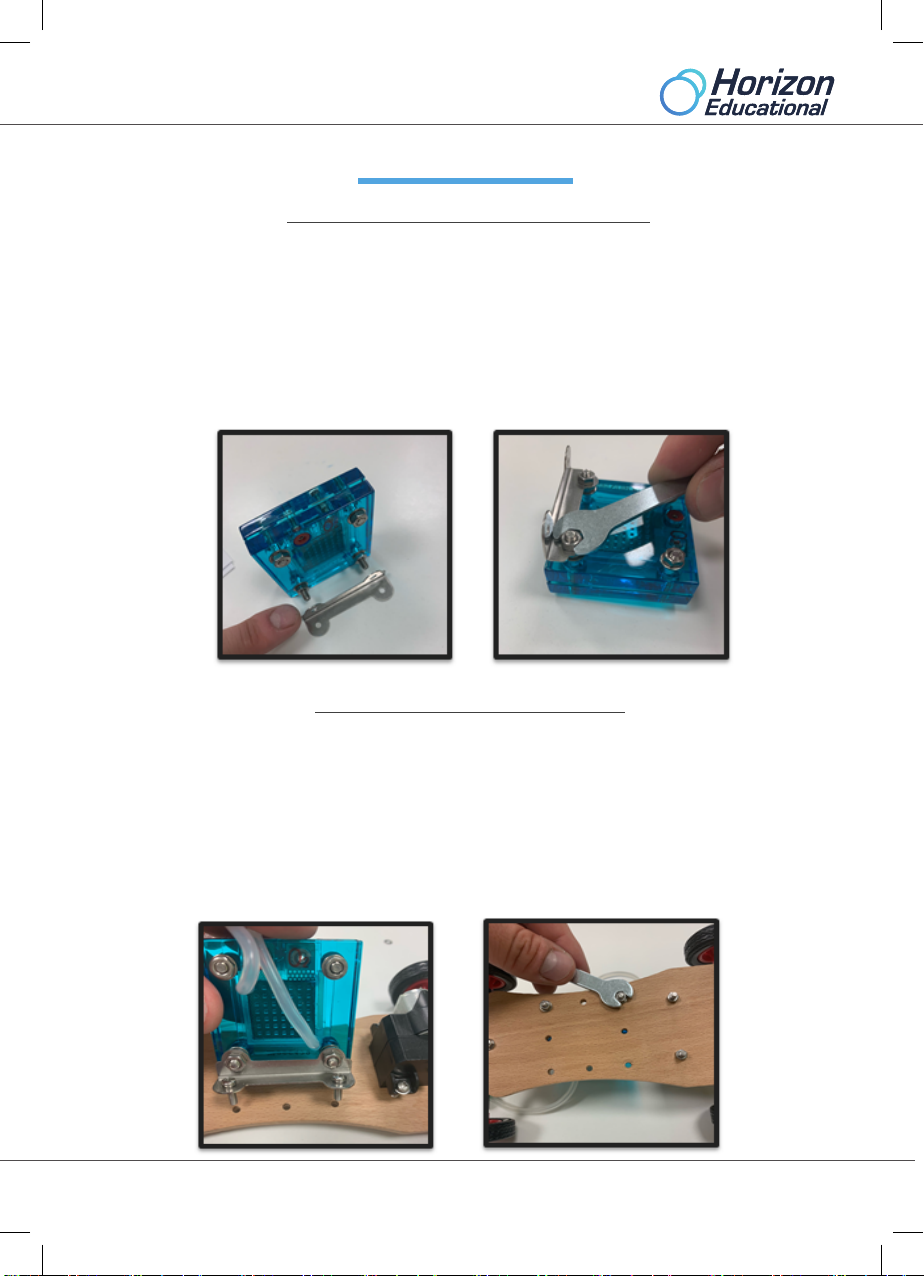
3.1. Attaching the mounting bracket to the Cell .................................................3
3.2. Attaching the Fuel Cell to the Chassis ........................................................3
4. Project-DIY Chassis-Car Kit ......................................................................................4
5. DIY RACE ..................................................................................................................5