manuals.online logo
Brands
  1. Home
  2. •
  3. Brands
  4. •
  5. Horizon Fitness
  6. •
  7. Home Gym
  8. •
  9. Horizon Fitness Torus 408 User manual

Horizon Fitness Torus 408 User manual

Other Horizon Fitness Home Gym manuals

Horizon Fitness E70 User manual

Horizon Fitness

Horizon Fitness E70 User manual

Horizon Fitness CLUB S400 User manual

Horizon Fitness

Horizon Fitness CLUB S400 User manual

Horizon Fitness TORUS User manual

Horizon Fitness

Horizon Fitness TORUS User manual

Horizon Fitness FS-50 User manual

Horizon Fitness

Horizon Fitness FS-50 User manual

Horizon Fitness SXS 5.7 User manual

Horizon Fitness

Horizon Fitness SXS 5.7 User manual

Horizon Fitness Torus 308 User manual

Horizon Fitness

Horizon Fitness Torus 308 User manual

Horizon Fitness TORUS 5 User manual

Horizon Fitness

Horizon Fitness TORUS 5 User manual

Horizon Fitness SXS 5.7 User manual

Horizon Fitness

Horizon Fitness SXS 5.7 User manual

Horizon Fitness FS 40 User manual

Horizon Fitness

Horizon Fitness FS 40 User manual

Horizon Fitness OXFORD II User manual

Horizon Fitness

Horizon Fitness OXFORD II User manual

Horizon Fitness OXFORD IV User manual

Horizon Fitness

Horizon Fitness OXFORD IV User manual

Horizon Fitness TORUS Manual

Horizon Fitness

Horizon Fitness TORUS Manual

Horizon Fitness OXFORD 5 User manual

Horizon Fitness

Horizon Fitness OXFORD 5 User manual

Horizon Fitness SXS 5.7 User manual

Horizon Fitness

Horizon Fitness SXS 5.7 User manual

Horizon Fitness TORUS 4 User manual

Horizon Fitness

Horizon Fitness TORUS 4 User manual

Horizon Fitness Functional Strength User manual

Horizon Fitness

Horizon Fitness Functional Strength User manual

Horizon Fitness TORUS User manual

Horizon Fitness

Horizon Fitness TORUS User manual

Horizon Fitness ADONIS User manual

Horizon Fitness

Horizon Fitness ADONIS User manual

Horizon Fitness OXFORD 5 User manual

Horizon Fitness

Horizon Fitness OXFORD 5 User manual

Horizon Fitness OXFORD 6 User manual

Horizon Fitness

Horizon Fitness OXFORD 6 User manual

Popular Home Gym manuals by other brands

T.D.S. 3501 Assembly instructions

T.D.S.

T.D.S. 3501 Assembly instructions

Body Solid EXM1950 Assembly instructions

Body Solid

Body Solid EXM1950 Assembly instructions

Energetics Multi Trainer 5.1 owner's manual

Energetics

Energetics Multi Trainer 5.1 owner's manual

Precor Discovery Series owner's manual

Precor

Precor Discovery Series owner's manual

Matrix MG-PL Series Service manual

Matrix

Matrix MG-PL Series Service manual

Reebok Tbr2i Manuale d'istruzioni

Reebok

Reebok Tbr2i Manuale d'istruzioni

Weider 8300 Hard Drive manual

Weider

Weider 8300 Hard Drive manual

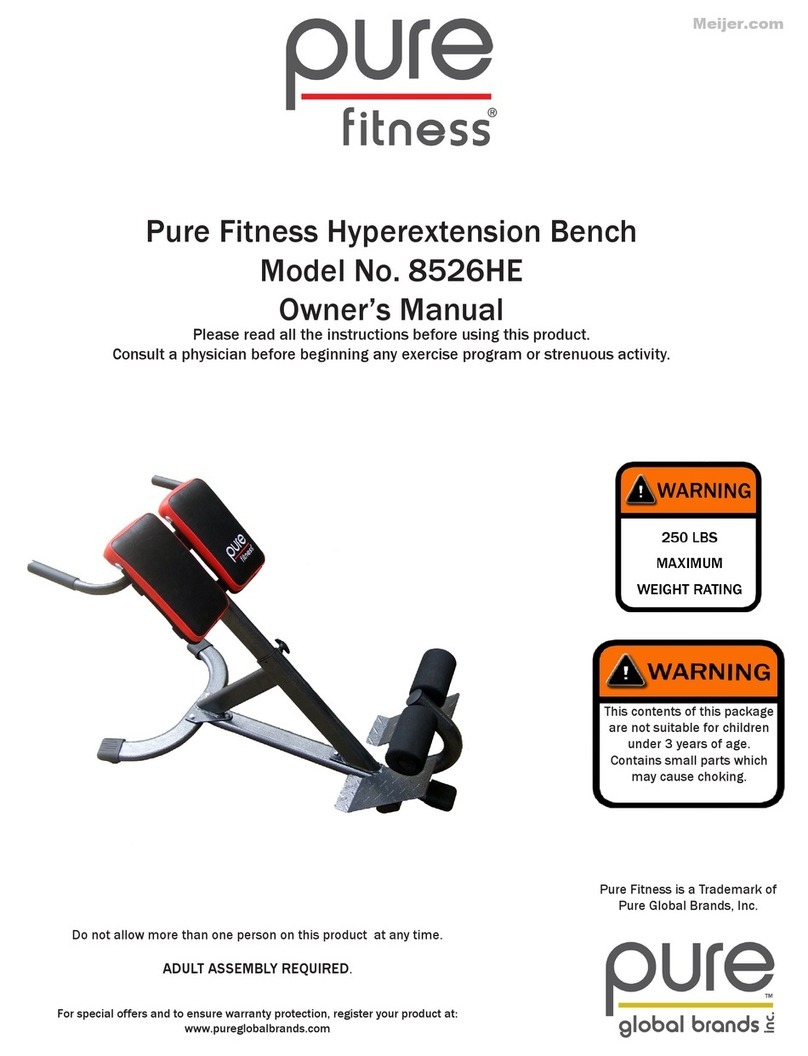
Pure Fitness 8526HE owner's manual

Pure Fitness

Pure Fitness 8526HE owner's manual

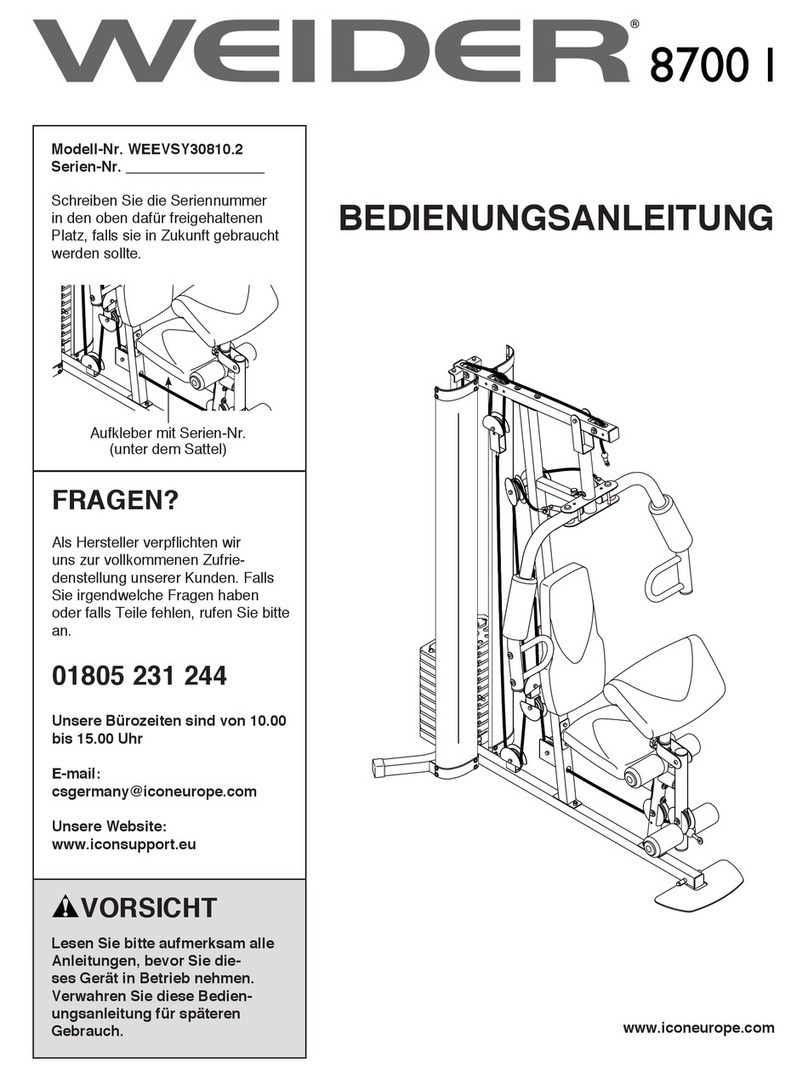
Weider 8700 I Bedienungsanleitung

Weider

Weider 8700 I Bedienungsanleitung

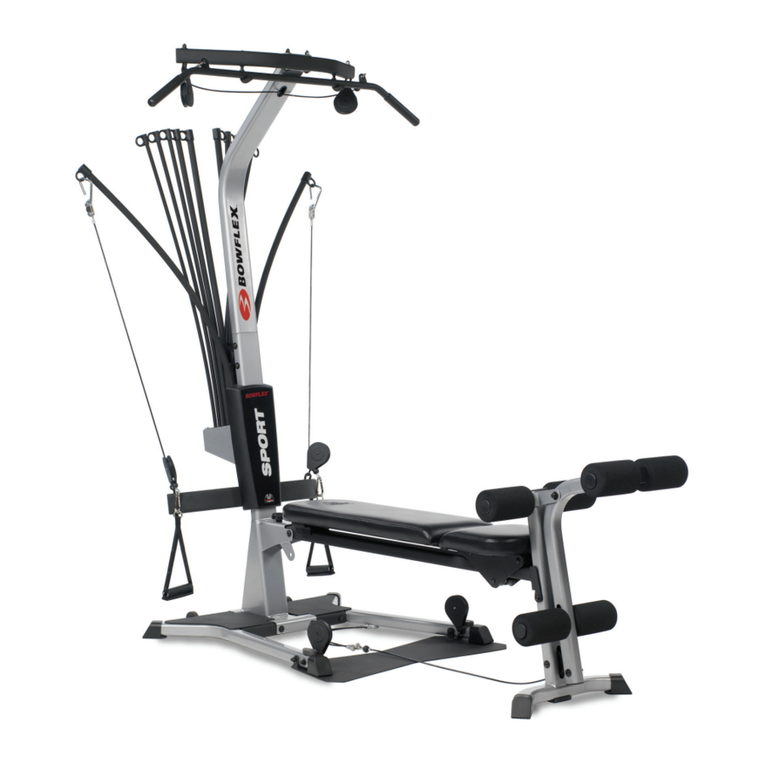
Bowflex Sport 001-6961 Assembly instructions

Bowflex

Bowflex Sport 001-6961 Assembly instructions

NordicTrack E8200 Competition Bench Bedienungsanleitung

NordicTrack

NordicTrack E8200 Competition Bench Bedienungsanleitung

Insportline RW600 user manual

Insportline

Insportline RW600 user manual

Weider WEMC10161 user manual

Weider

Weider WEMC10161 user manual

Body Solid GHYP-345 owner's manual

Body Solid

Body Solid GHYP-345 owner's manual

Evo TAHOE 5105 user manual

Evo

Evo TAHOE 5105 user manual

ParaBody 40 Assembly instructions

ParaBody

ParaBody 40 Assembly instructions

JLL Ventus Pro Air Power instruction manual

JLL

JLL Ventus Pro Air Power instruction manual

Trojan Colorado 370 user manual

Trojan

Trojan Colorado 370 user manual

manuals.online logo
manuals.online logoBrands
  • About & Mission
  • Contact us
  • Privacy Policy
  • Terms and Conditions

Copyright 2025 Manuals.Online. All Rights Reserved.

$-6#
4&3*&4
)0.&(:.64&34(6*%&
'03.0%&-
5PSVT
6LQGG 30
3
INTRODUCTION
IMPORTANT
PRECAUTIONS
ASSEMBLY
BEFORE
YOU BEGIN
CONDITIONING
GUIDELINES
TROUBLESHOOTING
& MAINTENANCE
LIMITED
WARRANTY
CONGRATULATIONS and THANK YOU for your purchase of this Horizon home gym!
Whether your goal is to tone your muscles, increase your strength or simply enjoy a fuller, healthier
lifestyle, a Horizon home gym can help you attain it – adding club-quality performance to your at-home
workouts, with the ergonomics and innovative features you need to get stronger and healthier, faster.
Because we're committed to designing fitness equipment from the inside out, we use only the highest
quality components. It's a commitment we back with one of the strongest warranty packages in the
industry.
You want exercise equipment that offers the most comfort, the best reliability and the highest quality
in its class.
A Horizon home gym delivers.
INTRODUCTION
Important Precautions
Assembly
Before You Begin
Conditioning Guidelines
Troubleshooting & Maintenance
Limited Warranty
CONTACT INFORMATION
4
5
17
18
22
24
Back Panel
TABLE OF CONTENTS
S400.indd 2-3 6/29/07 4:09:50 PM

/0*5$6%035/* 5/"5301.*
4/0*56"$&31 :-#.&44" &30'&#
/*(&#60:
(/*/0*5*%/0$
4&/*-&%*6(
(/*500)4&-#6035
&$/"/&5/*
".
%&5*.*-
:5/"33"8

/0*5$6%035/*
5/"5301.*
4/0*56"$&31
:-#.&44"
&30'&#
/*(&#60:
(/*/0*5*%/0$
4&/*-&%*6(
(/*500)4&-#6035
&$/"/&5/*
".
%&5*.*-
:5/"33"8
*.1035"/54"'&5:*/4536$5*0/4
4"7&5)&4&*/4536$5*0/4
3FBEBMMJOTUSVDUJPOTCFGPSFVTJOHUIJTIPNFHZN#BTJDQSFDBVUJPOTTIPVMEBMXBZTCFGPMMPXFEJODMVEJOHUIF
GPMMPXJOH3FBEBMMJOTUSVDUJPOTCFGPSFVTJOHUIJTIPNFHZN*UJTUIFSFTQPOTJCJMJUZPGUIFPXOFSUPFOTVSFUIBU
BMMVTFSTPGUIJTIPNFHZNBSFBEFRVBUFMZJOGPSNFEPGBMMXBSOJOHTBOEQSFDBVUJPOT*GZPVIBWFBOZRVFTUJPOT
BGUFSSFBEJOHUIJTNBOVBMDPOUBDUDVTUPNFSTFSWJDFBUUIFOVNCFSMJTUFEPOUIFCBDLDPWFSPGUIJTNBOVBM
50 3&%6$& 5)& 3*4, 0' */+63: 50 1&340/4
:$51,1*
$MPTFTVQFSWJTJPOJTOFDFTTBSZXIFOUIJTIPNFHZNJTVTFECZPOPSOFBSDIJMESFOJOWBMJETPSEJTBCMFEQFSTPOT
6TFUIJTBQQMJBODFPSIPNFHZNPOMZGPSJUTJOUFOEFEVTFBTEFTDSJCFEJOUIJTNBOVBM%POPUVTFBUUBDINFOUTOPU
SFDPNNFOEFECZUIFNBOVGBDUVSFS
/FWFSESPQPSJOTFSUBOZPCKFDUJOUPBOZPQFOJOH
*GZPVFYQFSJFODFBOZLJOEPGQBJOJODMVEJOHCVUOPUMJNJUFEUPDIFTUQBJOTOBVTFBEJ[[JOFTTPSTIPSUOFTTPGCSFBUI
TUPQFYFSDJTJOHJNNFEJBUFMZBOEDPOTVMUZPVSQIZTJDJBOCFGPSFDPOUJOVJOH
%POPUXFBSDMPUIFTUIBUNJHIUDBUDIPOBOZQBSUPGUIFIPNFHZN
"MXBZTXFBSBUIMFUJDTIPFTXIJMFVTJOHUIJTFRVJQNFOU
%POPUKVNQPOUIFIPNFHZN
"UOPUJNFTIPVMENPSFUIBOPOFQFSTPOCFPOIPNFHZNXIJMFJOPQFSBUJPO
5IF IPNF HZN TIPVME OPU CF VTFE CZ QFSTPOT XFJHIJOH NPSF UIBO  QPVOET 'BJMVSF UP DPNQMZ XJMM WPJE UIF
XBSSBOUZ
5IF IPNF HZN JT JOUFOEFE GPS JOIPNF VTF POMZ %P OPU VTF UIJTIPNF HZN JO BOZ DPNNFSDJBM SFOUBM TDIPPM PS
JOTUJUVUJPOBMTFUUJOH'BJMVSFUPDPNQMZXJMMWPJEUIFXBSSBOUZ
%POPUVTFPVUEPPST
t
t
t
t
t
t
t
t
t
t
t
"U/0UJNFTIPVMEQFUTPSDIJMESFOVOEFSUIFBHFPGCFDMPTFSUPUIFIPNFHZNUIBOGFFU
"U/0UJNFTIPVMEDIJMESFOVOEFSUIFBHFPGVTFUIFIPNFHZN
$IJMESFOPWFSUIFBHFPGTIPVMEOPUVTFUIFIPNFHZNXJUIPVUBEVMUTVQFSWJTJPO
'03)064&)0-%64&0/-:
"44&.#-:
*.1035"/53&"%5)&4&4"'&5:*/4536$5*0/4#&'03&64&
%VSJOHUIFBTTFNCMZQSPDFTTUIFSFBSFTFWFSBMBSFBTUIBUTQFDJBMBUUFOUJPONVTUCFQBJE*UJTWFSZJNQPSUBOU
UPGPMMPXUIFBTTFNCMZJOTUSVDUJPOTDPSSFDUMZBOEUPNBLFTVSFBMMQBSUTBSFmSNMZUJHIUFOFE*GUIFBTTFNCMZ
JOTUSVDUJPOTBSFOPUGPMMPXFEDPSSFDUMZUIFIPNFHZNDPVMEIBWFGSBNFQBSUTUIBUBSFOPUUJHIUFOFEBOEXJMM
TFFNMPPTFBOENBZDBVTFJSSJUBUJOHOPJTFT5IFSFTIPVMECFOPTJEFUPTJEFQMBZJOUIFGSBNFVQSJHIUT*G
UIFSFJTBOZQMBZJOUIFTFBSFBTUIFIPNFHZNIBTOPUCFFOQSPQFSMZBTTFNCMFE5PQSFWFOUEBNBHFUPUIF
IPNFHZNUIFBTTFNCMZJOTUSVDUJPOTNVTUCFSFWJFXFEBOEDPSSFDUJWFBDUJPOTTIPVMECFUBLFO
6/1"$,*/(
1MBDFUIFIPNFHZNDBSUPOPOBMFWFMnBUTVSGBDF*UJTSFDPNNFOEFEUIBUZPVQMBDFBQSPUFDUJWFDPWFSJOH
POZPVSnPPS5BLF$"65*0/XIFOIBOEMJOHBOEUSBOTQPSUJOHUIJTVOJU/FWFSPQFOCPYXIFOJUJTPOJUT
TJEF6OQBDLUIFVOJUXIFSFJUXJMMCFVTFE'"*-63&50'0--085)&4&*/4536$5*0/4$06-%3&46-5*/
*/+63:
:$51,1*
6LQGG 30
#FGPSFQSPDFFEJOHmOEZPVSIPNFHZNTTFSJBMOVNCFS
BOENPEFMOBNFMPDBUFEPOUIFMFGUSFBSTJEFPGUIFCBTF
GSBNFBOEFOUFSJUJOUIFTQBDFQSPWJEFECFMPX
&/5&3 :063 4&3*"- /6.#&3 "/%
.0%&- /".& */ 5)& #09&4 #&-08
4&3*"-/6.#&3
.0%&-/".&

/0*5$6%035/* 5/"5301.*
4/0*56"$&31 :-#.&44" &30'&#
/*(&#60:
(/*/0*5*%/0$
4&/*-&%*6(
(/*500)4&-#6035
&$/"/&5/*
".
%&5*.*-
:5/"33"8

/0*5$6%035/*
5/"5301.*
4/0*56"$&31
:-#.&44"
&30'&#
/*(&#60:
(/*/0*5*%/0$
4&/*-&%*6(
(/*500)4&-#6035
&$/"/&5/*
".
%&5*.*-
:5/"33"8
500-4*/$-6%&%
1"354*/$-6%&%
4FBU"TTFNCMZ4BGFUZ1JO
'PBN3PMMFST
4FBU#BDL$VTIJPO
.BJO#BTF'SBNF
.BJO4VQQPSU'SBNF3JHIU
.BJO4VQQPSU'SBNF-FGU
3BEJBM"SN"TTFNCMZ
$FOUFS6QSJHIU
4FBU"TTFNCMZ
8FJHIU4IJFMET
(VJEF3PET
8FJHIU4FMFDUJPO1JO
6QQFS1VMMFZ#SBDLFU
%VBM'MPBUJOH1VMMFZ#SBDLFU
4JOHMF'MPBUJOH1VMMFZ#SBDLFU
6QQFS1VMMFZ"TTFNCMZ
.VMUJQMF1VMMFZT
$BCMFT
-"516--%08/#"3
-"5#"3#3"$,&5"44&.#-:
."*/4611035'3".&3*()5
$&/5&34611035'3".&
$"#-&i$w
3"%*"-"3."%+645.&/51*/
4&"5#"$,1"%
4&"5#0550.1"%
4&"5"44&.#-:
4&"5)&*()5"%+645.&/5,/0#
'0".-&(30--&34
"%+645"#-&'0051-"5& $"#-&i#w
#"4&'3".&
4&"5"44&.#-:4"'&5:1*/
."*/4611035'3".&-&'5
4*/(-&'-0"5*/(16--&:#3"$,&5
8&*()54&-&$5*0/1*/
8&*()54)*&-%
%6"-'-0"5*/(16--&:#3"$,&5
(6*%&30%
611&316--&:"44&.#-:
3"%*"-"3."44&.#-:
$"#-&i"w
NN5XSFODI
NN'MBU8SFODI
4DSFXESJWFS
/05& %VSJOHFBDIBTTFNCMZTUFQFOTVSFUIBU"--OVUTBOECPMUTBSFJOQMBDFBOEQBSUJBMMZUISFBEFEJOCFGPSF
DPNQMFUFMZUJHIUFOJOHBOZ0/&CPMU/05&"MJHIUBQQMJDBUJPOPGHSFBTFNBZBJEJOUIFJOTUBMMBUJPOPGIBSEXBSF
"OZHSFBTFTVDIBTMJUIJVNCJLFHSFBTFJTSFDPNNFOEFE
13&"44&.#-:
"44&.#-:45&1
/:-0//65$
2UZ
'-"58"4)&3#
2UZ
#0-5"
2UZ
)"3%8"3&#"($0/5&/54
#"4&'3".&
."*/4611035
'3".&3*()5
."*/4611035
'3".&-&'5
/:-0//65$
'-"58"4)&3#
'-"58"4)&3#
#0-5"
$&/5&34611035
'3".&
0QFO )"3%8"3&#"(
1MBDF #"4& '3".&POnPPSJO
EFTJSFEMPDBUJPO
"UUBDI 3*()5."*/4611035
'3".&UPSJHIUTJEFPG#"4&
'3".&VTJOH#0-54"
'-"5 8"4)&34#BOE
/:-0/ /654$
3FQFBUPOPUIFSTJEF
"UUBDI $&/5&34611035
'3".&UP#"4& '3".&VTJOH
#0-54"'-"5 8"4)&34
#BOE/:-0/ /654$
"
#
$
%
&
6LQGG 30
8
INTRODUCTION IMPORTANT
PRECAUTIONS ASSEMBLY BEFORE
YOU BEGIN CONDITIONING
GUIDELINES TROUBLESHOOTING
& MAINTENANCE LIMITED
WARRANTY
9
INTRODUCTION
IMPORTANT
PRECAUTIONS
ASSEMBLY
BEFORE
YOU BEGIN
CONDITIONING
GUIDELINES
TROUBLESHOOTING
& MAINTENANCE
LIMITED
WARRANTY
Open HARDWARE BAG 2.
Attach UPPER PULLEY
ASSEMBLY to CENTER
SUPPORT FRAME using 2
BOLTS (D), 4 FLAT WASHERS
(B) and 2 NYLON NUTS (C).
Attach UPPER PULLEY
ASSEMBLY to the SIDE
UPRIGHTS using 4 BOLTS (A),
8FLAT WASHERS (B) and 4
NYLON NUTS (C).
Attach 1 SUPPORT PLATE on
each side.
Ensure that the LAT BAR
BRACKET ASSEMBLY flange is
positioned between the SIDE
UPRIGHT and the UPPER
ASSEMBLY BRACKET flange, as
shown in diagram.
A
B
C
D
E
ASSEMBLY STEP 2
NYLON NUT (C)
Qty: 6
FLAT WASHER (B)
Qty: 12
BOLT (A)
Qty: 4
BOLT (D)
Qty: 2
HARDWARE BAG 2 CONTENTS :
LAT BAR
BRACKET ASSEMBLY
UPPER PULLEY ASSEMBLY
FLAT WASHER (B)
NYLON NUT (C)
FLAT WASHER (B)
SUPPORT
PLATE
BOLT (A)
FLAT WASHER (B)
BOLT (D)
FLAT WASHER (B)
NYLON NUT (C)
Open HARDWARE BAG 3.
Attach SEAT WELDMENT SET.
Attach COVER to bolted joint using 4 SCREWS (F).
Attach RADIAL ARM ASSEMBLY to CENTER SUPPORT FRAME using 2 BOLTS (A), 4FLAT
WASHERS (B) and 2 NYLON NUTS (C).
A
B
C
D
ASSEMBLY STEP 3
NYLON NUT (C)
Qty: 2
FLAT WASHER (B)
Qty: 4
BOLT (A)
Qty: 2
SCREW (F)
Qty: 4
HARDWARE BAG 3 CONTENTS :
RADIAL ARM ASSEMBLY
NYLON NUT (C)
FLAT WASHER (B)
FLAT WASHER (B)
BOLT (A)
SEAT WELDMENT SET
FRONT COVER
BACK COVER
SCREW (F)
S400.indd 8-9 6/29/07 4:10:00 PM
10
INTRODUCTION IMPORTANT
PRECAUTIONS ASSEMBLY BEFORE
YOU BEGIN CONDITIONING
GUIDELINES TROUBLESHOOTING
& MAINTENANCE LIMITED
WARRANTY
11
INTRODUCTION
IMPORTANT
PRECAUTIONS
ASSEMBLY
BEFORE
YOU BEGIN
CONDITIONING
GUIDELINES
TROUBLESHOOTING
& MAINTENANCE
LIMITED
WARRANTY
Open HARDWARE BAG 4.
Attach LEG EXTENSION/CURL DOWN TUBE to SEAT ASSEMBLY using 1 BOLT (G),2FLAT
WASHERS (B) and 1 NYLON NUT (C).
NOTE: Position the LEG EXTENSION/CURL DOWN TUBE so the cable attachment is facing
the gym.
Insert SEAT SET SAFETY PIN.
A
B
C
ASSEMBLY STEP 4
NYLON NUT (C)
Qty: 1
FLAT WASHER (B)
Qty: 2
SEAT SAFTEY PIN
Qty: 1
BOLT (G)
Qty: 1
HARDWARE BAG 4 CONTENTS :
SEAT SET SAFETY PIN
FLAT WASHER (B)
NYLON NUT (C)
BOLT (G)
FLAT WASHER (B)
SHAFT
BUSHING
LEG EXTENSION/
CURL DOWN TUBE
Open HARDWARE BAG 5.
Attach SEAT BACK PAD to CENTER SUPPORT FRAME using 2 SCREWS (H), 2FLAT
WASHERS (B).
Attach SEAT BOTTOM PAD to SEAT WELDMENT using 4 BOLTS (D), 4FLAT WASHERS (B).
Install assembled seat into gym.
Install LEG PADS to LEG EXTENSION/CURL DOWN TUBE as shown in diagram.
A
B
C
D
E
ASSEMBLY STEP 5
FLAT WASHER (B)
Qty: 6
SCREW (H)
Qty: 2
BOLT (D)
Qty: 4
HARDWARE BAG 5 CONTENTS :
END COVER
LEG PAD
LEG EXTENSION/
CURL DOWN TUBE
FLAT WASHER (B)
SEAT WELDMENT
SEAT BOTTOM PAD
SEAT BACK PAD
BOLT (D)
FLAT WASHER (B)
SCREW (H)
S400.indd 10-11 6/29/07 4:10:05 PM
12
INTRODUCTION IMPORTANT
PRECAUTIONS ASSEMBLY BEFORE
YOU BEGIN CONDITIONING
GUIDELINES TROUBLESHOOTING
& MAINTENANCE LIMITED
WARRANTY
13
INTRODUCTION
IMPORTANT
PRECAUTIONS
ASSEMBLY
BEFORE
YOU BEGIN
CONDITIONING
GUIDELINES
TROUBLESHOOTING
& MAINTENANCE
LIMITED
WARRANTY
Open HARDWARE BAG 6.
Insert each GUIDE ROD into the BASE FRAME as shown in diagram.
Install rubber BUMPER onto each GUIDE ROD.
Install each WEIGHT PLATE onto GUIDE RODS
NOTE: Ensure that each WEIGHT PLATE’s selector pin slot faces downward.
Insert each GUIDE ROD into the corresponding hole in the UPPER PULLEY ASSEMBLY.
Install BACK SHROUD PLATE (top) to UPPER PULLEY ASSEMBLY using 2 BOLTS (I), 4 FLAT
WASHERS (J) and 2 NYLON NUTS (K).
NOTE: Ensure that each bolt is inserted through the hole at the top of the GUIDE ROD.
Install BACK SHROUD PLATE (bottom) to BASE FRAME using 2 BOLTS (I), 4 FLAT WASHERS
(J) and 2 NYLON NUTS (K).
NOTE: Ensure that each bolt is inserted through the hole at the bottom of the GUIDE ROD.
A
B
C
D
E
F
G
ASSEMBLY STEP 6
FLAT WASHER (J)
Qty: 8
NYLON NUT (K)
Qty: 4
BUMPER
Qty: 2
BOLT (I)
Qty: 4
HARDWARE BAG 6 CONTENTS :
BUMPER
GUIDE ROD
WEIGHT PLATE
TOP WEIGHT
BAYONET
SELECTOR PIN
INCREMENT WEIGHT
NYLON NUT (K)
FLAT WASHER (J)
FLAT WASHER (J)
BACK SHROUD PLATE SCREW (I)
FLAT WASHER (J)
SCREW (I)
BACK SHROUD PLATE
Open HARDWARE BAG 7.
Remove nylon nut and threaded
screw from end of CABLE A.
Insert cable end into LAT BAR
ASSEMBLY BRACKET pulley as
shown in diagram.
NOTE: After passing through
second pulley bracket, DUAL
FLOATING PULLEY BRACKET
must be installed.
Re-install threaded screw and
nylon nut before threading
cable into TOP WEIGHT PLATE.
NOTE: Always maintain at least
½˝ of weight cable screw in
TOP WEIGHT PLATE for saftey.
Hook LAT BAR on to cable using
the HOOK and rest in craddle.
A
B
C
D
E
ASSEMBLY STEP 7
CABLE A
Qty: 1
HARDWARE BAG 7 CONTENTS :
CABLE A
LAT BAR
RUBBER STOP
BALL
NYLON NUT (C)
FLAT WASHER (B)
DUAL FLOATING
PULLEY BRACKET
LAT BAR / WEIGHT
CABLE SCREW AND NUT
TOP WEIGHT
THREAD
HOOK
CLEVIS
FLAT WASHER (B)
SCREW (E)
S400.indd 12-13 6/29/07 4:10:10 PM
14
INTRODUCTION IMPORTANT
PRECAUTIONS ASSEMBLY BEFORE
YOU BEGIN CONDITIONING
GUIDELINES TROUBLESHOOTING
& MAINTENANCE LIMITED
WARRANTY
15
INTRODUCTION
IMPORTANT
PRECAUTIONS
ASSEMBLY
BEFORE
YOU BEGIN
CONDITIONING
GUIDELINES
TROUBLESHOOTING
& MAINTENANCE
LIMITED
WARRANTY
Open HARDWARE BAG 8.
Remove nylon nut, threaded screw and ball from end of CABLE B.
Route CABLE B through the pulley system in the RADIAL ARM ASSEMBLY as shown in
diagram.
After CABLE B routing is complete replace nylon nut, threaded screw and ball on end of
cable.
Hook HANDLES on to cable using the 2 HOOKS.
A
B
C
D
E
ASSEMBLY STEP 8
CABLE B
Qty: 1
HARDWARE BAG 8 CONTENTS :
RUBBER STOP
BALL
NYLON NUT (C)
FLAT WASHER (B)
CABLE B
GRIP
HOOK
CLEVIS
FLAT WASHER (B)
SCREW (E)
Open HARDWARE BAG 9.
Remove nylon nut, threaded
screw and ball from end of
CABLE C.
Attach threaded cable end
to SINGLE FLOATING PULLEY
BRACKET.
Route CABLE C through pulley
system of BASE FRAME up
through the DUAL FLOATING
PULLEY BRACKET and back
to BASE FRAME and CENTER
SUPPORT FRAME as shown in
diagram.
After CABLE C routing is
complete replace nylon nut,
threaded screw and ball on end
of cable.
Hook the LEG EXTENSION/CURL
DOWN TUBE to the end of the
cable using the HOOK and the
EXTENSION CABLE.
A
B
C
D
E
F
ASSEMBLY STEP 9
CABLE C
Qty: 1
HARDWARE BAG 8 CONTENTS :
RUBBER STOP
BALL
NYLON
NUT (C)
FLAT
WASHER (B)
HOOK
EXTENSION
CABLE
LEG EXTENSION/
CURL DOWN TUBE
CABLE SCREW
SINGLE FLOATING
PULLEY BRACKET
CABLE C
CLEVIS
FLAT WASHER (B)
SCREW (E)
S400.indd 14-15 6/29/07 4:10:15 PM
16
INTRODUCTION IMPORTANT
PRECAUTIONS ASSEMBLY BEFORE
YOU BEGIN CONDITIONING
GUIDELINES TROUBLESHOOTING
& MAINTENANCE LIMITED
WARRANTY
17
INTRODUCTION
IMPORTANT
PRECAUTIONS
ASSEMBLY
BEFORE
YOU BEGIN
CONDITIONING
GUIDELINES
TROUBLESHOOTING
& MAINTENANCE
LIMITED
WARRANTY
YOU’RE FINISHED!
Open HARDWARE BAG 9.
Install WEIGHT SHROUDS as shown in diagram, using 12 SCREWS (L) and 12 FLAT
WASHERS (M).
A
B
ASSEMBLY STEP 10
FLAT WASHER (M)
Qty: 12
SCREW (L)
Qty: 12
HARDWARE BAG 9 CONTENTS :
RIGHT SHROUD
SCREW (L)
FLAT WASHER (M)
SCREW (L)
FLAT WASHER (M)
LEFT SHROUD
BACK SHROUD
BEFORE YOU BEGIN
CONGRATULATIONS! on choosing your home gym. You’ve taken an important step in developing
and sustaining an exercise program! Your home gym is a tremendously effective tool for achieving your
personal fitness goals. Regular use of your home gym can improve the quality of your life in so many
ways.
HERE ARE JUST A FEW OF THE HEALTH BENEFITS OF EXERCISE:
• Improved Muscle Tone and Strength
• Increased Daily Energy Levels
• A Healthier Heart
• Weight Loss
The key to reaping these benefits is to develop an exercise habit. Your new home gym will help you eliminate
obstacles that prevent you from exercising. Inclement weather and darkness won't interfere with your
workout when you use your home gym in the comfort of your home. This guide provides you with basic
information for using and enjoying your new machine.
LOCATION OF THE HOME GYM
Place the home gym on a level surface. There should be 1 foot of
clearance behind the home gym, 3 feet on each side and 3 feet in front.
Do not place the home gym in any area that will block any vent or air
openings. The home gym should not be located outdoors.
3 feet
Front
3 feet
3 feet
Back
1 foot
SEAT ASSEMBLY PIN
Ensure that the seat assermbly safety pin is fully inserted before using the home
gym. Failure to do so may result in injury!.
WARNING
PROPER USAGE
Make sure to follow the MAINTENANCE schedule in this manual. Stop your workout immediately if you feel pain,
faint, dizzy or are short of breath.
Do not operate the home gym if there is any noticable damage to the cables
or pulleys. If any damage is noticable, contact customer tech support at the
number located on the back panel of this manual.
WARNING
S400.indd 16-17 6/29/07 4:10:19 PM
18
INTRODUCTION IMPORTANT
PRECAUTIONS ASSEMBLY BEFORE
YOU BEGIN
CONDITIONING
GUIDELINES
TROUBLESHOOTING
& MAINTENANCE LIMITED
WARRANTY
19
INTRODUCTION
IMPORTANT
PRECAUTIONS
ASSEMBLY
BEFORE
YOU BEGIN
CONDITIONING
GUIDELINES
TROUBLESHOOTING
& MAINTENANCE
LIMITED
WARRANTY
ALWAYS CONSULT YOUR PHYSICIAN BEFORE BEGINNING AN EXERCISE PROGRAM.
HOW OFTEN? (Frequency of Workouts)
The American Heart Association recommends that you exercise at least 3 to 4 days per week to maintain fitness.
If you have other goals such as weight or fat loss, you will achieve your goal faster with more frequent exercise.
Whether it’s 3 days or 6 days, remember that your ultimate goal should be to make exercise a lifetime habit.
Many people are successful staying with a fitness program if they set aside a specific time of day to exercise.
It doesn’t matter whether it’s in the morning before breakfast, during lunch hour or while watching the evening
news. What’s more important is that it’s a time that allows you to keep a schedule, and a time when you won’t
be interrupted. To be successful with your fitness program, you have to make it a priority in your life. So decide
on a time, pull out your day planner and pencil in your exercise times for the next month!
HOW LONG? (Duration of Workouts)
For aerobic exercise benefits, it’s recommended that you exercise from between 24 and 60 minutes per session.
But start slowly and gradually increase your exercise times. If you’ve been sedentary during the past year, it may
be a good idea to keep your exercise times to as little as 5 minutes initially. Your body will need time to adjust
to the new activity. If your goal is weight loss, a longer exercise session at lower intensities has been found to
be most effective.
HOW HARD? (Intensity of Workouts)
How hard you workout is also determined by your goals. If you use your home gym to prepare for a 5K run, you will
probably work out at a higher intensity than if your goal is general fitness. Regardless of your long term goals,
always begin an exercise program at low intensity. Aerobic exercise does not have to be painful to be beneficial!
There are two ways to measure your exercise intensity. The first is by monitoring your heart rate (using the grip
pulse handlebars or a wireless chest transmitter - may be sold separately), and the second is by evaluating your
perceived exertion level (this is simpler than it sounds!).
PERCEIVED EXERTION LEVEL
A simple way to gauge your exercise intensity is to evaluate your perceived exertion level. While exercising, if you
are too winded to maintain a conversation without gasping, you are working out too hard. A good rule of thumb
is to work to the point of exhilaration, not exhaustion. If you cannot catch your breath, it’s time to slow down.
Always be aware of these warning signs of overexertion.
GENERAL STRENGTH TRAINING GUIDELINES
• It is recommended that you perform at least 5-10 minutes of cardiovascular exercise before beginning your
strength routine in order to warm the muscles, increase the heart rate, and prepare your body for strength
training.
• Always raise and lower the weight in a smooth, slow, and controlled motion.
• Try not to hold your breath during strength training exercises. It is recommended that you exhale as you raise
the weight and inhale as you lower the weight.
• It is recommended that each muscle group be allowed to rest 48 hours between strength training.
• Complete each strength routine with a few simple stretches to maintain flexibility, and allow your body to
cool-down after your session.
CONDITIONING GUIDELINES
What is Target Heart Rate Zone?
Target Heart Rate Zone tells you
the number of times per minute
your heart needs to beat to
achieve a desired workout effect.
It is represented as a percentage
of the maximum number of times
your heart can beat per minute.
Target Zone will vary for each
individual, depending on age,
current level of conditioning,
and personal fitness goals. The
American Heart Association
recommends working-out at a
Target Heart Rate Zone of between
60% and 75% of your maximum
heart rate. A beginner will want to
workout in the 60% range while
a more experienced exerciser will
want to workout in the 70-75%
range. See chart for reference.
EXAMPLE:
For a 42-year-old user: Find age along the bottom of the chart (round to 40), follow age column up to
the target zone bar. Results: 60% of maximum Heart Rate = 108 Beats Per Minute, 75% of maximum
Heart Rate = 135 Beat Per Minute.
ALWAYS CONSULT YOUR PHYSICIAN BEFORE BEGINNING AN EXERCISE PROGRAM.
TARGET HEART RATE ZONE CHART
100%
75%
60%
BEATS PER MINUTE
20 25 30 35 40 45 50 55 60 65
AGE
TARGET ZONE
120 117 114 111 108 105 102 99 97 93
150 146 143139 135 131 128 124 120 116
S400.indd 18-19 6/29/07 4:10:19 PM