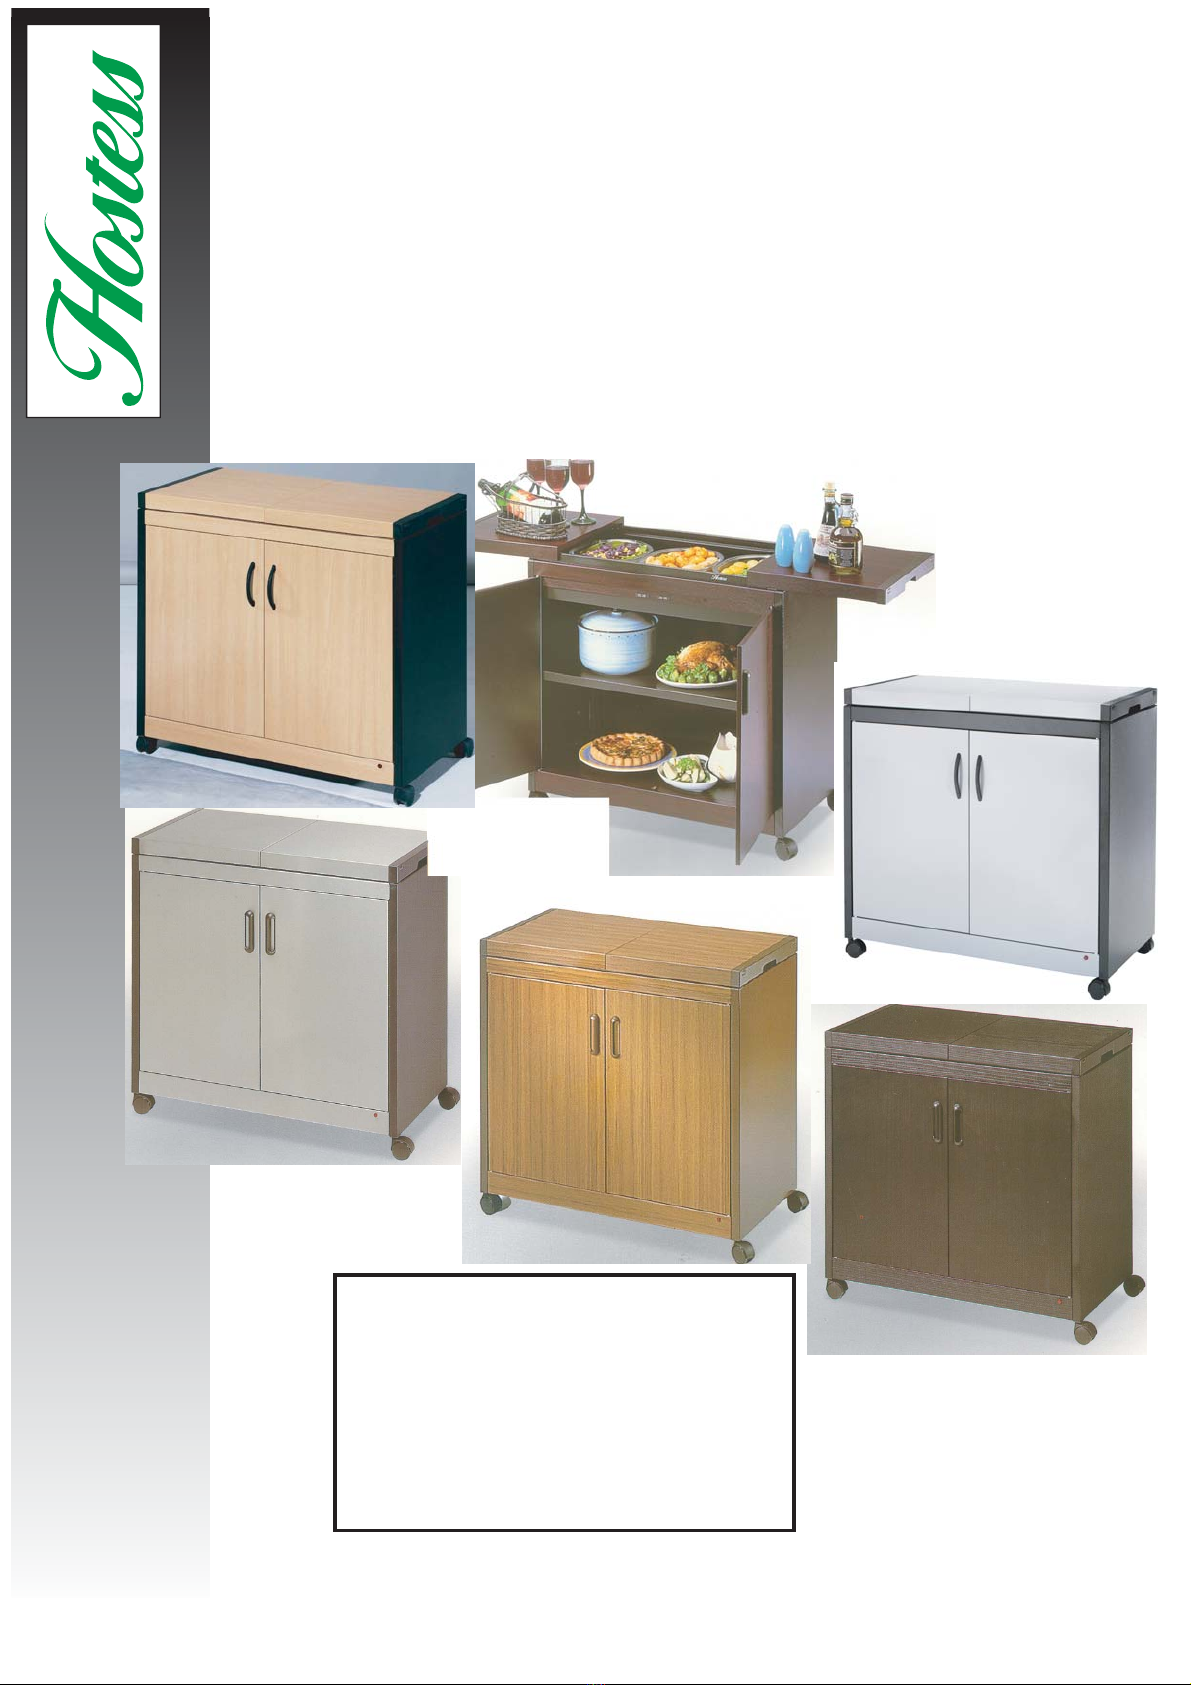
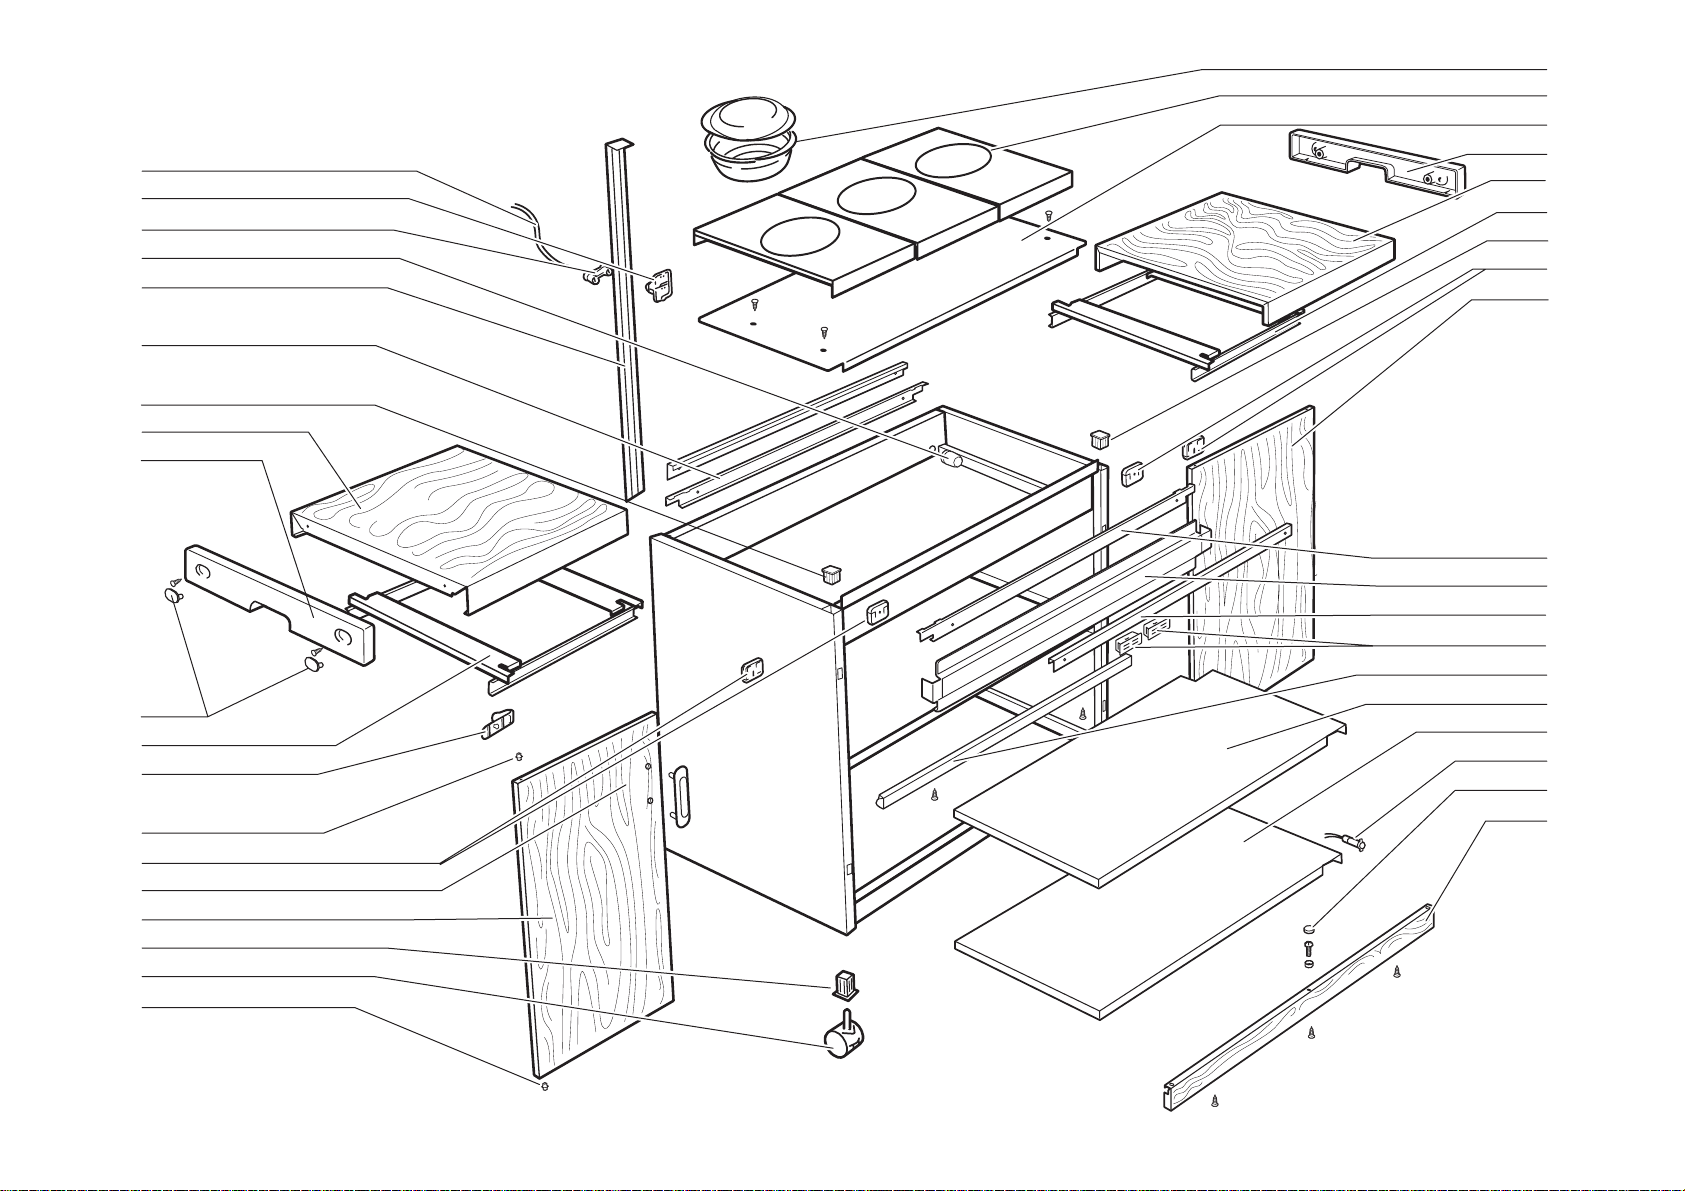
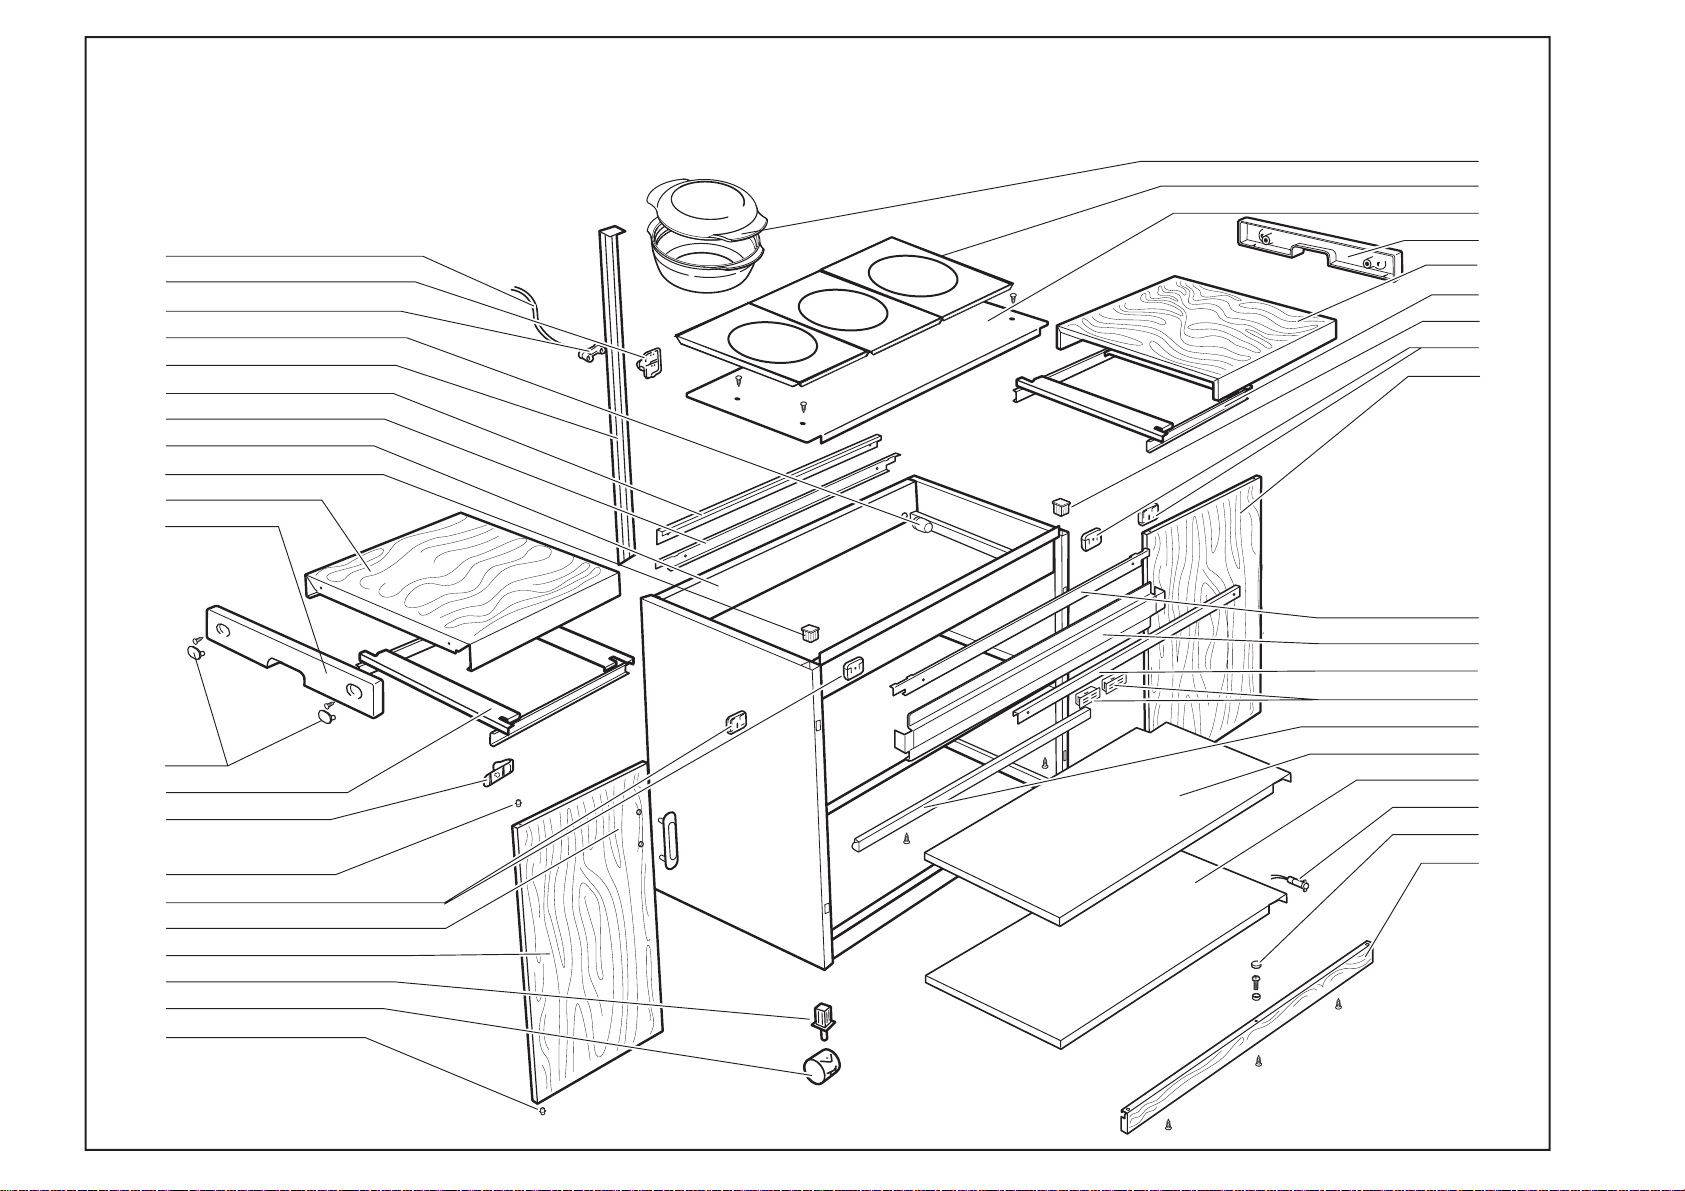
HL6232 Wood Effect Hostess Trolley - Parts List
116 Castor (4 Pack) 0101 078 53291
117 Castor Insert 0101 077 61302
118 Neon Assembly 0101 078 57811
120 Terminal Block 0101 078 53262
121 Strain Release Bush 0101 077 61511
122 Cordset (U.K.) 0101 076 90741
123 Door Assembly Left See Item 520
124 Door Handle Pair (HL6232BA, HL6232BS, HL6232BE & HL6232SV) 0101 092 42501
124 Door Handle Pair (HL6232DB, HL6232LB & HL6232GO) 0101 092 42511
125 Door Assembly Right See Item 520
126 Door Hinge Pin 0101 075 71811
127 Bottom Element Assembly (HL6232BA, HL6232BS, HL6232BE, HL6232SV) 0101 089 25661
127 Bottom Element Assembly (HL6232DB, HL6232GO & HL6232LB) 0101 089 22491
129 Screw Cover Cap (HL6232BA, HL6232BS, HL6232BE, HL6232SV) 0101 077 64361
129 Screw Cover Cap (HL6232DB, HL6232GO & HL6232LB) 0101 077 61461
130 TT Screw Cover Cap (HL6232BA, HL6232BS, HL6232BE, HL6232SV) 0101 077 64382
130 TT Screw Cover Cap (HL6232DB, HL6232GO & HL6232LB) 0101 077 61382
131 Bottom Rail (HL6232BA) 0101 070 13331
131 Bottom Rail (HL6232BS) 0101 070 13281
131 Bottom Rail (HL6232BE) 0101 070 14861
131 Bottom Rail (HL6232DB) 0101 070 12541
131 Bottom Rail (HL6232LB & HL6232GO) 0101 070 12331
131 Bottom Rail (HL6232SV) 0101 084 15291
501 Top Cover Glide Support Assembly (HL6232BA, HL6232BS, HL6232BE, HL6232SV) 0101 089 25651
501 Top Cover Glide Support Assembly (HL6232DB, HL6232GO & HL6232LB) 0101 089 22361
502 Outer Glide (HL6232BA, HL6232BS, HL6232SV, HL6232BE) 0101 085 12081
502 Outer Glide (HL6232DB, HL6232LB, HL6232GO) 0101 082 12081
503 Printed Glide Cover (HL6232BA, HL6232BS, HL6232SV, HL6232BE) 0101 077 64321
503 Printed Glide Cover (HL6232DB, HL6232LB, HL6232GO) 0101 077 61491
510 Wiring Cover (HL6232BA, HL6232BS,HL6232SV, HL6232B) 0101 085 12051
510 Wiring Cover (HL6232DB, HL6232LB, HL6232GO) 0101 082 12051
513 Cable Clip 0101 177 04501
516 Element Panel Trim (HL6232BA, HL6232BS, HL6232BE,HL6232SV) 0101 085 12351
516 Element Panel Trim (HL6232DB, HL6232LB, HL6232GO) 0101 082 12351
520 Pair of Doors (HL6232BA) - not available separately 0101 092 36861
520 Pair of Doors (HL6232BS) - not available separately 0101 092 36821
520 Pair of Doors (HL6232DB) - not available separately 0101 092 36811
520 Pair of Doors (HL6232LB) - not available separately 0101 092 36801
520 Pair of Doors (HL6232BE) - not available separately 0101 092 42531
520 Pair of Doors (HL6232SV) - not available separately 4213 092 61531
Bold text indicates a choice of parts depending on the model version