manuals.online logo
Brands
  1. Home
  2. •
  3. Brands
  4. •
  5. Hotpoint
  6. •
  7. Oven
  8. •
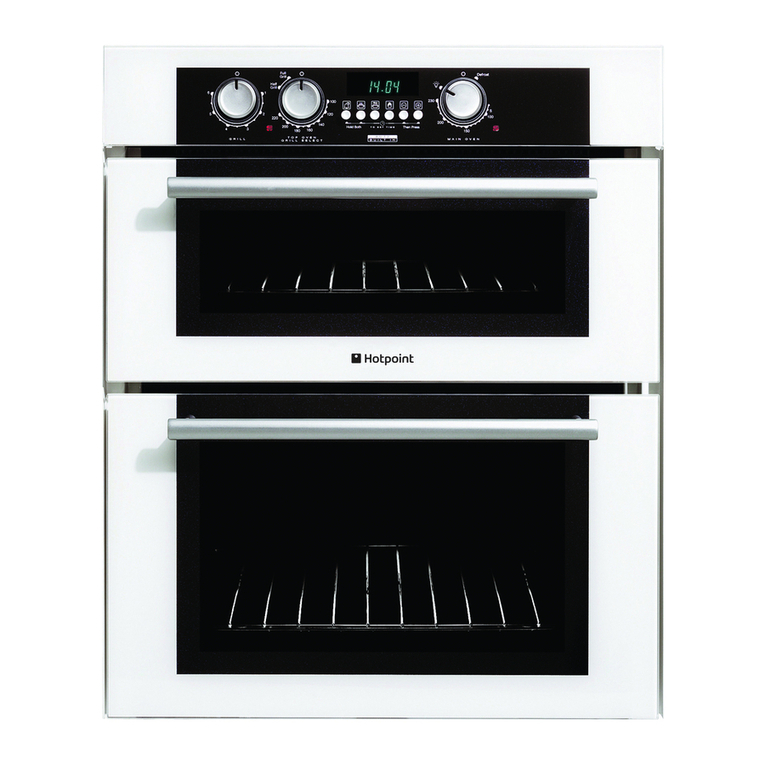
  9. Hotpoint BD62 Mk2 User manual

Hotpoint BD62 Mk2 User manual

This manual suits for next models

3

Other Hotpoint Oven manuals

Hotpoint SCL 08 EB User manual

Hotpoint

Hotpoint SCL 08 EB User manual

Hotpoint 6160 Instruction Manual

Hotpoint

Hotpoint 6160 Instruction Manual

Hotpoint AHP37X User manual

Hotpoint

Hotpoint AHP37X User manual

Hotpoint EG 902 GX S User manual

Hotpoint

Hotpoint EG 902 GX S User manual

Hotpoint OS 897D P/HP S User manual

Hotpoint

Hotpoint OS 897D P/HP S User manual

Hotpoint C3VM57RU/HA User manual

Hotpoint

Hotpoint C3VM57RU/HA User manual

Hotpoint DHS53X S User manual

Hotpoint

Hotpoint DHS53X S User manual

Hotpoint SX 1049L CX S User manual

Hotpoint

Hotpoint SX 1049L CX S User manual

Hotpoint SX 1038N CX S User manual

Hotpoint

Hotpoint SX 1038N CX S User manual

Hotpoint KSD 99 CX S User manual

Hotpoint

Hotpoint KSD 99 CX S User manual

Hotpoint BQ 63 (K) User manual

Hotpoint

Hotpoint BQ 63 (K) User manual

Hotpoint W502G User manual

Hotpoint

Hotpoint W502G User manual

Hotpoint BS53X User manual

Hotpoint

Hotpoint BS53X User manual

Hotpoint ST87EX User manual

Hotpoint

Hotpoint ST87EX User manual

Hotpoint SE48101PGX User manual

Hotpoint

Hotpoint SE48101PGX User manual

Hotpoint DX 1032 CX S User manual

Hotpoint

Hotpoint DX 1032 CX S User manual

Hotpoint BD32 Mk2 User manual

Hotpoint

Hotpoint BD32 Mk2 User manual

Hotpoint DQ47 User manual

Hotpoint

Hotpoint DQ47 User manual

Hotpoint SE861X/1 User manual

Hotpoint

Hotpoint SE861X/1 User manual

Hotpoint BS43 User manual

Hotpoint

Hotpoint BS43 User manual

Hotpoint SA4844CIX Installation and operation manual

Hotpoint

Hotpoint SA4844CIX Installation and operation manual

Hotpoint FK 89 E P.20 X/HA S User manual

Hotpoint

Hotpoint FK 89 E P.20 X/HA S User manual

Hotpoint SE1002X User manual

Hotpoint

Hotpoint SE1002X User manual

Hotpoint BS63E User manual

Hotpoint

Hotpoint BS63E User manual

Popular Oven manuals by other brands

Brandt FC 222 user manual

Brandt

Brandt FC 222 user manual

aumate TOA20M04N-1E instruction manual

aumate

aumate TOA20M04N-1E instruction manual

Maytag CWE4100AC - 24" Single Electric Wall Oven Dimension Guide

Maytag

Maytag CWE4100AC - 24" Single Electric Wall Oven Dimension Guide

Kernau KBO 1076 S PT B instruction manual

Kernau

Kernau KBO 1076 S PT B instruction manual

Bosch HB 37 N Series User manual and installation instructions

Bosch

Bosch HB 37 N Series User manual and installation instructions

Electrolux EOD5420AA user manual

Electrolux

Electrolux EOD5420AA user manual

Mx Onda MX-HC2183 instruction manual

Mx Onda

Mx Onda MX-HC2183 instruction manual

Daewoo F6EV19SM2 Service manual

Daewoo

Daewoo F6EV19SM2 Service manual

Blodgett MT3870 Specifications

Blodgett

Blodgett MT3870 Specifications

GE ZET2F owner's manual

GE

GE ZET2F owner's manual

GE JK3000DF3WW owner's manual

GE

GE JK3000DF3WW owner's manual

eka EKF 523 NT Operating and instruction manual

eka

eka EKF 523 NT Operating and instruction manual

AEG Electrolux E3191-5 user manual

AEG Electrolux

AEG Electrolux E3191-5 user manual

Pratica Rocket Express quick start guide

Pratica

Pratica Rocket Express quick start guide

Viking Professional VGSO260T user guide

Viking

Viking Professional VGSO260T user guide

FM RX203 instruction manual

FM

FM RX203 instruction manual

Bosch HBN331 9B Series instruction manual

Bosch

Bosch HBN331 9B Series instruction manual

NEFF B95M42N0MK Instructions for use

NEFF

NEFF B95M42N0MK Instructions for use

manuals.online logo
manuals.online logoBrands
  • About & Mission
  • Contact us
  • Privacy Policy
  • Terms and Conditions

Copyright 2025 Manuals.Online. All Rights Reserved.

Instructions for Installation and Use
Build-in Electric double oven
BD62 Mk2
BD52 Mk2
DQ47 Mk2
DE47X
To the Installer:
Before installation, fill in the product details on the back cover of this book.
The information can be found on the rating plate.
To the User:
You must read the instructions prior to installing and using the appliance and
then retain them for future reference.
2
PL AS R AD THIS BOOKL T CAR FULLY.
Contents Page
Introduction 3
Safety Information - Always 4
Never 5
The main parts of your Double Oven (BD62 & BD52) 6
The main parts of your Double Oven (DQ47 & DE47X ) 7
Temperature Conversion Chart 8
Controls (BD62 & BD52) 9
Controls (DQ47 & DE47X ) 0
Multifunction Selection Switch (BD62 & BD52)
Oven Timer Operation 2- 7
Grill Pan and Handle 8
Operation when using Top Oven for Grilling 9-20
Guide for Grilling 20
Using the Top Oven as a Convection Oven 2
Operation when using the Top Oven as a Convection Oven 22
Cooking Temperature Charts 23-24
Main Oven Fan Grilling (BD62 & BD52) 25
Main Oven Fan Grilling Roasting Chart (BD62 & BD52) 26
Using the Main Oven for other Functions 27
Main Oven - Convection (BD62 & BD52) and Fan Oven 28
Main Oven - Fan Oven Cookery Notes 29-30
Main Oven - Cooking Temperature Charts 3 -32
Main Oven - Circulaire Roasting (BD62 & BD52) 33
Main Oven - Circulaire Roasting Chart (BD62 & BD52) 34
Slow Cook 35
Main Oven Grilling (BD62 & BD52) 36
Care and Cleaning 37-40
Installation Instructions 4 -44
If Something Goes Wrong 45-46
Hotpoint Guarantee 47
Hotpoint After Sales Service Back Cover
Retention of this Instruction Book
This Instruction Book must be kept handy for reference as it contains important
details on the safe and proper use of the appliance.
If you sell or pass the appliance to someone else, or move house and leave it behind,
make sure this Book is also provided so the new owner can become familiar with the
appliance and safety warnings.
3
Introduction
This appliance conforms to the following EEC Directives:
Electromagnetic Compatibility Low Voltage Equipment
89/336/EEC 73/23/EEC
92/3 /EEC 93/68/EEC
93/68/EEC
Your new appliance is guaranteed* and will give lasting service. This guarantee is only
applicable if the appliance has been installed in accordance with the installation
instructions detailed in this booklet.
To help make best use of your cooking equipment, please read this booklet carefully.
The appliance is designed specifically for domestic use and responsibility will not be
accepted for use in any other installation.
To help remove the ‘new’ smell, heat up the empty ovens to maximum temperature for a
minimum of two or three hours, keeping the oven doors closed. Ensure that the room is
well ventilated (e.g. open a window or use an extractor fan) and that persons who may be
sensitive to the odour avoid any fumes.
It is suggested that any pets be removed from the room until the smell has ceased.
This odour is due to temporary finish on oven liners and elements and also any moisture
absorbed by the insulation.
When the cooker is first used an odour may be emitted,
this will cease after a period of use
* The guarantee is subject to the provisions that the appliance:
(a) Has been used solely in accordance with the Users Instruction Book.
(b) Has been properly connected to a suitable supply voltage as stated on the
rating plate attached to this equipment.
(c) Has not been subjected to misuse or accident or been modified or repaired by
any person other than the authorised employee or agent.
(d) Has been correctly installed.
4
Always
●Always make sure you remove all packaging and literature from inside the
oven and grill compartments before switching on for the first time.
●Always make sure you understand the controls prior to using the appliance.
●Always keep children away from the appliance when in use as the surfaces
will get extremely hot during and after cooking.
●Always make sure all controls are turned off when you have finished cooking
and when not in use.
●Always stand back when opening an oven door to allow any build up of steam
or heat to disperse.
●Always use dry, good quality oven gloves when removing items from the
oven/grill.
●Always take care to avoid heat/steam burns when operating the controls.
●Always turn off the electricity supply at the wall switch before cleaning and
allow the appliance to cool.
●Always make sure the shelves are in the correct position before switching
on the oven.
●Always keep the oven and grill doors closed when the appliance is not in use.
●Always take care when removing utensils from the top oven when the main
oven is in use as the contents may be hot.
●Always keep the appliance clean as a build up of grease or fat from cooking
can cause a fire.
●Always follow the basic principles of food handling and hygiene to prevent
the possibility of bacterial growth.
●Always keep ventilation slots clear of obstructions.
●Always refer servicing to a qualified appliance service engineer.
●During use the oven becomes hot. Care should be taken to avoid touching
heating elements inside the oven,
SAF TY ADVIC
IN TH V NT OF A CHIP PAN OR ANY OTH R PAN FIR :
. TURN OFF THE COOKER APPLIANCE AT THE WALL SWITCH.
2. COVER THE PAN WITH A FIRE BLANKET OR DAMP CLOTH, this will smother
the flames and extinguish the fire.
3. LEAVE THE PAN TO COOL FOR AT LEAST 60 MINUTES BEFORE MOVING IT.
Injuries are often caused by picking up a hot pan and rushing outside with it.
NEVER USE A FIRE EXTINGUISHER TO PUT OUT A PAN FIRE as the force of
the extinguisher is likely to tip the pan over. Never use water to extinguish
oil or fat fires.
Safety Information
When used properly your appliance is completely safe but as with any electrical
product there are certain precautions that must be observed.
PL AS R AD TH PR CAUTIONS B LOW B FOR USING YOUR APPLIANC .
5
Never
●Never leave children unsupervised where a cooking appliance is installed as
all cooking surfaces will be hot during and after use.
●Never allow anyone to sit or stand on any part of the appliance.
●Never store items above the appliance that children may attempt to reach.
●Never remove the oven shelves whilst the oven is hot.
●Never heat up unopened food containers as pressure can build up causing
the container to burst.
●Never store chemicals, food stuffs or pressurised containers in or on the
appliance, or in cabinets immediately above or next to the appliance.
●Never operate the grill with the door closed as this will cause the appliance
to overheat.
●Never use the appliance as a room heater.
●Never use the grill to warm plates.
●Never dry any items on the oven doors.
●Never install the appliance next to curtains or other soft furnishings.
●Never allow children to play with the appliance controls.
●Never use ‘steam cleaners’.
This appliance is not intended for use by persons (including children) with reduced
physical, sensory or mental cpabilities, or lack of experience and knowledge, unless they
have been given supervision or instruction concerning use of the appliance by a person
responsible for their safety.
Children should be supervised to ensure that they do not play with the appliance.
Safety Information
6
The main parts of your Double Oven (BD62 & BD52)
WARNING: DO NOT TOUCH TH GLASS DOORS WH N TH OV N IS IN US AS TH S
AR AS CAN B COM HOT.
High Speed
Grill Element
Stay Clean
Liner
Fan Grill
Element
Multifunction
Selector
Main Oven
Temperature
Control
Timer
Top Oven
Temperature Control
Top
Oven
Pilot
Main Oven
Pilot
Grill Control
Rod
Shelf
Oven
Light
Oven
Fan
Stay Clean
Liner
Meat pan and
Roasting rack
Model & Serial
number
Inner Door
Glass
Oven Light
Grill Pan, Food support
and Anti-Splash Tray
Top Oven
Door
Oven
Shelves
Main Oven
Door
Inner
Door
Glass
N V R line the shelves, floor or sides of the oven or grill with aluminium foil as
overheating and damage may result.
7
The main parts of your Double Oven (DQ47 & D 47X1)
WARNING: DO NOT TOUCH TH GLASS DOORS WH N TH OV N IS IN US AS TH S
AR AS CAN B COM HOT.
High Speed
Grill Element
Stay Clean
Liner
Main Oven
Temperature
Control
Timer
Top Oven
Temperature
Control
Top
Oven
Pilot
Main Oven
Pilot
Grill Control
Rod
Shelf
Oven
Light
Oven
Fan
Stay Clean
Liner
Meat pan
Inner Door
Glass
Oven Light
Grill Pan, Food support
and Anti-Splash Tray
Top Oven
Door
Oven
Shelves
Main Oven
Door
Inner
Door
Glass
N V R line the shelves, floor or sides of the oven or grill with aluminium foil as
overheating and damage may result.
MODEL & SERIAL NUMBER LABEL –
Record the Model No. and the Serial No.
on KEY CONTACTS, back page.
8
Temperature Conversion Chart
The chart below gives details of comparisons of oven settings for gas conventional ovens
and fan oven in degrees ˚F and ˚C
CONV NTIONAL
OV N
˚F ˚C
250 20
275 40
300 50
325 60
350 80
375 90
400 200
425 220
450 230
475 240
GAS
MARK
/2
2
3
4
5
6
7
8
9
FAN
OV N
˚C
00
20
30
40
60
70
80
200
2 0
220
9
The Controls (BD62 & BD52)
Grill
Control Top Oven
Temperature
Control
Main Oven
Temperature
Control
Timer
❍❍ ❍
❍
Multifunction
Selector
Main Oven Pilot
IMPORTANT
Before using your oven in the ordinary way, ALWAYS make sure that the timer has been
set to MANUAL operation. Unless this is done, the main oven cannot heat up. Before
seeking assistance, make sure this is done (refer to oven timer operation).
MULTIFUNCTION S L CTOR
Rotate the control knob in either direction to the required function. Many of the
functions will also require the main oven thermostat to be set before the oven will
heat up.
MAIN OV N T MP RATUR CONTROL
This is used in addition to the multifunction selector. This is used for the
functions: fan oven, fan grill, half grill and full grill and conventional oven.
Turn the control clockwise to set the oven thermostat to the required
temperature.
If the timer is set correctly and the selector switch set to a suitable function an
indicator light will illuminate. This will remain on until the oven reaches the
required temperature. This light will then cycle on and off as the thermostat
maintains control of the oven temperature.
TOP OV N T MP RATUR CONTROL
Turn the control clockwise to set the top oven thermostat to the required
temperature. An indicator light will illuminate. This will remain on until the oven
reaches the required temperature. This light will then cycle on and off as the
thermostat maintains control of the oven thermostat.
GRILL CONTROL
The grill control is designed to provide variable heat control of either both grill
elements on together or the single left-hand grill element only.
To set the grill power turn the grill control to any setting MIN ( ) - MAX (4),
clockwise for FULL grill and anti-clockwise for HALF grill.
COOLING FAN
A gentle flow of air will be blown below the control panel when the grill control is used
and after a short period of time when the ovens are used.
Note: Whenever the appliance has been used, the cooling fan may run on or
restart itself after all the controls have been turned off. This indicates that the
appliance is still warm.
Top Oven Pilot
AB CD
0
The Controls (DQ47 & D 47X1)
Grill
Control Top Oven
Temperature
Control
Main Oven
Temperature
Control
Timer
❍❍ ❍
Main Oven Pilot
IMPORTANT
Before using your oven in the ordinary way, ALWAYS make sure that the timer has been
set to MANUAL operation. Unless this is done, the main oven cannot heat up. Before
seeking assistance, make sure this is done (refer to oven timer operation).
MAIN OV N T MP RATUR CONTROL
Turn the control clockwise to set the oven thermostat to the required
temperature.
If the timer is set correctly an indicator light will illuminate. This will remain on
until the oven reaches the required temperature. This light will then cycle on and
off as the thermostat maintains control of the oven temperature.
TOP OV N T MP RATUR CONTROL
Turn the control clockwise to set the top oven thermostat to the required
temperature. An indicator light will illuminate. This will remain on until the oven
reaches the required temperature. This light will then cycle on and off as the
thermostat maintains control of the oven thermostat.
GRILL CONTROL
The grill control is designed to provide variable heat control of either both grill
elements on together or the single left-hand grill element only.
To set the grill power turn the grill control to any setting MIN - MAX,
clockwise for FULL grill and anti-clockwise for HALF grill.
COOLING FAN
A gentle flow of air will be blown below the control panel when the grill control is used
and after a short period of time when the ovens are used.
Note: Whenever the appliance has been used, the cooling fan may run on or
restart itself after all the controls have been turned off. This indicates that the
appliance is still warm.
Top Oven Pilot
AB C