manuals.online logo
Brands
  1. Home
  2. •
  3. Brands
  4. •
  5. Hotpoint
  6. •
  7. Range
  8. •
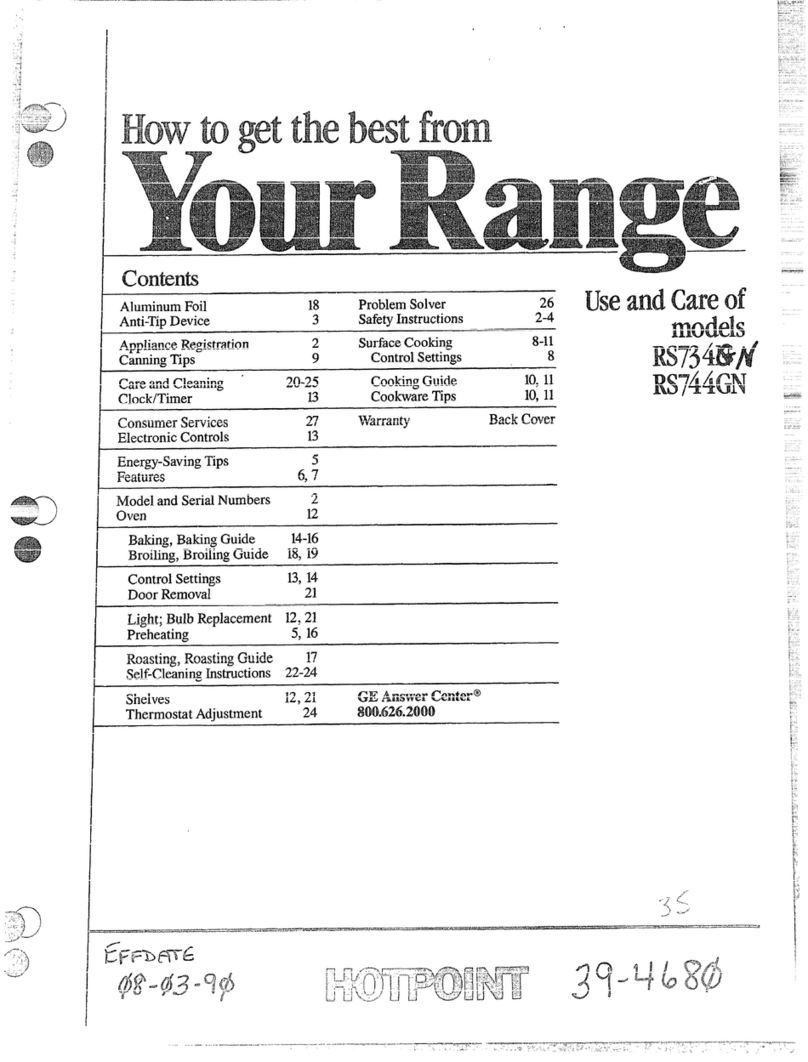
  9. Hotpoint RB747GJ Installation instructions

Hotpoint RB747GJ Installation instructions

Other manuals for RB747GJ

1

This manual suits for next models

5

Other Hotpoint Range manuals

Hotpoint RB790 - 30 in. Electric Range User manual

Hotpoint

Hotpoint RB790 - 30 in. Electric Range User manual

Hotpoint RB557 User manual

Hotpoint

Hotpoint RB557 User manual

Hotpoint RB525BCCT User instructions

Hotpoint

Hotpoint RB525BCCT User instructions

Hotpoint RB525HCT User manual

Hotpoint

Hotpoint RB525HCT User manual

Hotpoint RF725GP Installation instructions

Hotpoint

Hotpoint RF725GP Installation instructions

Hotpoint RGB790DETBB User guide

Hotpoint

Hotpoint RGB790DETBB User guide

Hotpoint RGB745DEP Manual

Hotpoint

Hotpoint RGB745DEP Manual

Hotpoint RB768GN Installation instructions

Hotpoint

Hotpoint RB768GN Installation instructions

Hotpoint RGB524PPAWH User instructions

Hotpoint

Hotpoint RGB524PPAWH User instructions

Hotpoint RGB524EH Installation instructions

Hotpoint

Hotpoint RGB524EH Installation instructions

Hotpoint RGB540SEHSA User manual

Hotpoint

Hotpoint RGB540SEHSA User manual

Hotpoint RB536DPWW - 30" Electric Range User manual

Hotpoint

Hotpoint RB536DPWW - 30" Electric Range User manual

Hotpoint RGB533WEAWW Service manual

Hotpoint

Hotpoint RGB533WEAWW Service manual

Hotpoint RGB744GEN Installation guide

Hotpoint

Hotpoint RGB744GEN Installation guide

Hotpoint RGB790SERSA User guide

Hotpoint

Hotpoint RGB790SERSA User guide

Hotpoint RGB528PENWW User manual

Hotpoint

Hotpoint RGB528PENWW User manual

Hotpoint RB757BH User instructions

Hotpoint

Hotpoint RB757BH User instructions

Hotpoint RGA512EJ Installation instructions

Hotpoint

Hotpoint RGA512EJ Installation instructions

Hotpoint RGB524EN Installation guide

Hotpoint

Hotpoint RGB524EN Installation guide

Hotpoint RA824DDWW Programming manual

Hotpoint

Hotpoint RA824DDWW Programming manual

Hotpoint RA724KWH User instructions

Hotpoint

Hotpoint RA724KWH User instructions

Hotpoint RGB790WEKWW User manual

Hotpoint

Hotpoint RGB790WEKWW User manual

Hotpoint RGB526DETBB User instructions

Hotpoint

Hotpoint RGB526DETBB User instructions

Hotpoint RGB744WEAWW Service manual

Hotpoint

Hotpoint RGB744WEAWW Service manual

Popular Range manuals by other brands

Maytag MGR5875QDW - 30 Inch Gas Range Use and care guide

Maytag

Maytag MGR5875QDW - 30 Inch Gas Range Use and care guide

Frigidaire FFGF3024SS use & care

Frigidaire

Frigidaire FFGF3024SS use & care

Capital Precision Series GCR484W Specifications

Capital

Capital Precision Series GCR484W Specifications

Officine Gullo GGS8P Installation and use instruction

Officine Gullo

Officine Gullo GGS8P Installation and use instruction

LG LSD4913 Series owner's manual

LG

LG LSD4913 Series owner's manual

Kenmore 4101 - Elite 30 in. Slide-In Electric Range installation instructions

Kenmore

Kenmore 4101 - Elite 30 in. Slide-In Electric Range installation instructions

Moffat Blue Seal Evolution G576 Technical data sheet

Moffat

Moffat Blue Seal Evolution G576 Technical data sheet

CornuFé C1NF user guide

CornuFé

CornuFé C1NF user guide

GE JGS650SEFSS Dimensions and installation information

GE

GE JGS650SEFSS Dimensions and installation information

LG LDG3015ST Manual De Propietario

LG

LG LDG3015ST Manual De Propietario

Whirlpool RF350PXP Use and care guide

Whirlpool

Whirlpool RF350PXP Use and care guide

Samsung FCQ321HTUW Service manual

Samsung

Samsung FCQ321HTUW Service manual

Kenmore 790.45712 Use & care guide

Kenmore

Kenmore 790.45712 Use & care guide

Wolf CHR CHSSR owner's manual

Wolf

Wolf CHR CHSSR owner's manual

Smeg Built-in Microwave Oven Instructions for the user

Smeg

Smeg Built-in Microwave Oven Instructions for the user

Zanussi ZCG054G user manual

Zanussi

Zanussi ZCG054G user manual

GE JCSS630 quick start guide

GE

GE JCSS630 quick start guide

Samsung NX58M9960P series installation manual

Samsung

Samsung NX58M9960P series installation manual

manuals.online logo
manuals.online logoBrands
  • About & Mission
  • Contact us
  • Privacy Policy
  • Terms and Conditions

Copyright 2025 Manuals.Online. All Rights Reserved.

.-—.......& .=_ .—-!.
-5
-,.,
-? ~f~@wto
3-A=. getthebestfmm
-—2.. \,
-,. .
Iuseandcare
model
RB747GJ
Energy-savingtips jp5
Features ‘pki
surfaceCooting
ovenCooting
How
tooperatethe
self-cleaningoven -lp20
—- -— .. .
_-—-.y
%-.
:’
i
-,-.
/
/
.s
,. . .
>.
.-
——----- ---.--.-———.-.-—-------.——... . ...>...
&fore l-JsingYmwRange. ......2
~afii~y~nstructioml . . . . . . . ...3.4
Energy -SavingTips...........5
I?eatum&YoUrR2UIge ......6.7
SurfaceCooking . ., . . . . . . . ...8
HonmCaxmingTips. .. . . . . . ...9
SurfaceCookingGuide .....10.11
AutomaticTirner~d CIock ....l2
UsingYourOven . . . . . . . . . ...13
Baking ....................~~
BalcingGuide . . . . . . . . . . . . . ..l5
~oasting . . . . . . . . . . . . . . . . . ..~6
RoastingGuide . . . . . . . . . . . . . .17
Broiling. . . . . . . . . . . . . . . . . . . .1$
BroilingGuide. . . . . . . . . . . . . . 19
Howto Operatethe
Self-CleaningOven ......20.21
CareandCleaning ........22-24
CIeaningGuide . . . . . . . . . . ...25
TheProblemSolver . . . . . . . ...26
IfYouNeeciService . . . . . . . ...27
warranty . . . . . . . . . ..BackCo~er
Read‘thisbookcarefully.
11isintendedIOhelpyouoperate
and maintainyournewrange
properly.
Keepit handy foranswerstoyour
questions.
If youdon’tunderstandsomething
or need more help, write (include
yourphone number):
Consumer Affairs
Hotpoint
AppliancePark
LouisviHe,KY40225
writedown ‘themodel.
andserial ENmberse
You’llfind them on alabelon
thefront ofthe range behindthe
ovendoor.
These numbers are also on the
Consumer Product Ownership
RegistrationCard that came with
your range. Beforesending inthis
card, please write these numbers
here:
Model Number
Serial Number
Use these numbers in any
correspondence or service calls
concerning your range.
Ifyou I“eceived
adamag~drange.a *
Immediatelycontactthedealer (or
builder)that soldyouthe range.
save time and money,
Beforeyou-l-E’eqlnest
service”e*
Checkthe Problem Solveron
page26.It listsminorcausesof
operatingproblemsthatyoucan
correct yourself.
,,
‘
., =,
Wnenusingelectricalappliances,
basicsafetyprecautionsshould
befollowed,includingthe
following:
@use this app~ianceonlyfor its
iIItendeduse as describedinthis
manual.
@R? !Nlmeyour appliance is
pmpdy *hued and gromdd
byaqualifiedtechnicianin
accordancewiththeprovided
installationinstructions.
eDon’tattempt to repair
or rephwe any part of your
range mlless it is specifically
recommended in this book. All
otherservicingshouldbereferred
to aqualified~echnician.
@Beforeperforming any
service,DIscomm THE
RANGE PomR ISUPPLY
AT THE HOZJSEHOLD
~~~mm~~ ~NJ~
BYREMOVINGTHE FUSE
OR SWITCHINGOFF THE
CIRCUITBREAKER.
*Do not kave cM&en ahme-
chikh-enshouldnotbe leftalone
or unattendedinan areawherean
applianceis in use.Theyshould
neverbeallowedto sitor stand
onanypart ofthe appliance.
@mm%Mow anyone$0climb
stand or hang On the A4w,
‘dmWeror rangetq. They4mdd
damage ‘therangeand eventip
itover,4muMingseverepersonal
injury.
~CAUTION: ITEM!$ Ol?
INTEMST mcHILDmN
SHOULD NOT BESTORED
Ii’N’ICABB’WIESABOVEA
RAPWE OR ON Tm
BACKSPLASHOF A
wG&cmDmN
cLmmG ori Tm
RAJWE TO REACH ITEMS
COULDWSERIOUSLY
mmD.
~Neverwearloose-fittingor
hanginggmmmts whileusing
theappliance.Flammablematerial
couldbe ignitedif broughtin
contactwithhotheatingelements
and maycause severeburns.
@I.Jse‘onlydry p4MhoMers-
moistor damp potholderson
hot surfacesmay resultin burns
fromsteam.Do notletpotholders
touchhotheatingelements Do
notuse atowelor other bulky
cloth.
@Never use your appliance for
Warnling or heating the KMlm.
@storage in or on applian42e—
*Keep h4xMl and grease filters
ckw to maintiillgoodveflting
andto avoidgreasefires.
@Do not MCooltiIlggn%we
or41tk nanlmablematerials
accumulatein (Wnearthe
range.
@Do notHJ!sewatermlgrease
fires.Neverpickup aflaming
pm. smother flamingpm on
SWfawWit bycovering‘pan
completelywithwell-fittingM9
4XWM!sheetmmattray.
Fkming greaseoutsideapm
Gmlbe put out bycovering‘with
bakingsoda or,if available,a
multi-purpse drydR43mkaI
mfoam.
@Do not touchheating
ek!mmt$or interiorSdhce of
oven.These surfacesmaybe hot
enoughto burn eventhoughthey
are dark in color. During and
after use, do nottouch, or let
clothingor other flammable
materialscontactsurfaceunits,
areas nearby surfaceunits or any
interior area ofthe oven;allow
sufficienttime for cooling, first.
Potentiallyhot surfacesinclude
the cooktopand areas facingthe
cooktop,ovenventopeningand
surfaces near the opening, and
crevicesaround the ovendoor.
Remember: The insidesurface
ofthe ovenmaybe hot when the
door is opened.
=when Coik.inglp$M4L9foHow
Flammablematerialsshouldnotbe
stored in an ovenor near surface
units.
our directions e~a;tly and always
cook the meat t-oat least 170”F.
This assures that, in the remote
possibility that trichina maybe
present in the meat, it will be
!ded and the meat wil1be safe
to eat.
I(cofiiimied next page) ‘)
-I
.
.,
... ,!
. . (amtinued)
,-
.!
.,
..
,surfacecookingunits
eusepropw panSi2x2-’his
applianceisequippedwithone
or moresurfaceunitsofdifferent
size.Selectutensilshavingflat
bottomslargeenoughto cover
thesurfaceunitheatingelement.
Theuseof undersizedutensils
willexposeaportionofthe
heatingelementto directcontact
andmayresultin ignitionof
clothing.Proper relationshipof
utensiltoburnerwillalso
improveefficiency.
~.Newwileavesurfaceunits
mawnded athighhat settings.
Boilovercausessmokingand
greasyspilloversthatmaycatch
on fire.
@Be sure drip pansandvent
duds arenotcoveredandare
in place.Their absenceduring
cookingcoulddamagerange
partsand wiring.
@DQn’tm$ealuminum foilto
line drip pans or anywherein
theovenexceptasdescribed in
thisbook. Misusecould resultin
ashock, fire hazardor damage
to the range.
@Only certain types of gkw+
gkuw/ceran3ie,earthenwareor
othergbmii conbhwrs am
.sUitddefor Irmge-tqlservice;
others may break becauseof the
suddenchangein temperature.
(Seesection on “Surface
Cooking” for suggestions.)
QTo nlininlize burns9 ignition
of hmmable materials, and
spillage,the handleof:4
container should be turned
towardthe center ofthe range
withoutextendingovernearby
surkm units.
~~{>]~’~~~~~g~~f~~~eor NXNk.
:, 7-?
‘~qF~~&&1:>,~]1
...>.~.>YTqj];.n~~~?’’.:~~~<-*~
z~&?!h&L\cbK.,+..-”l-c ‘-t
.,77+&:. .:.x
““”-n‘t~~~n.$j~g~y.
;~Bpj~ly::~~~~;:;gl.f+t
I..*-ib-.~-al.x
r.
@stand awayf’lwmrangewhen
openingOw’n door. Hot airor
steamwhich escapescancause
bums tohands, faceamhr
eyes.
@Keepaneyeonfoods behg
fried atHIGH orMEDIUM
HIGH !hW3t%
@To mm.the pwiummy
ofa!bUmnorelectric SERoeky
alwaysbe certainthat the
-controls
forall surfaceunits
areat OFF positionandall
coilsam coolbeforeattempting
to liftor removeWunit.
@Don’t heat IRnoptmdifood
HmAMx’sinthe oven.Pressure
couldbuildupand thecontainer
CWM bt@9 causinganiinjury.
@Keep ovenventducts
unobstructed. @When flamingfoodsunder
the hood, mm the fanoft’.me
fan, if operating,mayspread
the flame.
~Keep own freefromgrease
buildup.
~Ham OWNIsheif’indesired
positionwhile own is62001.If
shelvesmustbe hand[edwhen
hot, do notlet potholdercontact
heatingunitsin the oven.
~Rinds forfryingshould be as
dR-yas possible. Frost on frozen
foodsor moistureon fresh foods
cancause hot fatto bubbleLLp
and oversidesofpan.
~Pullingoutshelf tothe
shelf stopisaamwniewx in
iifting
hew-yfoods. It isdso a
precautionagainsthms from
touchinghot surfacesof the
door orovenwalk.
oUse Mk fatforeffective
shallowor deep-fatfrying.
Fillingthe pan too full offat can
cause spilloverswhen foodis
added.
ewhen wingUdiirlg or
!rwmng ibagsinOveny follow
the manufacturer’sdirections.
@If acombinationof oilsor
fats willbe usedin frying, stir
togetherbeforeheating, or as fats
melt slowly.
QDo notwe your oventodry
newspapers. If overheated,they
can catch fire. GAlwaysheatfat sbdy9 and
watchas it heats.
@Use deep fat thermometer
whenever possible to prevent
overheatingfatbeyondthe
smokingpoint.
-!
,,
1’
,
.,,.
g;>= -‘-
u
,...+.,,....
“S++Yourrange,]iIte ma?ly other hOUS~-
hold items,isIIeavyand cansettle
=9 intosoftfloor coverings suchas
~- cushioned viny] or carpeting. W’hen
moving the range on this type of’
flooring, use care, and it is recom-
mended that these simple and inex-
pensive instructions be followed.
The range should be installed on a
sheet of plywood (or similar mater-
ial) as follows: When thejloor’
covering is terminated at the front
of ~hera~zge,the area that the range
will rest on should be built up with
plywood to the same level or higher
than the floor covering. This will
then allow the range to be moved
for cleaning or servicing.
Leveling screws are located on each
_corner of the base of the range. By
~rernoving the bottom drawer you
——
--’canlevel the range to an uneven
floor with the use of anutdriver.
*TT-O remove drawer, pull drawer out
‘=~11 the way, tilt up the front and
remove it. To replace, insert glides
at back of drawer beyond stop on
range glides. Lift drawer if neccs-
s:iry to insert easily. Let front Of
drawer down, then push in to close.
Use cooking utensils of medium
weight aluminum, tight-fitting
covers, and flat bottoms which
completely cover the heated por-
tion of the surface unit.
Cook fresh vegetables with a
minimum amount of water in
acovered pan.
Watch foods when bringing them
quickly to cooking temperatures
at HIGH heat. When food
reaches cooking temperature,
reduce heat immediately to
lowest setting that will keep it
cooking.
Use residual heat with surface
cooking whenever possible. For
example, when cooking eggs in
the shell, bring water to boil,
then turn to OFF position to
complete the cooking.
Use correct heat for cooking
task. ..HIGH—to start cooking
(if time allows, do not use HIGH
heat to start), MEDIUM HI—
quick brownings, MEDIUM—
slow frying, Low—finish cooking
most quantities, simmer—double
boiler heat, finish cooking, and
special for small quantities.
When boiling water for tea or
coffee, heat only the amount
needed. It is not economical to
boil acontainer full of water for
only one or two cups.
Preheat the oven only wilen
necessary. Most foods will cook
satisfa~torily without preheating.
If you find preheating is neces-
sary, watch the indicator light,
and put food in the oven
promptly after the light goes out.
Always turn oven OFF before
removing food.
During baking, avoid frequent
door openings. Keep door open
as short atime as possible when
it is opened.
Cook complete oven meals
instead of just one food item.
Potatoes, other vegetables, and
some desserts will cook together
with amain-dish casserole, meat
loaf, chicken or roast. Choose
foods that cook at the same tem-
perature and in approximately
the same time.
Use residual heat in oven when-
ever possible to finish cooking
casseroles, oven meals, etc. Also
add rolls or precooked desserts
to warm oven, using residual
heat to warm them.
—.
-.
-....
----- .—-—.... -.--..-— ... .-——-...,.
‘..--—— . . .
...---7 -- —. .’
. .... —’.&-– —- .———. .——..—
*
>
(?
Expk-aimd
Feature Index OEl page
1ModelaridSerial Numbers 2
2SurfaceUnit Controls 8
3Two’’ON’’Indicator Lights 8
forSurface Units
4OvenSet Control 13
5OvenTempControl 13
6OvenCyclingLight(Glowsuntiloven 13
reachesselectedtemperature,thengoes
offandonduringcookingwiththeoven
unitsasternpera~re is maintained.)
7AutomaticOven Timer, 12
Clock and Minute Timer
8Plug-h Calrod@SurfaceUnit 23
(Maybe removed when cleaning
under unit.)
9Stay-UpCalrod@SurfaceUnit 23
(May be raised butnot removed
when cleaning under unit.)
10 3-in-1Surface Unit (Energy saver 8
unit heatsarea 4: 6“or 8“according
to sizeofcookware.)
11 3-in-1Surface Unit Control 8
12 Chrome-Plated Trim Rings and 22
Porcelain Drip Pans
13 Oven VentDuct (Located under 22
right rear surface unit.)
14 Oven Interior Light (Comes on 22
automatically w~lendoor iSOPened”)
15 Oven Light Switch (Use to turn 15
oven Iighton during cooking when
ovendoor is closed.)
I6Oven Door Latch 20
1‘j’ La[ch Rehxlse(Push in while inoving 20—
]door latch @the right for .self-cle~ning
.%. ~v~r~Operaiiml.)
;l.–-...–-- ..~
.,”
-.,.‘i
.-’
.—
Feature Ihk!x
18 OvenLockedLight (Glowsduring
self-cleaningwhen ovenhas reached
cleaningtemperature. Ovendoor
cannotbeopenedwhenthislightison.)
19 OvenCleaningLight(Glowsduring
self-cleaningwhen allcontrolsareset.
Cyclesoffand on with theoven
heatingunitsafter ovenreaches
cleaningtemperature.
20 BroilUnit
21 BakeUnit (’Maybelifted gently
for wipingovenfloor.)
22 Oven Shelves
23 OvenShelfSupports(LettersA, B,
Cand Dindicatecookingpositions
for shelvesas recommended on
baking, roastingandbroilingguides.)
24 BroilerPan and Rack
25 StorageDrawer
26 CooktopLight Button(Push and hold
until cooktoplight comeson.)
27 COOktopLamp
28 Oven Door Gasket
;xplained
onpage
20
20
20
16
15
15
20
22
13
22
20
*“(2”inmodel !mm-nberindicates BlackGk%mDoor’=
...,.. ,.,l.. -=4_- —. — .——..————-
See Swfme cooking (hide OE!4pages 10and 11.
Sm’fa$x coding with
Er!&f3ilk?Hmt cmm’ds
Yoursurface units and controls are
designedto giveyou an infinite
choiceof heat settingsfor surface
unit cooking.
At both OFF and HIGH positions,
there is aslightniche so control
“clicks”at those positions;“click”
on HIGH marks the highestsetting;
the lowestsetting is betweenthe
words LOWand OFF. In aquiet
kitchen you may hear slight“click-
ing”sounds during cooking, indi-
cating heat settingsselectedare
being maintained.
Switching heats to higher settings
always show aquicker change than
switching to lower settings.
.=’,-,
<.
---
step1
Grasp contoi knob and push in. . .
3. Calrod@Surface Units
(1.mtrd must be pushed intoset
only Mm OFIFposition. -when
control isinany position other
than OFF, it may be rotated
withoutpushingin.
Besure you turn control to OFF
when you finish cooking. An indi-
cator light willglow when ANY
heat on any surface unit is on.
cooking Guide
for Ustig I-ihx@
m
MED
HI
MED
Low
WM
Quick start for cooking;
bring water to boil.
Fast fry, pan broil; maintain
fast boil on large amount of
food.
Saute and brown; maintain
slow boil on large amount
of food.
Cook after starting at
HIGH; cook with little
water in covered pan.
Steam rice, cereal; maintain
serving temperature of most
foods.
Nom:
1. At HIGH, MED HI, never leave
food unattended. Boiloverscause
smoking; greasy spiiiovers may
catch fire.
2. At WARM, LOW, melt choco-
late, butter on small unit.
-~-
j-.jQ:.,7; :{; [.; $;‘f-f--;;~ ~j..iy&.:‘Uil:i
This surface unit offers the conven-
ience of three units in one. The unit
may be used as an S-inch, 6-inch, or
4-inch unit to accommodate any
size utensil. Turn sizeselector
switch, next to surface unit control,
~os, 6, ~r 4. Then turn surface unit
contrmjto desired heat setting.
Match unit sizeselectionto sizeof
utensil.
[I
L__---J==d=d
LARGE-8-inch unit. Turn switch
to 8when using large utensilsthat
completelycover the unit (3-quart
to 6-quart saucepans or 8-to
10-inchskillet).Then selectdesired
heat setting.
~–
IL
MEDILJM-6-inch unit. Turn
switch to 6when using medium-
sizedcooking utensils that do not
completely cover the unit (2 to
2%-quart saucepans or 6to 7-inch
skillets).Then selectdesired heat
setting.
[
SMALL—4-inch unit. Rum switch
to 4when using smaHmaking
utensils about 4inches in diameter -
(’
(as al-quart saucepan). l%en select ~.....
desired heat setting.
(“’j
‘~J-+
.-.
Q. May Ican foodsand plwa-w!s
on my iwfaceunits?
A. Yes,butonlyuseutensils
designedforcanningpurposes.Check
themanufacturer’sinstructionsand
recipesforpreservingfoods.Be
surecanner is flat-bottomedand
fitsoverthecenterofyourCalrod”
unit. Sincecanninggenerateslarge
amountsofsteam, be carefulto
avoidburnsfromsteamor heat.
Canningshouldonly be doneon
surfaceunits.
Qcan Icover my drip pans with
foil?
A. No. Clean as recommendedin
C1eaningGuide.
Q. cm Iusespecial inking
equipnlent, likeammhutd wok,
on any Surface Umts?’
A. Utensilswithoutflatsurfaces
are notrecommended.The lifeof
yoursurfaceunitcan beshortened
and therangetopcan bedamaged
fromthehighheatneededforthis
typeofcooking.
‘Q*
why am 1notgetting‘theheat
1need frommy unitswrentthon.lghl
Ihave the knobs on the right
setting?
A. Afierturning surfaceunitoff
and makingsureitiscool, checkto
makesurethatyourplug-inunits
are securelyfastenedintothe
surfaceconnection.
Q. why do my utensilstilt when I
place them on the !3Wfm!e‘unit’?
A. Becausethe surfaceunitis
nottlat. Make surethat the “feet”
on yourCalrod@unitsare sitting
tighdyinthe mngetop indentation
andthereflectorring is flaton the
rangesurface.
Q. why hthe porcekninfinish on
my m’ltaimrs‘comingoff?
A. Ryouset yourCalrod@unit
higherthan requiredfor the
containermaterial, and leaveit, the
finishmaysmoke,crack, pop, or
burn dependingonthe potor pan.
Also, atoo highheatfor long
periods, and smallamountsofdry
food, maydamagethe finish.
Canning Add. be doneon
Cooktoponly.
In surfacecookingof foodsother
than canning, the use oflarge-
diameter utensils(extendingmore
than l-inchbeyondedgeof trimring)
isnot recommended. However,
when canning with water-bathor
pressure canner, large-diameter
utensilsr-naybe used. This is
because boilingwatertemperatures
(evenunder pressure) are not
harmful to cooktopsurfaces
surrounding heating unit.
HOWEVER, DO NOT USE
LARGE DIAMETER CANNERS
OR OTHER LARGE DIAMETER
UTENSILS FOR FRYING OR
BOILING FOODS OTHER
THAN WATER.Most syrup or
sauce mixtures—andall types of
fryin~-cook at temperatures nlu~h
higher thn boiIingwater. Such
temperatures coultievcntwdly
,<!.>
-% harm cooktop sw+vxs surrounding
iheating Units.
J
.-,--
.—,\
,>
—-
ObserveFdbwhg IPbil-ks
;~~
~~~@cg
LBring waterto boil on HIGH
heat, then after boilinghas begun,
adjustheatto lowestsettingto
maintainboil (savesenergy and
best uses surface unit.)
2. Besure canner fitsovercenter
ofsurface unit. If your rangedoes
not allowcanner to be centered on
surface unit, use smaller-diameter
containers for good canningresults.
3. Flat-bottomed canners givebest
canning results. Be sure bottomof
canner is flat or slightindentation
fitssnugly over surfaceunit.
Canners with flangedor rippled
bottoms(oftenfoundinenamelware)
are not recommended.
RIGHT WRONG
~~” J:A~~~~
4. When canning, use recipes from
reputablesources. Reliablerecipes
are availablefromthe manufacturer
ofyourcanner; manufacturersof
glassjars forcanning,such as Ball
and Kerr; and the United States
Department of Agriculture
Extension Service.
5. Remember, in foHowii~gthe
recipes, that canning is aprocess
that generateslargeamountsof
steam. Be careful while canningto
preventburns from steam or heat.
NOTE: If your rangeis being
operated on lowpower (voltage),
canning may takelonger than
expected, eventhough directions
havebeen carefully followed. The
process may be improvedby:
(1)usingapressurecanner,and
(2)forfastestheatingoflarge
waterquantities,beginwith
HOTtapwater.
...—>.I.. —.— -,., ,.,t.’ .,-, --%-~ -... ..r+.—-a- --,,-- .,.— .-——t--- =-. r
sau+pan tothe sizeofthesurface
unit,Apan thatextendsmorethan
an inchbeyondtheedgeofthetrim
ringtrapsheat.whichcauses
“crazing”(finehairlinecracks)cm
porcelain,and discoloration
rangingfrom blueto dark grayon
chrometrim rings.
cookware.Hat groundPyrocerarn”
saucepansor skilletscoatedon the
bottomwithaluminumgenerally
cookevenly.Useglasssaucepans
withheat-spreadingtrivets
availableforthatpurpose.
1. Usemedium-or heavy-weight
cookware.Aluminumcookware
conductsheatfasterthanother
metals.Cast ironand coatedcast
ironcookwareis slowto absorb
heat, butgenerallycooksevenlyat
LOWor MEDIUM settings.Steel 2. Toconservethemostcooking
energy,pansshouldbeflaton the
pansmaycook unevenlyii not
combinedwithother metals. bott~rn,-havestraightsidesandtight
Settingto Complete
Cooking
Directionsand Setting
toStartCooking comments
Cookware
mod
Cereal
Cornmeal, grits,
oatmeal Cerealsbubbleandexpandas
theycook; use largeenough
saucepantopreventboiiover.
Milkboils overrapidly.Watchas
boilingpoint approaches.
Covered
Saucepan HI. Incoveredpanbring
watertoboil beforeadding
cereal.
LOWor WM, then addcereal.
Finishtimingaccording
topackagedirections.
MED,tocook 1or 2minutes
tocompletelyblendingredients.
Uncovered
Saucepan HI. Stir togetherwateror
milk, cocoa ingredients.
Bringiust to aboil.
cocoa
Percolate8to 10minutesfor
8cups, less for fewercups.
LOWto maintaingentlebut
steadyperk.
Percolator HI. Atfirst perk, switch
heatto LOW.
Coffee
Eggs
Cookedin shell Covered
Saucepan HI. Covereggswithcool
water.Cover pan, cook
until steaming.
MED HI. Melt butter, add
eggsand coverskillet.
LOW.Cookonly3to 4
minutesforsoftcooked;
15minutesforhardcooked.
Continuecookingat MED HI
untilwhites arejust set, about
3to5more minutes.
LOW,thenadde~s. When
bottomsofe~s havejust set,
carefullyturn overto cook
other side.
[fyoudonotcoverskillet, baste
eggswith fatto cooktopsevenly.
Fried sunny-side-up Covered
Skillet
Fried overeasy Uncovered
Skillet HI. MeIt butter.
Removecookedeggswith slotted
spoon or pancaketurner.
LOW.Carefhllyadd eggs.
Cook uncoveredabout 5
minutesat MED HI.
MED. Addegg mixture.
Cook, stirring todesired
doneness.
Poached Covered
Skillet HI. Incoveredpanbring
waterto aboil.
Ews continueto set slightlyafter
cooking. For omelet do notstir
last few minutes.When set, fold
in half.
Fresh fruit: Use 1/4to 1/2cup
waterper pound offruit.
Dried fruit: Use wateras package
directs. Timedepends on whether
fruit hasbeen presoaked. If not,
allow morecookingtime.
Meat canbe seasonedand floured
beforeit is browned, if desired.
Liquid variations forflavor couid
be wine, fruit or tomatojuice or
meat broth.
Timing: Steaks 1to2-inches: 1to
2hours. BeefStew: 2to 3hours.
Pot Roast: 2Mto4hours.
Scmmblcdor omelets Uncovered
Skillct HI. Heat butter until light
golden incolor.
LOW.Stir occasionallyand
check for sticking.
HI. Incoveredpan bring
fruit and waterto boil.
C(wered
Saucepan
HI. Melt fht, thenaddmeat.
Swi[chto MED HI to
brownmeat. Addwateror
other liquid.
LOW.Simmer until fork
tender.
MMS, Poultry
f3riliSCd: PO(roasts of
beef, lamb or VCiIl;
pork Stctiksand
chops
Covered
SIiillet
MED HI or MED. Brownand
cook todesireddoneness,
turning overas needed.
Pan frying is best for thin steaks
and chops. If rare is desired, pre-
heat skillet before adding meat.
HI. Preheat skillet, then
(7rCilSt?lightly.
~
Jncovcrcd
ikillel i
\
,-,- \
(-;,
‘-----.-J f