manuals.online logo
Brands
  1. Home
  2. •
  3. Brands
  4. •
  5. Hotpoint
  6. •
  7. Range
  8. •
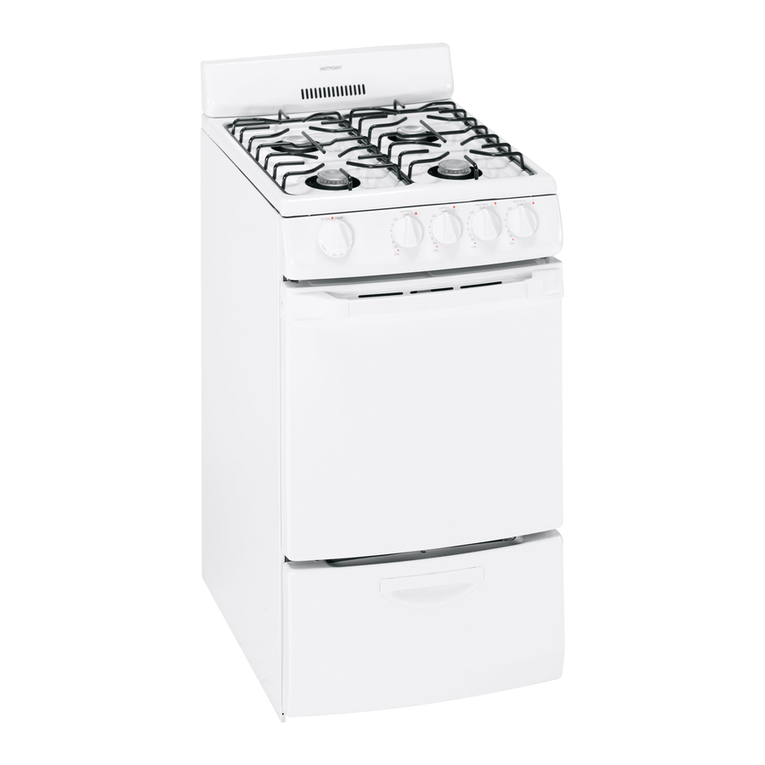
  9. Hotpoint RGB524PR Installation guide

Hotpoint RGB524PR Installation guide

This manual suits for next models

7

Other Hotpoint Range manuals

Hotpoint RB757CHCC User instructions

Hotpoint

Hotpoint RB757CHCC User instructions

Hotpoint RGB744 Installation guide

Hotpoint

Hotpoint RGB744 Installation guide

Hotpoint RB734J User manual

Hotpoint

Hotpoint RB734J User manual

Hotpoint RB526HCC - 30 Inch Electric Range User manual

Hotpoint

Hotpoint RB526HCC - 30 Inch Electric Range User manual

Hotpoint RGA720PKWH - R 20 Inch Gas Range Manual

Hotpoint

Hotpoint RGA720PKWH - R 20 Inch Gas Range Manual

Hotpoint RB787WC Service manual

Hotpoint

Hotpoint RB787WC Service manual

Hotpoint RB536BCCT Service manual

Hotpoint

Hotpoint RB536BCCT Service manual

Hotpoint RB790DT User manual

Hotpoint

Hotpoint RB790DT User manual

Hotpoint RA724KWH User instructions

Hotpoint

Hotpoint RA724KWH User instructions

Hotpoint RB787WC2WW and Operating instructions

Hotpoint

Hotpoint RB787WC2WW and Operating instructions

Hotpoint RGB790WEKWW User manual

Hotpoint

Hotpoint RGB790WEKWW User manual

Hotpoint RGA724EKWH - R 24 Inch Gas Range User manual

Hotpoint

Hotpoint RGA724EKWH - R 24 Inch Gas Range User manual

Hotpoint RGB526DETBB User instructions

Hotpoint

Hotpoint RGB526DETBB User instructions

Hotpoint RB790DT User instructions

Hotpoint

Hotpoint RB790DT User instructions

Hotpoint RF43 Installation instructions

Hotpoint

Hotpoint RF43 Installation instructions

Hotpoint RB524 Installation guide

Hotpoint

Hotpoint RB524 Installation guide

Hotpoint RB731 Installation instructions

Hotpoint

Hotpoint RB731 Installation instructions

Hotpoint RGB528BEAAD Service manual

Hotpoint

Hotpoint RGB528BEAAD Service manual

Hotpoint RB536DPWW - 30" Electric Range User manual

Hotpoint

Hotpoint RB536DPWW - 30" Electric Range User manual

Hotpoint RB632GN Installation instructions

Hotpoint

Hotpoint RB632GN Installation instructions

Hotpoint RGA720 Operating instructions

Hotpoint

Hotpoint RGA720 Operating instructions

Hotpoint RB758DP User manual

Hotpoint

Hotpoint RB758DP User manual

Hotpoint RGA720EK Service manual

Hotpoint

Hotpoint RGA720EK Service manual

Hotpoint RGB790CEKCC - 30 Inch Gas Range User manual

Hotpoint

Hotpoint RGB790CEKCC - 30 Inch Gas Range User manual

Popular Range manuals by other brands

Maytag MGR5875QDW - 30 Inch Gas Range Use and care guide

Maytag

Maytag MGR5875QDW - 30 Inch Gas Range Use and care guide

Frigidaire FFGF3024SS use & care

Frigidaire

Frigidaire FFGF3024SS use & care

Capital Precision Series GCR484W Specifications

Capital

Capital Precision Series GCR484W Specifications

Officine Gullo GGS8P Installation and use instruction

Officine Gullo

Officine Gullo GGS8P Installation and use instruction

LG LSD4913 Series owner's manual

LG

LG LSD4913 Series owner's manual

Kenmore 4101 - Elite 30 in. Slide-In Electric Range installation instructions

Kenmore

Kenmore 4101 - Elite 30 in. Slide-In Electric Range installation instructions

Moffat Blue Seal Evolution G576 Technical data sheet

Moffat

Moffat Blue Seal Evolution G576 Technical data sheet

CornuFé C1NF user guide

CornuFé

CornuFé C1NF user guide

GE JGS650SEFSS Dimensions and installation information

GE

GE JGS650SEFSS Dimensions and installation information

LG LDG3015ST Manual De Propietario

LG

LG LDG3015ST Manual De Propietario

Whirlpool RF350PXP Use and care guide

Whirlpool

Whirlpool RF350PXP Use and care guide

Samsung FCQ321HTUW Service manual

Samsung

Samsung FCQ321HTUW Service manual

Kenmore 790.45712 Use & care guide

Kenmore

Kenmore 790.45712 Use & care guide

Wolf CHR CHSSR owner's manual

Wolf

Wolf CHR CHSSR owner's manual

Smeg Built-in Microwave Oven Instructions for the user

Smeg

Smeg Built-in Microwave Oven Instructions for the user

Zanussi ZCG054G user manual

Zanussi

Zanussi ZCG054G user manual

GE JCSS630 quick start guide

GE

GE JCSS630 quick start guide

Samsung NX58M9960P series installation manual

Samsung

Samsung NX58M9960P series installation manual

manuals.online logo
manuals.online logoBrands
  • About & Mission
  • Contact us
  • Privacy Policy
  • Terms and Conditions

Copyright 2025 Manuals.Online. All Rights Reserved.

d4
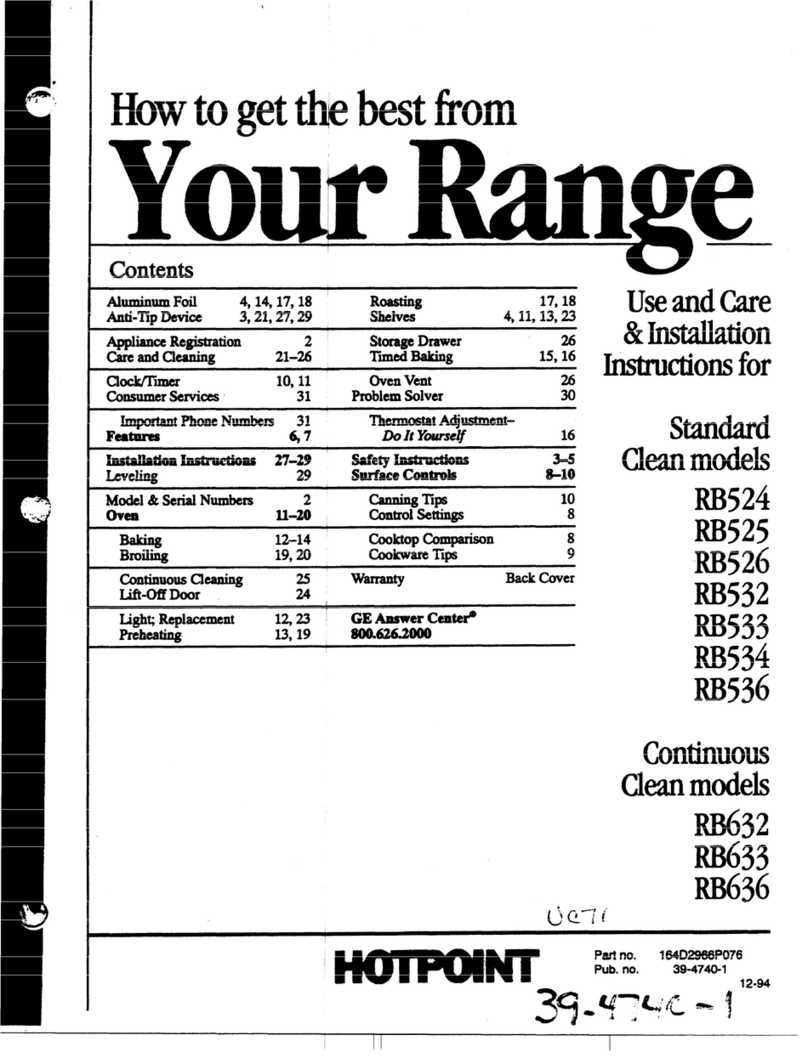
Howtoget t. Ie Jestfrom
Icontents
IAnti-TipDevice 3,38 Preheating 14,15
ApplianceRegistration 2Roasting,RoastingGuide 16,17
ICareandCleaning 20–26 Shelves 13,23,25
ClockandTimer 8,9 ThermostatAdjustment 27
IConsumerServices 47 PowerOutage 10,12
Cooktop 21 ProblemSolver 44
IFeatures 6,7 SafetyInstructions 2–5
HootingUnderRange 29,30 Surface Cooking 10,11
IInstallationIns~ctions 28-43 BurnerGrates 21,25
Leveling 38 Burners 20,25
IMinorAdjustments 27 ControlSettings 10
ModelandSerialNumbers 2, 30 CookwareTips 11
Ioven 12,13 HameSize 11,44
AirAdjustment 27,35,37,42 LightingInstructions 10
IBaking,BakingGuide 14,15 Warranty BackCover
BroilerPanandRack 18,23,25
IBroiling,BroilingGuide 18,19 Installation 2%43
ControlSettings 12
IDoorRemoval 22
Light;BulbReplacement 12,23
OvenBottom 22 GE Answer Center”
OvenVents ~,~, ~3,21 800.626.2000
useandcare
&
mtiuatio
ofModels
RGB52&R
RGB52@R
RGB528ER
RGB~28GER
RGB52yGEP
RGB628G
—————--—-— ——
.—
It isintendedtohelpyouoperate
andmaintainyour newrange
properly.
Keepithandyforanswerstoyour
questions.
Ifyoudon’tunderstandsomething
orneedmorehelp,write(include
yourphonenumber):
ConsumerAffairs
Hotpoint
AppliancePark
Louisville,KY40225
wI*itedown themode~
andserialnumbers.
Dependingonyourrange,you’ll
findthemodelandserialnumbers
onalabelonthefrontoftherange,
behindthekickpanel,storage
drawerorbroilerdrawer.
Thesenumbersarealsoon the
ConsumerProductOwnership
RegistrationCardthatcame
withyourrange.Beforesending
in thiscard,pleasewritethese
numbershere:
Model Number
Serial Number
Use thesenumbersin any
correspondenceor servicecalls
concerningyourrange.
Immediatelycontactthedealer(or
builder)thatsoldyoutherange.
savetimeand money.
Beforeyou request
Servitee.e
Check the ProblemSolverinthis
book.It listscausesofminor
operatingproblemsthatYOU can
correct yourself.
If you need service...
Toobtainservice,seethe
ConsumerServicespagein the
backof thisbook.
Toobtainreplacementparts,
contactGE~otpoint Serviceand
PartsCenters.
We’reproudof ourserviceand
wantyoutobepleased.If forsome
reasonyouarenothappywiththe
serviceyoureceive,herearethree
stepsto followforfurtherhelp.
FIRST,contactthepeoplewho
servicedyourappliance.Explain
whyyouarenotpleased.In most
cases,thiswillsolvetheproblem.
NEXT,if youarestillnotpleased,
writeallthedetails-—including
yourphonenumber—to:
Manager,ConsumerRelations
Hotpoint
AppliancePark
Louisville,KY40225
FINALLY,if yourproblemis still
notresolved,write:
MajorApplianceConsumer
ActionPanel
20NorthWackerDrive
Chicago,IL60606
——
WANING: Mthe
informationinthk
manlual
isnotfollowed
exactly9 afireor explosion
may FeSuitcawing
propetiy damage,
persona!injwy or death.
—Donotstoreor use
gasolineor other
flammablevapors and
liqtids inthetieitity
ofthisor any other
appliance.
—mT To Do mYou
sm~~GAS
eDonott~ tolightany
appliance.
~Do nottouchany
,“:/
/“
—-.=,
.- ............ . ..—.— —...==..—.=- —.-—-.——--——.—.-.——.....-.” -.!.-.7 “a--.-.-—-
;.
,,: -.______
:
1
lwiPoRTANT
SAFETY NOTICX
“~heCalifornia SafeDrinking
f}~aterand Toxic Enforcement
Act requires the Governorof
Californiato publishalistof
substancesknownto thestate
to causecancer,birthdefectsor
otherreproductiveharm,and
requiresbusinessesto warn
customersofpotentialexposure
to suchsubstances.
Gasappliancescancauseminor
exposureto four of these
substances,namelybenzene,
carbonmonoxide,formaldehyde
andsoot,causedprimarilyby the
incompletecombustionof natural
gasor LP fuels.Properlyadjusted
burners,indicatedby abluish
ratherthan ayellowflame,will
rninirnizeincompletecombustion.
Exposureto thesesubstancescan
beminimizedby ventingwith an
openwindowor usinga
\rentilationfan or hood.
grounded,three-prongoutletin
accordancewiththeNational
ElectricalCode.Do~lotusean
extensioncordwith
thisappliance.
aBe sure ail packing materials
are removed from the range
beforeoperatingit topreventfire
or smokedamageshouldthe
packingmaterialignite.
eLocate range out of Mtchen
traffic path and out of drafty
locationsto prevent pilo$
Outige (on mode~swith
Shnding pilok) and poor
air circulation.
*Besure your range is eorK’eetly
adjusted by aqualified Sertice
technician or installer for the
type of gas (natural or LP) that
is to be Msed,Yourrangecanbe
convertedforuse witheither
typeof gas. See~staliation
Instructions.
eAfter prolonged Useof a
rangeyhigh floor temperatures
may result and nlany floor
coverings will not tithsand
thi$ Mnd Of US~e Neverinstail
the rangeover vinyltile or
linoleumthatcannotwithstand
suchtypeof use.Neverinstallit
directlyover inte~iorkitchen
carpeting.
0CAUTION:ITEMSOF
INTEmsT To CHILDREN
SHOULDNOTBE STOWD
INCABINETSABOVEA
mNGE ORONTHE
BACKSPLASHOFA
mNGE4HmDREN
CLMBNG ONTHERANGE
To REACHITEMSCOULDBE
SERIOUSLY
mmED.
wAmING–Aniranges
cantip and
injurycould
result.To
prevent
accidental
tippingof
therange?
attachan
approved
Anti-Tip
deviceto the
wall.(SeeInstallation
Instructions.)Tocheckif the
deviceis installedand engaged
properly,carefullytip the range
forward.me Anti-Tipdevice
shouldengageandpreventthe
rangefrom tippingover.
If youpulltheIangeoutfrom the
wall for any reason,make swe
the Anti-Tipdeviceis engaged
when youpush the rangeback
againstthe wal!.
.---—. —.
—..”....,,. . . . . . . . ,.
>,.”........_=_. ——— ..
..... ........
.......
$Foryoursafety9never use
yourapplianceforW’arlllingor
heatingtileroom.
aDonot usewater ongrease
fires. Neverpick up aflaming
pan.TLIi~offburner,then
sn~otherflamingpan by covering
pancompletelywithwell-fitting
lid,cookiesheetor tlattray.
Flaming greaseoutsideapan can
beput outby coveringwith
bakingsodaor,if available,a
muhi-purposedry chemicalor
foam-typefireextinguisher.
s~~ ~~~~~~~~fl~~~~~~~
materials in an oven,arange
storage draweror near
2Cooktop.
*Donotstoreor use
Co-mbustiblematerials5gasoline
or otherflammablevaporsand
Mqwidsin tilevicinityofthisor
anyotherappliance.
~Donotletcookinggrease or
other flammable materials
accumulatein or near
therange.
QV?hen Cooking porli9 follow
thedirectionsexactlyandalways
cookthe lneatto an internal
temperatureof at least 170°F.
Thisassu]esthat, in theremote
possibilitytha[tricl]in~~naybe
~]resentin the n~ea[,it wi[lbe
i(illedaIId[herncatwill be safe
to eat.
,/,
,,
snlokinganclgreasyspillovers
thatmaycatchon fire.
oAdjust top bur”nerflame Sixc
so it doesnot extend beyond the
edgeof the cooliware.Excessive
fla~neishazardous.
ouse Oniydry pot llolders—
moistor damppotho]derson hot
surfaces~nayresultinburnsfroin
steam.Do not letpotholders
comenearopenflameswhen
liftingcookware.Do not usea
towelor otherbulkyclothin
placeof apot holder.
*To minimize tile possibility
of burns~ignitionof flammable
materials,and spillage,turn
cookwarehandlestowardthe
sideor backof therangewithout
extendingover adjacentburners.
~Alwaysturn surfaceburner
to OFFbeforeremoving
Cool{ware.
ecarefully watchfoodsbeing
friedat ahighflanlesetting.
oNeverbloclithevents(air
openings)ofthe range.They
providethe air inletand outlet
that are necessaryfor the range
to operateproperlywith correct
combustion,Air openingsare
locatedat the rear of the cooktop,
at the top and bottomof the oven
dOOr,
:111~~t [hebottonlOfthe
@
“--
~Foodsforfrying Shoulflbeas “:,$“:
(Iryas possible.Frostonfrozen
foodsor ~moistureon freshfoods
cancausehotfat tobubbleup
andoversidesof pan.
ouse l&astpossibleamount of
fat for effectiveshallowor
deep-fatfrying.Fillingthe pan
toofullof fat can causespil]overs
whenfood is added.
@If aCombinationof oils or fah
will be used in frying?stir
togetherbeforeheatingor asfats
meltslowly.
~Alwaysheat fat slowly?and
watchas it heats.
QUse adeepfat thermometer
Wllelleverpossibleto prevent
overheatingfat beyondthe
smokingpoint.
~Useproper pan siz~Avoid
pansthat areunstableor easily
tipped.Selectcookwarehaving
flatbottomslargeenoughto
coverburnergrates.Toavoid
spillovers,makesurecookware
is largeenoughto containthe
foodproperly.Thiswillboth
savecleaningtime and prevent
hazardousaccumulationsof
food,sinceheavyspatteringor
spilloverslefton range can
ignite.Use panswith handles
that canbe easilygraspedand
remaincool.
.-.,.-... ..... . ..—-—-----------..—.-.-..--.——-
—— —-—..............-———— —... -——
----.”. . . . . --—--—- . .
..-”. .. ,. . ..—-. -=.l-. —--- . .. .
i,, Y!
*Donot!eaveplasticitenlson
tl~ecoolftop—theymaymelt if
lefttoo closeto the vent.
sDe ~lotleaveanyitemsonthe
cooktop.The hot air fromthe
ventmay igniteflammableitems
and willincreasepressurein
closedcontainers,whichmay
causethem to burst.
6Toavoidthepossibilityofa
burn, alwaysbecertainthat the
controlsforailburlle?rsare at
theOFFpositionand allgrates
are COOIbefore attempting to
renlove them.
ev/hen HalRingfoods are
under the heod~turn the fan
off. The fan?if operating9 may
spreadtheflames.
*If range islocatednear a
tvindowy
do not hang long
curtainsthat could blowover
the top burnersand createafire
hazard.
whenopeningthedoorofaklot
oven.Thehotair andsteam
that escapecancauseburnsto
hands,faceandeyes.
~Keepoven freefromgrease
buildup.
@Placeoven shelfindesired
positionwhileovenisCool.
oPullingoutshelftotheshelf-
stop isaconvenienceinlifting
heavyfoods,It isalso a
precaution againstburnsfrom
touchinghotsurfacesofthe
dOO~OrOV~~
WaIISe The IOW~St
position “R” is not designed
to slide.
oDon9tuse aiunlinumfoil
anywhere inthe oven exceptas
described in tilis boolf.Misuse
could resultin afire hazard or
damageto the range.
*wheKRbroiling9ifmeatis too
close totheflame?the fatmay
ignite.Trimexcessfattoprevent
excessiveflare-ups.
*Malie sure broiler pan is in
placecorrectlytoreducethe
possibilityof greasefires.
~If you should haveagrease
fireinthe broilerpan9 turn
off oven,aridkeepovendoor
or broilerdrawer(onmodelsso
equipped)closedto containfire
untilitburnsout.
cle~ning Your Range
~Clean only parts listed in this
Use and Care Book.
oKeep range clean and free
of accumtllations of grease or
Spilloversy which may ignite,
*Be careful when you clean the
cooktop because the area over
the pilot (on models so
equipped) willbe hot,
If You Need service
eRead 66The Problem so!v@r99
inthe
backofthisbool<e
eDon9tattelnptto repair or
.replaceallypart ofywdrrange
u~llessit isspecifically
~ecom~nendedi]~thisbook,.All
other servicingshould.be refe~~e~
to aqualifiedtechnician.
1,
,.
....
..”.— -- —.-— .————.——. -.--—— —.—. .—--. -.—.— .-..— ---- ..— .. —.—-—.—.— ..————
h
.——— -...—-.— ..—
__ ————. -- —:
-,
———
I--l
--
e-.‘,
,.
I)
‘,.
L._...J
...........-,.,....mp__ ————_____ — —___ ————--..-_,. ———————._,..__..,_,-.,_,,r,.a-,+
---—.-—...——.——
Feature Index (Notall modelshave all features. Appem~nceof featuresvaries.)
1Surface Burners,Drip Pans (on somemodels) andGrates
2Oven Lamp On/Off Switch(on somemodels)
3Clock and Timer(on somemodels)
See page
20,21,25,26
12
8,9
4,5, 13,21
4Oven Vent
5OvenControl
6SurfaceBurnerControls
7Cooktop
12
10
21
18,23,25
8Broiler Pan and Rack
9Oven Shelves(number of shelvesvaries) 13,23,25
1310 Oven Shelf SuppOrtS
4,21
11 Air Ventin Oven Door (located at top of Oven Door)
12 Broiler Drawer
13 Air Intake
23
4,21
14 Model and Serial Numbers (located on front frame of range,
behind Broiler Drawer) 2,30
22
3,38
15 RemovableOvenDoor
16 Anti-r~ipDevice(Locatedrightrearatbottom.SeeInstallationInstructions.)
17 OvenBottom 22
12,23
18 oven [ntcriorLight (on some models)
.---.,,..
,,?
... ..
r
. . i
l;
ii
‘--] 1:
I
.- .
J, 1!
—. -—.. -+ -.. —.. .— .. “-. . .
““-. ,..
!.. . —-------- .— ---——— --- ——...—- -—
.-
Foliow directions belowif your
rangehas the clockand timer
shownabove.
The electronicrange clock and
timer allow you to setthe timer
up to 9hoursand45minutes.You
havethechoiceofhavingthetimer
showthetimecountingdownor
thetimeofday.In eithercase,the
timerwillsignalattheendofthe
timerperiodto alertyouthatthe
timeis up.
Tosetthe clock
NOTE: When you firstplug in the
range or after apower failure,
the entire Clock/Timerdisplay
will light up. After several
seconds “12:00” will then
flash on the display.
1. Press the CLOCK pad. “12:00”
stopsflashingand “SETTIME”
flashesonthedisplay.
2. PressandholdtheUPor
DOWNpadandthetimeof day
willchange10minutesatatime.
Tochangethetimeby single
minutes,givethepadsshorttaps.
Forexa]]lple,to settheclockfor
3:15,pressandholdtheUP pad
until“3:10”appears,andthentap
theUPpad until“3:15” is
displayed.
3. PresstheCLOCKpadandthe
clockwillbe set.If youdo not
press the CLOCK pad, the clock
will automatically be set within
One miilute.
‘Fosetthe Timer
1.PresstheTIMERON/OFFpad.
“:00” appearson the displayand
“SET TIMER” flashes.
2. Use the UP and DOWN padsto
setthe timer.Shorttapson theUP
or DOWN pad changethe timer’s
settingoneminuteat atime.
Pressing and continuingto hold
the UP pad increasesthe setting
five minutesat atimeuntilone
hour (“1:00”) isdisplayed.After
one hour is displayed,pressingand
holdingthe UP pad increasesthe
setting 15minutesat atime. (Short
taps on the UP and DOWN pads
will always changethe settingby
1-minuteincrements.)The timer
can be setfor amaximumof 9
hours and 45 minutes.
3. To start the timer,press the
TIMER ON/OFF pad. If the
TIMER ON/OFP pad is
not pressed, the timer will
automatically startafter a
few seconds.
As the timer counts down, a
singlebeep will indicatewhen
one minute is left. After this beep,
the display will countdown in
seconds. When the timer reaches
“:00,” you will hear three sets of
three short beeps, and then asingle
beep every 10seconds for 10
minutes or until you press any
of the Clock/Timer pads.
When the timeris countingdown,
use theUP and DOWN pad to
changethe remainingtime,or
press theTIMER ON/OFF pad
to cancelthe timer function.The
timer functioncannotbe cancelled
until “SET TIMER” stops
flashingand “TIMER” appears
on the display.
ToDisplaythe Timeof
Day wMIe the Timer
Is operating
Pressingthe CLOCK pad while the
timer is operatingwill not interfere
with the timer’soperation;the
displaywill changeto show the
time of day,but the timer will
continueto count down and will
stillsignal when time is up. Simply
pressfie TIMERON/OF~pad
j---.,
(
,
.
..
,.,-
(“ ‘~
\l
x=..‘-’”
Lc;
1( -:,
d“
_-. -.. —. . .... . .... ... . .. . .... . . ... . —— ——. —....-. -- ......—---.,— -.... --.
~O~~OWdi~~CtiO~S below if yOU~
range has the clock and timer
ShOW~ above.
clock
To set the CIock,push in the knob
and turn it to the right. Let the
knob out when the clock hands
reach the correct time. Continue
turningthe knob to 0~.
Timer
The Timer has been combined with
therange clock. Use it to time all
your precise cooking operations.
You’llrecognize the Timer as the
pointer that is different in color
.== &an the clock hands.
@?*Y Minutesaremarkedup to30,and
hours are marked up to 4on the
center ring of the clock.
To set the Timer, turn the knob to
the left—without pushing in—until
the pointer reaches the number of
minutes or hours you want to time.
}4tthe end or the set time~a
buzzer s{)undsto tell you time
is up. Turn the knob—without
pushing in—until the pointer
reaches OFF and the buzzer stops.
..,—— —— .-.+.-e---- . . . . .. —-A. —.. -—--.—. . . .=—— ,.—. ..------ ---- . .. . . —— —“.. -. . .. —.—— . . . ...=.. ~—. ..——..
.—— —.-
The surfaceburnerson these
ranges have s~andingpilotsthat
must be lit initially.To lightthem:
1. Be suresurface burnercontrol
knobs are in the OFF position.
2. Remove the grates and lift the
cooktop up (see the Lift-Up
Cooktop section).
3. Locate the two pilotports and
light each of them with amatch.
Note: If the pilot is too high or
low, you can adjust it. See the
“Adjustthe Surface Burner Pilots
If Necessary” section of the
Installation Instructions.
4. Lower the cooktop. Yoursurface
burners are now ready for use.
5. Observe lightecIburners.
Compare the flames to pictures
in the Problem Solver. If any flame
is unsatisfactory, call for service.
Lighting Instructions for
Electric IgnitionModels
Surfaceburnerson theseranges
are lightedby electricignition,
endingthe need for standingpilots
with constantlyburningflames.
In easeof apolveroutige, youcan
lightthe pilotlessignitionsurface
burnerson yourrangewith amatch.
Hold alightedmatch to the burner,
then turn the knob to the LITE
position.Usee-me caution when
Iigbtingburnersin this manner.
Surface burnersin use when an
electricalDowerfailureoccurs will
continue;Ooperatenormally.
The electrodeofthe spark
igniteris exposed.When one
burneris turnedto LITE, allthe
burnersspark.Do not attempt
to disassembleorclean around
anyburnerwhileanotherburner
is on. An electricshockmay
result,whichcouldcauseyou
to knockoverhotcookware.
surfaceBurnercontrols
The knobs that turn the surface
burners on and off are located on
the control panel in front of the
burners.
The two knobs on the left control
the left front and left rear burners.
The two knobs on the right control
the right front and right rear
burners.
Eiectric IgnitionModels:
PUSIIthe control knob in and
turn it to LITE. Youwill hear a
littleclickingnoise—the sound
of the electric spark igniting
theburner.
Standing Pilot Modei:
Push controlknob in and turn it to
HI position.The burner should
lig~twithin afew seconds. e:
BeforeLig12tingaBurner
sIf drip pans are supplied with
your range, they should be used
at all times.
~Make sure both grates on one
side of the range are in place
before using either burner.
-!,---
:, ,’,,.
.:
. .. ..’ —-——.—-—.—-.----.--...—.......
After the burner ignites,turn the --:..
knob to adiustthe flame size.
.n
FIame willbe almost.horizontal **
‘.
4’
md till liftslightlya%vayfrom the ,
L
burner %Vhenthe burner is first
turned on. Ablowing or hissing
sound maybeheardfor30to60
;
seeon~.Thisnormalsoundis dueto
‘
improvedinjectionofgasandairinto
;
the burner.Putapan on the burner
,
before lighting it, or adjust the
:
.
.
flame to match pan size as soo~~as
~
it lights, andtheblowingor hissing
I
;
soundwillbemuchlessnoticeable.
\
GDo not operate aburner for an
extendedperiodoftimewithout
havingcookwareontl~egrate.The
finishonthegratemaychipwitho~]t
cookwaretoabsorbtl~eheat.