manuals.online logo
Brands
  1. Home
  2. •
  3. Brands
  4. •
  5. Hotpoint
  6. •
  7. Refrigerator
  8. •
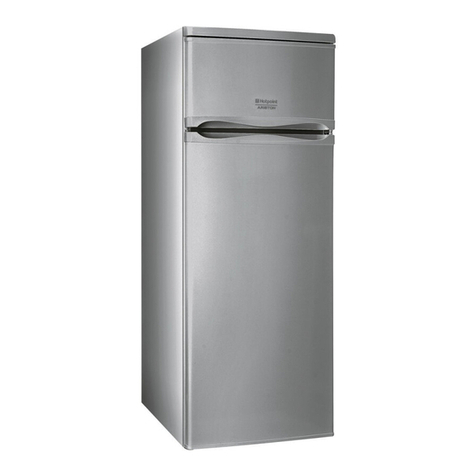
  9. Hotpoint CTF14 Installation instructions

Hotpoint CTF14 Installation instructions

Other manuals for CTF14

5

This manual suits for next models

1

Other Hotpoint Refrigerator manuals

Hotpoint FF4DX User manual

Hotpoint

Hotpoint FF4DX User manual

Hotpoint SXBHAE 924 WD User manual

Hotpoint

Hotpoint SXBHAE 924 WD User manual

Hotpoint CTX18 Installation instructions

Hotpoint

Hotpoint CTX18 Installation instructions

Hotpoint MISTRAL FF61 User manual

Hotpoint

Hotpoint MISTRAL FF61 User manual

Hotpoint HTS16BBRL User manual

Hotpoint

Hotpoint HTS16BBRL User manual

Hotpoint HTS18BBEWW Manual

Hotpoint

Hotpoint HTS18BBEWW Manual

Hotpoint HS2321L User manual

Hotpoint

Hotpoint HS2321L User manual

Hotpoint H7NT911TWH1 User manual

Hotpoint

Hotpoint H7NT911TWH1 User manual

Hotpoint RL175G User manual

Hotpoint

Hotpoint RL175G User manual

Hotpoint CTX22G Installation instructions

Hotpoint

Hotpoint CTX22G Installation instructions

Hotpoint SH8 2D XROFD 2 User manual

Hotpoint

Hotpoint SH8 2D XROFD 2 User manual

Hotpoint MISTRAL FF71 User manual

Hotpoint

Hotpoint MISTRAL FF71 User manual

Hotpoint HTS18GBS User manual

Hotpoint

Hotpoint HTS18GBS User manual

Hotpoint FSFL 1 Series User manual

Hotpoint

Hotpoint FSFL 1 Series User manual

Hotpoint FFUQ User manual

Hotpoint

Hotpoint FFUQ User manual

Hotpoint FFUQ 18 Series Operating instructions

Hotpoint

Hotpoint FFUQ 18 Series Operating instructions

Hotpoint RLB20 User manual

Hotpoint

Hotpoint RLB20 User manual

Hotpoint FFUQ 18 Series Operating instructions

Hotpoint

Hotpoint FFUQ 18 Series Operating instructions

Hotpoint HM312I User manual

Hotpoint

Hotpoint HM312I User manual

Hotpoint CSF22T Installation instructions

Hotpoint

Hotpoint CSF22T Installation instructions

Hotpoint CSX20 Specification sheet

Hotpoint

Hotpoint CSX20 Specification sheet

Hotpoint HME35 User manual

Hotpoint

Hotpoint HME35 User manual

Hotpoint HTS18BBP User manual

Hotpoint

Hotpoint HTS18BBP User manual

Hotpoint HM315I User manual

Hotpoint

Hotpoint HM315I User manual

Popular Refrigerator manuals by other brands

Frigidaire FRS26TS7DW2 Use & care manual

Frigidaire

Frigidaire FRS26TS7DW2 Use & care manual

Fisher Scientific 10ECEEFSA manual

Fisher Scientific

Fisher Scientific 10ECEEFSA manual

Summit FF22BDRSS user manual

Summit

Summit FF22BDRSS user manual

Frigidaire FFRU17B2QWE use & care

Frigidaire

Frigidaire FFRU17B2QWE use & care

Hitachi R-SG28KPH instruction manual

Hitachi

Hitachi R-SG28KPH instruction manual

Dometic RMH 7390 L operating instructions

Dometic

Dometic RMH 7390 L operating instructions

AEG S71700TSW0 user manual

AEG

AEG S71700TSW0 user manual

Electrolux ENB3669 Instruction book

Electrolux

Electrolux ENB3669 Instruction book

Electrolux ERN 2930 Instruction book

Electrolux

Electrolux ERN 2930 Instruction book

Beko GNE 60520 X user manual

Beko

Beko GNE 60520 X user manual

Jenn-Air JUR248LBES00 Use & care guide

Jenn-Air

Jenn-Air JUR248LBES00 Use & care guide

Dometic RGE 4000 Installation and operating manual

Dometic

Dometic RGE 4000 Installation and operating manual

Dometic L-0191B Brochure & specs

Dometic

Dometic L-0191B Brochure & specs

LG LRBP1031W - 10 Cu. Ft. Cabinet Depth Bottom Freezer... owner's guide

LG

LG LRBP1031W - 10 Cu. Ft. Cabinet Depth Bottom Freezer... owner's guide

Daewoo RN-33 Series user manual

Daewoo

Daewoo RN-33 Series user manual

Haier RF-8888-174 Service manual

Haier

Haier RF-8888-174 Service manual

Blaupunkt 5CK2 Series user manual

Blaupunkt

Blaupunkt 5CK2 Series user manual

Beko B5RCNE366HG user manual

Beko

Beko B5RCNE366HG user manual

manuals.online logo
manuals.online logoBrands
  • About & Mission
  • Contact us
  • Privacy Policy
  • Terms and Conditions

Copyright 2025 Manuals.Online. All Rights Reserved.

--0
.-
.:
ApplianceRegistration 2LightBulbReplacement 11
BaseGrille 4Modeland SerialNumbers 2
Care and Cleaning 11 ProblemSolver 12-14
Condenser 11 RepairService 15
DrawerRemoval 7,8 SafetyInstructions 3
Energy SaverSwitch 5Shelves 7
Energy-SavingTips 2TemperatureControls 5
FoodStorageSuggestions 6Vacation&Moving Tips 11
StorageDrawers 7Warranty BackCover
StorageTimes 6WaterFilterAccessory 10
IceTrays 10
Icemaker 9
IcemakerAccessory Kit 10
Installation 3,4
Adapter Plug 4
AdjustableRollers 4
Clearances 4
Electrical Requirements 3,4
Extension Cord 4
Grounding 3
Location 4
WaterSupply toIcemaker 4
..-—. .....—=.—a..e~
Beforeusingyourrefrigemtor,
readthkbookcarefully.
Itisintendedtohelp youoperate
andmaintainyournewrefrigerator
properly.
Keepit handyforanswerstoyour
questions.
Ifyoudon’tunderstandsomething
or need morehelp, write (include
yourphonenumber):
ConsumerAffairs
Hotpoint
AppliancePark
Louisville,KY40225
Writedownthemodeland
serialnumbers.
You’llseethemon alabelatthe
bottom,just insidethe fresh food
compartmentdoor.
These numbersare also on the
Consumer ProductOwnership
RegistrationCard that came with
your refrigerator.
Beforesendingin the registration
card, please write these numbers
here:
Model Number
Ene=y”savingtips —
Usethesenumbersinany *Locationofyourrefrigeratoris —
correspondenceor servicecalls
concerningyourrefrigerator.
If youreceivedadamaged
refrigerator,immediatelycontact
thedealer (or builder)that soldyou
therefrigerator.
Savetime and money.
Beforeyourequestservice, check
the ProblemSolveron pages 12
through 14.It listscausesofminor
operatingproblemsthat youcan
correct yourself.
Serial Number
important.Avoidlocatingitnextto
yourrange, aheatingventor where
the sunwillshinedirectlyonit.
@Don’topen thedoors more often
than necessary.
@Closethedoorsassoonaspossible,
particularly inhot, humid weather.
~KeepEnergy SaverSwitchin the
NORMAL positionunlessmoisture
formson the outsideofthe ‘
refrigerator.
@Be sure the doorsare closed
tightly.Beforeleavingthe house
or retiring forthenight, check to
be surethe doorshaven’tbeen left
open accidentally.
@Storeonly thosefoodsrequiring
refrigerationin yourrefrigerator.
~Wipemoisturefrom bottlesand
cartonsbefore puttingthem in the
refrigerator.
@Keep foodscoveredto reduce
moisturebuildup insidethe
refrigerator.
~If youturn thecontrols to the
coldest positionfor quick chilling
or freezing, be sureto turn them
back to regular settings.
@Don’tovercrowdyour refrigerator.
Overcrowdingcan require extra
electrical energy to keep everything
cool.
;
W_~~–When usingthis
appliance, alwaysexercise basic
safety precauti~ns, includingthe
following:
*Use ttis applim~ceody forits
ktended pwpse as described in
this Use and Care Book.
hstdlation ktiuctiom beforeitis
med. See @ounding instructions
below and on page 4.
aNeveruplug your refrigerator by
palling on the pwer cord. Mways
grip plug firrnlyand pull straight
out from the outlet.
eRepair or replaceimmediately
di eieettie servicecords thatkve
become fray~ or othetise *-
aged. Do not use acord that shows
cracks or abrasion damage along
—. its Iength or at either the plug or
connector end.
@If yolmrefdgeYatoFks m
aatomaticieemderq donot place
figer’s or‘h@ on the automatic
ieemtig mecktim wMe the
reMgeratoris plu~ed h. Thiswill
prevent contact with the moving
parts of the ejector mechanism,
or with the ,heating element that
releases the cubes.
aDon’trefreeze frozenfoodswtich
have thwed completely.
The United States Department of
Agri.ctiture in Home and Garden
Bulletin No. 69says:
‘~..You may safely refreeze frozen
foods that have thawed if they stfil
contain ice crystals or if they are
stillcold—below 4°F.
‘~..Thawed ground meats, poultry,
or fish that have any off-odor or
off-colorshould not berefrozen and
should not be eaten. Thawed ice
cream should be discarded. Hthe
odor or color of any food ispoor
or questionable, get rid of it. The ,,
food may be dangerous to eat.
“Even partial thawing and refreez-
ing reduce the eating quality of
foods, particularly fruits, vegeta-
bles,and prepared foods.The eating
quality of red meats is affected less
than that of many other foods. Use
refrozen foods as soon as possible
---.T
m, =
to save as much of their eating my
reduce the possibtiityof danger to m.=
children. -
--
A. Before making any repairs.
Note: We stronglyrecommend
that any servici~gbe performed
by aqualified individual. —.
B. Before cleaning. ~-
-
C. Before replacing aburned-out S
light bdb, the refrigerator should =-
be unplugged in order to avoid ~.
m.
contact with alivewire ftiament. =;=.
(A burned-out light bulb may =
break when being replaced.) ==.-
Note: Turning control to OFF m~.
position does not remove power ~.~;..
to the light circuit. ~:z--=
-.
~—
n
PREFERRED c
METHOD
QQ\
T
h
~?> %
3P
‘.,,—-
F.;, ,@
L
,Y,
&.“ INSUREPROPER
;j
/
GROUNDEXISTS
8EFO~EUSE
Fig.“1
Where astandard two-prong wall
outlet isencountered, it isyour per-
sonal responsibility and obligation
to have it replaced with aproperly
grounded three-prong wall outlet.
Because of potential safety
hazards under certain conditions,
we stronglyrecommend againstuse
of an adapter plug.However,ifyou
stillelect to use an adapter, where
localcodespermit, aTEMPORARY
CONNECTION may be made to a
properly grounded two-prongwall
outlet by useof aUL listed adapter
(Fig.2) available at most local
hardware stores.
a
TEMPORARYMETHOD ,
(ADAPTERPLUGSNOT .
PERMITTEDINCANADA)
ALIGNLARGE @
.(
‘RONGs’sLOT: %t‘~; :: c---
v
t>.-”,; “o\1
r
-/ INSUREPROPERGROUNO
Fig. 2‘= j~#o~l~~~~~NECTION
The larger slot in the adapter
must be aligned with the larger slot
in the wailoutlet to provide proper
polarity in the connection of the
power cord.
CAUTION: Attaching adapter
ground terminal to wall outlet
cover screw does not ground the
appliance unless cover screw is
metal, and not insulated, and wall
outlet isgrounded through house
wiring. Youshould have the circuit
checked byaqualified electrician
to make sure the outlet isproperly
grounded.
“whendiscomecdng the power
cord froni the adapter, :l]W~yS hold
the adapter with one hand. If this
is not done, the adapter ground
~erminalisvery likely to bre~ikwith
repeated LIse.
ingagroundingtypeplugandoutlet
and that the electrical rating of the
cord be 15amperes (minimum)and
120volts.Such extensioncords
are obtainable [hroughyour local
service organization.
~~e retrigera~~r s~Ow]~
~lw~ys be ~l~gge~ in~o its own
~ntiti~ual electrical Outlet—
(115volt, 60 Hertz, or 100volt,
50Hertz, singlephase AC). This is
recommended forbestperformance
and to prevent overloadinghouse
wiringcircuits, which could cause
apossible fire hazard from over-
heating wires.
RefrigeratorInstallation
Location
Do not tistd] reitigeratorwhere
temperahre Wgo below 60°F.
because itwillnot run often enough
to maintain proper temperatures.
Do instd it on afloorstrong
enough to supportaidly loaded
refrigerator.
Also see Energy-SavingTips
regarding location.
clearances
Allowthe followingclearances for
ease of installationand proper air
circulation.
Sides ...............3/4°
Top ..................l”
Back .................l”
watersupply to Icemaker
(on modelsso eqtaipped)
You will need to connect your
icemaker to acold water line. A
water supply kit containing copper
tubing, shut-off valve, fittings and
instructions is available at extra
cost from your dealer. There
should be sufficie~lttubing for
the icemaker from the cold water
supply to allow you to move the
refrigerator out from the wall
sevdral feet (approximately 3coiis
of l/4-inch copper tubing that
measure :.t least 10inches in
dj~n~eter). 4
—
Some models have adjustable
rollersthat enable you to move
the refrigerator awayfrom the wall
for cleaning; other models have
adjustablelevehnglegs. Rollers
or legs, located behind the base
grill,should be set so the refriger-
ator isfirmly positioned on the
floor and the front is raised just
enough that the doors close easily
when opened about halfway.
To adjustrollersorIevei@ legsq
remove base grille by grasping it
at bottom and pulling it out.
ROLLER II
ADJUSTINGSCREW
N
LEVELINGLEG
--F IL
b
L
‘\
+o
mrnroller adjusting screwsor
levelinglegs clockwiseto raise
refrigerator, counterclockwiseto
lowerit. Use adjustablewrench
(3/8”hex head bolt) or pliers.
When adjustingfront rollers or
levelinglegsforproperdoorclosure,
it isrecommended that the bottom
front edge ofthe cabinet be
approximately3/4”from the floor.
To replace base gtiie9 align prongs
on back of grille with c~an~psin
cabinet and push forward until
grille snaps into place.
-...-—-..-—.—..——
—..-
OpemtingYourRefrigerator
—setthe Use ofthe EnergySaverSwitchcan
saveyoumoney.Estimatedyearly
savings,dependingon yourlocal
electricrates, are asfollows:
“- a1
.
FREEZER FRESH FOOD
Model mi%l
sINITIAL SETTING
9IS COLDEST
oIS OFF
IIlllllllllm
7s 543
A
cINITIAL SETTING
EIS COLDEST TEMPERATURE
CONTROLS
ALLOW 24 HOURS
BETWEEN ADJUSTMENTS ~F14 $6.00 $13.00$18.00 14V0
CTF16$6.00 $14.00$19.00 140/~
Withtheheatersturnedoff, there
isachancethat moisturemayform
on theoutsideofyourrefrigerator,
especiallywhen theweather is
humid. Thehumidityismostlikely
to be highin the summer,in the
early morninghours, and in homes
which are notair conditioned.
.If you turn yourhousehold
Yourrefrigeratorhastwocontrols
thatletyouregulatethetemperature
in thefresh foodand freezer
compartments.
INITMLLY, set the FRESH
FOOD controlat 5and the
NEZER controlatCo
Forcolderor warmertemperatures,
adjustthedesired compartment
controloneletteror numberatatime.
IMPORTANT
When initially setting the controls
or when adjustingthem, allow24
hours for the temperaturesto
th;rrnostat below 60’F. at night
.. .youmaywantto turnthelettered
controlonestepcolder,asfrom“C”
to “D~’Cooler temperaturesin the
housemaycausethe compressorto
operatelessfrequently,thusallowing
thefreezer compartmentto warm
somewhat.Toprotectyour frozen
foodsupply,leaveyour lettered
settingat thiscoldersettingfor the
entirewinteror for whateverperiod
oftimeyouare turningdownyour
thermostat. This isespecially
importantwhen the thermostatis
turneddownforan extendedperiod.
This changeshouldhaveno effect
on your fresh foodcompartment.
However,iffreezing occurs, turn
the numbered controlone step
warmer, as from “5” to “4:’
When you stopturning the
thermostatdown, turn temperature
controlsbacktotheirregularsettings.
Enemy saver switch
The Energy SaverSwitchis located
on the upper leftsideofthe fresh
foodcompartment.
Over an extendedperiod oftime,
moisturethat formson theoutside
maycausedeteriorationofthepaint
finish.It willbe importanttoprotect
thefinishby usingappliancepolish
waxasdescribedonpage 11.
stabilize,or even-out.
Note: firning thefreshfood
control to the-OFFpositionstops
coolingin B~H eompartmenh—
fresh food AND freezer—but
does not shut off powerto the
refrigerator.
How to Test Tempemtures
Usetinelnilktestforthefreshfood
co~llpartment.
Place acontainerof
milkon the top shelfin thefresh
foodcompartment. Check it aday
later. If the milk istoo warm or too
cold, adjustthetemperaturecontrols.
Use the ice cream testforthe
freexer eompartnlent.Place a
container of ice cream in the center
ofthe freezer compartment. Check
itafter aday.If it’stoo hard or too
soft,ad-justthetemperature controls.
Always allow 24 ilours for
$332refrigerator to reach the
temperature yo~lset.
Men the Energy&averStitih
kp~hed to theright9electricity
flowsthroughthelowwattage
heaterswhichwarmthe outside
ofthe cabinetand, under most
conditions,preventtheforming
ofmoistureor waterdroplets.
It isnotnecessaryto defrostthe
freezeror fresh foodcompartments.
Yourrefrigeratorisdesignedand
equippedto defrostitself
automatically.
To reduce the amountof
electricity reqllired tooperate
yourrefrigerator,pushswitch
totheNORMALpQsitioII.
This
turns off hea!ersin yourrefrigerator
that prevent moisture from forming
~...——..— ..-—..——.
Foodstoragesuggestions
suggested storagetimes To store refrozen meats, Hshmd
IN IN
Ealing quality drops REFRIGERATOR FREEZER
after time shown AT
35” 1T400F.
FreshMeats DAYS
Roasts(Beef &Lamb), . . . . 3to 5
Roasts(Pork &Veal). . . . . 3105
Steaks(Beef) . . . . . . . . . . . 3t05
Chops (Lamb) . . . . . . . . . . . 3t05
Cbops (Pork) ........... 3t05
Ground &Stew Meats. 1to 2
Variety Meats........... lto2
Sausage(Pork) .......... lto2
ProcessedMeats
Bacon................7
Frankfurters . . . . . . . . . . . . 7
Ham(Whole) . . . . . . . . . . . 7
Ham(Half) ............. 3t05
Ham (Slices) . . . . . . . . . . . . 3
Luncheon Meats......... 3t05
Sausage(Smoked). . . . . 7
Sausage(Dry&Semi-Dry). .14’to 21
Cookti Meats
Cooked Meatsand
Meat Dishes. 3t04
Gravy &Meat Broth . . . . . . . lto2
FreshPoultry
Chicken &Turkey(Whole). 1to 2
Chicken (Pieces). .1to 2
Turkey(Pieces). .1to 2
Duck&Goose(Whole). . . 1to 2
Giblets.. .. . . . . . . . lto2
00F.
MONTHS
6to 12
4t08
6tO 12
6t09
3t04
3t04
3t04
lto2
1
Y2
lto2
lto2
lio2
Freezing
not recom-
mended.
2t03
2t03
12
9
6
;
CookedPoultry
pieces (Covered with Broth) 1to 2
Pieces (Not Covered). 3to 4
Cooked Poultry Dishes. 3t04
Fried Chicken ., 3to 4
6
1
4t06
(Ofherthanformeafs&poultry) FRE;ZER
&lost fruits and vegetables. .8-12 months
Lean fish. . . .6-8 months
Fattyfish, rolls and breads:
soups, stew, casseroles . . . . ...2-3 months
Cakes, pies, sandwiches,
leftovers (cooked),
Ice cream (original t;arton). .1month max.
hjewtechniquesareconstantlybeingdeveloped.
ConsulttheCollegeorCountyEx!ensionServiceor
yourlocalUtilityCompanyforthelatestinformation
onfreezingandstoringfoods.
+[1.7.[.[’~)[lt[ftll~tll offl,qt”ici[l[ltt”(~
Afeats, fish and pouitry purchased
[14C)nlthc s[ore vary in ~ua]it yand
;I!:c:Conse(]uen[!y,S:!fcStOI-:l~~time
L
in y[>urrefrigcra[or will vary.
*Always remove store wrappings.
~Rewrap in foil, filmor wax paper
and refrigerate immediately.
To storecheese, wrap wellwith wax
paper or aluminum foil,or put in a
plastic bag.
@Carefully wrap to expel air and
help prevent mold.
@Store pre-packaged cheese in its
own wrapping if you wish.
To storevegetables,use the
vegetable drawers—they’vebeen
designed to preserve the natural
moisture and freshnessof produce.
@Covering vegetables with amoist
towel helps maintain crispness.
~As afurther aid to freshness,
pre-packaged vegetables can be
stored in their original wrapping.
To storeice cream– Fine-quality
ice cream, with high cream
content, willnormally require
slightlylower temperatures than
more “airy*’already-packaged
brands with low cream content.
@It willbe necessary to experiment
to determine the freezer compart-
ment location and temperature con-
trol setting to keep your ice cream
at the right serving temperature.
@The rear of the freezer conlpart-
ment isslightlycolder than the front.
Tips on freezing foods
There are three essential require-
ments for efficient home freezing.
1. IE~itialquality, Freeze only
top-quality foods. Freezing retains
quality and flavor: itcannot improve
qLla~ity.
2. Speed. The quicker i’ruitsand
veg~tilbles are fr~>zenafter picking,
{11;better {he frozen produ:t will
[le. You’lls21iJe ?iine, tc>(>—less
culling and sc>r[ingivillbe needed.
3=Preper pi3&’
k[:$jfigouse {oo~
fvr:lps(icsiglled Cspe<;iallyfor
freezing.
.
(?
‘Fofreeze meat, Hshmd potitiy,
wrap wellin freezer-weightfoil(or
other heavy-dutywrappingmaterial)
formingitcarefully to the shape of
the contents. This expels air.Fold
and crimp ends of the package to
provide agood, lastingseal.
Don’t refreeze meat that has com-
pletely thawed; meat, whether raw
or cooked, can be frozen success-
fullyonly once.
Limit freezing of fresh (unfrozen)
meats or seafoods to number of
pounds at atime as follows:
CTF14. . . . . . . . . . . . ..12 pounds
CTF16..............14 pounds
For Convenience ees
@Store alllike things together.This
not onlysavestime, but electricity—
because you can find foods faster.
~Place the oldest items up front so
they can be used up promptly.
~Use shelves on the door for most
often used sauces and condiments.
~Use the meat drawer, if your
model has one, for meats you do
not freeze.
To save money in energy
and food Costs eee
~Place most perishable items such
as milk, cream or cottage cheese
toward the rear of the top fresh food
shelf where they willstay coldest.
~Cover moist foods with tight lids,
plastic film or foil.
~Leaf vegetables and fruits placed
in storage drawers will last longer
when stored in closed plastic corl-
tainers or wrapped in plastic film.
QDo not overloacl your fresh food
or freezer compartment with alot
of warm food at one time.
~Open the door the fewest times
possible to save electrical e~~ergy.
~When going away for several days,
leave as few perishables as possible
in the refrigerator, Set icemaker, if
your model has one, to tl]e “OFFq’
position and shut off wt~terto the
refriger:ltor.
shelves&storueDrawers
AdjustableShelves Sealed&FreshDrawer
(onmocielssoequipped) Toiremovedmwerswhenthe fresh
fmd Cornpatimentdoor mmot be
openedfu1iy9followtheprocedllre
belowthat appliesto yourmodel.
(onmodelsso equipped)
Some models haveadjustableshelves
inthe fresh foodcompartment,
enablingyouto rearrangetheshelves
tofityourfamily’sfoodstorage
needs.
IMI—
ToRemove
Half-widthDmwers
(onmodelsso equipped)
1. Removefoodfromdrawersand
drawercoversand shelfabovethem,
and takeshelf out.
2. Grip drawerandcoverfarthest
fromthe door simultaneouslywith
both hands, liftthem off the front
supports,and pull themout.
Thisrefrigerateddrawerisdesigned
tokeepunwrappedfoodsfreshby
retainingthenaturalmoisture
contentoffoodssuchas:
oArtichokes ~Cherries ~Plums
~Asparagus ~Corn ~Radishes
oBeets,topped ~Currants ‘- ~Rhubarb
eBlueberries eGreens,leafy ~Spinach
~Carrots @Lettuce @Tomatoes,
6Celery *Parsley ripe
~Peas,green
Toremoveshelves:Tiltshelfup
at front, then liftit up and outof
trackson rear wal1of refrigerator.
Asinanyrefrigeratedstoragearea,
it isrecommendedthat odorous
foodsbestoredwrapped-foods
suchas:
Q
Broccoli ~Cabbage @Parsnips
6Brussels ~Cauliflower aTurnips
\
In@ll\ Sprouts ~GreenOnions
❑Lower to
lock into place I ! ~
m/*.”’
Storagetimewilldepend uponthe
typeoffoodand itsconditionwhen
placedinthedrawer. 3. Grip remainingdrawer and
coversimultaneouslywith both
hands, lift them offthe front
supports, and pull forwardjust
enoughtodetachfrom rear supports.
Excesstv~terwhichmayaccumulate
inthebottomofthe Sealed&Fresh
Drawershouldbe pouredoutand
thedrawerwipeddry.
The Scaled&Fresh Drawer is
partially scaled bygasketsattached
to[hccoverat the frontand back
edges. Alwaysreplace thedrawer in
thiscoverand[IIIS/I
tltc{i)-oIi’eYall
i/1(’ii’ii>’
ill.
‘1{)re~jlate shelves:Select desired
shclfhcight. Withshelf’frt}ritraised
slightly,engagetop lLigsin tracksat
rcai-of’cabinet. Then Iowcr frontof
shelf’until iilocks inloposition.
Drawers at the bottom ofthe
frcsilfoodcompartment will stop
beforecoming all the wayout of the
refrigerator to help preventcontents
from spilling (lilto[Ioor. Drawers
cai}easily be rt;i~~ovedbytilting up
s[ight\yai]dp[illii~gpast the “stop”
Iocatioil.”
\
..
4. Tilt drawer and cover sideways.
DmwerRemoval—
Half-widthDmwers
(onmodelsso equipped)
5. Turndrawerand cover and take
themout.
Toreplace: reverseprocedure,
makingsurecoversengagesupports
atrear and reston supportsat front
ofrefrigerator. Sealed&Fresh
drawerand itscovermust be
returned to the leftposition.
DmwerRemoval—
(onmodelssoequipped)
1, Removefoodfromdrawer cover
antishelvesaboveitand takeout
shelves.
\
3. Up-end drawerand coverwith
front-sidedown.
DetachableMeatDmwer
(onmodeisso equipped)
Theslide-outmeatdrawercanbe
removedand takentothesinkor
foodpreparationarea. Youmayalso
relocateitwithinthe freshfd
compartmenttosuityourstorage
needs.
On f~-width shelfmodeh, just
slidedrawerout, removedrawer
coverfromshelfabove,relocate
coverinthepositionyoudesireit
andslidedrawerback intoplace.
On half-widthshelfmodels,the
drawerand theshelfto whichit
attachescan berelocatedat any
level.
—
—
4. Turn drawer and coverto J.eft
and removefrom refrigerator.(With
left-handdoor, turn drawer and
coverto right.)
‘~orep!ace: reverse procedure,
making sure cover engages support
bracketsat rear and rests on support
br:lckcts:[ front of refrigerator.
8
Iceservice
—1
AutomaticIcemaker
—(onmodels so equipped)
Youricernakertil produce eight
cubespercycle—approximately
10!)cubes in a24-hour period,
depending on freezer compartment
temperature, room temperature,
number of door openingsand other
use conditions.
If your refrigeratoris operated
beforewaterconnection ismade
to theicemaker,keep the icemaker
feeler arm in’the OFF (up)position
as shown below.
Feeler Arm in
OFF position
Icemaker 1
“F
Ice Storage Bin
W~en refrigerator has been
connected to waterSupply$move
the feeler arm to the ON (clown)
position.
FeelerArm in
ON position
Ice cube mold willautomatically
fillwith water after cooling to
freezing temperature, and first
cubes normally freeze after several
hours. When cubes are solidly
frozen, they willbe ejected from
the mold into the ice storage bin by
means of asweeper arm. Icemaking
willcontinue until the feeler arm
sensesasufficientaccumulation of
ice cubes in the storage bin and
halts the operation temporarily.
For maximum ice storage, level
the stored cubes with your hand
occasionally. Be sure nothing
interferes with the swingof the
feeler arm.
The icemaker ejects cubes in
groups of eight and it isnormal
for several cubes to be joined
together.
Once yow icernakerisin oper-
ation, thow awaythe firstfew
batchesof ice cubes. This will
flush away any impurities in the
water line. Do the same thing
after vacations or extended
periods when ice isn’tused.
caution:
Under certain rare circum-
stances, ice cubes maybe
discolored, usually appearing
with agreen-bluish hue. The
causeofthisunusualdiscoloration
isapparentlyduetoacombination
of factorssuch as certain
characteristics of local waters,
household plumbing and the
accumulation of copper saltsin
an inactivewater supply line
which feeds the icernaker.
Conti~luedconsumption of such
discolored ice cubes maybe
injurious to health. If such
discoloration is observed,
discard the ice cubes and
contact your Hotpoint Factory
Service Center or an authorized
CL~stomerCare@servicer.
*home water supplyis to be off for
several hours.
~ice storage bin is to be removed
for aperiod of time.
~going away on vacation, at which
time you should also turn off the
valve in the water supply line to
your refrigerator.
If ice isused irrfrequentlyqold cubes
willbecome cloudy and taste stale.
Empty ice storage bin periodically
and wash it in lukewarm water.
men alargesupplyof ice will
be needed, make an extra supply
ahead of time. Empty bin, put cubes
in plastic bags or containers and
store in the freezer compartment
until the bin refills.
m@-
—
~–
-
—.
-
-----
-
=—
—.
-
=
—.
w
—.
-
.....
mf-
If tMsis yow firsticemaker,you’ll
hear occasional sounds that may be
unfamiliar. They are normal ice-
making sounds and are not cause
for concern.
Iceservice(continued)
msv-ReIeaseT” IceTmys
(on;odels so equipped)
To release ice cubes, holdthetray
upside-downoveracontainerand
twistboth ends. \
Accessories
AutomaticIcemaker
Accessory mt
(optionalatextracost)
Theoptionalautomaticicemaker
willreplacetheiceyouuse...
automatically.It cankeepYOU
.
\\\ suppliedwith abinfulo~c~bes—
For onlyone or two ice cubes,
leavethe trayright-sideup, twist
both ends slightlyand removethe
number ofcubesyou want.
Wash icetraysin lukewarm
water only.Do not put them in
an automatic dishwasher.
iceforeverything,everybody—
withoutfussor muss.
Ifyourrefrigeratordid notcome
alreadyequippedwith an automatic
icemaker,youmayaddone—contact
yourlocalHotpointdealer; specify
UK-~T-5, Awatersupplykit
containingcoppertubing,shut-off
valve,fittingsand instructions
neededto connectthe icemakerto
yourcold waterlineis also
availableat extracost.
IeemakerAccessory
Youricecubescanonly
be asfresh-tastingasthe
waterthatproduces
them.That’swhyit’sa
goodideatopurifyyour
waterwithawaterfilter.
Itsactivatedcharcoal
removesmusty,stale
odorsandunpleasant
medicinal,metallic
tastes.Aporousfiber
cartridgecatchesdirt,
rustparticles,sandand
siltwhilespeciaicrystals
reduce depositsofhard
Thefilterisanoptionatextra
cost,availablefromyourHotpoint
deder. SpecifyWRWX214.It has
completeinstillationinstmctions
andinsti!s inminuteson 1/4”0.D.
copperwaterline.
—