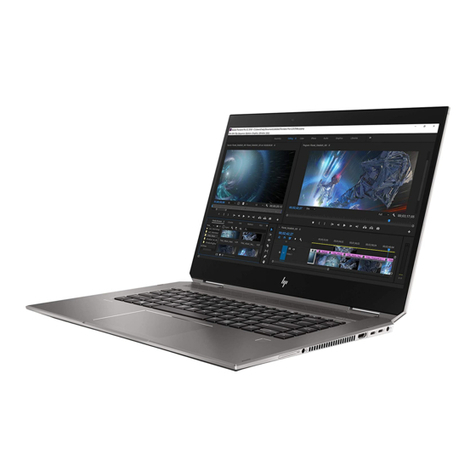
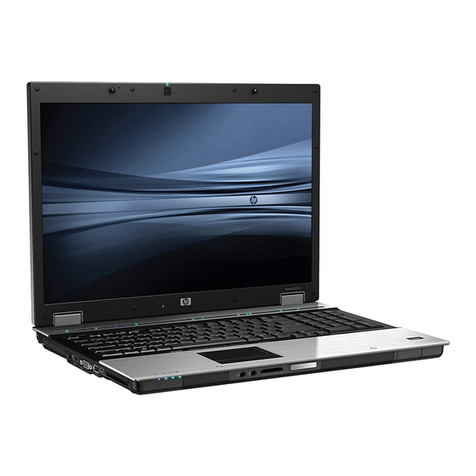
HP EliteBook Folio 9470m User manual

ISB USER GUIDE
HP EliteBook Folio 9470m
Laptop
UserGuide

1
TheHardware
Learn the important parts of your new HP EliteBook
Folio 9470m
Unpack the Laptop from its carry sleeve and use the included power cable to
charge as shown below:
Note: Laptops come with both power adapters and electrical plugs. If you are
travelling to a country which uses a different power supply (110V as opposed to
220V), you will need only a different electrical plug which fits the wall socket of
the country to which you are travelling. These country specific plugs can be
purchased at electronics stores or at most airports. The power adapter acts as an
electrical converter for both voltages.
Note: All Senior School
class rooms will be
equipped with a power
adapter for your use.

2

3
TheTouchPad
Quickly double-tap to turn the TouchPad off and on
Usetouchgestures
TouchPad gestures make it easy and fun to work with images or pages of text.
With a light touch, use 2 fingers on the TouchPad simultaneously to activate these
gestures.

4
Start Computer and Login to the Network
Once you have a power supply, open the Laptop by lifting the lid from the center.
If you require a network connection where wireless is not available, please
connect the network cable to the right side of the Laptop.
(25) Please note: The SD Card slightly
extends beyond the side of the laptop
and can be easily released.

5
Press the Power Button to boot your computer.
Once your computer has booted, enter your Username and Password to login to
the network.
Please remember:
Passwords are always case sensitive.

6
Connecting to a Wi-Fi Network
Wi-FiatSchool
The Laptop should automatically pick up and connect to the school’s Wi-Fi
network but if it does not, please follow the directions below and choose the
network called ISB-NET. The School also has an ISB-Guest-NET network set up for
visiting guests to use. Do not use the ISB-Guest-Net network as it will not permit
you access to the school’s shared drives and will cause connection problems
next time you try to connect.
If, while at School, the Wi-Fi connection is lost, a network cable must be used to
gain access to the system. There are certain areas within School which have
limited Wi-Fi access (i.e. NEO and the Drama room).
Before moving out of a Wi-Fi area, ensure that all
PASS transactions have been updated. PASS
transactions (i.e. attendance) which have not
been concluded prior to losing the Wi-Fi
connection will be lost.
Wi-FiatHomeorontheGo
If you are connecting to a Wireless (Wi-Fi) network, click on the network icon in
the notification area at the bottom of your screen to see all the available
connections where you are located and the signal strength of each.
Next, click on the network to which you would like to
connect.
It is imperative that all PASS
transactions are concluded while still
connected to the network!
Publicly available Wi-Fi networks are
known as Hotspots. Some of these
networks do not require a password
and are free to use while others require
a subscription.

7
Wi-FiatHomeorontheGo(continued)
After selecting Connect, the computer will start checking the wireless network for
security information. Ensure Connect automatically is ticked for future automatic
connection. If the network system is not open and requires a password, a panel
will pop up where the security key can be entered; ticking the Hide characters box
will only show dots instead of your security key. You may also press a Connect
button on some home DSL boxes that will automatically populate the security
key. If the network is open, this panel will not pop up and will go directly to the
next step.
Once the security key has been successfully entered, the below panel will pop up
for you to define the type of network; choose from the choices provided (Home,
Work or Public).

8
Wi-FiatHomeorontheGo(continued)
Your computer will finalize the connection process with the defined network.
When completed, the new network is established and saved for immediate future
use.

9
Using the Keys and Buttons
Hotkeys
A hot key is a combination of the fn key and one of the function
keys. To use a hot key press the fn key and then briefly press the
second key of the hot key combination.

10
Numerickeypad
Press the fn key (1) and the
num lk key (3) to turn the
embedded numeric
keypad (2) on and off.
Lights

11
Using thePort Replicator
There will be a port replicator (image below) in each classroom equipped with
either a ceiling beamer or an interactive whiteboard. The port replicator will
provide sound and video connections and is connected to the Laptop via a USB
cable. The port replicator will not function properly if the electrical connection is
not plugged in.
DVD Drives
DVD drives will be attached to port replicators in rooms equipped with interactive
whiteboards only. These DVD drives are configured as CODE 2 and can play most
European DVDs. If a CODE 1 DVD drive is required, please request one from the
Helpdesk.
Note: When using an
external video display, be
sure to disable the
automatic E-mail alerts.
Important: The DVD drive is
powered through your Laptop
and NOT through the port
replicator. Therefore, the DVD
must be removed from the drive
prior to disconnecting the Laptop
from the port replicator.

12
Remote Access with VDI
Virtual Desktop Infrastructure (VDI) enables staff to access the school network
remotely. Through this portal, staff can access
the school network and are able to access:
Personal and shared drives
E-mail
PASS / 3Sys
MS Office 2007 Suite applications
Other ISB applications
LoggingOntoVDI
Click on desktop icon .
Click Connect on the first window that pops up.
On second window, click OK
Always Remember:
Never save your work to the
Desktop! Everything on the
desktop will be permanently
deleted when you logoff!
Save your work regularly –to
your P:\drive or My Documents
folder.

13
In the 3rd window, enter your user name and password; Login button
will become active and click it. VDI will authenticate the login
information.
Select “ISB VDI – Production” and click Connect. The default Display
setting is set to Full Screen, but you may adjust to your satisfaction.
The last window that
pops up will inform
you the Connection
Server is preparing the
desktop …

14
VDIToolBar
When working in the full screen view, the below VDI Tool Bar is at the center top
of the desktop but is hidden when not in use. Move your mouse over the top
center of your desktop and the tool bar will “slide” down. If you prefer, you may
“Pin” the tool bar to the desktop so that is remains on top and does not hide. To
log off, click the Start button and then the Log off button.
By clicking on Send Ctrl-Alt-Delete you can get to such
functions as task manager, lock this computer, change
password, etc.
Downloaded Software Installation
Local administration rights have not been granted. If you require installation of
new software, please see you HOD.
After 30 minutes of
computer idle time, the VDI
session will automatically
disconnect!

15
Configure a Printer
To attach to a printer, click on the Start button in the lower left corner of your
screen and then navigate over to Devices and Printers.
Next, click on the Add a Printer button at the top of the dialog box, select
Add a network, wireless or Bluetooth printer and then find your printer on
the list provided.

16
File Structure
To locate your personal drive (P:), click on the Start button and choose the
folder with your name on it.
Navigate to your home drive and save files here regularly. Files saved to the
Desktop will not be saved. You may, however, save a Shortcut to your
Desktop.
Shutdown at End of
Day
Remember to properly shut down
your computer at the end of each
workday. Click on the Start button in
the lower left corner of your screen
an navigate over to Shut down or
select Shut down from the list if it is
not visible to you.
Store your Laptop and this User Guide
in the provided pouch. Additional
hardware, such as an external mouse,
power supply, etc. should be stored
separately.

17
Help and Support
For detailed information, refer to the user guides on your computer. Click on
the Start button, navigate over and click on Help and Support.
Do’s and Don’ts
Don’t continually charge the laptop battery when not in use. Unplug the
electrical adapter from the wall outlet when the laptop is shut down.
Don’t leave the laptop on/running when not in use for long periods; turn
the laptop off (shutdown) when work is completed to help conserve the
electrical components.
Shut down laptop when leaving the campus –at the end of the day or
when travelling to another campus.
Don’t leave the laptop in direct sunlight or in a dusty location.
Don’t lay your laptop on any cloth material when in use, e.g. bed spread,
duvet, blanket, etc. as the computer will suck in dust and lent into the fan
motor; it is best if you rest the laptop on a solid surface so there is
ventilation on the underside.
Don’t eat or drink when working on the laptop.
Gently clean your laptop monitor with a cloth if dusty; spray class cleaner
on the cloth instead of the monitor to avoid damage to the monitor.
The same goes for cleaning the keyboard; be gentle as the cloth could get
caught on the corner of a key and pull it off.
To avoid possible damage, it is best to put the laptop away in a safe and
protected location when finished working.
It is not recommended to exchange SD cards between personal
computers and the ISB laptop; we had several cases where personal
computers had a virus and all the SD card data was corrupted.
Don’t pile heavy objects on top of your laptop or press down on the
laptop to prevent damage to the monitor. The same applies to packing
your laptop into a backpack with many items.
When carrying the laptop, i.e. from class to class, close the laptop lid to
help prevent dropping the computer.
Other manuals for EliteBook Folio 9470m
4
Table of contents
Other HP Laptop manuals

HP
HP HP OmniBook 900 User manual

HP
HP Compaq Presario User manual

HP
HP EliteBook 820 G1 Manual

HP
HP Pavilion 14-ab099 Manual

HP
HP 8530p - EliteBook - Core 2 Duo 2.4 GHz User manual

HP
HP Compaq Presario Specification sheet

HP
HP 13-ae007nb User manual

HP
HP OmniBook 7100 User manual

HP
HP Presario CQ57-300 User manual

HP
HP 15 Notebook PC Manual

HP
HP HP COMPAQ BUSINESS NOTEBOOK PC X1000 Manual

HP
HP Pavilion dv3000 - Entertainment Notebook PC User manual

HP
HP ZBook 15 Manual

HP
HP Compaq Presario Manual

HP
HP Compaq tc4200 User manual

HP
HP EliteBook 8560p User manual

HP
HP ENVY m6 Manual

HP
HP HP Mini 1000 User manual

HP
HP ProBook 4545s Manual

HP
HP Compaq NC4010 Manual