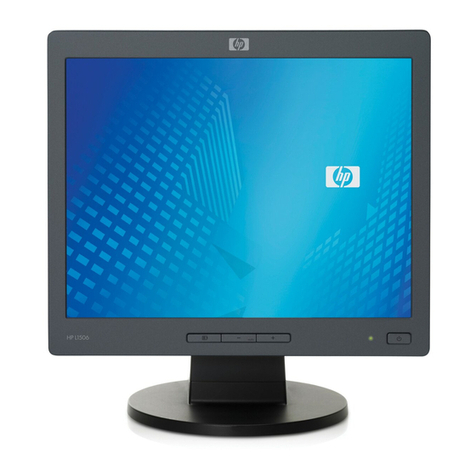
HP D5259A - Pavilion M70 - 17" CRT Display User manual

hp
hphp
hp
p
pp
pavilion
avilionavilion
avilion v
vv
v70
7070
70s
ss
s
d
dd
display
isplayisplay
isplay
u
uu
user's
ser'sser's
ser's g
gg
guide
uideuide
uide
®

The information contained in this document is subject to change without notice.
Hewlett-Packard® Company makes no warranty of any kind with regard to this material,
including, but not limited to, the implied warranties of merchantability and fitness for a particular
purpose.
HP shall not be liable for errors contained herein or for incidental or consequential damages in
connection with the furnishing, performance, or use of this material.
HP assumes no responsibility for the use or reliability of its software on equipment that is not
furnished by HP.
This document contains proprietary information that is protected by copyright. All rights are
reserved. No part of this document may be photocopied, reproduced, or translated to another
language without the prior written consent of HP.
Hewlett-Packard Company
Home Products Division
P.O. Box 4010
Cupertino, CA 95015-4010
Printed in the Taiwan
© Copyright Hewlett-Packard Company, 2000. All rights reserved.
Hewlett-Packard is a registered trademark of Hewlett-Packard Company in the United States of
America and other countries.
The ENERGY STAR name is a U.S. Registered mark of the U.S. Environmental Protection Agency.
Other brand or product names are trademarks of their respective holders.

Contents
ContentsContents
Contents
Introduction
IntroductionIntroduction
Introduction................................
................................................................
....................................
........
....1
11
1
Precautions
PrecautionsPrecautions
Precautions ................................
................................................................
....................................
........
....2
22
2
Features
FeaturesFeatures
Features................................
................................................................
.........................................
..................
.........4
44
4
Specifications
SpecificationsSpecifications
Specifications................................
................................................................
.................................
..
.5
55
5
Installing the Base Pedestal
Installing the Base PedestalInstalling the Base Pedestal
Installing the Base Pedestal...............
..............................
...............7
77
7
Control Locations and Functions
Control Locations and FunctionsControl Locations and Functions
Control Locations and Functions ........
................
........8
88
8
Controls and Adjustments
Controls and AdjustmentsControls and Adjustments
Controls and Adjustments.................
..................................
.................9
99
9
Connections
ConnectionsConnections
Connections................................
................................................................
...................................
......
... 1
11
15
55
5
Pin Assignments and Signal Levels
Pin Assignments and Signal LevelsPin Assignments and Signal Levels
Pin Assignments and Signal Levels ....
........
.... 1
11
17
77
7
Timing Charts
Timing ChartsTiming Charts
Timing Charts ................................
................................................................
................................ 1
11
18
88
8
Troubleshooting
TroubleshootingTroubleshooting
Troubleshooting..............................
............................................................
.............................. 21
2121
21
Automatic Power Saving
Automatic Power SavingAutomatic Power Saving
Automatic Power Saving ..................
....................................
.................. 2
22
22
22
2
Declaration of Conformity
Declaration of ConformityDeclaration of Conformity
Declaration of Conformity................
................................
................ 2
22
25
55
5
Contents
ContentsContents
Contents
II
IIII
III
III
Introduction
IntroductionIntroduction
Introduction
Congratulations on your purchase of a Hewlett-
Packard Multi-Frequency monitor. One of the
most versatile monitors available today, the v70s
automatically adjusts its vertical and horizontal
scanning frequencies to those of your computer’s
graphics adapter. The v70s provides crisp text
and vivid color graphic displays when used with
Multi-Frequency and compatible graphics adapters
(see specifications).
1
11
1
Introduction
IntroductionIntroduction
Introduction

Precautions
PrecautionsPrecautions
Precautions
To prevent electric shock do not remove
screws or back cover.
There are no user-serviceable parts inside
the monitor. Refer servicing to qualified
service personnel.
DO NOT REMOVE THE TILT/SWIVEL BASE!
The input power source:
The monitor is designed to be Full Range
from AC 100V to AC 240V.
Warning:
This appliance should be grounded.
Always connect the display to a grounded,
three-prong power outlet. Use only the
factory-supplied power cord.
Do not put the monitor or other heavy objects
on the power supply cord. A damaged
power cord may cause fire or electric shock.
Do not insert objects into the monitor.
They may cause fire or failure.
Do not allow liquids to fall into the cabinet.
2
22
2
v
vv
v70s Monitor Guide
70s Monitor Guide70s Monitor Guide
70s Monitor Guide

1
11
1To reduce eye fatigue, avoid using the display
in direct sunlight or other bright lights.
2
22
2Do not operate the monitor beyond the
specified temperature and humidity range
(see specifications).
3
33
3For proper operation, keep the monitor
adequately ventilated.
4
44
4Keep the monitor away from transformers,
motors, fans or strong magnetic fields.
5
55
5If the monitor does not operate properly, turn
off the power switch and then unplug the
monitor.
6
66
6When an irregular supply is applied, a
protection circuit will turn off the monitor (the
power indicator will also be turned off). If this
happens, turn off the power switch and wait at
least 30 seconds before turning it on again.
3
33
3
Precautions
PrecautionsPrecautions
Precautions

Features
FeaturesFeatures
Features
1
11
1Automatically scans horizontal frequencies
ranged from 30kHz to 70kHz and vertical
frequencies ranged from 50Hz to 120Hz.
2
22
2Meets DPMS and NUTEK power-saving
standards.
3
33
3All functions can be controlled by On-Screen
Display.
4
44
4Plug-and-play compatibility.
5
55
5Full-scan display
–
15.9-inch diagonal
viewable image size.
6
66
6Rotation (tilt control).
7
77
7Self-test
–
When you disconnect the signal cable
from the PC, the display will produce as below
:
SELF-TEST PATTERN
SELF-TEST PATTERNSELF-TEST PATTERN
SELF-TEST PATTERN
8
88
8Color temperature selection
–
9 3 00K / 7000K
/ 6500K and user adjustable.
4
44
4
v
vv
v70s Monitor Guide
70s Monitor Guide70s Monitor Guide
70s Monitor Guide
C
ABLE
NO
T
CONN
E
C
TED

Specifications
SpecificationsSpecifications
Specifications
Power Source AC 100-240V, 50/60Hz
(Full Range)
Power 1
11
1 Normal: 100W Max.
Consumption 2
22
2 Stand-by Mode: <10W
3
33
3 Suspend Mode: <10W
4
44
4 Off Mode: <5W
Picture Tube 90deflection,
0.27mm dot pitch
15.9" Diagonal (viewable)
low radiation, glare,light
transmission 53%
Maximum 1280 x 1024 at 60Hz
Resolution refresh rate
Input Signals
Video Analog 0.7 Vp-p /
75 ohm positive
Separate Sync positive / negative
Synchronization
Horizontal 30KHz to 70KHz
Vertical 50Hz to 120Hz
Active Display
Area
Horizontal 306mm typical
Vertical 230mm typical
Safety Standard UL / CSA
EMI Standard FCC Class B
5
55
5
Specifications
SpecificationsSpecifications
Specifications

Environmental
Conditions
Operating 5°C~ 40°C
Temperature
Operating 10% ~ 80%
Humidity (non-condensing)
Storage -20°~ +60°
Temperature
Storage 5% ~ 95%
Humidity
High Voltage 25KV
Dimensions 410mm x 422mm x 426 mm
(W x H x D)
Weight (Net) 15.1 kg
Tilt and Swivel Operation:
Tilt and Swivel Operation:Tilt and Swivel Operation:
Tilt and Swivel Operation:
The swivel range is normally limited to 45
degrees to the right and the left of the front
position (marked by a small molded pip on the
top front of the base).
The tilt range is normally limited at an angle of -5
degrees forwards and +15 degrees backwards.
This allows you to set the screen angle to the
viewing position most comfortable to you.
6
66
6
v
vv
v70s Monitor Guide
70s Monitor Guide70s Monitor Guide
70s Monitor Guide

Installing the Base
Installing the BaseInstalling the Base
Installing the Base
Pedestal
PedestalPedestal
Pedestal
1
11
1Turn the monitor upside down on a sturdy
surface. (Don’t place it screen-side down;
the glass can be scratched.)
2
22
2Position the base pedestal with the latch
facing the back of the monitor.
3
33
3Insert the seven tabs on the base pedestal
into the seven slots found on the bottom of
the monitor.
4
44
4Push the base pedestal toward the front of
the monitor until it snaps into position.
7
77
7
Installalling the Base Pedestal
Installalling the Base PedestalInstallalling the Base Pedestal
Installalling the Base Pedestal

Manual Degauss
Select
Down/Brightness
Up/Contrast
Power Switch
Power Indicator
Control Locations and Functions
Control Locations and FunctionsControl Locations and Functions
Control Locations and Functions
Note:
Note:Note:
Note:
Locations of display controls are shown below.
Operation of controls is explained in the following
pages.
FRONT
FRONTFRONT
FRONT REAR
REARREAR
REAR
Power Supply Connector Signal Cable
8
88
8
v
vv
v70s Monitor Guide
70s Monitor Guide70s Monitor Guide
70s Monitor Guide

Controls and Adjustments
Controls and AdjustmentsControls and Adjustments
Controls and Adjustments
1.
1.1.
1. Power Indicator
A. This indicator will light when the power is
on and the power cord is properly
connected.
B. The state of the LED is dependent on the
power state of the monitor. When the LED
is green, the monitor is in the normal
state. When it is amber, it indicates a
power - saving state.
2.
2.2.
2. Power Switch
Press to power on the monitor; press again to
power off.
We recommend powering your system on first,
then the monitor.
3.
3.3.
3. Direct access adjustments
These adjustments can be called to the screen
only when the menu display is not present.
a. Press the button, a “contrast” horizontal
bar graph will appear, press either or
button to adjust upward or downward on
contrast.
9
99
9
Controls and Adjustments
Controls and AdjustmentsControls and Adjustments
Controls and Adjustments
CONTRAST 20 SEC
CONTRAST 20 SECCONTRAST 20 SEC
CONTRAST 20 SEC
100%
ADJUST:
A
DJUST:ADJUST:
A
DJUST:
/
OK :
/
OK :
/
OK :
/
OK :

b. Press the button, a “brightness”
horizontal bar graph will appear, press
either or button to adjust upward
or downward on brightness.
4.
4.4.
4. OSD MENU
Press “select” button to reveal the OSD main
menu, all adjustments and settings are covered
in the following main menu display:
The adjustment items written in the upper section
of the menu display and the lower section icon
contain a property which belongs to the arrowed
adjustment item.
You can select the adjustment items or its
property which you may adjust or perform
settings by simply pressing either or button
to move the yellow graph to the desired item.
BRIGHTNESS 20 SEC
BRIGHTNESS 20 SECBRIGHTNESS 20 SEC
BRIGHTNESS 20 SEC
50%
ADJUST:
ADJUST:ADJUST:
ADJUST: / OK:
/ OK:/ OK:
/ OK:
10
1010
10
v
vv
v70s Monitor Guide
70s Monitor Guide70s Monitor Guide
70s Monitor Guide
1024
10241024
1024
768 68.7KHZ 85HZ
768 68.7KHZ 85HZ768 68.7KHZ 85HZ
768 68.7KHZ 85HZ
MOVE:
MOVE:MOVE:
MOVE: / SELECT:
/ SELECT:/ SELECT:
/ SELECT:
50%
SHAPE
COLOR 9300K
MISCELLANEOUS
EXIT MENU 20SEC
HORIZONTAL CENTERING
SIZE & POSITION

Push the
button once again, the OSD menu
will then enter the adjustment function. The
slide bar locating at the lower section becomes
red in color, pressing either or button to
adjust the settings that you desired.
After the adjustment is completed, push the
button once more to return to the normal OSD
menu.
EXIT MENU
Menu display will be closed automatically in
20 seconds.
Or select EXIT MENU and push the. button.
11
1111
11
Controls and Adjustments
Controls and AdjustmentsControls and Adjustments
Controls and Adjustments

ICON
ICONICON
ICON NAME
NAMENAME
NAME FUNCTION
FUNCTIONFUNCTION
FUNCTION ICON
ICONICON
ICON NAME
NAMENAME
NAME FUNCTION
FUNCTIONFUNCTION
FUNCTION
Brightness
Contrast
Horizontal
centering
Width
Vertical centerin
g
Height
OSD move
OSD move
To adjust the luminance level in
the image
To adjust the difference in
luminance between light and
dark areas of the image
To adjust the horizontal position
of the display
To adjust the width of the
display
To adjust the vertical position of
the display
To adjust the height of the
display
To enable the OSD menu to be
positioned horizontally
To enable the OSD menu to be
positioned vertically
SHAPE
SHAPESHAPE
SHAPE
Zoom
Tilt
Orthogonality
Trapezoid
Pincushion
Pin balance
To enlarge or shrink the picture,
the default setting is 50% of the
slide bar
To adjust the display tilt
To adjust the display squareness
To adjust the straightness of the
vertical edges of the display in
conjunction with the pincushion
control
To adjust the straightness of the
vertical edges of the display
To adjust the straightness of the
vertical edges of the display in
conjunction with pincushion and
trapezoid
12
1212
12
v
vv
v70s Monitor Guide
70s Monitor Guide70s Monitor Guide
70s Monitor Guide
SIZE & POSITION
SIZE & POSITIONSIZE & POSITION
SIZE & POSITION

ICON
ICONICON
ICON NAME
NAMENAME
NAME FUNCTION
FUNCTIONFUNCTION
FUNCTION ICON
ICONICON
ICON NAME
NAMENAME
NAME FUNCTION
FUNCTIONFUNCTION
FUNCTION
COLOR
COLORCOLOR
COLOR
Default color
Color presets
Red value
Green value
Blue value
Save current
color
To restore the color tint of the
background to 9300k
To select the desired 3 fixed
(9300k, 7000k, 6500k )
background tint and an
adjustable custom setting by
pushing the ↵select button
To ad
j
ust the red ma
g
nitude when
color preset selects “custom”
definable setting
To adjust the green magnitude
when color preset selects
“custom” definable setting
To adjust the blue magnitude
when color preset selects
“custom” definable setting
To store the current custom
settings of the color tin
About monitor
Demagnetize
Monitor defaults
L
an
g
ua
g
e/S
p
rache
/Langue
VERT. MOIRE
HOR. MOIRE
Shows the properties of the
currently used display mode
To manually degauss the display
Recalls the original factory display
presettings
Menu language selection, totally 5
languages
To reduce the vertical wavy
colored lines or patterns in the
background of your image
To reduce the horizontal wavy
colored lines or patterns in the
background of your image
To remove the display of OSD
menu
B
R
S
<<<
>>>
R
G
13
1313
13
Controls and Adjustments
Controls and AdjustmentsControls and Adjustments
Controls and Adjustments
EXIT MENU
EXIT MENUEXIT MENU
EXIT MENU
MISCELLANEOUS
MISCELLANEOUSMISCELLANEOUS
MISCELLANEOUS

5.
5.5.
5. MENU LANGUAGE
MENU LANGUAGEMENU LANGUAGE
MENU LANGUAGE
To select the Menu Language in the
Miscellaneous Menu, the Language menu will
be displayed.
Pressing either or key to select the desred
language, then push the
“select” key, thus the OSD menu appears
with the chosen language.
MENU LANGUAGE
MENU LANGUAGEMENU LANGUAGE
MENU LANGUAGE
MOVE:
MOVE:MOVE:
MOVE: / SELECT:
/ SELECT:/ SELECT:
/ SELECT:
DEUTSCH
ITALIANO
FRANÇAIS
ESPAÑOL
CANCEL
ENGLISH
14
1414
14
v
vv
v70s Monitor Guide
70s Monitor Guide70s Monitor Guide
70s Monitor Guide

Connections
ConnectionsConnections
Connections
Your monitor has two connecting cables: a Power
Supply Cord, which connects to a wall outlet,
surge protector or other power source, and a
Signal Cable, which connects to the graphics
adapter of your computer. To ensure safety and
correct operation, always follow these four steps
when connecting the monitor:
1
11
1Make sure the monitor and computer are
turned off. (See previous section on safety.)
2
22
2Connect the power cord to the back of the
display.
3
33
3Plug the other end of the cable into a
grounded outlet.
4
44
4Connect the video cable on the monitor to the
15-pin video graphics connector on the rear
panel of the computer, and fasten the screws.
(If you have an HP Pavilion computer, this port is
marked in orange. For other computers, check
your computer manual for the video port
location.)
Note:
Note:Note:
Note:
Don’t force the cable into the connector; line it up
carefully so you don’t bend the pins.
15
1515
15
Connections
ConnectionsConnections
Connections

Connecting the Speakers
Connecting the SpeakersConnecting the Speakers
Connecting the Speakers
The display is designed for use with speakers
supplied with HP Pavilion computers.
To connect the speakers:
1
11
1Identify the left and right speakers. You can
tell which side a speaker fits onto by its
mounting pegs. The side of the speaker with
mounting pegs fits against the side of the
display.
2
22
2Fit the pegs of the right speaker into the
corresponding holes on the right side of the
display.
3
33
3With the pegs in the corresponding holes, tilt
the speaker toward the front of the monitor
and push down until the speaker is secure.
4
44
4Repeat procedure for left speaker and push
down until speaker is secured.
Refer to your computer setup poster for
instructions to connect your speaker to the PC.
Tilt speakers toward
front and push down
16
1616
16
v
vv
v70s Monitor Guide
70s Monitor Guide70s Monitor Guide
70s Monitor Guide

Pin Assignments and Signal Levels
Pin Assignments and Signal LevelsPin Assignments and Signal Levels
Pin Assignments and Signal Levels
15-Pin D-SUB male video connector
15-Pin D-SUB male video connector15-Pin D-SUB male video connector
15-Pin D-SUB male video connector
PIN NO.
PIN NO.PIN NO.
PIN NO. SIGNAL
SIGNALSIGNAL
SIGNAL PIN NO.
PIN NO.PIN NO.
PIN NO. SIGNAL
SIGNALSIGNAL
SIGNAL
1RED 9NC
2GREEN 10DIGITALGROUND
3 BLUE 11 MONITOR SENSEI
4 DIGITAL GROUND 12 SDA (DDC1/2B)
5 RETURN (DDC2B) 13 H. SYNC.
6GROUND 14V.SYNC.
7 GROUND 15 SCL (DDC2B)
8GROUND
SIGNAL LEVEL
SIGNAL LEVELSIGNAL LEVEL
SIGNAL LEVEL
Note:
Note:Note:
Note:
The signal level at pin 1,2,3 is 0.7 Vp-p.
The signal level at pin 13,14 is 5 Vp-p.
1
6
11
17
1717
17
Pin Assignments and Signal Levels
Pin Assignments and Signal LevelsPin Assignments and Signal Levels
Pin Assignments and Signal Levels
Other manuals for D5259A - Pavilion M70 - 17" CRT Display
2
This manual suits for next models
2
Table of contents
Other HP Monitor manuals

HP
HP FP5315 - Compaq Presario - 15" LCD Monitor Instruction manual

HP
HP TFT7210R User manual

HP
HP S7650 User manual

HP
HP L1906 User instructions

HP
HP LV1561W User manual

HP
HP Engage One 10t Manual

HP
HP S2231a User manual

HP
HP Pavilion f1503 Specification sheet

HP
HP Compaq Advantage LA2206x User manual

HP
HP L2035 User instructions